The Ball at the Baroness's Mansion
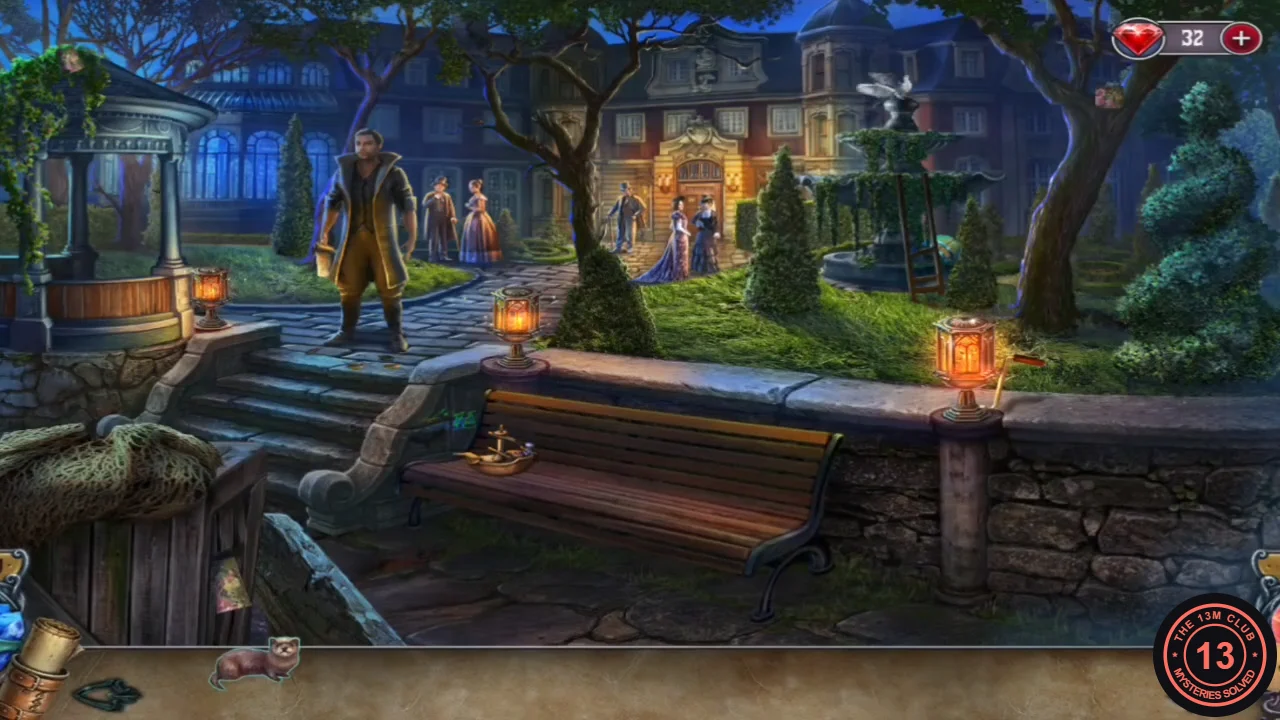
A doorman blocks the mansion entrance: nobody gets in without an invitation or their name on the list.
- Release the WEASEL by the bench near the doorman to distract him, then look at his guest list. Every name is crossed out except BAUMBACH.CODEBaumbach
- Talk to the doorman and give the name Baumbach. Inside, the Baroness greets you, then makes an announcement to her guests. Louisa wakes up captive on a train. New objective: get off the prison train.
Prison Cell Latch
Louisa is locked in a cell carriage with an unconscious prisoner.
- Play the hidden-object scene on the prisoner and receive a COIN.
- Zoom into the floor by the bench, read the note ("Enjoy your last ride.") and take the HAMMER HEAD.
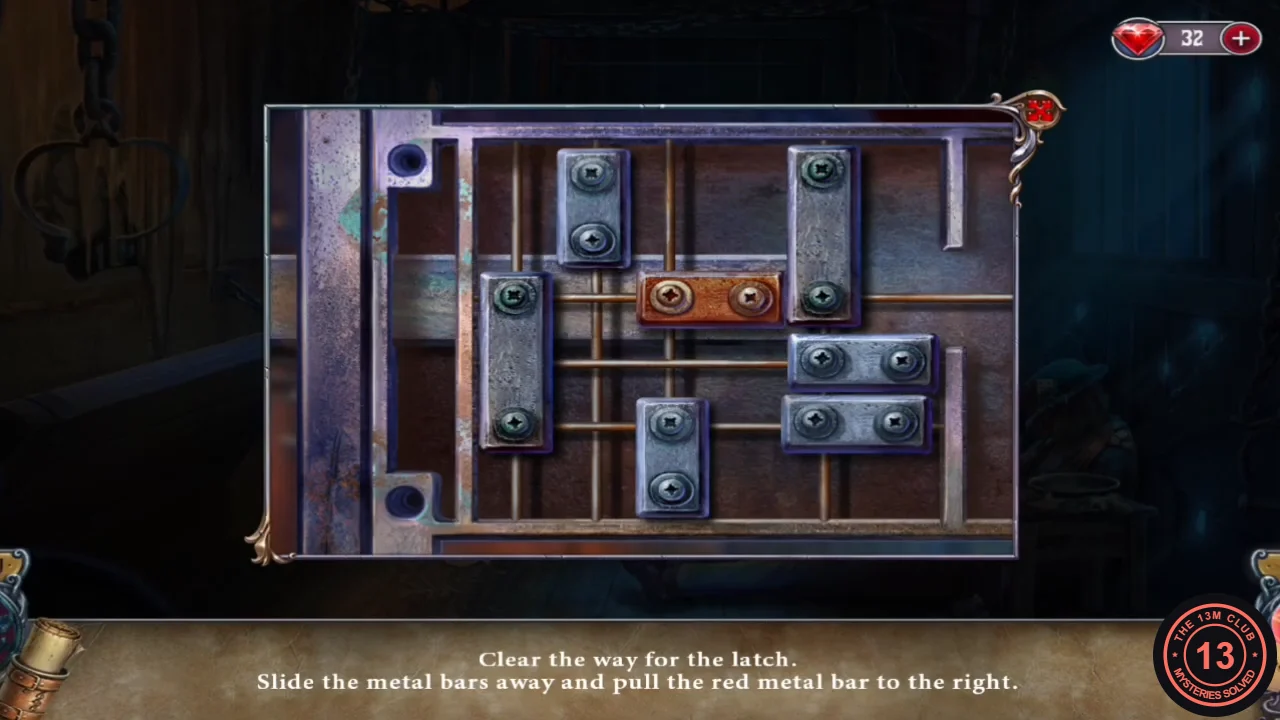
- Zoom into the lock plate on the cell door and place the COIN. A sliding-bar puzzle starts: "Clear the way for the latch. Slide the metal bars away and pull the red metal bar to the right." Each bar slides only along its length. Clear the red bar's row by moving the vertical bars in its way up or down, which may first mean shifting the horizontal bars that block them. Then drag the red bar out to the right. There are two boards with fixed layouts; this guide explains the method rather than listing every slide.
The Sleeping Guard and Father's Cell
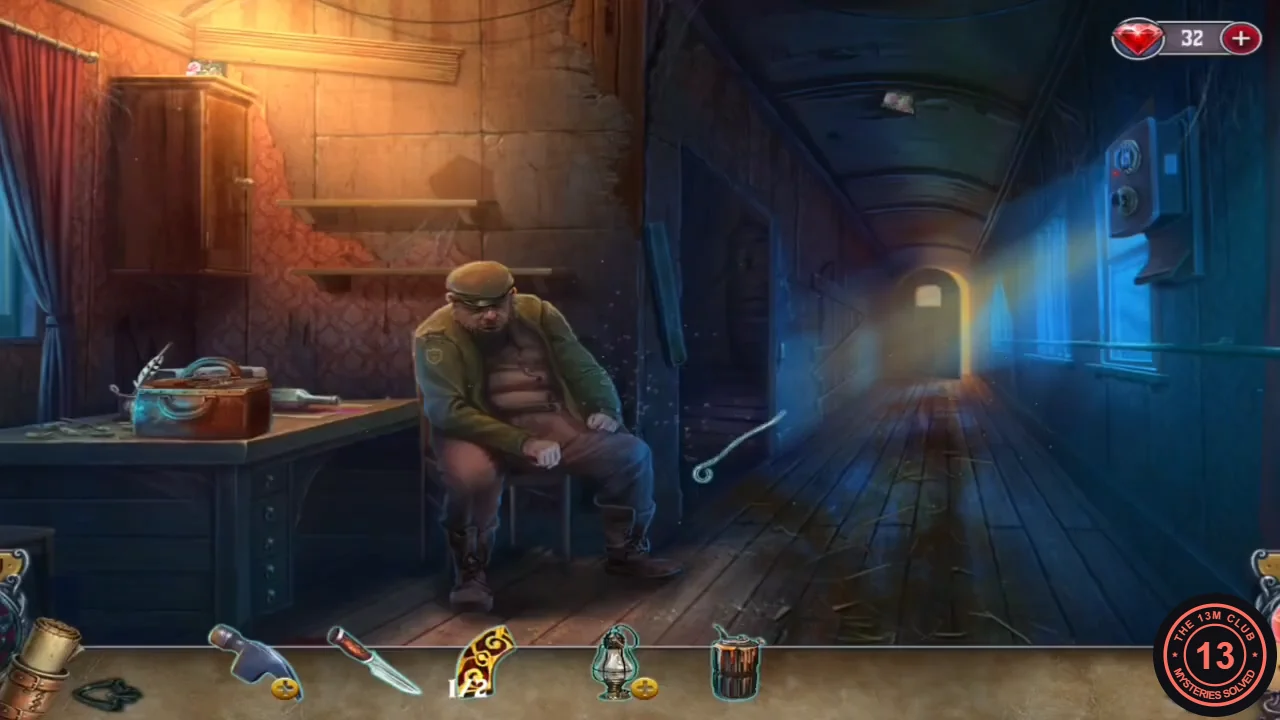
Hank the guard is asleep in the corridor; Father is held in another cell.
- Zoom into the radio on the wall. Read the note ("Hank, stop drinking! This is the last warning.") and take the KNIFE pinning it.
- Take TOOLBOX LOCK PART 1/2 from the sleeping guard.
- Open the hatch in the cell door further down the corridor and take the EMPTY LANTERN and the CANE from the captives' cell.
- Go back into your cell, zoom into the broken floorboards and use the CANE to hook the can hanging under the train. Take the OIL and the WIRE.
- Open the WIRE in your inventory and untangle it into a HOOK. Zoom into the guard's belt ("Waking up the guard is the last thing I want. But how can I reach the key?") and lift the CELL KEY with the HOOK.
- Open Father's cell door with the CELL KEY ("Father! He's frozen! I have to warm him up somehow!") and take the HAMMER HANDLE. Combine it with the HAMMER HEAD to make a HAMMER.
- Zoom into the red curtain in the corridor and use the HAMMER to take it down as a WARM BLANKET. Through the window you overhear: "We'll be arriving in a few minutes, Baroness." - "Good. This will finally end soon."
- Give the WARM BLANKET to Father. He hands you the LIGHTER: "Here. Take this, and find a way off this train."
- Open the EMPTY LANTERN in your inventory, pour in the OIL and light it with the LIGHTER. Take the LANTERN.
The Guard's Toolbox
A dark storage nook in the corridor hides the second lock part and the toolbox.
- Hang the LANTERN in the dark nook by the corridor stairs. Take TOOLBOX LOCK PART 2/2. The toolbox is tangled in red rope ("What a mess. There's no way I will untie this. Is there another way?"), so cut it free with the KNIFE.
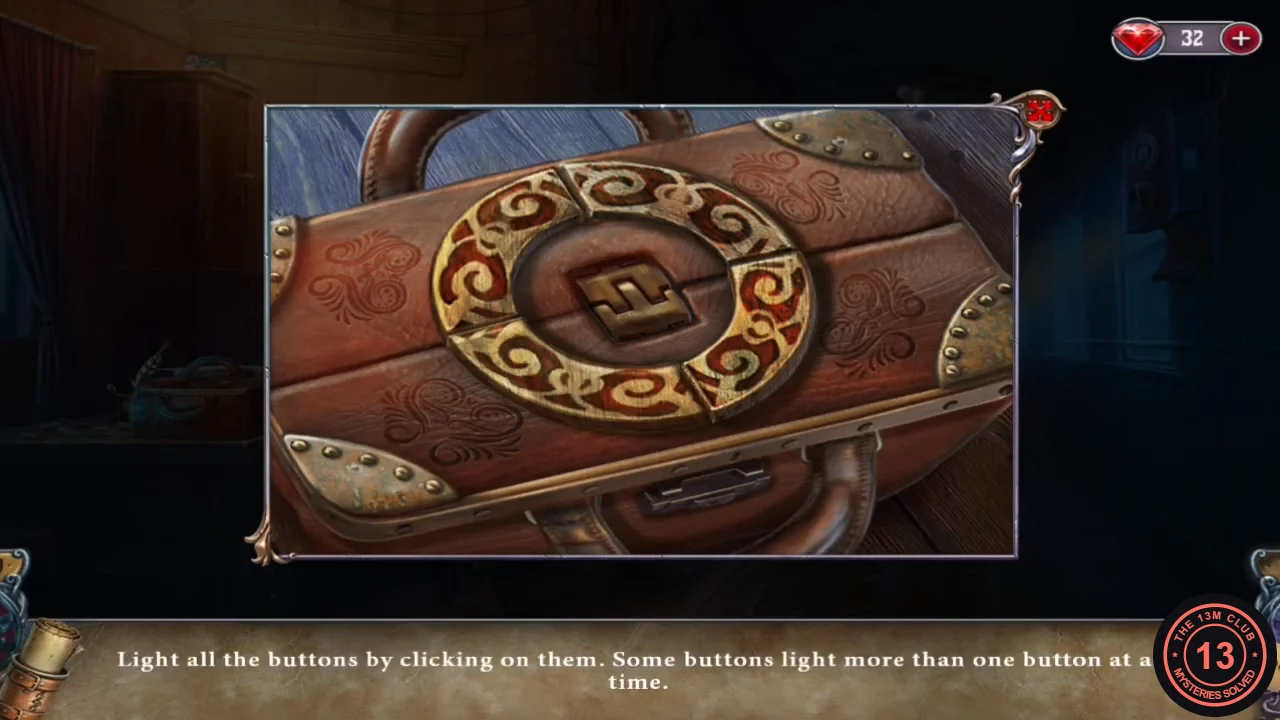
- Place both TOOLBOX LOCK PARTS in the ring on the toolbox. Then "Light all the buttons by clicking on them. Some buttons light more than one button at a time." Select an unlit segment and watch which other segments light up with it, then keep choosing unlit segments until the whole ring glows. A well-chosen segment can light the entire ring at once.
- Open the toolbox and take the SAW BLADE and the DOOR KNOBS. Fit the SAW BLADE to the saw frame beside the guard and take the SAW.
Mask Door Elements
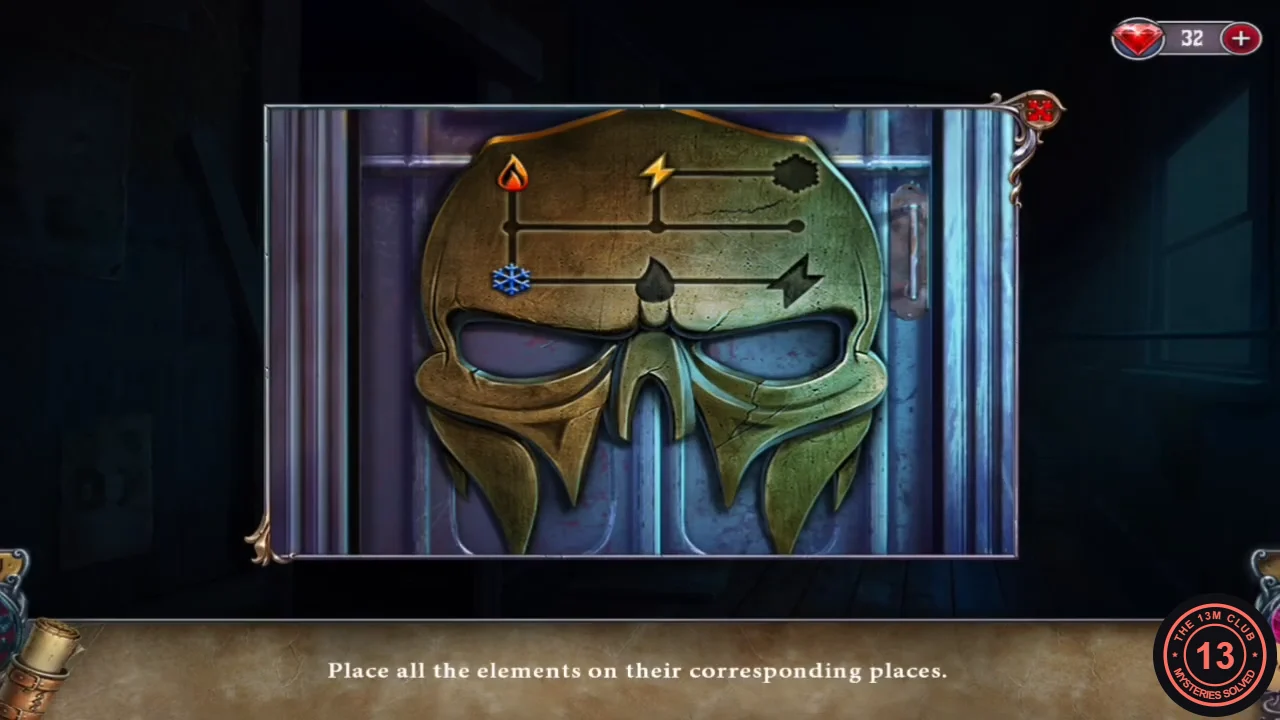
Put the DOOR KNOBS on the mask door at the end of the corridor. "Place all the elements on their corresponding places." Three symbols (fire, lightning, snowflake) move along the grooves one junction at a time and cannot pass each other. Their targets are the snowflake slot at the top right, the lightning slot at the lower right and the drop-shaped slot in the centre of the bottom groove.
- Place the DOOR KNOBS on the mask to start the puzzle.
- Move the snowflake out of the way: up the left groove to the middle groove, then all the way right along the middle groove.
- Move the lightning bolt down from the top groove to the middle groove, left to the left groove, down to the bottom groove and right to the lightning slot.
- Move the snowflake left to the centre of the middle groove, up to the top groove and right into the snowflake slot.
- Finally move the fire down the left groove to the bottom groove and right into the drop-shaped slot. The door opens.
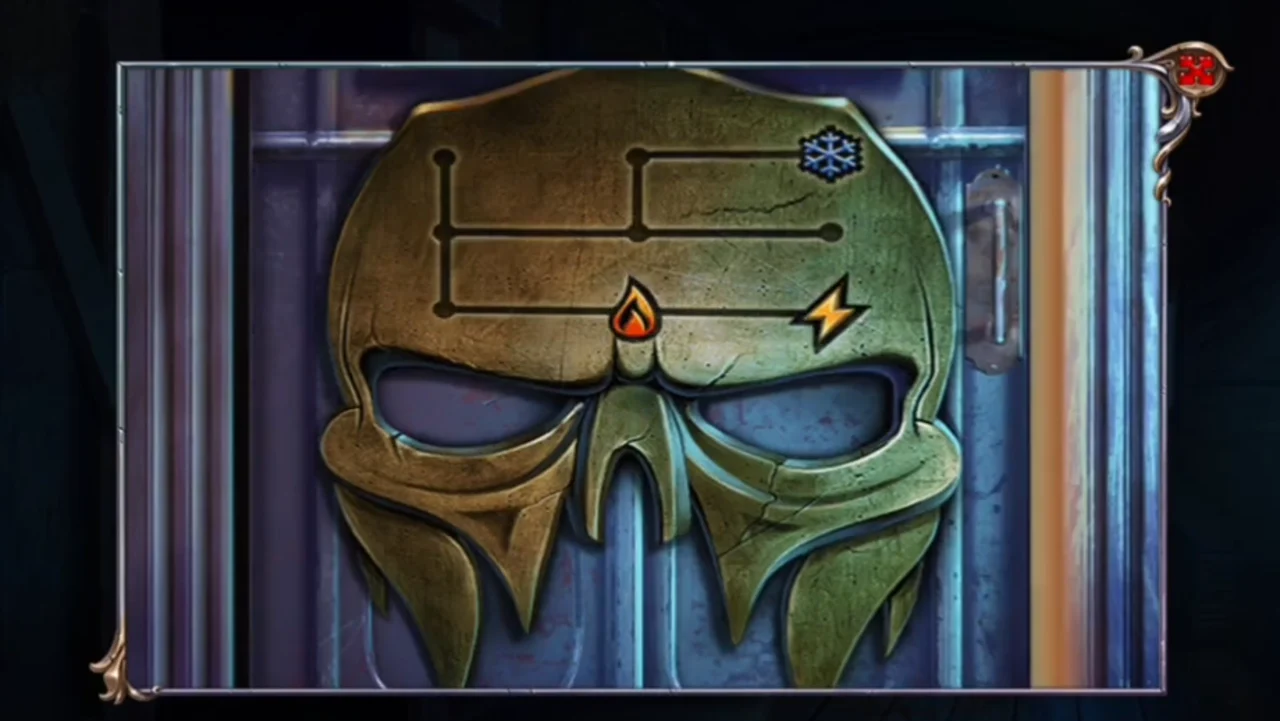
Solved: snowflake top right, fire in the drop slot, lightning lower right.
The Artifact and the Duel on the Train Roof
The Baroness's carriage holds the artifact in a barred box.
- Zoom into the box on the table ("The artifact is here, but these metal bars won't let me open it."), cut the bars with the SAW and take the ARTIFACT.
- Conrad appears at the window ("Louisa, run!"). Select the Baroness to escape through the window with Conrad.
- On the roof, Conrad fights a masked man ("Louisa, I've found you at last. Did you find your father?") and is wounded ("Ah! My hand!"). Take the RAPIER he drops and use it on the masked man.
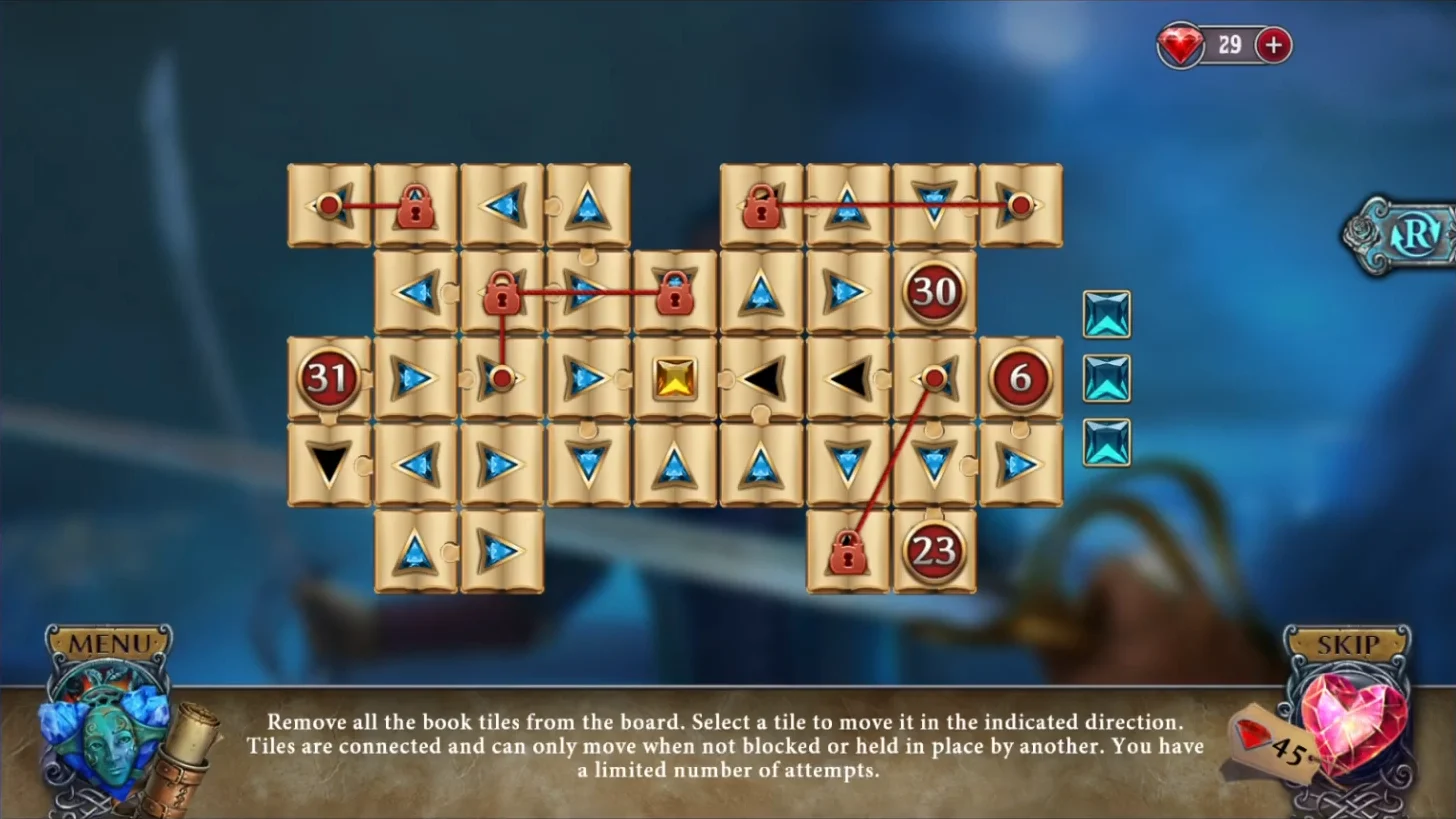
- Duel puzzle: "Remove all the book tiles from the board. Select a tile to move it in the indicated direction." A tile slides off only if nothing is in its way, and padlocked tiles are held in place. Every successful move lowers the red number counters; when a counter reaches zero, its chained padlock opens. The gems on the right are your limited attempts, so check each tile's path before you select it. A wasted move costs a gem, but you can afford a couple of mistakes. Start with tiles on the edges whose arrows point outward, and keep removing free tiles until the padlocks open and the board is empty. This guide gives the method rather than a full move list.
- The masked man is defeated. Take the BROKEN BADGE from the roof.