The Abandoned Train Station
After the labyrinth, Louisa and Conrad reach a mountain train station with a red train, a boarded-up hut and a supply crate on the platform.
- Take the CROWBAR from the sparkling crate in the foreground.
- Zoom into the boarded hut door, take down the calendar ("1889 ... Day X") and pry the planks off with the CROWBAR.
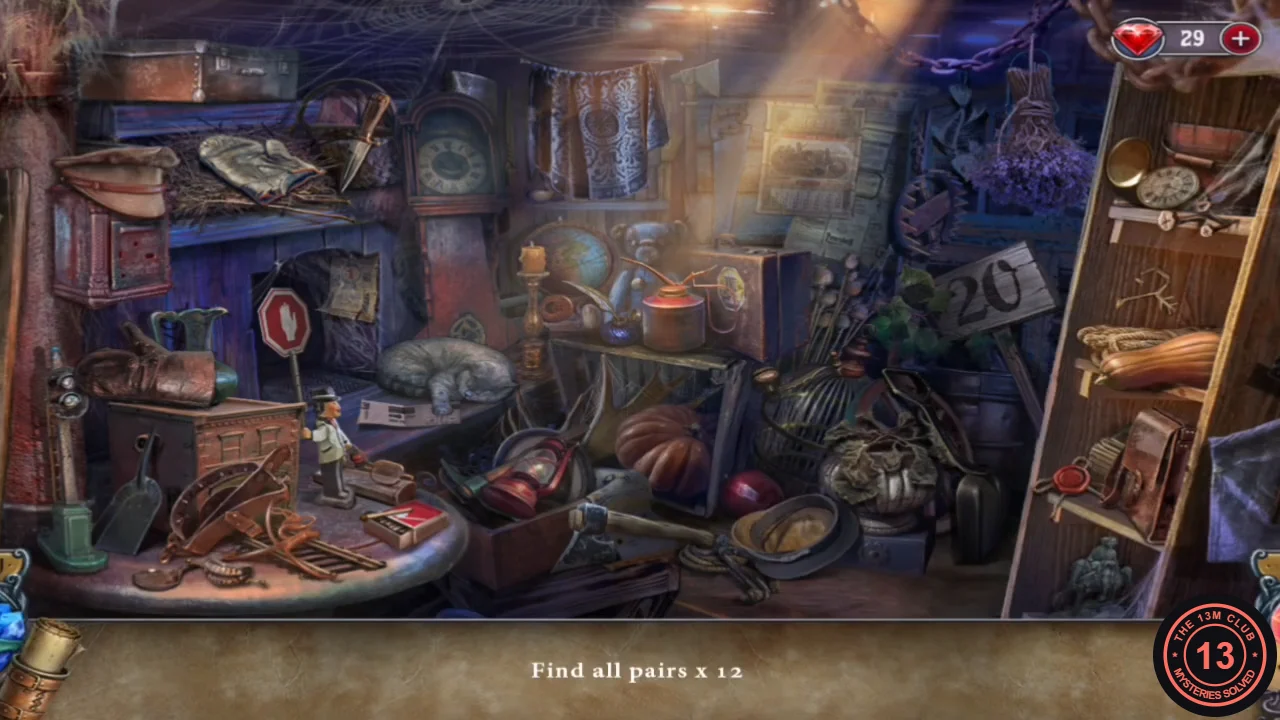
- Enter the hut for a hidden-object scene: "Find all pairs x 12". Find matching pairs of objects (cases, lanterns, plates, framed pictures and so on). A pair that is easy to miss is the pumpkin on the floor and the gourd on the right shelf. A compartment then opens on the table; take the TRAIN KEY.
- Zoom into the crate on the platform with two star-shaped sockets and take the RAIL LEVER lying on it.
- Unlock the train carriage door with the TRAIN KEY and step inside.
The Baroness's Train Carriage
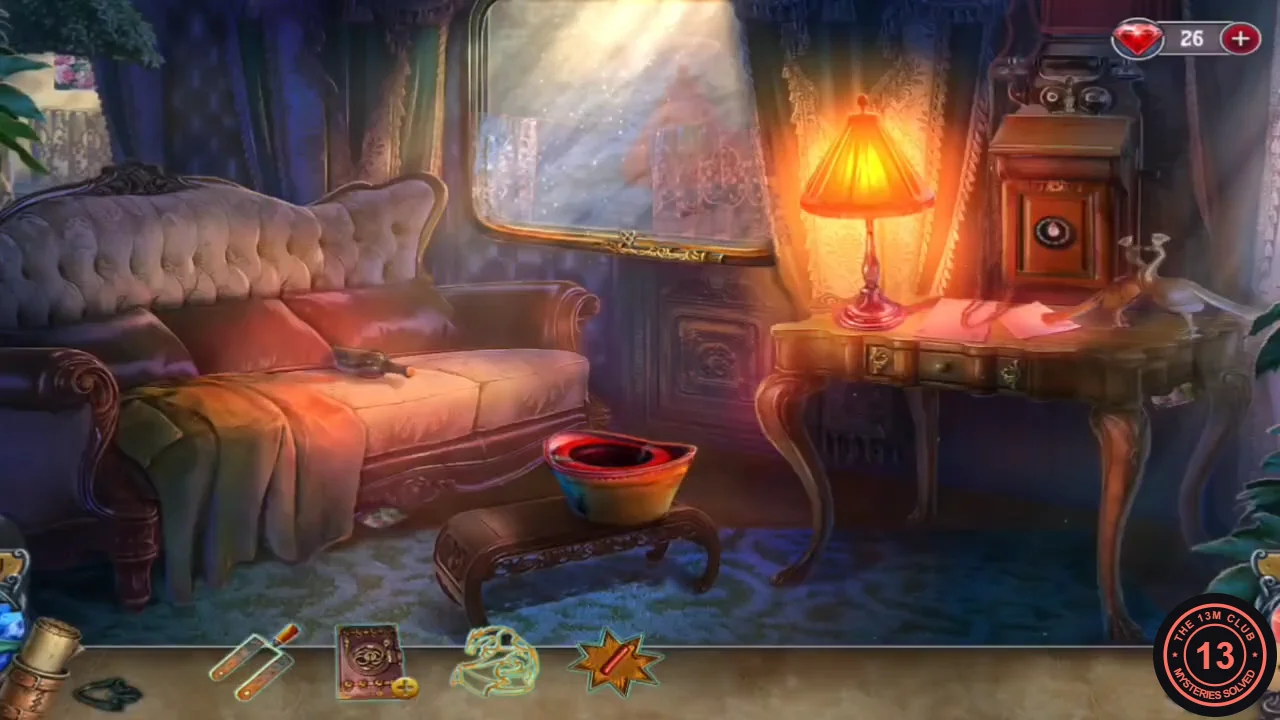
The plush carriage holds a purse, a hat box, a locked wall safe and a window looking out onto a track lever.
- Zoom into the sofa and take the PURSE lying on the wine bottle. The bottle itself is sealed ("The cork's in tight.").
- Zoom into the hat box on the footstool, open the lid and take the DIARY from inside.
- Open the PURSE in your inventory and take the DIARY KEY.
- Open the DIARY with the DIARY KEY. The pages read "I can't use this artifact on my boy, but others can exchange their souls for power." and "No matter what the cost, I'll heal my son." Turn the page, open the pocket and take the GOLDEN DRAGON (green dragon emblem) and DYNAMITE KEY 1 (orange star). There is faint writing on the left page that you can't read yet. Keep the DIARY.
- Zoom into the window. Outside, a broken lever box stands next to a hanging bee nest. Fit the RAIL LEVER into the box and pull it; the arm swings round and knocks down the nest. Take the BEE NEST.
The Waterfall and the Dragon Statuettes
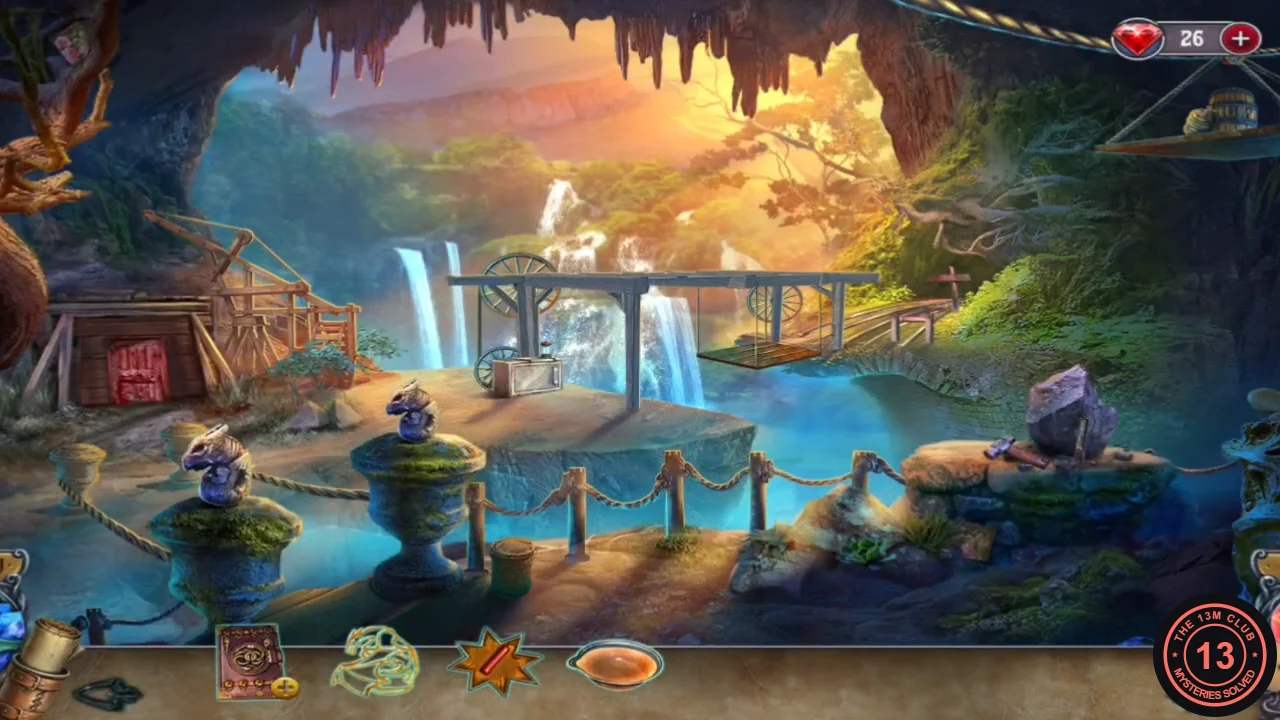
A flashback shows the Baroness at the mine: "Hold my jewelry. The Ancient One cannot tolerate silver." New objective: get into the mines. The new area is a waterfall landing with two stone pedestals, a water-wheel generator and a stonemason's block.
- Zoom into the rock on the right and take the TONGS.
- Go back to the station and zoom into the furnace. Put the BEE NEST in the bowl over the coals and let it melt. The bowl is too hot to touch ("This bowl is too hot!"), so lift it with the TONGS to get the HOT WAX.
- Return to the waterfall and zoom into the two pedestals. Knock the cracked statuette off the right pedestal. Pour the HOT WAX over the intact dragon statuette on the left and take the WAX MOLD.
- Zoom into the stonemason's block by the rock where you found the tongs. Place the WAX MOLD on the stone and use the chisel; take the DRAGON STATUETTE.
- Place the DRAGON STATUETTE on the empty right pedestal, then select each statuette once to turn both of them to face forward.
- Zoom into the water-wheel generator and take the CHARCOAL from the pile beside it.
The Carriage Safe and the Dynamite Crate
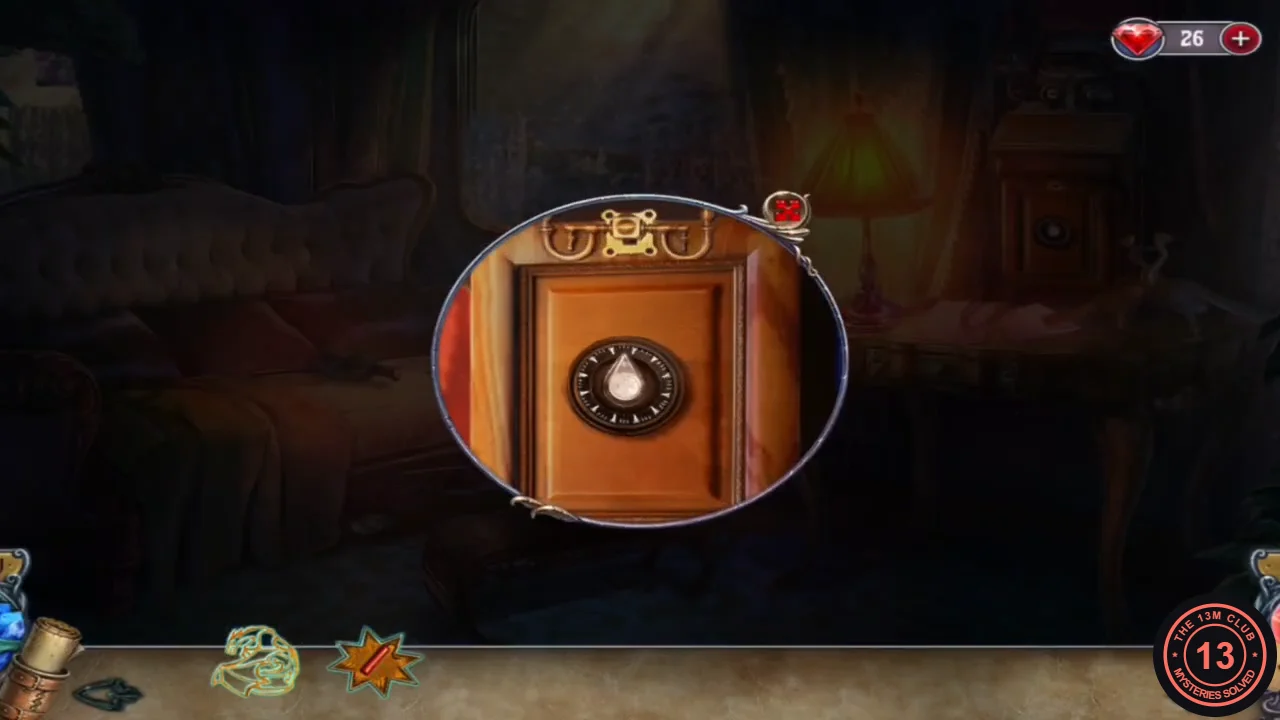
The charcoal reveals the writing hidden in the Baroness's diary.
- Back in the carriage, rub the CHARCOAL over the faint writing in the DIARY. It reveals 29 with an arrow pointing right, 17 with an arrow pointing left and 6 with an arrow pointing right. Take the SAFE CODE.CODE29 right, 17 left, 6 right
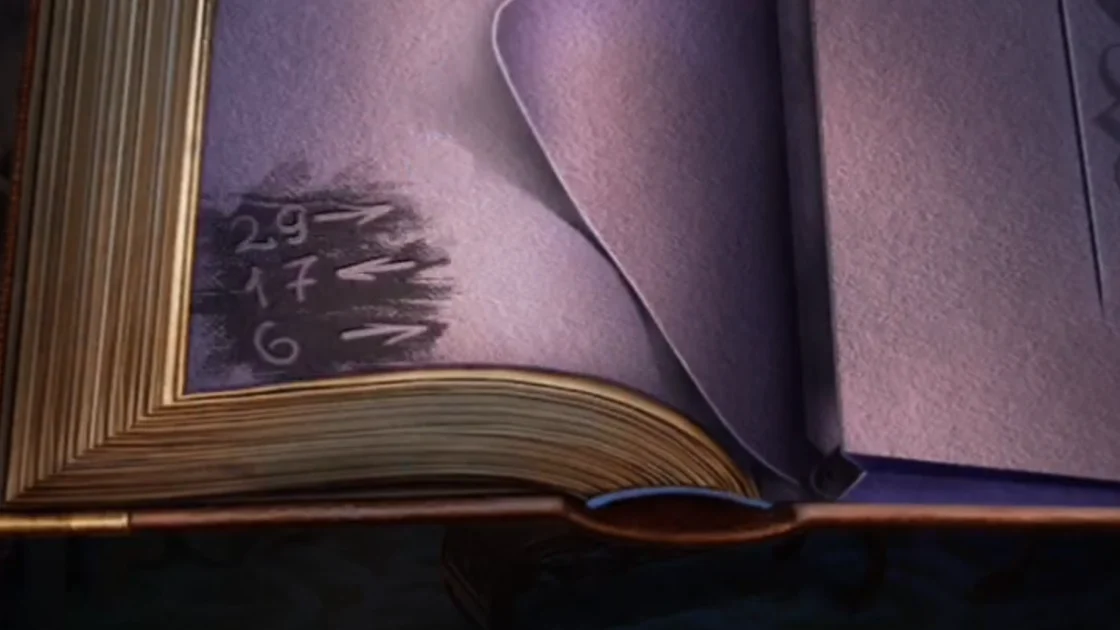
The charcoal rubbing in the diary: 29 right, 17 left, 6 right. - Zoom into the wall safe and place the SAFE CODE. The dial turns to the code by itself and the door opens. Take the CRYSTAL SHIELD and DYNAMITE KEY 2 (orange star) from inside.
- Go out to the platform crate and fit both DYNAMITE KEYS into the star sockets. Take the DYNAMITE and the OIL CANISTER from the straw.
- At the waterfall, zoom into the generator, remove the old canister and put in the new OIL CANISTER. A cutscene follows: a stone giant attacks at the mine entrance and the DYNAMITE is used against it.
The Stone Arm and the Mine Lift
The fallen giant leaves a stone arm by the landing. Louisa gains a new hand ability.
- Zoom into the stone arm ("...Conrad?"). Take the SCRAP METAL and the SILVER RING from the ground, then touch the arm. A flashback plays: "This was a hard one. He tried to steal silver ore from the mine... but he chose the wrong time."
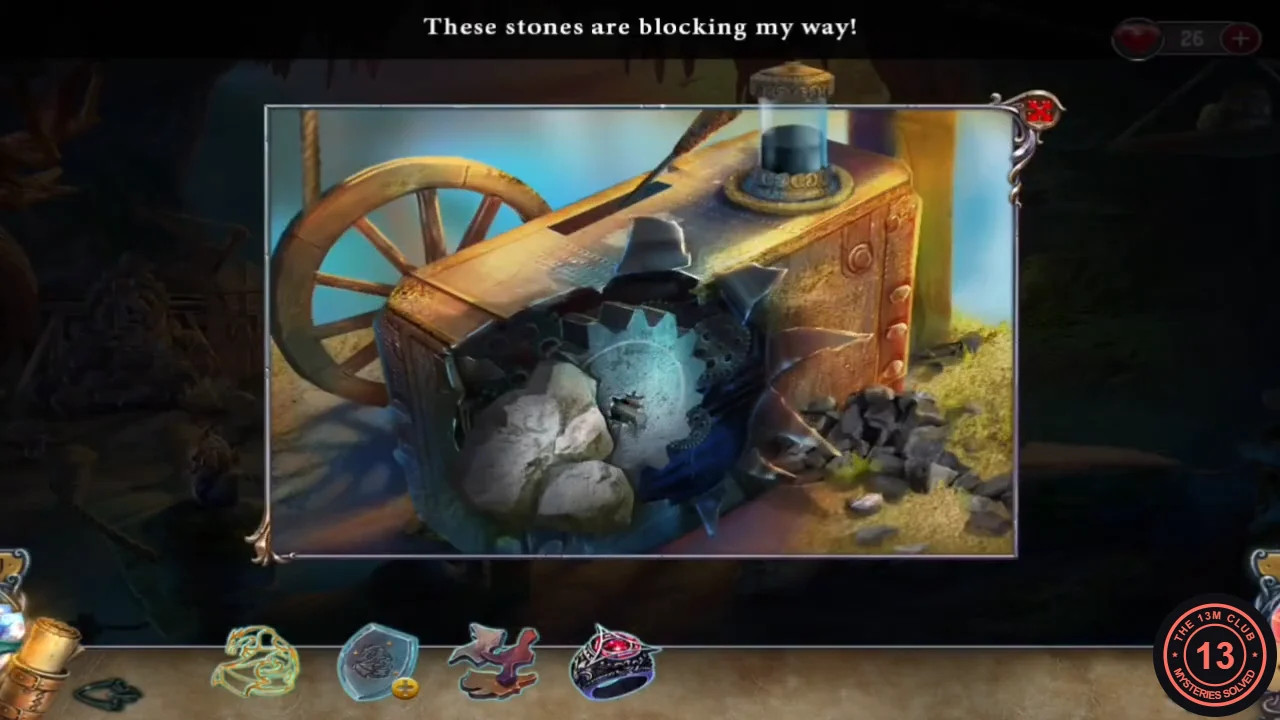
- Zoom into the generator again. Rocks block the gear housing ("These stones are blocking my way!"). Select the hand ability icon at the bottom left and use it on the stones to clear them. Take the BROKEN WHEEL (the old gear). "The main gear has to be replaced or the lift won't work."
- At the station furnace, put the BROKEN WHEEL in the mould, add the SCRAP METAL and pull the red lever. Take the SPARE WHEEL.
- Fit the SPARE WHEEL into the generator, then pull the lever on top of the generator. The lift starts working; ride it down to the mine tunnel.
The Mine Tunnel and the Station Search
The tunnel holds a broken mine cart chained to a post and a skull-marked signpost. The track lever is rusted solid ("Rusted. It won't move.").
- Rebuild the cart: collect the missing cart pieces around the tunnel (a wheel caught in the roots at the top left, a board on the ledge at the top right and further parts by the track). Each one snaps onto the cart.
- Zoom into the signpost and take the OLD BRANCH and the WHISTLE PART.
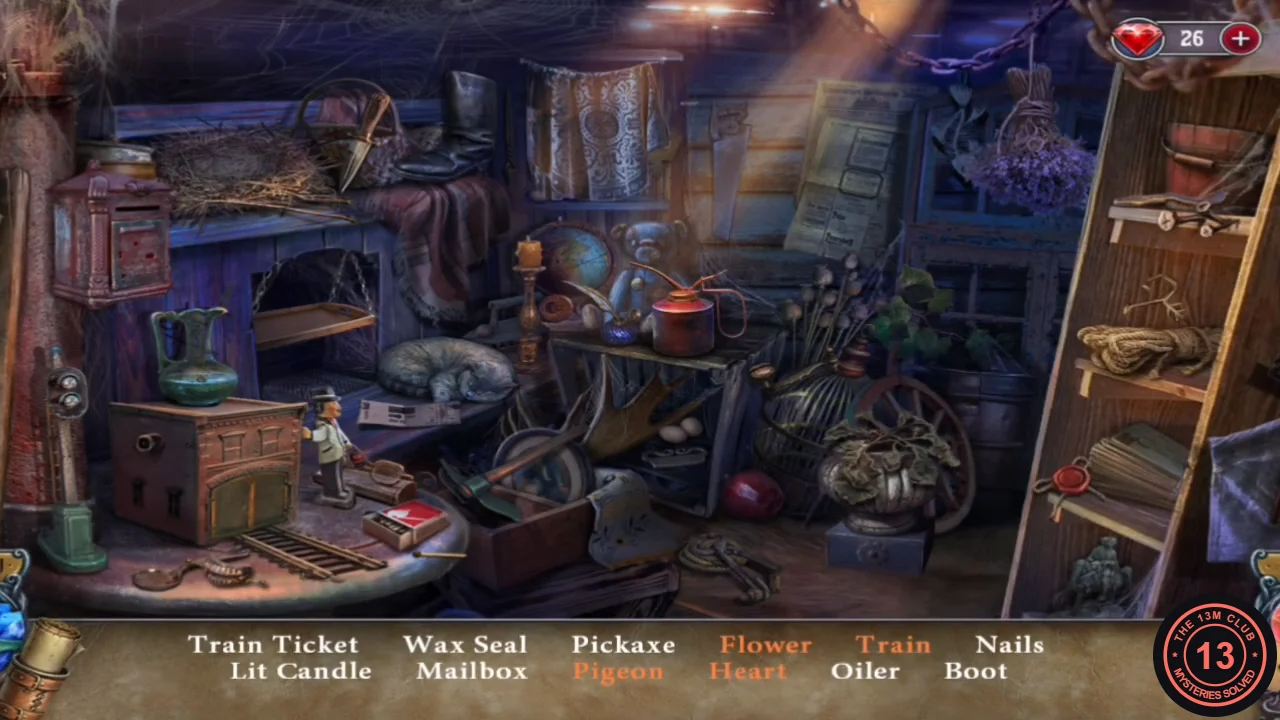
- Back at the station, play the hidden-object scene in the hut. Items: Train Ticket, Wax Seal, Pickaxe, Flower, Train, Nails, Lit Candle, Mailbox, Pigeon, Heart, Oiler, Boot. Items in orange need an extra step. For example, water the dying plant with the pitcher to make the Flower bloom ("The plant's almost dead."), and lure the Pigeon to the nest with grain. You receive the OILER.
- A crow on the lamp post is holding something ("It's holding something. Shoo!"). Zoom into the steam whistle on the post ("It looks fine but there's no handle."), attach the WHISTLE PART and pull it. The whistle scares the crow, which drops the POCKET KNIFE onto the crates; take it.
- Open the POCKET KNIFE in your inventory to get the CORKSCREW. In the carriage, uncork the wine bottle on the sofa with it and take the EMPTY BOTTLE.
- Zoom into the desk drawer in the carriage, fit the SILVER RING as its handle, open it and take the MINE MAP.
- At the waterfall, the bundle hanging at the top right is out of reach ("Out of my reach."). Pull it down with the OLD BRANCH and take the METAL SPONGE.
- Zoom into the pipe wrapped in red cloth by the landing and pull the cloth away; green liquid drips out ("That looks like acid."). Fill the EMPTY BOTTLE to get ACID.
- In the tunnel, oil the cart with the OILER, then pour the ACID on the chain that ties the cart to the post to dissolve it.
Mine Map Puzzle
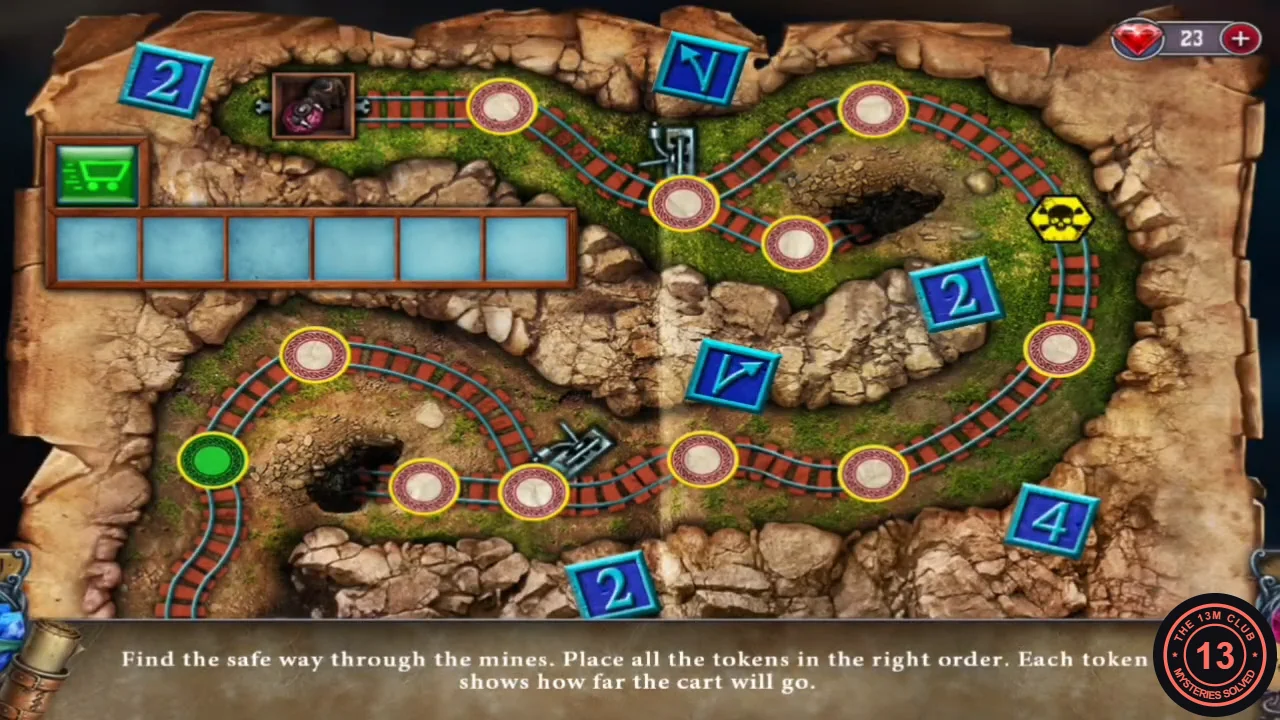
Use the MINE MAP on the cart. "Find the safe way through the mines. Place all the tokens in the right order. Each token shows how far the cart will go." Drag the scattered tokens into the empty slots of the bar, left to right. Number tokens move the cart that many stops; arrow tokens choose the left or right branch at a junction. Avoid the skull stops. There are two boards. The solutions below are for the layouts shown in the overview images; if your board differs, plan the route stop by stop with the same rule.
- Place the MINE MAP on the cart to start the puzzle.
- Board 1 (six slots): 2, left-turn arrow, 4, 2, right-turn arrow, 2. The cart rolls along the green track to the exit.CODE2, left arrow, 4, 2, right arrow, 2
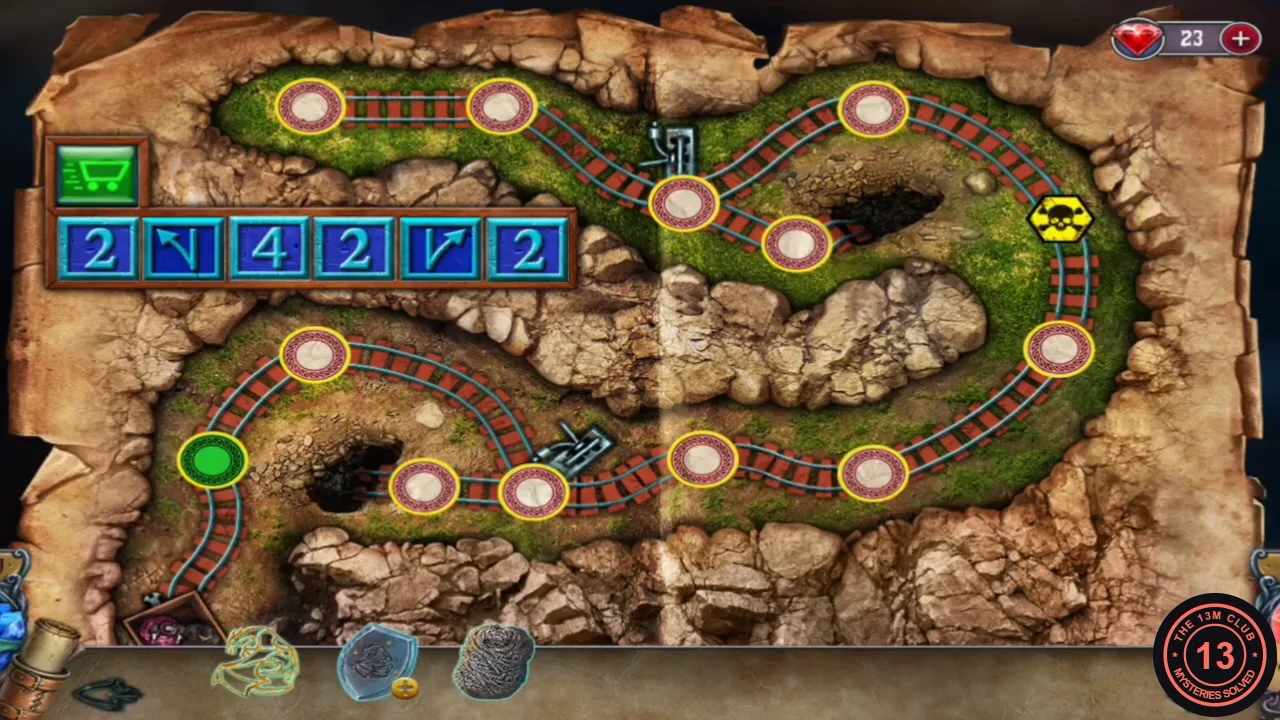
Board 1 solved: 2, left arrow, 4, 2, right arrow, 2. - Board 2 (nine slots): 3, left-turn arrow, 4, 3, 3, left-turn arrow, 1, 2, 2. The cart crosses the lava field to the green exit.CODE3, left arrow, 4, 3, 3, left arrow, 1, 2, 2
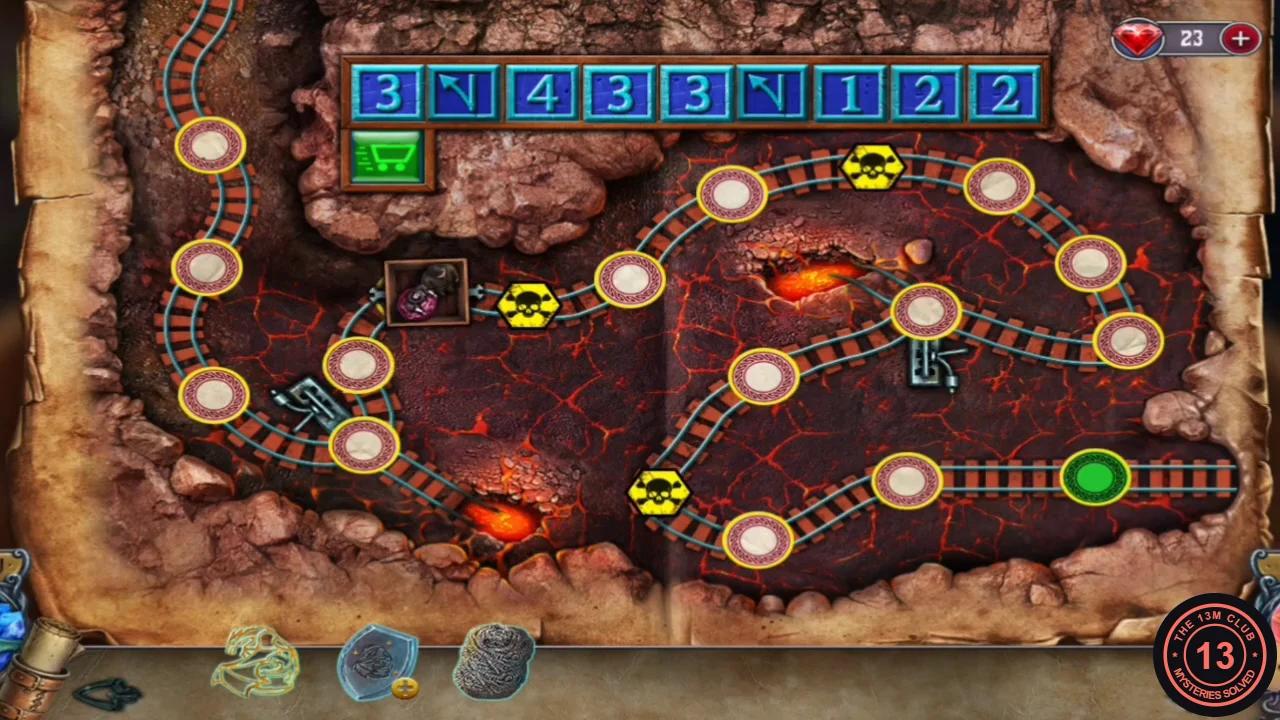
Board 2 with the finished bar, before the cart sets off: 3, left arrow, 4, 3, 3, left arrow, 1, 2, 2.