The Lava Cavern and the Dragon Wall
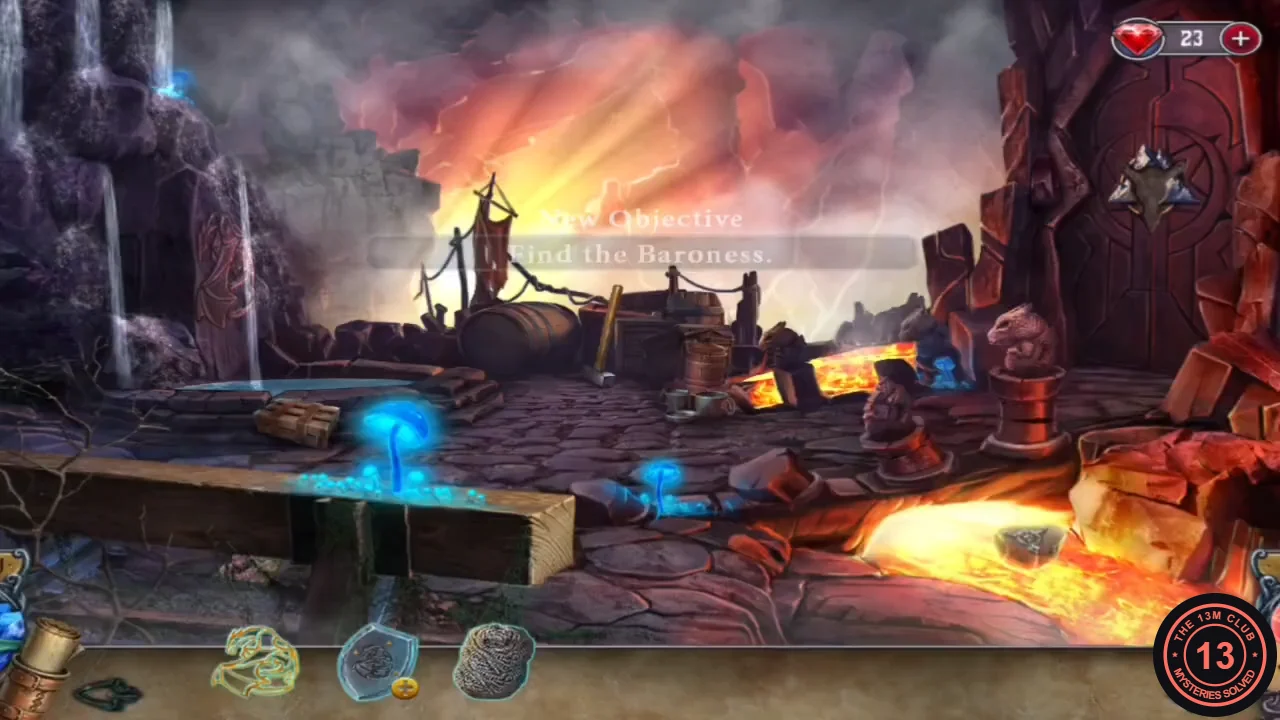
The cart brings Louisa to a volcanic cavern. New objective: find the Baroness. Glowing blue mushrooms grow around the cavern, and a sealed red door with an empty emblem frame stands on the right.
- Zoom into the broken crate by the lava and take the SLEDGEHAMMER. Something else inside is covered in slime ("It's covered with... slime? Disgusting."); leave it for now.
- Collect the four GLOWING MUSHROOMS around the cavern and combine them in your inventory.
- Place the GOLDEN DRAGON on the CRYSTAL SHIELD in your inventory.
- Zoom into the dragon relief carved into the rock wall. Hold up the CRYSTAL SHIELD so the light shows the weak spot, then break the wall with the SLEDGEHAMMER. A dark cave opens behind it.
- The cave is pitch dark. Place the GLOWING MUSHROOMS to light it up. A seated knight is revealed: "This is one of the Knights of the Dragon! And that's his sword..."
The Knight of the Dragon and the Sealed Door
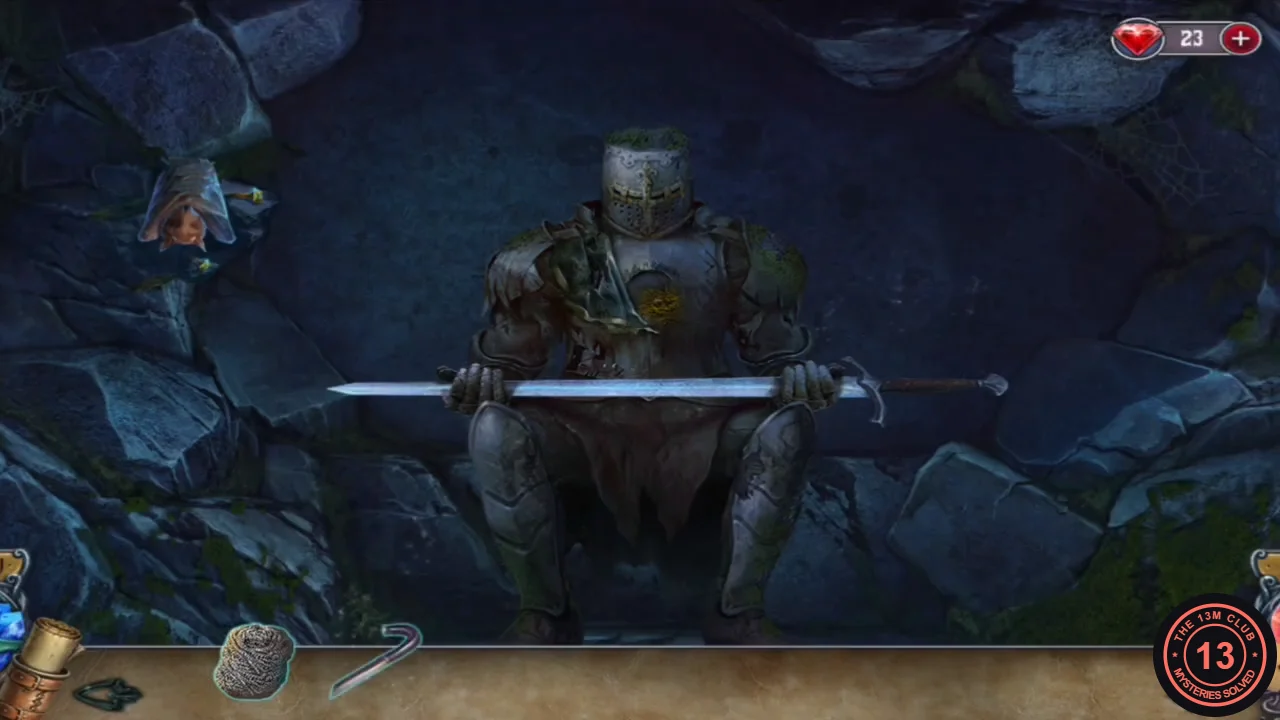
The knight's cave and the lava cavern hold the pieces needed to open the red door.
- In the knight's cave, take the HOOK hanging on the right.
- Zoom into the moss on the knight's chest and scrub it with the METAL SPONGE. You receive an OLD RAG.
- Back in the lava cavern, wipe the slime off the object in the crate with the OLD RAG and take the PEAR.
- Zoom into the lava stream where a metal emblem is stuck ("It's too hot! I can't grab it with my bare hands.") and fish it out with the HOOK. Take the KNIGHT'S CREST.
- In the knight's cave, offer the PEAR to the bat hanging at the top left. Once it moves, take the METAL PINS from the rock behind it.
- Go to the red door in the lava cavern and place the KNIGHT'S CREST in the empty frame, then insert the METAL PINS. The door opens. (The crest does not fit the round socket on the knight's chest: "I can't use this right now.")
The Silver Sword
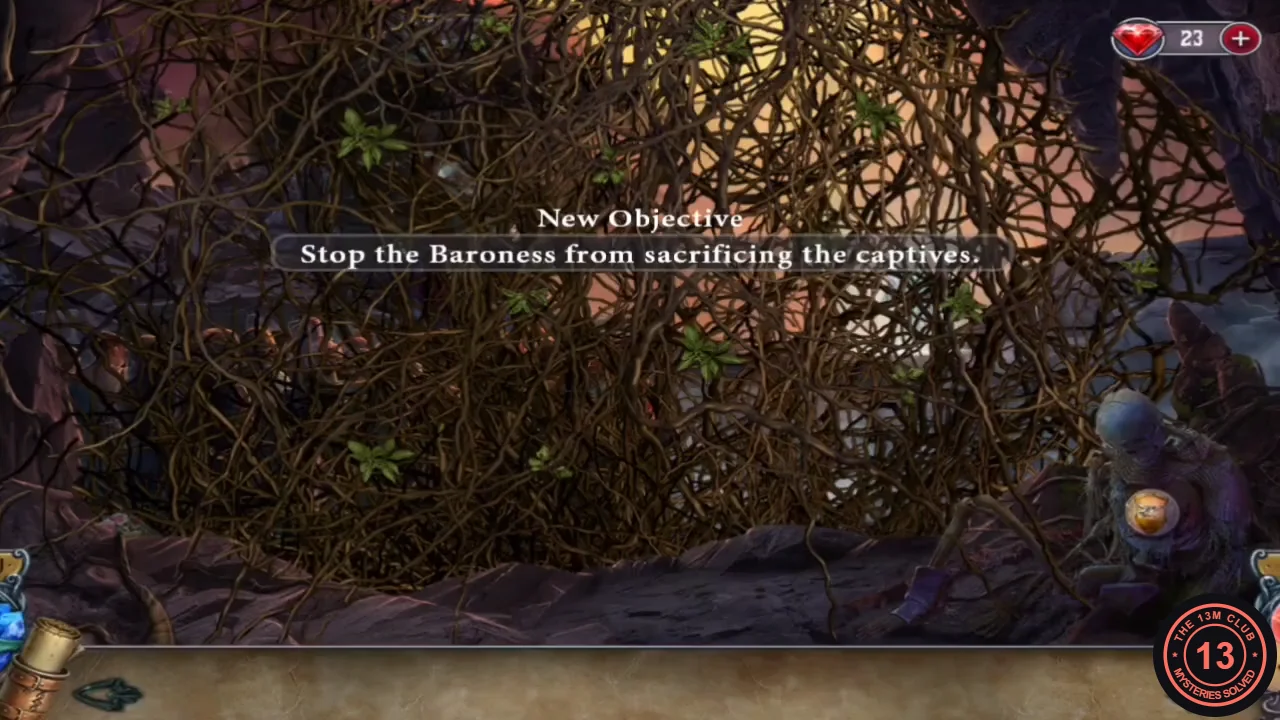
Behind the door, Louisa sees Father and Conrad among the captives ("Father! Conrad! You're alive!") as the Baroness calls out: "Ancient One! I have fulfilled my part of the deal. These souls are yours. Now heal my son!" A wall of thorny brambles blocks the way. New objective: stop the Baroness from sacrificing the captives.
- At the brambles ("Conrad and my father are on the other side! I need to save them!"), take the round golden lion medallion (the KNIGHT'S PENDANT) lying at their foot.
- Return to the knight and place the KNIGHT'S PENDANT in the round socket on his chest. Glowing runes appear for a hidden-symbol scene. Round 1: House Afire, Dragon, Dagger, Hand, Cup, Eye. Round 2: Spider, Wind, Rose, Snake, Skull, Key. Finally select the glowing Sword to receive the SILVER SWORD.
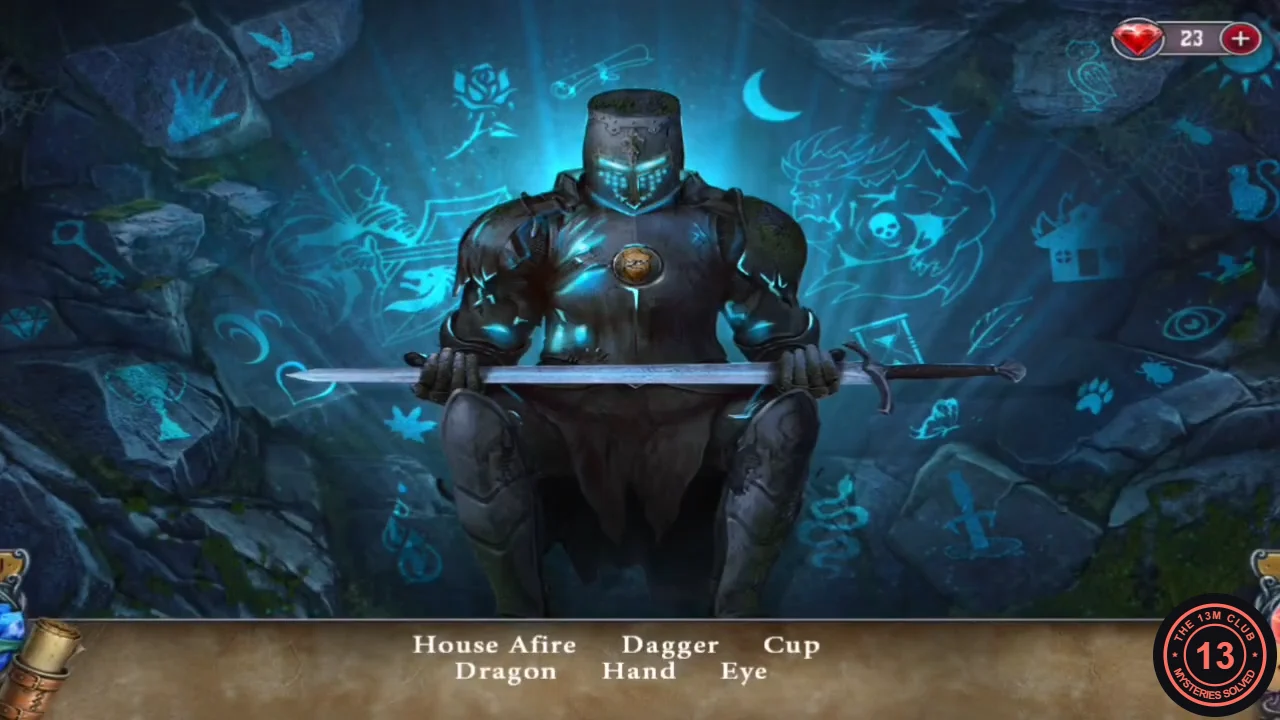
The hidden-symbol scene after the pendant is placed (round 1 list). - Cut through the brambles with the SILVER SWORD.
Final Puzzle: The Ancient One
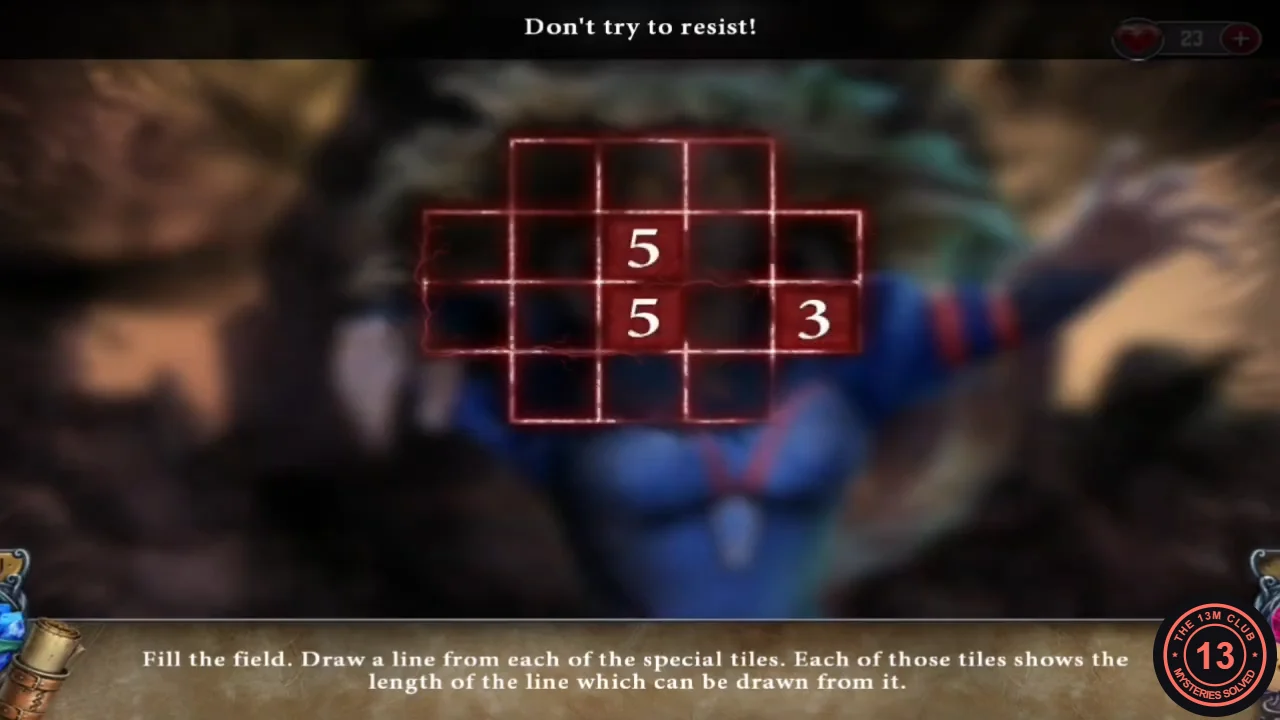
"Fill the field. Draw a line from each of the special tiles. Each of those tiles shows the length of the line which can be drawn from it." Each number is how many cells its line covers, not counting the number tile. Lines turn freely but may not cross, and every cell must be used. There are three fixed boards. In the solutions, rows are counted from the top and columns from the left edge of the widest row. Each line is listed from its number tile outward.
- Board 1 ("Don't try to resist!"; 4 rows: row 1 has columns 2-4, rows 2-3 have columns 1-5, row 4 has columns 2-4; 5 at row 2 col 3, 5 at row 3 col 3, 3 at row 3 col 5). Upper 5: up to row 1 col 3, left to row 1 col 2, down to row 2 col 2, left to row 2 col 1, down to row 3 col 1. Lower 5: right to row 3 col 4, down to row 4 col 4, left along row 4 to col 2, up to row 3 col 2. The 3: up to row 2 col 5, left to row 2 col 4, up to row 1 col 4.
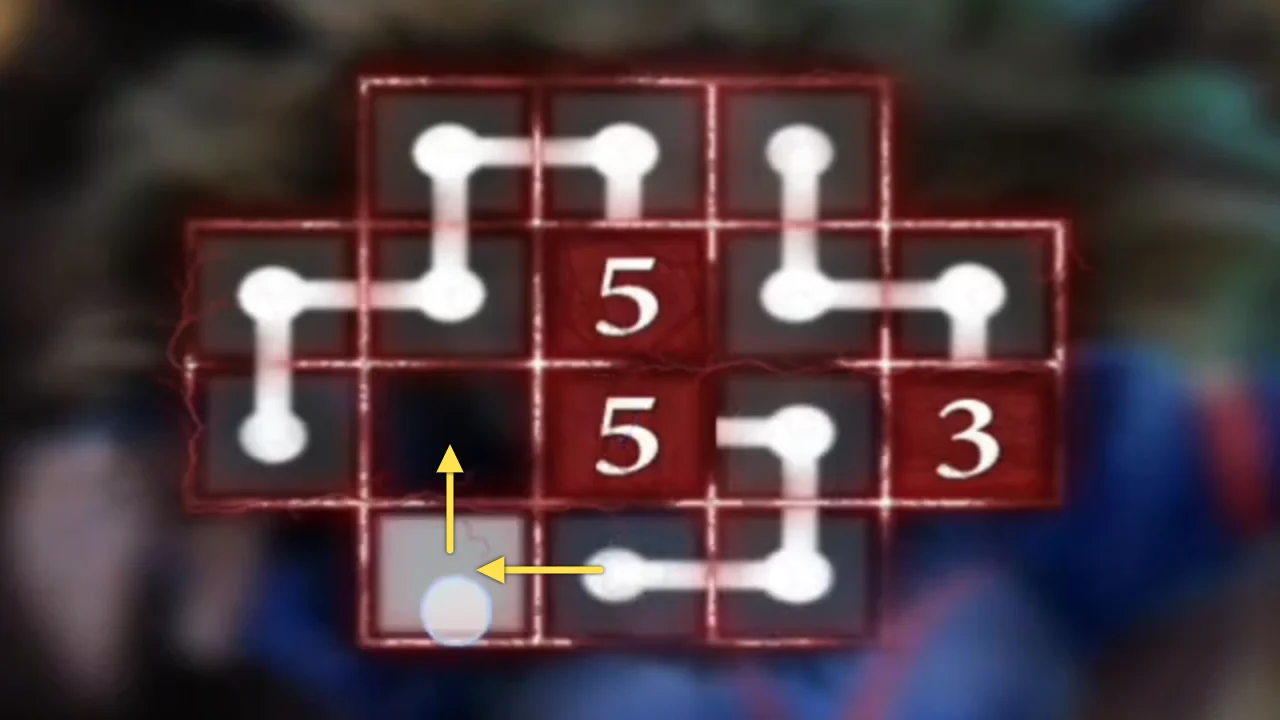
Board 1 just before it completes. The yellow arrows show the last two cells of the lower 5. - Board 2 (5 rows: rows 1 and 5 have columns 2-6, rows 2-4 have columns 1-7; 4 at row 1 col 6, 8 at row 3 col 4, 7 at row 4 col 4, 8 at row 5 col 2). The 4: left along row 1 to col 2. Upper 8 (row 3 col 4): up to row 2 col 4, right to col 5, down to row 3 col 5, right to col 6, up to row 2 col 6, right to col 7, down to row 3 col 7 and row 4 col 7. The 7: left to row 4 col 3, down to row 5 col 3, right along row 5 to col 6, up to row 4 col 6, left to row 4 col 5. Lower 8 (row 5 col 2): up to row 4 col 2, left to col 1, up to row 3 col 1, right to cols 2 and 3, up to row 2 col 3, left along row 2 to col 1.
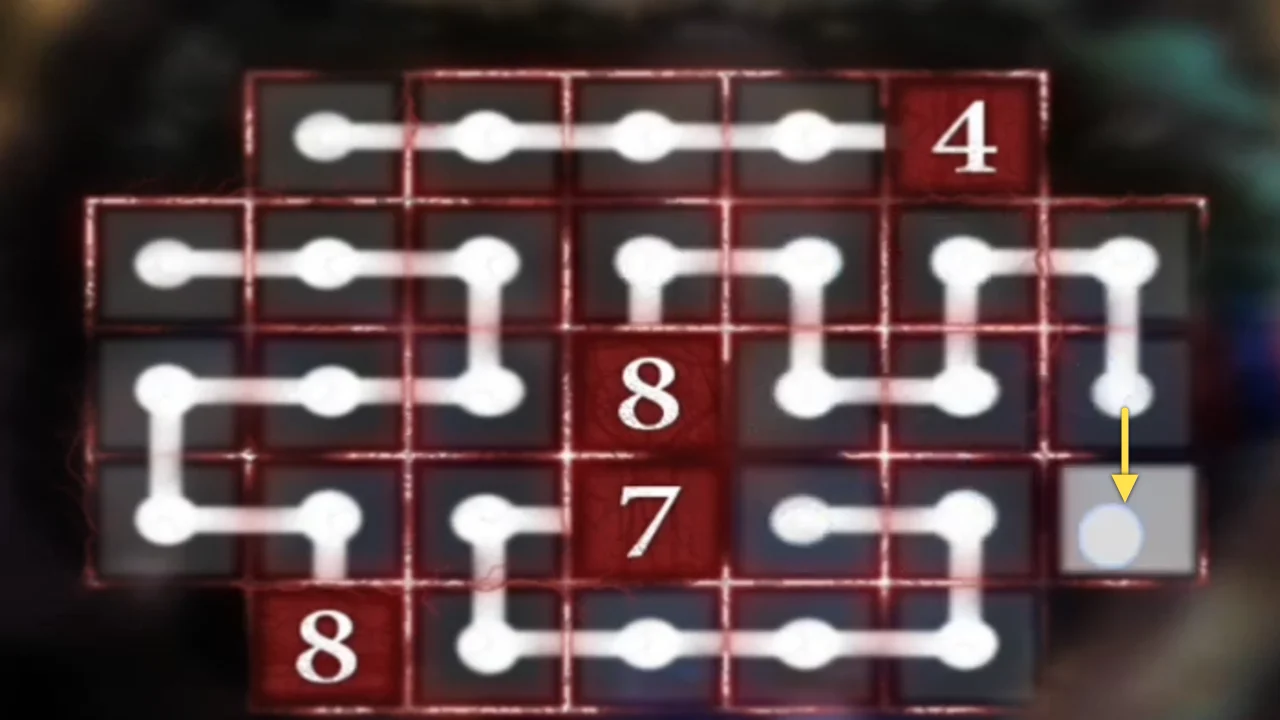
Board 2 just before it completes. The yellow arrow shows the final cell of the upper 8. - Board 3 (7 rows: rows 1 and 7 have columns 2-8, rows 2-6 have columns 1-9; 16 at row 2 col 7, 12 at row 3 col 1, 10 at row 4 col 3, 10 at row 5 col 6, 6 at row 6 col 9). The 16: down to row 3 col 7, right to col 8, up to row 2 col 8 and row 1 col 8, left to row 1 cols 7 and 6, down to row 2 col 6, left to col 5, up to row 1 col 5, left to col 4, down to row 2 col 4, left to col 3, up to row 1 col 3, left to col 2, down to row 2 col 2, left to row 2 col 1. The 12: down column 1 to row 6, right to row 6 col 2, down to row 7 col 2, right to col 3, up column 3 to row 5, left to row 5 col 2, up column 2 to row 3, right to row 3 col 3. The left 10 (row 4 col 3): right to col 4, up to row 3 col 4, right to col 5, down column 5 to row 7, left to row 7 col 4, up column 4 to row 5. The right 10 (row 5 col 6): down to row 6 col 6 and row 7 col 6, right along row 7 to col 8, up to row 6 col 8, left to col 7, up column 7 to row 4, left to row 4 col 6, up to row 3 col 6. The 6: up to row 5 col 9, left to col 8, up to row 4 col 8, right to col 9, up column 9 to row 2.
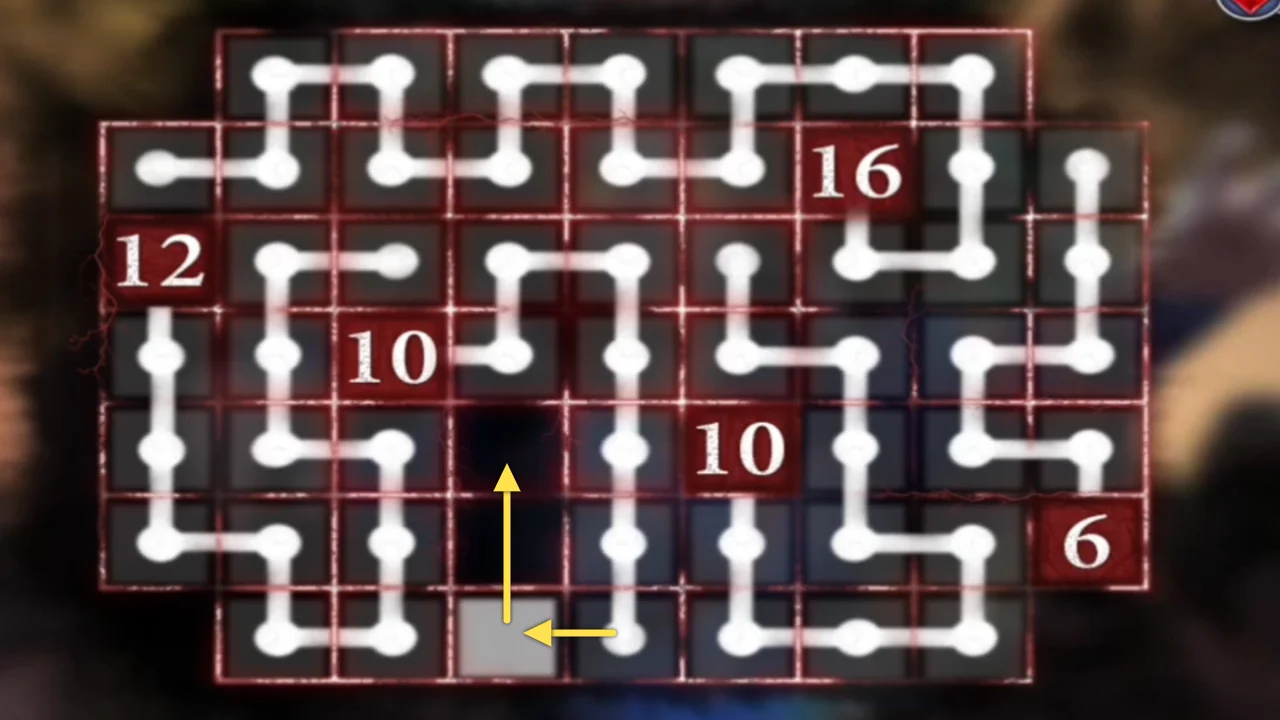
Board 3 just before it completes. The yellow arrows show the last three cells of the left 10.
The Price of a Miracle
The final cutscene plays with no further input. There is one ending: it is the same whichever heart you chose in Chapter 2 (Save Conrad or Save Greg).
- Watch the ending. The Baroness screams as the Ancient One's power fails, and Conrad collapses with burning wounds ("Don't die. Please, please don't die..."). The young Baron calls "Bring him here!" before the cave collapses. Epilogue: "A year later, Conrad and Louisa were married. Greg had gained another son, and the young Baron was cured. Miracles were made, and each of them had paid their own price." Then: "Well done! You may now access the BONUS GAME!"