Escape the Falling Carriage
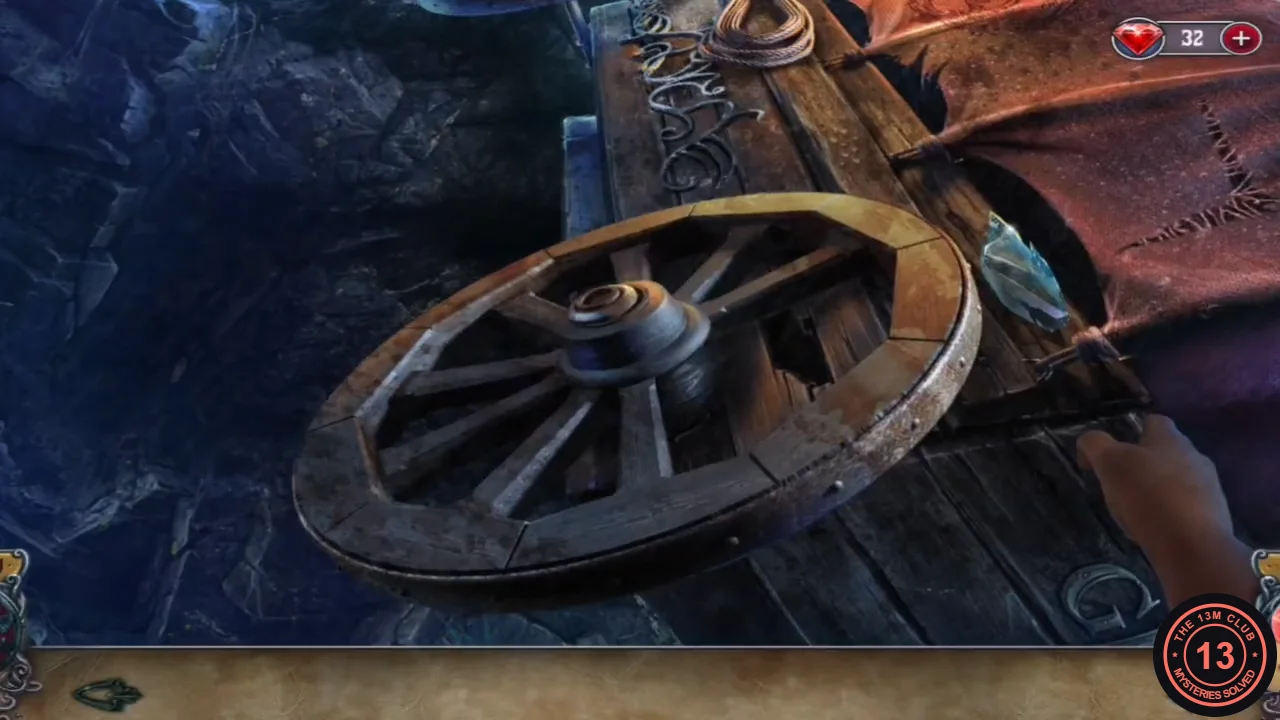
From the title screen choose Play, then Main Game. The Bonus Chapter stays locked until the main game is finished. Louisa wakes in a carriage hanging over a cliff.
- Take the GLASS SHARD from the canopy and use it to cut open the fabric.
- Open the cargo, move the fan, ornament and case aside, then take the STICK and the HOOK.
- Wedge the STICK into the wheel hub and pull the wheel to steady the carriage.
- Take the ROPE that appears on the carriage roof and attach it to the HOOK to make a HOOK WITH ROPE.
- Use the HOOK WITH ROPE on the fence post across the gap. A slider runs up and down on the right: tap the scene when it crosses the yellow mark. Conrad then pulls Louisa to safety.
Father's Pouch Button Puzzle
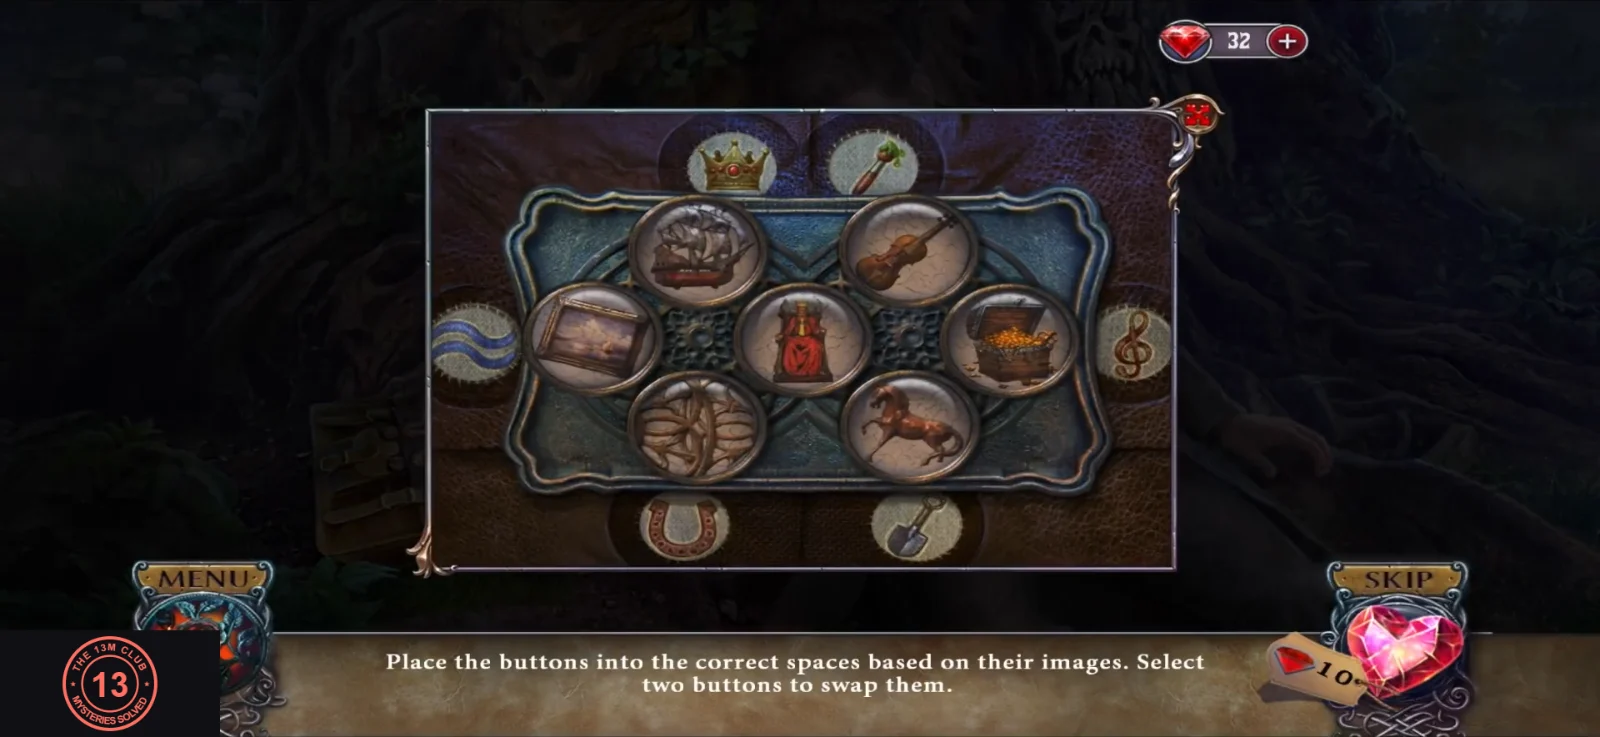
Father is unconscious under a tree by the road. His pouch holds a button board: each button belongs next to the outer picture it relates to. Select two buttons to swap them.
- Examine Father, then open his pouch to start the button puzzle.
- Swap buttons until each sits by its partner: king on a throne by the crown (top left), painting by the brush (top right), ship by the waves (left), violin by the treble clef (right), horse by the horseshoe (bottom left), treasure chest by the shovel (bottom right). The knotted-rope button stays in the centre.
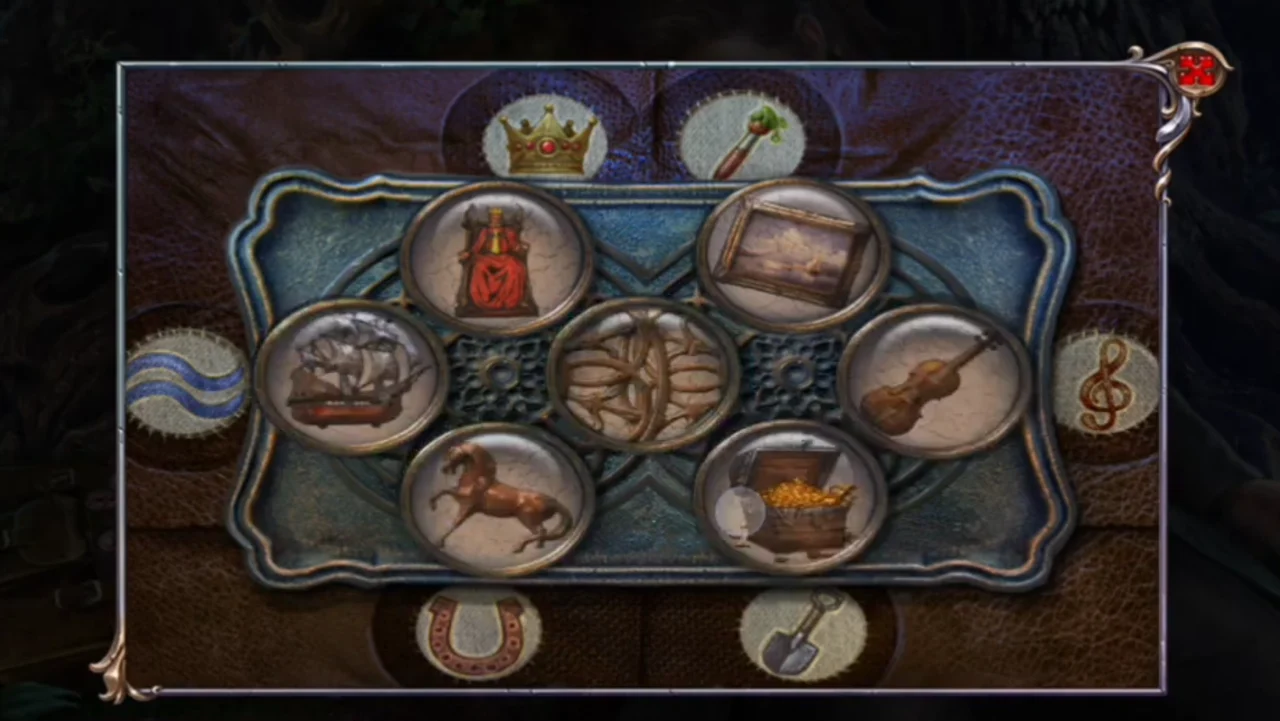
Completed arrangement: each button sits beside its matching outer symbol. - Read the letters and take BAG KEY 1/2 and AID KIT DECORATION 1/3.
Recover Father's Bag
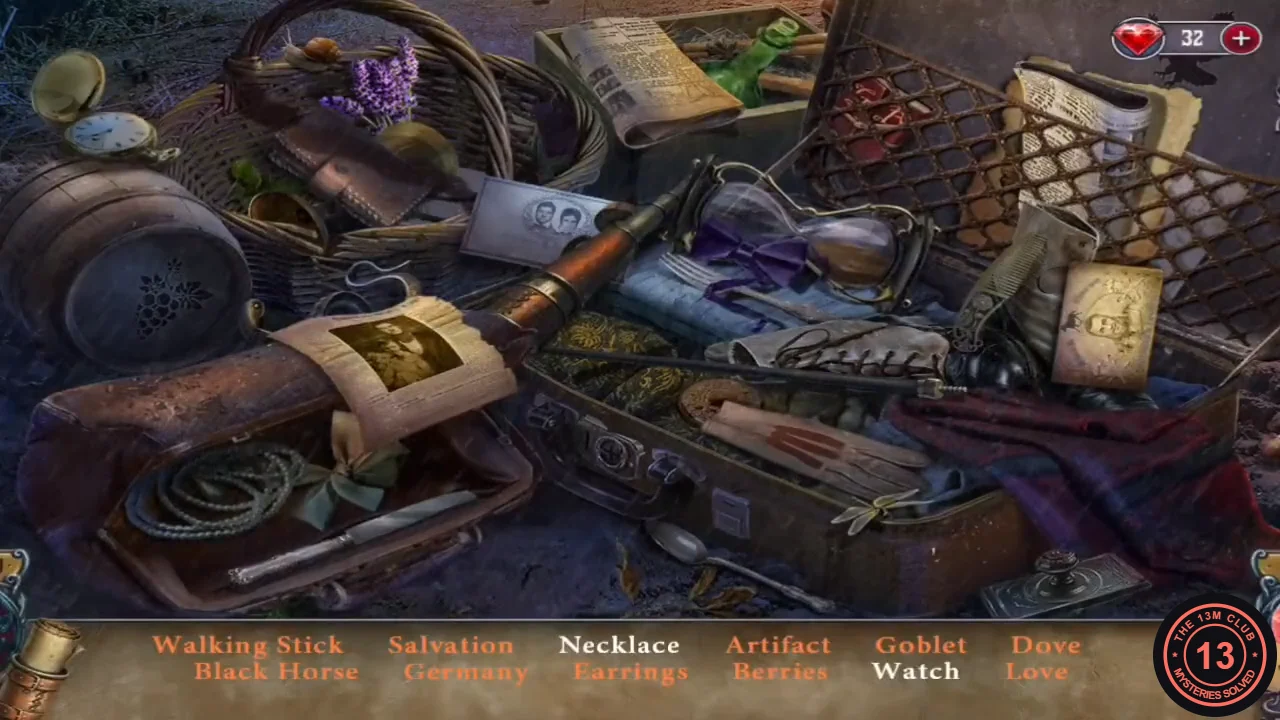
Father's bag fell from the wreck. Collect its keys, open the trunk and search the luggage.
- At the crash site, take the BLINDERS.
- Zoom into the broken mask, select the two mask pieces to fit them together, and take AID KIT DECORATION 2/3 from underneath.
- Look down the slope: the bag is out of reach ("That's my bag. How can I reach it?"). Take the small POUCH lying near it, open it, move the contents and take BAG KEY 2/2.
- Place both BAG KEYS in the trunk lock at the wreck and turn them.
- Find the listed items in the luggage hidden-object scene. You receive a WALKING STICK.
- Talk to Conrad, who asks for food to calm the horses.
- Use the WALKING STICK to hook the bag on the slope; take the CARROT, MONEY and FIRST AID KIT from it.
- Give the CARROT to the horse and put the BLINDERS on it. Conrad thanks you; take AID KIT DECORATION 3/3.
First Aid Kit Diagnosis
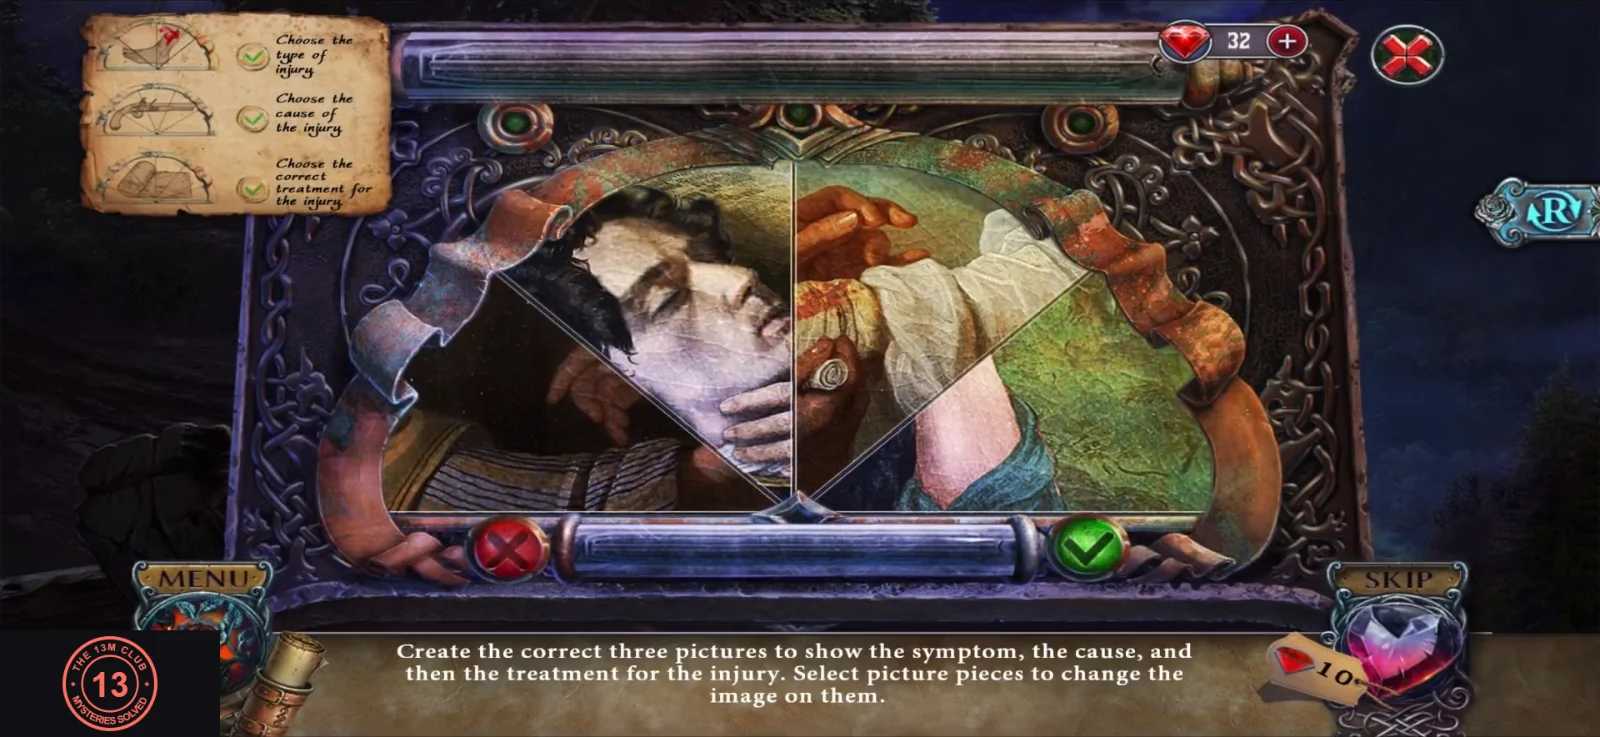
Build three pictures in order: the symptom, the cause and the treatment. Select a wedge of the picture to change its image; when all wedges form one scene the label appears and the next stage begins.
- Place the three AID KIT DECORATIONS on the FIRST AID KIT to open it.
- Symptom: complete the picture of the unconscious man lying with a hand at his head. The word Fainted appears when it is right.
- Cause: complete the picture of the crashed carriage (Accident).
- Treatment: complete the picture of the table with smelling-salt bottles (Ammonia), then take the AMMONIA.
- Use the AMMONIA on Father. He wakes; you receive CONRAD'S LETTER and ride with Conrad to the Black Horse tavern.
Tavern Yard and the Cryptex
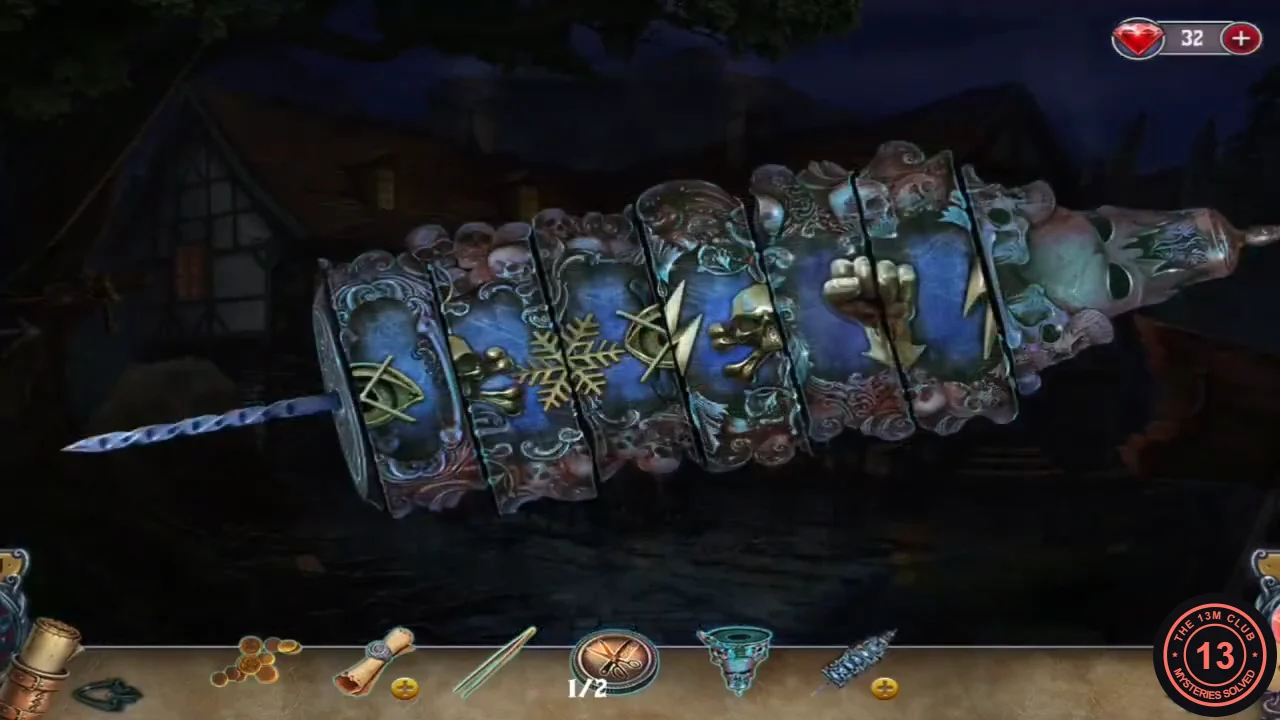
The tavern is locked for the Baroness's ball. Search the yard and the horse's saddlebag.
- Turn the tavern sign and take the TWEEZERS.
- Zoom into the twig-covered box by the fence, clear it and take TOKEN 1/2.
- Go to the tavern door. Take the PITCHFORK and the CRYPTEX PART from beside the door (a short scene shows the crowded tavern through the window).
- Use the PITCHFORK on the haystack to take some HAY.
- Zoom into the horse, give it the HAY and take the CRYPTEX from its saddlebag.
- Add the CRYPTEX PART to the CRYPTEX and rotate its six rings until five whole emblems line up across the front, each spanning two neighbouring rings: a clenched fist above a downward arrow, a lightning bolt, a skull and crossbones, a snowflake and a crossed-out eye. The cryptex opens: read the notes inside and take the LIGHTNING SYMBOL.
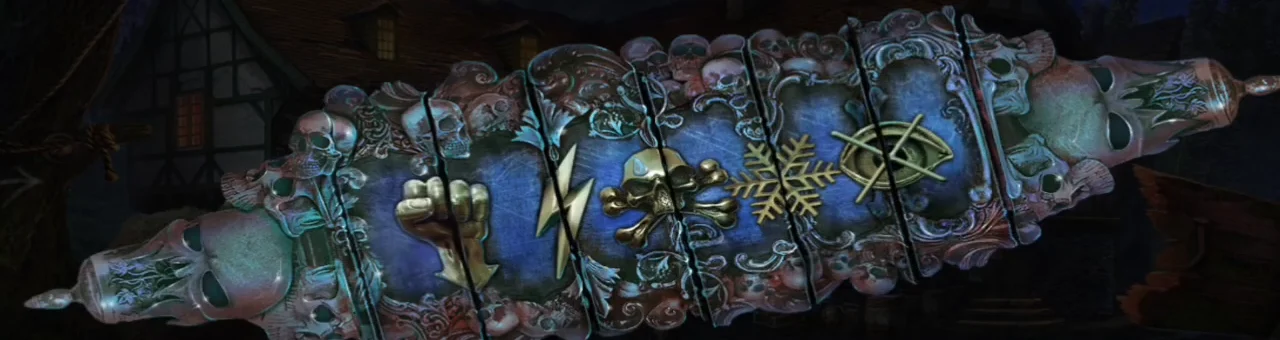
Solved: five whole emblems in a row across the six rings. - Place the LIGHTNING SYMBOL on the saddlebag lock, remove the mask inside and take the KNOCKING CODE.
- Take TOKEN 2/2, tied with rope to the tree trunk on the left of the yard.
Tavern Door Tokens and Knocking Code
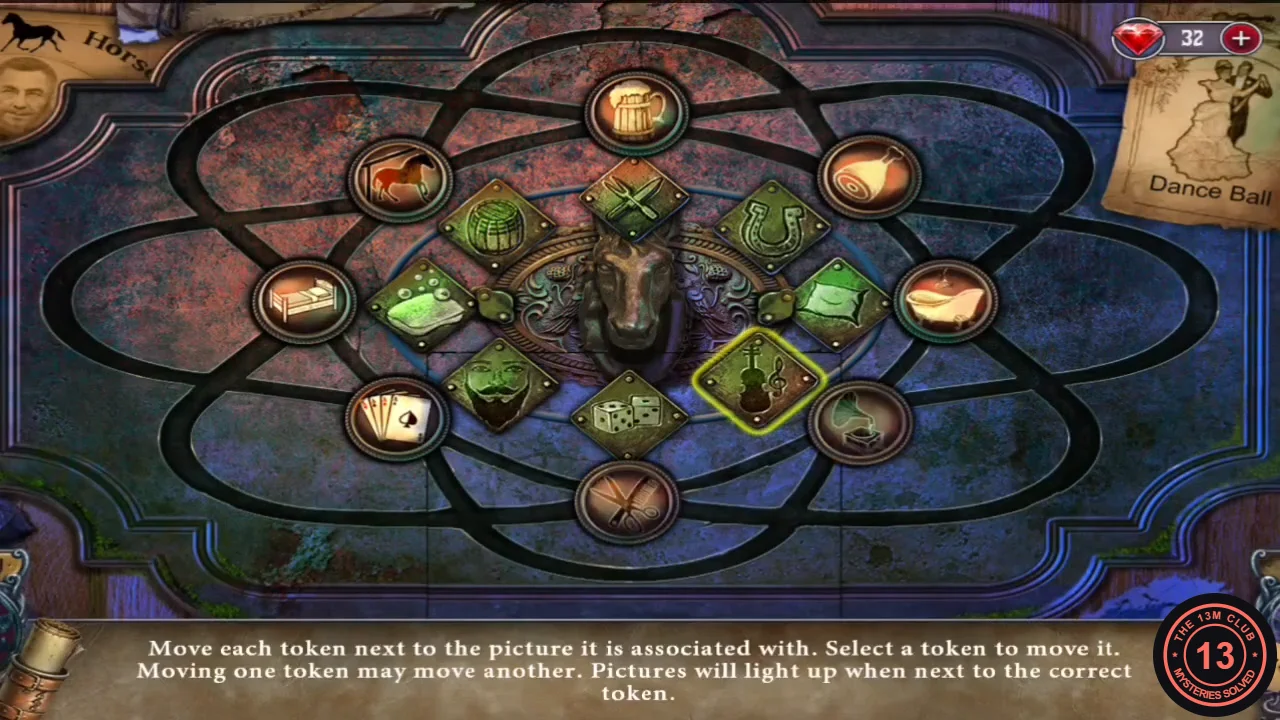
The door panel needs both tokens. Its sliding tokens must each sit next to the outer picture they belong with; moving one token can push another along the lines, and a picture lights up when its partner is beside it. This is a lengthy rearrangement, so work towards the pairs below rather than following a fixed move list.
- Read the note on the door, then place TOKEN 1/2 and TOKEN 2/2 in the empty slots of the panel.
- Arrange the tokens so these pairs touch: beer mug and barrel, ham and fork and knife, horse and horseshoe, bed and pillow, gramophone and violin, scissors and comb with the bearded face, playing cards and dice, bathtub and soap.
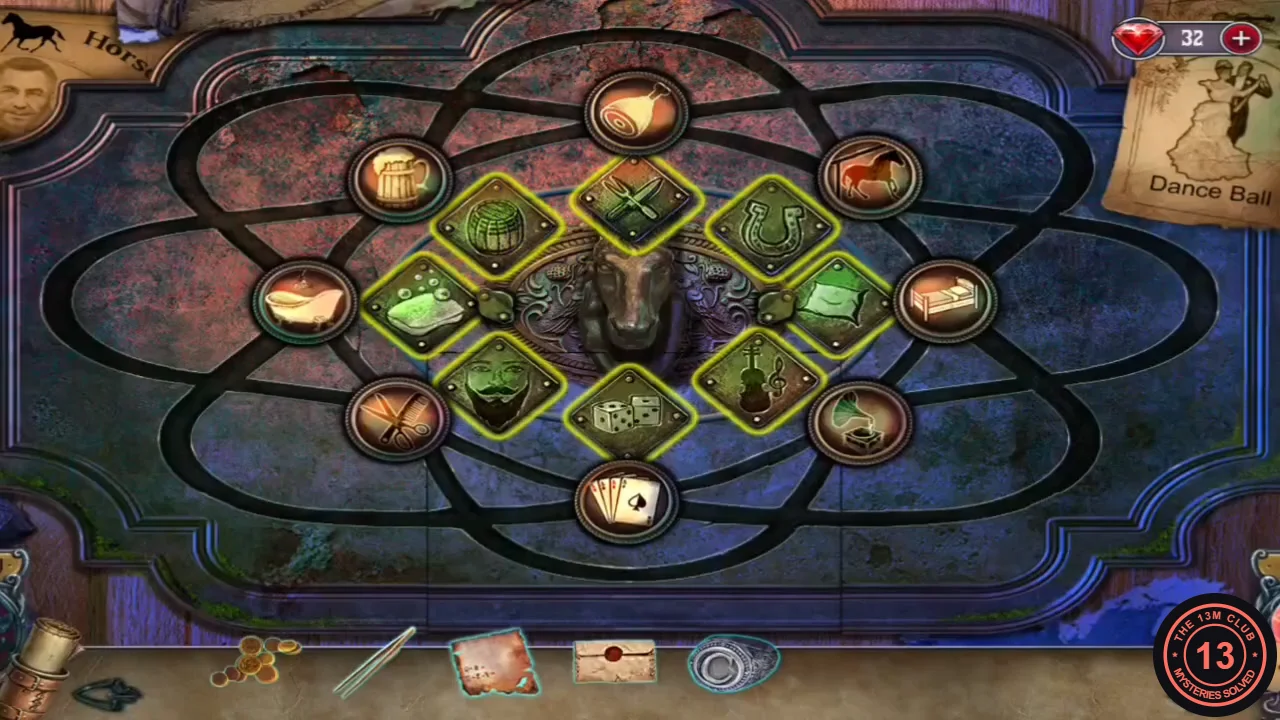
Solved: every token is lit beside its partner picture. - Place the KNOCKING CODE beside the knocker. It lists three knocks: double knock = green rune + purple # rune; triple knock = yellow rune + red rune + blue F-shaped rune; long knock = cyan rune + orange arrow rune. Select the runes in that order: green, purple, yellow, red, blue, cyan, orange.
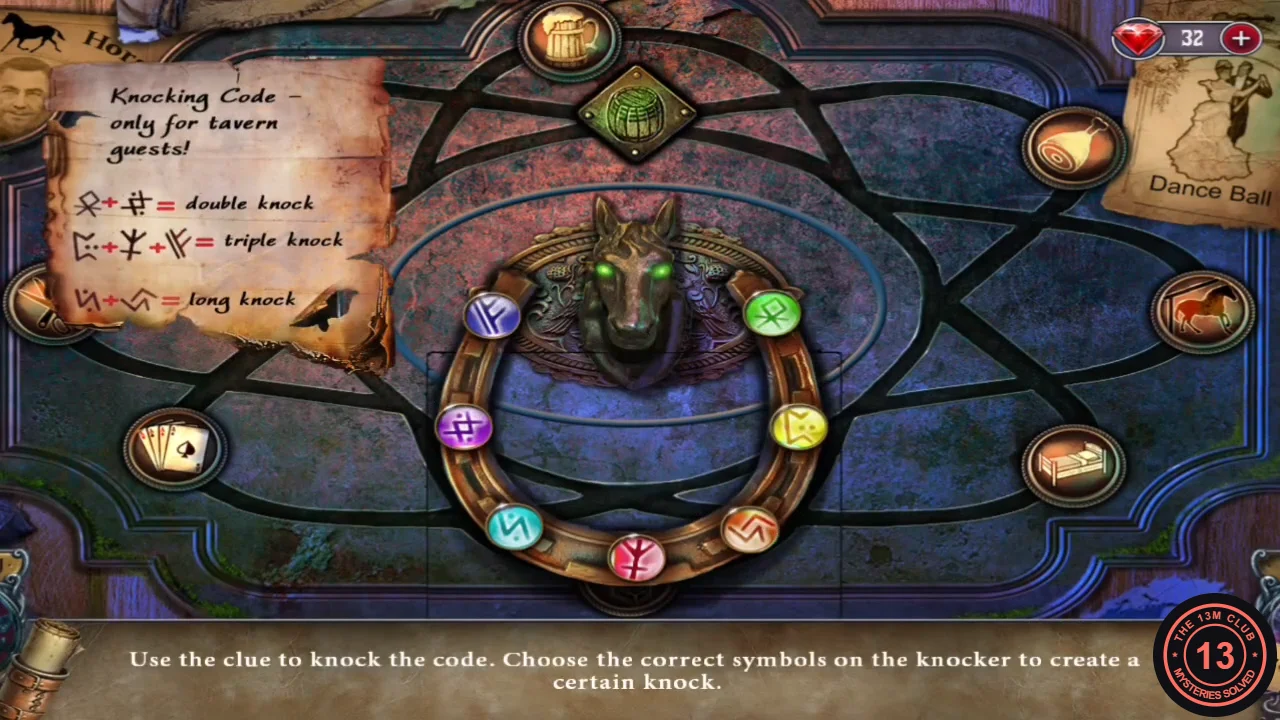
The knocking code note next to the rune ring. Match each symbol on the note to the coloured rune with the same shape.
Tavern Hall: Cat Stones and the Bell
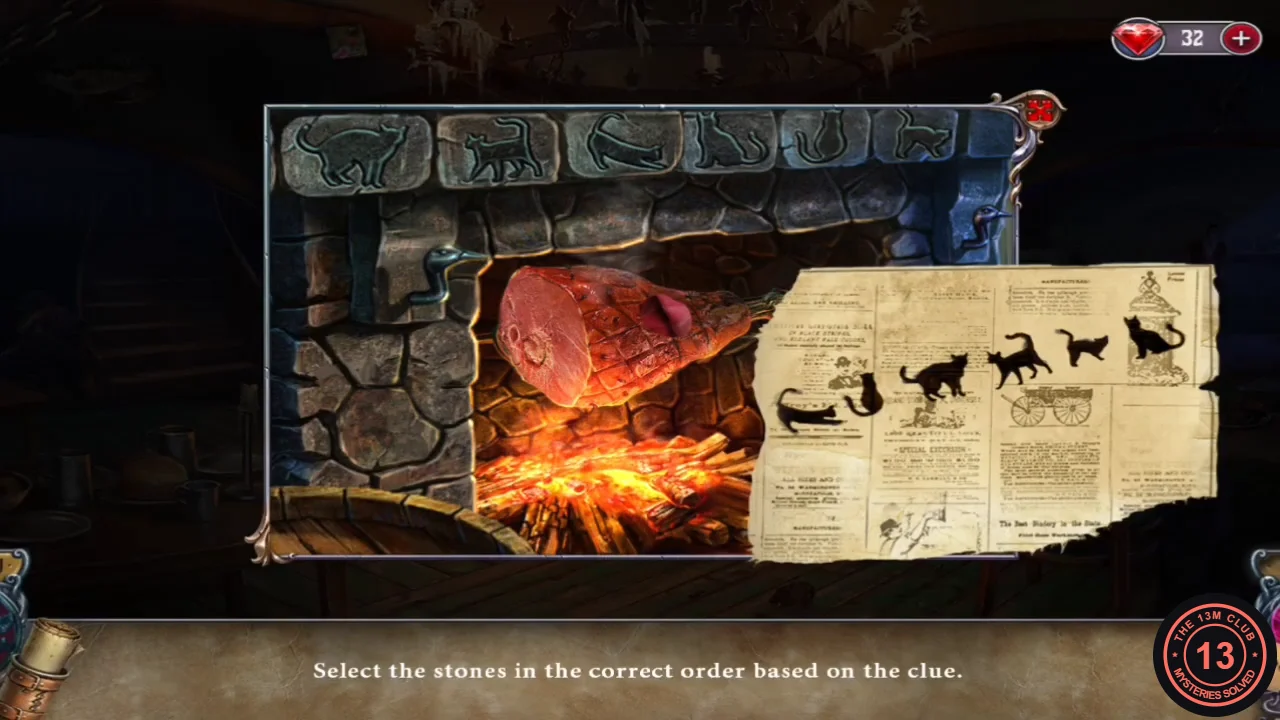
The bartender cannot hear you because the counter bell is missing. The fireplace holds a stone puzzle opened by the cat's newspaper clue.
- At the counter, read the chef's note and take the FORK.
- At the fireplace take the OIL, then use the FORK on the roast to get some MEAT.
- Give the MEAT to the white cat, then take the newspaper it was guarding: the CAT CODE.
- Place the CAT CODE on the fireplace. Press the six cat stones above the fire in the order of the silhouettes on the newspaper. Numbering the stones 1-6 from left, press 3 (lying cat), 5 (small sitting cat), 1 (arched cat), 2 (walking cat, tail up), 6 (small standing cat), 4 (sitting cat seen from behind). Take the MUSICIAN FIGURINE.CODE3-5-1-2-6-4
- Listen to the hooded men's conversation. At the gramophone, turn the horn and take the small figurine with the TWEEZERS, place the MUSICIAN FIGURINE and take the BELL.
- Remove the ring from CONRAD'S LETTER to get CONRAD'S RING (keep both).
- Place the BELL on the counter and ring it. Talk to the bartender and show him CONRAD'S LETTER; he will help after you finish his orders.
Bartender's Orders
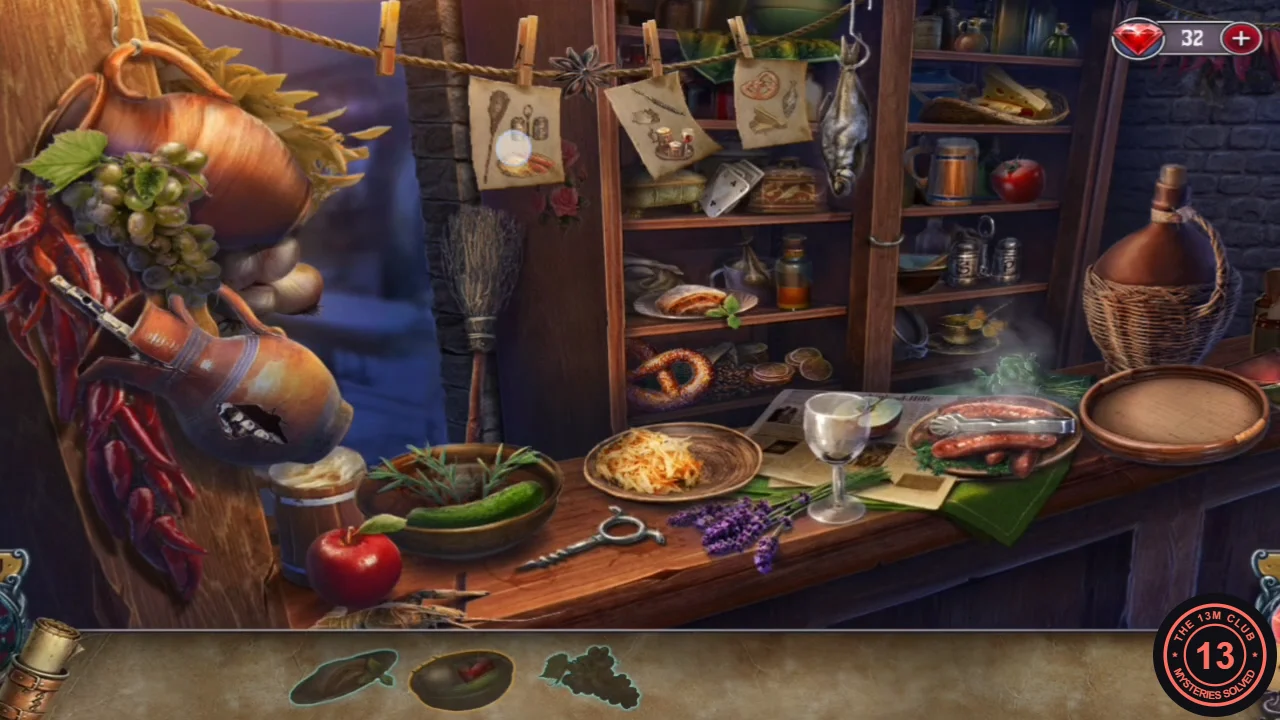
Four order slips hang on the line; you can prepare two at a time. Tap a slip to load its items into the bar at the bottom, then select or assemble those items in the scene.
- Prepare the first two orders. For the vegetable bowl, select the empty wooden bowl first, then the cucumber and the onion; the sausages go onto the sauerkraut plate.
- Prepare the drinks and snack orders: take the pretzel, dried fish and cheese with grapes; fill the beer stein; move the wicker wine bottle to the counter and open it with the corkscrew from the counter before pouring the wine. When every order is served, the bartender gives you the KEY to Conrad's room.
The Artifact Box
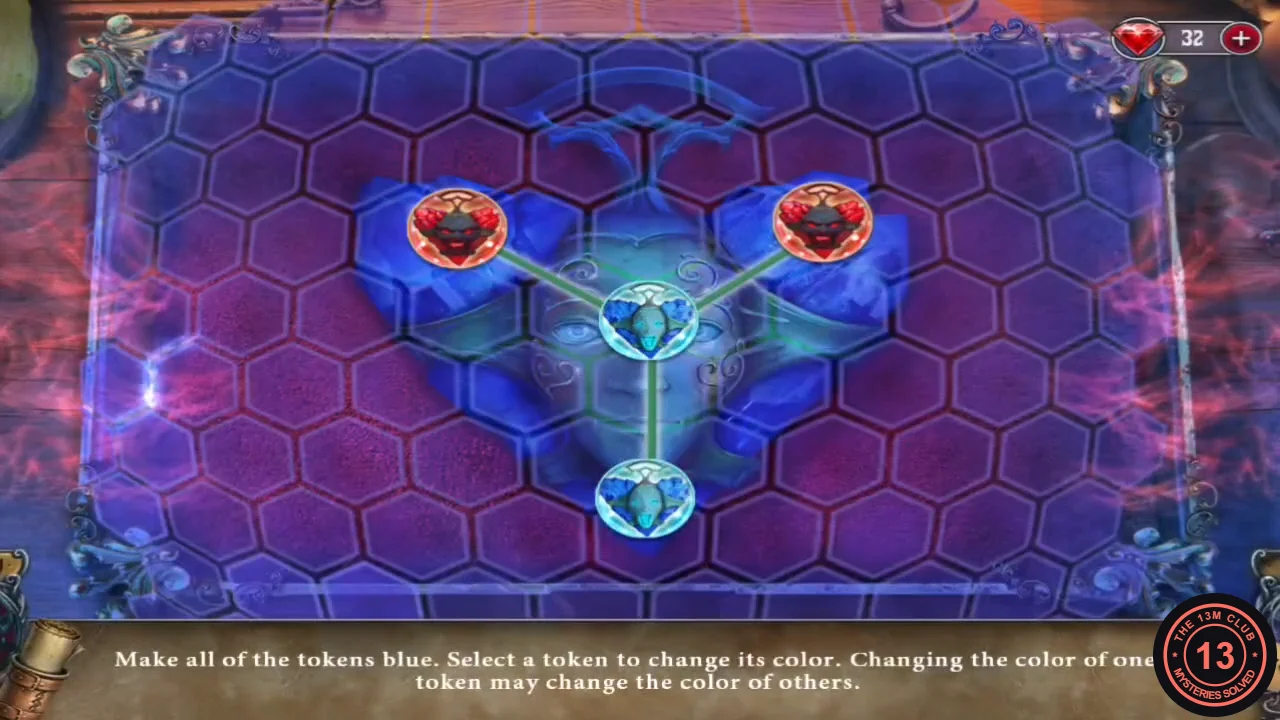
Selecting a token flips its colour and the colour of every token joined to it by a line. Make all tokens blue in each of the three stages.
- Talk to Father, then talk to Father and Conrad at the table. Give Conrad the MONEY to open the artifact box.
- Stage 1 (four tokens): select the top-left token, then the top-right token.
- Stage 2 (seven tokens): select the bottom-right token, then the centre token.
- Stage 3 (nine tokens, starting with five red): select each of the nine tokens exactly once, in any order. If you have already clicked some, select only the ones you have not yet clicked, or use the reset and start again.
- Watch the scene: the brotherhood attacks and Louisa flees upstairs with the ARTIFACT.