Unlocking the Bonus Chapter
The bonus chapter tells Conrad's story before the main game: after the mine accident takes his hand, the Baroness forces him to work for her. In the free-to-play edition the main game is free, but the bonus chapter is paid extra content. The game menu shows it as locked ("You must complete the main game first") until you finish the main story.
- Finish the main game. After the ending, the game shows "Well done! You may now access the BONUS GAME!" On the PLAY screen, choose Bonus Chapter instead of Main Game. In this free-to-play edition the bonus chapter is a paid extra: the developer confirms this in its replies on the Google Play page.
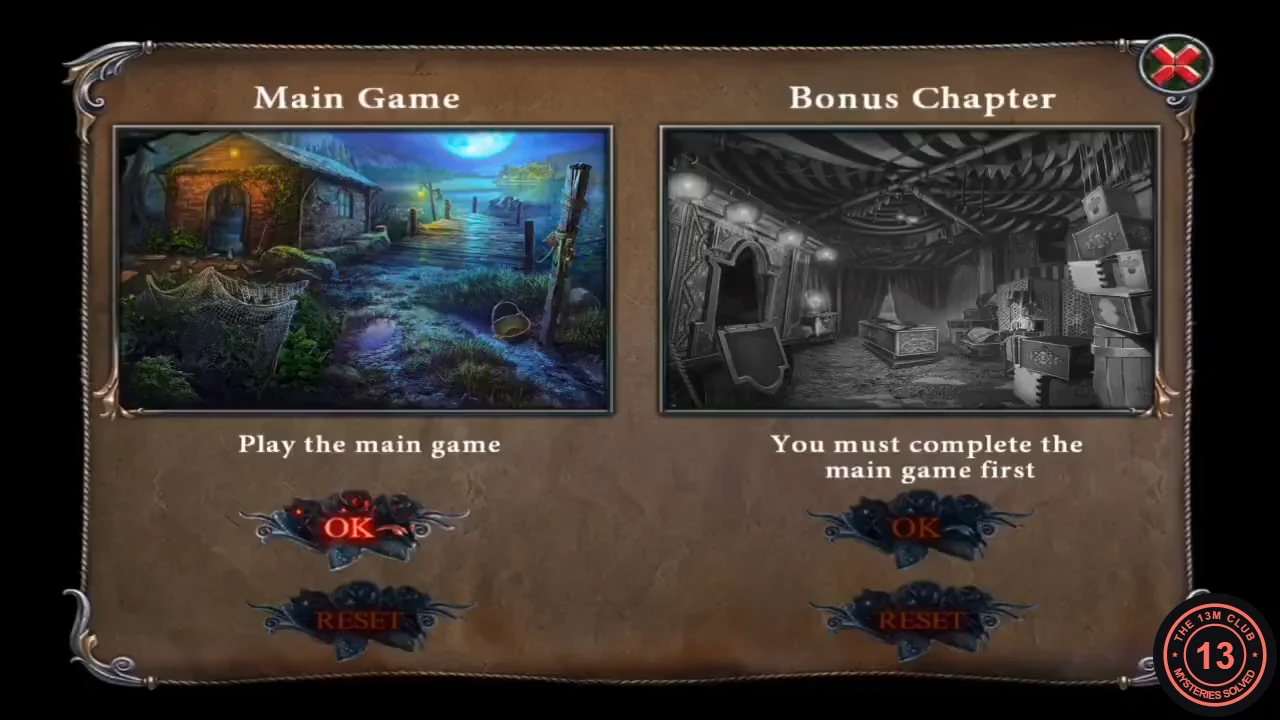
Before the main game is finished, the Bonus Chapter is greyed out on the play menu. - Watch the opening. Conrad: "After the accident in the mine took my hand, I had to seek work elsewhere. And what I found was not what I expected." The Baroness gives him a new stone hand and an order: "There's a magician living near the tavern. Catch him for me. Ruin something particular in his box of tricks." New objective: damage the magician's box.
The Tavern and the Magician's Backstage
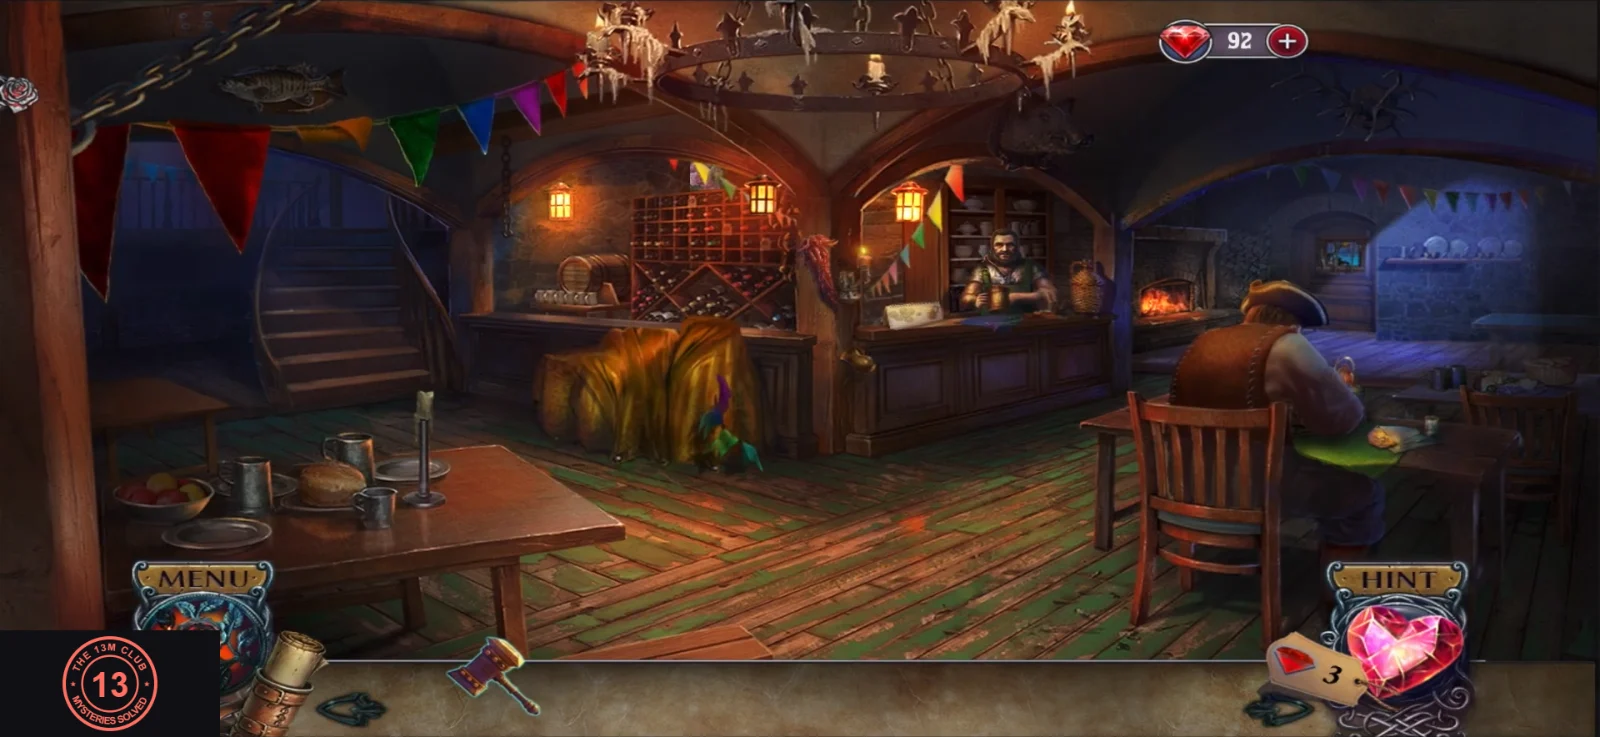
You need five TOKENS (inventory counter x/5) to trade for ale, which buys you a show ticket. The barkeep explains: "Even if you can't afford a ticket, you can still play the games. And exchange the tokens you win for ale and sausages right here!" The bonus also has PORTRAIT PIECE collectibles. A badge at the top left says "Portrait pieces to find here: 1" when you enter a scene that still has one, and "There are no more portrait pieces here." once it is collected. The tavern has one portrait piece: at the top-right corner of the wine rack behind the bar, partly hidden by a bunting flag. The backstage room has none. The pieces in later scenes are listed in their sections below.
- Talk to the card player: "I'll give you my ticket if you bring me some more ale." Take the TOKEN (1/5) from his table and read the newspaper ("Tragedy in the mines!"). Collect the portrait piece at the top-right corner of the wine rack behind the bar.
- Zoom into the cloth-covered table with the parrot ("Have to find something to cut through.") and take the blue BOOKLET there (counter 1/3). Then open the lantern cage on the post and take the SCISSORS from inside. The candle stub stays in the cage.
- Talk to the boy at the fair door ("Your ticket, please."). New objective: get to the fair. Cut the tablecloth with the SCISSORS to start a hidden-object scene: Windmill, Dragon, Flower, Bunny, Wand, Doll, Pigeons, Cutlery, Watch, Bottle, Mask, Star. Items in orange need an extra action first. You get a POUCH. Open it for two more TOKENS.
- At the barkeep's counter, take the MATCHES ("I can use it to light something."). Strike one and use the LIT MATCH to light the candle in the lantern cage, then take the LANTERN.
- Go backstage. It's dark. At the tray with the flask and gears ("And now I need to light it."), use the MATCH to light the lamp. In the dim light, pick up the curved metal HANDLE and the PATCH from the floor. The gas pipe on the wall says "The line's broken. I'll need to patch it."
- Open the long case lying on the floor and take the TOKEN (4/5) and the PLIERS. Fit the HANDLE onto the desk drawer ("I can't open it just like that."), open it and take the KEY and the SPRING. Put the PATCH on the broken gas line so the wall lamps light up.
- Open the locked cupboard with the KEY. Read the newspaper ("Count von Crayts' Tragic Death - His widow, Baroness von Crayts, Assumes Rule") and take the TWEEZERS and the glass-cabinet handle from the shelves. Fit the handle to the glass cabinet ("It's missing a handle.") and open it.
- In the figurine box, pull the broken spring out with the TWEEZERS, then fit the SPRING ("A new spring needs to be fitted."). Press the horse figures down ("I've got to keep them down.") until the little drawer opens, and take the last TOKEN (5/5) and the second BOOKLET (2/3) from it.
- Give the five TOKENS to the barkeep for a mug of ALE. Give the ALE to the card player for his TICKET, then hand the TICKET to the boy at the door.
The Fair and the Magician's Tent
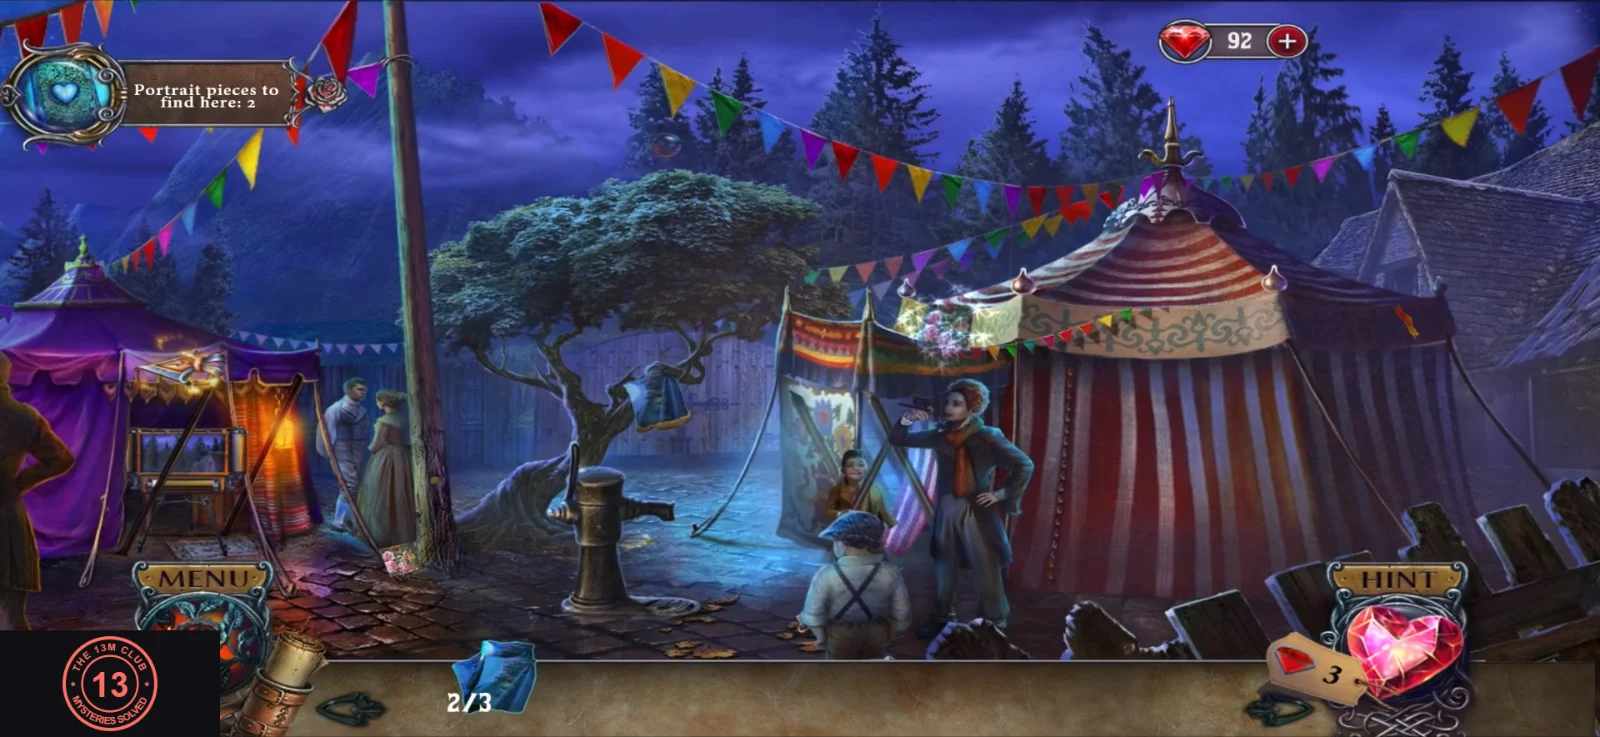
New objective: enter the magician's tent. From here on, collect the COINS as they appear (counter x/6). The barkeep trades them for SAUSAGES later. The third blue BOOKLET is here too. Portrait pieces: two at the fair and one inside the tent.
- At the fair, collect the two portrait pieces: one on the banner above the tent's stage entrance and one on the ground by the water pump at the lower left. Take the third BOOKLET (3/3) from the blue cloth by the pump ("Fresh water? This might be handy.") and the first COIN (1/6).
- Go to the side alley. A KNIFE is stuck in the poster on the crate ("They're stuck! Need something sharp to wiggle them out."). Visit the hungry fox in the booth ("Poor girl... are you hungry?") and take the tool lying in the booth. Use it on the poster to free the KNIFE. Pick up the coins here as well (counter 3/6).
- Cut the striped tent flap with the KNIFE ("This seems a good place to cut though.") to get inside. New objective: lock the box. Collect the tent's portrait piece from the carved lattice mask stand in the middle of the tent.
- Explore the tent. The rabbit cage has an empty water bowl ("They're thirsty."). Take the BOWL and the carrot. At the carved panel of the magic box ("Well, now I need to lock this back up."), take the first fan-shaped piece (counter 1/2). In the bed alcove, read the magician's diary and note the empty card frame ("I need something specific to start it up."). The casket on the mask stand has a special lock.
- Fill the BOWL with fresh water at the fair pump and give it to the rabbits. Take the second fan-shaped piece (2/2) from their cage. Use both pieces on the casket at the mask stand. Inside are a MAGICIAN'S INSTRUCTION part ("This thing looks like some kind of instruction. It can be useful.") and the first CHAIN piece (counter 1/3).
- Take the GARLAND (it does not fit the magic box: "I can't use this right now.") to the toy theatre in the alley and hang it across the stage. The theatre is still incomplete ("It's incomplete."). Add the three BOOKLETS: the backdrop unrolls and the shadow puzzle starts.
The Shadow Theatre
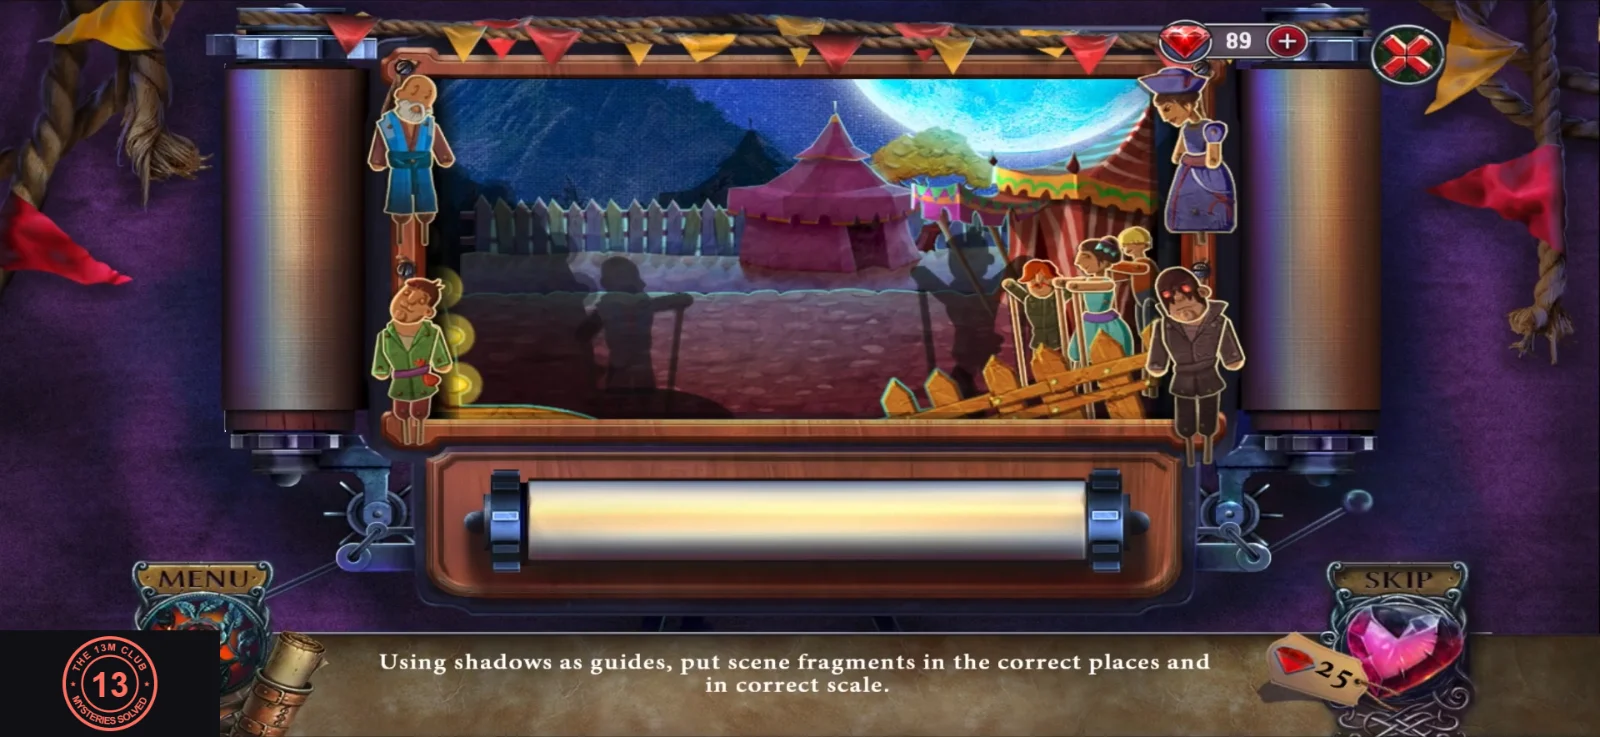
"Using shadows as guides, put scene fragments in the correct places and in correct scale." The toy theatre has four scenes. Drag each piece (tents, people, fences, lanterns) onto the shadow with the same outline, and resize it until it covers the shadow exactly. There is no fixed order.
- Solve the four theatre scenes: the fair at night, the fair tents, the backstage wagon and the stage arch. Between scenes the story continues: "His tales interested the Baroness. She wanted to learn more about the Order that fought the evil spirit centuries ago." ... "She hired a man to sabotage the magician's equipment and trap the magician during his own show." Take the COINS from the tray at the end. The coin counter reaches 6/6.
- Back at the tavern's cloth-covered table, play the second hidden-object scene: Chocolate Pot, Fleur-de-lis, Cogwheel, Scarves, Moon, Ladle, Locomotive, Hourglass, Origami, Horse, Clubs, Ball. You receive the SET OF SUITS. Trade the six COINS with the barkeep for SAUSAGES.
The Card Pairs Memory Game
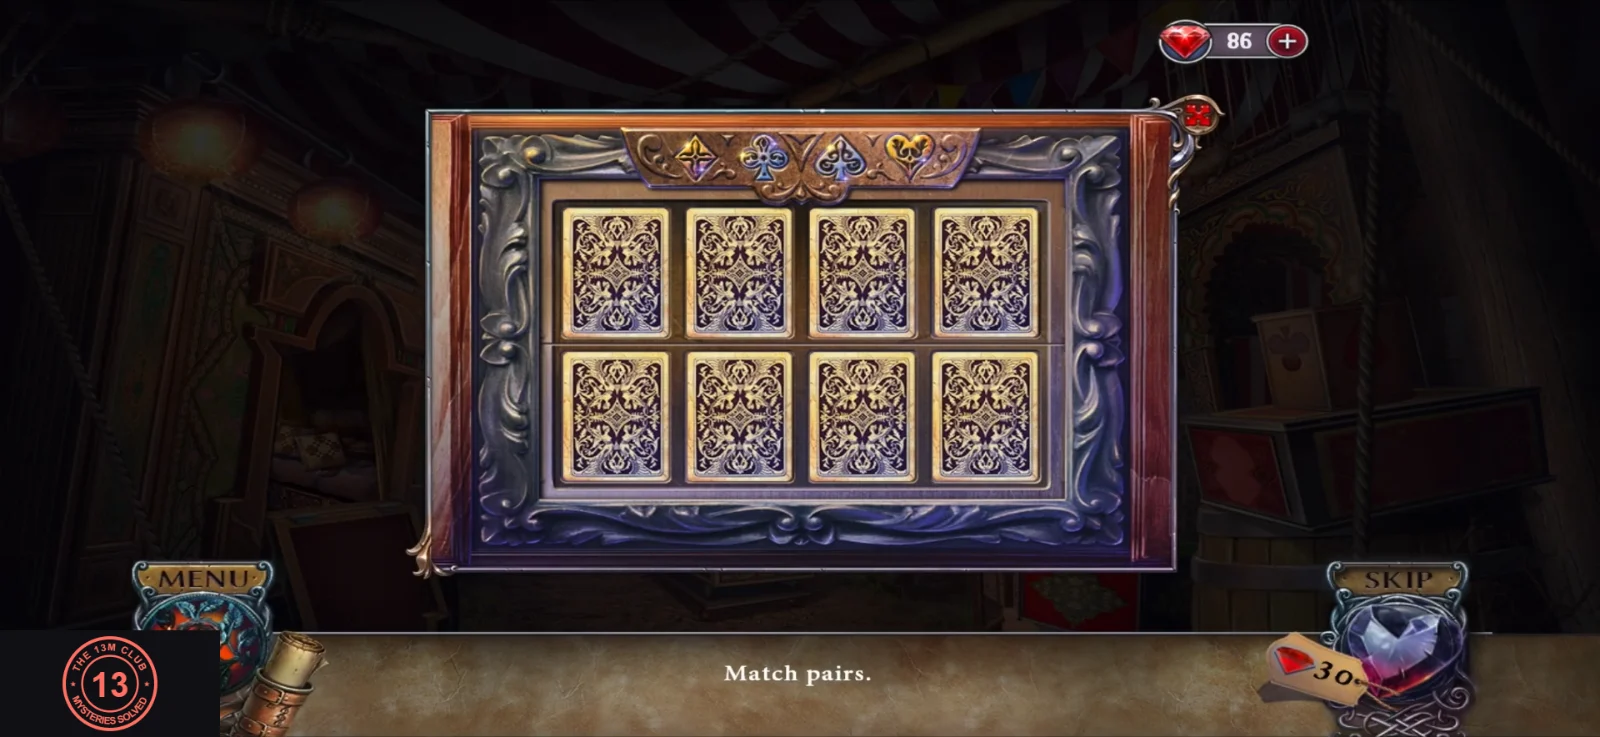
The empty card frame in the magician's bed alcove takes the SET OF SUITS from the second hidden-object scene.
- Place the SET OF SUITS in the card frame in the tent to start the memory game ("Match pairs."). Eight cards lie face down in two rows of four. Turn over two cards at a time: two cards with the same number are a pair and stay face up. After every two-card turn, whether the cards matched or not, the whole board slides one place clockwise, so keep track of where each card you have seen has moved. The top row moves right, the bottom row moves left, and the cards at the ends wrap round to the other row. A wrapped card can come back face down, so check it again. The game is won when all eight cards are face up at once. Take the second CHAIN piece (2/3) from the opened frame.
- Give the SAUSAGES to the fox in the alley booth and take the third CHAIN piece (3/3) from under it. Use the CHAIN on the magician's box to lock it. In the cutscene Conrad locks the magician in during the show, and the Baroness sends him after a map: "It contains a clue about how to increase the power of the artifact."
The Forest and the Temple Door
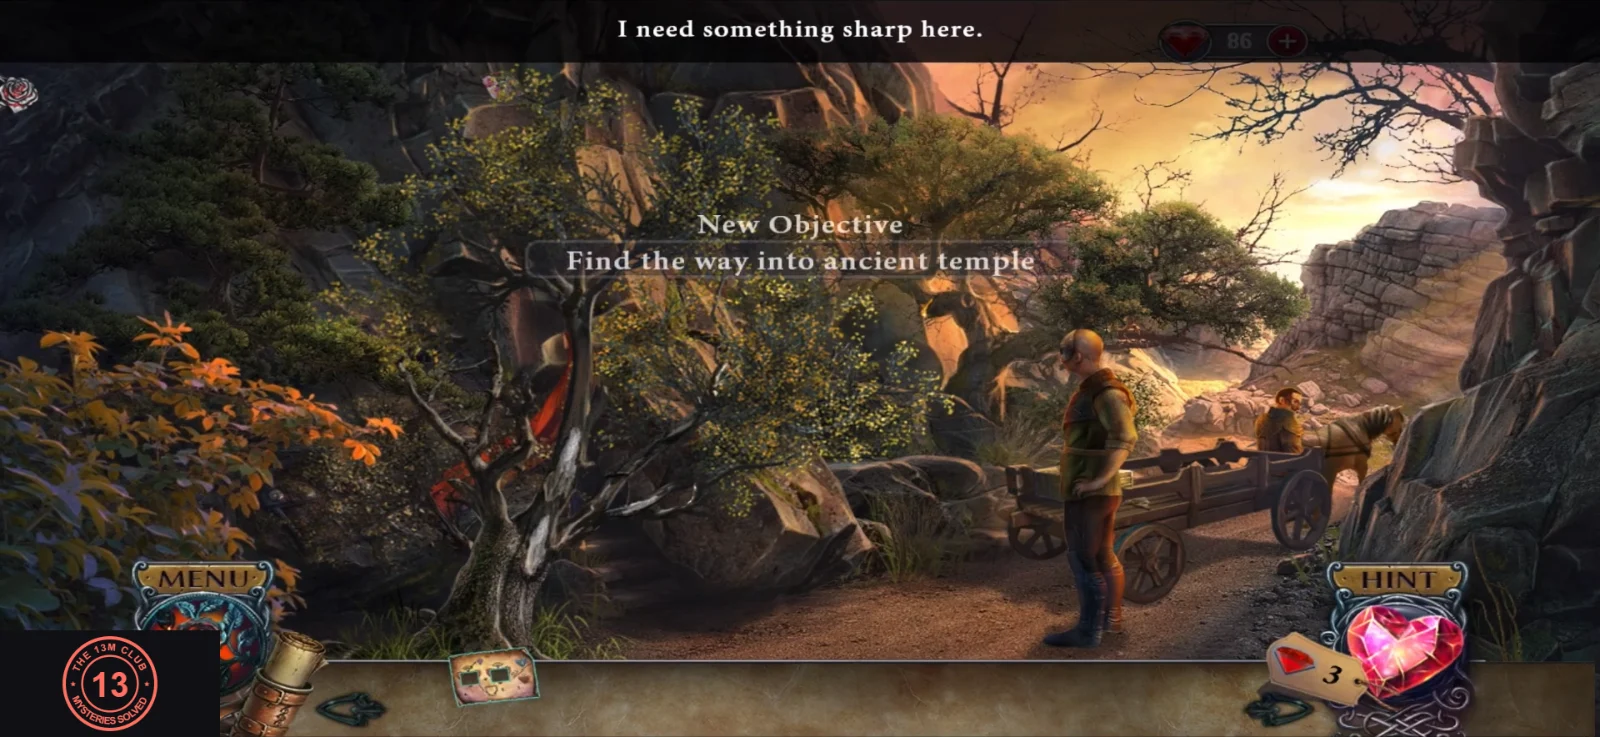
New objectives: find the map, then find the way into the ancient temple. The forest's portrait piece is high in the branches of the left tree, the one with the red cloth, against the rock. Your stone hand can move heavy stones. Click the hand icon on the left of the inventory bar to use it.
- Collect the portrait piece in the branches of the left tree. Open the wooden crate and take the KNIFE and the BUCKET. Cut the red cloth on the tree with the KNIFE ("I need something sharp here.") to get the SCARF.
- When the masked man taunts you ("You're not even trying. Concentrate! Your new hand is powerful."), use the stone-hand power on the big rock to reveal a round door with two animal-shaped recesses. Study the parchment clue beside it.
The Rosette Arches
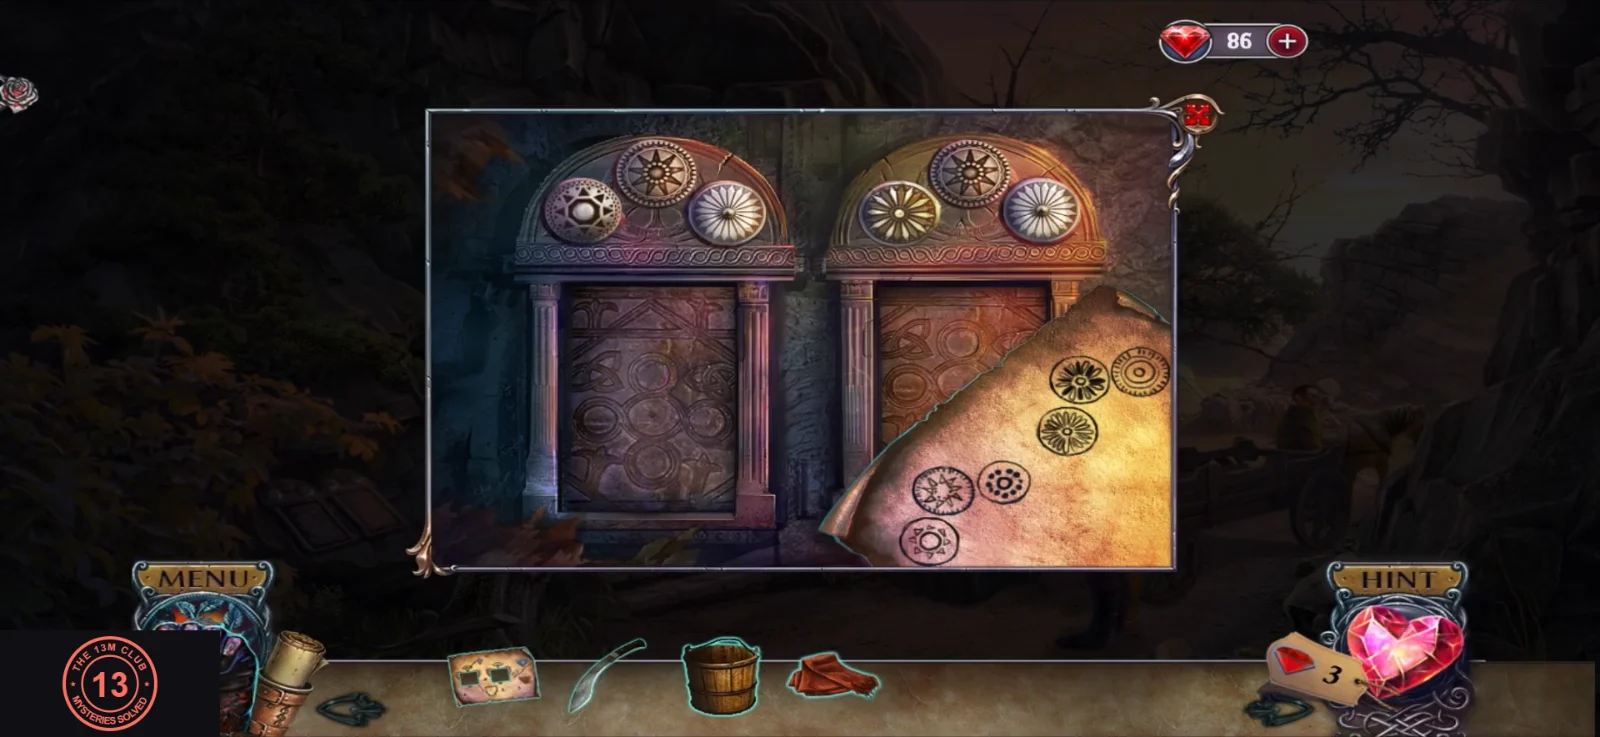
The parchment clue beside the round door shows which rosette belongs in each position on the two stone arches.
- Solve the two rosette arches to match the clue. Left arch: jewelled star on the left, sharp eight-point star on top, round dotted rosette on the right. Right arch: white daisy on the left, gold sunflower on top, concentric-ring rosette on the right. The arches open. Take the stone animal FIGURINE and place it in a recess on the round door, then pick up the broken blue figurine pieces.
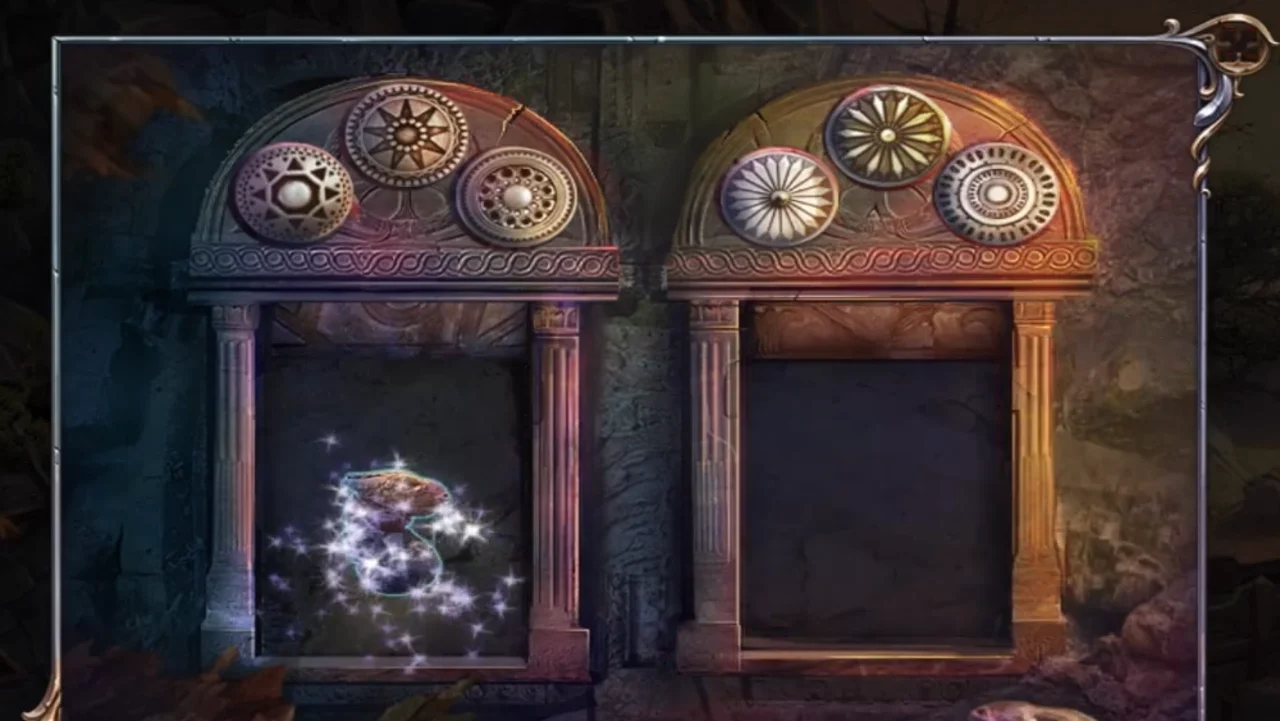
The rosette arches solved. The left arch has opened to reveal the stone figurine. - Put the figurine pieces in the crate ("I can repair something here."). Hold the BUCKET under the knot on the tree by the door and cut it with the KNIFE so the golden sap runs into the bucket. Use the sap in the crate to glue the figurine, then place it in the second recess. The temple door opens.
The Waterfall Valley and the Stepping Stones
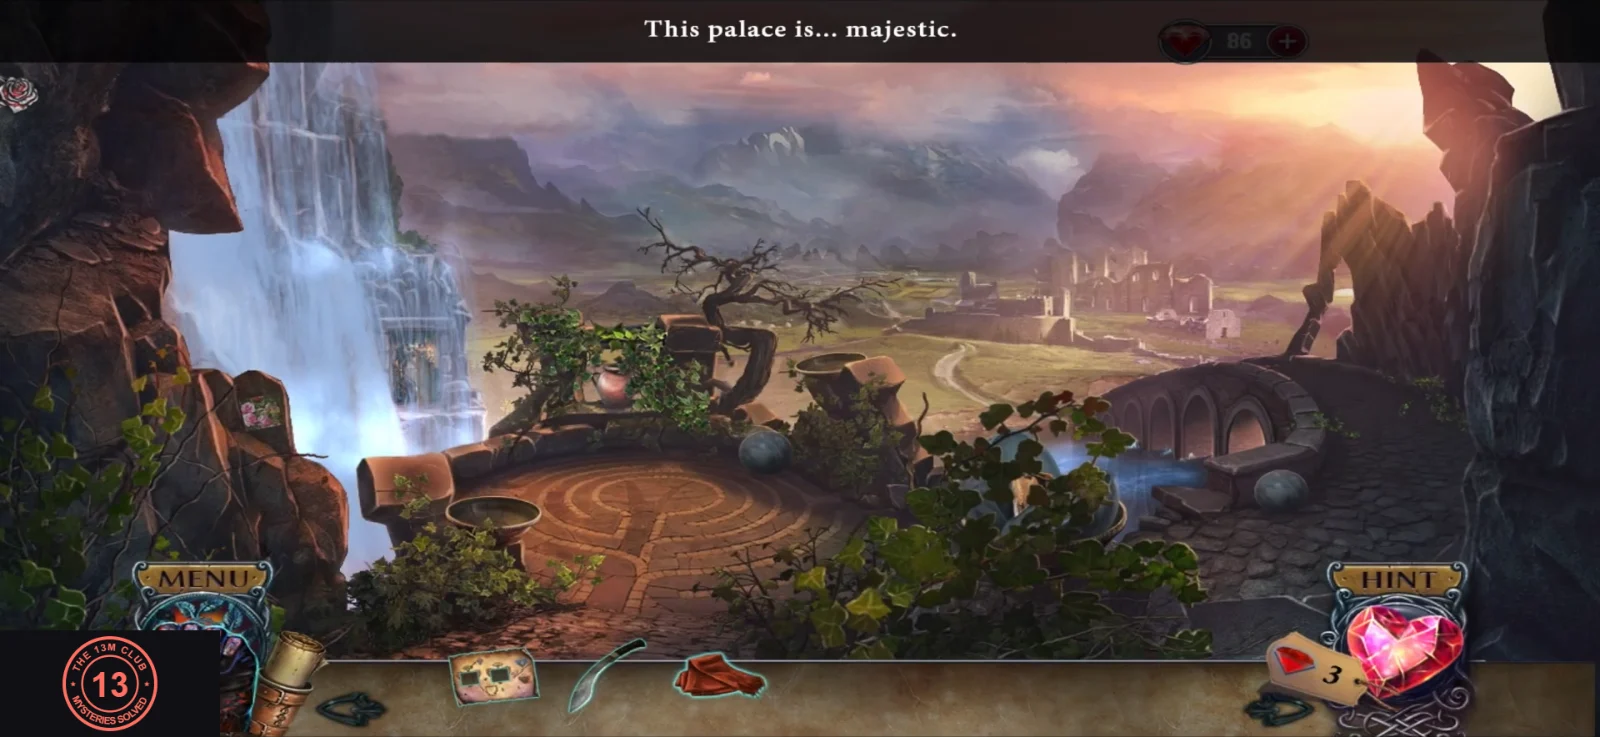
"This palace is... majestic." Three stone bowls by the bridge need spheres ("The bowls need to be filled again."), and the mosaic beside the waterfall is missing three tiles. The portrait piece is on the rock face of the waterfall at the left.
- Collect the portrait piece from the waterfall rock face at the left and the first grey SPHERE on the ground. Cut the vines on the right bowl with the KNIFE ("Something sharp would be useful.") for MOSAIC TILE 1/3. Use the stone hand on the urn ("Maybe my hand will be... handy.") for tile 2/3. Take the CRACKED SPHERE from the right bowl and the second sphere on the bridge.
- Take the CRACKED SPHERE back to the forest crate and mend it with the sap (sphere 3/3). Place the three spheres in the bowls to start the stepping-stone puzzle.
The Stepping-Stone Path
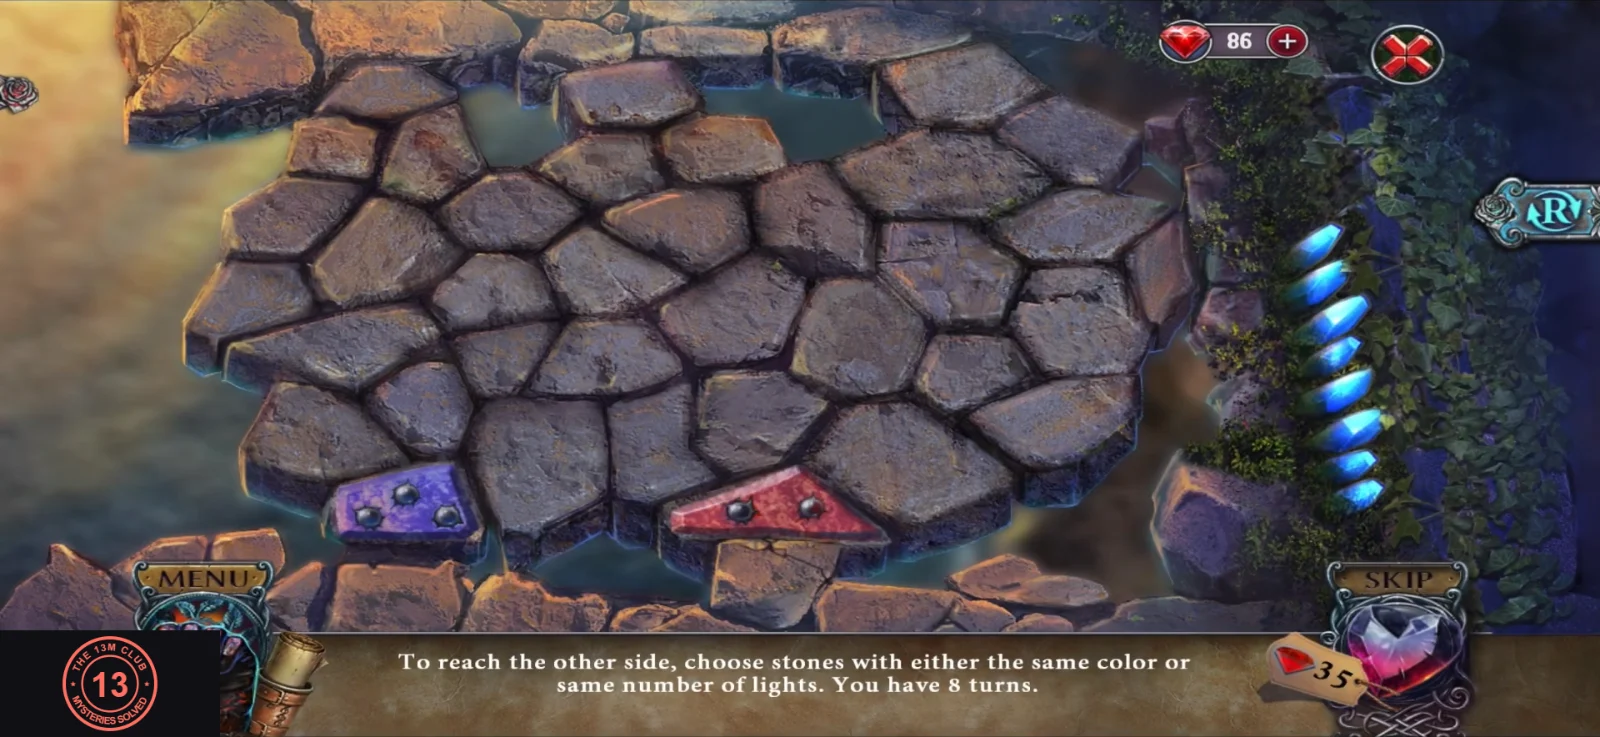
The three filled bowls raise a path of coloured stones across the water. Each stone shows a number of small lights.
- "To reach the other side, choose stones with either the same color or same number of lights. You have 8 turns." The layout is fixed. From the starting red stone with two lights, click: the small red stone (1 light) up-left, the green stone (1) to its right, the large green stone (3) above, the blue stone (3) to its right, the yellow stone (3) up-right, the long red stone (3) above, and finally the red stone (1) on the far edge. That is seven moves. If you go wrong, press RESET.
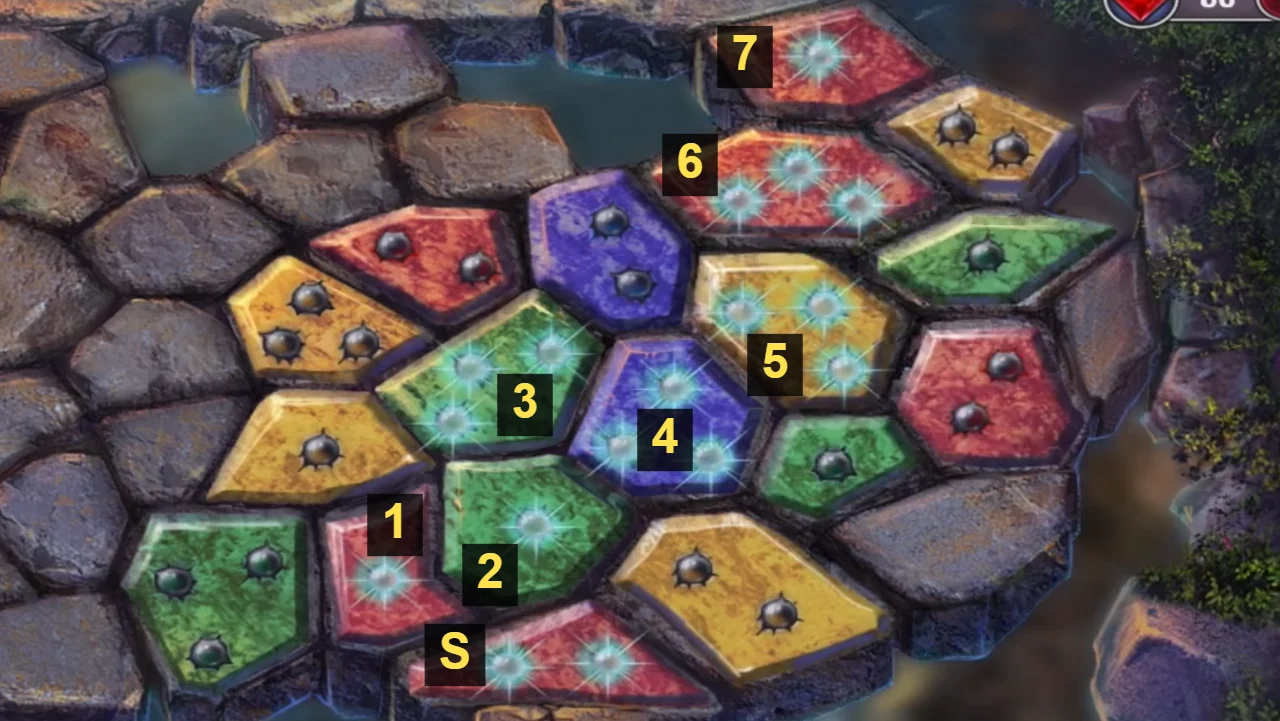
The solved stepping-stone path: start at S, then click stones 1 to 7 in order.
The Knights' Temple
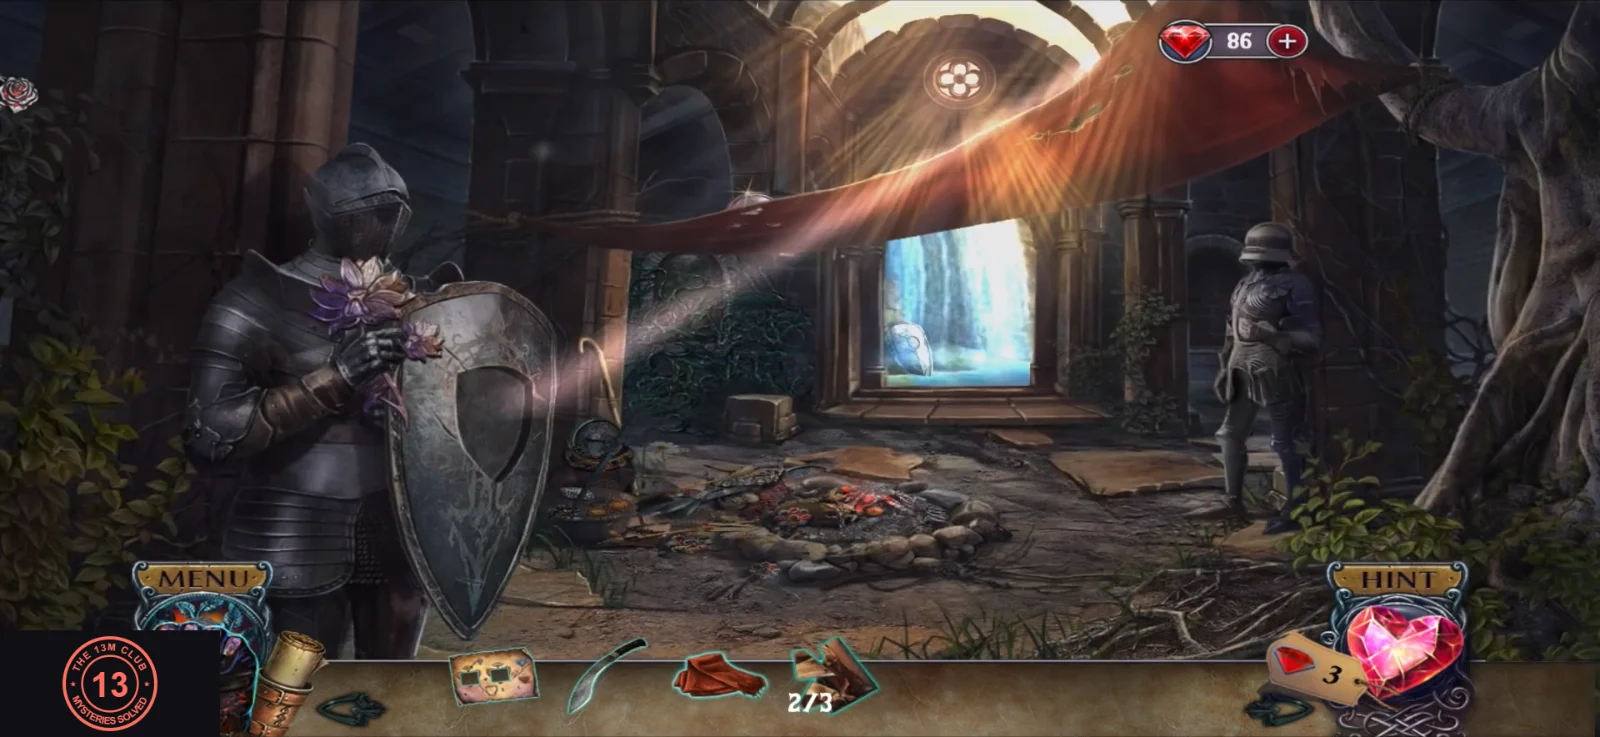
New objective: discover the temple's secret. Two knight statues stand in the hall: the left one holds a shield, the right one is empty-handed ("Looks like this knight was holding something."), and a dark alcove is blocked by vines. The temple hall has two portrait pieces.
- Collect both portrait pieces: one in the purple flower bouquet the left knight holds at his chest, and one on the stone ledge below the lower-right corner of the bright waterfall window, left of the right knight. Cut the vines in the alcove with the KNIFE ("Too dark. I need to find a way to bring some light in here."). At the temple pool ("Something's hidden behind the stone."), use the stone hand to move the stone. Take MOSAIC TILE 3/3 and the SHIELD.
- Give the SHIELD to the empty-handed knight on the right. Its round recess is empty ("A perfect circle. Need something round, I guess."). Put the three tiles into the waterfall mosaic in the valley and take the DIRTY MIRROR. Set it in the left knight's shield ("Age-old dust. I need something serious to clean it."), dip the SCARF in the pool to get a WET SCARF, and wipe the mirror. The light beam reaches the alcove.
- Search the lit alcove: Chamomile, Compass, Earrings, Dagger, Quiver, Crown, Dragonfly, Necklace, Matches, Mirror, Knives, Flask. You get a second DIRTY MIRROR. Place it in the right knight's shield and clean it with the WET SCARF. The second beam lights the painting.
- Look at the painting to see the knights' story ("They built a temple and protected it with the power of silver. The spirit didn't dare set foot on this land."). Take the EMBLEM from the painting and insert it in the stone pillar by the pool. A passage opens into the waterfall cave.
The Waterfall Cave and the Map
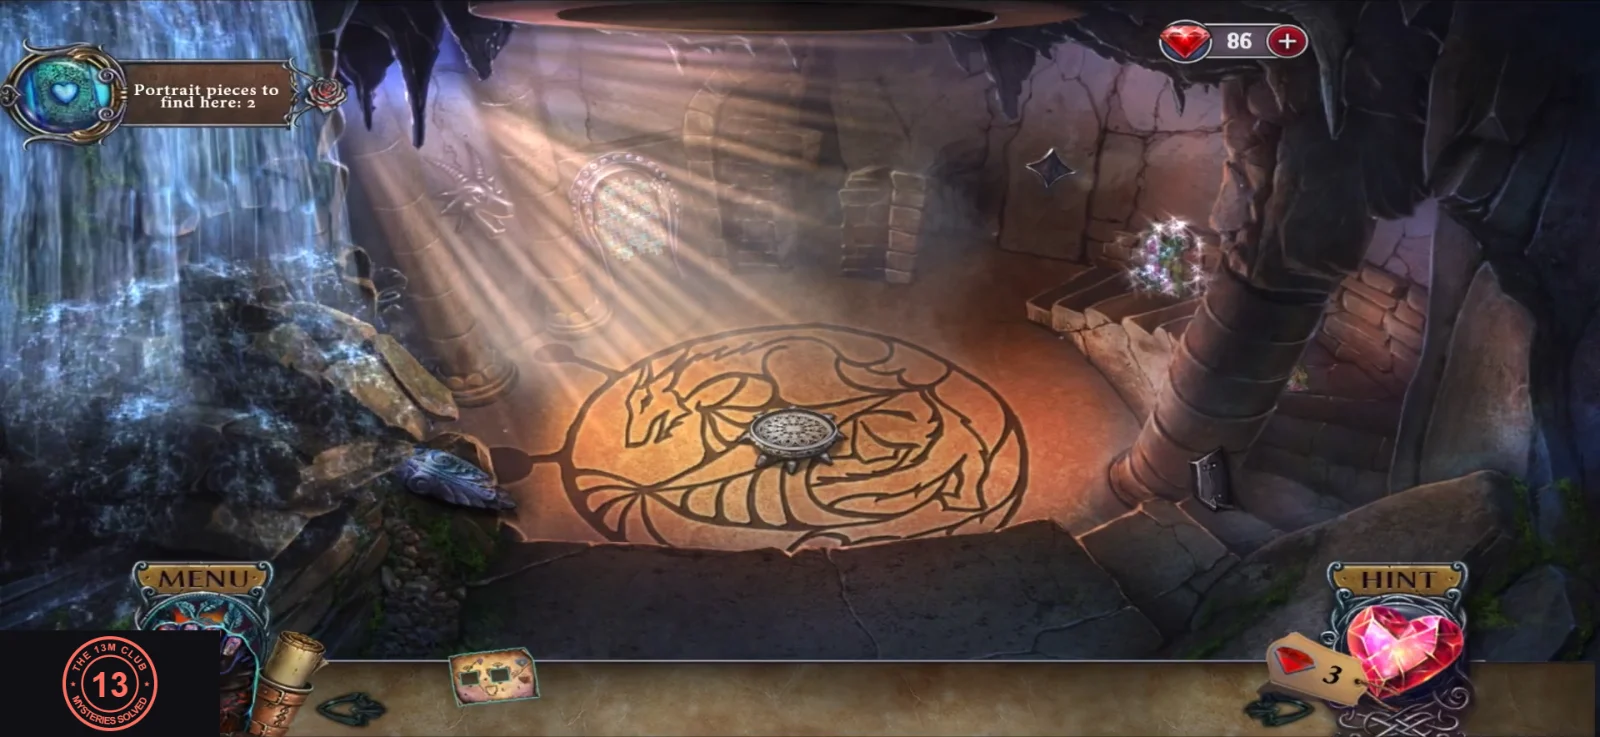
The cave has a flower-shaped slot, a star-shaped slot and a carved tile wall. It also has two portrait pieces.
- Collect the two portrait pieces, both beside the big pillar on the right: one on the back staircase just left of the pillar, and one low at the foot of the pillar beside the lower steps. Take the BRACER on the right and the CLAY TABLET on the left. Use the stone hand on the floor emblem: a cage lowers and water flows into the channel. The tile wall is "missing one of the stone leaves". Put the CLAY TABLET there to start the labyrinth.
The Sliding Chip Labyrinth
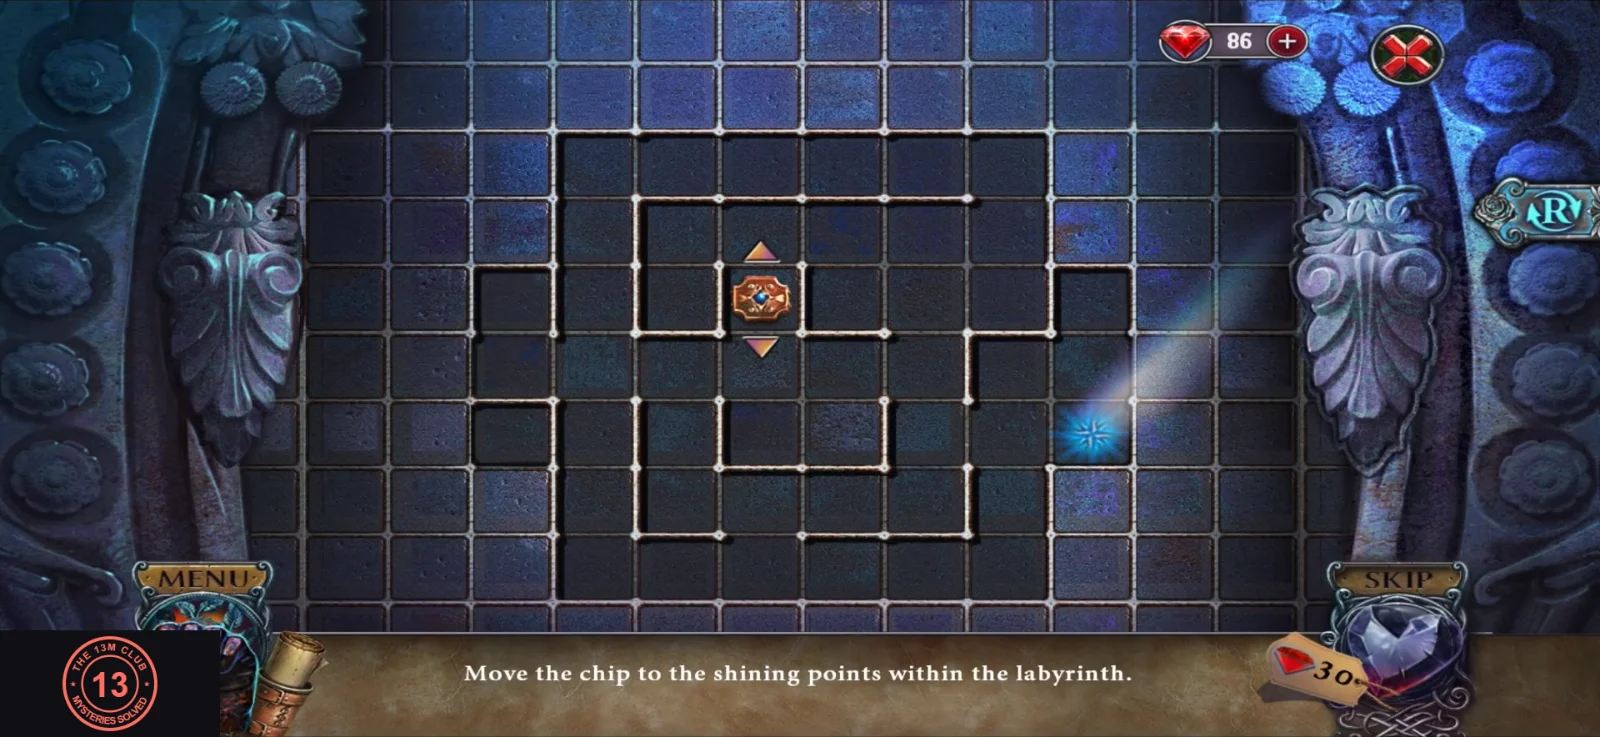
Placing the CLAY TABLET starts a sliding labyrinth on the tile wall: "Move the chip to the shining points within the labyrinth." Select a chip and tap one of the arrows around it. The chip slides in that direction until a wall or another chip stops it, so one tap can cross several squares. There are three boards, and each new board adds a chip and more shining points while the finished chips stay in place. The routes below solve each board from the position it starts in.
- Board 1 has one chip and one shining point in a small alcove on the right edge. Tap the arrows in this order: up, right (the chip stops at the wall), up into the top row, left (it runs to the left end of the top row), down the long left-hand corridor to the bottom row, right along the bottom row, up (a wall stops it beside the alcove), right into the alcove, then down onto the shining point.
- Board 2 grows to the left. A new chip appears in the top-left corner, the first chip stays where it finished, and two new shining points sit in small boxes in the left part, an upper one and a lower one. Chips stop against walls and against other chips. Move the new chip down, right, down; it now waits diagonally below and left of the upper point. Move the first chip left, down, left, up, left (it stops against the waiting chip), then up onto the upper point. Finally move the waiting chip left, down, right, up onto the lower point.
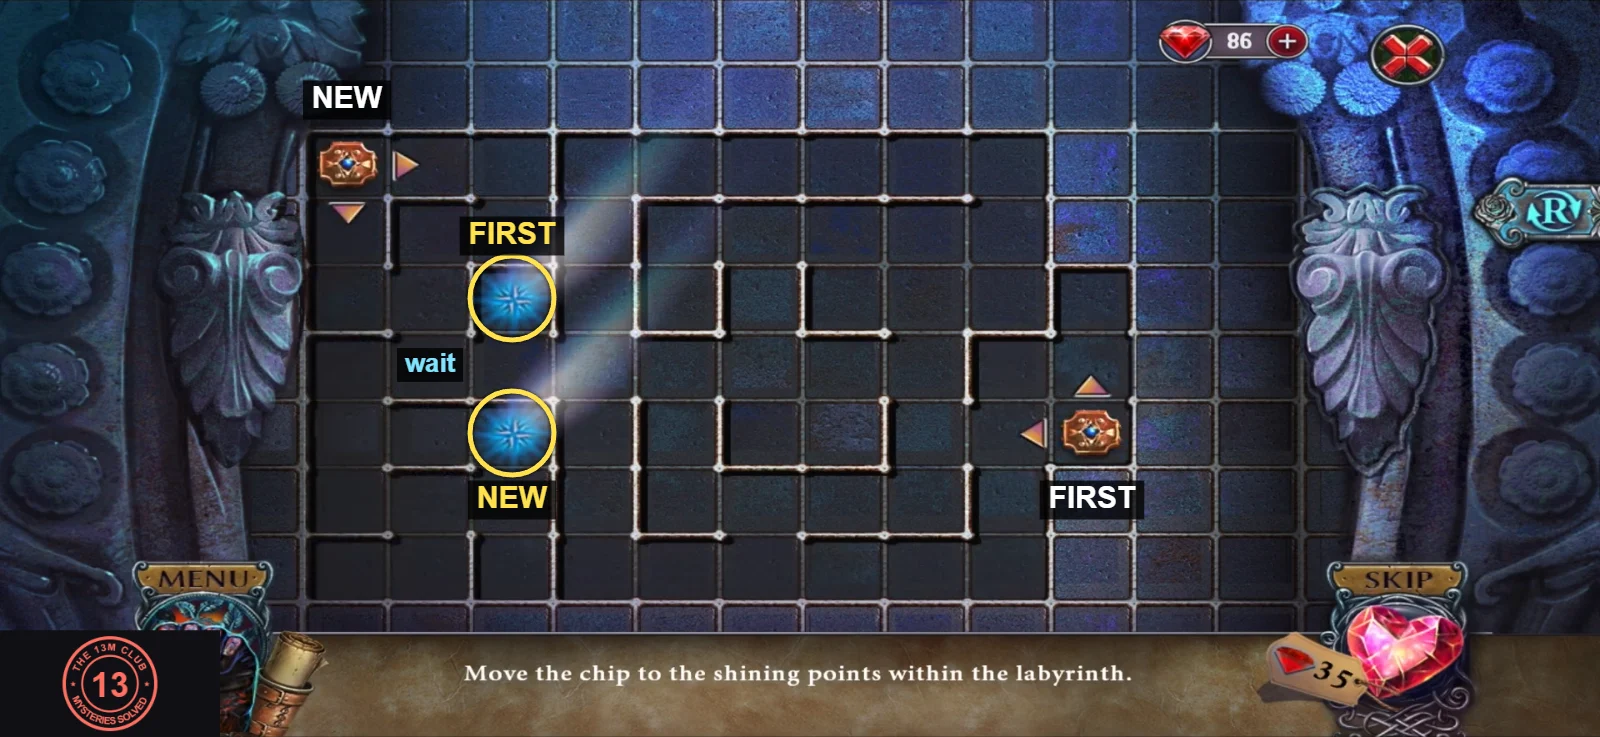
Board 2 at the start. White labels mark the chips, yellow labels the point each one ends on, and "wait" the square where the new chip waits. - Board 3 grows to the right. The two chips stay on the old points, a third chip appears in the top-right corner, and there are three new points: an upper and a lower one in the boxes two squares right of the old points, and one on the right under a short wall. A chip that slides onto a shining point stops there. 1) Park the top-right chip: down, left, up, right, down, right, down, left, up, right, up. It now waits diagonally below and right of the right-hand point. 2) Lower-left chip: left, up, right, down, left, up onto the lower middle point. 3) Upper-left chip: down, right, up, right, up, left, down, right, up, right (it stops against the parked chip), then up onto the right-hand point. 4) Parked chip: left, down, left, up, right, down, left, up, left, then down onto the upper middle point. You receive the MAP and SILVER PETAL 1/2. New objective: deliver the map to the Baroness.
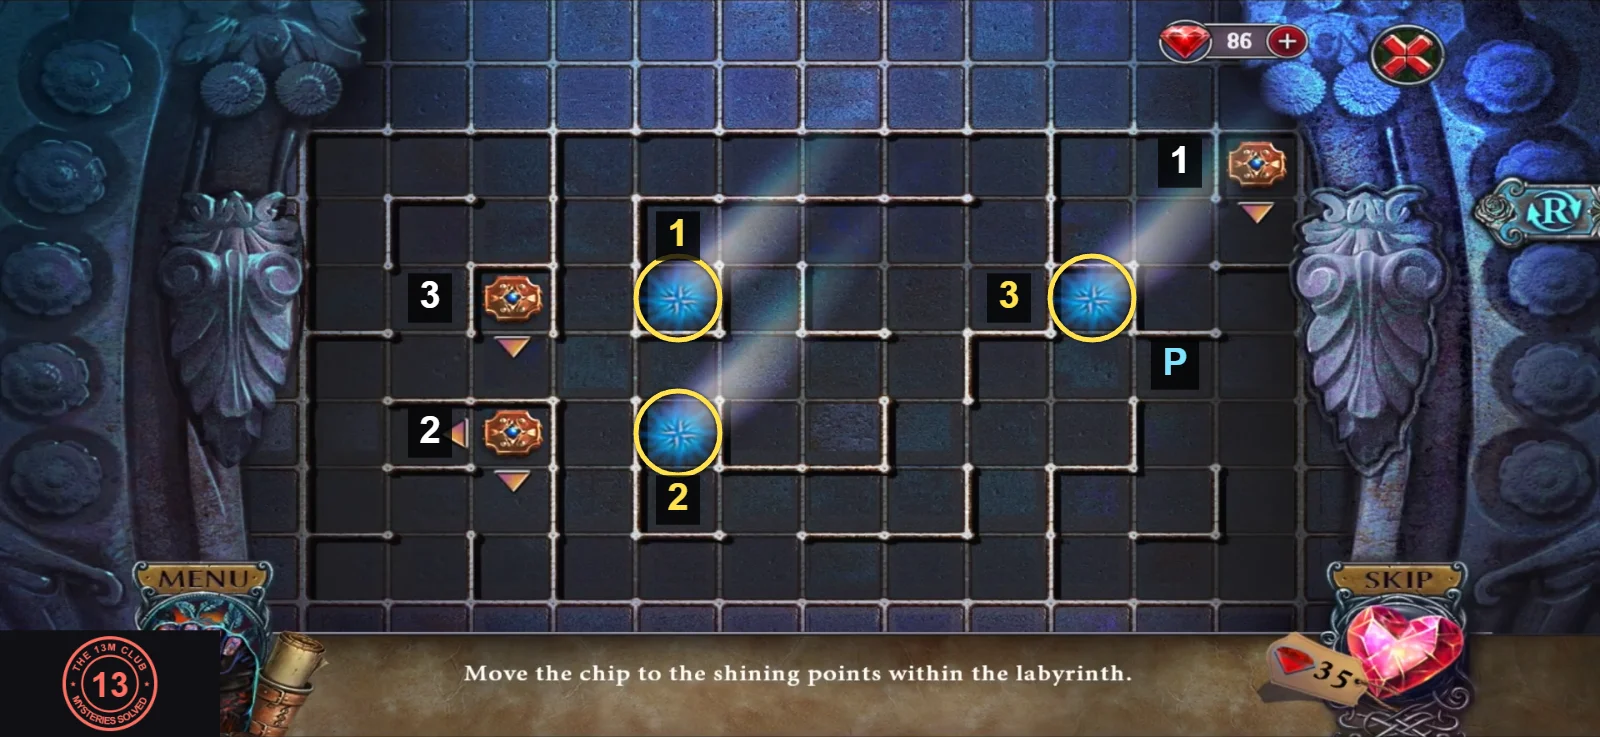
Board 3 at the start. Each white chip number ends on the yellow point with the same number. Chip 1 first waits at P.