Lab drawer room symbols and the item exchange
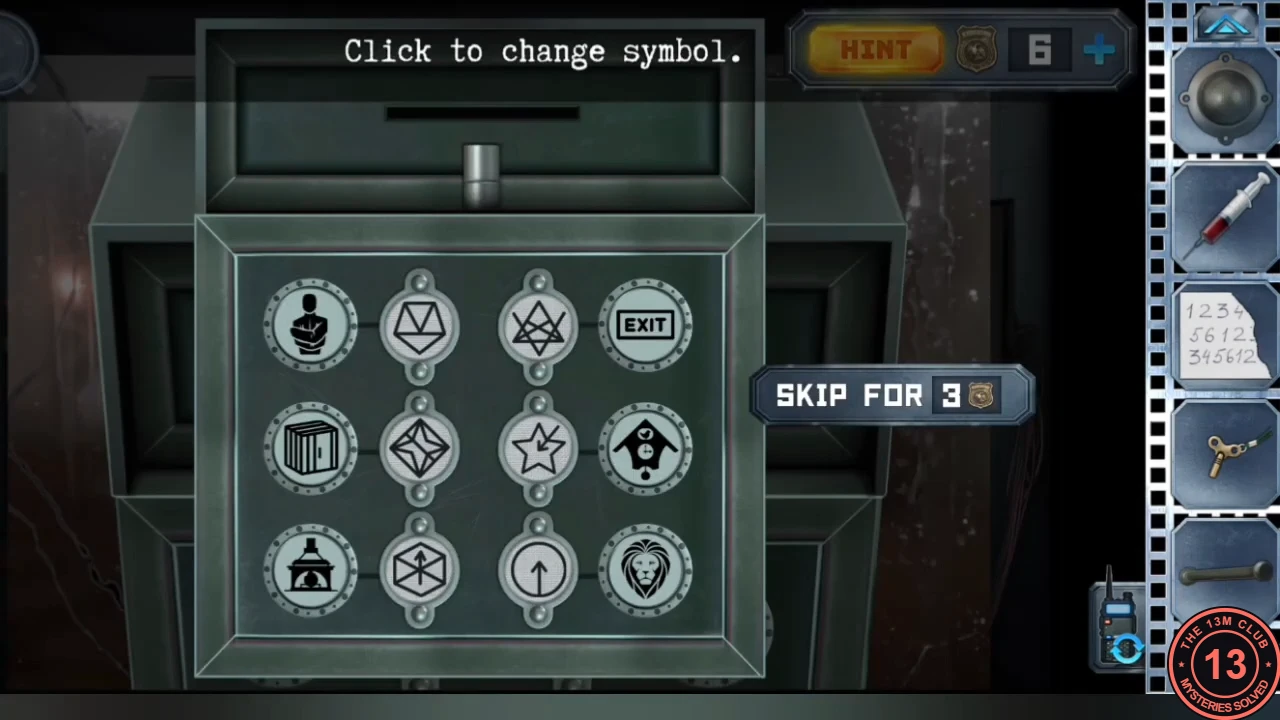
A drawer in Alex's lab connects to a drawer in Anna's mirror room so they can pass items. First Alex must unlock it with the room symbols.
- Put the panda figurine on the zoo world map.
- As Alex, open the drawer in the lab. Each room icon must be paired with the symbol painted somewhere in that room (look at the walls and objects in each room). Tap symbols to change them until every pair lights green: bust - star, EXIT - spoked wheel, cell - arrow, cabin house - triangle, tent - diamond, lion - six-pointed star.
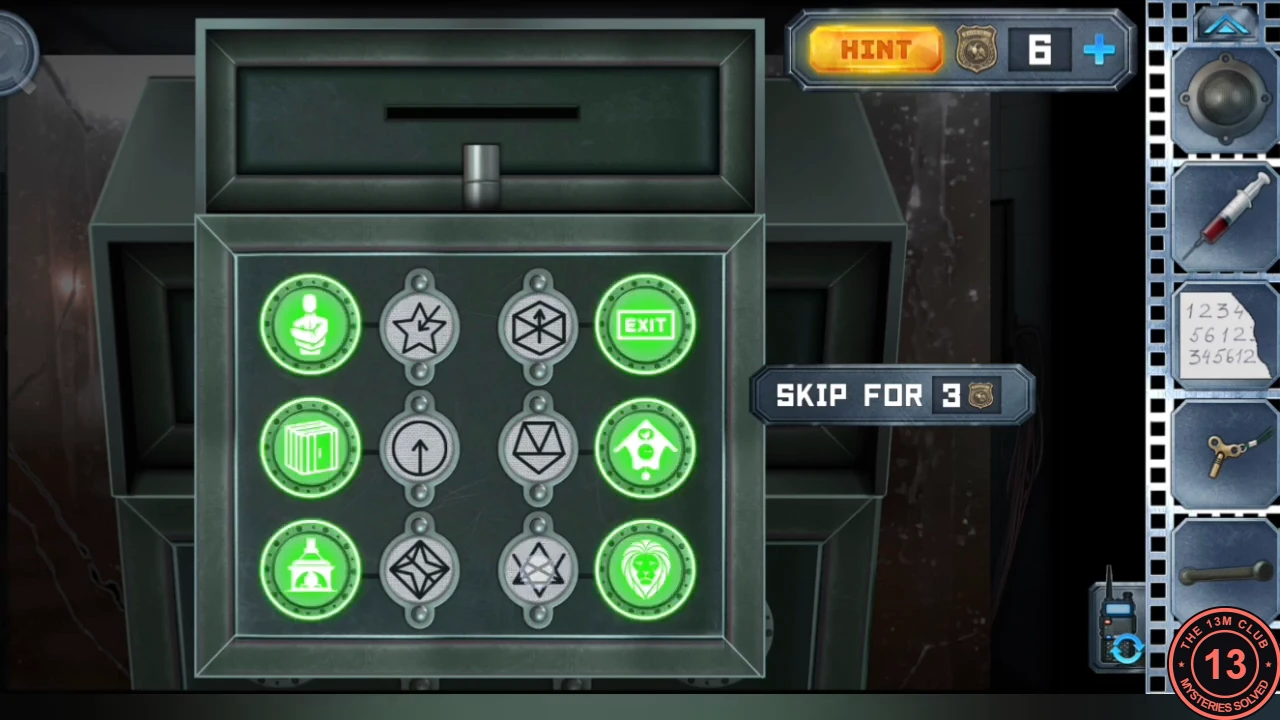
Solved: every room icon lit green next to its symbol. - Exchange items through the drawer (put an item in, switch characters and take it from the other drawer). Send the spectrogram to Anna; Anna sends back the laser pointer.
Laboratory: the laser mirrors
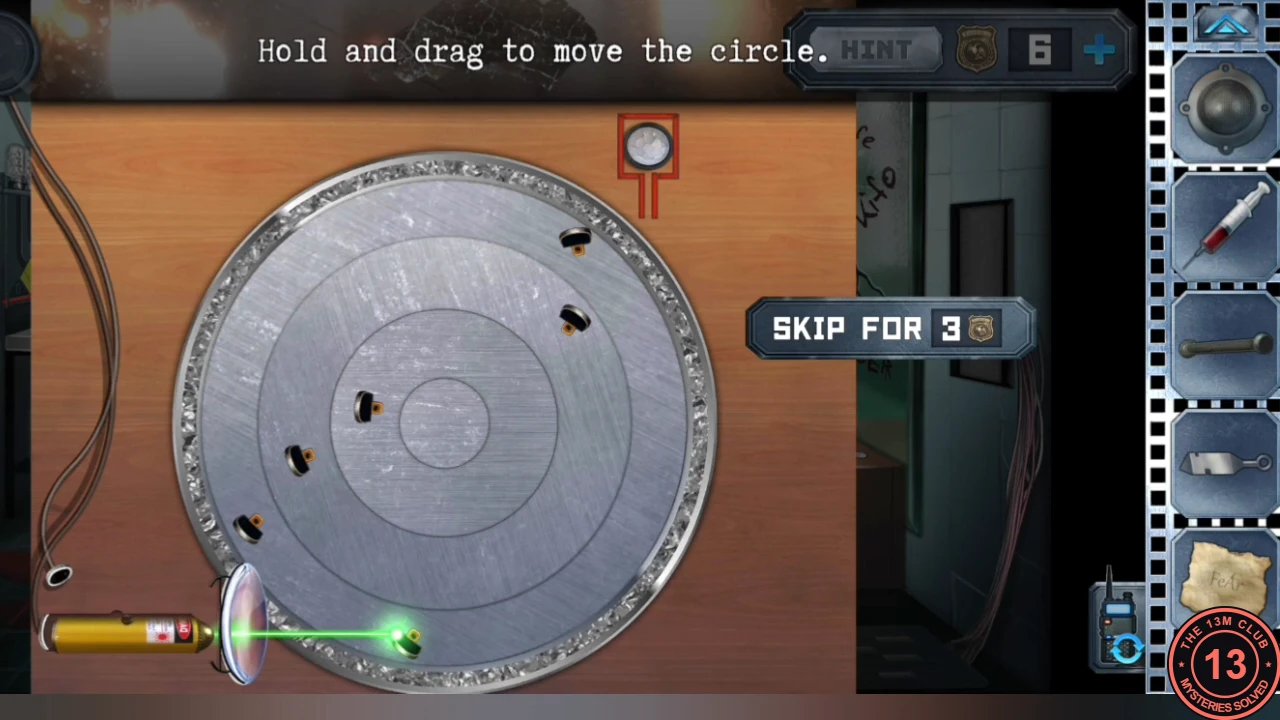
The laser pointer on the lens desk aims a beam through a set of rotating mirrors.
- Put the laser pointer behind the lens on the right-hand lab desk. Drag the mirror circles so the beam is reflected all the way to the button at the top right. Take the jade rod.
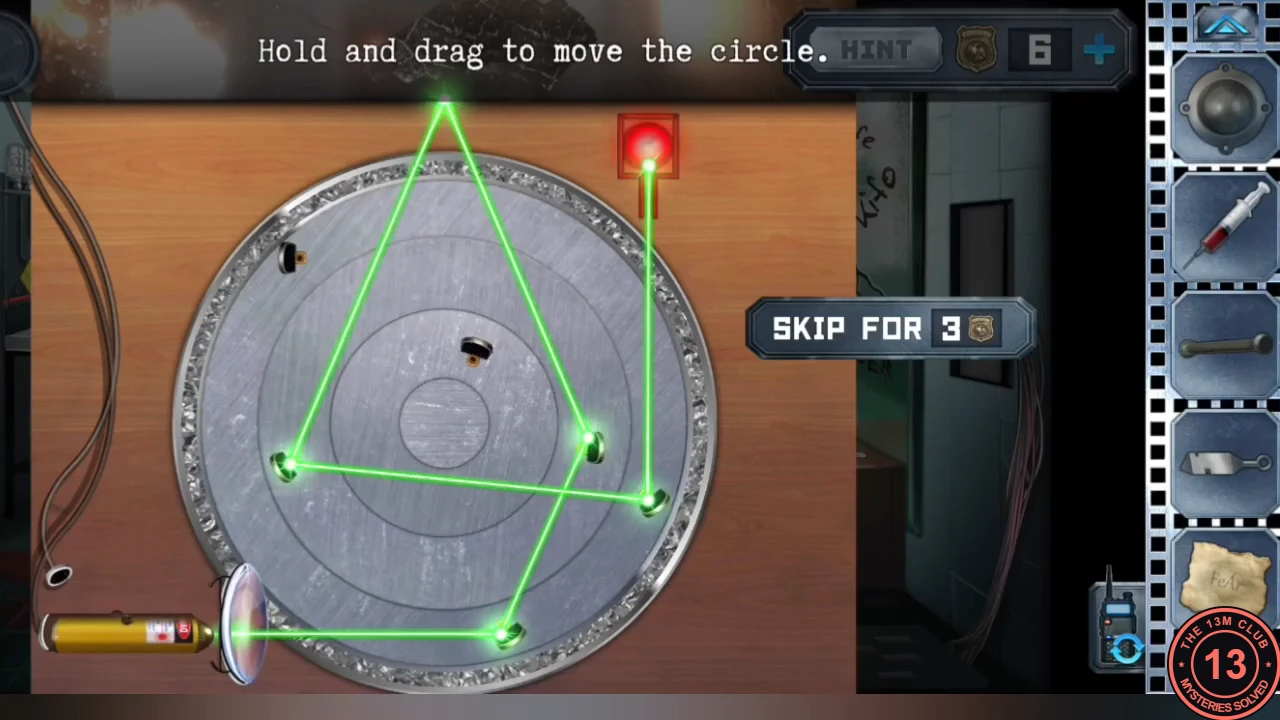
Solved: the beam reflected all the way to the button. Example from one playthrough. - In the mortuary fit the vice handle to the vice on the side table, open it and take the green square piece. Put it in the square slot on the lab's left wall.
Reception: assembling the torn photo
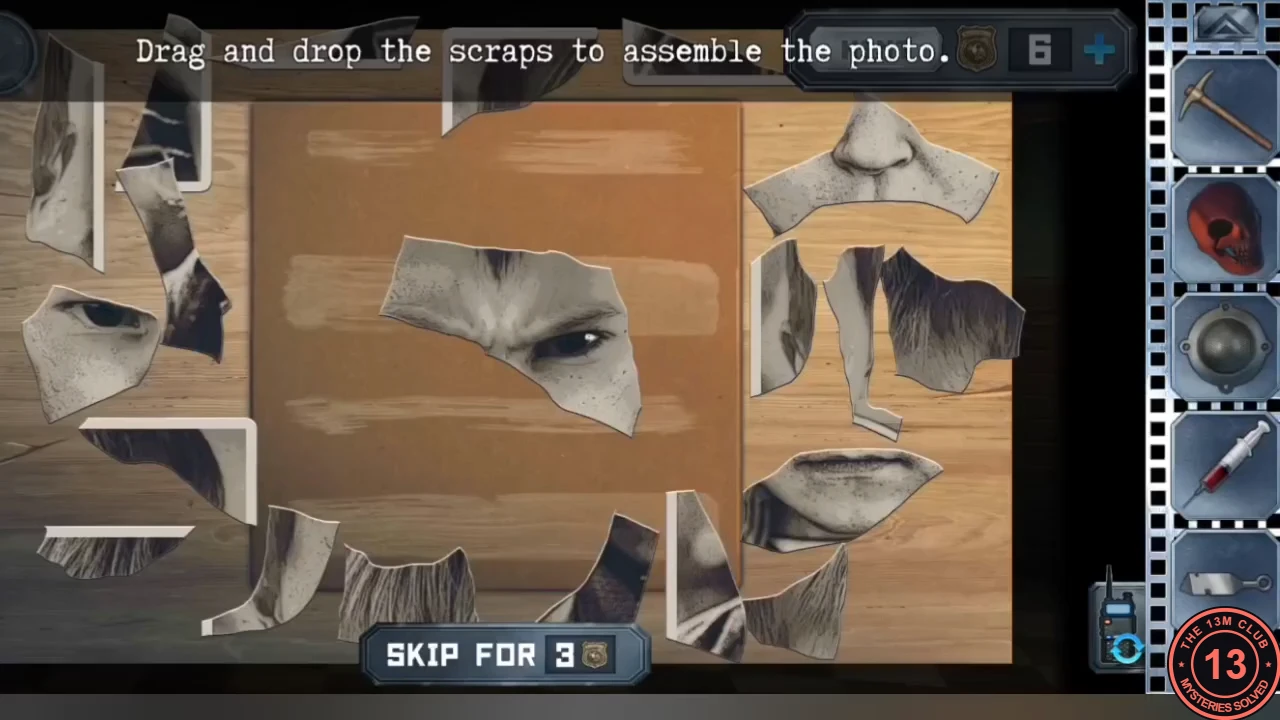
The two photo fragments complete the torn photo on the reception table, the last picture for the cabin photo wall.
- In the reception office put both photo fragments on the torn photo and drag the scraps into place to complete it: the "Angry boy" photo. Send it to Anna through the drawer and place it on the cabin photo wall.
Cabin photo wall: the face-sorting game
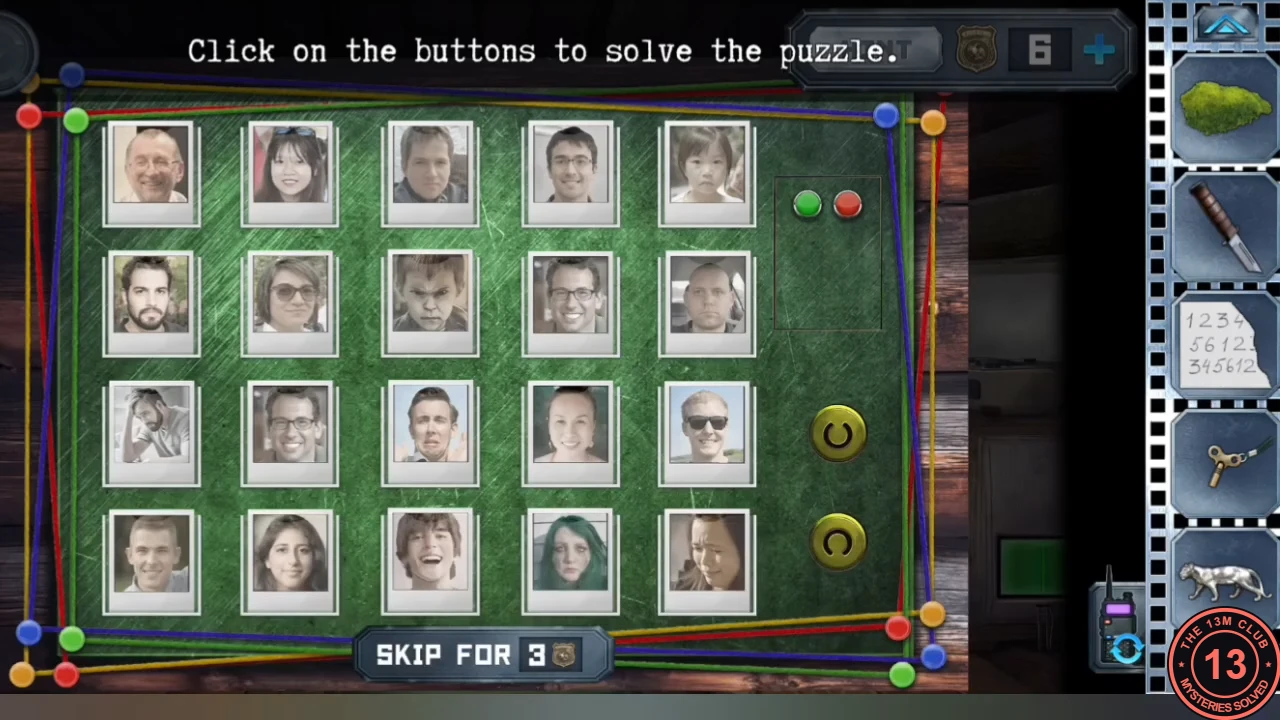
With all four photos in place, the cabin photo wall starts a reaction game.
- The completed photo wall starts a sorting game: photos scroll upward; press the upper button for a smiling or laughing face and the lower button for a sad or angry one. Winning releases another red part; put it on the mirror-room exit door.
Zoo: the wind-up rabbit
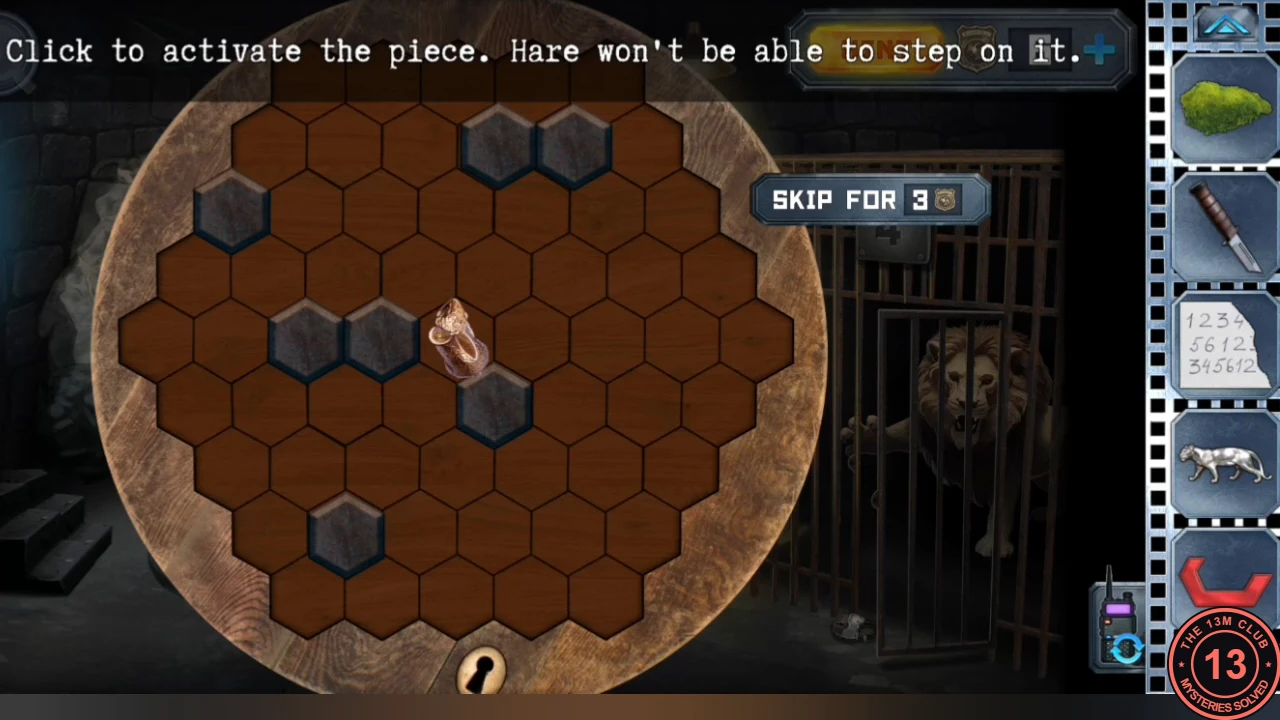
The winding key from the lab starts a wind-up rabbit on the zoo's round table.
- Have Alex send the winding key through the drawer. In the zoo, use it on the round table. The rabbit runs around a hexagon board: tap cells to block them and box the rabbit in before it reaches the edge. Take the rabbit figurine.
Clearing stump: the radar rings
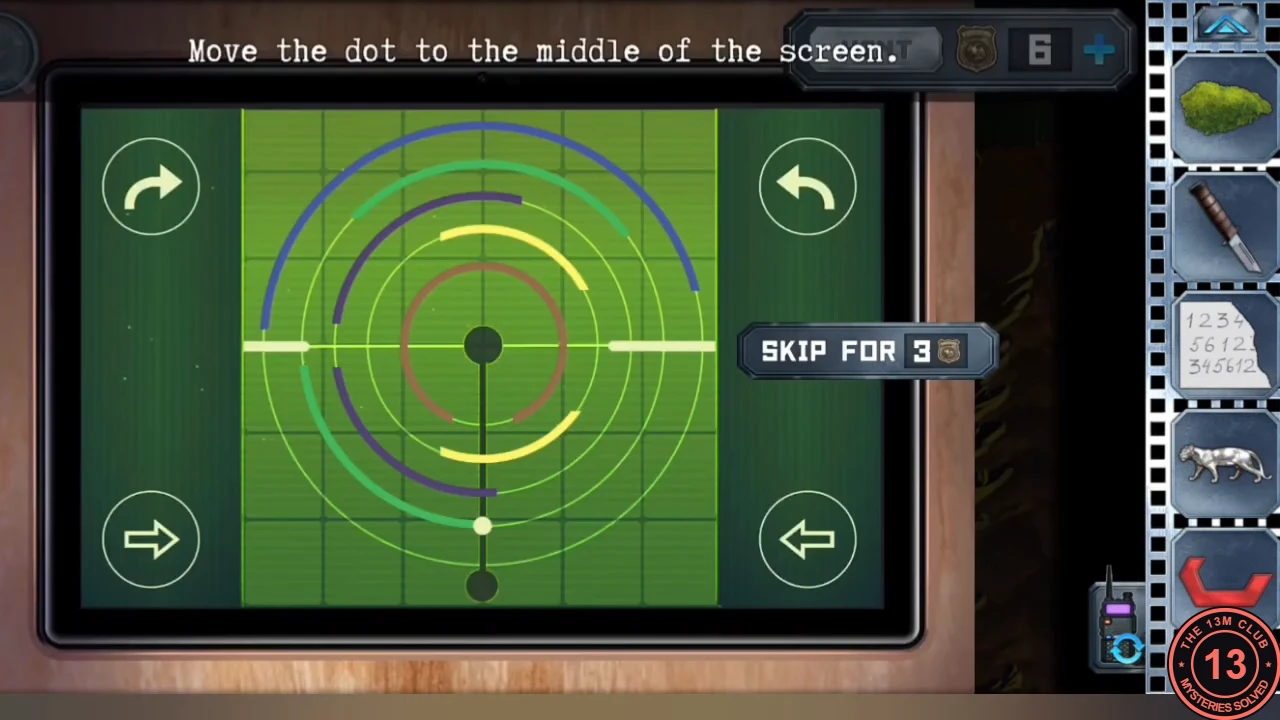
The rabbit figurine activates a radar puzzle on the stump in the clearing; it gives the key to cage 3.
- Put the rabbit figurine on the stump in the clearing. A radar screen appears: use the side arrows to rotate the rings and shift the centre bar until the dot can slide to the middle. Take the key to cage 3.
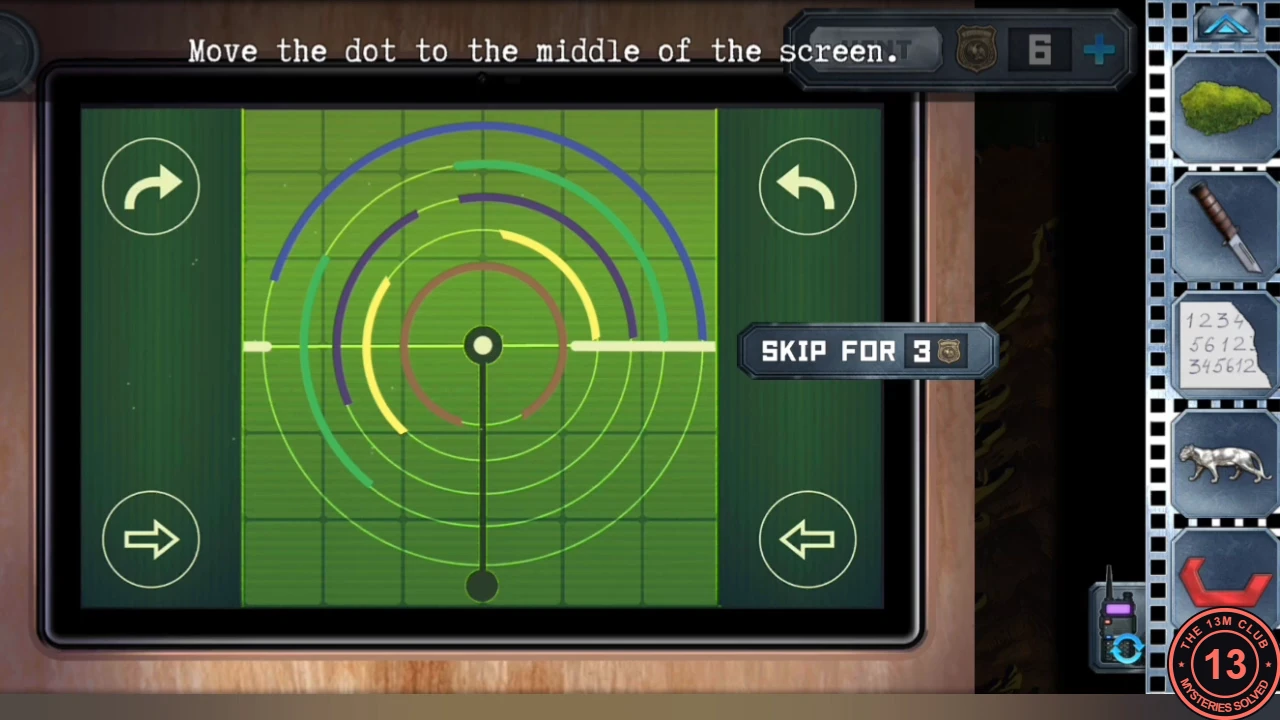
Solved radar: the dot in the centre after rotating the rings. Example from one playthrough. - Open cage 3 in the zoo, throw the tarp over it so the raven cannot attack, and take the bottle of blood and the guest card.
Zoo: the world map habitats
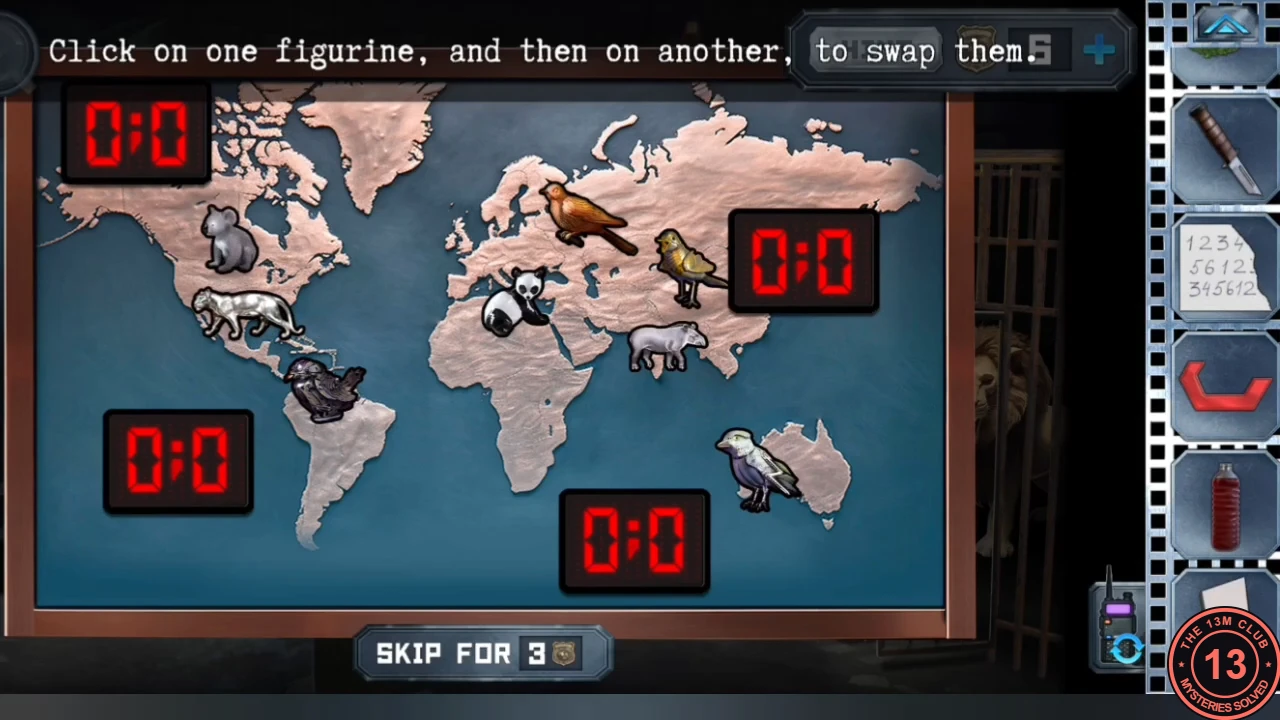
Placing every figurine on its home continent turns the map score boards into the song order for the bird tree.
- Have Alex send the puma figurine and the first letter fragment through the drawer. Put the puma on the world map, then tap two figurines to swap them until each animal is on its home continent (puma and eagle in North America, tapir in South America, panda and the orange bird in Asia, koala in Australia). Every score board turns green: North America 1:6, South America 2:5, Asia 3:8, Australia 4:7.
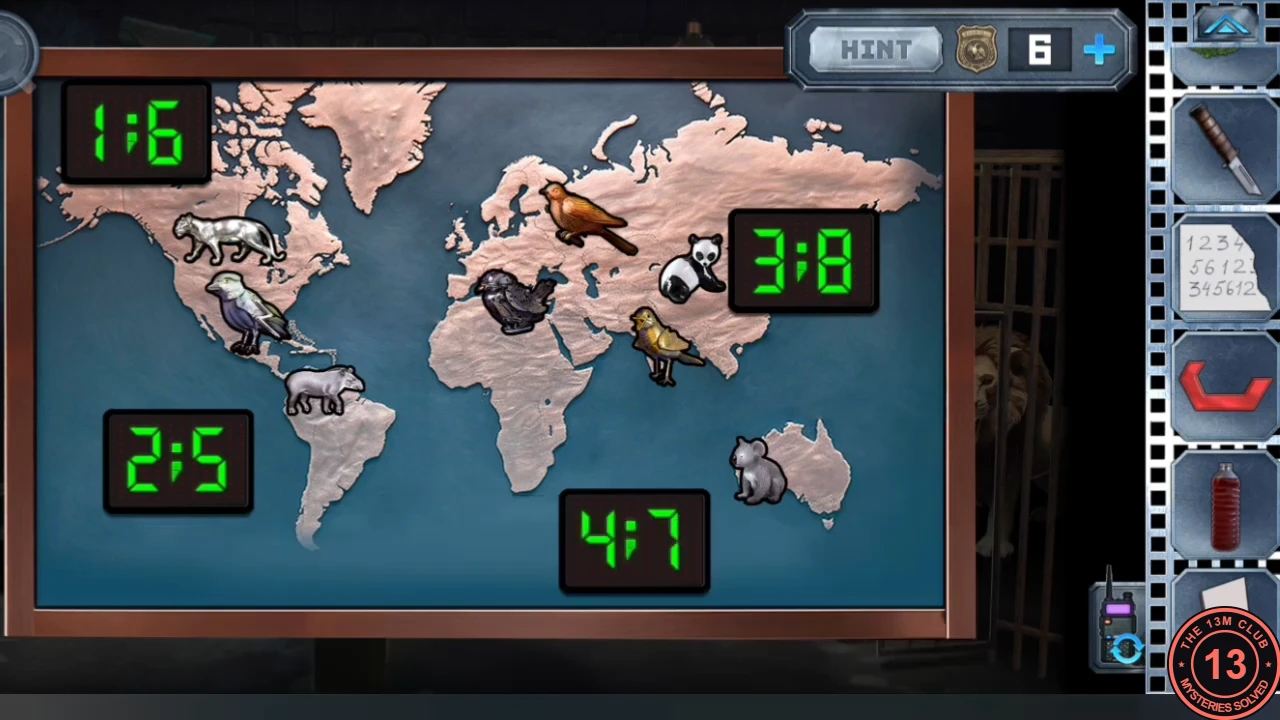
Solved: every board green (North America 1:6, South America 2:5, Asia 3:8, Australia 4:7).
Goat camp: the singing birds
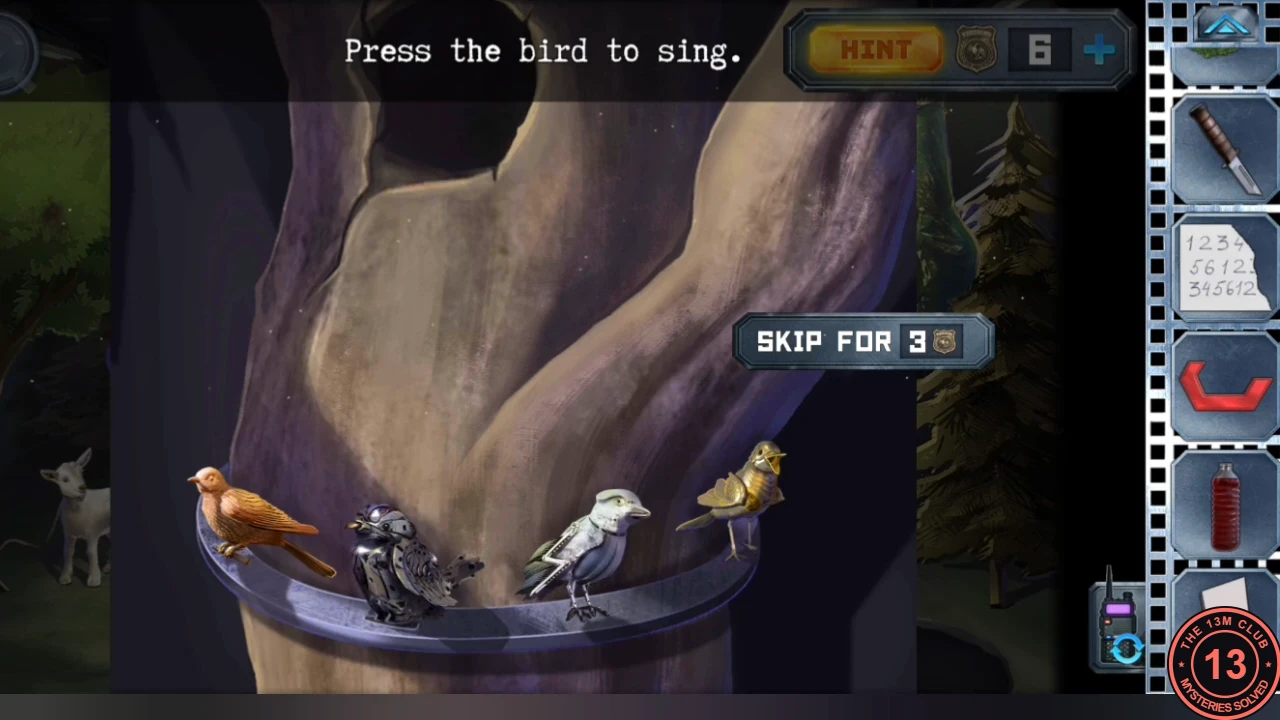
The score boards on the world map give the order in which to press the birds on the bird tree.
- The board numbers are song positions. At the bird tree press the birds in this order: orange, black, gold, white, black, orange, white, gold. An owl comes out of the hollow with a red square piece; take it.CODEorange, black, gold, white, black, orange, white, gold
The fake sacrifice and the treehouse dolls
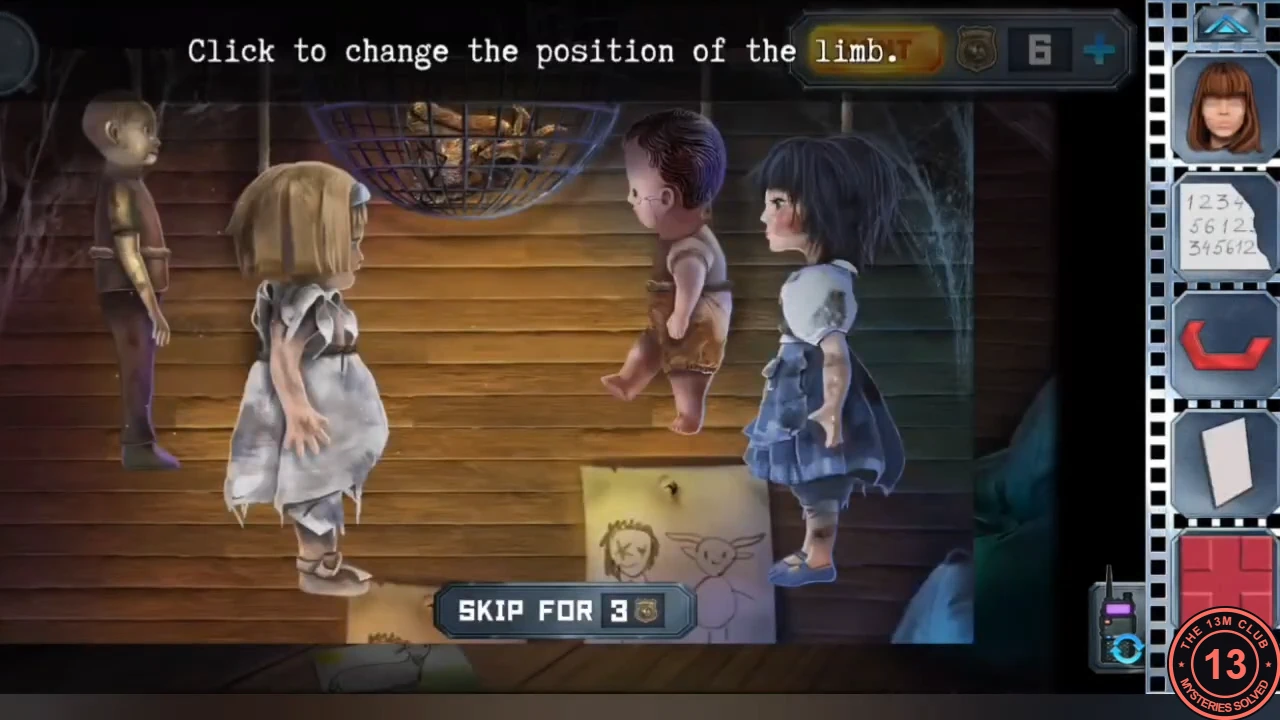
The altar wants a goat sacrifice. Anna fakes it.
- Pour the soporific onto the moss to make hypnotic moss and give it to the goat. When it is asleep pour the bottle of blood over it, then put the broken knife on it to fake the sacrifice. Study the altar drawing of the dancing figures.
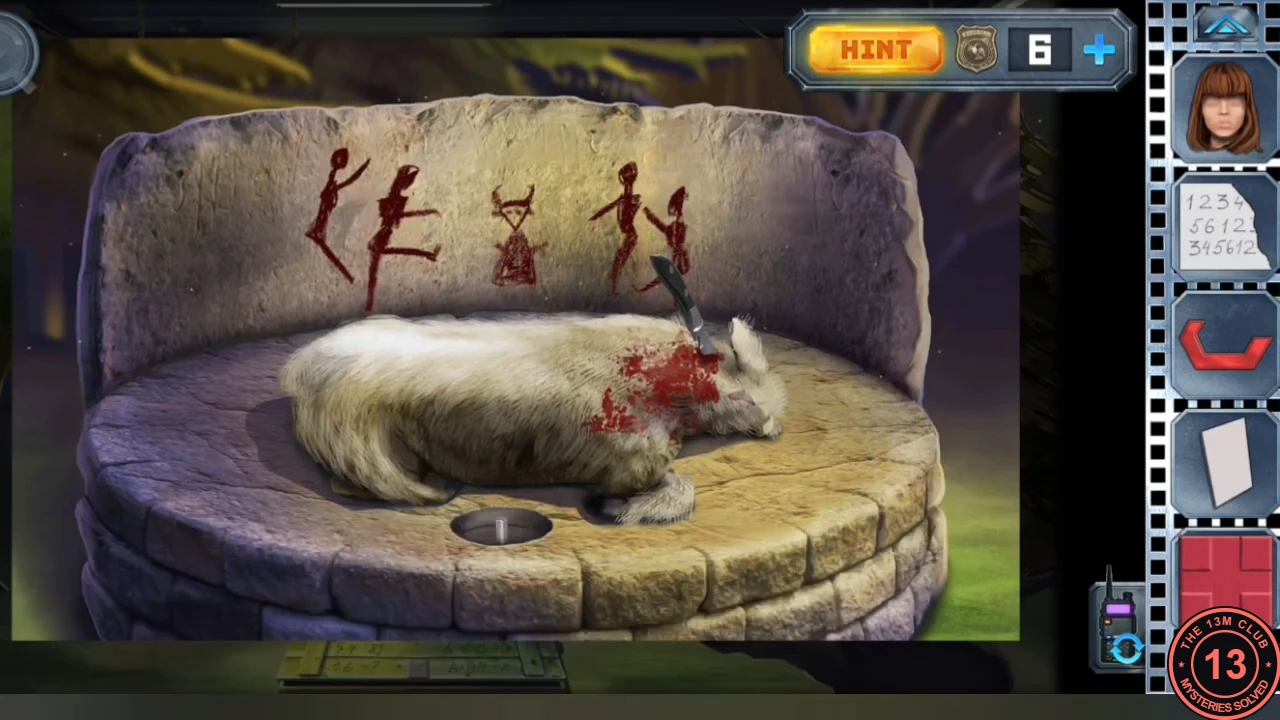
The fake sacrifice done. The red dancers drawn on the altar are the pose clue for the dolls. - In the treehouse tap the dolls' limbs to change their positions until every doll copies the pose of its figure in the altar drawing. Take the devil statue that appears.
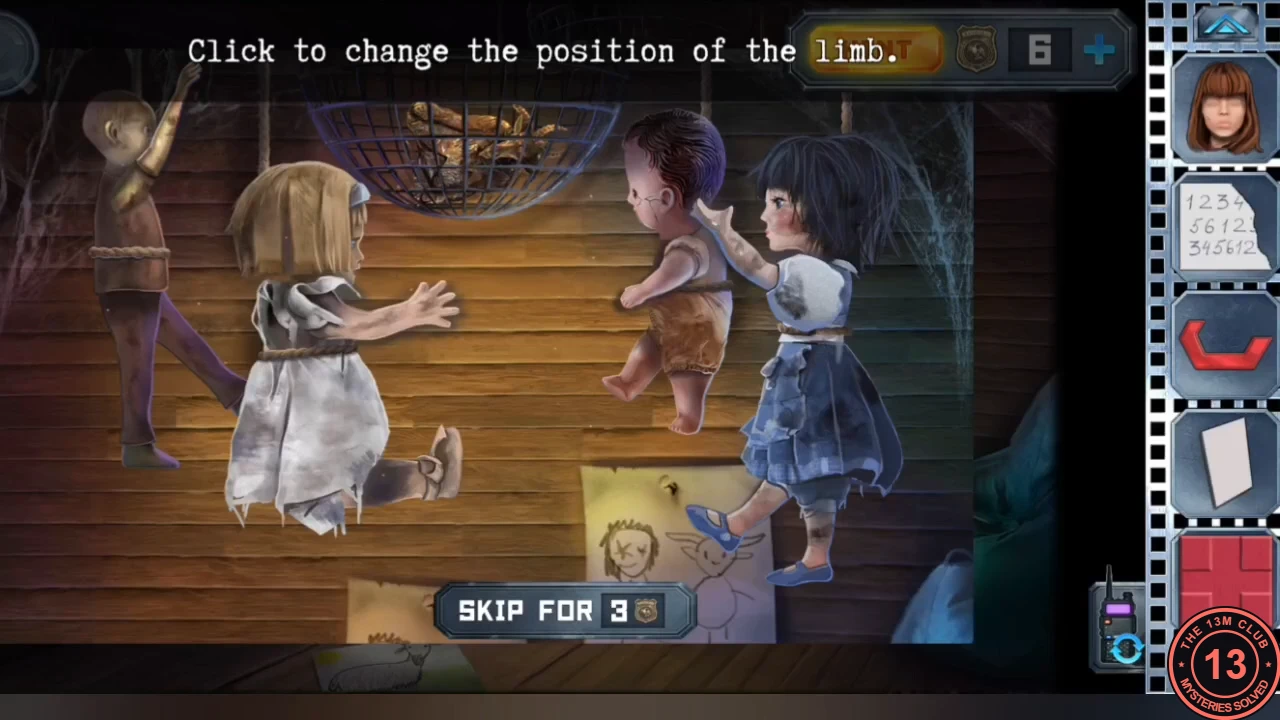
Solved: each doll copies its dancer from the altar drawing. - Put the devil statue on the altar and take the mysterious charm.
Ball-drop pipes and the reagent
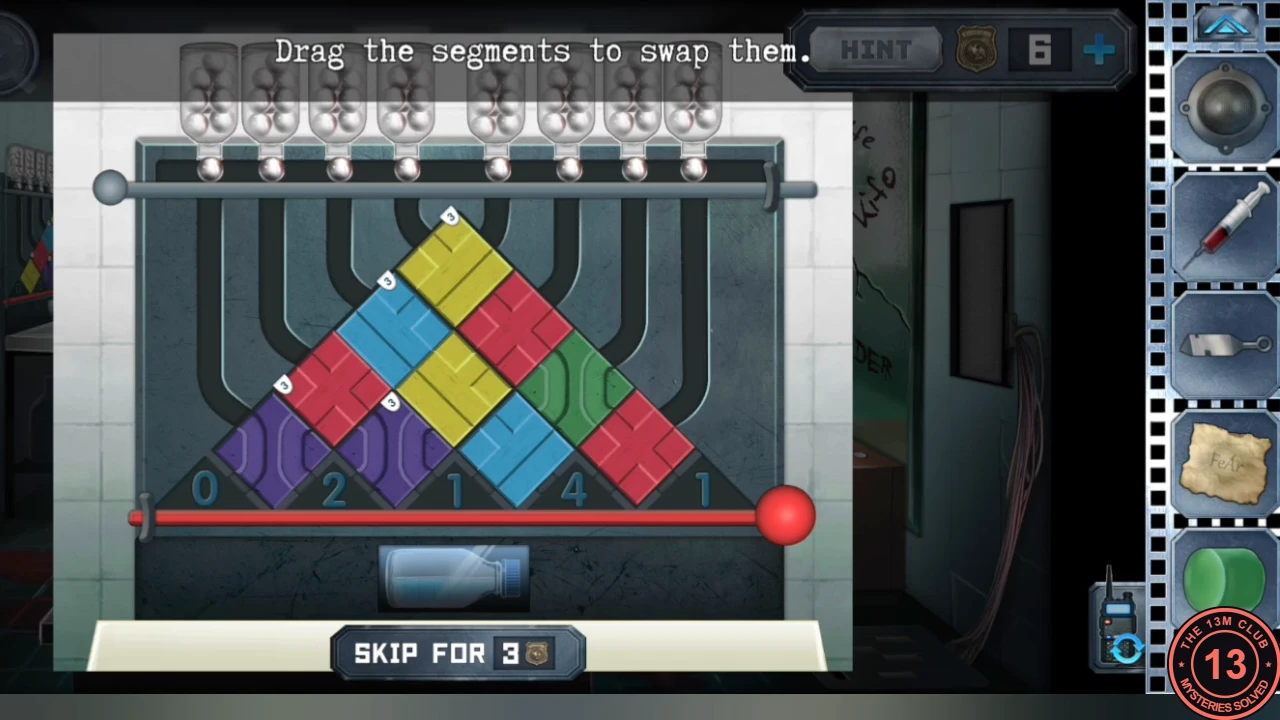
The red square piece completes the ball-drop panel on the lab wall.
- Send the red square piece to Alex. Put it on the lab's left wall. Each bin at the bottom shows how many balls it needs (0, 2, 1, 4, 1 from left to right). Drag pipe segments to swap them so the routes deliver the right numbers, then pull the barrier left. Take the reagent and put it on the central desk with the other chemicals.CODE0-2-1-4-1
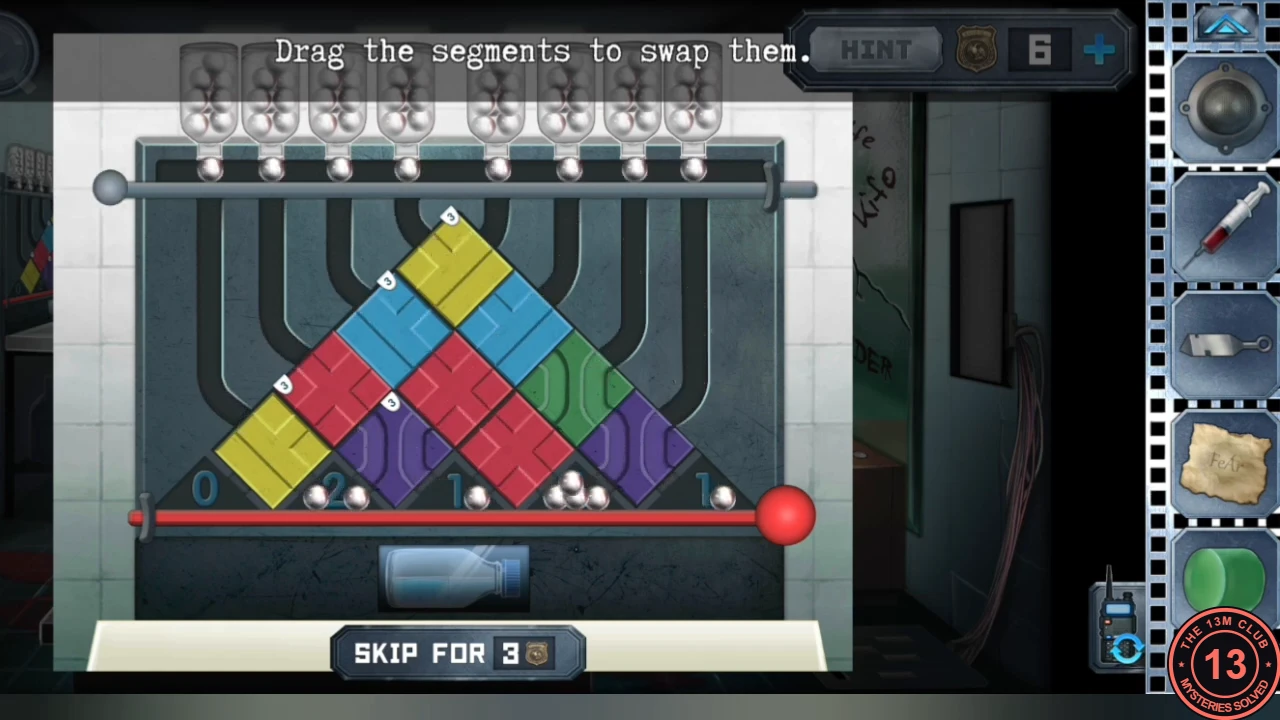
Solved: balls land 0, 2, 1, 4, 1. Example segment layout from one playthrough.
Iron maiden snake and the display case
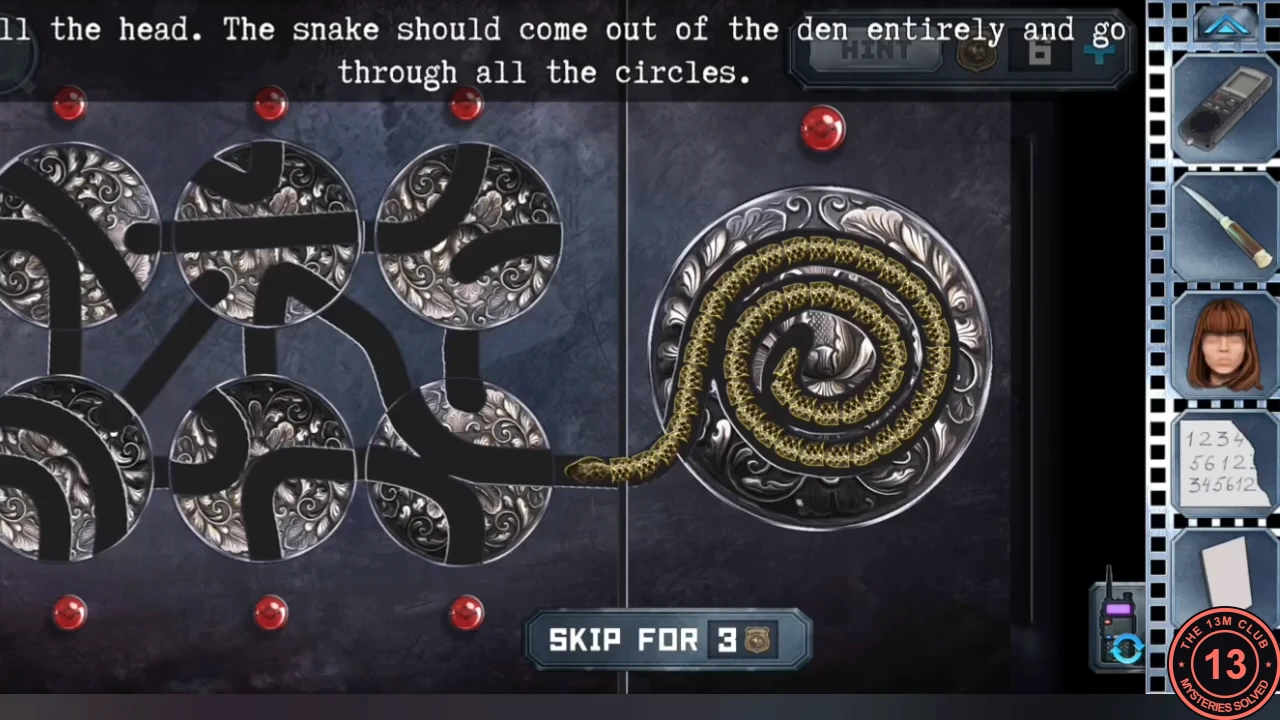
The mysterious charm opens a snake puzzle inside the iron maiden.
- In the mirror room insert the guest card into the token machine (it needs a password later) and put the steak knife on the cutlery table.
- Put the mysterious charm on the iron maiden. Rotate the round charms and drag the snake so it leaves its den completely and passes through every circle. Take the severed hand.
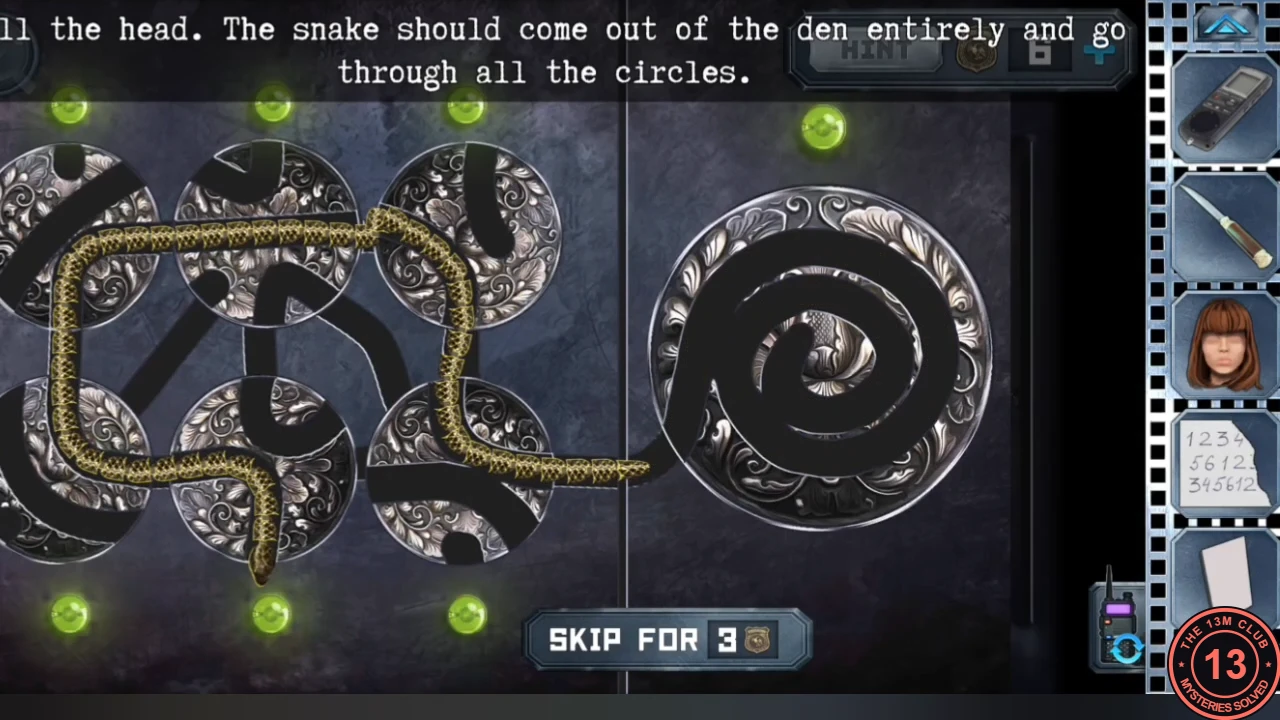
Solved: the snake out of its den and through every circle. Example route from one playthrough. - Press the hand onto the scanner in the middle of the torture chamber to open the display case. Take the fish knife and the jar with eyes.