Zoo room, the goat-camp trap and lighting the fire
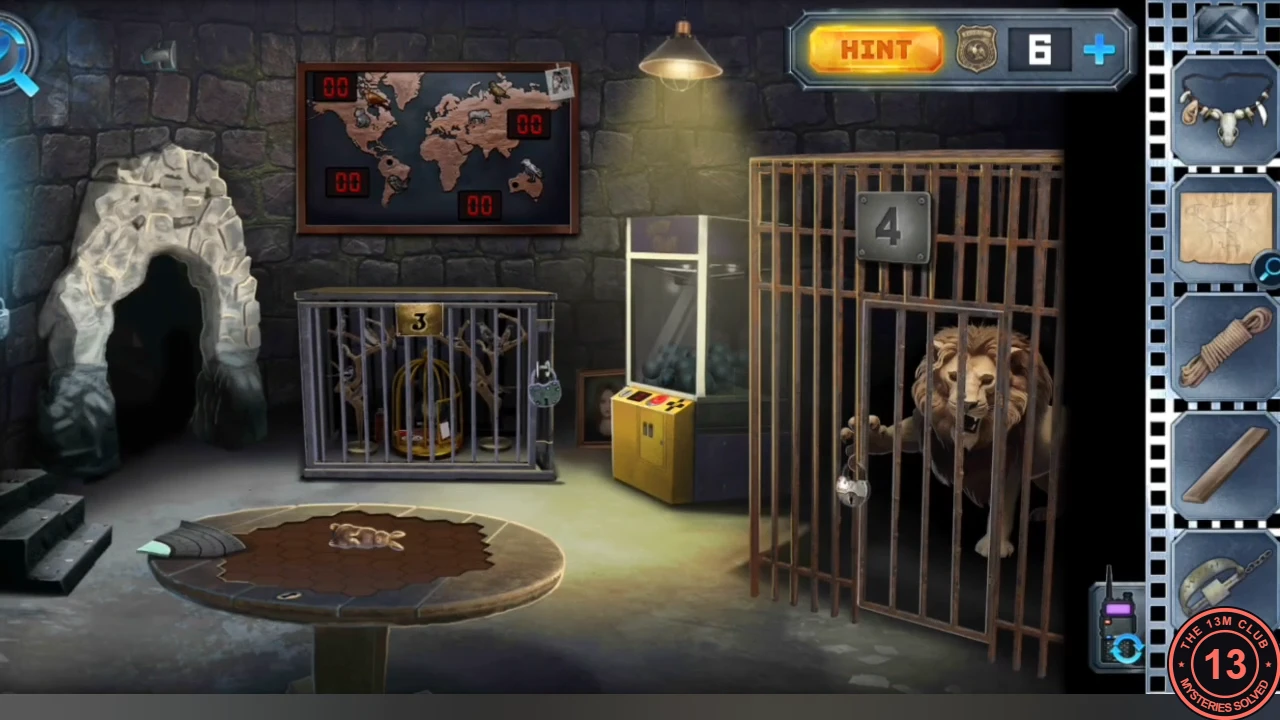
The zoo room has a lion in cage 4, a raven in cage 3, a claw machine, a cave, a world map with four score boards, a round table and a locked door with four dials.
- In the zoo room take the vinyl record fragment and the "Sad man" photo. Note the four-dial lock on the left door and the world map; both are used later.
- In the goat camp place the trap on the X in front of the camera and the lever on the camera, then tie the rope between the trap and the camera. Take the tarp lying beside the chest; it uncovers a deep hole.
- At the fire pan spray the lighter fluid over all the logs, then hold the match over them until the whole pile burns.
- Put the "Sad man" photo into a gap on the cabin photo wall.
Two mannequins, the furnace and the camera lens
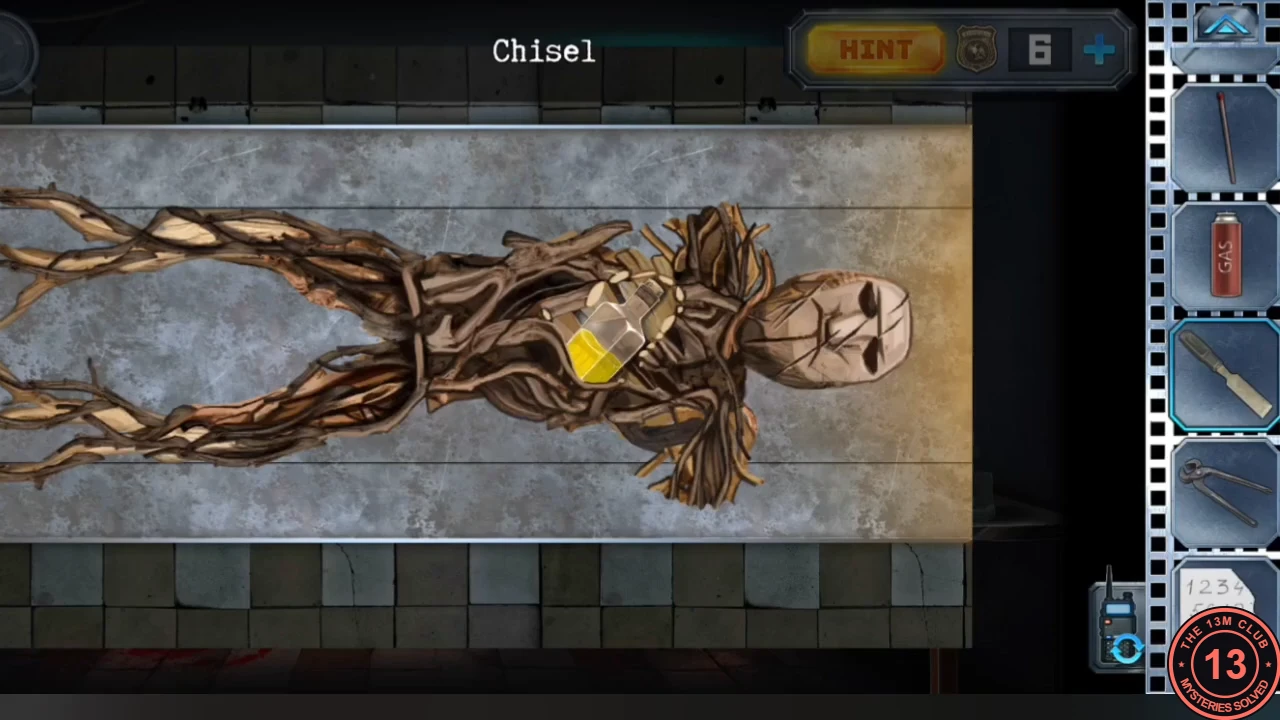
Alex opens both mannequins and burns the wooden one to get the items hidden inside.
- In the bathroom off the living room (the steam is gone now) take the chisel and the pliers.
- In the hospital room use the retractor on the mannequin lying on the bed. Take the lotus flower from its belly.
- In the mortuary use the chisel on the wooden mannequin's chest to take the vial of yellow liquid. The furnace must be open (from its switch panel) and the mannequin's branch arms already sawn off. Fit the red propane tank into the holder on top of the furnace and the electric igniter (a red button) below it, if you have not done so already, then press the igniter. The furnace lights and the cut mannequin slides off the table into the open furnace and burns to ash (in the recording it went in by itself as soon as the igniter was pressed). Use the pliers to pull the glowing ball out of the ashes on the table.
- Climb to the security camera above the mortuary stairs and pry its lens out with the chisel.
Bed lamp, cool box and the blowtorch
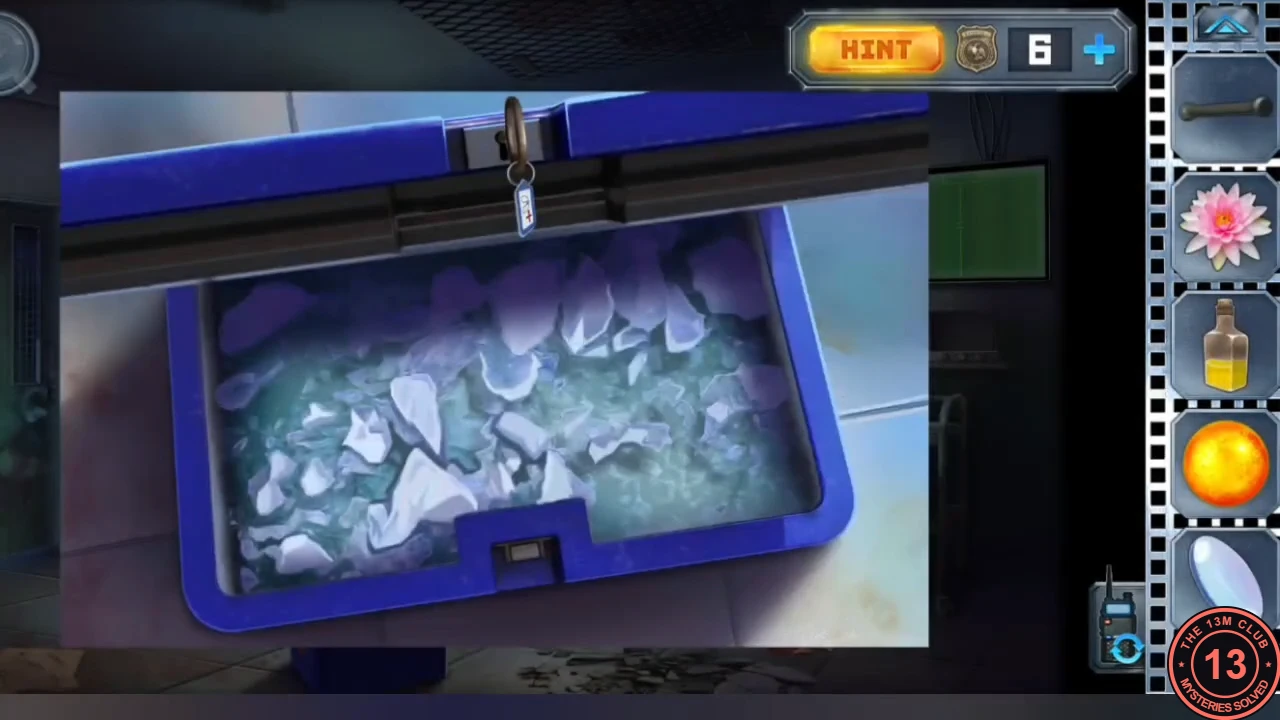
A bulb, a key and the burning ball lead to the blowtorch that opens the office exit bar.
- Screw the bulb into the lamp beside the living-room bed and take the key that is revealed.
- Unlock the blue cool box in the hospital room. Drop the burning ball into the frozen contents; when the ice melts take the puma figurine and the blowtorch nozzle. Combine the nozzle with the gas cylinder from the furnace to make a blowtorch.
- In the office use the blowtorch on the steel bar across the exit door and remove it. Take the triangle-shaped key from the hole in the door and look at the symbol revealed there (the room symbols are needed for the lab drawer).
The flower fan above the bed and the hidden letters
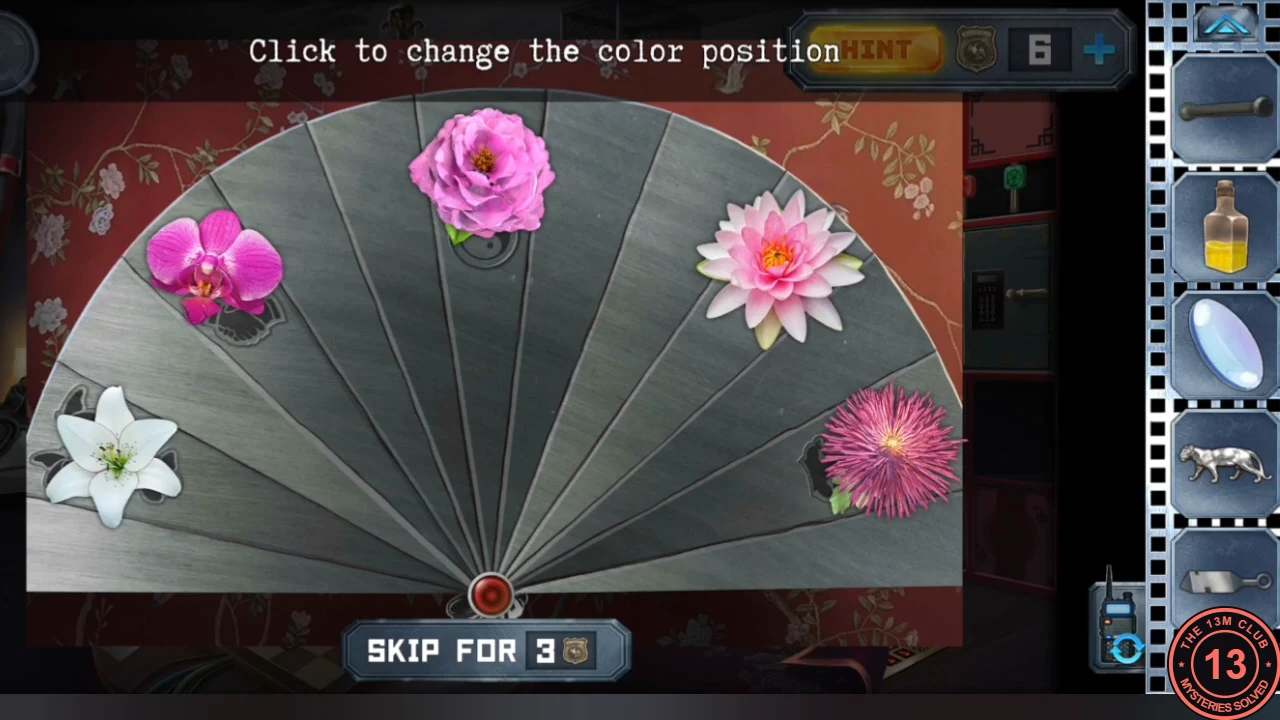
The fan-shaped panel above the living-room bed needs five flowers in the order shown in the bookshelf book.
- Place the lotus in the fan above the bed. Tap the flowers to swap their positions until they match the fan drawing in the bookshelf book: water lily (lotus) at the top centre, white lily upper left, orchid upper right, peony lower left and chrysanthemum lower right.
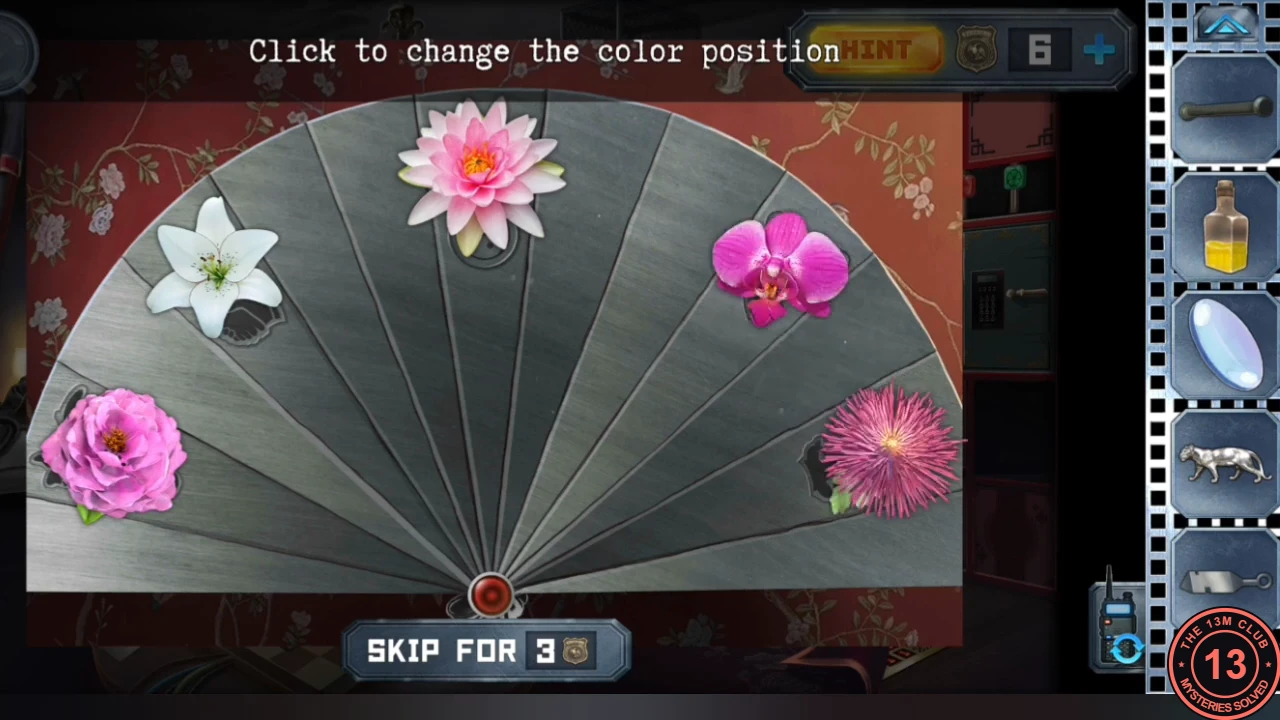
Solved: water lily top centre, white lily upper left, orchid upper right, peony lower left, chrysanthemum lower right. - The book also points at the wall: take the "mystery paper" from the wall above the bed. It looks blank.
- In the office light the desk lamp with the match and hold the mystery paper over the flame. The letters "FeAr" appear (capital and small letters as written).
- In the laboratory put the lens on the small right-hand desk and the yellow vial on the large central desk. Both need more parts later.
Carpet safe 598243 and the clue under the blood
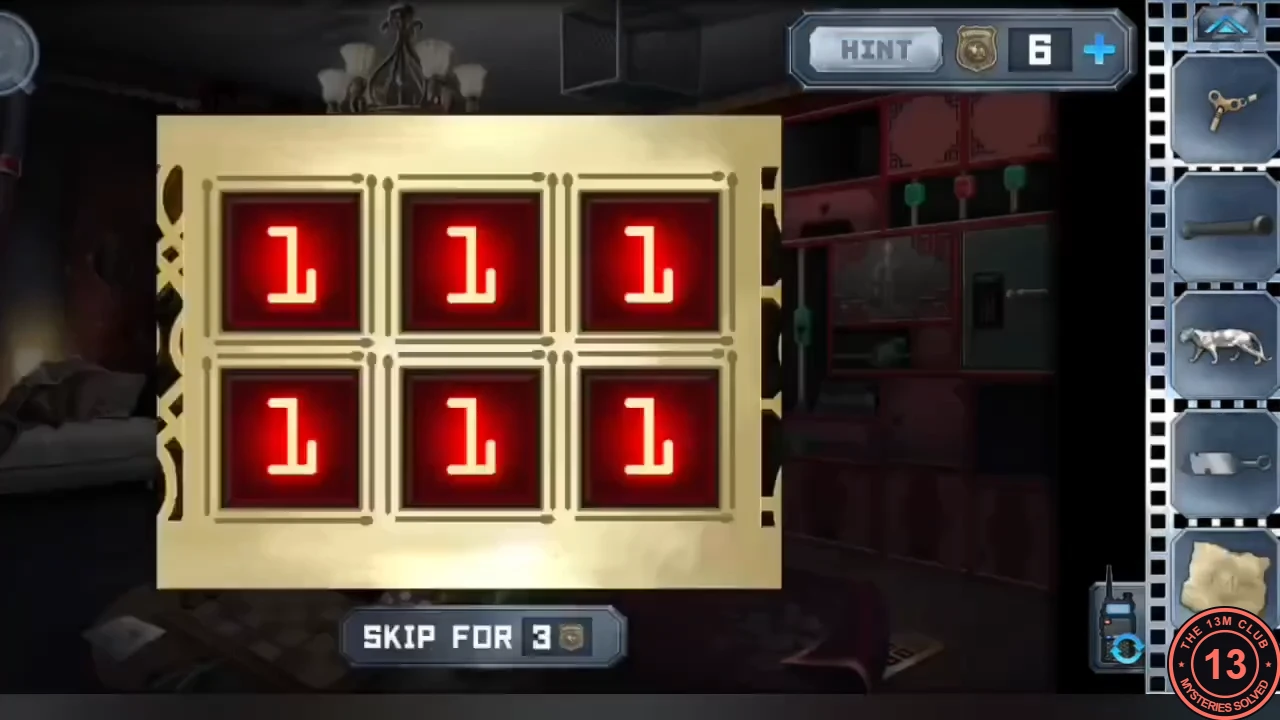
The six blackboard numbers open the floor safe hidden under the living-room carpet.
- Lift the corner of the living-room carpet to find a six-digit safe. Enter the boxed blackboard numbers, top row then bottom row: 598243. Take the stain remover.CODE598243
- In the office use the remover on the bloody skull on the floor, then clean it with the mop. Pairs of numbers appear on the floor; in each pair one number is circled. Read them as dial number and setting: dial 1 = 8, dial 2 = 6, dial 3 = 5, dial 4 = 9.CODE1-8, 2-6, 3-5, 4-9
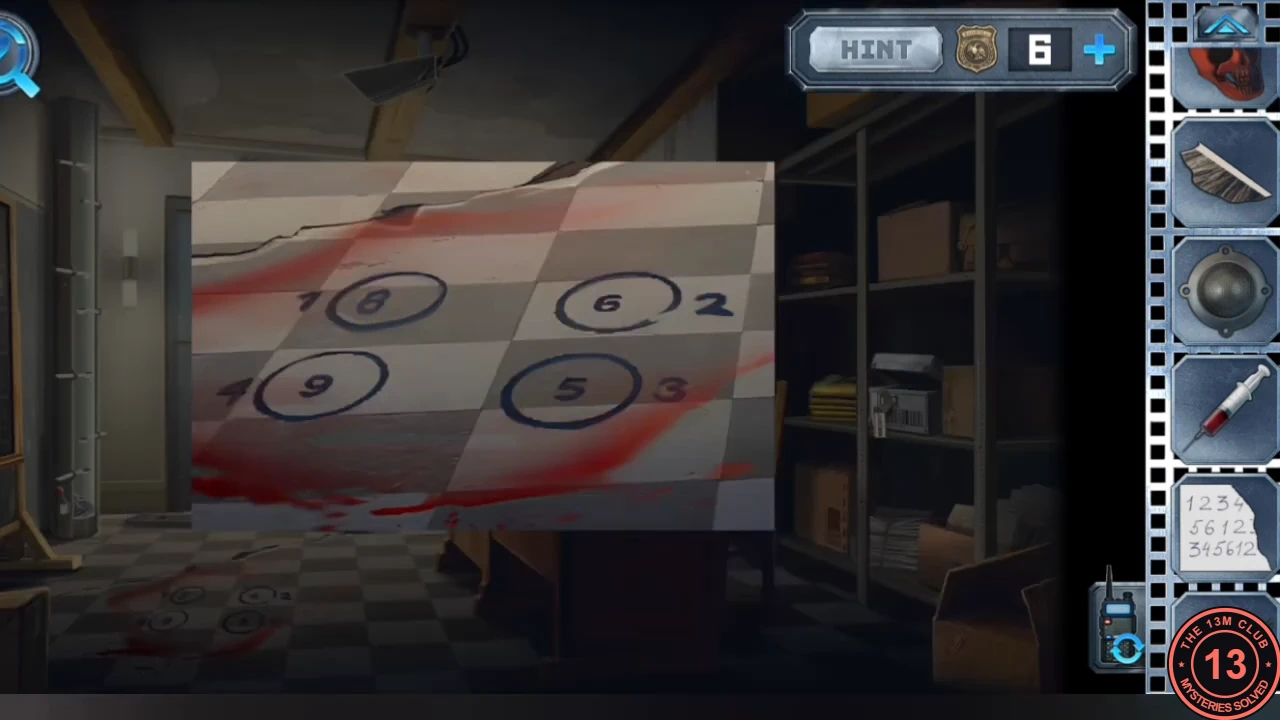
Clue: the cleaned office floor. The small number is the dial, the circled number its setting (1-8, 2-6, 3-5, 4-9).
Zoo door dials and the mirror room
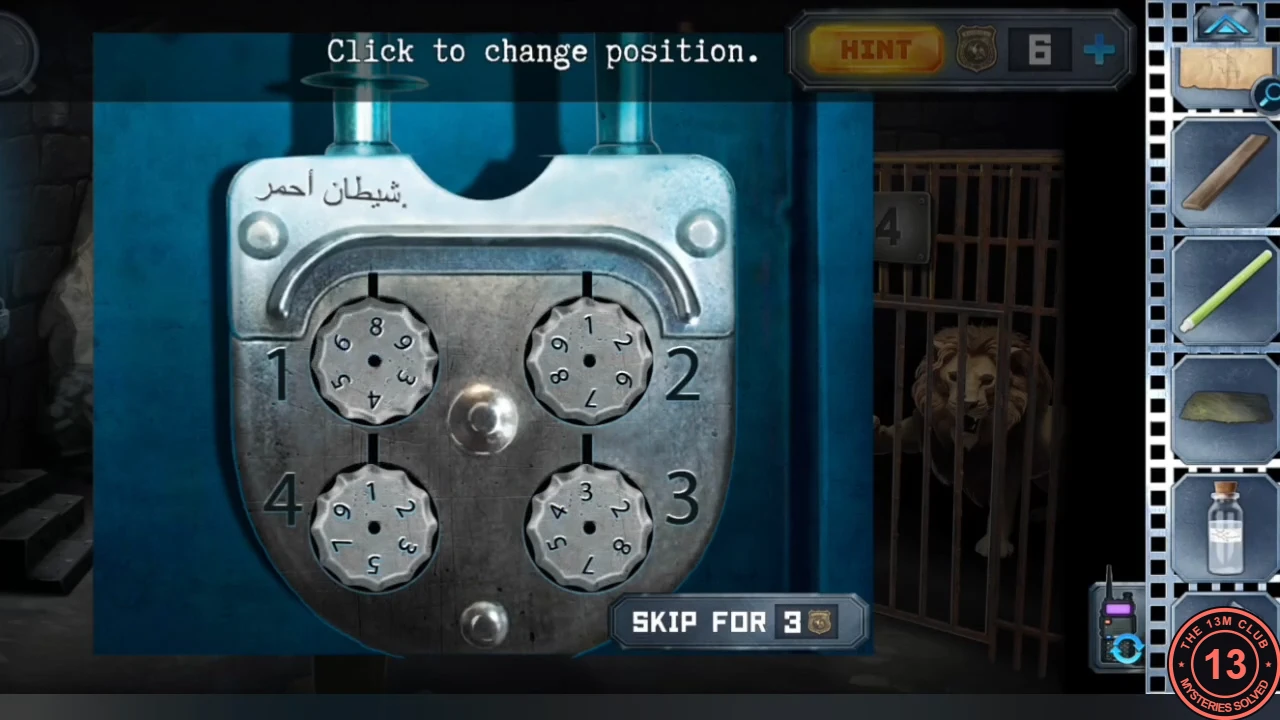
The office floor clue opens the zoo room's four-dial door into the mirror room.
- Switch to Anna. At the zoo room's left door set dial 1 to 8, dial 2 to 6, dial 3 to 5 and dial 4 to 9. The door opens into the mirror room.CODE8-6-5-9
- In the mirror room take the lantern, the bicycle chain, the red part on the table, the key to cage 4 and the "Laughing teenager" photo. Put the red part on the exit door (two more are needed). Note the cutlery table, the arcade machine, the token machine and the drawer.
Cat, dog and mouse cage
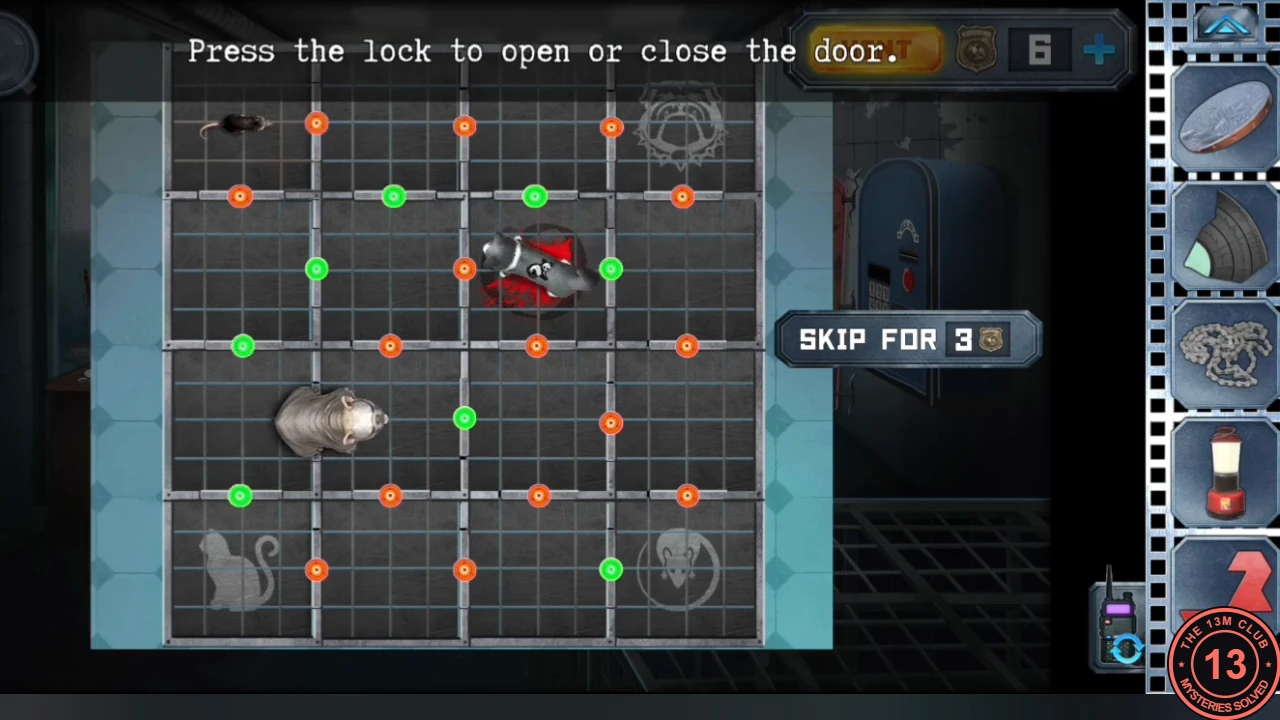
Locking and unlocking doors steers three animals that move on their own. This is a trial-and-error puzzle; the guide gives the method rather than every tap.
- Open the cage puzzle in the mirror room. Tap a lock to open or close that door. The cat, the dog and the mouse wander on their own through open doors, so close doors to block routes and open them to lead each animal to its own marked spot. Get the cat home first: that releases the panda figurine.
- Keep guiding the dog and mouse until all three sit on their places ("Everybody sit down!"). The empty cage is added to your inventory.
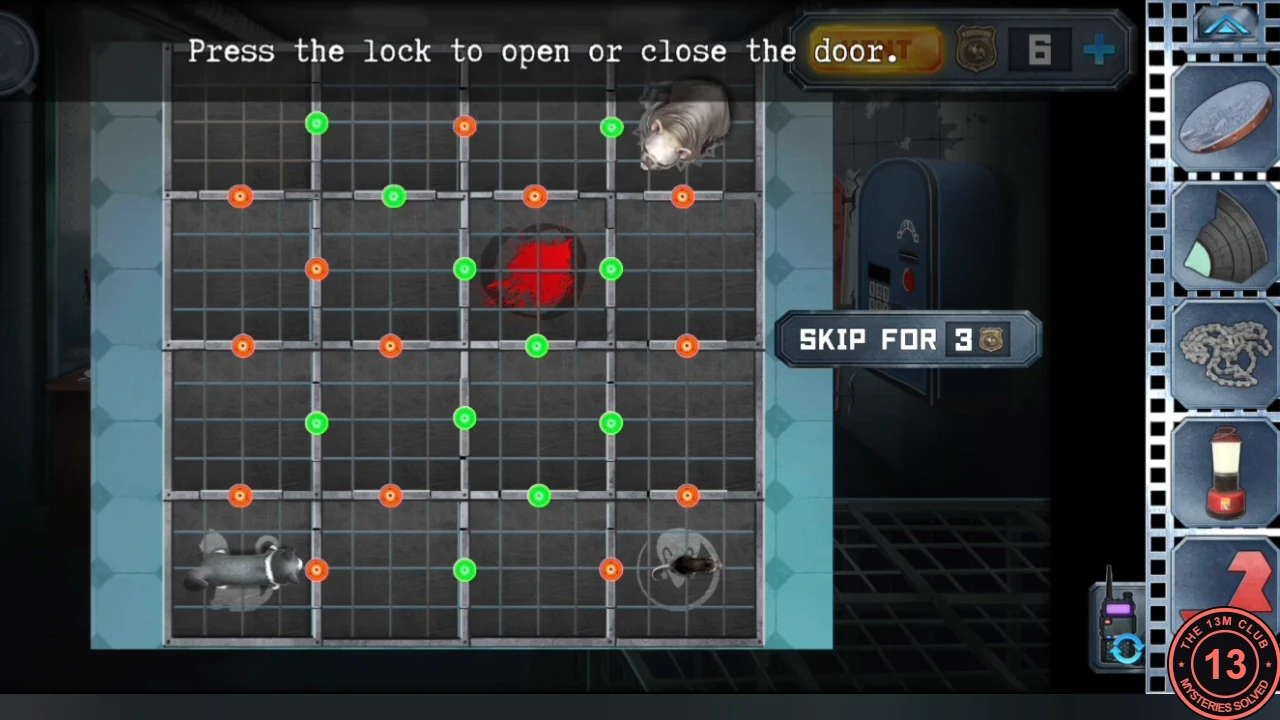
Solved: dog top right, cat bottom left, mouse bottom right. Example from one playthrough; the door states that get you there can vary.
Cave aquarium and fishing in the goat-camp hole
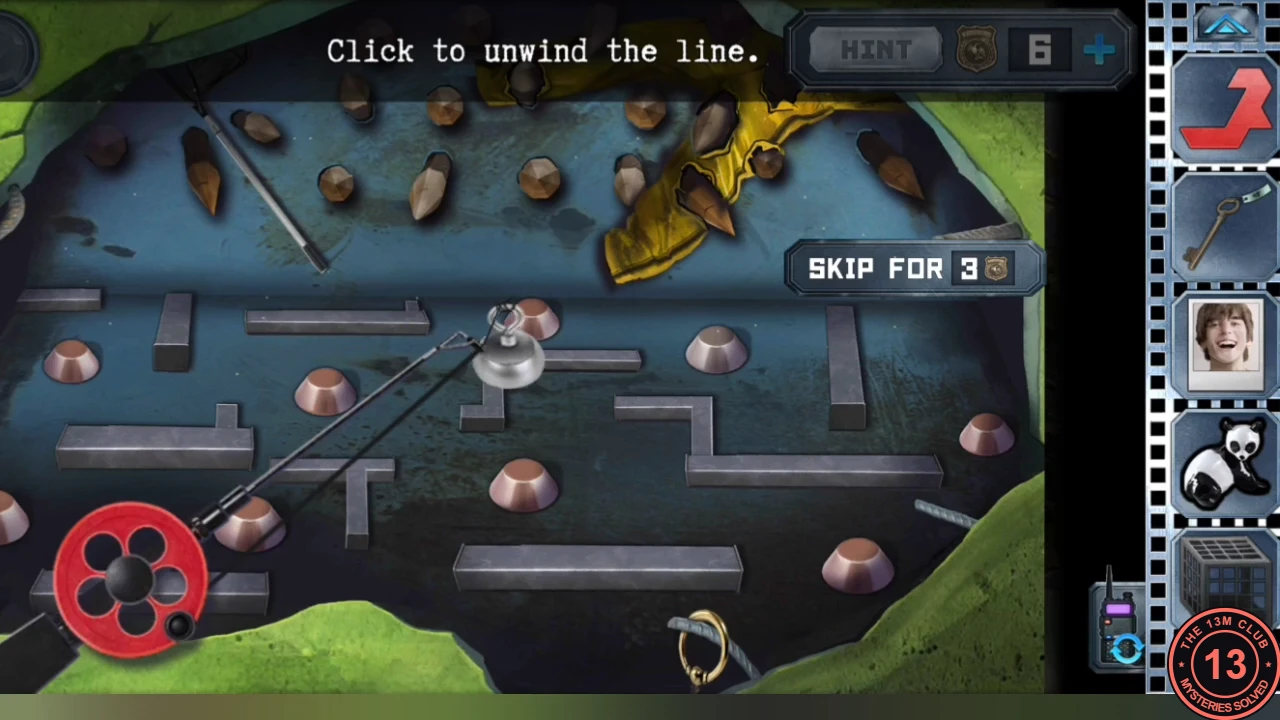
A magnetic fishing rod from the cave retrieves two items from the hole under the tarp.
- Use the lantern to light the zoo cave and take the magnetic fishing rod by the aquarium.
- Lower the rod into the hole in the goat camp. Unwind the line and steer the magnet down through the maze to the items at the bottom. Retrieve the round handle and the net.
- Use the net on the cave aquarium to scoop out the laser pointer (Alex needs it).
Flower lever, fourth setting: the cellar clue and the treehouse
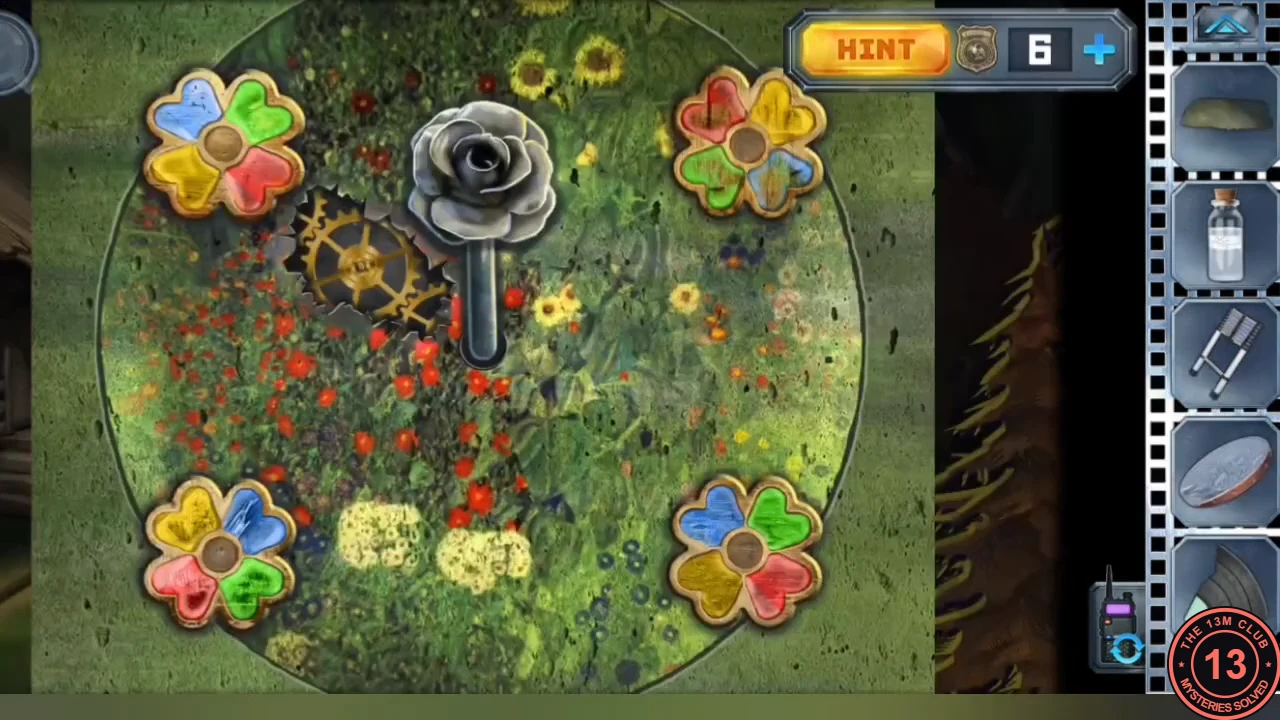
The cabin trapdoor hides the last flower clue, and the fourth setting raises a treehouse.
- In the cabin move the carpet, fit the round handle to the trapdoor and open it. Use a glowstick to light the cellar. Take the questionable meat and study the 4x4 coloured circles on the floor. Read them in 2x2 blocks, as with the earlier clues; under the green glowstick light the blue circles look teal.
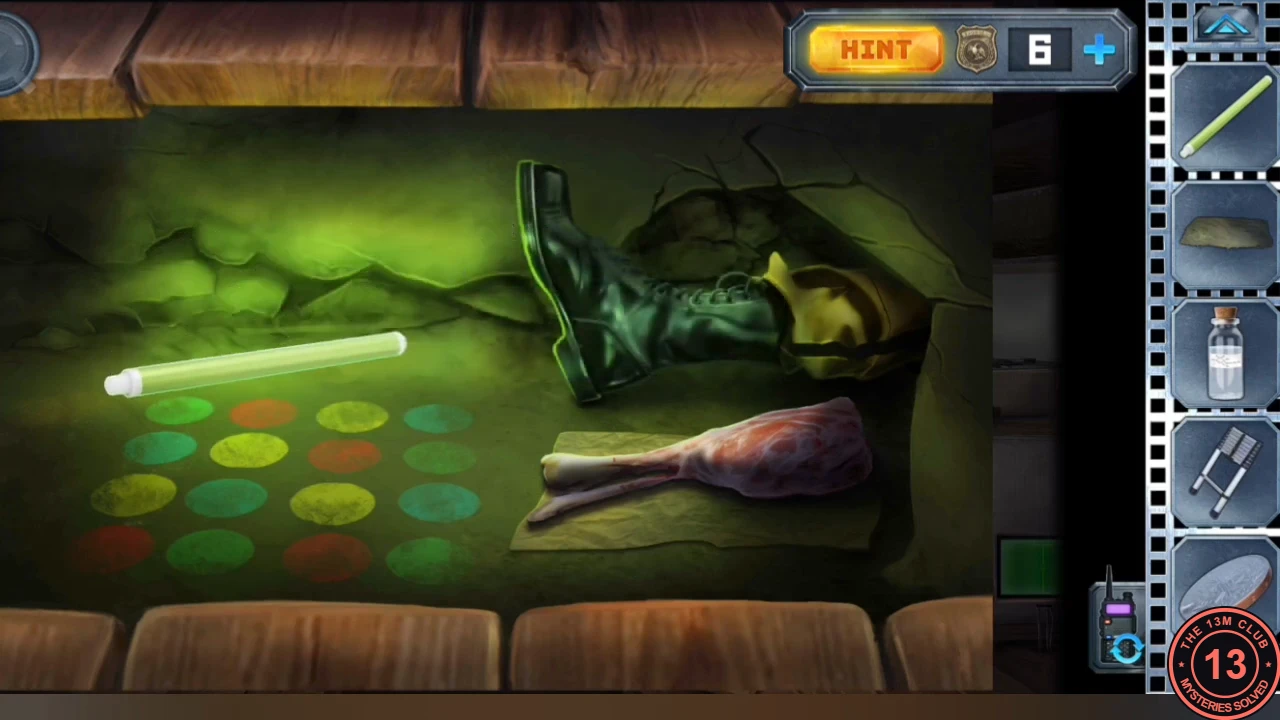
The cellar lit by a glowstick: the questionable meat and the rows of coloured circles used for the flower lever. - Set the four flowers on the flower lever to the colours from the cellar circles and turn the lever counter-clockwise. A treehouse appears; climb up with the ladder.
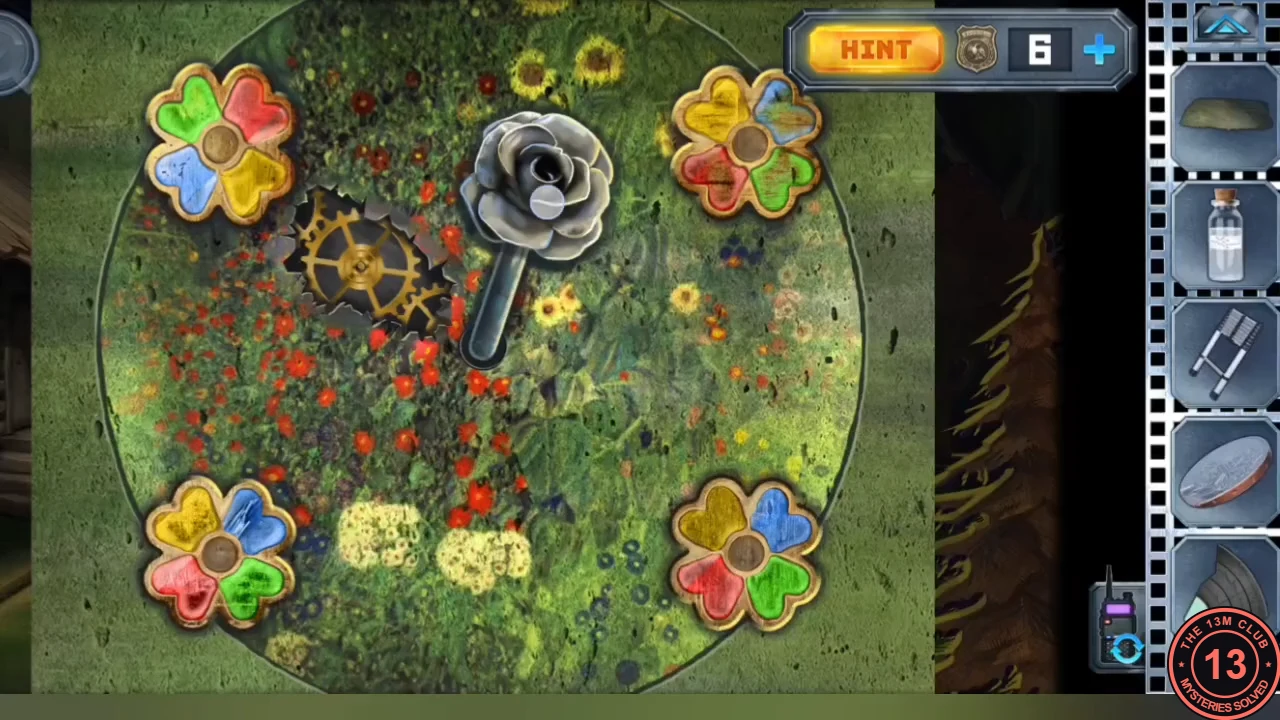
Fourth flower setting as entered in this playthrough, taken from the cellar circles, just before the lever is turned. - In the treehouse take the voice recorder and the jar with a toy. Note the hanging doll and the A, B, C, D blocks; the dolls are solved later.
Roasting the meat and the lion's gears
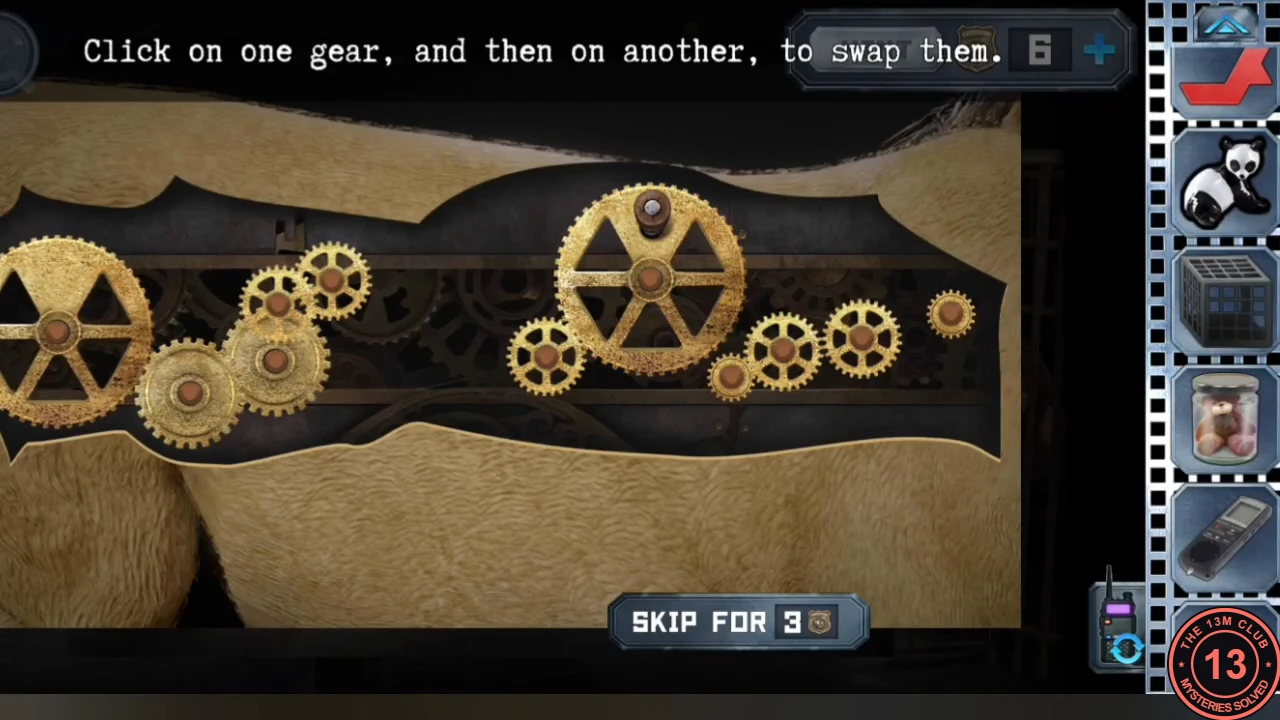
Cooking the meat sets off a sprinkler and drops a knife; the lion is calmed with a chain of gears.
- Put the questionable meat over the burning fire pan. The fire alarm goes off, water puts out the fire and a steak knife drops into the pan. Take the steak knife; the meat is now roasted.
- Put the "Laughing teenager" photo on the cabin photo wall.
- Unlock cage 4 with its key and step inside. At the gear panel on the lion, tap two gears to swap them until the drive train lines up, then use the bicycle chain to link the two gears in the middle and turn the leftmost gear. The lion calms down; take the head dummy.
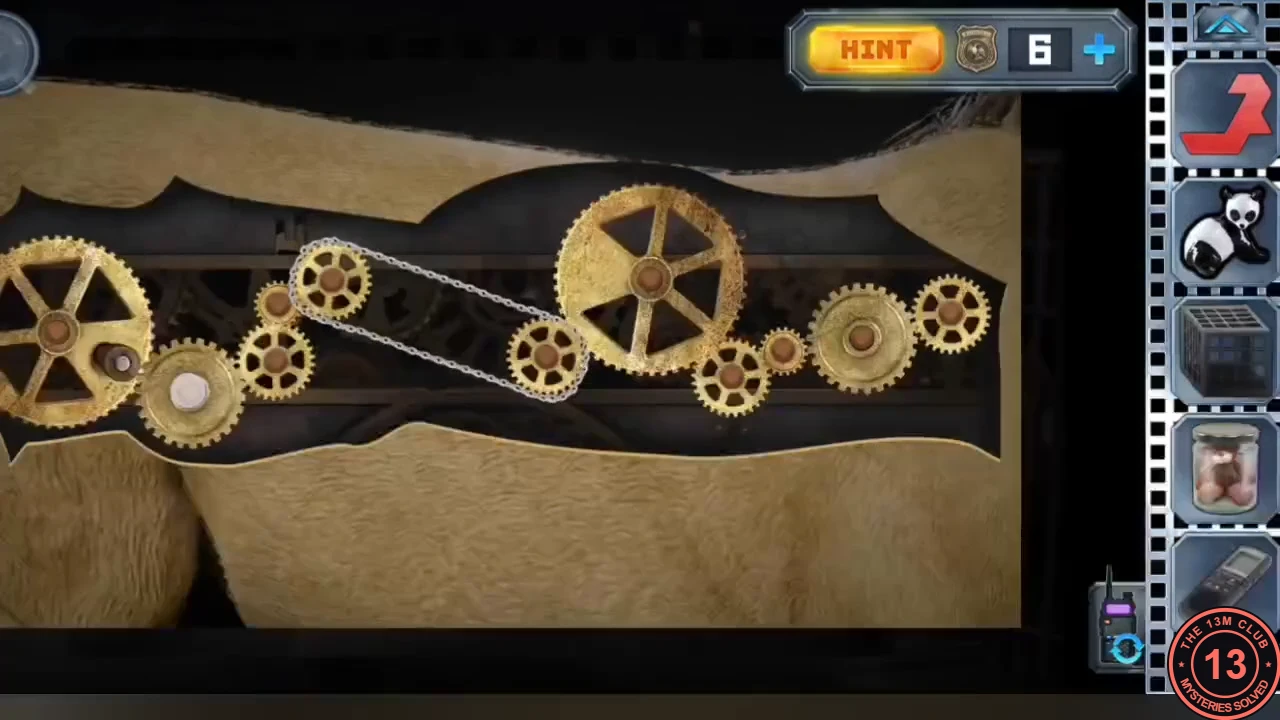
Solved: gears lined up and the bicycle chain linking the two middle gears.
The trap camera, moss and the jar shelf
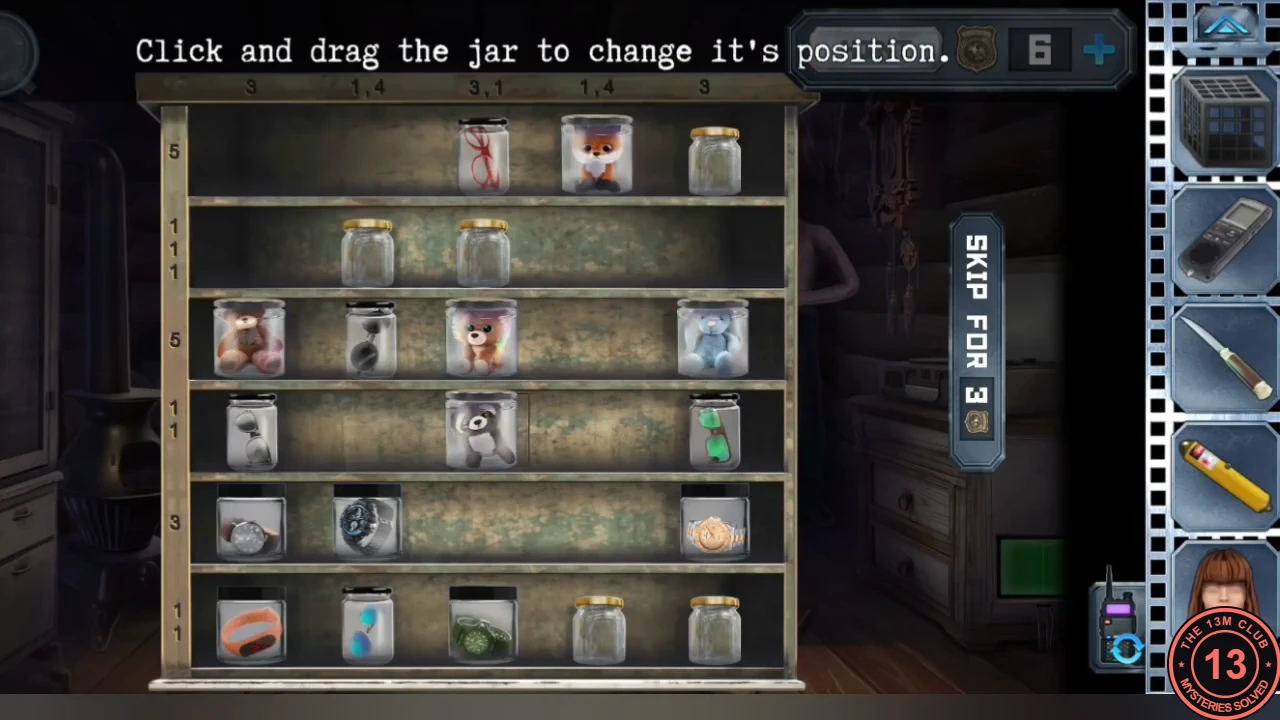
The roasted meat baits the camera trap, and the cupboard jars form a picture-logic puzzle.
- Put the roasted meat in the trap on the X in the goat camp, walk away and come back. A body in a bag now hangs where the trap was. Cut the bag with the sharpened coin and take the scraper and the bandage.
- Use the scraper on the fallen branch to collect moss.
- Put the toy jar on the cupboard shelves. Drag jars so that each row and column matches its numbers (separate numbers mean separate groups of jars with gaps between them). Column clues left to right: 3 | 1,4 | 3,1 | 1,4 | 3. Solution by row, top to bottom (J = jar, . = empty): JJJJJ, J.J.J, JJJJJ, .J.J., .JJJ., .J.J. Take the broken knife.
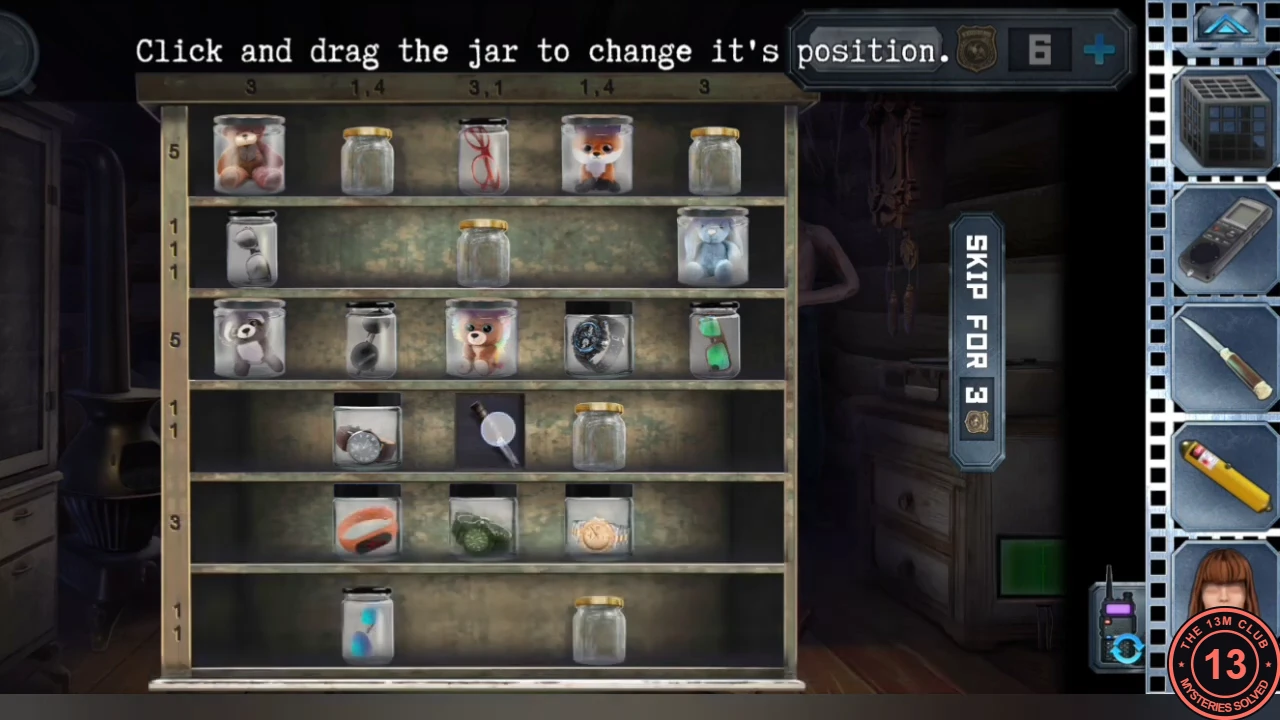
Solved jar shelf. A hidden compartment with the broken knife opens in the middle gap of the fourth row. - In your inventory combine the bandage with the wood from the branch to make a splint, and fix it to the prisoner's broken leg in the torture chamber. He sits up; take the artificial bird from his hand and put it on the last empty perch of the bird tree.