Menus, hints and switching between Alex and Anna
Scary Horror 3 is played as two prisoners, police officer Alex Marshall and journalist Anna Lee, who are held in separate rooms. Chapter 1 and Chapter 2 are both playable from the Chapters menu; Chapter 3 is listed as "In develop".
- From the main menu choose New Game (or Chapters, then Chapter 1) and press Continue on the 18+ disclaimer. After the intro you start as Alex in his cell.
The main menu: New Game starts Chapter 1; Chapters lets you pick a chapter. - Tap objects to inspect or collect them; items go into the inventory column on the right. Combine items by dragging one onto another. Police badges are the hint currency: HINT spends one, and every puzzle has a "Skip for N" button that spends badges. Once Anna has a working walkie-talkie, the walkie-talkie button at the bottom right switches between the two characters.
Alex's cell: the four drain valves
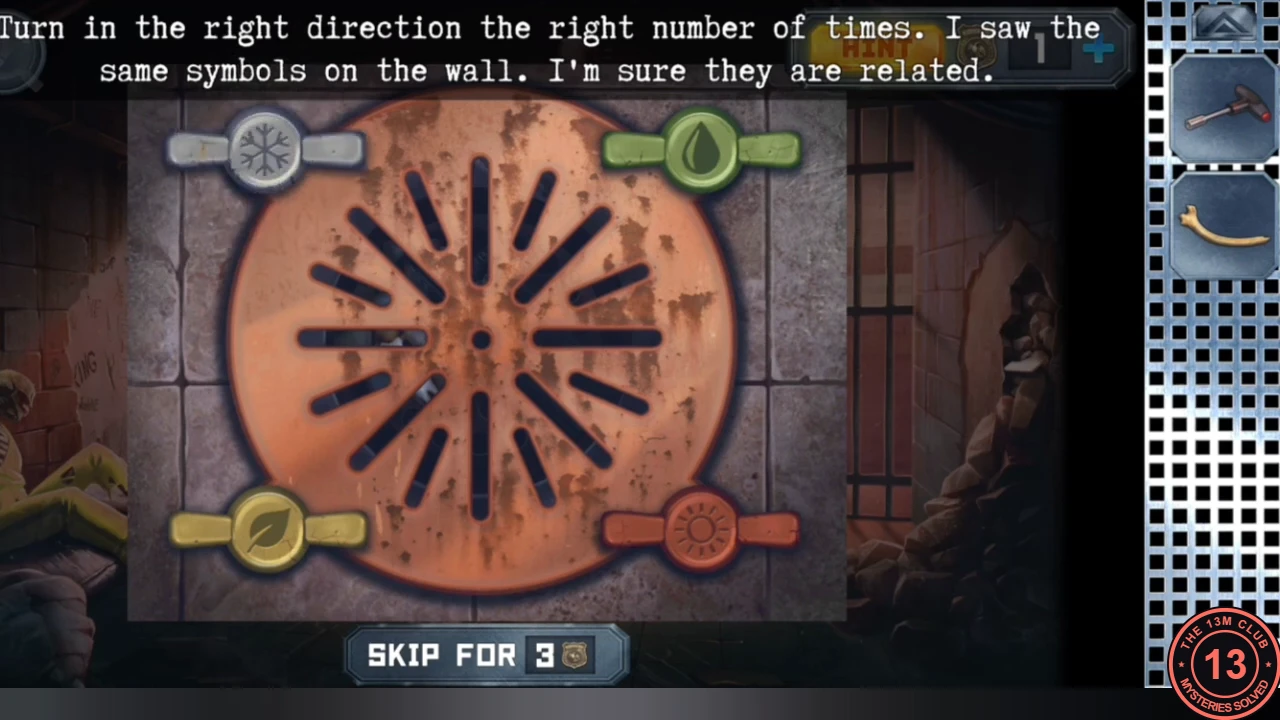
Alex starts behind electrified bars. The wall drawing tells you how many turns each valve of the floor drain needs.
- Collect the screwdriver, the rag and the rock lying around the cell.
- Use the rock on the skeleton's rib cage. Take the sharp bone, and the police badge inside (it adds one hint badge).
- Wipe the dirty left wall with the rag. It shows four symbols with small sums: two leaves with one crossed out (2 - 1), two droplets (1 + 1), a snowflake with IV - I, and a sun with IX - V.
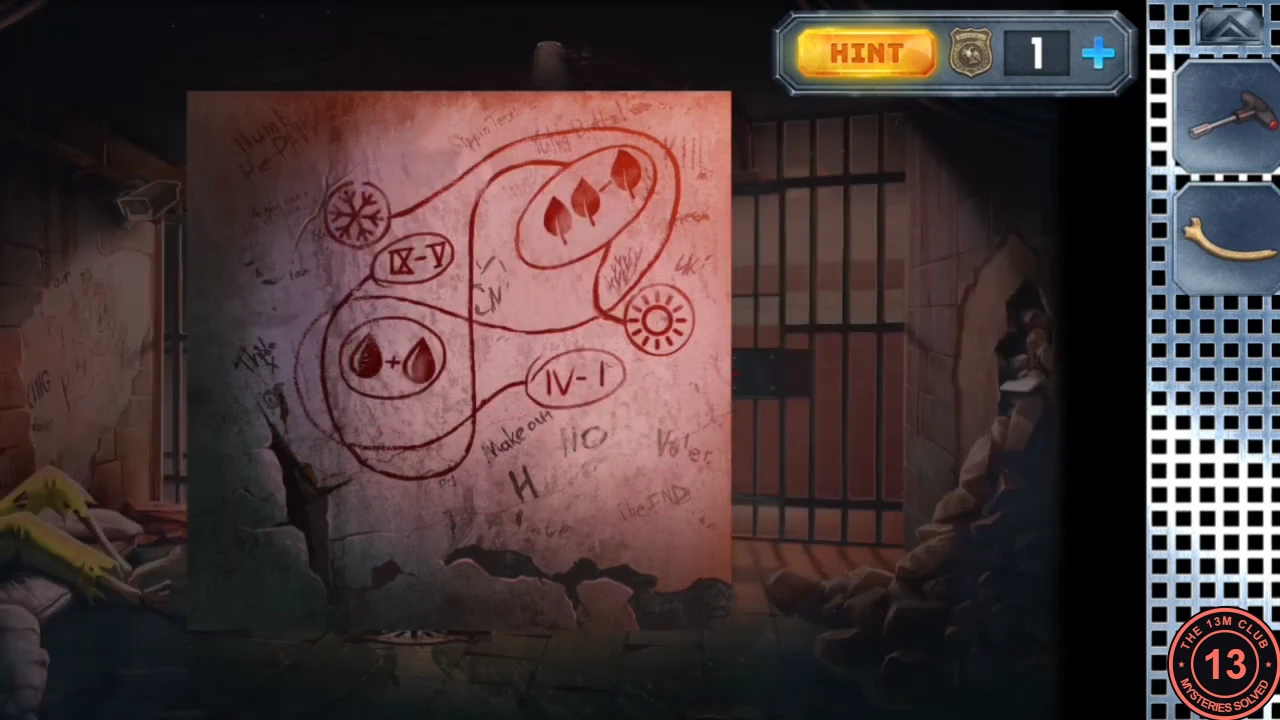
Clue: the wiped wall drawing that gives the number of turns for each drain valve. - Open the drain in the floor. Tap each valve the matching number of times: leaf 1, droplet 2, snowflake 3, sun 4. The lid opens.CODE1-2-3-4
- Take the walkie-talkie and the pile of teeth from the drain. Alex calls out on the radio and the view switches to Anna.
Anna's padded cell: frames that add up to 13
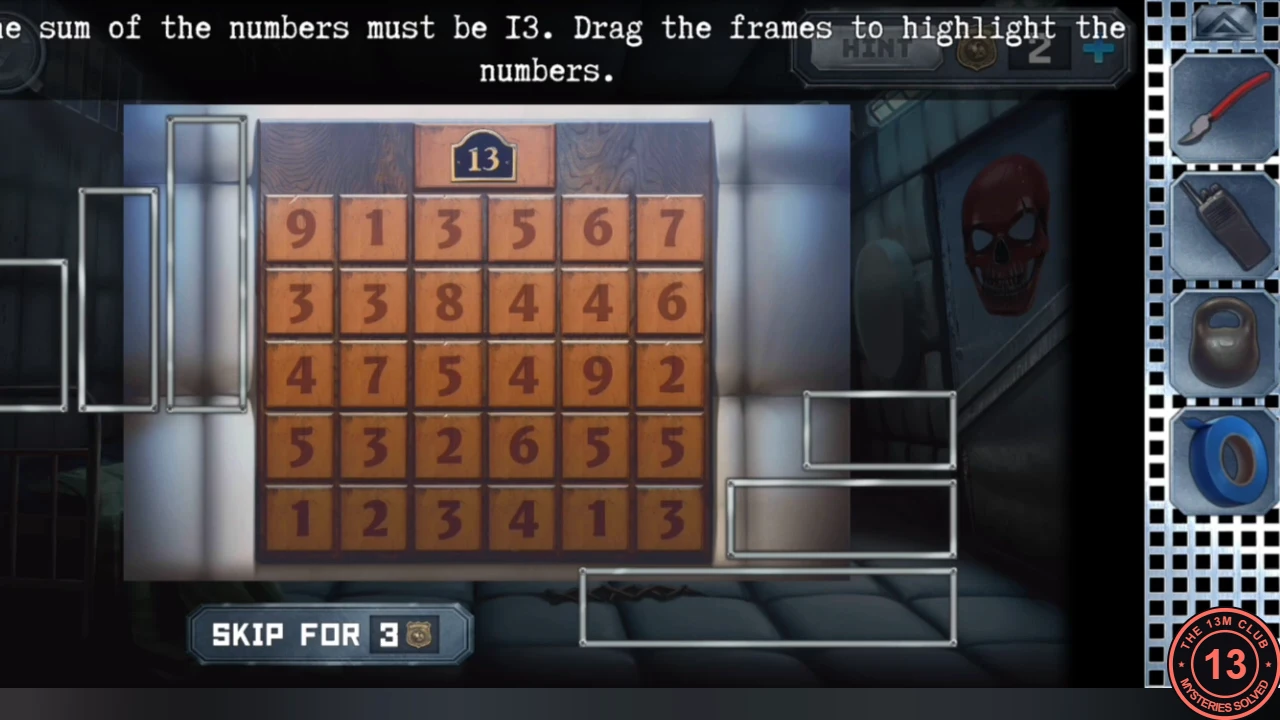
Anna wakes in a padded cell. The numbered board on the wall needs frames placed so that every frame encloses numbers totalling 13.
- Pick up the half of the wire cutters (a red-handled cutter jaw) lying on the floor near the foot of the bed, the dead walkie-talkie from the floor, the kettlebell from the rabbit doll on the bed and the roll of tape. Keep the cutter half; the other half turns up later in this cell.
- Open the number board (6 columns by 5 rows, with a 13 badge on top). Drag each empty frame onto the grid so that the numbers inside every frame add up to 13. Every frame must be used and the frames cannot overlap. When all frames are correct a CONGRATULATIONS sign lights and the ceiling fabric bursts.
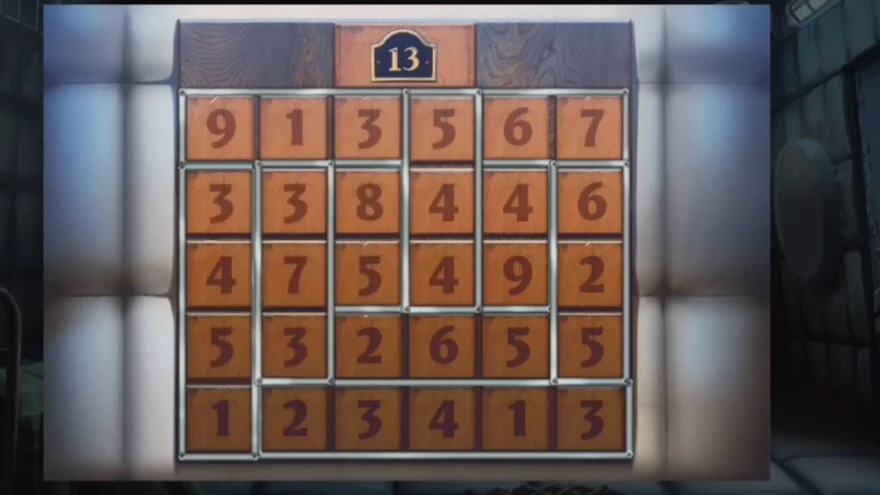
Solved: every frame encloses numbers totalling 13. Example from one playthrough. - Use the kettlebell on the mirror to break it and take the shard of glass and the "Smiling lady" photo behind it. Combine the shard with the tape to make a glass knife.
- Use the glass knife on the stitched seam in the floor padding. It opens to show red fabric with wires: this is the power line for the cell bars.
- Cut open the rabbit doll's belly with the glass knife to get batteries, and put them into the dead walkie-talkie. Anna and Alex can now talk, and the walkie-talkie button switches characters.
- Once the board is solved, the second half of the wire cutters drops from above onto the floor ("They were dropped from above!"). Pick it up, then combine the two halves in the inventory to make the wire cutters. Use the wire cutters on the wires in the floor seam. This cuts the power to Alex's cell bars.
Alex's cell: the access card and the lock pins
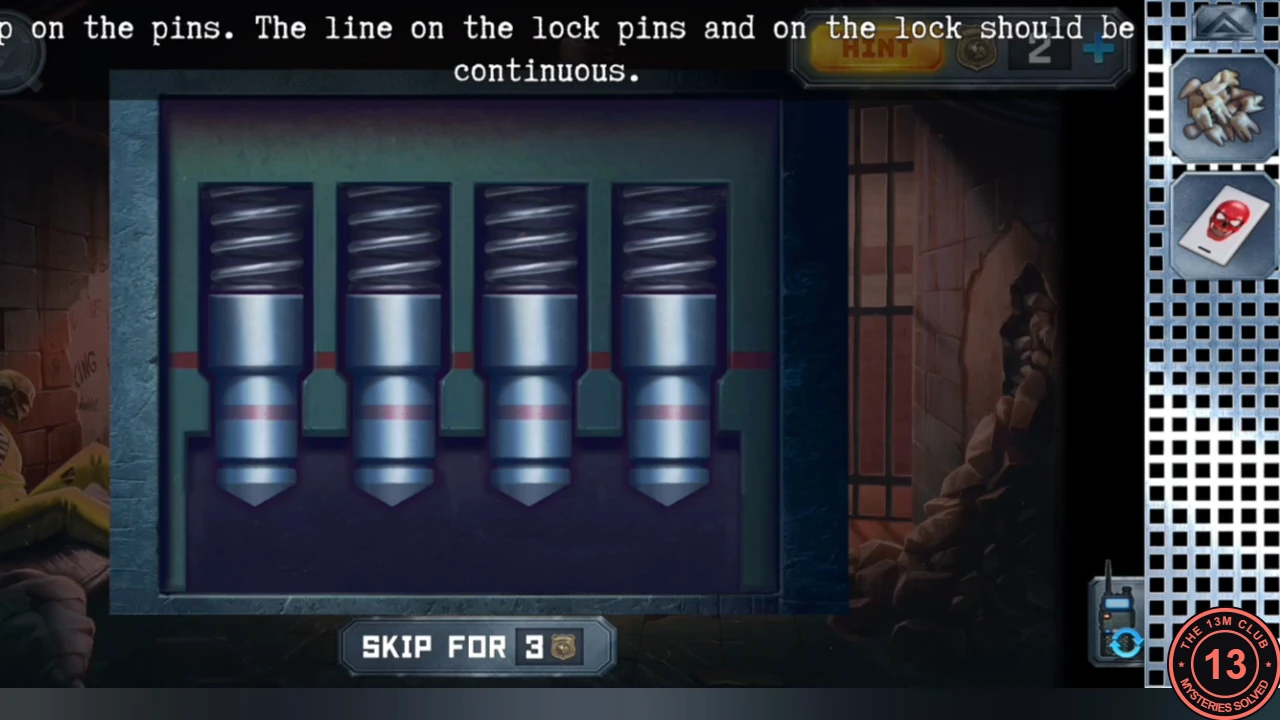
With the power off, Alex can work on the lock of his cell.
- Switch to Alex. Open the lock panel on the bars and use the screwdriver on its four screws to remove the cover.
- Use the sharp bone on the cracked stones in the right wall to pry out the red skull access card.
- Return to the open lock. Tap the spring pins so that the line drawn on each pin continues the line on the lock body. When the line is continuous across all pins the cell opens and Alex steps into the prison hallway.
Prison hallway: the skull panel pipe puzzle
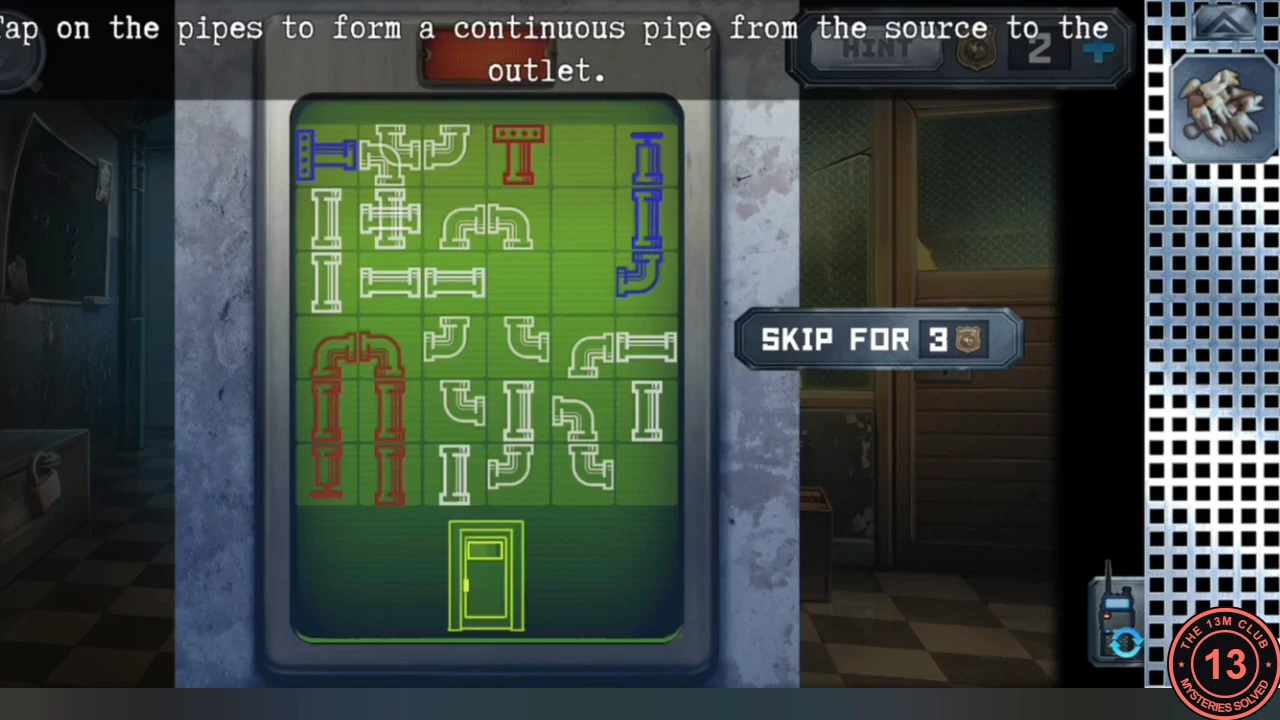
The hallway has a blue hospital door, a reception window, a chest, a bucket and a red skull panel that controls Anna's door.
- Take the bloody mop head from the bucket.
- Insert the red skull access card into the panel beside the hospital door. Rearrange the pipe segments so that both the blue and the red pipes run without a break from their sources to the outlet at the door. When both flow, Anna's padded door unlocks.
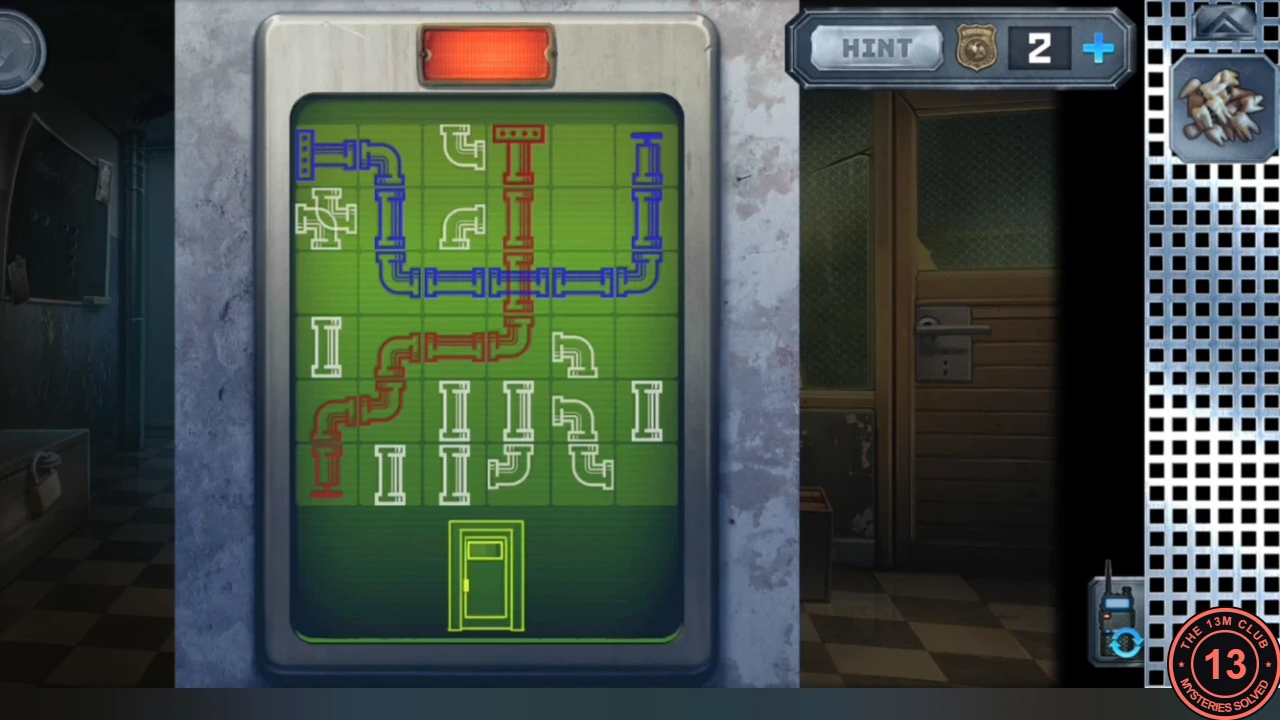
Solved: the blue and red pipes both run without a break. Example from one playthrough.
Torture chamber: aquarium power and the rotary wheel
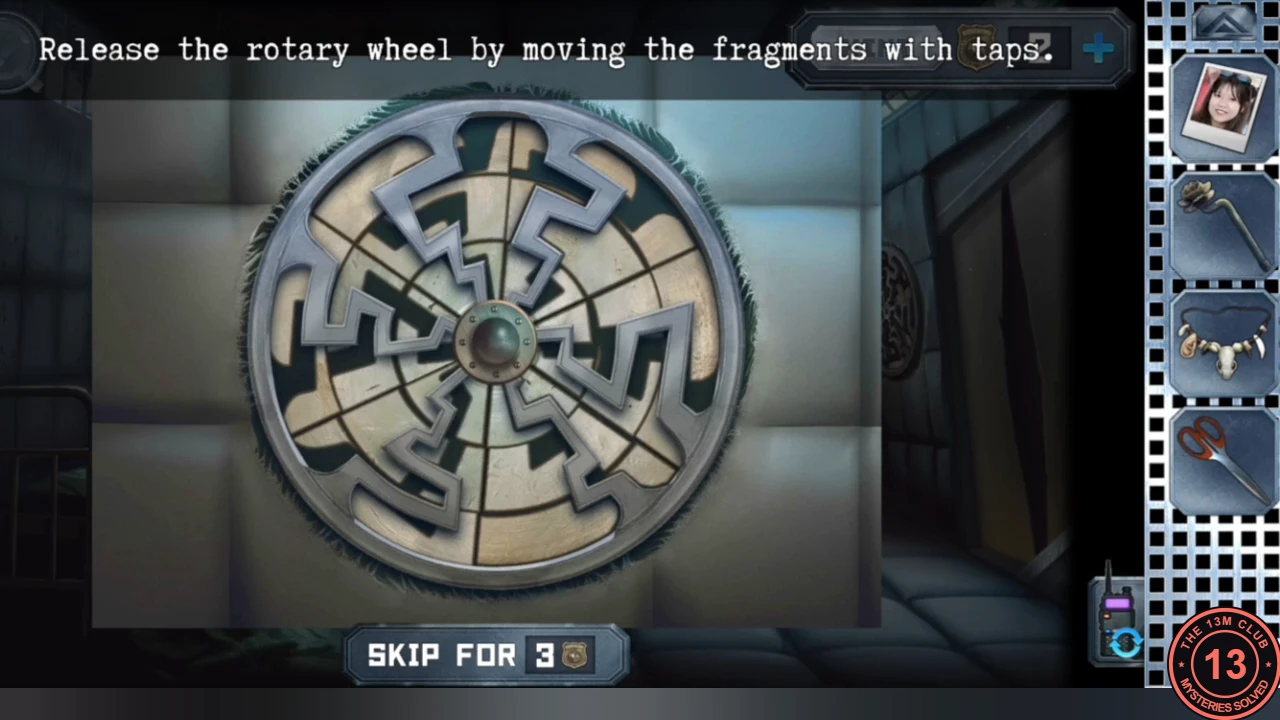
Anna cuts her way out of the padded cell into a torture chamber with a prisoner on a rack, an iron maiden, an aquarium and a cage.
- Switch to Anna and use the glass knife on the padded wall to cut through into the torture chamber.
- Take the flower lever (a metal flower on a rod), and the fang necklace from the iron maiden.
- The aquarium is electrified. Use the wire cutters on the cable beside the door to cut its power, then take the scissors from the aquarium.
- Go back into the padded cell and use the scissors on the round patch of padding. Behind it is a rotary wheel: tap fragments to swap them within the same ring until the picture is whole with no shadowed pieces. Take the caster wheel.
Office: the fan maze
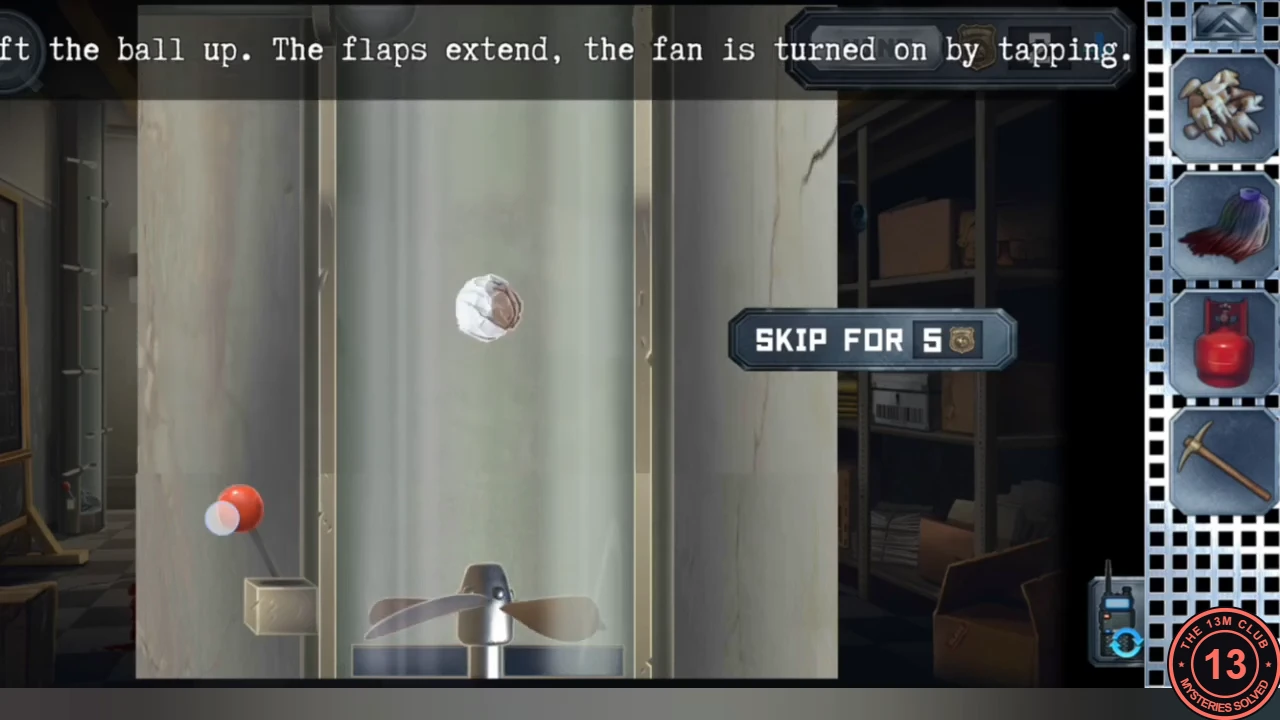
Alex reaches the office through the hallway. The fan box on the wall blows a paper ball through a maze, and the paper ends up with Anna.
- Switch to Alex and enter the office. Take the pickaxe and the red propane tank.
- Open the fan box on the wall. Tap to raise the flaps and switch the fan on so the paper ball is blown up and through the maze. When it gets out, the paper is delivered to Anna (it is the instruction sheet for the forest trap).
Office: the bell-tower pieces and the shelves
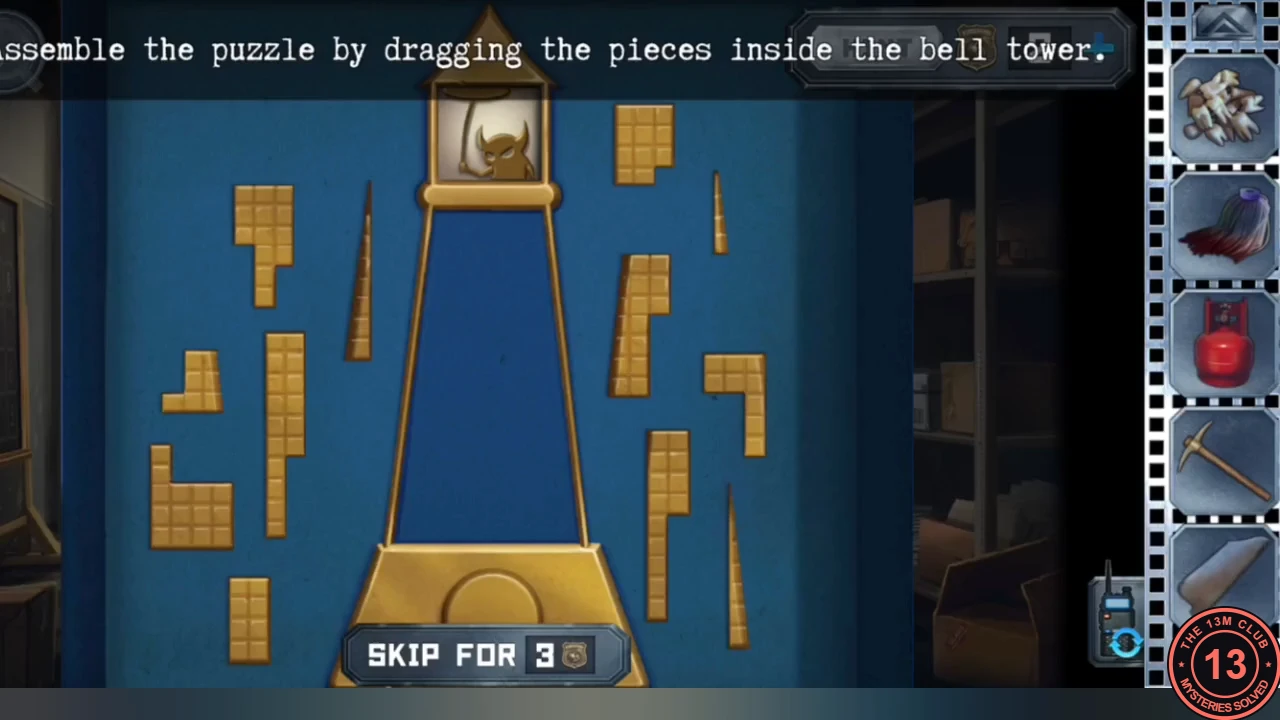
The office exit is barred with a steel bar that you can only remove much later, but the door, the desk and the shelves already hold useful items. The blue box on the desk holds a bell-tower piece puzzle.
- Tap the barred EXIT door and take the saw blade from it. Then open the left-hand drawer of the desk and take the special key (a key with several flat prongs); it opens the reception door.
- Open the blue box on the desk. Drag all the pieces into the bell-tower outline so it is completely filled. Take the round hedgehog button.
- At the shelves, slide the boxes aside to search behind them. Take the raven magnet and the "Cops and Thieves" cartridge.
Reception door lock and the hallway chest
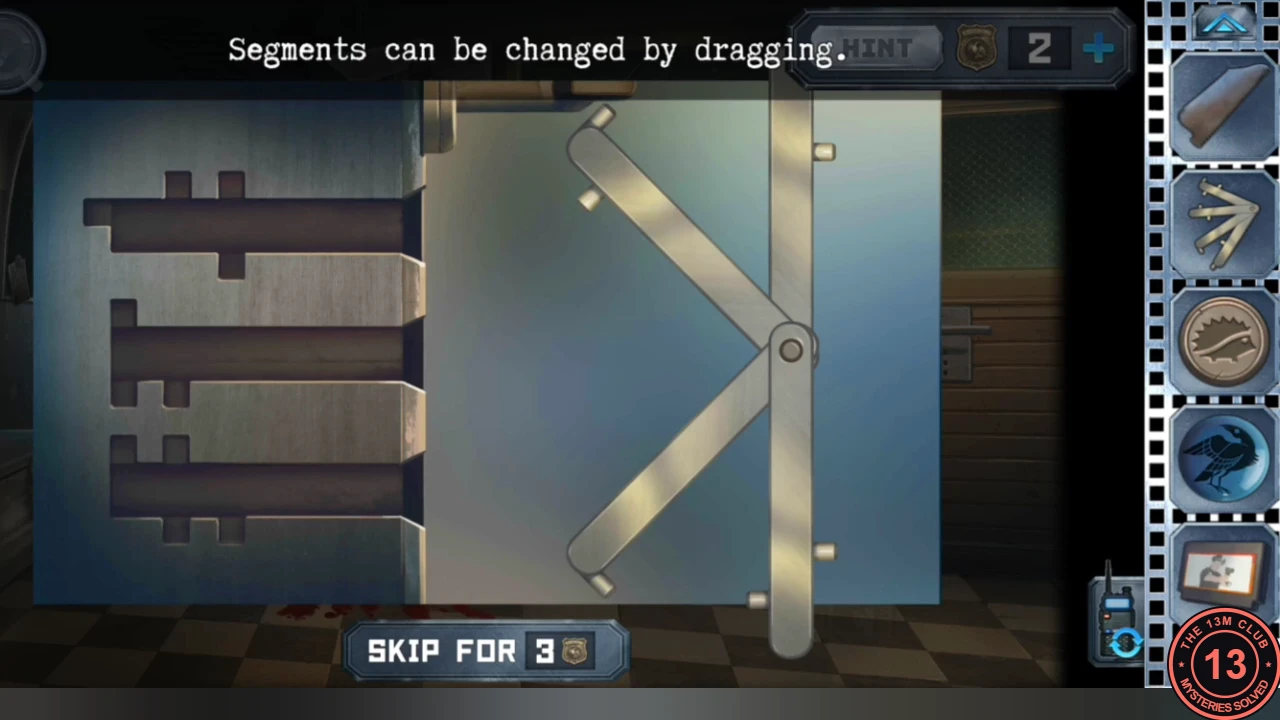
The special key from the office desk opens the reception door, and the pickaxe breaks the chest in the hallway.
- Use the special key from the office desk on the reception door. In the lock, drag the bar segments until the three shapes form the key outline, and the door opens.
- In the reception office take the set of number tiles from the table and the red skull mask hanging on the coat stand. The torn photo on the table is missing pieces; you will finish it later.
- Back in the hallway, break the chest padlock with the pickaxe. Move the yellow uniforms aside and take the water bottle and the small key.
Office: the white box layered slider
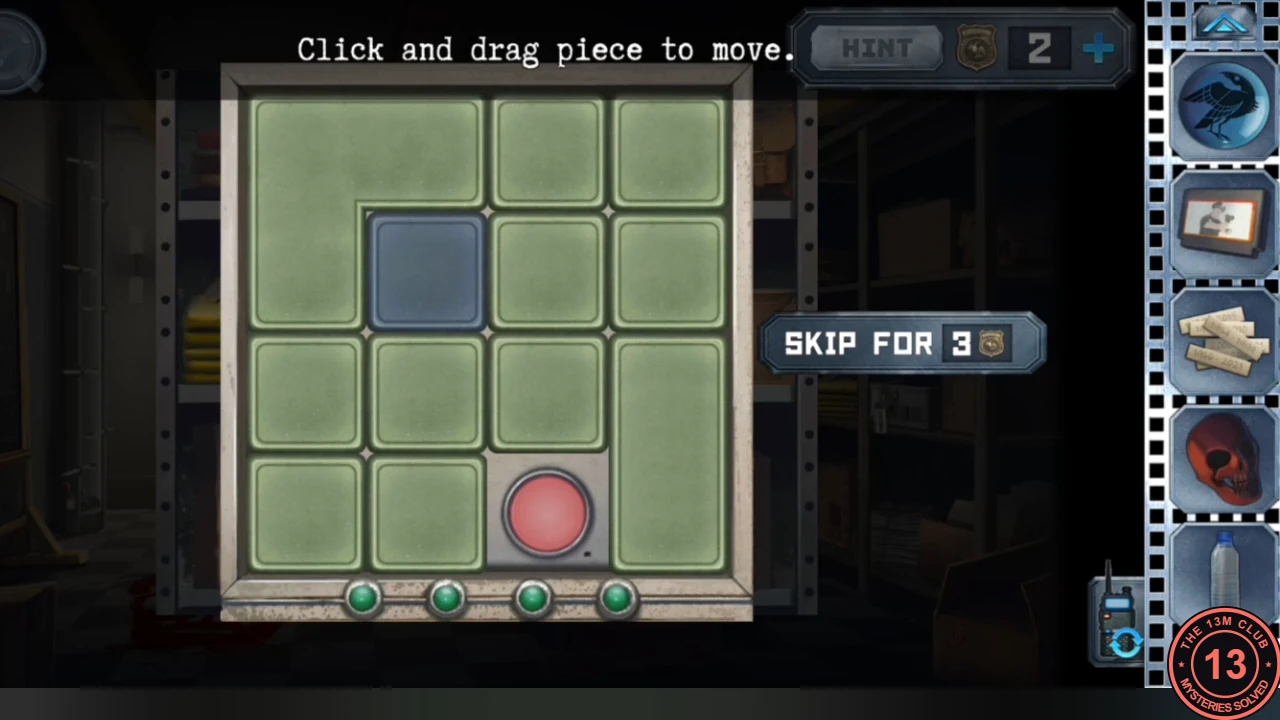
The small key from the hallway chest opens a white box on the office shelf. Its sliding layers hide the battery for the console.
- In the office, open the white box on the shelf with the small key. Slide the green and grey tiles until all four red buttons can be pressed through the layers (each layer lights a green lamp). Take the battery.
- Put the round hedgehog button into the empty slot on the ring lock of the blue hospital door. The door now asks you to "Put the animals in the correct order"; the order comes from a clock that Anna finds later, so leave it for now.
The blackboard match-stick sums
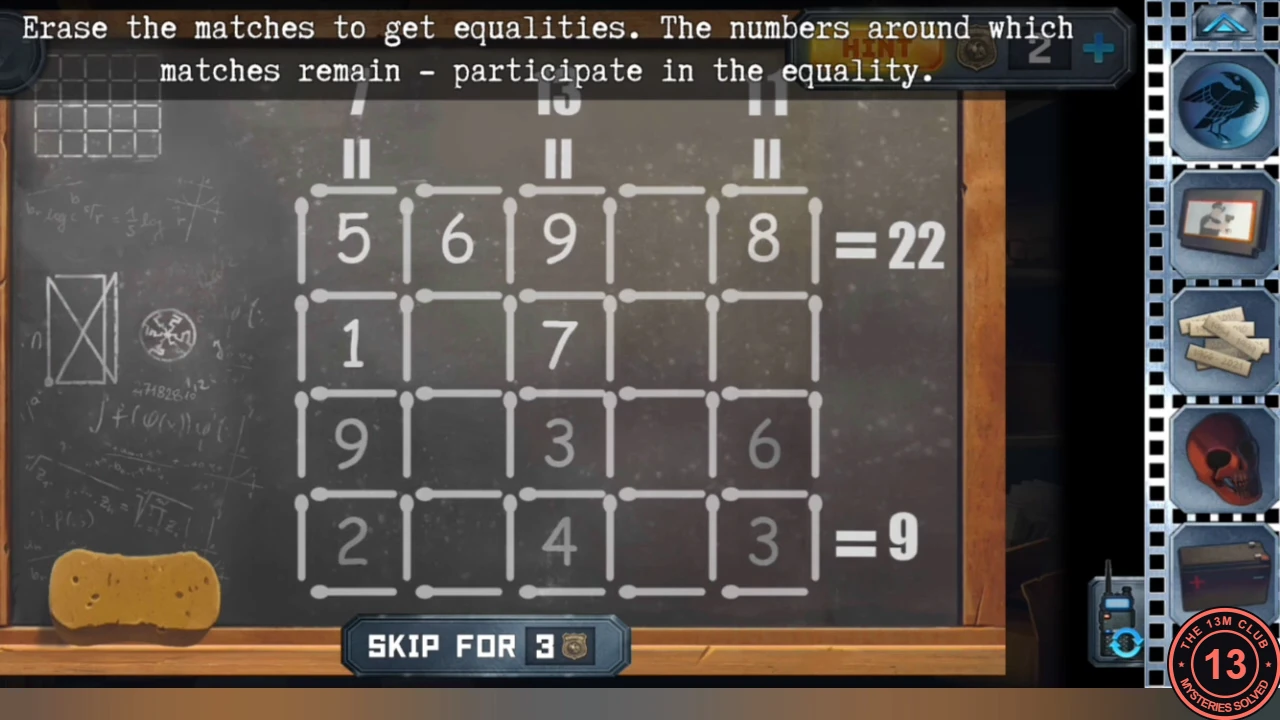
The hallway blackboard holds two clues: a sum puzzle that becomes a later safe code, and a chalk drawing that tells Anna how to free the prisoner.
- Use the water bottle on the blackboard sponge. Now erase match-sticks so that only some numbers stay boxed. The column totals at the top (7, 13, 11) and the row totals on the right (22 and 9) must be met by the boxed numbers. Keep the boxes around 5, 9 and 8 in the top row and around 2, 4 and 3 in the bottom row.
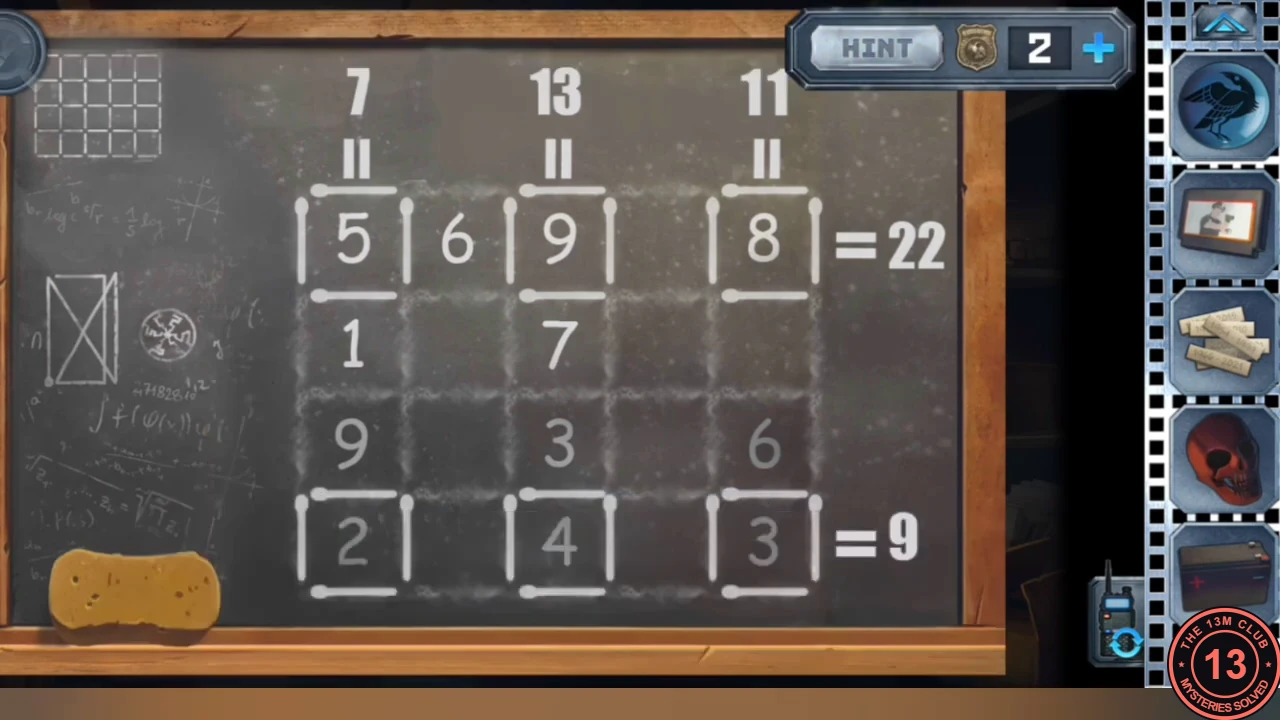
Solved: boxes around 5, 9, 8 (= 22) and 2, 4, 3 (= 9); the drawing at the left is the prisoner clue. - Note the chalk drawing at the left of the board: a rectangle with an X through it, an extra line down its right-hand side and a small dot at its bottom-left corner. It is the knot order for the prisoner in the torture chamber; the next section explains how to read it.
Torture chamber: loosening the prisoner's knots
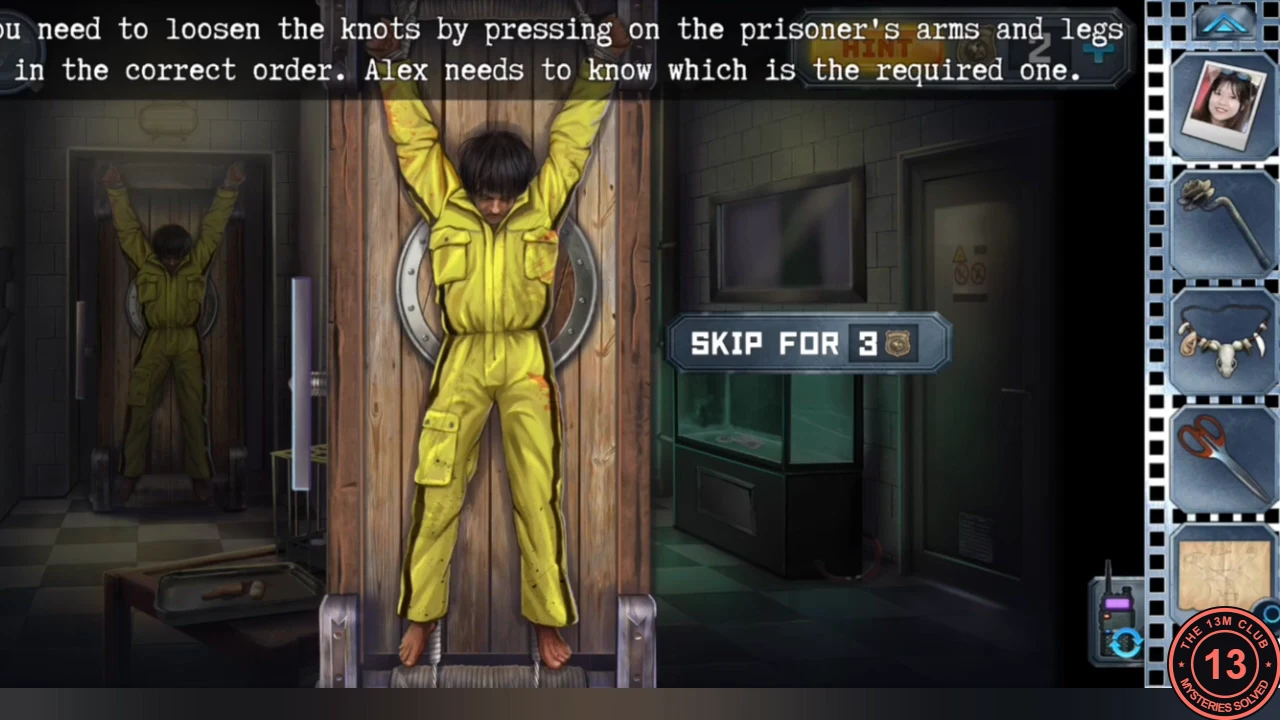
The prisoner on the rack is tied at both wrists and both ankles. Tapping a limb loosens its knot, and the knots must be loosened in the order drawn on the hallway blackboard.
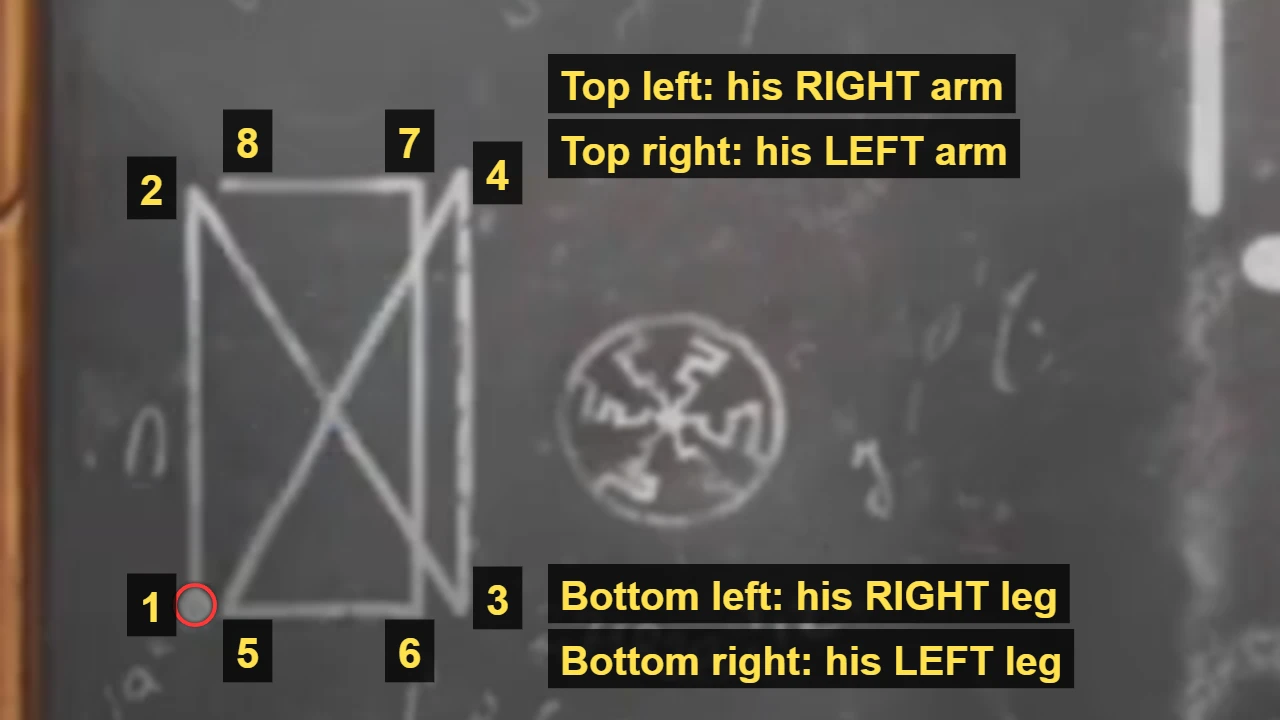
- Switch to Anna. Place the caster wheel in the round slot in the prisoner's rack. The four corners of the chalk drawing stand for his limbs as you face him: hands at the top, feet at the bottom. Start at the dot (bottom left) and follow the chalk lines corner to corner, tapping the limb at each corner; every line is used once. The order that freed him in the recording, tap by tap, is: bottom left, top left, bottom right, top right, bottom left, bottom right, top right, top left. Because you are facing him, that is his right leg, right arm, left leg, left arm, right leg, left leg, left arm, right arm. After the eighth tap he drops to the floor, unconscious, with a broken leg.