Gym mirror and the utility room fuses
Alex bounces the gym laser to free a key, then restores the fuses in the basement utility room.
- In the inventory drag the mirror fabric onto the piece of plastic to make a mirror. Put it on the electric chair so the laser is reflected onto the weight machine; a gold key falls from behind its glass. Take the key to the utility room.
- Open the basement utility room with it. Take the key with a red skull from the workbench. Use the weird key (the grey socket tool) to undo the four odd bolts over the fuse box.
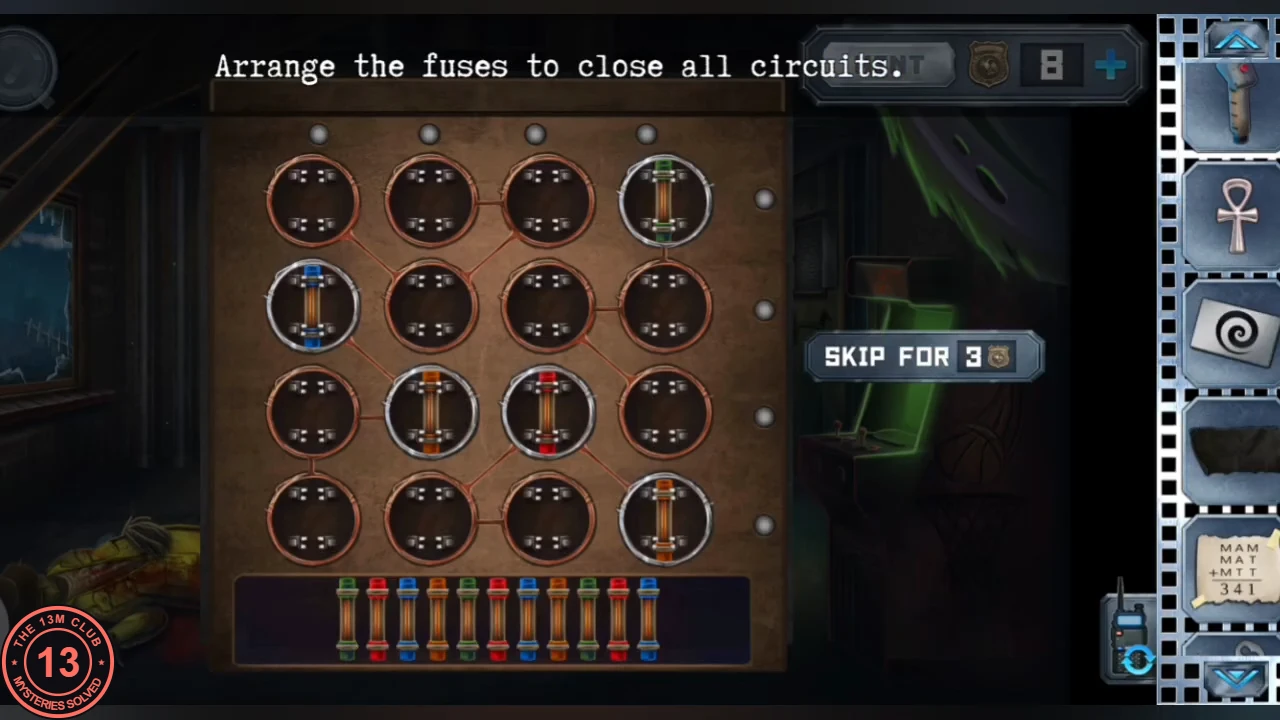
- "Arrange the fuses to close all circuits": drag the fuses from the fuse set into the sockets so that the colours at each fuse's ends match the neighbouring contacts. Each row and column lamp turns green when its circuit closes. Fill the sockets with only one possible fuse first. When all are green Alex realises the elevator leads to Anna.
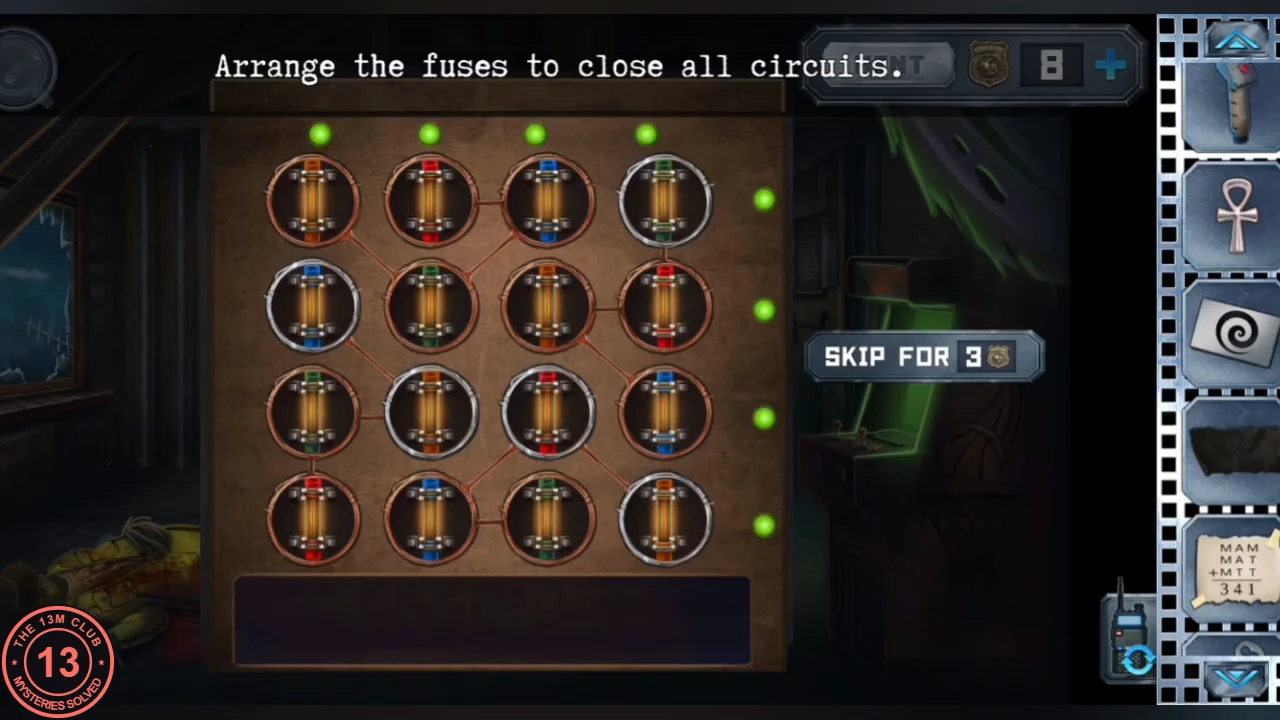
Solved: every row and column lamp is green (example from one playthrough).
Weight machine: the laser disks
The blue lever from Anna's elevator redirects the gym laser into a disk lock that opens Alex's office.
- As Anna, take the blue lever from the floor of the bloody elevator and send it to Alex.
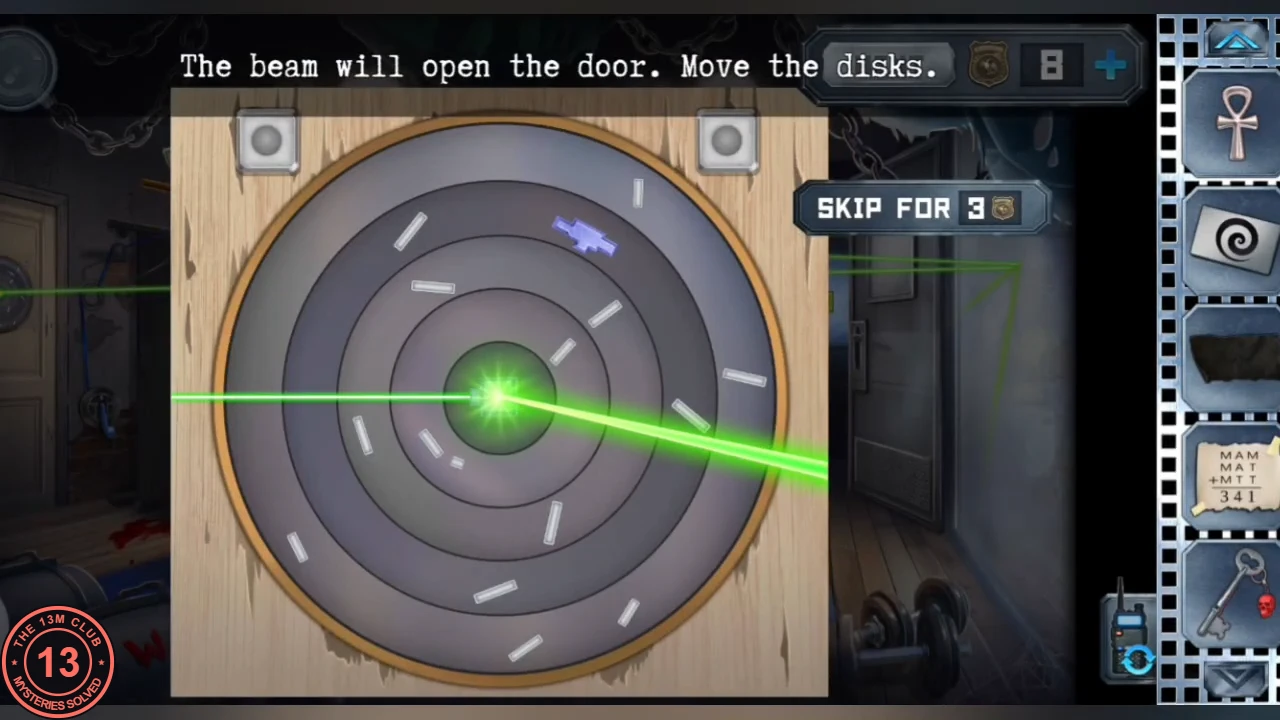
- As Alex, put the blue lever in the weight machine to redirect the beams. "The beam will open the door. Move the disks.": rotate the rings of the wall disk. Each ring carries small mirror bars that bounce the beam; arrange them so the beam is reflected up to both grey targets in the top corners, which turn red when hit. Turn the outer rings first, then fine-tune the inner ones. The door opens into Alex's office.
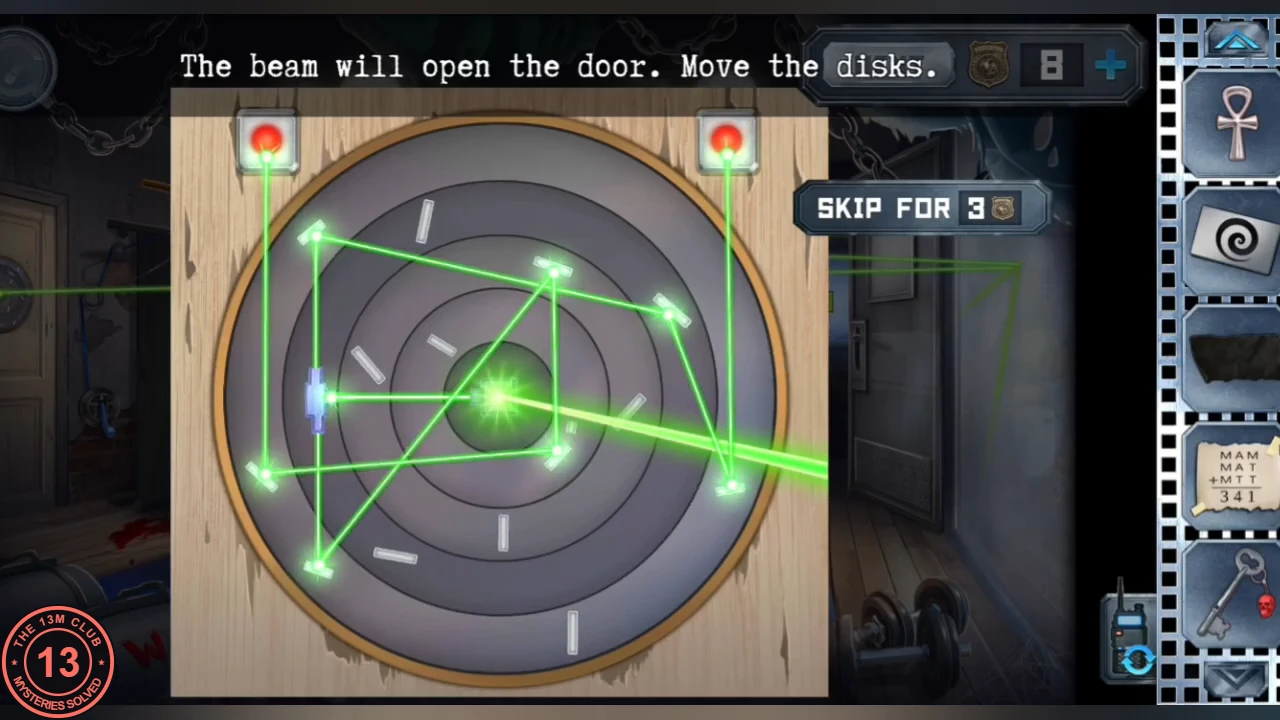
Solved: the beam bounces off the disk mirrors and lights both targets red (example from one playthrough).
Office: the picture frame of sums and the eye chest
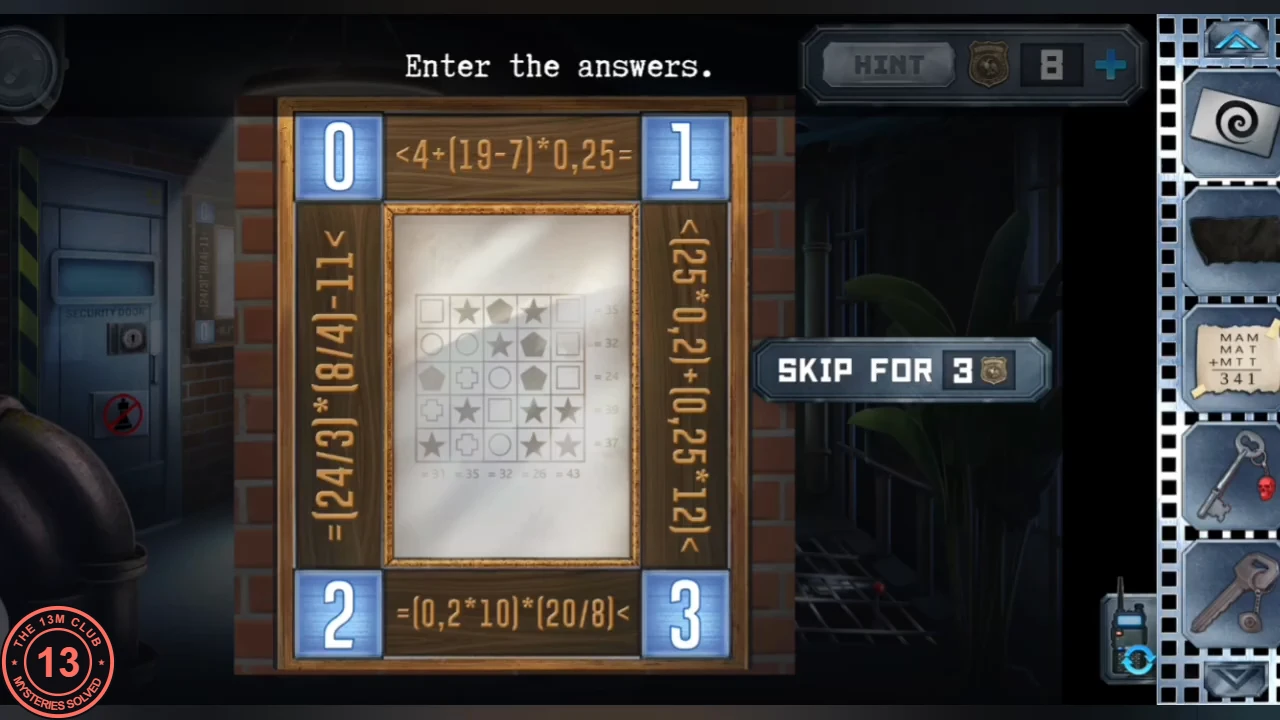
Alex's office has a picture frame of sums, a safe slot in the brick wall, a rock-paper-scissors table behind glass and a security door.
- Pick up the key with an eye from the office floor near the entrance.
- Open the picture frame of sums ("Enter the answers."). The four sums work out as 4 + (19 - 7) x 0.25 = 7, (24 / 3) x (8 / 4) - 11 = 5, (25 x 0.2) + (0.25 x 12) = 8 and (0.2 x 10) x (20 / 8) = 5. Together with the < and = signs between them, the corners are top left 6, top right 7, bottom left 5 and bottom right 9. Take the mathematical picture.CODE6-7-5-9
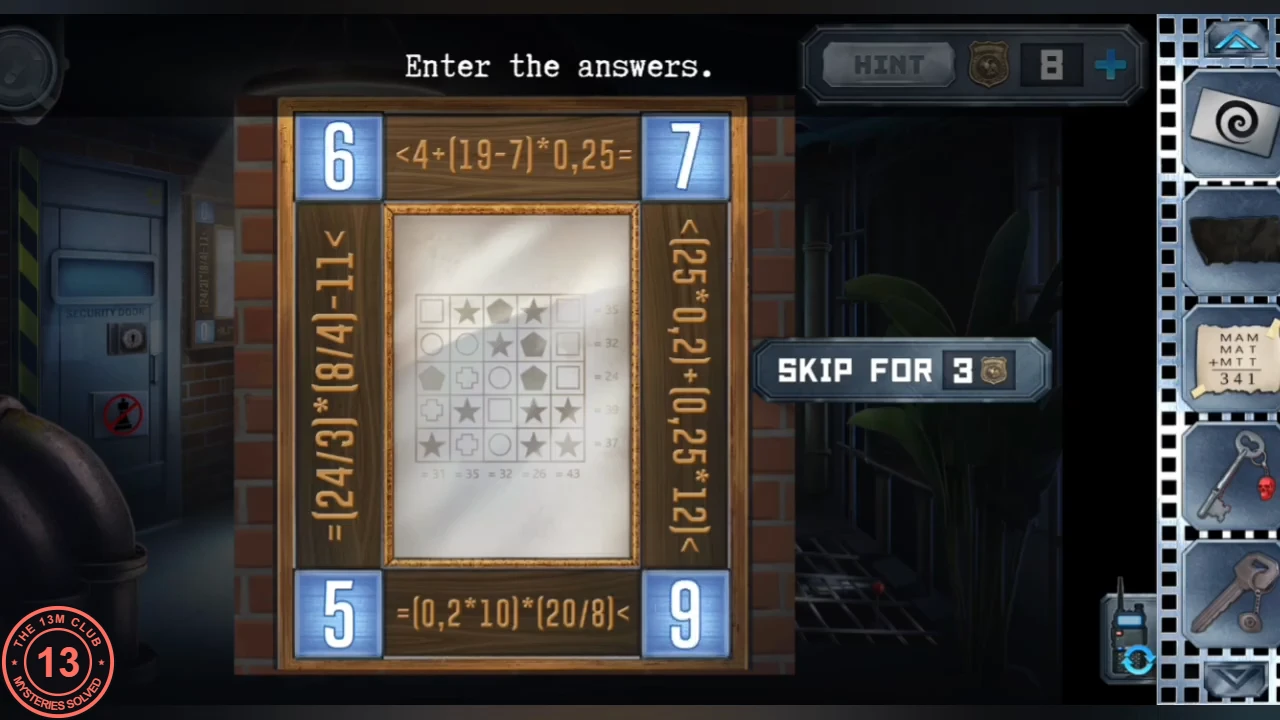
Solved: corners 6 (top left), 7 (top right), 5 (bottom left) and 9 (bottom right). - Put the spiral card in the spiral slot of the office brick wall. Try the rock-paper-scissors table: the red-masked man reads Alex's moves, so leave it for now.
- Send the key with an eye and the mathematical picture to Anna. As Anna, open the padlock on the furnace-room chest with the key with an eye. Inside are a locked book with an empty space on its cover, and a lock pick. Send the lock pick to Alex.
Office security door: the lock pick
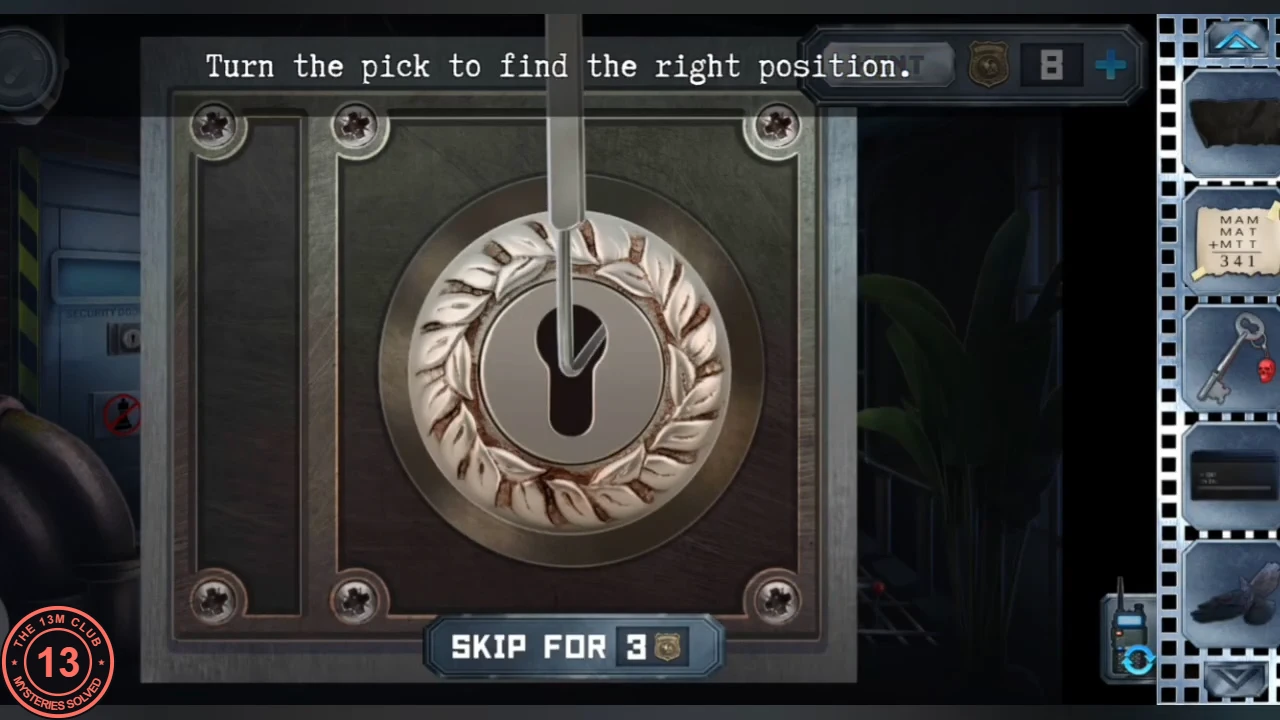
The lock pick from Anna's chest opens the office security door into the crypt.
- As Alex, use the lock pick on the office security door: "Turn the pick to find the right position." Sweep it slowly around the keyhole until it catches. The door opens into the crypt.
Crypt coffin, the glyph cylinder and the morning star
The crypt holds an electric chair, a meditating mannequin and a coffin marked with an ankh.
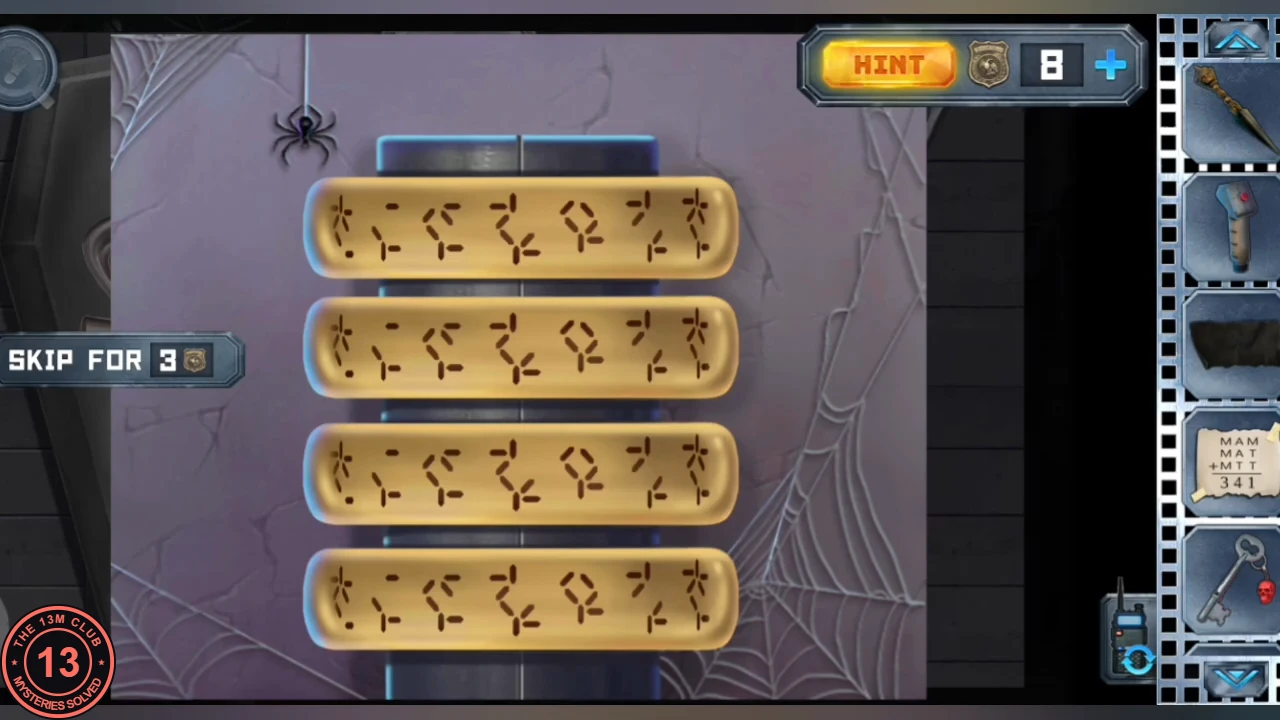
- Open the crypt coffin with the ankh. Drag the skull, rib cage, pelvis and leg bones out of the coffin: the flexible shaft (a silver crankshaft) lies underneath, across the spine. Take it, then tap the gold glyph cylinder at the foot of the coffin and take the orange key bit. Rotate the cylinder's four glyph rings so that they match the symbols the museum chandelier casts on the carpet. Four gold rings drop into the coffin (they are only scenery; nothing needs them), and the hanging cage in Anna's furnace room crashes through the floor.
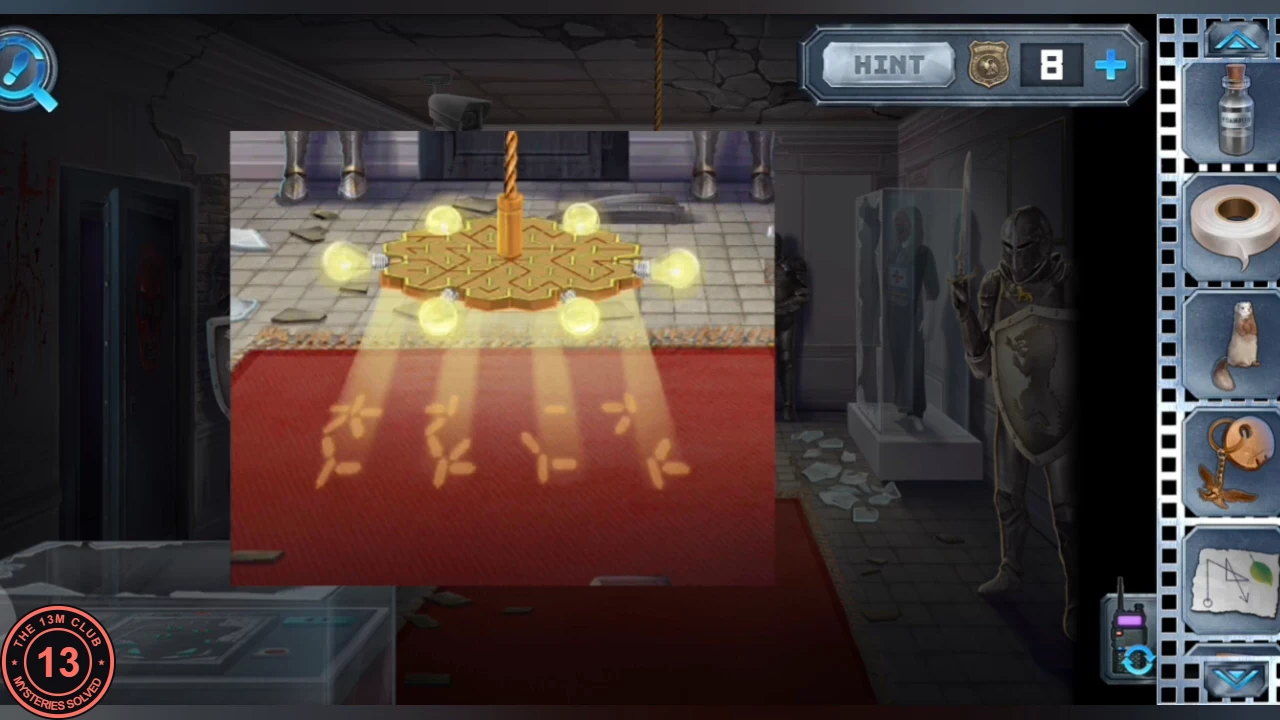
Clue: the four glyphs the chandelier casts on the museum carpet, read left to right. 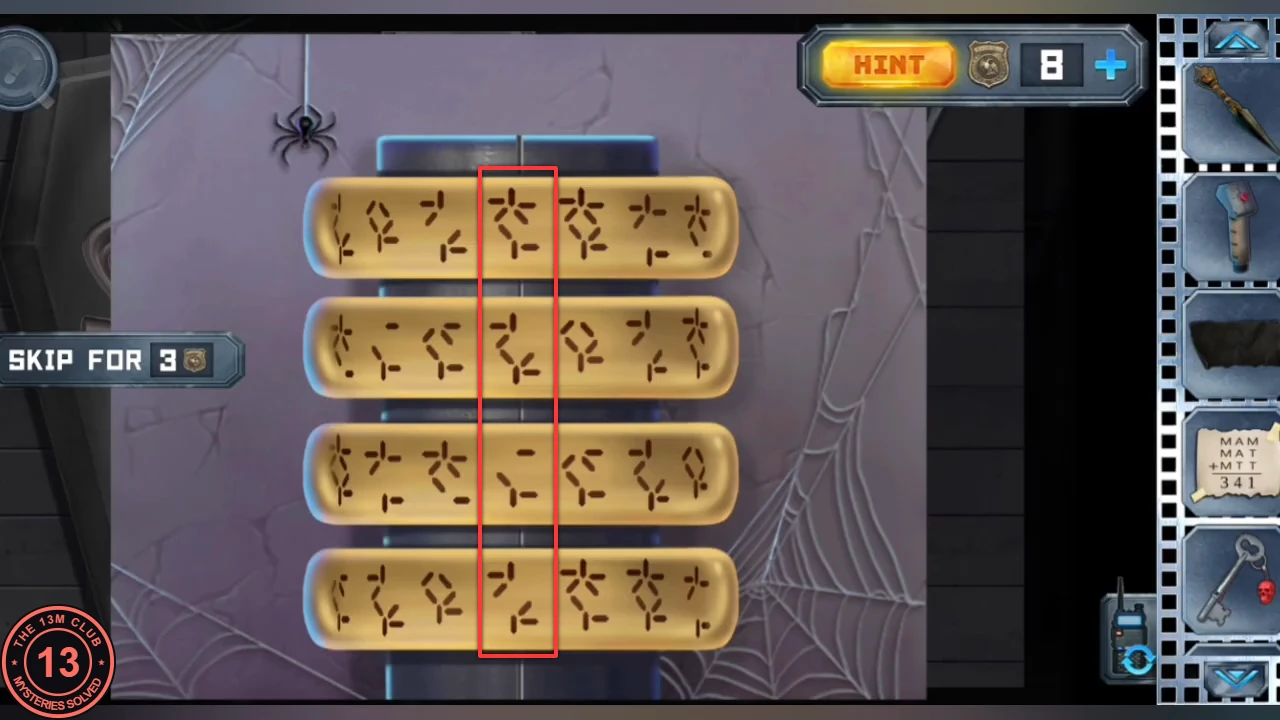
Solved: the centre column (outlined) shows the carpet glyphs from top to bottom. - As Anna, look at the shattered floor where the cage fell: "Morning star is hidden here." Tap the red five-pointed star among the glass triangles and take the peroxide. Pick up the key with a fox lying in the shards.
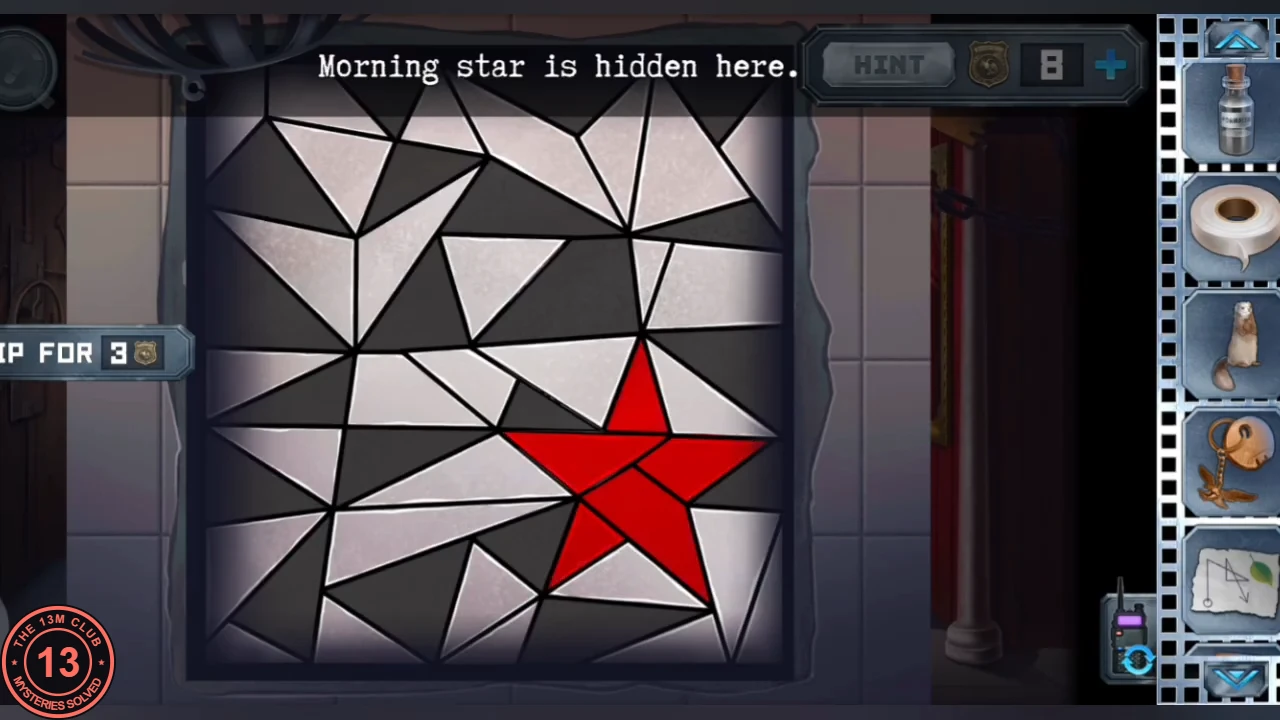
The red morning star among the glass triangles.
Museum safe: the symbol sums
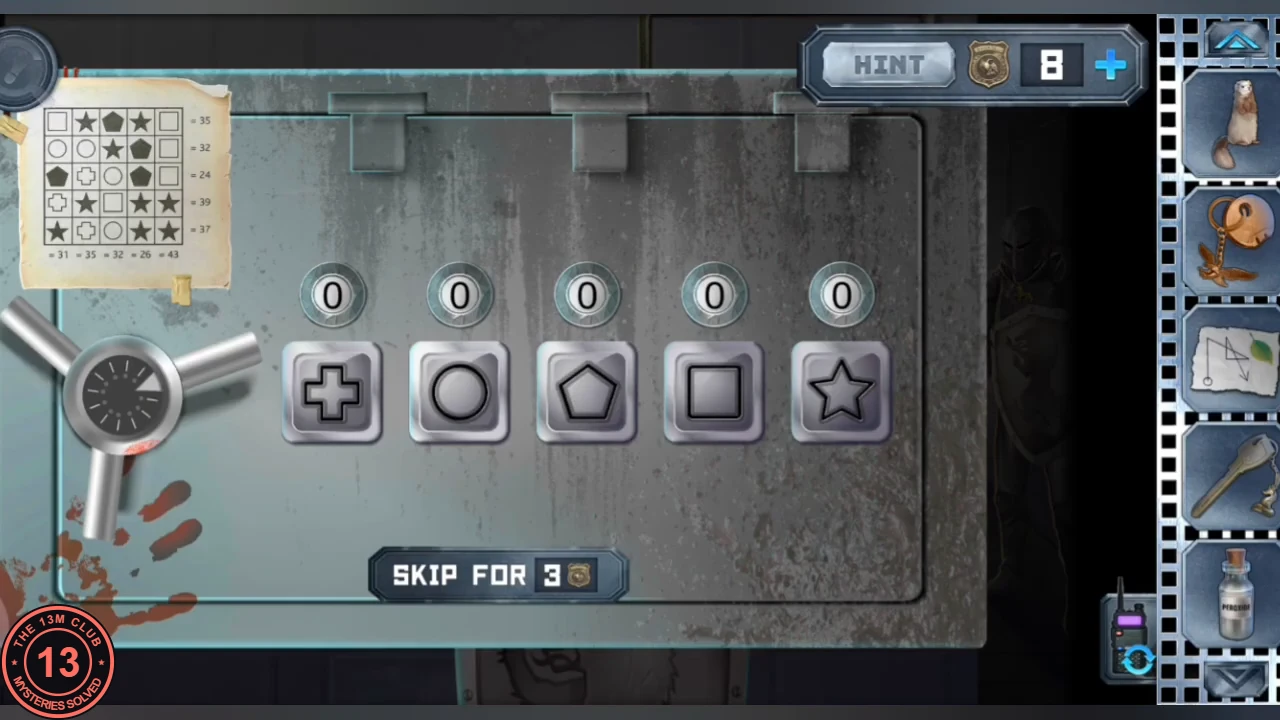
The mathematical picture from Alex's office is the clue for the five-symbol safe behind the abstract painting in the museum.
- Open the museum safe behind the abstract painting with the mathematical picture beside it. Each symbol has one value that makes every row and column total correct: cross 6, circle 7, pentagon 1, square 9, star 8. Enter 6 7 1 9 8 and take the red lever. Send the red lever and the key with a fox to Alex.CODE67198
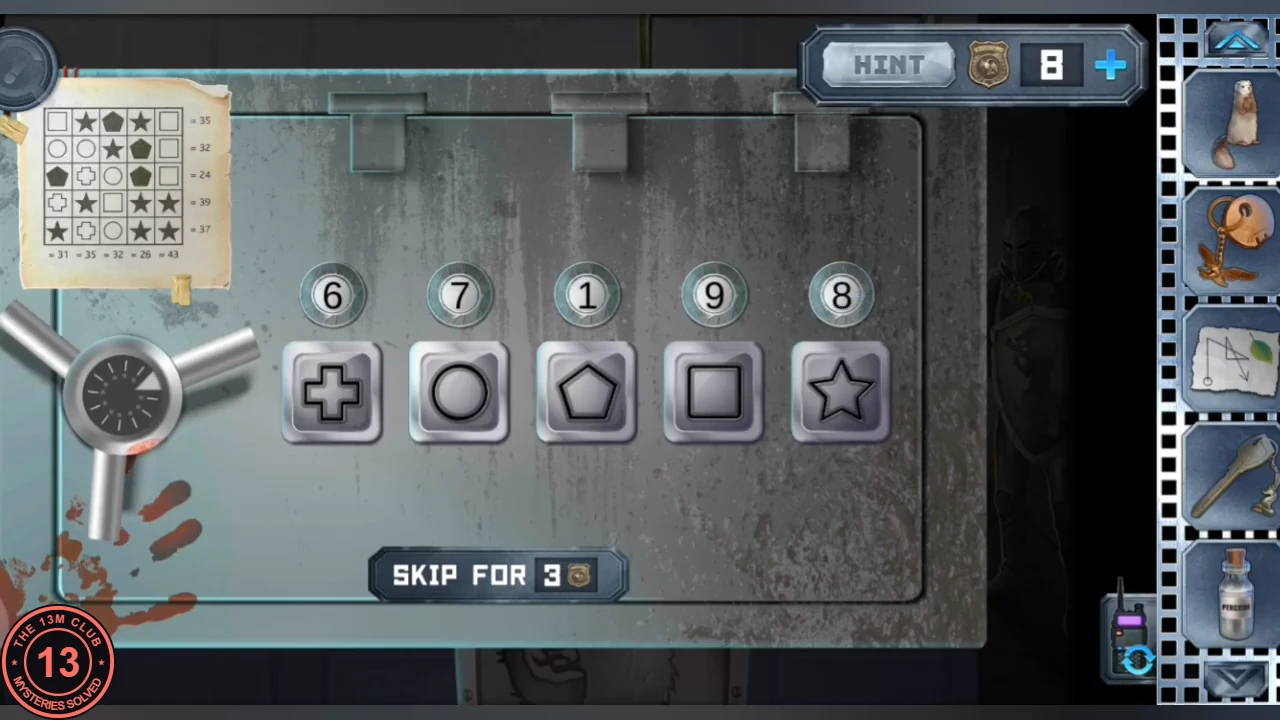
Solved: cross 6, circle 7, pentagon 1, square 9, star 8, with the mathematical picture beside the safe. - Alex sends Anna the orange key bit. At the furnace-room key-cutting bench, join the key head and the key bit with the soldering iron ("Alex! I made a key!") and send the key with a hawk to Alex.
Crypt dials: MAM + MAT + MTT = 341
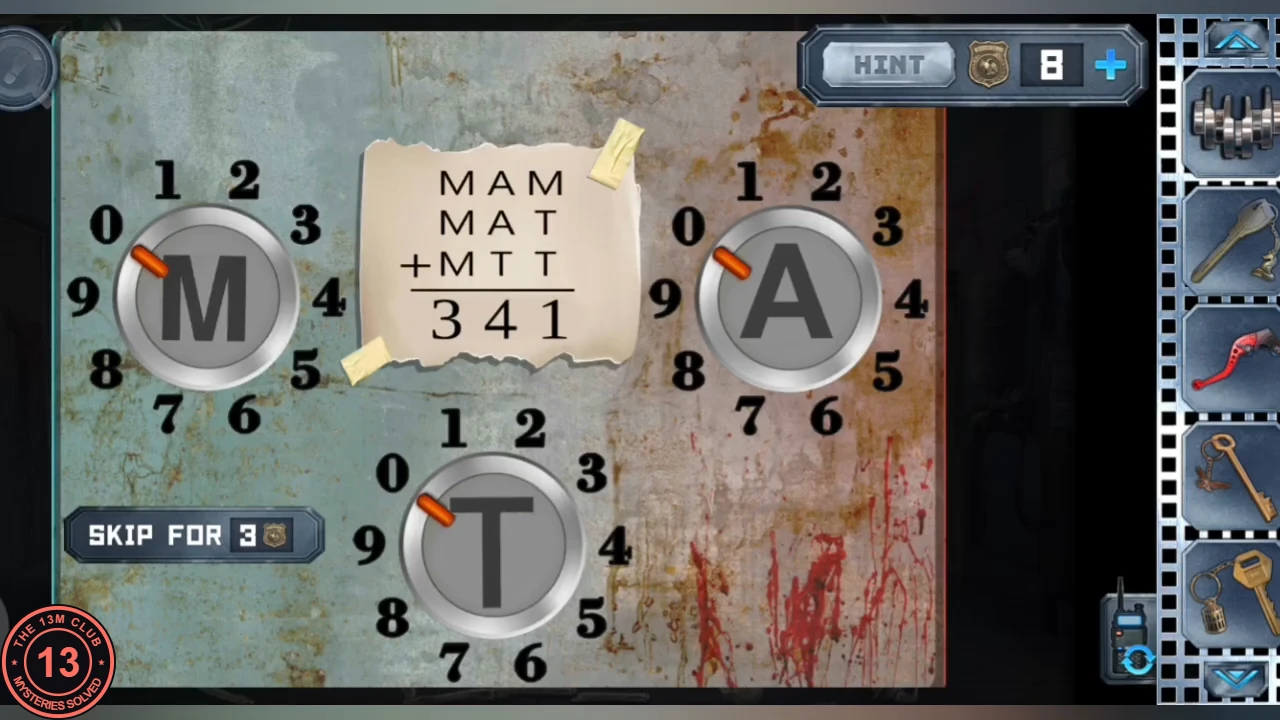
Alex decodes the equation and restores power in the crypt.
- At the meditating mannequin in the crypt, take the small key with a cage from its raised hand and the triangular screwdriver (red wooden handle) from its lower palm.
- Set the crypt dials M, A and T. In MAM + MAT + MTT = 341 the three hundreds digits are all M, so M = 1; then 121 + 120 + 100 = 341 gives A = 2 and T = 0. A wall panel opens; take the acetone.CODEM1 A2 T0
Crypt: the voltmeter circuit
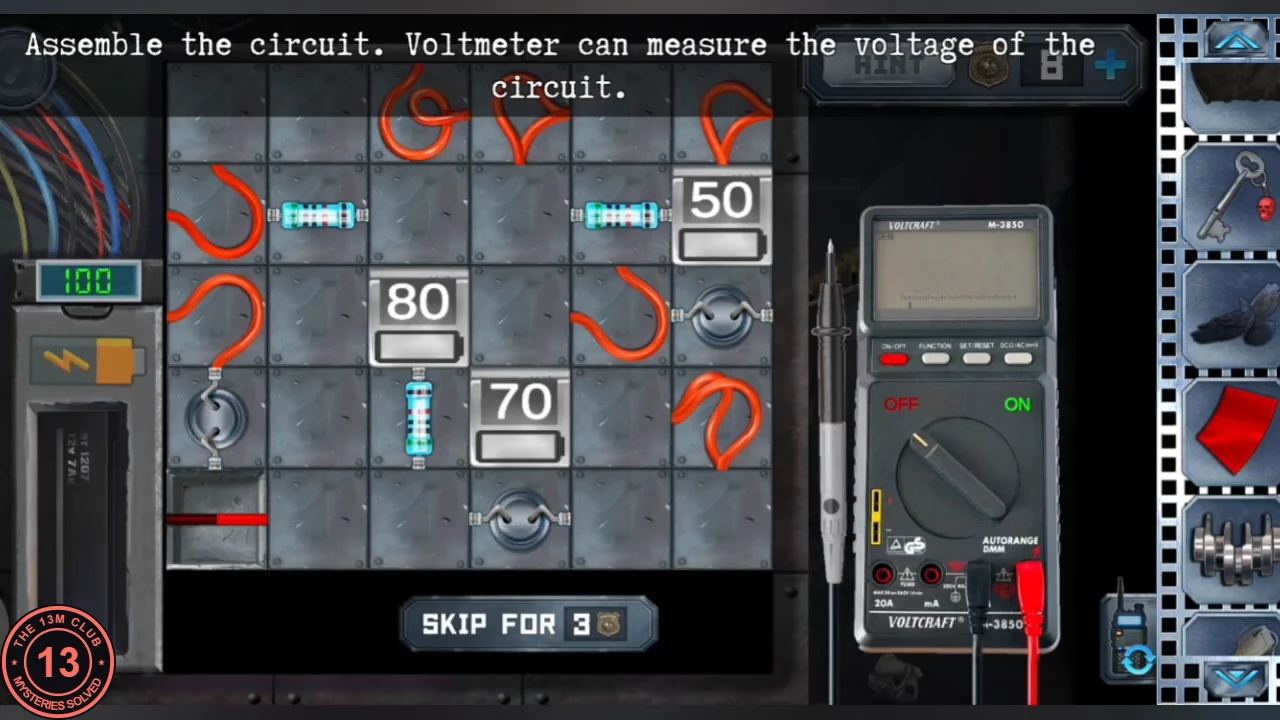
A circuit panel in the crypt restores the power once each numbered box receives its voltage.
- "Assemble the circuit. Voltmeter can measure the voltage of the circuit.": place the wire, resistor and connector tiles so the 100-volt source feeds each numbered box (80, 50 and 70); a box turns green when it gets its voltage. Use the voltmeter probe to check a box before rearranging. When all three are green the crypt lamps light and Alex can reach the purple room.
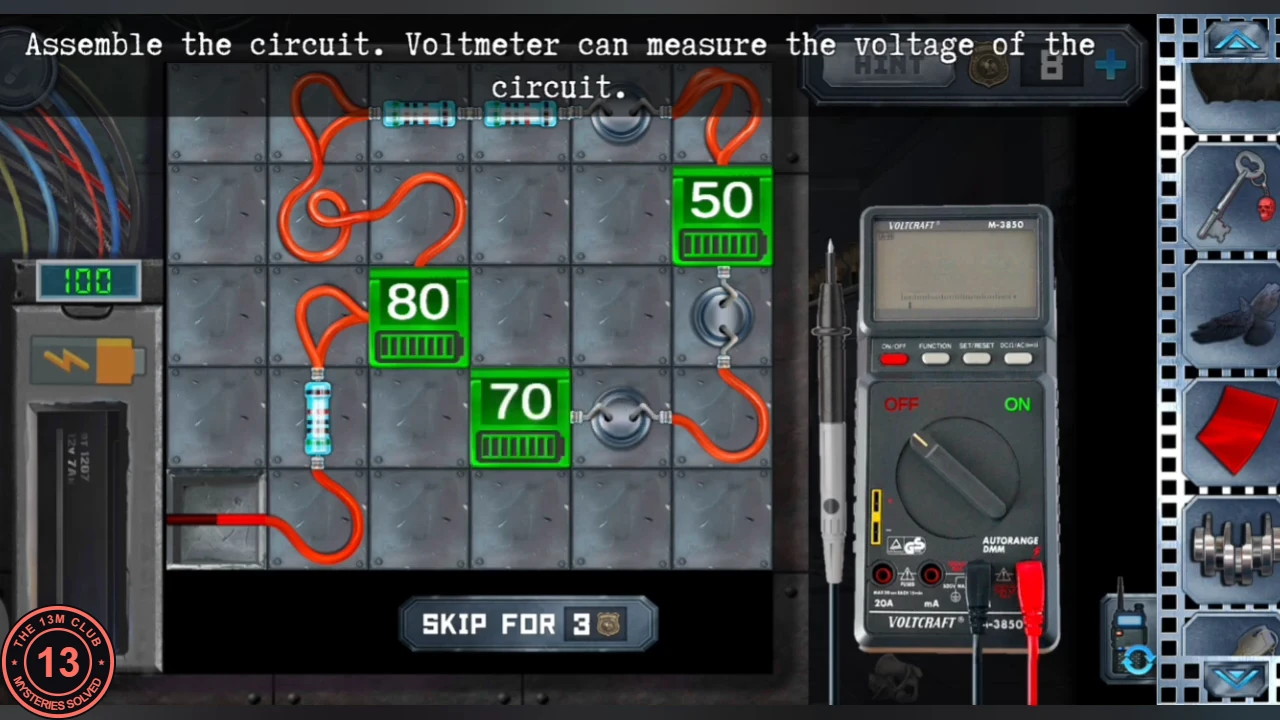
Solved: the 80, 50 and 70 boxes are all green (example from one playthrough).
Purple room mirror, the cage padlock and the bird cages
The purple room has a colour-wheel floor, a disco ball, bird cages with stuffed animals and a curtained window with keys hanging outside.
- Wipe the mirror ("Take a good look at yourself.") until Alex's reflection is clear.
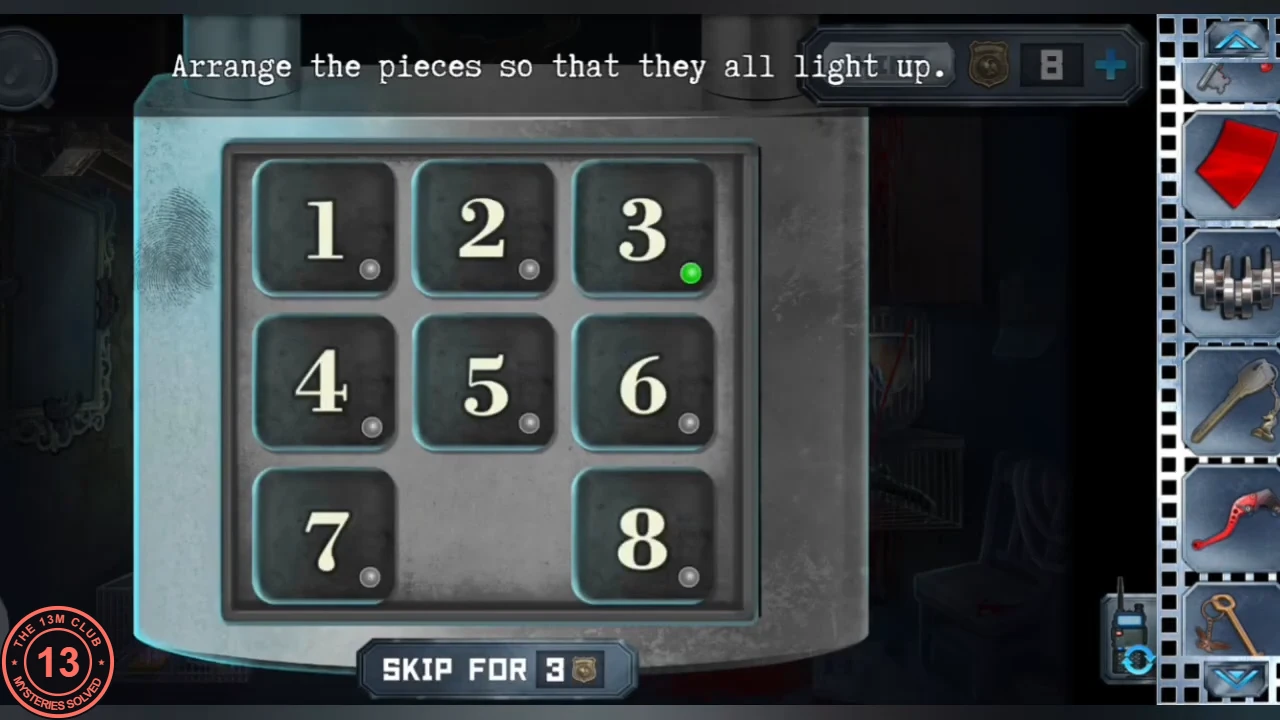
- Solve the cage padlock: "Arrange the pieces so that they all light up." Slide the eight tiles until every dot lights. Final layout: 2 4 3 / 8 1 5 / 6 empty 7. Take the "3D Cubes" cartridge.CODE243 / 815 / 6_7
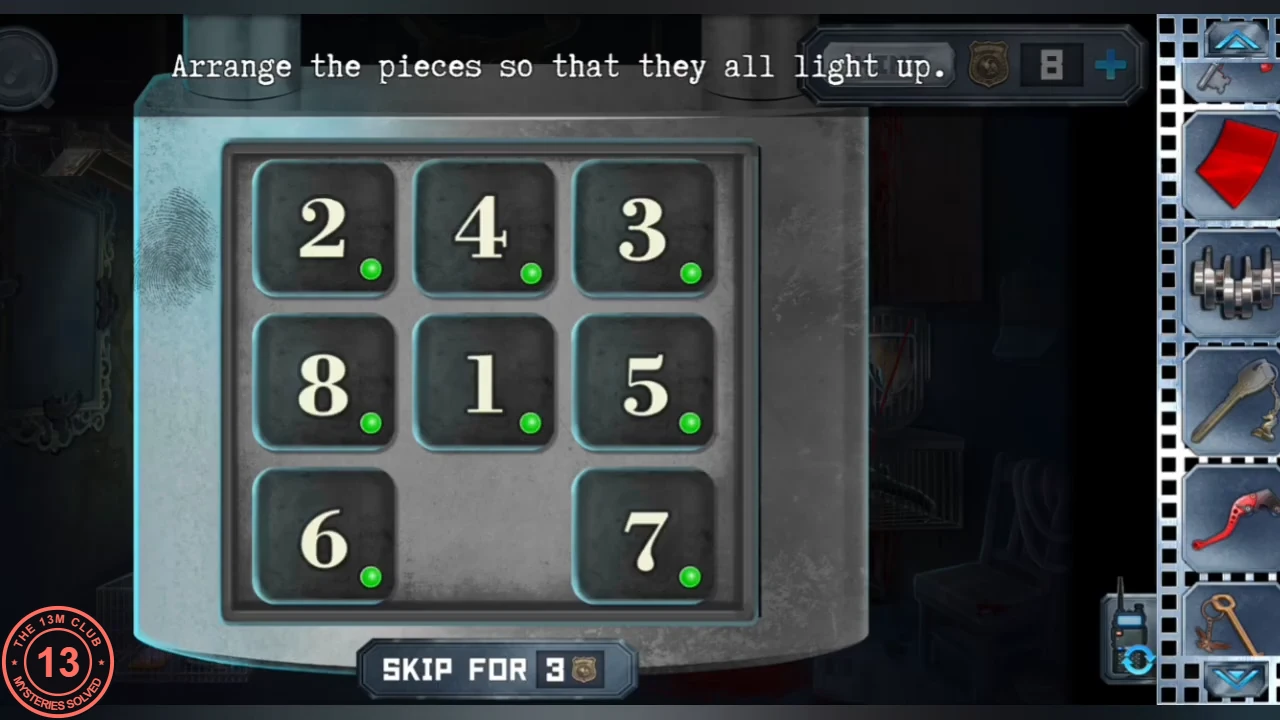
Solved: 2 4 3 / 8 1 5 / 6 (empty) 7, with every dot lit. - Open the curtain and take the parchment pinned on the window (LECTORI BENEVOLO SALUTEM). The keys outside are out of reach for now.
- Open the hawk cage with the key with a hawk and the fox cage with the key with a fox. The lizard dummy escapes; pick up the red skull where it lands. The newspapers from 1937 in the lizard cage are only background.
- Send the parchment, the red skull, the triangular screwdriver, the "3D Cubes" cartridge, the acetone and the key with a cage to Anna. Keep the red lever (the tube refuses it).
The prisoner, the locked book and VITA BREVIS
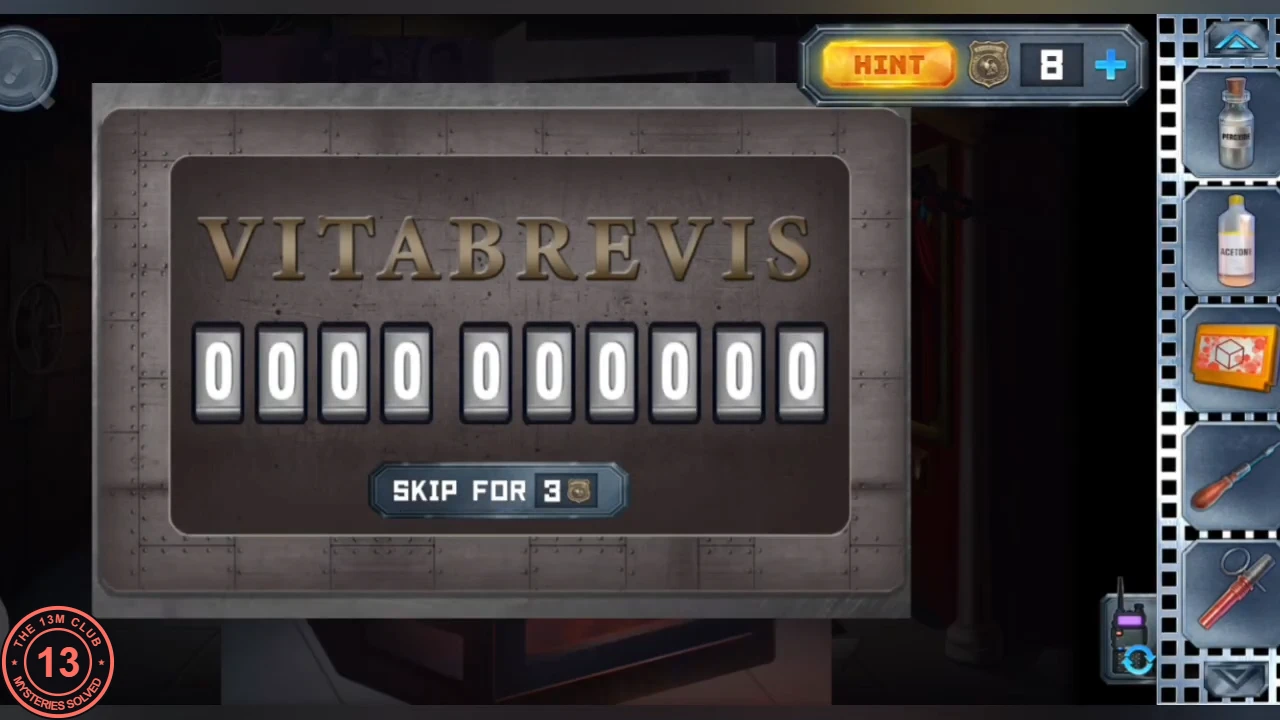
Anna helps a prisoner behind a corridor hatch, then decodes a Latin book lock.
- Open the padlocked hatch in the corridor wall with the key with a cage and talk to the prisoner behind the grate. Give the ferret to the prisoner ("Thank you. Now things will be easier."); the prisoner leaves the red fuse on the sill. Take it.
- Put the red skull in the space on the cover of the book in the furnace-room chest and open it. Lay the LECTORI BENEVOLO SALUTEM parchment over the numbered page: its lines link digits to letters. Spell VITABREVIS with that key (V 4, I 7, T 1, A 3, B 9, R 8, E 2, S 5) and enter 4713982475. The fire cage opens; take the grappling hook from it.CODE4713982475
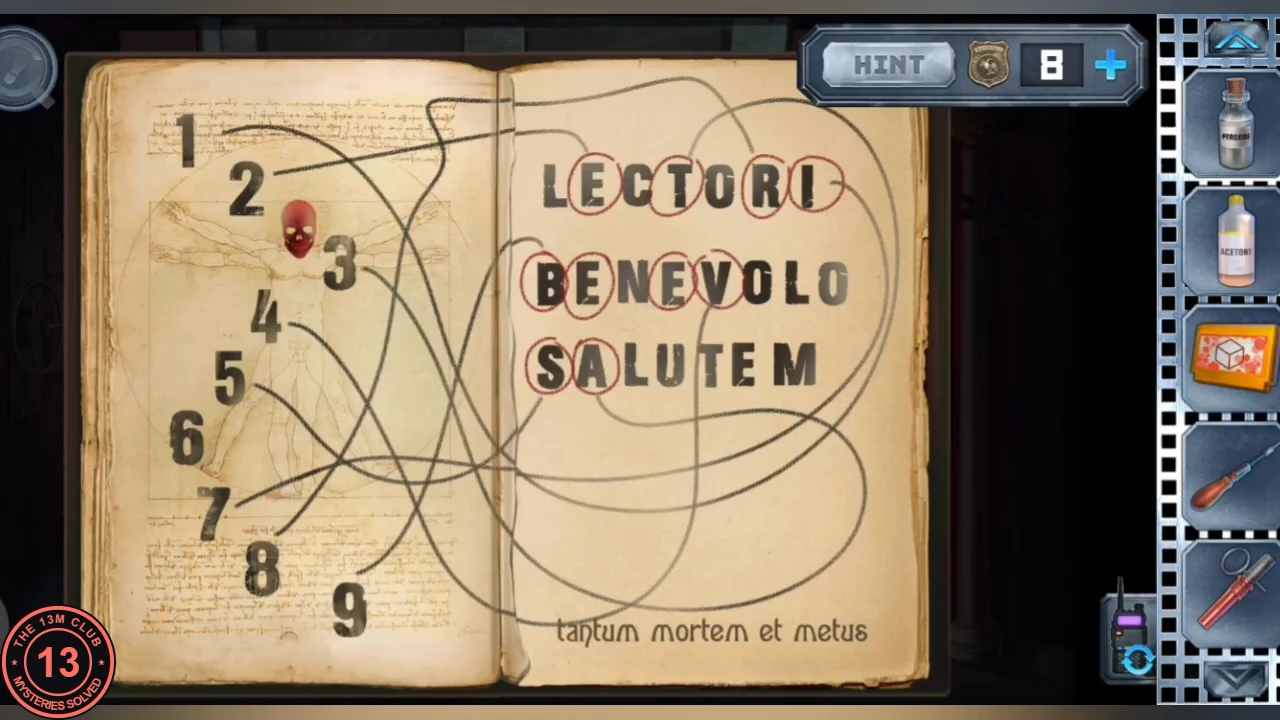
Clue: the numbered page with the parchment laid over it. Follow each line from a digit to its circled letter. - Unscrew the button plate in the elevator with the triangular screwdriver and take the key with a peacock. Send the key with a peacock and the grappling hook to Alex. Keep the red fuse.
Spray paint, rock-paper-scissors and the Crow cartridge
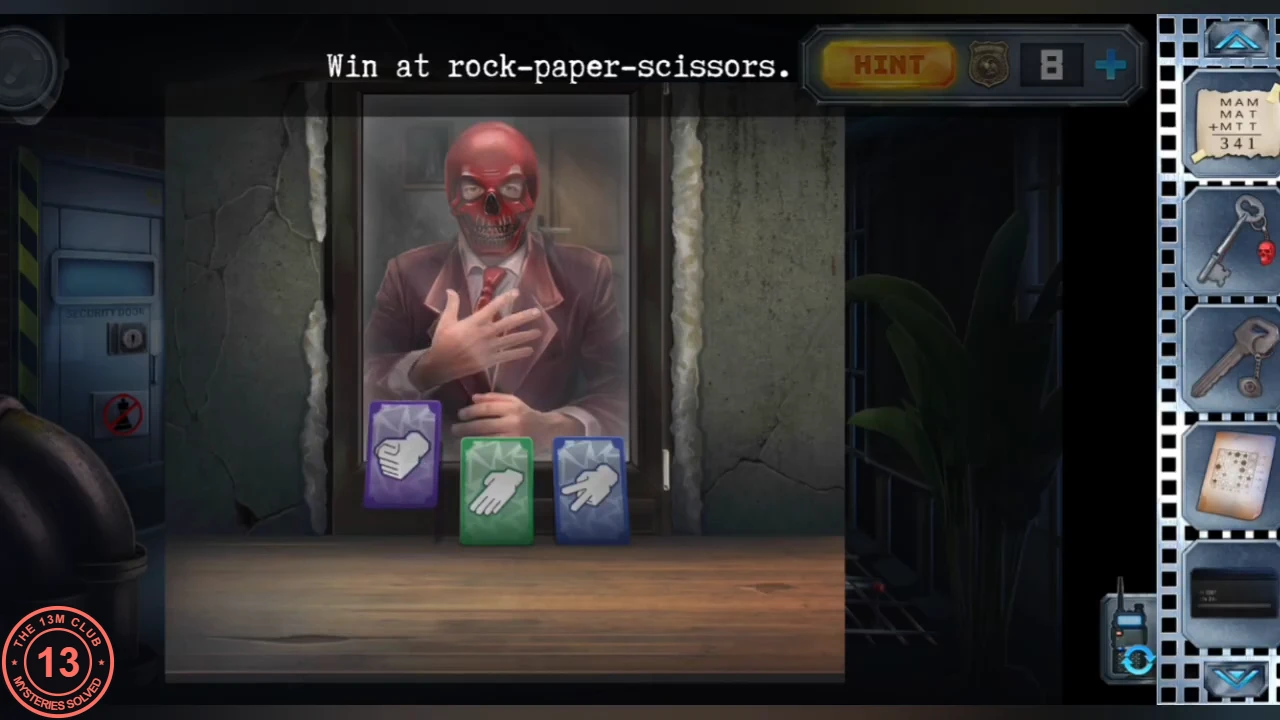
The red-masked man in the office reads Alex's moves until Alex blinds him.
- Open the wardrobe (with the peacock on its double doors) with the key with a peacock. Take the flask and, from among the clothes, the spray paint. Send the flask to Anna.
- Put the red lever on the lower right pulley of the gym weight machine.
- Spray the glass in front of the red-masked man ("Well, not so careful now?!"); he can no longer read you. Win the rock-paper-scissors rounds and take the black lever from the tray. Put it on the upper right pulley of the weight machine; the "Crow" cartridge comes out ("Finally! I thought you would stay there."). Take it.
Gym: sort by colour
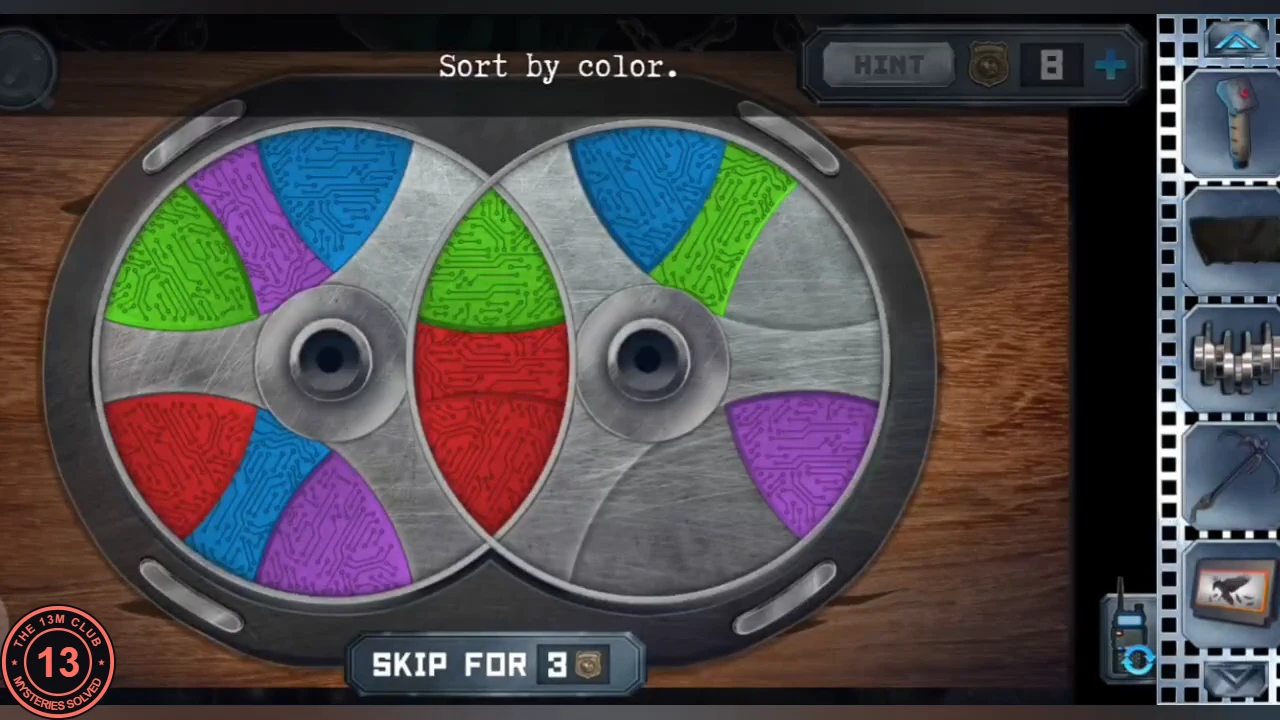
Three long rotation puzzles lead to the crystal ball. Their starting positions are mixed up, so the guide gives the target and a method rather than every move. The first is in the red-skull box above the man in the gym's electric chair.
- Open the red-skull box above the head of the man in the gym's electric chair with the key with a red skull. "Sort by color": two overlapping wheels share some segments. Rotate one wheel, then the other, to move segments between them until each colour sits together (purple and blue on the left wheel, green and red on the right). Finish one colour at a time and park completed segments on the wheel you are not turning. When it is solved the box opens; take the yellow stained glass fragment.
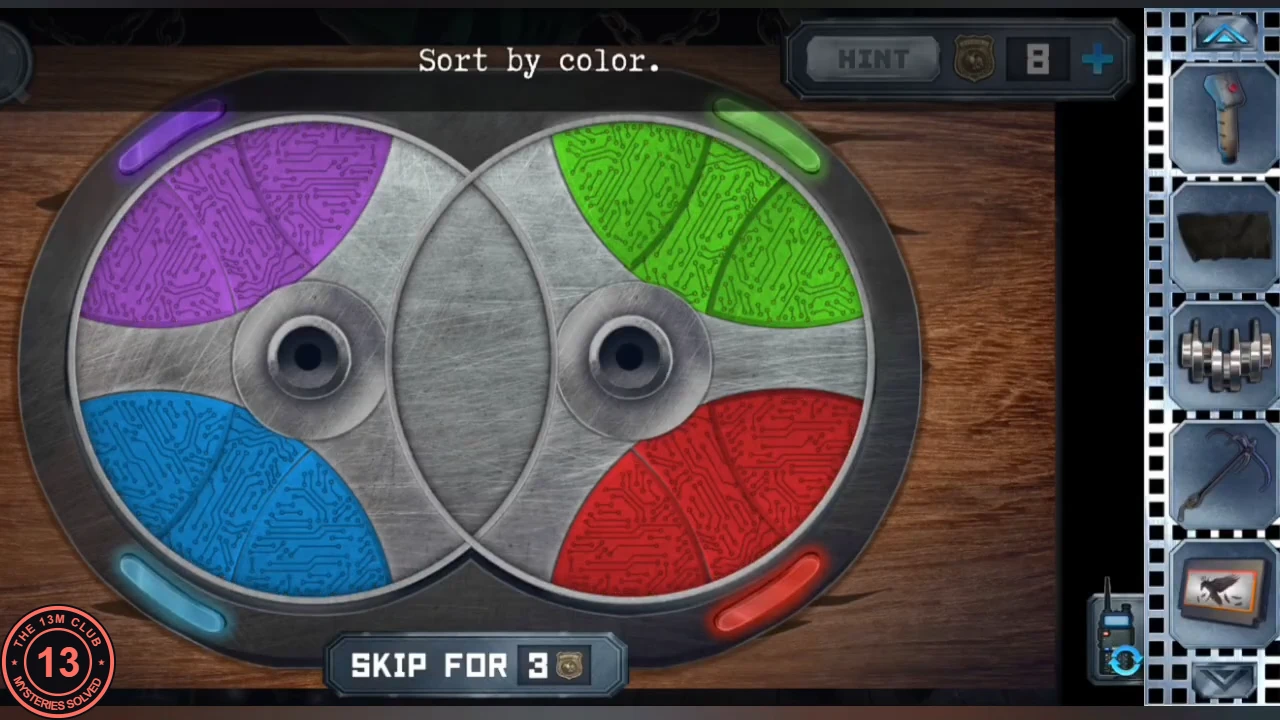
Solved: purple and blue on the left wheel, green and red on the right.