Cops and Thieves on the hallway console
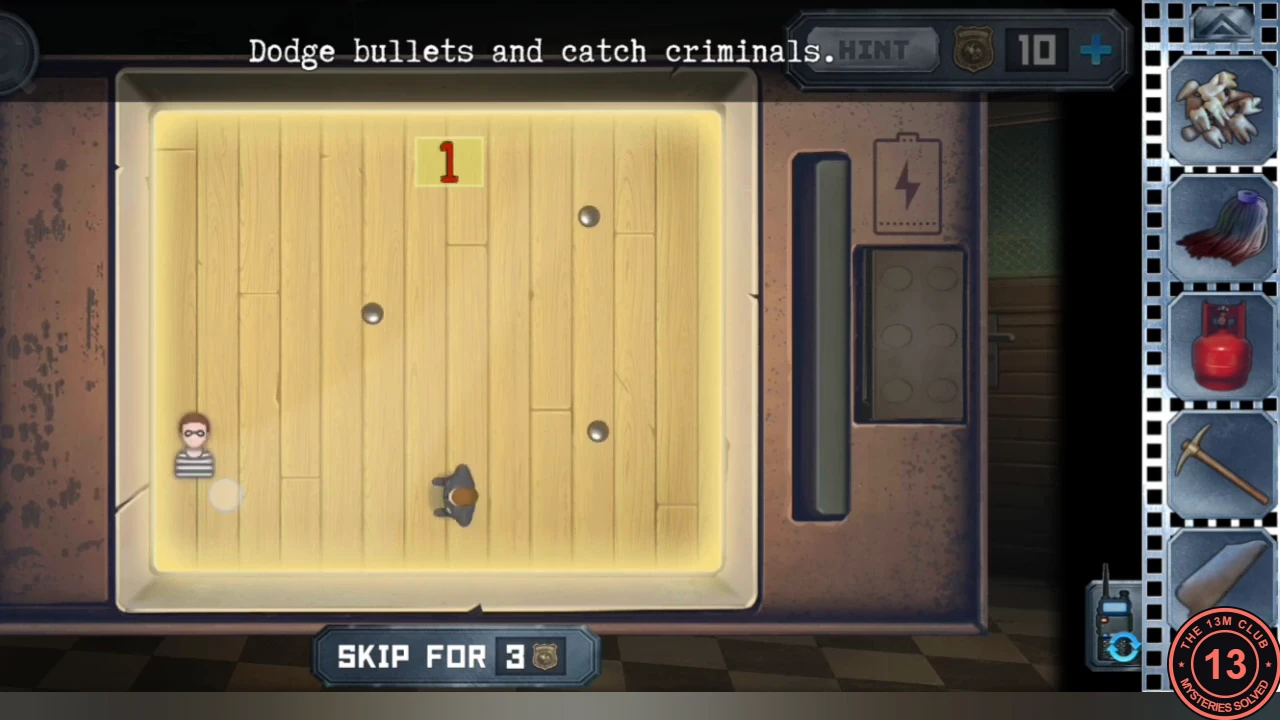
Alex now has the battery, the cartridge, the raven magnet and the number tiles. The console game in the hallway gives the X-ray.
- At the game console in the hallway, insert the battery and the "Cops and Thieves" cartridge. Move the policeman to catch 10 criminals while dodging the bullets, which speed up as you go. Winning gives you an X-ray.
Blackboard magnets: two rows of five
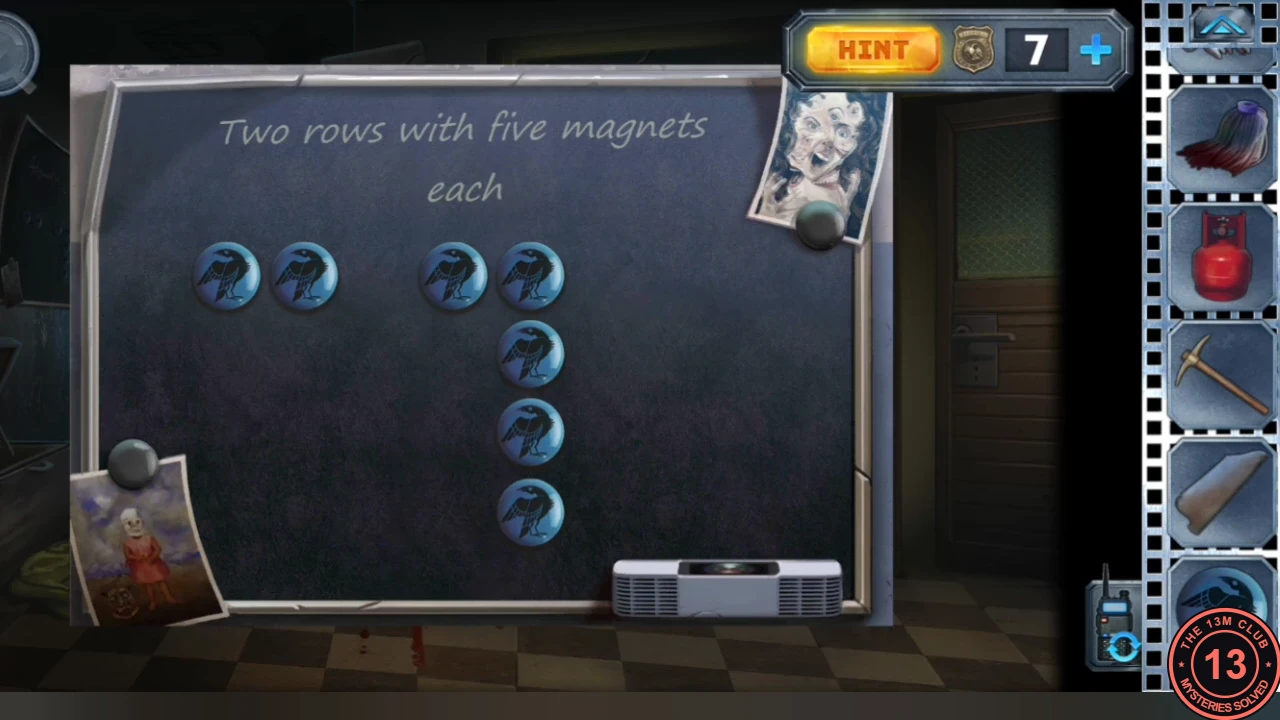
The raven magnet completes the set of magnets for the hallway blackboard. Arranging them reveals the time for the cuckoo clock.
- Put the raven magnet on the blackboard. The task says "Two rows with five magnets each": there are only eight magnets, so make a corner: three magnets across, three down, and two stacked on top of each other where the lines meet. The stacked pair counts in both lines, so each line has five. A message appears: "Anna, don't forget to wish mommy happy birthday at 17:15." Note the time shown on your board; it is the cuckoo-clock time.CODE17:15
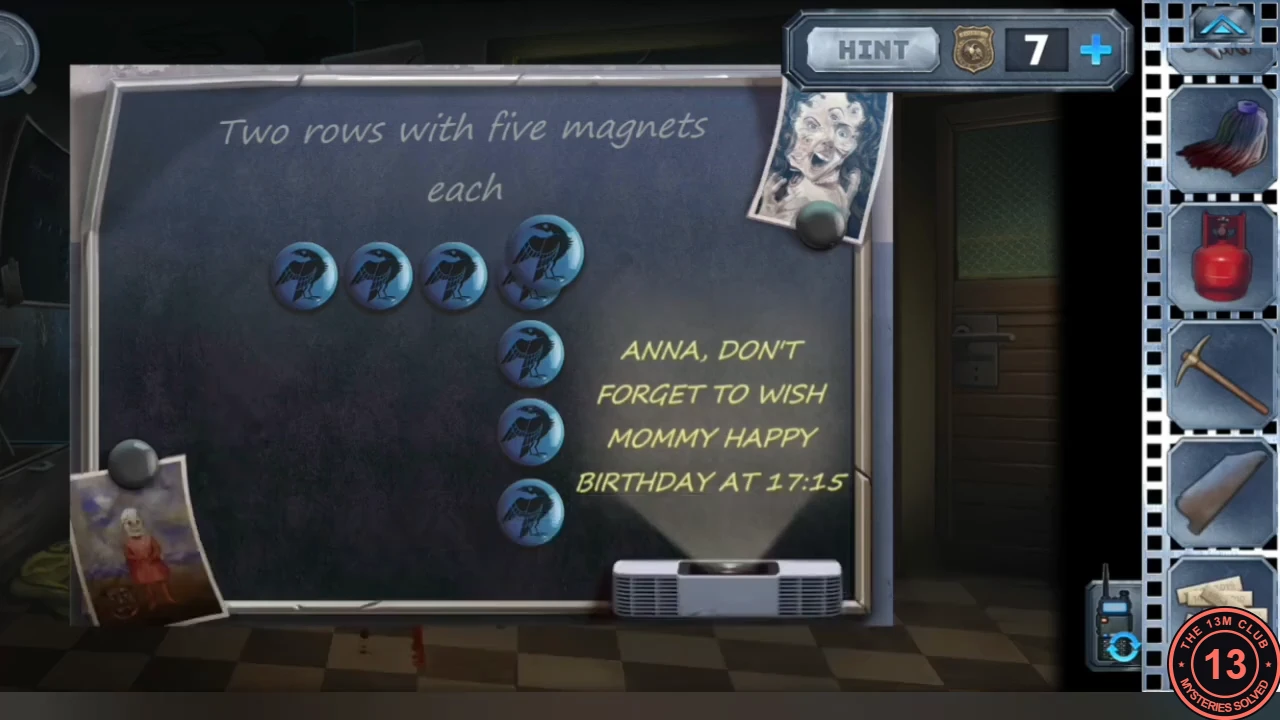
Solved: the magnets form a corner with one stacked on the corner, revealing the 17:15 message.
Office WANTED board: the year ranges
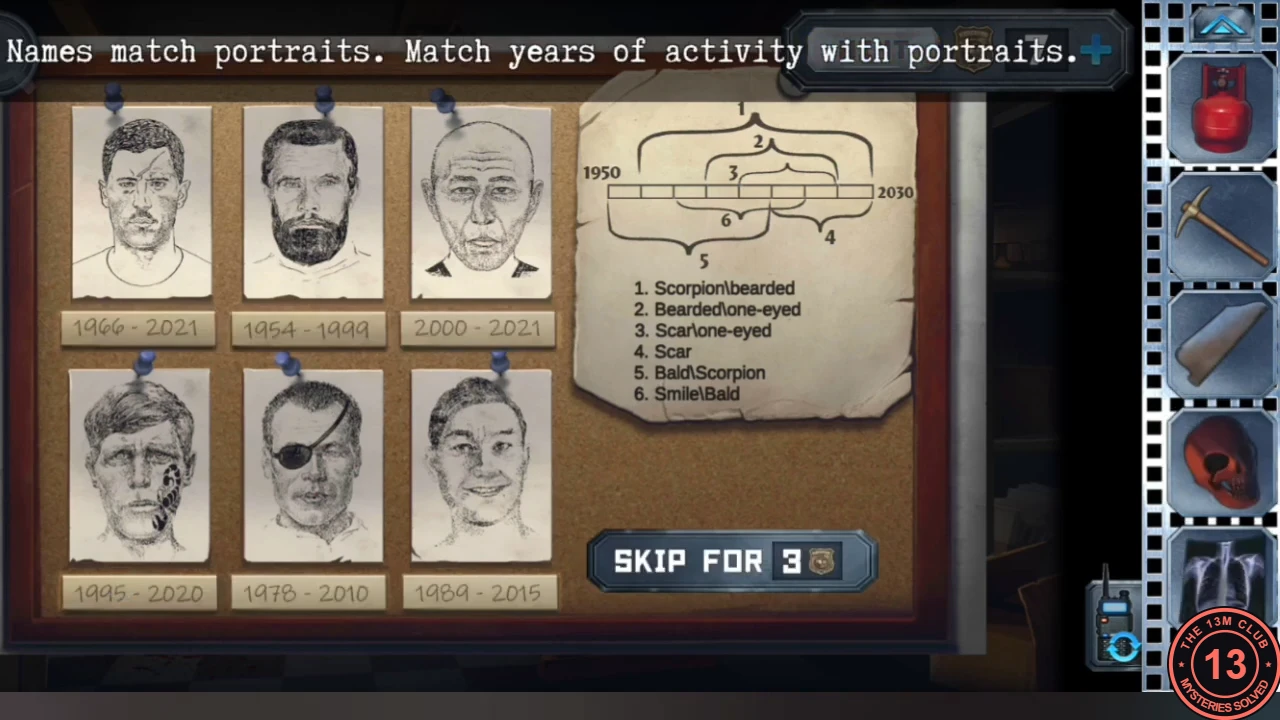
The number tiles from the reception go on the WANTED board in the office. The timeline note on the board decides which years belong under each portrait.
- In the office, place the number tiles on the WANTED board. Use the note on the board: each pair of features (scar, beard, one eye, scorpion tattoo, bald head, smile) belongs to one period on the timeline. Drag each year range under the matching portrait. Top row, left to right: 2000-2021, 1989-2015, 1954-1999. Bottom row: 1966-2021, 1995-2020, 1978-2010. A photo fragment drops out.
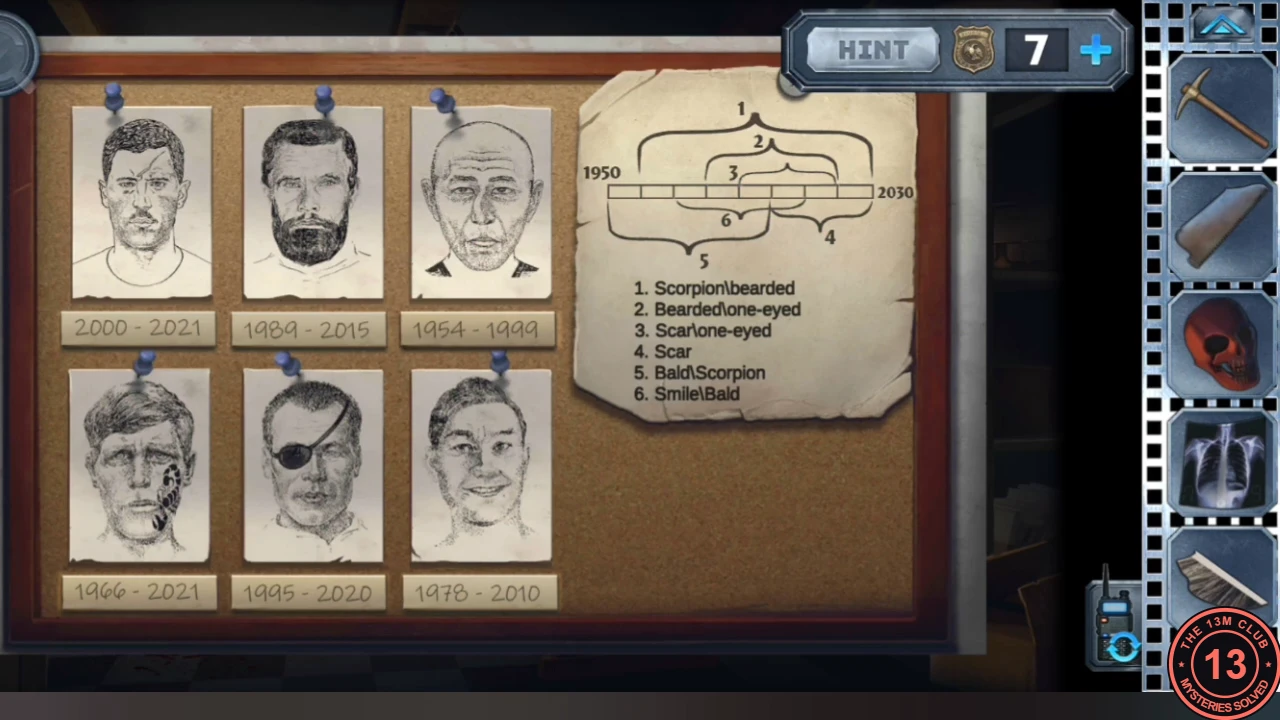
Solved: the year ranges under each portrait, with the timeline note on the right.
Torture chamber: the aquarium tubes
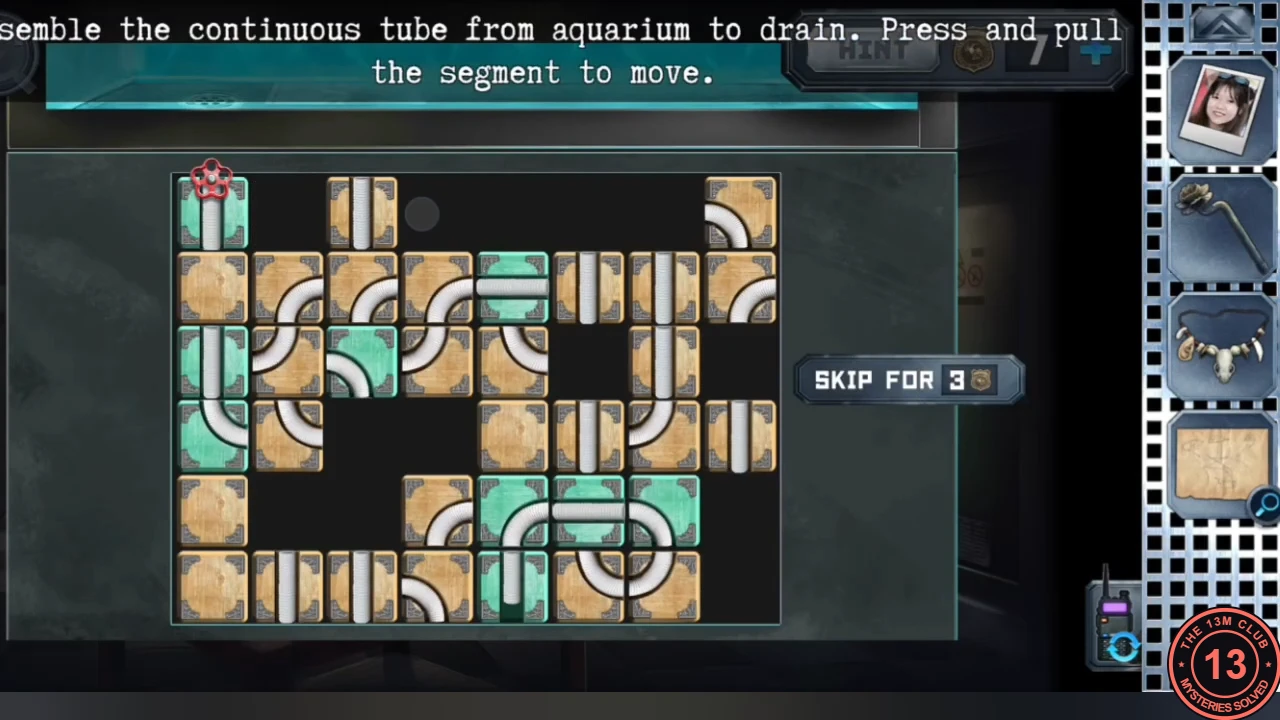
Anna drains the aquarium to reach the bread at the bottom.
- As Anna, use the scissors to lift the aquarium lid. Press and pull the tube segments so that one continuous tube runs from the aquarium to the drain, then turn the valve at the top left. The water drains. Take the bread from the bottom.
Torture chamber: the cockroach cage
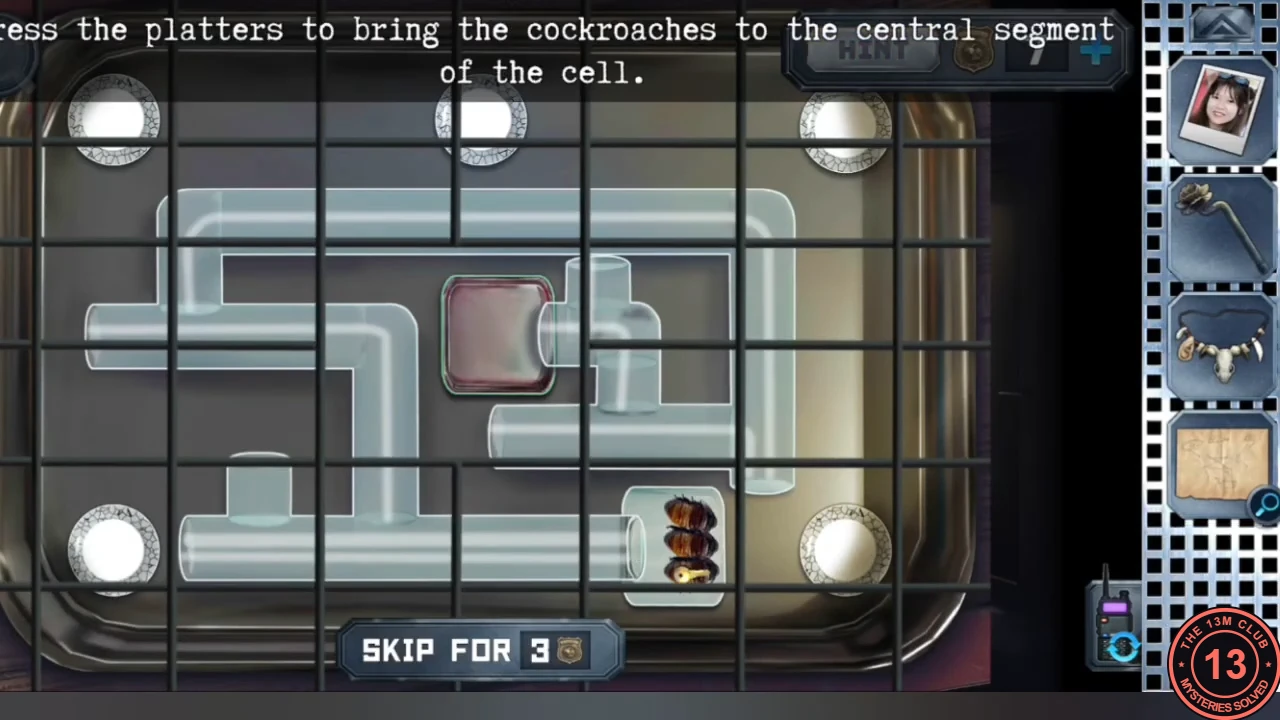
The bread lets Anna steer a cockroach that carries the torture-chamber key on its back.
- Open the cage on the table and put bread on the plates. The cockroaches move toward food. Shift the plates to herd the cockroach with the key on its back into the central segment, then take the key.
- Use the key on the torture chamber door to step out into the forest.
Forest clearing and the goat camp chest (code 4957)
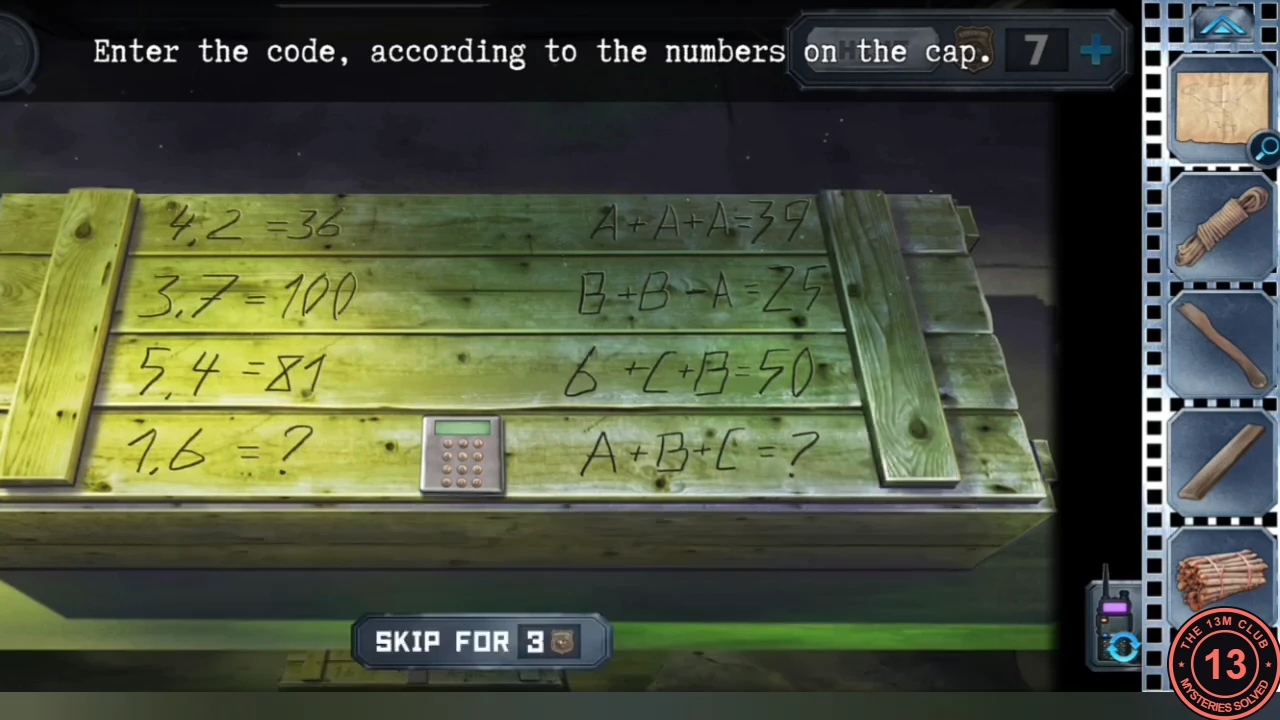
The forest has a clearing with a fire pan and a slot for the flower lever, a fallen branch, and a camp with a goat, an altar, a chest and a camera.
- Take the rope from the bench. Put the flower lever in its slot on the ground (you will use it several times). At the fallen branch take the axe handle and tap the wood to break off a piece of wood.
- Go left to the goat camp and take the firewood. The chest lock shows two riddles. First: 4.2 = 36, 3.7 = 100, 5.4 = 81, so a.b = (a + b) squared, and 1.6 = 49. Second: A + A + A = 39, B + B - A = 25, 6 + C + B = 50, so A = 13, B = 19, C = 25 and A + B + C = 57. Enter 4957 and take the lighter fluid and the glowsticks from the chest.CODE4957
- At the tree with artificial birds, take the key hidden there.
Birdhouse gears and the first colour clue
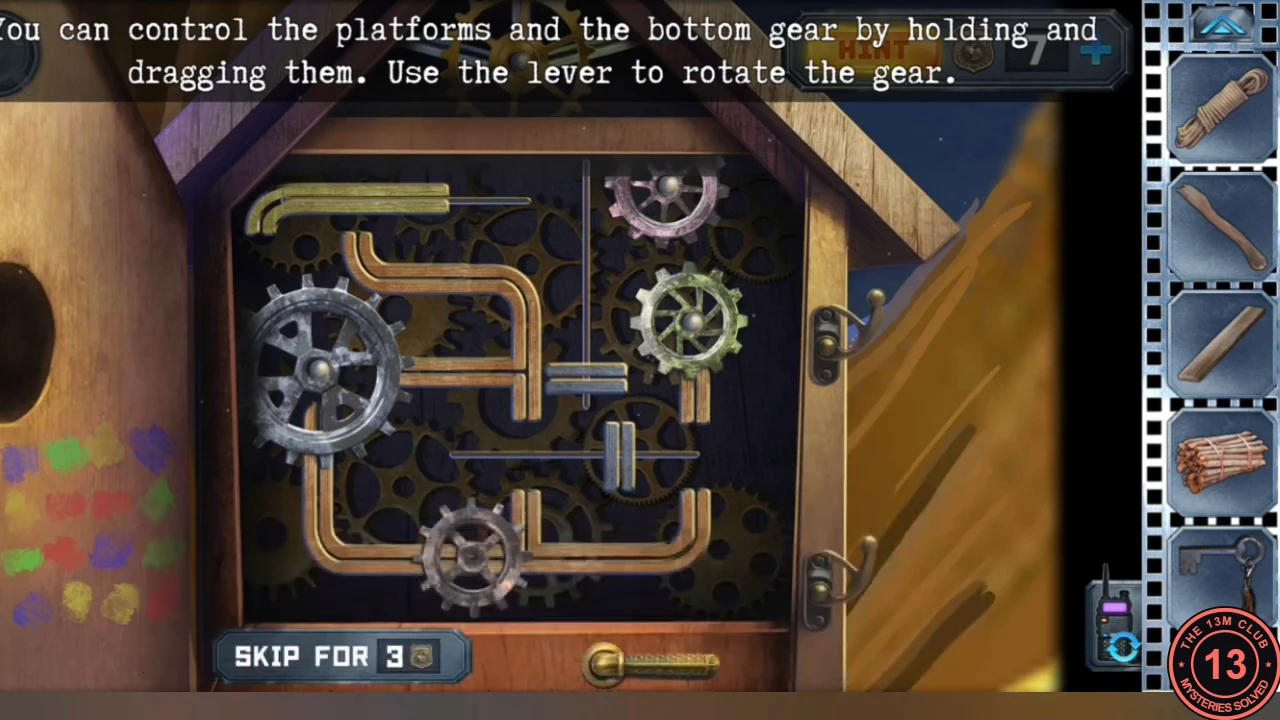
The birdhouse hides a golden gear for the flower-lever mechanism, and its door carries the first colour clue.
- Open the birdhouse. Drag the platforms and the bottom gear so that a chain of gears reaches the golden gear at the top, then pull the lever handle below to turn them. Take the golden gear.
- Look at the left side of the birdhouse door: sixteen coloured paint marks in four rows. Read them as four 2x2 blocks: each block gives the petal colours of the flower in the same corner of the flower lever (top-left block for the top-left flower, and so on), in the same positions as the petals. This is the first flower setting.
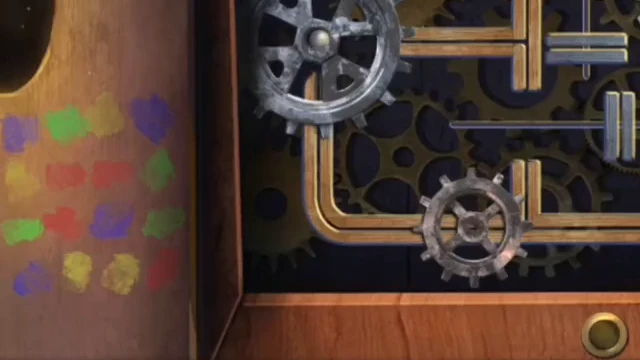
Clue: the paint dabs on the birdhouse door. Each 2x2 block gives the petal colours of the flower in the same corner of the lever.
Fire pan: laying the firewood
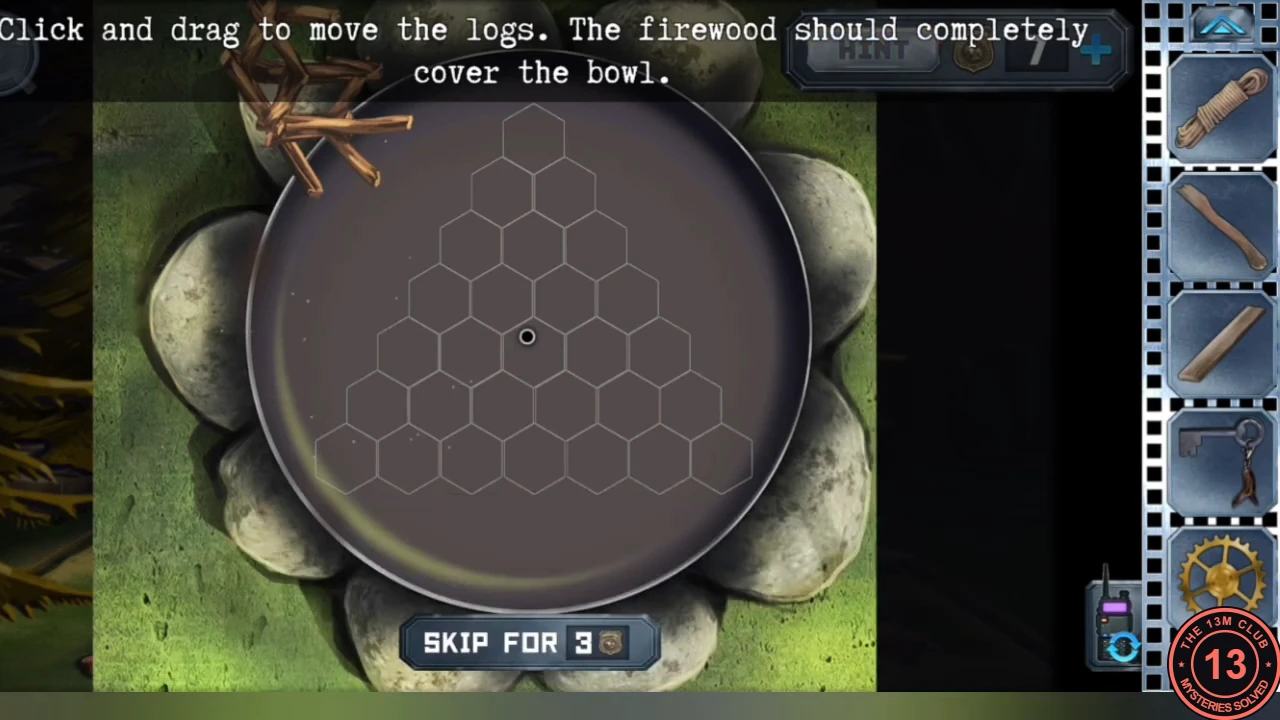
The fire pan in the clearing must be filled with firewood before it can be lit later.
- At the fire pan, place the firewood and drag the logs until every hexagon in the bowl is covered.
- Go back to the torture chamber. Now that the prisoner is down, use the axe handle on the round hatch behind him to pry out the bear trap. Keep it for the goat camp.
Flower lever, first setting: open the cabin
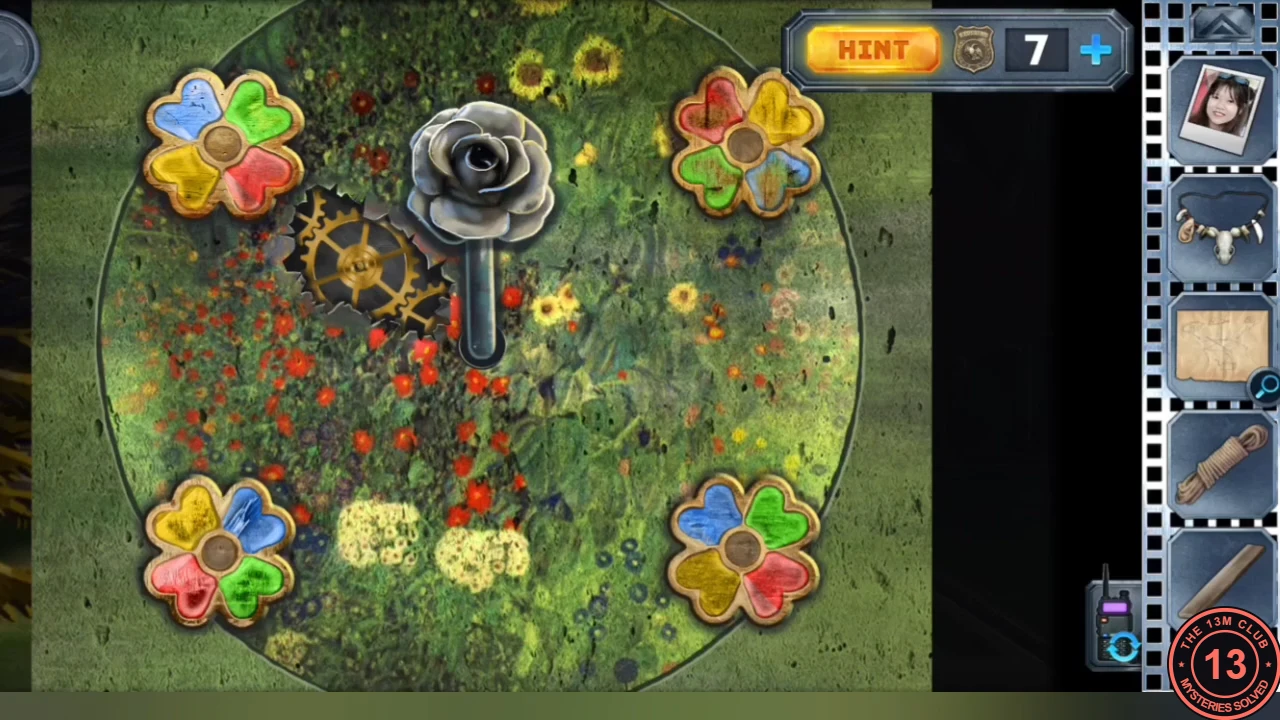
The flower lever has four four-petal flowers around a gear. Each setting is copied from a colour clue and then confirmed by turning the lever counter-clockwise.
- Place the golden gear in the centre of the flower-lever mechanism.
- Rotate each of the four flowers so that its petals match its 2x2 block of colour marks on the birdhouse door, then turn the lever counter-clockwise until Anna hears the sound change. The cabin unlocks.
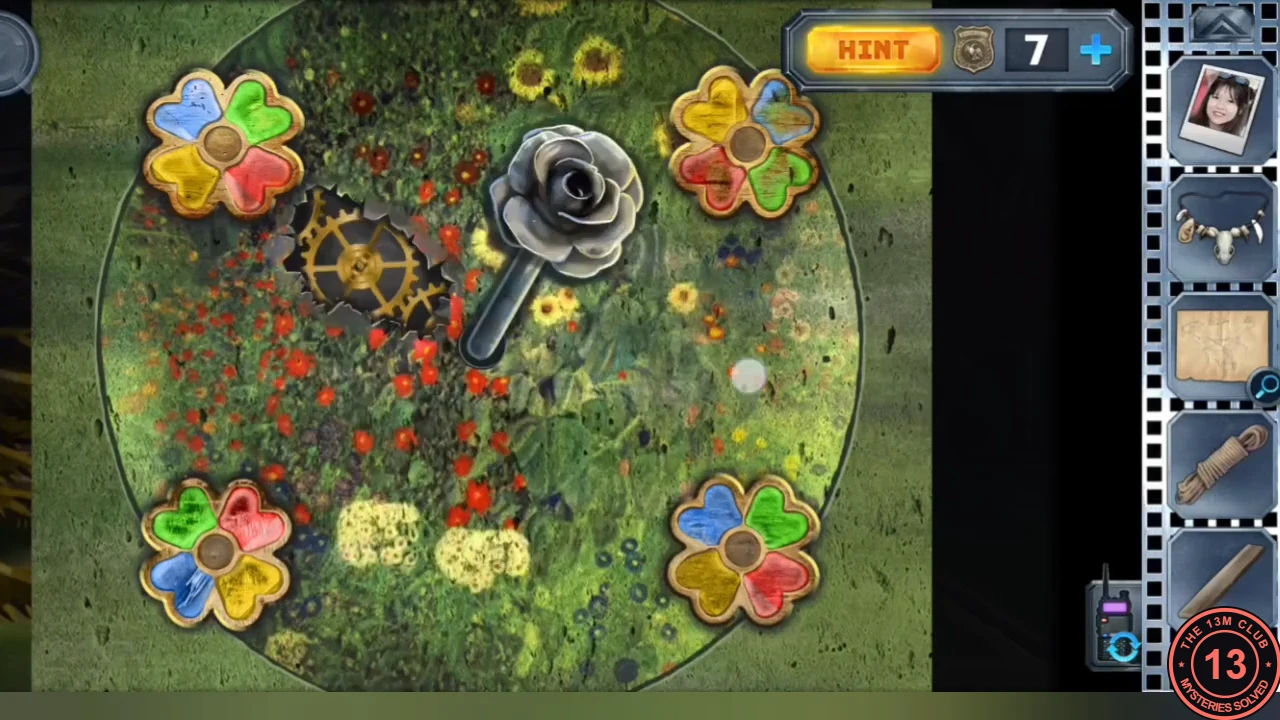
Solved: first flower setting, matching the birdhouse dabs; the lever is being turned.
The cabin: stove latch, cupboard and photo wall
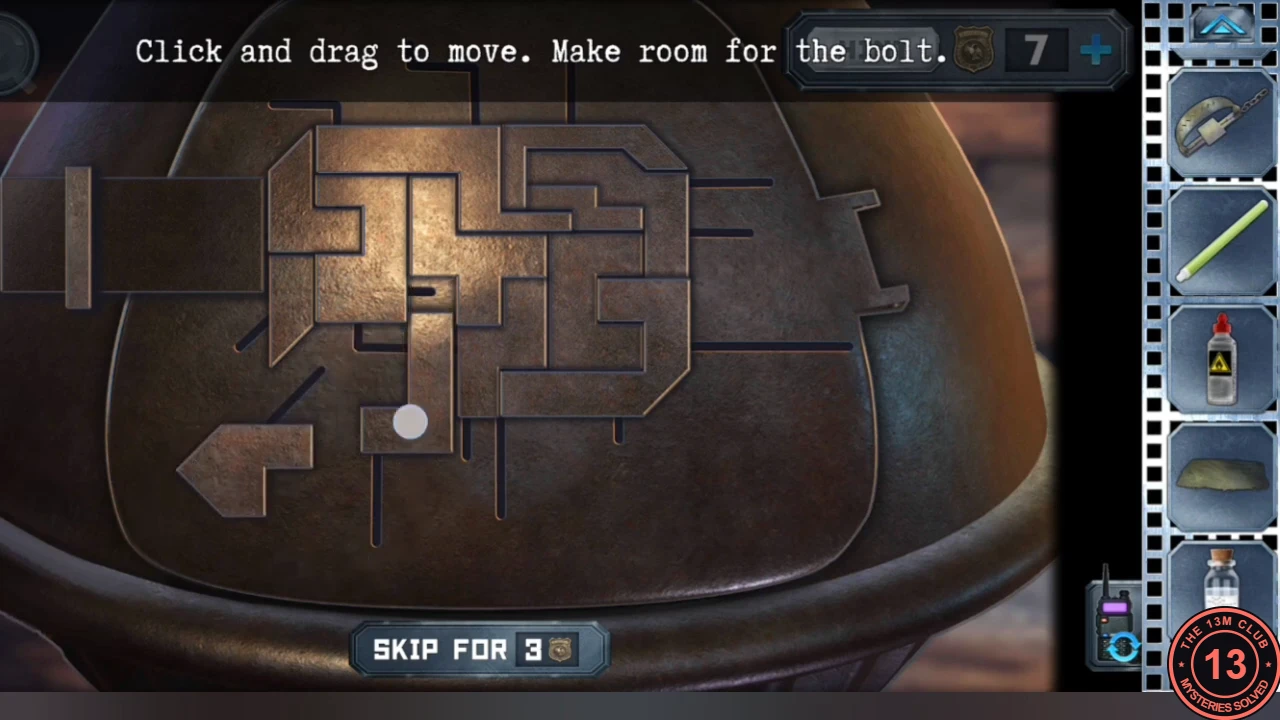
The cabin holds a photo wall, a stove, a cupboard, a mannequin, a cuckoo clock, a green monitor and a trapdoor under the carpet.
- Take the ladder. At the stove, drag the loose parts out of the way to make room for the latch, then slide the latch right. Take the lever (it belongs to the trail camera in the goat camp) and the match from inside.
- Unlock the cupboard with the key from the bird tree and take the soporific. The jars on the shelves are a puzzle for later.
- Put the "Smiling lady" photo into one of the four gaps on the photo wall. The coloured pins where the strings meet at the four corners of the photo wall are the second flower clue: each corner gives the petal colours of the flower in that corner of the lever.
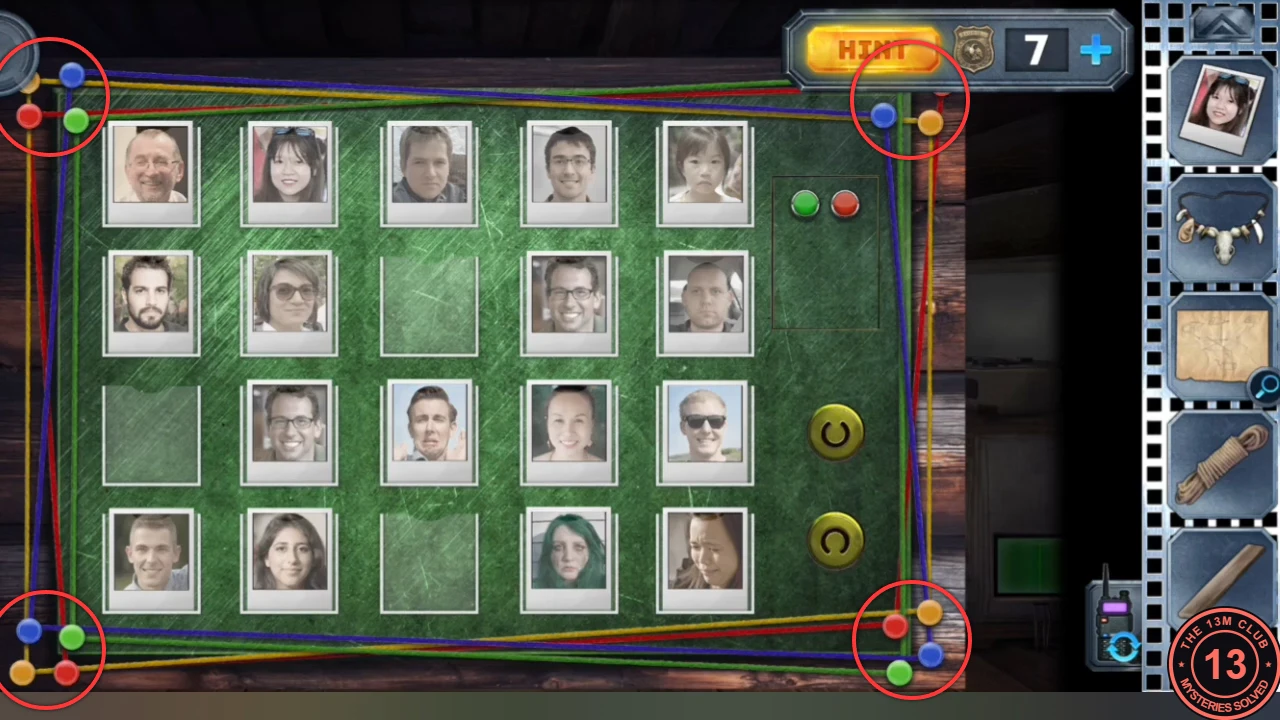
Clue: the coloured pins where the strings meet at each corner give the second flower setting. One top-right pin is hidden under the HINT counter.
Flower lever, second setting: the stump
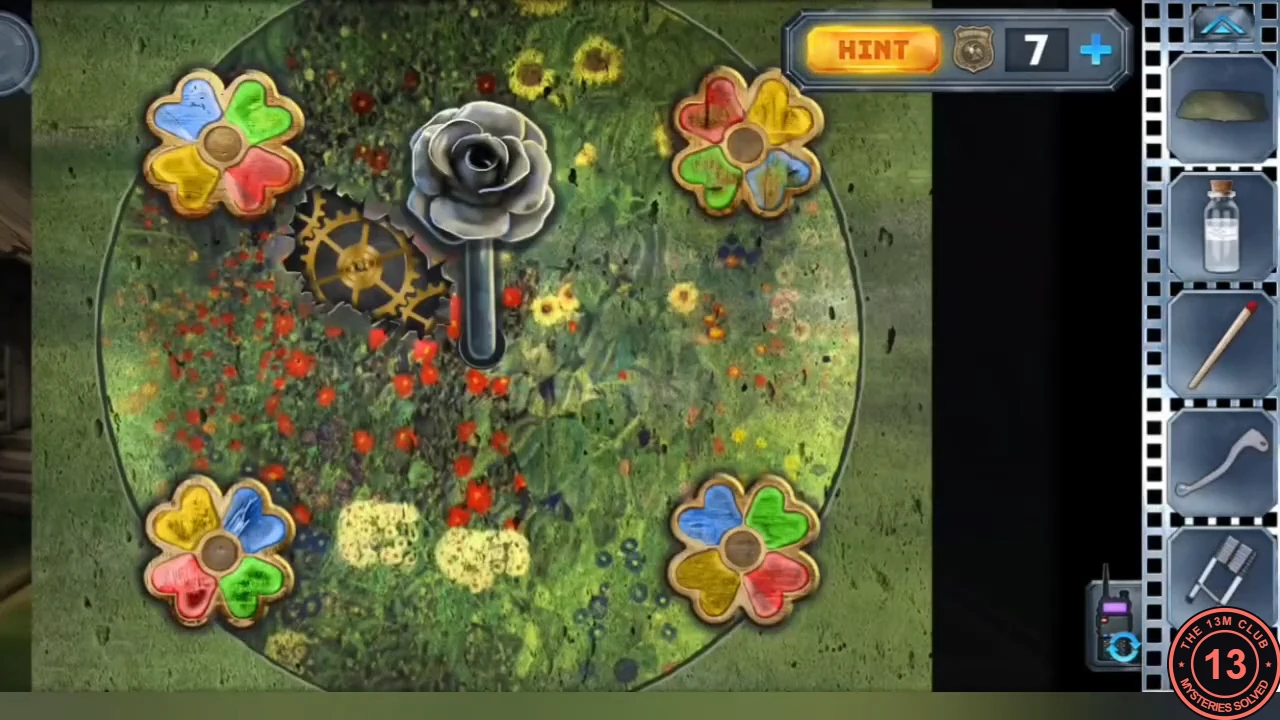
The coloured pins at the corners of the photo wall give the second flower-lever setting, which clears the trees around a large stump.
- Back at the flower lever, rotate the flowers to match the string colours at the photo-wall corners and turn the lever counter-clockwise. Nearby trees vanish and a large stump appears in the clearing. Take the sharpened coin lying on the stump (the stump's figurine slot is used much later).
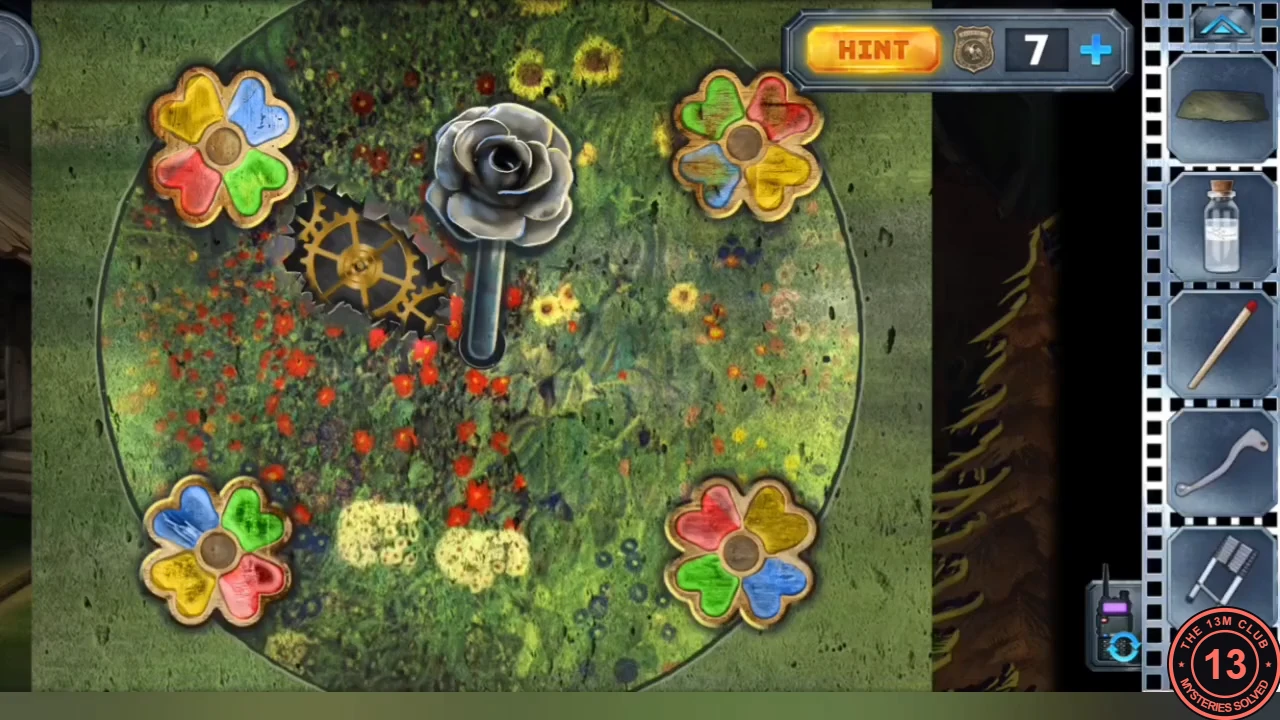
Solved: second flower setting, copied from the photo-wall corners; the trees start to vanish. - Put the fang necklace on the cabin mannequin. More pieces go on it later.
Cuckoo clock: setting the time
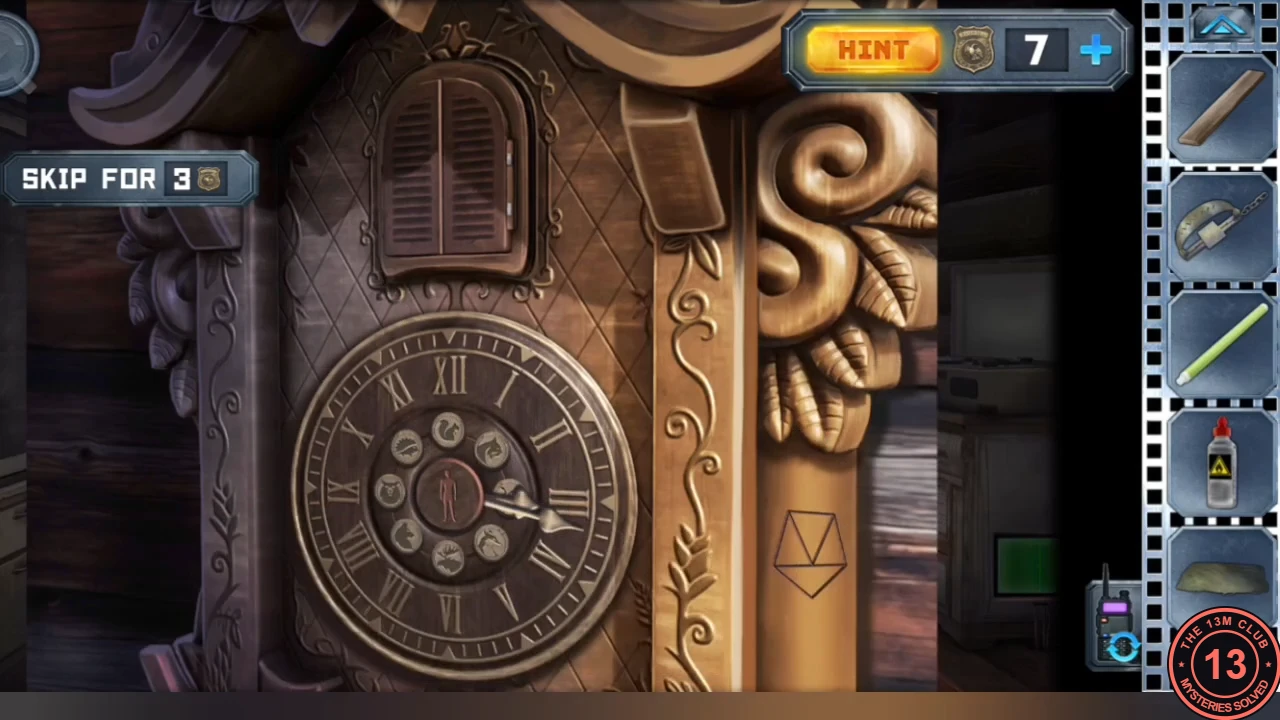
The time from the blackboard magnets opens the cuckoo clock in the cabin, and the animal ring in the clock face is the order for the hospital door.
- Set the cabin cuckoo clock to the time in the blackboard magnet message (17:15 in both recordings checked). A golden artificial bird comes out; take it. Look at the ring of animal symbols around the clock centre.CODE17:15
- Put the golden bird on its empty perch on the bird tree in the goat camp.
Hospital door: the animal ring lock
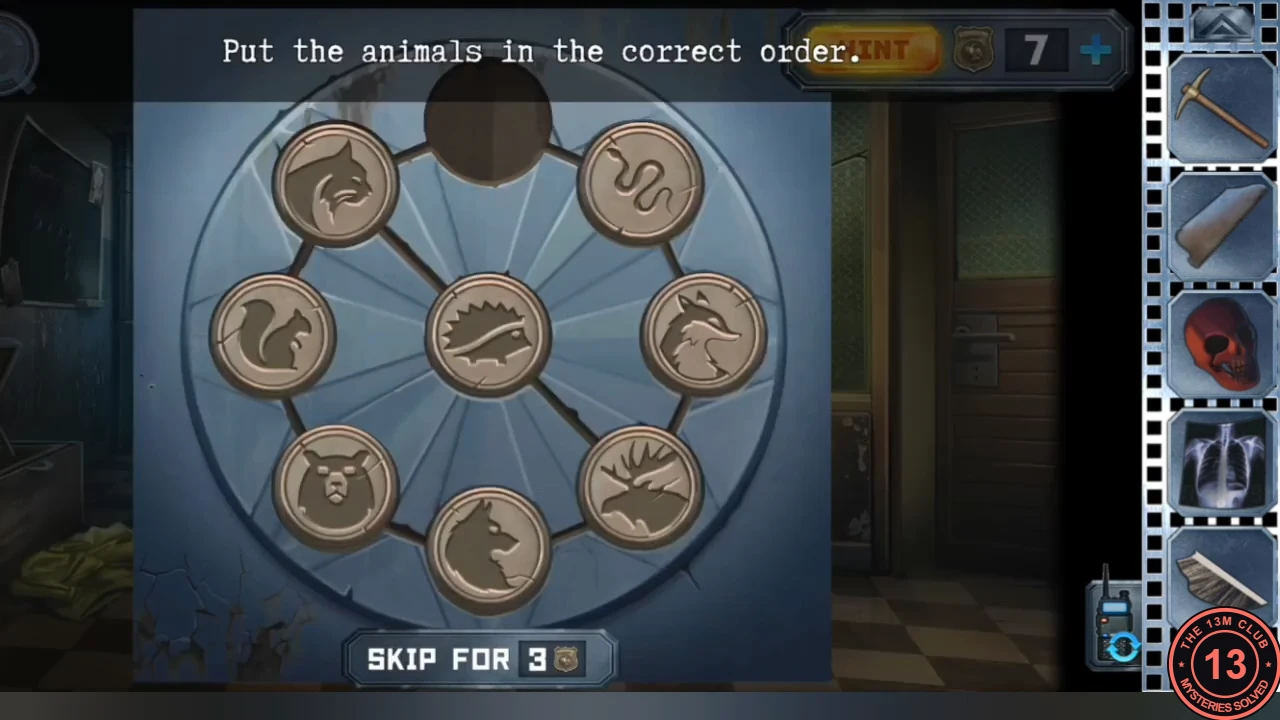
The ring lock on the blue hospital door, which took the hedgehog button earlier, wants its animals in the same order as the ring on the cuckoo clock.
- Switch to Alex. At the hospital door, rearrange the animal tokens around the human figure so they copy the ring on the clock face. Clockwise from the top the finished ring is: squirrel, lynx, snake, fox, moose, wolf, bear, hedgehog. The door opens.
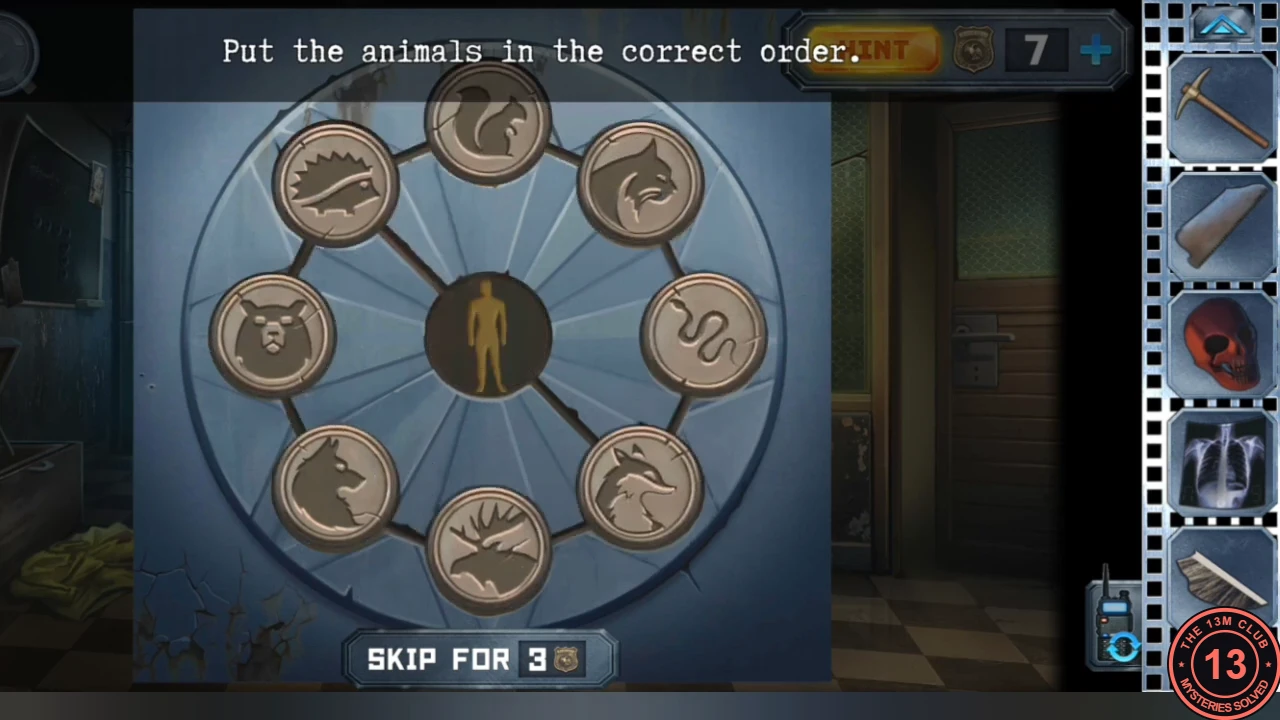
Solved: the hospital door animals copied from the clock face.