Outside the Southern Pumping Station
Task: 'Infiltrate the water-pumping station'. A guard watches the entrance from his booth.
- Take the BOTTLE OF ALCOHOL from the lid of the green dumpster.
- Cut the white sheet on the rubbish pile left of the dumpster with the KNIFE to get a PIECE OF CLOTH.
- Stuff the PIECE OF CLOTH into the BOTTLE OF ALCOHOL to make a MOLOTOV COCKTAIL, then drag it into the burning barrel by the brick building.
- In the guard booth, take the SIGNAL PISTOL from the desk. Lift the safety cover and press the red button to open the gate, then go inside.
Pumping Station Hall
Inside the pumping station, take the VALVE and open the orange hatch. Climbing down starts the timed sneaking sequence.
- The door at the top of the stairs needs a card, and the orange hatch needs a valve. Open the wooden crate on the workbench under the stairs and take the VALVE.
- Fit the VALVE to the orange hatch, turn it and climb down. A timed sneaking sequence starts.
Sneaking Past the Guards
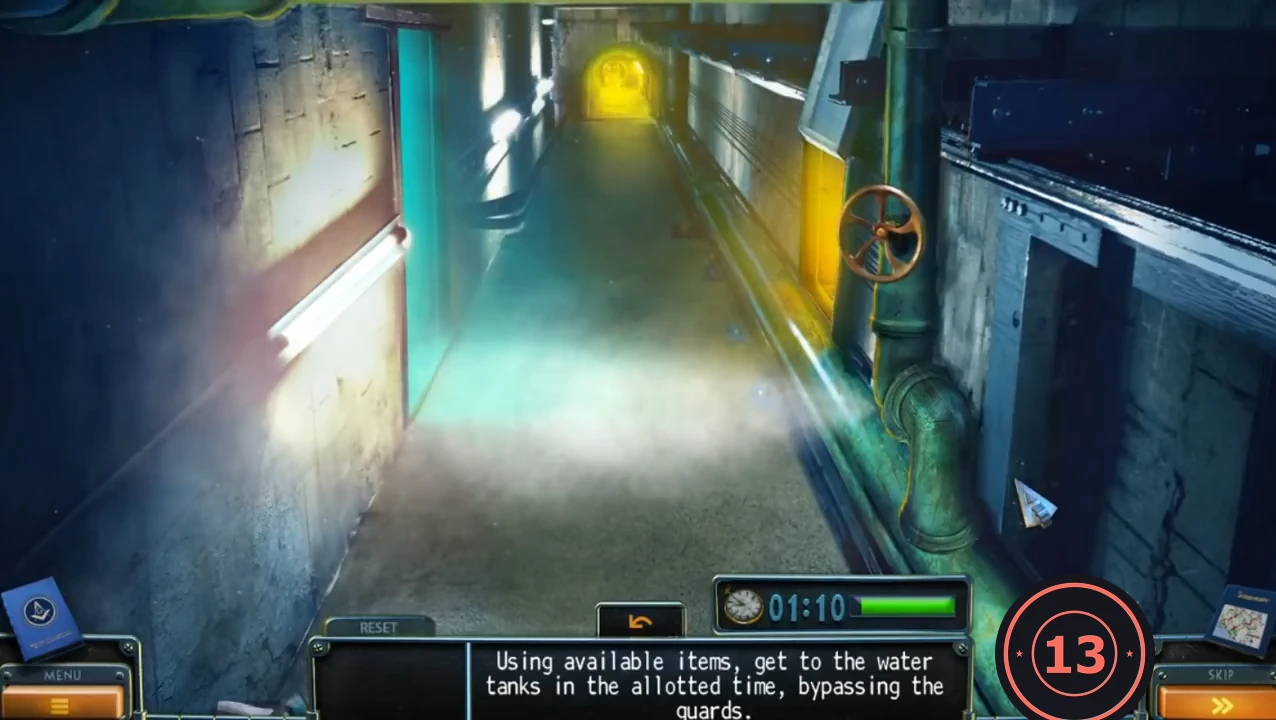
You have about 1:18. RESET restarts the sequence and SKIP is available. Items you find here go into a separate slot.
- Take the side doorway on the right of the first corridor and take the KEY from the yellow jacket. Go back, continue along the corridor into the round tunnel and take the left side to the blue tank room.
- Open the barred door at the back left with the KEY. In the yard, take the BRICK from the pile at the bottom left.
- Go back to the tank room, climb the stairs on the right and throw the BRICK into the lamp light in the courtyard. The guards go to the tunnel.
- Go down and out through the barred door into the yard. Enter the lit doorway of the blue building and take the WRENCH from the bag on the crate.
- In the tank room, click the glowing floor pit. Use the WRENCH on the small nut low on the red pipe to stop the steam and take the KEY from the hook.
- Go to the yard, take the alley on the left and open the fenced gate with the KEY.
Roof and Control Room
Hear the plan on the roof, take the MAGNETIC ACCESS CARD and enter the control room. One pump is broken and needs repair first.
- Listen to the plan: pump all the water into this one tank, then stop Travis with the magnetic crane. Take the MAGNETIC ACCESS CARD from the yellow raincoat pocket. The red box on the floor is locked.
- Return to the hall and swipe the MAGNETIC ACCESS CARD at the door at the top of the stairs. Enter the control room.
- Check the crane remote on the left console. Press the red button on the right console: one pump is broken. Take the T-shaped KEY from the panel beside the red button.
Pump Repair
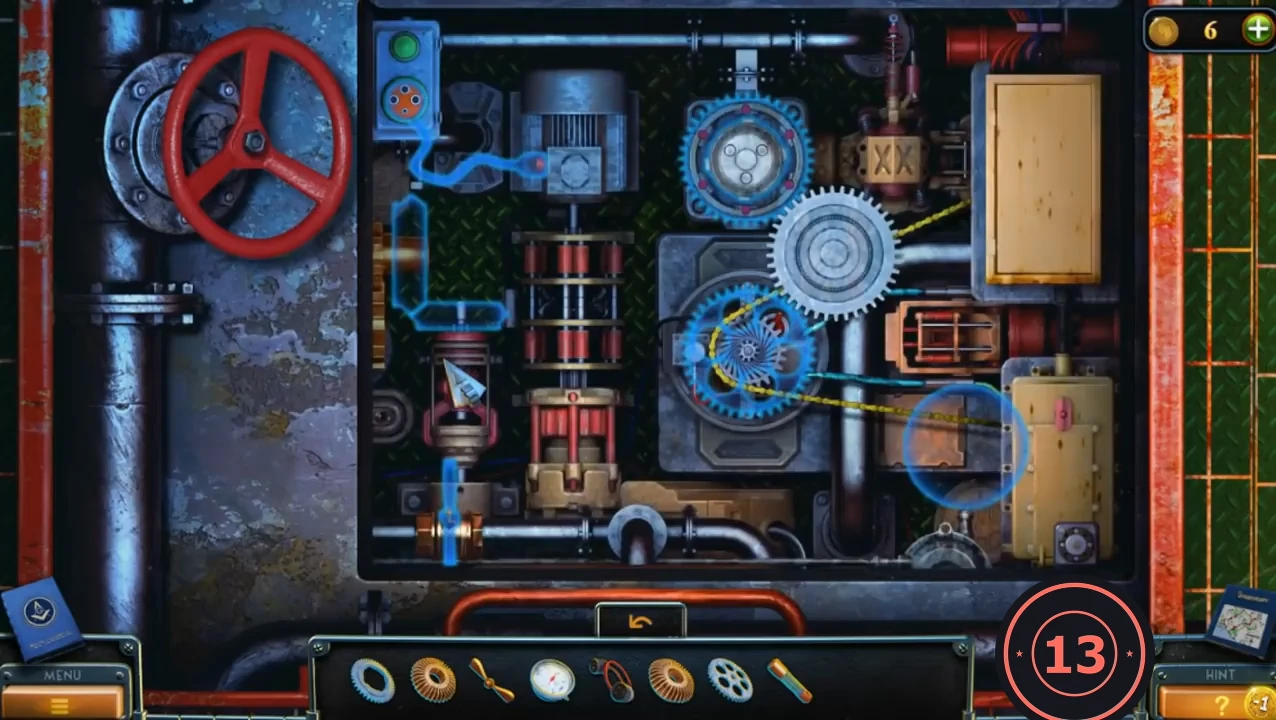
Drag each part from the tray into the blue outline where it fits. A wrong part gives 'No, this item can't be used here...'.
- On the roof, open the red floor box with the T-shaped KEY.
- Fit the VALVE WHEEL on the top-left shaft and the LEVER in the slot at the bottom left of the door. Pull the lever up to open the door.
- Inside, place the GEARS, MANOMETER, RED WIRE, FAN, BEVEL GEAR and ELECTRICAL FUSE into their matching outlines. The fuse goes in the yellow box at the top right.
Tank Pumping
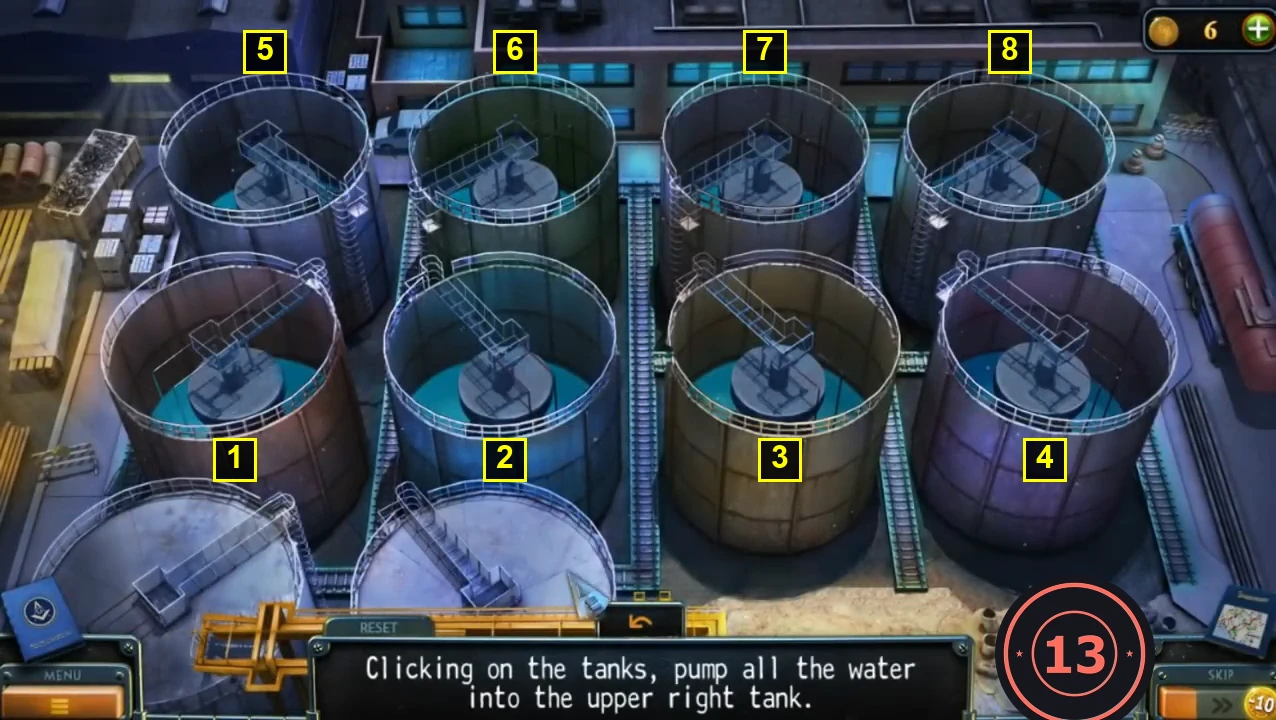
The first control-room puzzle: pump all the water into the upper right tank. It starts from the same layout every time in the recordings checked, so the sequence below can be followed exactly. Solving it in fewer than 35 moves earns the Specialist achievement; the sequence below uses 19.
- In the control room, press the pump panel on the right console to start the tank puzzle.
- Number the eight tanks: front row 1 to 4 from left to right, back row 5 to 8 from left to right. Tank 8 (back right) is the upper right tank that must end up full. Clicking a tank pumps its water into the tank it is piped to, until that tank is full. Click the tanks in this order: 3, 6, 3, 2, 1, 6, 3, 5, 6, 3, 1, 6, 3, 7, 4, 3, 1, 6, 3. All the water is now in tank 8. If a click goes wrong, press RESET and start the sequence again.CODE3, 6, 3, 2, 1, 6, 3, 5, 6, 3, 1, 6, 3, 7, 4, 3, 1, 6, 3
The Magnetic Crane
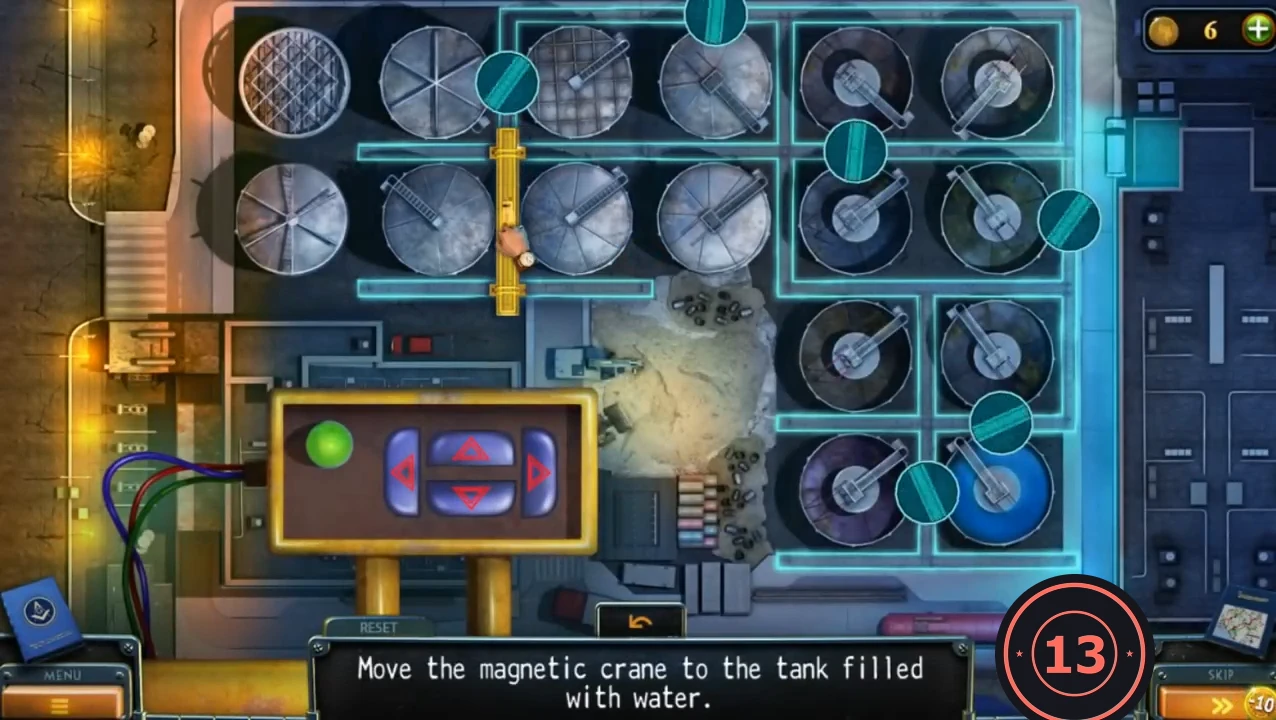
With the tank full, the crane remote on the left console moves the magnetic crane along its tracks. Each arrow press moves it one track section, and the round teal gates change as it moves. The crane starts in the same place every time in the recordings checked, so the sequence below can be followed exactly.
- Use the crane remote on the left console.
- The remote has four arrow buttons. Each press moves the crane one track section in that direction, and the round teal gates on the tracks change as it moves, so follow the presses exactly: Left, Left, Right, Up, Right, Right, Down, Up, Right, Right, Left, Right, Down, Left, Right, Down, Left, Left, Right, Down, Left, Right, Right. The crane stops over the blue tank at the lower right. If it goes wrong, press RESET and start again.CODELeft x2, Right, Up, Right x2, Down, Up, Right x2, Left, Right, Down, Left, Right, Down, Left x2, Right, Down, Left, Right x2
Stopping Travis
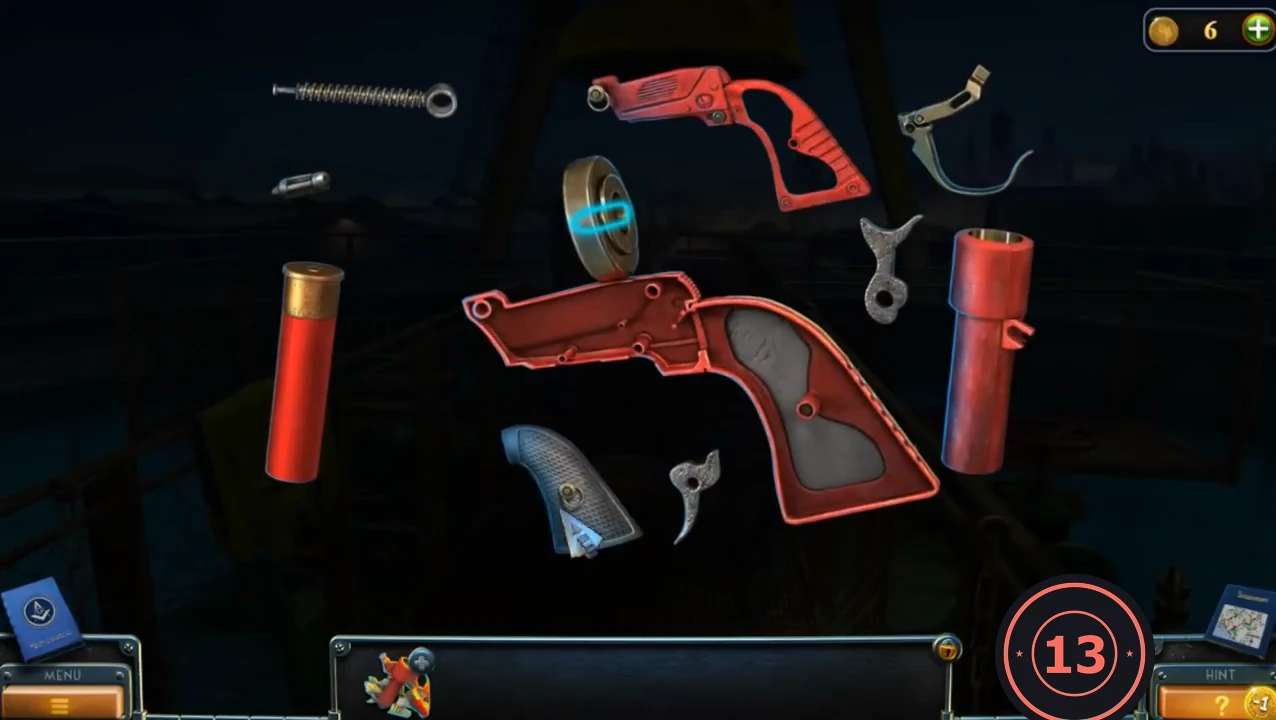
The final confrontation on the roof: collect the parts of the broken signal pistol, rebuild it and fire it so the magnetic crane can stop Travis.
- Leave the control room and go to the roof. Travis attacks and the SIGNAL PISTOL breaks on the grating.
- Search four spots on the walkway for the BROKEN SIGNAL PISTOL pieces (10): the far end by the crane, the centre-right in front of the red valve wheel, the bottom left by the raincoat railing and the left-middle by the railing.
- Open the BROKEN SIGNAL PISTOL in the inventory and drag each part onto its blue outline: the small parts onto the frame, the barrel, the grip plates and finally the cartridge. Close the barrel.
- Fire the SIGNAL PISTOL into the sky above the walkway. Your partner switches on the magnetic crane and the mask is pulled off Travis.