The Locked Storage and the Vent
The alarm has locked Laura and the Bishop in the Order's storage. Your task is 'Get out of the storage'. The flame icon with a countdown under the coin counter belongs to the free-to-play shop offer and does not limit your play time.
- Look at the vent grate on the right-hand wall: you need something to jam the fan with. Take the CROWBAR lying on the floor in front of the central platform.
- The electrical box on the hoist has bare wires ('I must not touch the naked wires'); leave it for later.
- Use the CROWBAR on the vent grate to pry it off; the crowbar is then jammed into the fan. Enter the vent.
Vent Maze
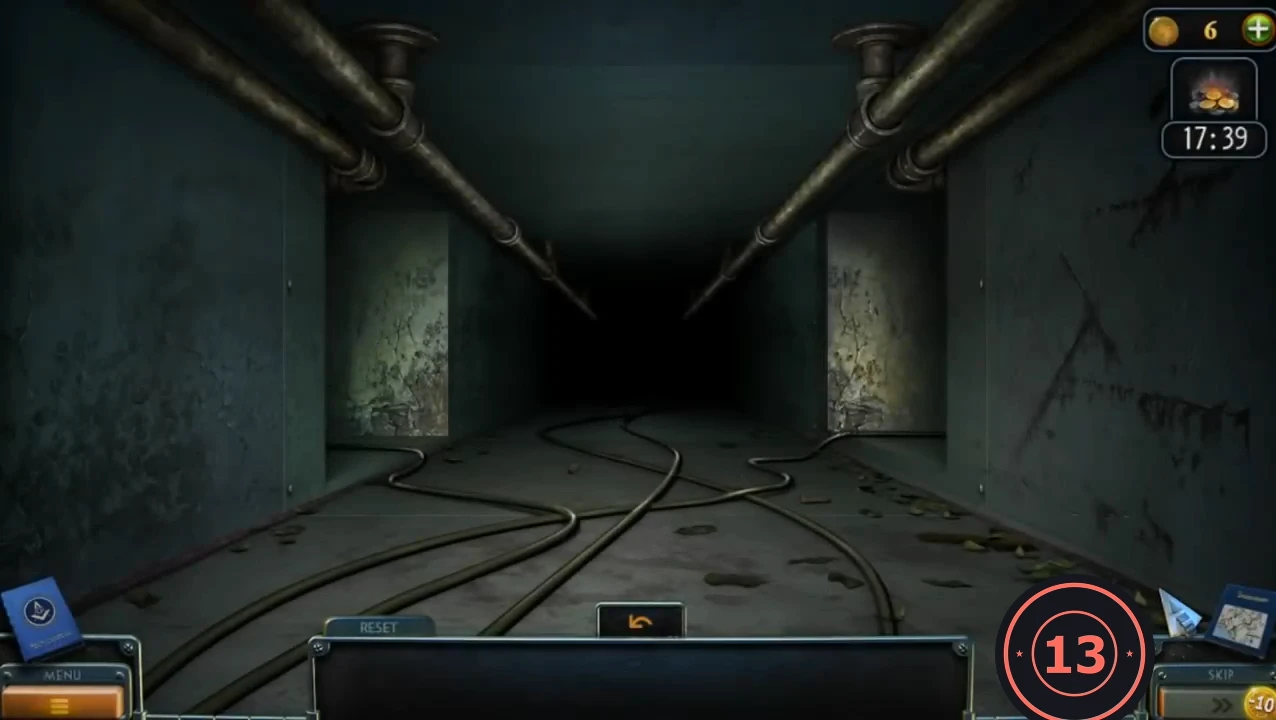
Goal: "Find a way out of the vent." Use the arrows to move through the first-person ducts. Grates with X-braces are dead ends. The Bishop tells you over the radio to reach the security room.
- From the first view (side openings left and right, dark duct straight ahead): 1) go straight ahead; 2) take the opening on the right; 3) take the opening on the left; 4) at the cross-duct with the horizontal pipe, take the opening on the right. You arrive in the small end room with a floor grate. If you hit a grate with an X-brace, use the back arrow at the bottom and try again.CODEForward, right, left, right.
- Take the WIRE from the floor of the vent end room.
- Open the floor grate by clicking its two front corner bolts (left, then right) and drop into the security room.
Security Room: Lockers, Fan and Console
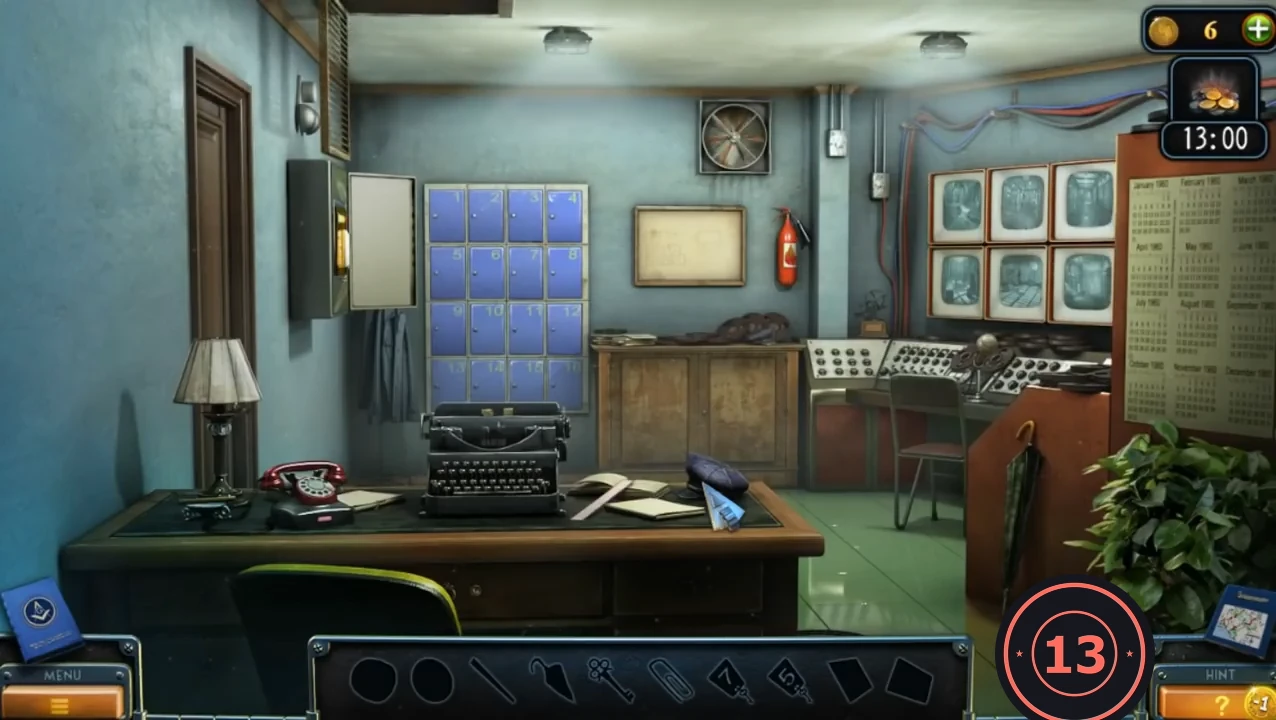
The security room has its own item bar with silhouettes of the objects needed here. The wall control panel needs a code and a key card; the console speaker is broken.
- Zoom into the desk and take the RULER. The desk drawer is closed.
- Take the UMBRELLA leaning against the red cabinet on the right side of the room.
- Open locker 1 and take the COIN. Locker 3 holds only a mug; the other lockers need keys.
- Zoom into the wall fan. Use the UMBRELLA to stop the blades, then the RULER to push out the key behind them: KEY #7.
- Open locker 7 with KEY #7, zoom into the envelope and take the PAPER CLIP.
- Zoom into the console under the monitors. Use the COIN to turn the four bolts of the speaker grille and remove it. Take the small KEY lying on the faulty speaker and lift the faulty speaker out.
- Open the desk drawer with the KEY and take KEY #5.
- Open locker 5 with KEY #5 and take the CALENDAR.
- Zoom into the telephone, unscrew the handset's earpiece and take the SPEAKER.
- Put the SPEAKER into the console hole and connect the wires. Laura reaches the Bishop: he tells her to look under the typewriter for a spare key card.
- Slide the PAPER CLIP under the typewriter on the desk to pull out the KEY CARD.
Security Control Panel
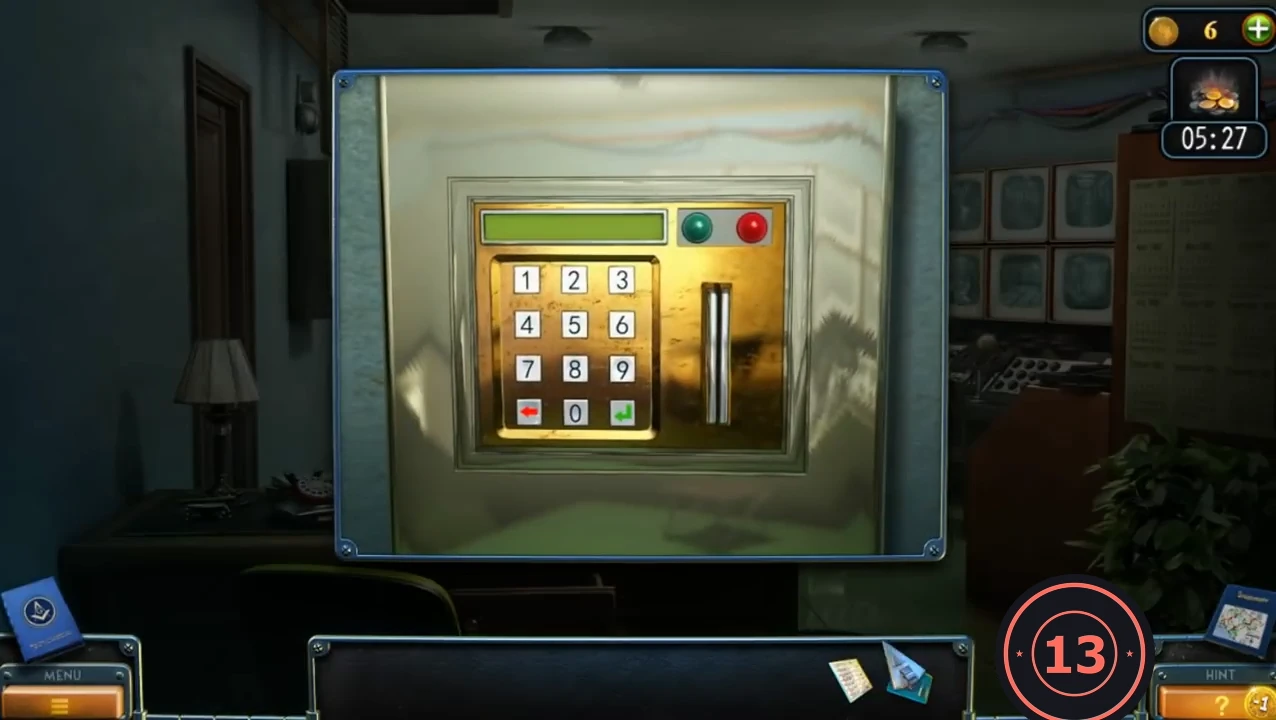
The keypad by the door disables the protection once you enter the code and insert the key card. The 1960 calendar is the hint: blue circles in January to March and red circles on 13, 14, 15 and 18 March.
- Place the CALENDAR beside the control panel, type 1458 and press the green button.CODE1458
- Insert the KEY CARD into the slot to open the chip board.
Security Chips
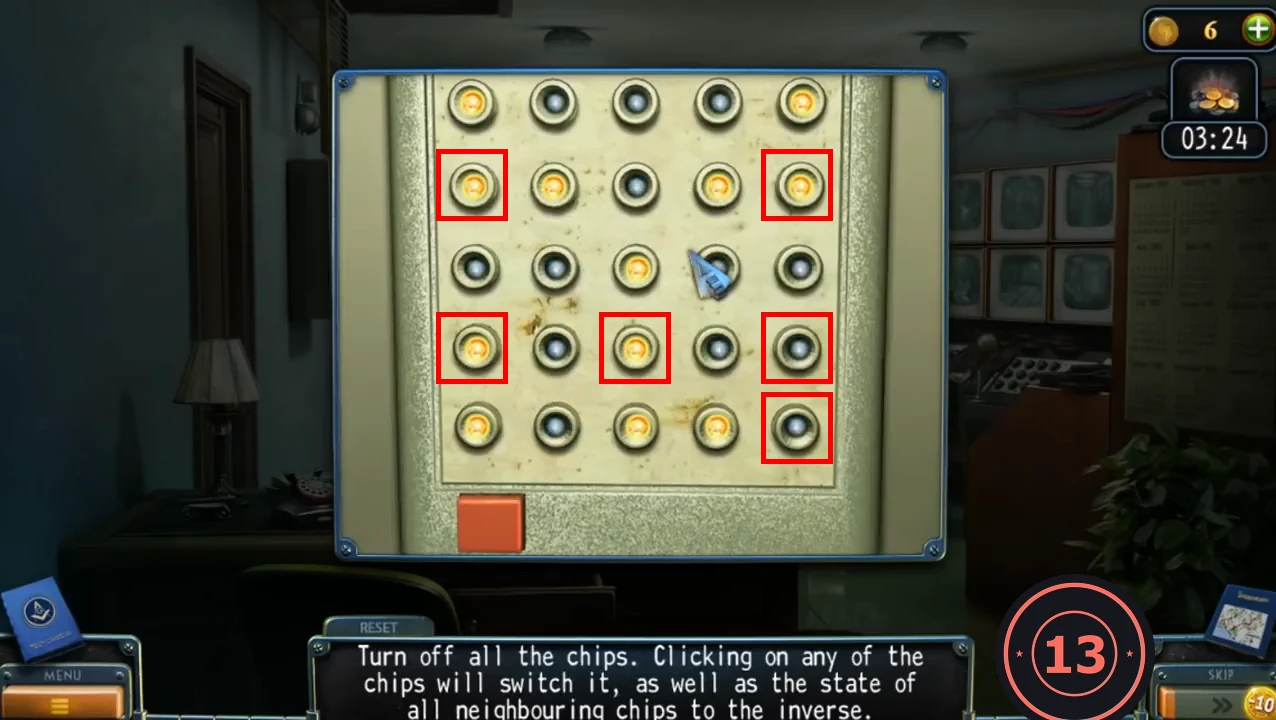
Goal: "Turn off all the chips. Clicking on any of the chips will switch it, as well as the state of all neighbouring chips to the inverse." A click toggles the chip and the chips directly above, below, left and right of it (not diagonals). The starting layout was the same in both recordings checked.
- Starting layout (rows top to bottom, X = lit): X...X / XX.XX / ..X.. / X.X.. / X.XX. Click these six chips in any order: row 2 column 1, row 2 column 5, row 4 column 1, row 4 column 3, row 4 column 5, row 5 column 5. All chips go dark.
The Bishop's Briefing
The Bishop explains what the stolen mask does and where to look next: the Order's ledger in the library. The ladder up to it is broken.
- Cutscene: the mask stolen from the storage gave Travis superpowers. The archive holds documents on every object, and their numbers are in the Order's ledger, kept in a chest in the library. The Bishop gives you the GREEN SNAKE KEY. New task: 'Find information about the mask'.
- In the library, the ladder is broken: one of its rollers is missing.
Storage Hoist
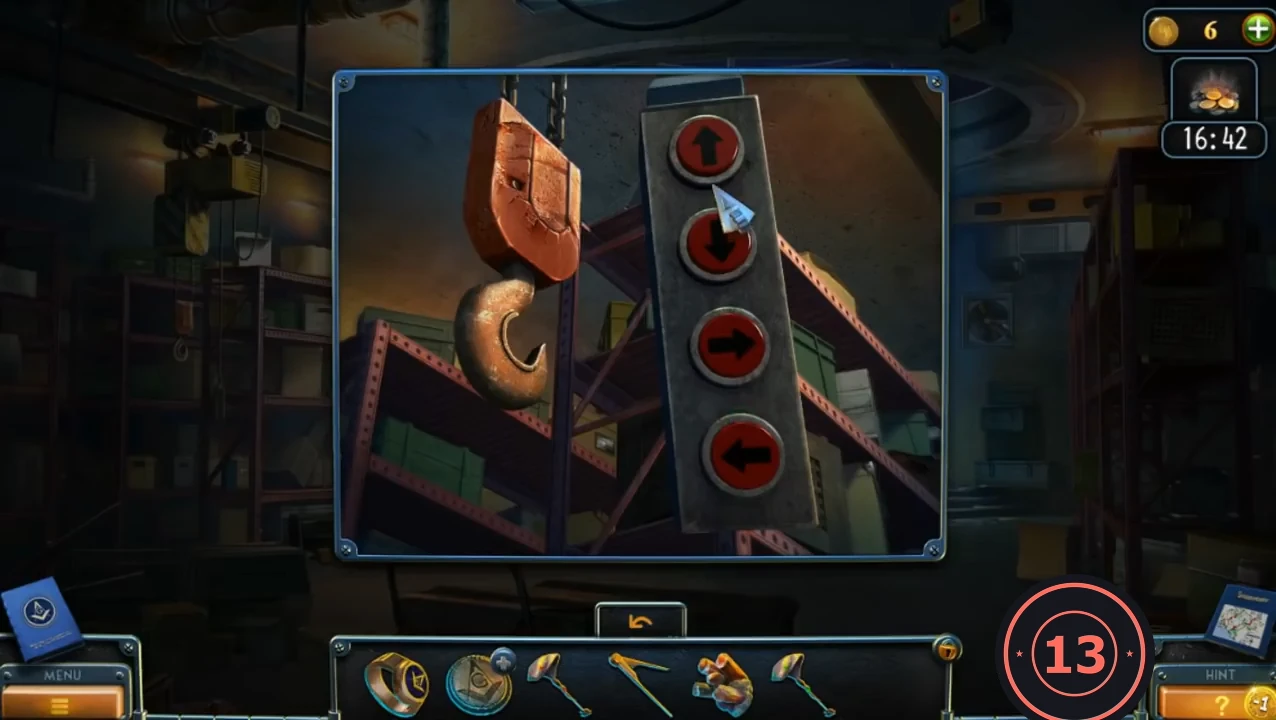
Power the storage hoist and lift the cover to find the ROLLER for the library ladder.
- Return to the storage. Zoom into the pallet on the floor (lower centre), move the box and take the RUBBER GLOVES.
- Zoom into the hoist's electrical box. Use the RUBBER GLOVES and then the WIRE on the bare wires; a panel with four arrow buttons appears.
- Press LEFT to move the hoist across the room, then DOWN to hook the cover's handle and UP to lift it. Take the ROLLER revealed underneath.
Library Ladder and the Ledger
Repair the ladder, open the chest with both snake keys and look up the plague mask in the ledger. Its entry gives the archive case number.
- In the library, put the ROLLER on the broken ladder wheel and climb up to the chest.
- Use the RED SNAKE KEY and the GREEN SNAKE KEY on the chest's lock to open it.
- While the ledger is open, open the MEDALLION OF THE ORDER in inventory and put the COMPASS FIGURINE on it. Other parts are still missing.
- Turn the ledger pages to the plague mask: 'Artifact number 54204. Plague Mask... Case number 001 252, section 42.' Take the KEY from the chest and open the locked side door of the library.