Archive Corridor
Find the mask's folder in the archive filing cabinet and collect the PORTRAIT, the LOCK PIN and the PLAYING CARDS. Memorise the time engraved in the pocket watch's lid.
- Zoom into the filing cabinet with drawers 31-48 and open drawer 42 (third row, middle). Take the folder No001252: you receive the VIDEOTAPE and a DOOR HANDLE. New task: 'Watch the video'.
- Take the PORTRAIT from the wall on the left near the end of the corridor (the G.N. Kotton portrait stays).
- The tall clock is missing its minute hand.
- Zoom into the boards in front of the far door and take the LOCK PIN lying among them. The boards sticking out of the floor block the door for now.
- At the card table on the right, take the PLAYING CARDS. Open the pocket watch on the poker chips and memorise the time engraved in its lid.
Projector Room
Through the door at the end of the corridor is the screening room with red seats, three portraits, a lectern and an easel.
- Take the DRY RAG from the floor near the easel and the POINTER from the easel.
- Look at the torn loudspeaker (it needs paper and glue), the wire in the slot of the table (it needs cutting) and the projection screen box on the ceiling. Take the GLUE.
- Collectibles: the FEATHER on a red seat at the front left and the MORPHING OBJECT on the floor between the seats left of centre.
- The lectern has a round socket with the same picture as the medallion; you will come back with it.
- Zoom into the red cabinet on the left. Slide the PLAYING CARDS through the gap to lift the latch and take the ROLLER.
Projection Booth
Open the projection booth and start collecting the parts the projector checklist asks for. Lighting the alcove lamp reveals the sliding-portrait box.
- Back in the archive corridor, fit the DOOR HANDLE on the door at the side and enter the projection booth.
- Take the HAMMER. The projector's checklist needs a videotape, bulb, roller, audio cable, projector lens and gear.
- Break the wall lamp box with the HAMMER and take the LIGHT BULB.
- Mount the ROLLER and the VIDEOTAPE on the projector.
- Take the SLIDING LADDER from the upper middle of the booth, near the poster.
- Screw the LIGHT BULB into the dark lamp in the left alcove. The lit desk holds a box with a sliding-portrait puzzle; place the PORTRAIT in it.
Sliding Portraits
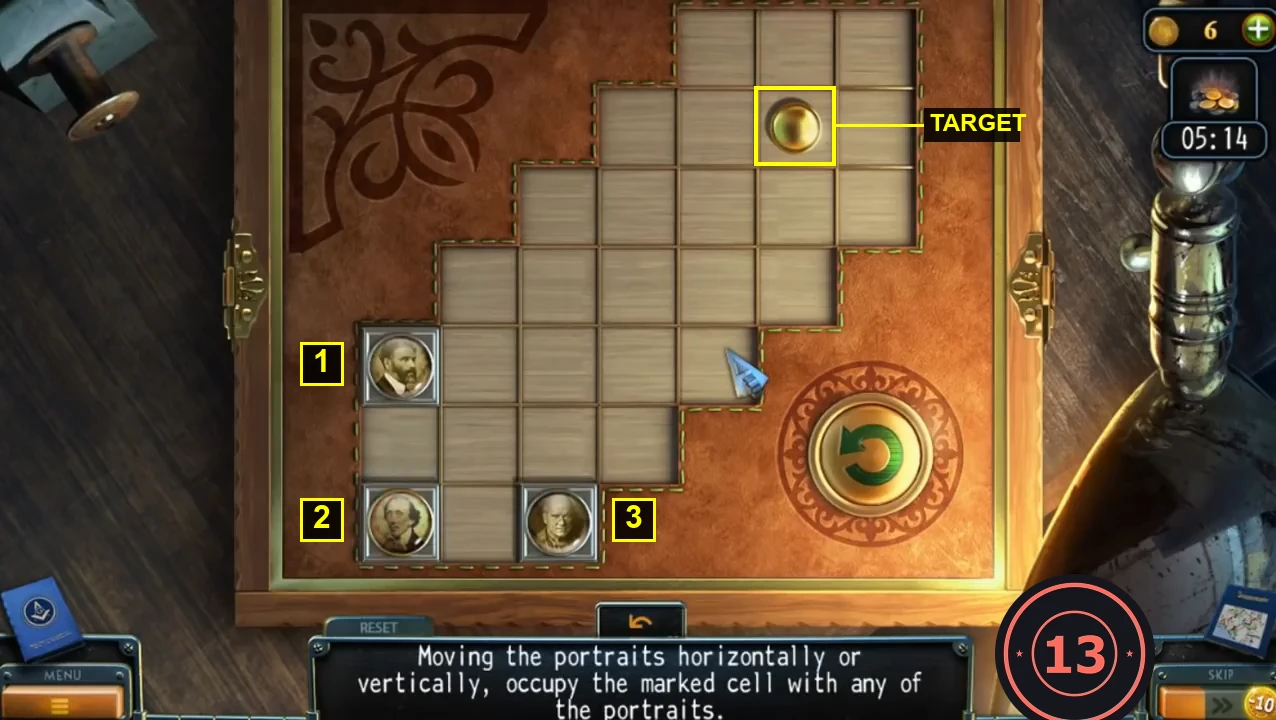
Goal: "Moving the portraits horizontally or vertically, occupy the marked cell with any of the portraits." Each portrait slides until it hits an edge or another obstacle.
- Number the portraits: 1 = the one on the left edge (middle), 2 = bottom-left corner, 3 = third cell of the bottom row. Each portrait slides until it hits the board edge or another portrait. Drag: 1) portrait 3 up (it stops in the row just below the wide steps); 2) portrait 3 right (to the right edge); 3) portrait 1 right; 4) portrait 1 up (to the top row); 5) portrait 2 right; 6) portrait 2 up; 7) portrait 2 right (it stops next to portrait 3); 8) portrait 3 up (top-right corner); 9) portrait 1 right (it stops next to portrait 3); 10) portrait 2 up; it stops under portrait 1, on the gold cell.CODE3 up, 3 right, 1 right, 1 up, 2 right, 2 up, 2 right, 3 up, 1 right, 2 up.
- Take the MINUTE HAND from the opened box. The coffee stain on the desk hides an etching, but the dry rag must be soaked first.
- Fit the MINUTE HAND on the tall clock in the archive corridor. It needs the correct time.
Storage of the Order
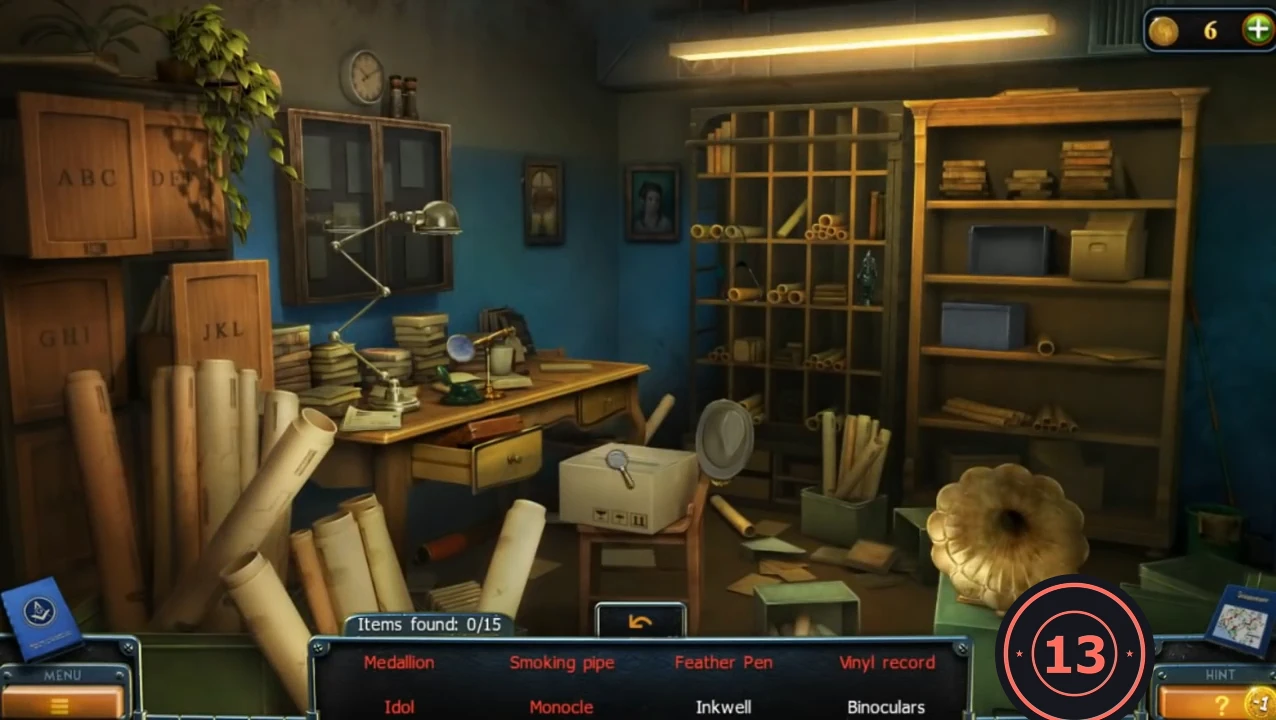
An interactive search scene in a cluttered blue office. The list at the bottom shows eight items at a time and new names replace the ones you find. The 15 items are: Medallion, Smoking pipe, Feather pen, Vinyl record, Idol, Monocle, Inkwell, Binoculars, Statuette, Envelope, Compass, Brass pipe, Football, Spyglass and Stethoscope. Names in red need an extra action first (opening a drawer or box, or combining something in the scene). The reward is the PROJECTOR LENS.
- Look at the G.N. Kotton portrait on the corridor wall: the same letter G is missing from the medallion.
- Use the HAMMER's claw to pull up the boards by the far corridor door and enter the Storage of the Order.
- Find all 15 items. Start with the desk on the left: clicking it opens a close-up where you open the desk drawers and the cardboard box on the floor beside it; several items (among them the Idol in the lower drawer) are found there. The rest are spread around the shelves, filing cabinets, rolled papers and the gramophone of the main view. When the last item is found you receive the PROJECTOR LENS.
Clock Hints
Three hints give the three clock positions: the pocket watch, the painting glass in the projector room and the coffee stain in the booth.
- Combine the SLIDING LADDER and the LOCK PIN in inventory to make a FOLDING LADDER, then place it under the frame on the left wall of the projector room. The glass needs wiping.
- Open the map, choose the Order tab and go back to the Order laboratory (the lab with the blue glass reagent cabinet where Travis made the serum, not the Institute). Soak the DRY RAG in the sink on the right, where you found the photo tray, to get a WET RAG.
- Wipe the frame glass with the WET RAG: the reflection shows clock hands to remember.
- In the booth, fit the PROJECTOR LENS on the projector. Then wipe the coffee stain on the desk with the WET RAG to reveal the third clock position.
Archive Clock Latches
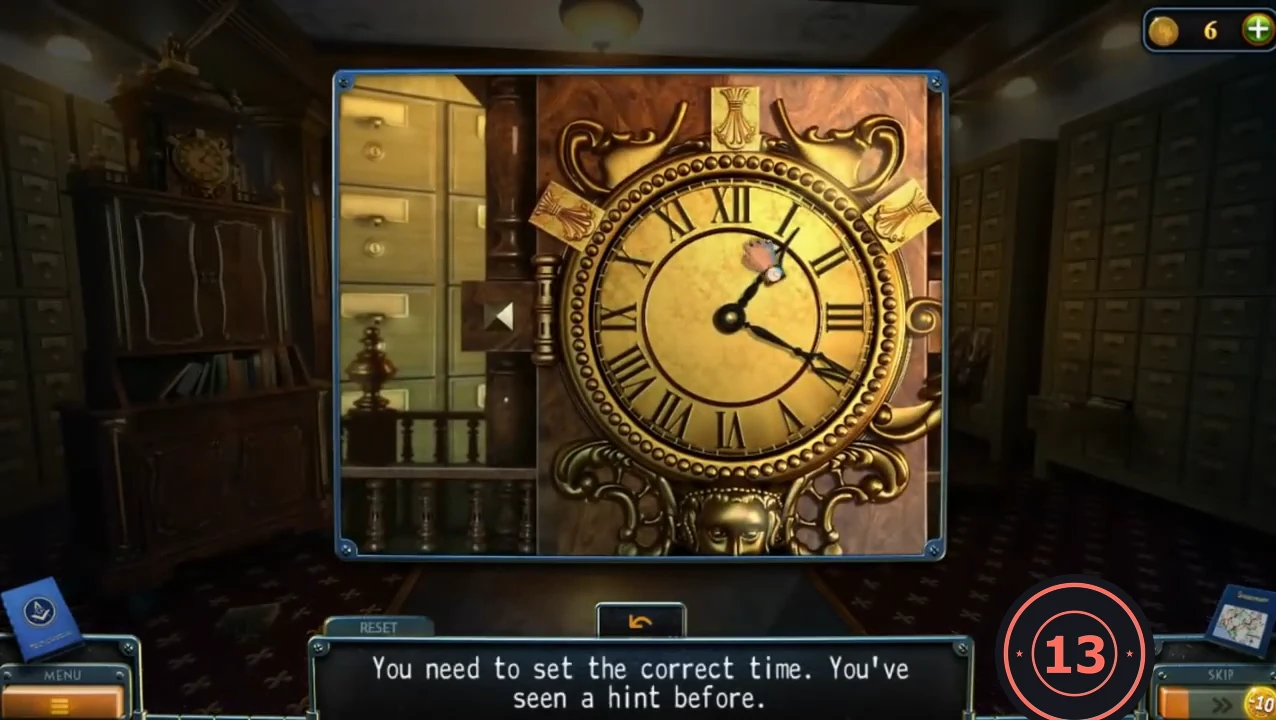
The clock has three ornamental latches (left, right and top). Each correct setting of the hands turns one latch. A partial setting gives: '...are still closed. It seems I need to find the correct clock position for all the latches.'
- Set minute hand to XI and hour hand to III (about 2:55): the left latch turns.
- Set minute hand to XI and hour hand to II (about 1:55): the right latch turns.
- Set minute hand to XII and hour hand to VIII (8:00): the numerals glow blue and the top latch lifts. Take the NIPPERS, the ANGLE BRACKET FIGURINE and the GEAR from the compartment.
Medallion and Projector Parts
Complete the MEDALLION OF THE ORDER and use it at the lectern for the AUDIO CABLE, then repair the loudspeaker to get the STENCIL.
- Open the MEDALLION OF THE ORDER and add the ANGLE BRACKET FIGURINE.
- Cut the letter G from the G.N. Kotton nameplate with the NIPPERS, put it on the medallion, then put the RING in its centre to activate it. You get the MEDALLION.
- Install the GEAR in the booth projector. A cable is still missing.
- Put the MEDALLION in the round socket of the projector-room lectern and take the AUDIO CABLE and the SCISSORS.
- Cut the wire in the table slot with the NIPPERS and take the SHEET OF PAPER. Repair the torn loudspeaker with the SHEET OF PAPER and the GLUE; you obtain the STENCIL.
Film Stencil
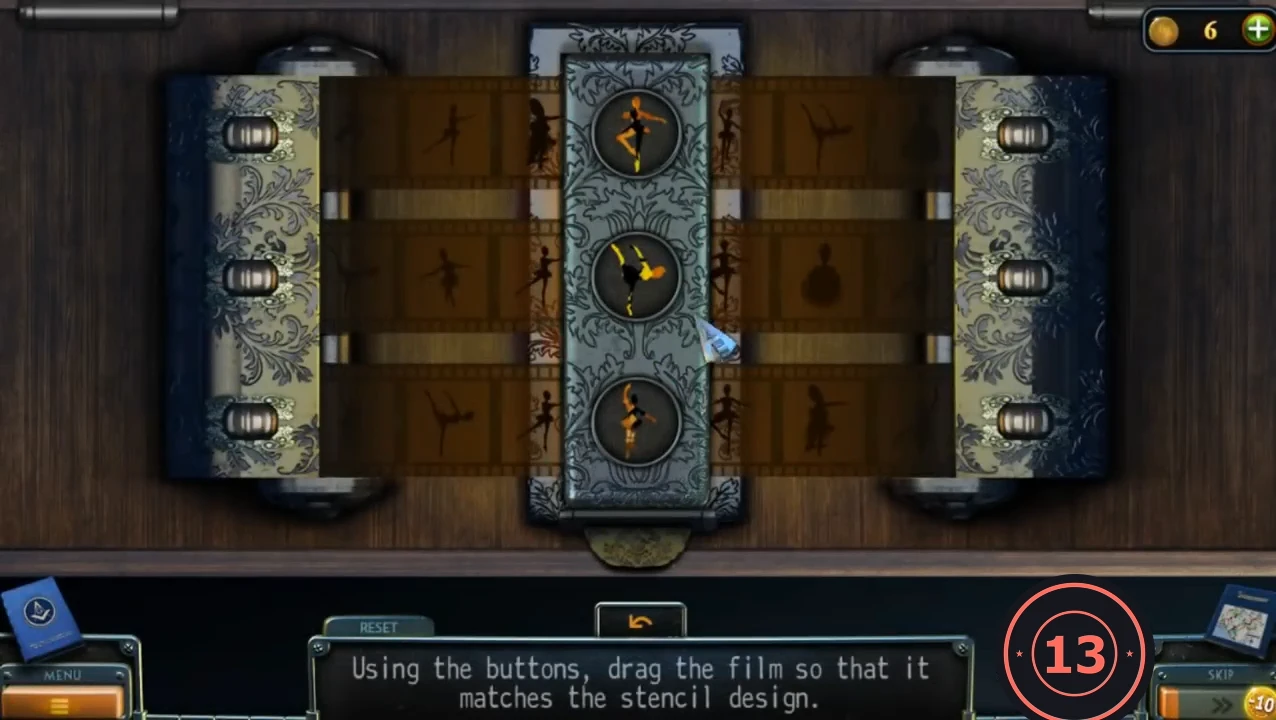
Goal: "Using the buttons, drag the film so that it matches the stencil design." The panel is on the booth wall (upper left) with three film rows of dancer silhouettes.
- Place the STENCIL on the film panel to start the puzzle.
- Each film row has a roller button on the right. Press the top button 3 times, the middle button 3 times and the bottom button 3 times. Each press moves that film strip one frame; when all three stencil windows are filled by the matching dancer silhouettes, the stencil panel glows and unlocks.CODETop button x3, middle x3, bottom x3.
- Take the PROJECTOR BULB from the compartment.
Watching the Film
Finish the projector and pull down the screen to watch the film about the plague doctor mask.
- Connect the AUDIO CABLE and insert the PROJECTOR BULB in the booth projector.
- In the projector room, hook the screen box on the ceiling with the POINTER and pull the screen down.
- Switch on the projector in the booth. Laura and the Bishop watch the film about the plague doctor mask.