Hall of the Order: First Look
The laboratory is behind the locked door in the hall. The ornate double door behind the dinosaur skeleton needs ten KEYS; keys are counted in the inventory (x/10).
- Zoom into the red ottoman in the right foreground and take the LIGHTER. It is out of fuel and its cover must be removed first. New task: open the door to the lab.
- Look at the tall cabinet on the right: it has a lock with four dials and you need a hint.
- Zoom into the long table at the back right and take the MEDALLION OF THE ORDER. Both candelabras are missing a candle and the box in the middle of the table is missing a piece.
- Take the KEYS (1/10) from the glass vase with red sticks at the right end of the reception desk.
- Behind the reception desk, open the upper drawer for the PRECISION SCREWDRIVER and KEYS (2/10), and the lower drawer for a CANDLE.
- Look at the ornate double door behind the dinosaur skeleton: ten keys are needed. Go through the blue archway at the back right into the library.
Library
The library holds keys for the hall's ten-key door, the first part of the scheme and the RED SNAKE KEY. Two collectibles are here too.
- Take the UMBRELLA hanging on the right-hand bookcase. The globe needs a sharp object to open it.
- Zoom into the right part of the back desk: the flask contains fuel. Take the KEYS (3/10) and the DRY WICK.
- Use the RING on the lock of the glass display case on the left and take the RED SNAKE KEY.
- Collectibles in the library: the MORPHING OBJECT, a stack of books on the top shelf of the second bookcase from the left, and the VINYL RECORD on the floor right of the globe. The ladder is missing a roller.
- Zoom into the books in the middle of the back desk. Take the PART OF THE SCHEME (1/3) and the KEYS (4/10) from the open book on the left. A taped book needs something to cut the tape.
Left Candelabra
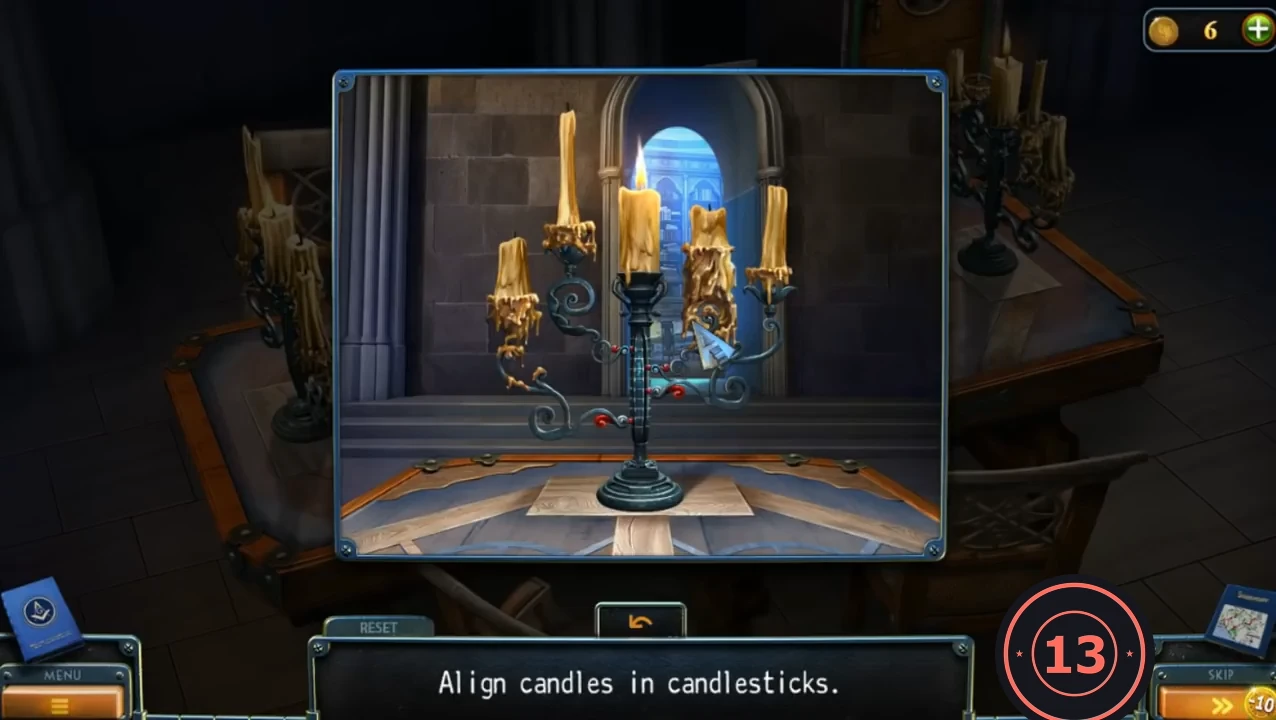
Goal: "Align candles in candlesticks." Each of the four side holders has its own wax collar; the loose candles above them are in the wrong holders. Click one candle, then another, to swap them. Numbering below is left to right, skipping the lit centre candle: 1 far left, 2 inner left, 3 inner right, 4 far right.
- In the hall, place the CANDLE on the left candelabra of the long table to start the puzzle.
- Swap candle 2 with candle 3 (the tall thin candle moves to the inner-right holder with the long drippy collar, and the short candle with the notched top moves to the inner left). Then swap candle 1 with candle 4. Finished layout: thin candle far left, notched short candle inner left, tall thin candle inner right, medium square-topped candle far right. The candles light when every candle is in its holder.CODESwap 2-3, then 1-4.
Sharp Tooth, Ottoman and Mosaic Piece
Get the SHARP TOOTH from the dinosaur skeleton and use it to open the ottoman and the taped book for the PART OF THE MOSAIC.
- Use the UMBRELLA on the jaw of the dinosaur skeleton to get the SHARP TOOTH and the KEYS (5/10).
- Cut the upholstery of the red ottoman with the SHARP TOOTH. Take the PART OF THE SCHEME (2/3) and the COTTON BALL.
- Collectible: the FEATHER on the lower front panel of the curved reception desk.
- In the library, take the COMPASS FIGURINE from the fuel-flask close-up of the back desk.
- Cut the tape on the taped book with the SHARP TOOTH and take the PART OF THE MOSAIC.
Mosaic Box
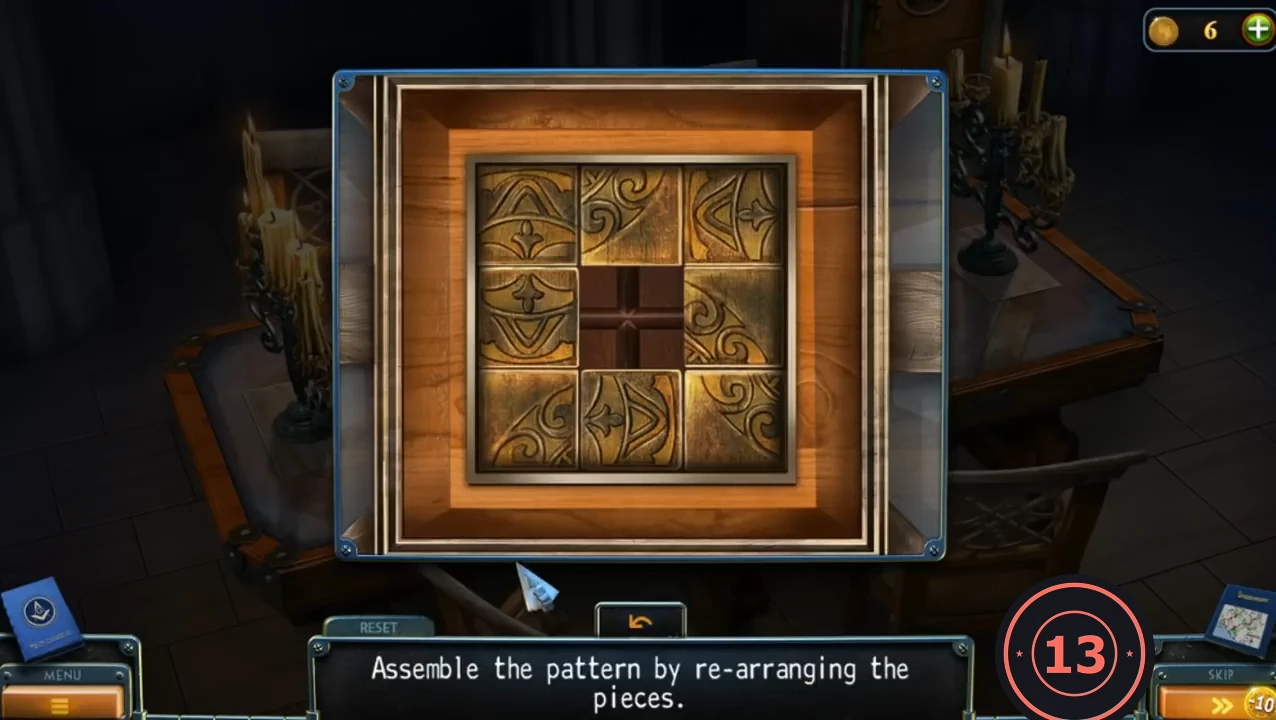
Goal: "Assemble the pattern by re-arranging the pieces." It is a 3x3 sliding puzzle with one empty space: click a tile next to the gap to slide it in. The finished picture is one round emblem with the empty space in the middle. Because the solution is a long chain of slides, this guide gives the method rather than every move.
- In the hall, place the PART OF THE MOSAIC in the box in the middle of the long table to start the puzzle.
- Slide the eight tiles until they form the round emblem with the empty space in the centre. Practical method: first build the top row by matching the edge patterns of neighbouring tiles, then complete the left column, and only then rotate the last three or four tiles around the gap until they fit. Once a finished row is in place, avoid moving it again. When the emblem is complete the box opens: take the CANDLE.
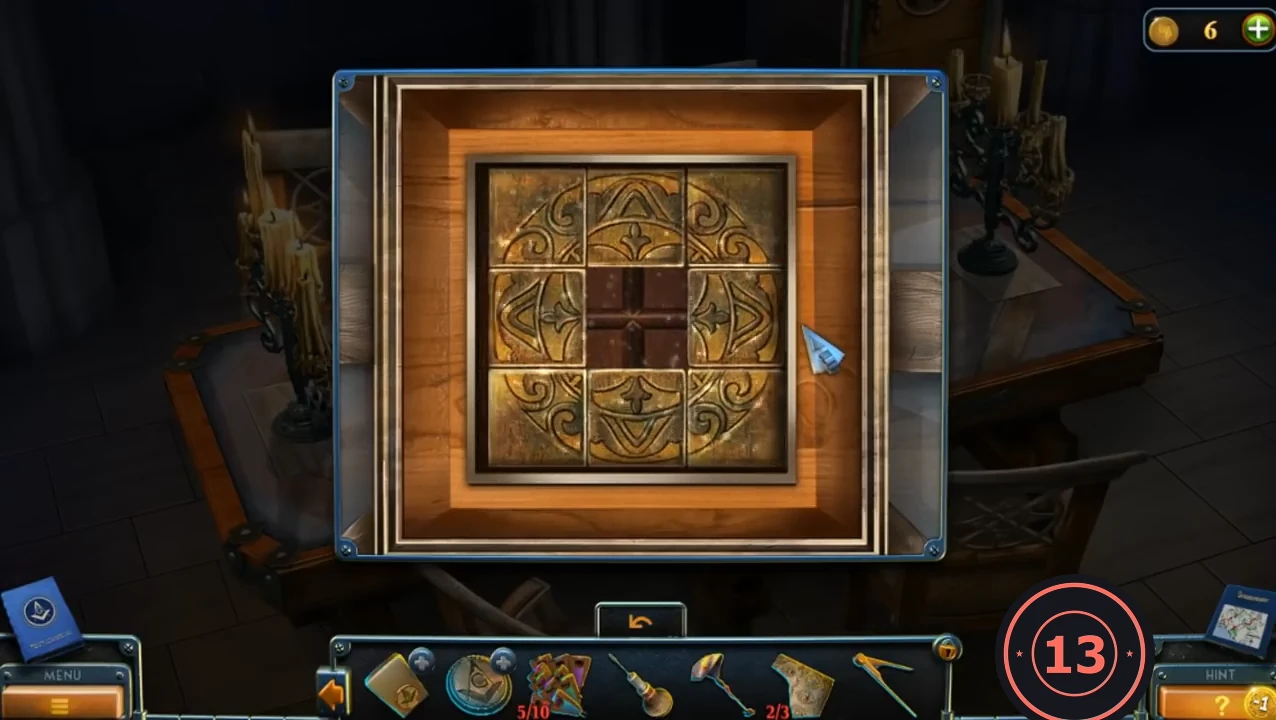
Completed mosaic: the engravings form a single round emblem and the empty space ends in the middle.
Right Candelabra and the Hint
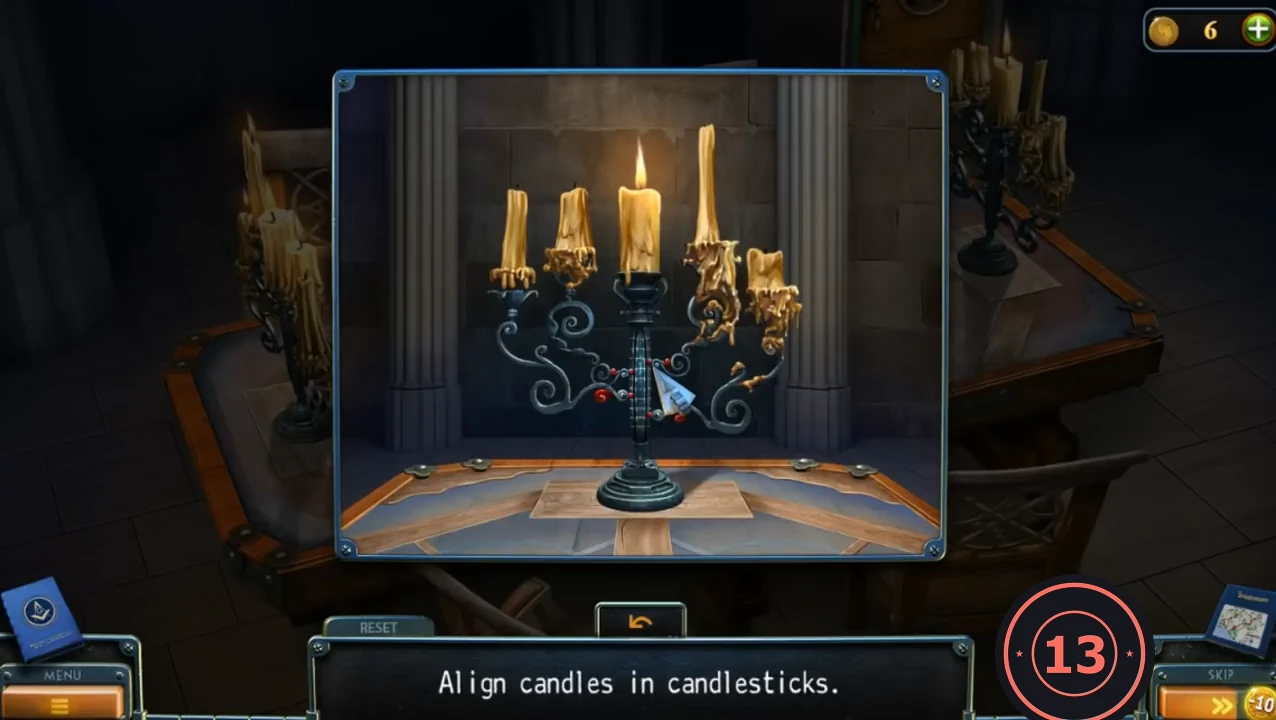
Goal: "Align candles in candlesticks" again. Same rules as the left candelabra: click one candle, then another, to swap them. Numbered left to right, skipping the lit centre candle.
- Place the CANDLE on the right candelabra to start the second candle puzzle.
- Swap candle 1 with candle 2, then swap candle 2 with candle 4. Finished layout: wide drippy candle far left, short candle with the notched top inner left, tall thin candle inner right (it stays put), thin candle far right.CODESwap 1-2, then 2-4.
- Open the star-pattern lid in the middle of the table and take the HINT: four clover circles with arrows to four dials and a drawing of the cabinet.
Cabinet Dial Lock
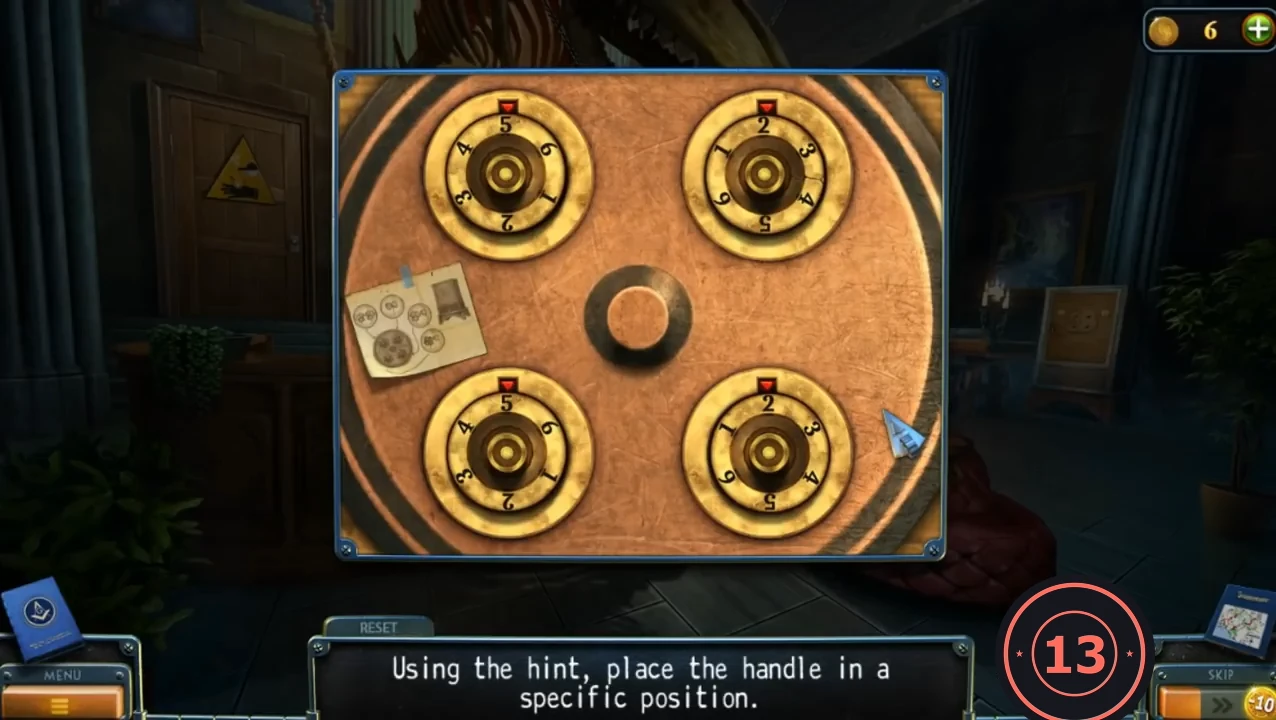
Goal: "Using the hint, place the handle in a specific position." Each of the four dials is numbered 1 to 6 and is read at the red marker at its top. Count the clover leaves in each circle of the HINT.
- Use the HINT on the four-dial lock of the tall cabinet on the right of the hall. Set top left 6, top right 2, bottom left 5, bottom right 4.CODE6-2-5-4
- Inside, take the SHOTSHELL, the KEYS (6/10) from the small desk and the TWEEZERS from its drawer. The red drawer is locked.
Blow Open the Lab Door
The plan is to pour gunpowder from the shotshell into the lab door's keyhole and ignite it.
- In the library fuel-flask close-up, take the PAPER from the desk. Put the COTTON BALL into the flask and pull it out with the TWEEZERS to get COTTON SOAKED IN FUEL. Do the same with the DRY WICK to get the WICK.
- In the inventory, use the SHOTSHELL on the PAPER to get PAPER WITH POWDER.
- Open the LIGHTER in the inventory: remove its cover with the PRECISION SCREWDRIVER, insert the COTTON SOAKED IN FUEL and close it to get a working LIGHTER.
- Zoom into the keyhole of the big wooden door with the yellow warning sign at the upper left of the hall. Pour in the PAPER WITH POWDER, insert the WICK and light it with the LIGHTER.
- Cutscene: the infected Bishop attacks in the laboratory and Travis ties him up. Travis can recreate the serum but needs two different fluorescent reagents. New task: help Travis.
Laboratory: Keys, Scheme and Lamp
Search the laboratory for more keys, the last part of the scheme and the LAMP, then open the green storeroom door.
- Look at the blue glass reagent cabinet: you need a UV lamp. Take the KEYS (7/10) from the white urinal on the right-hand wall.
- Collectible: the VINYL RECORD on the lab floor right of the overturned small table. The desk drawer with a padlock needs something narrow to push the latch.
- Zoom into the green sink on the right and take the KEYS (8/10), the PHOTO DEVELOPMENT LIQUID, the PHOTO TRAY, the SCALPEL and the PART OF THE SCHEME (3/3); the three parts form the SCHEME.
- Open the SCHEME in the inventory and develop it: place it in the PHOTO TRAY with water and add the PHOTO DEVELOPMENT LIQUID to restore its colours.
- The green door on the left of the lab is locked. Use the SCALPEL to push the padlock latch on the desk drawer; take the KEYS (9/10) and the LAMP. Remove the crumpled cloth from the lamp's socket: it still needs a bulb.
- In the library, cut the paper map of the globe with the SCALPEL and take the KEY. It does not open the small library door, and the ladder still needs fixing.
- Place the KEYS in the ten-key door in the hall: one key is still missing.
- Open the green door on the left of the lab with the KEY to enter the storeroom search scene.
Lab Storeroom
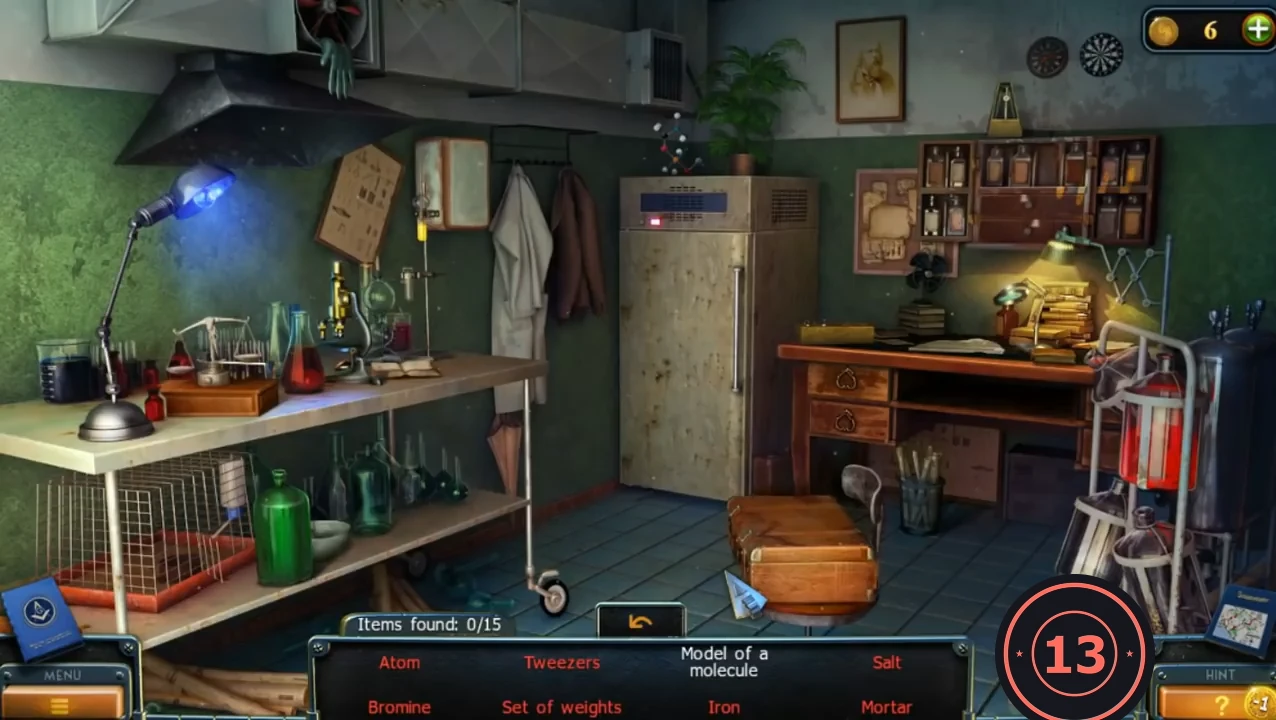
Find 15 items: Atom, Tweezers, Model of a molecule, Salt, Bromine, Set of weights, Iron, Mortar, Metronome, Microscope, Syringe, Gloves, Dartboard, Scale and UV lamp. Names shown in red need an extra action.
- Iron: zoom into the periodic table under the magnifying glass on the right-hand desk and move the lens to Fe (atomic number 26). The open book there notes that NaCl is common salt. Set of weights: the yellow box at the top left of the same close-up.
- Microscope on the left table. Tweezers in the white metal box on the wall left of the lab coat; then rearrange the board pieces in that box to form the inscription "Br" and click it for Bromine.
- Salt: in the fridge, move the bottles on the top shelf aside, pour the Na jar into the large beaker, then move the I bottle and add the Cl flask. Syringe at the lower left of the fridge shelf; Model of a molecule on top of the fridge.
- Mortar: move the green bottle on the lower shelf of the left table. Scale: on the left table near the lamp base. UV lamp: the blue lamp on the left table. Gloves: put the green glove hanging on the right side of the fridge into the suitcase on the floor.
- Metronome on top of the bottle cabinet at the upper right; Dartboard is the disc on the upper right wall; Atom: turn the small framed picture above the desk left of the bottle cabinet.
Fluorescent Reagents
Make a UV lamp to find the glowing vials in the reagent cabinet. Travis then hands over the last of the ten KEYS.
- Combine the LAMP and the UV LAMP in the inventory.
- Shine the UV LAMP on the blue glass reagent cabinet and take the two vials that glow.
- Travis still needs elbaite, a rare mineral. Laura thinks it is in the storage; Travis hands over the KEYS (10/10) he found among the vials.
Ten-Key Door
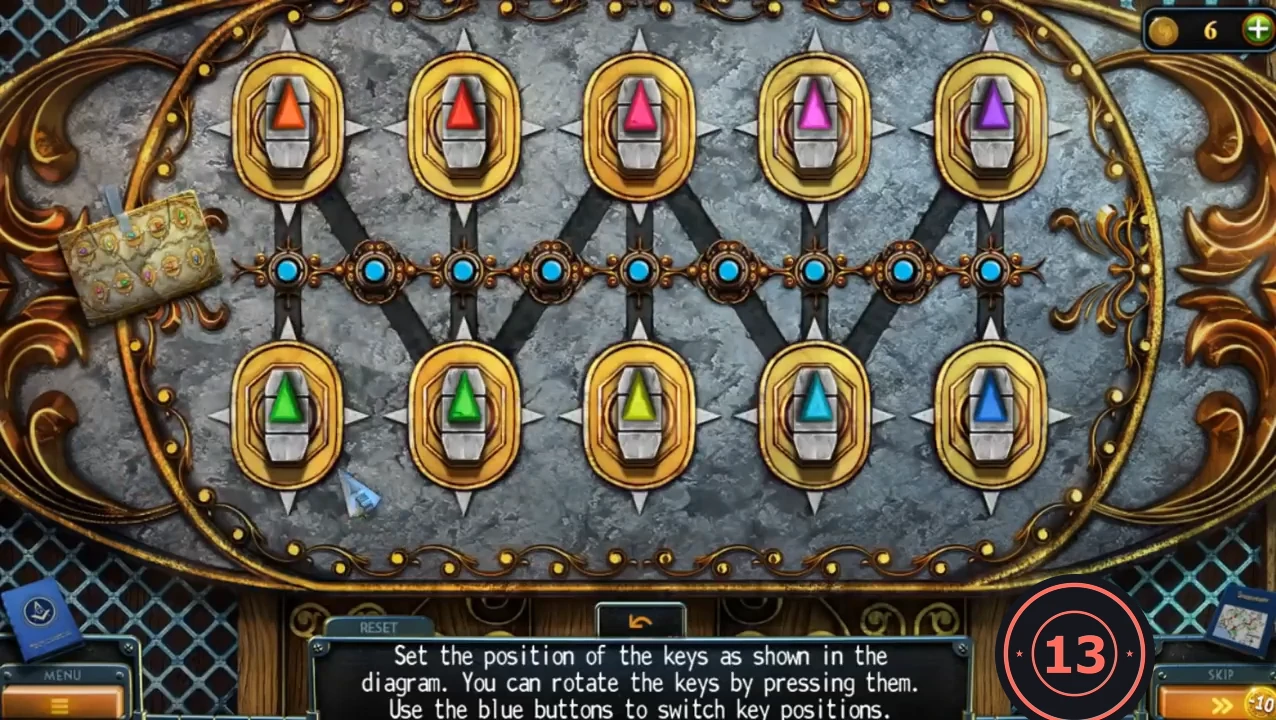
Goal: "Set the position of the keys as shown in the diagram. You can rotate the keys by pressing them. Use the blue buttons to switch key positions." The cracked diagram plate is shown when you first click and stays pinned at the top left.
- Place the KEYS in the ornate double door behind the dinosaur skeleton to start the puzzle.
- Click a key to rotate it, and use the blue buttons to switch the positions of keys, until every key matches the diagram. Top row, left to right: purple pointing left, yellow down, cyan left, red right, green up. Bottom row, left to right: pink up, green right, magenta down, orange left, blue down. Tip: get each colour into its correct slot first, then set the directions. The door opens to the vault when all ten keys match.
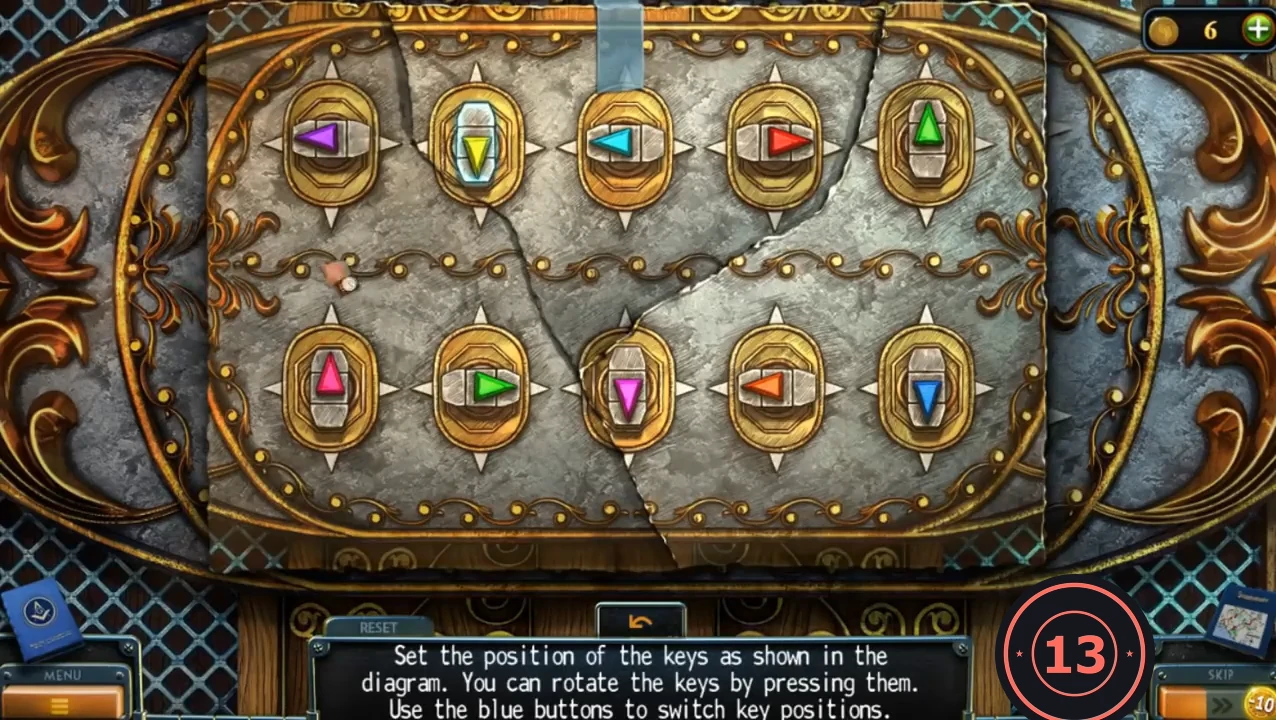
The diagram that appears when you first click the door: the target colour and direction for every key.
The Elbaite and Travis's Betrayal
Take the ELBAITE from the vault's glass case with the RING of the Order. The chapter ends with Travis's betrayal.
- Zoom into the glass case in the centre of the vault. Put the RING (the ring of the Order you found in Chapter 1) into the slot at the top of the case and take the ELBAITE.
- Collectible: the MORPHING OBJECT at the upper right of the vault, near the round skylight. (The FEATHER on the ceiling beam left of the skylight is listed under Collectibles.)
- Cutscenes: the lab is empty and Travis takes something from a case in the storage before a creature attacks Laura. The Bishop wakes her: it was a hallucination, he gave her an antidote, there is no epidemic, and Travis used her to get into the Order and steal. The alarm has locked them in the storage. Chapter 3 begins.