Escape the Dressing Room Trailer
Laura wakes up locked inside a circus dressing-room trailer. Choose a tutorial option when asked; it does not change the route.
- Zoom into the round table in the middle of the trailer. Take the RING, then pull the cloth aside to reveal a ballerina music box (you will return to it later).
- Zoom into the vanity with the mirror. Open the drawers and take the KEY and the PLIERS.
- Look at the puppet theatre on the secretary desk on the left: several masks are missing from its grid. You will need five masks for it later.
- Use the KEY on the wardrobe on the far left. Push the clothes aside and take the HANGER.
- Open the HANGER in the inventory and use the PLIERS on its metal bar to get A THIN TUBE.
- Zoom into the exit door on the right (it is locked from the outside) and use A THIN TUBE in the gap to lift the latch. Go outside.
Amusement Park and Park Exit: First Look
Your task is to return to the city. Several things here can only be done later, so note them as you go.
- In the Amusement Park, inspect the seesaw (you need a long, thin rod to knock out its axle), the broken carousel horse (a metal key lies in the debris but you cannot reach it), the locked ticket booth on the right, the fortune-telling machine (it needs a special token) and the briefcase with a 3-digit lock.
- Zoom in beside the briefcase and mannequin and take the MASK (1/5).
- Go to the Park Exit. The exit gate is locked. Collectibles: the VINYL RECORD in the flower bed behind the bench, just right of the lamp post on the left, and the MORPHING OBJECT, a crow perched on top of the iron fence above the gate.
- Zoom into the car interior: the glove compartment needs a handle. Open the trunk and take the WRENCH lying on the wooden box. The box is a train game that does not yet have enough game pieces.
- Zoom into the pier on the right side of the Park Exit and take the GAME PIECE (1/5).
Water Channel and the Carousel Key
A stranger calls for help from the tunnel across the water channel. Collect the tools on this side first.
- Go to the Water Channel (swan ride). Your new task is to help the stranger. Zoom into the bag on the bench of the dock and take the CROCHET, then move the yarn and take the FLASHLIGHT (its battery is dead).
- Zoom into the sect pamphlets on the ground and take the MAGNET hidden under them.
- Zoom into the pamphlets on the dock planks in the left foreground. Use the CROCHET in the thin gap between the planks to pull out the MASK (2/5). The bridge to the far side has collapsed and the swan cable cannot be used yet.
- Return to the Amusement Park and use the MAGNET on the broken carousel horse's debris to pull out the KEY.
- Use the KEY on the ticket booth door on the right. A rotating-maze puzzle opens.
Ticket Booth Rotating Maze
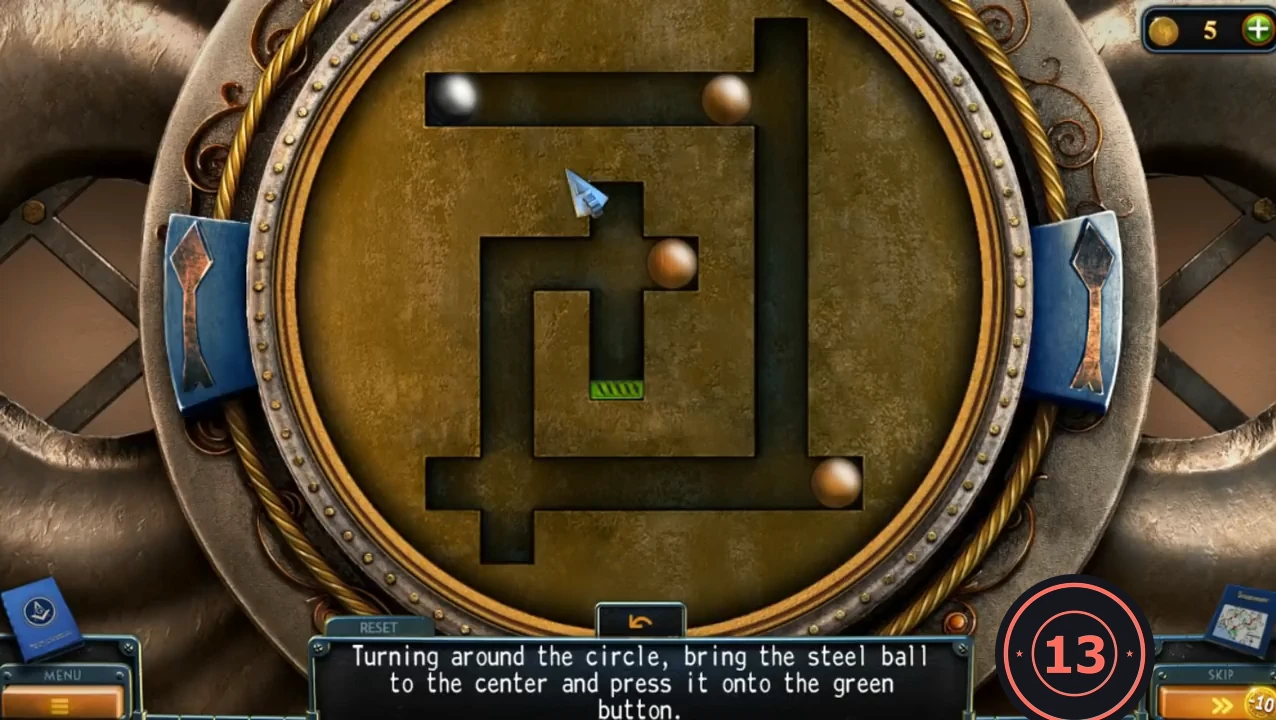
Goal: "Turning around the circle, bring the steel ball to the center and press it onto the green button." The two side buttons rotate the whole maze a quarter turn left or right; all balls then roll with gravity. Copper balls act as blockers.
- From the starting layout, press the side buttons in this order: LEFT once, RIGHT four times, LEFT three times, RIGHT three times, LEFT once, RIGHT twice. The left button turns the maze clockwise and the right button turns it anticlockwise; wait for the balls to stop rolling before the next press. After the last turn the steel ball drops down the centre passage onto the green button. If the balls end up somewhere else, press RESET and start the sequence again.CODEL, R, R, R, R, L, L, L, R, R, R, L, R, R
- Take the HOOK-AND-LOOP and the GAME PIECE (2/5) from the opened booth.
Car, Briefcase Code and Ignition
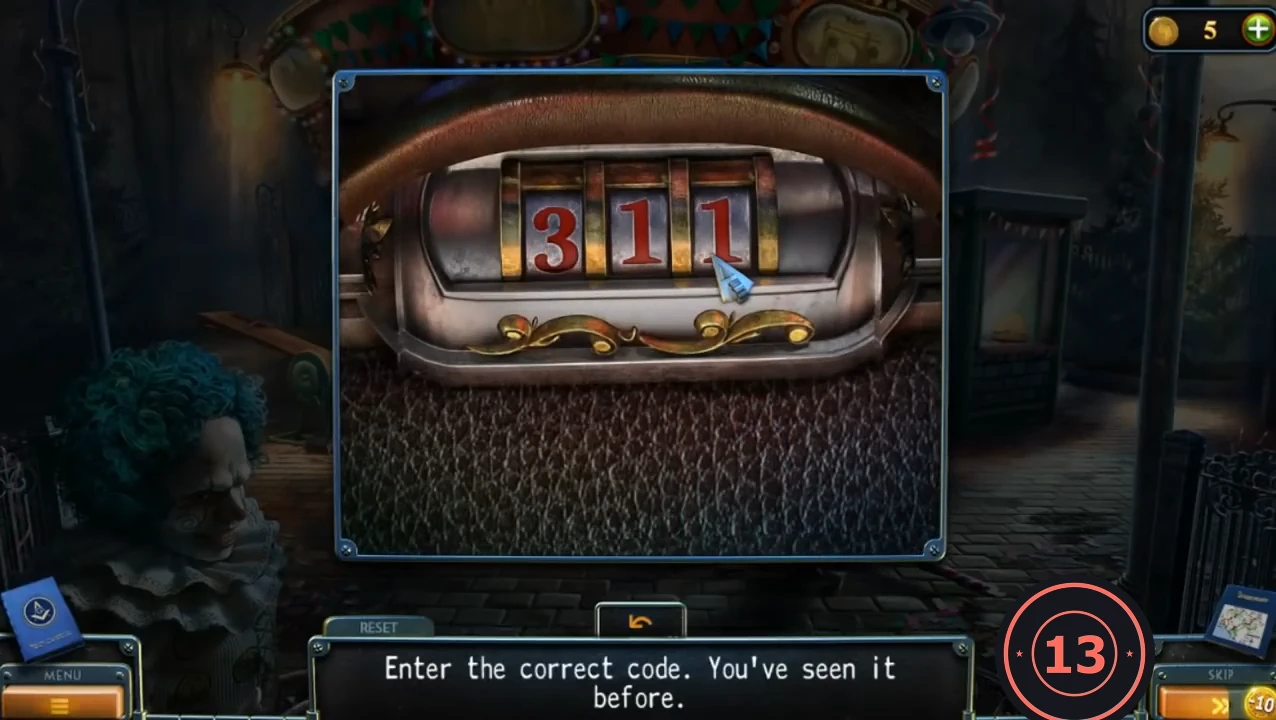
The car at the Park Exit hides the briefcase code. Collect the last three GAME PIECES (3/5 to 5/5) here, then start the train puzzle in the trunk.
- Go to the Park Exit car interior. Flip down the sun visor: take the GAME PIECE (3/5) and note the code 413 written on the sticker behind it.
- Return to the Amusement Park briefcase by the mannequin and enter 413. Take the CAR KEY and the GAME PIECE (4/5).CODE413
- Use the CAR KEY in the car's ignition. The dashboard lights up and a radio broadcast warns about the infected. Take the GAME PIECE (5/5) that becomes available in the car.
- Open the trunk and place the GAME PIECES on the wooden train box to start the puzzle.
Model Train Box
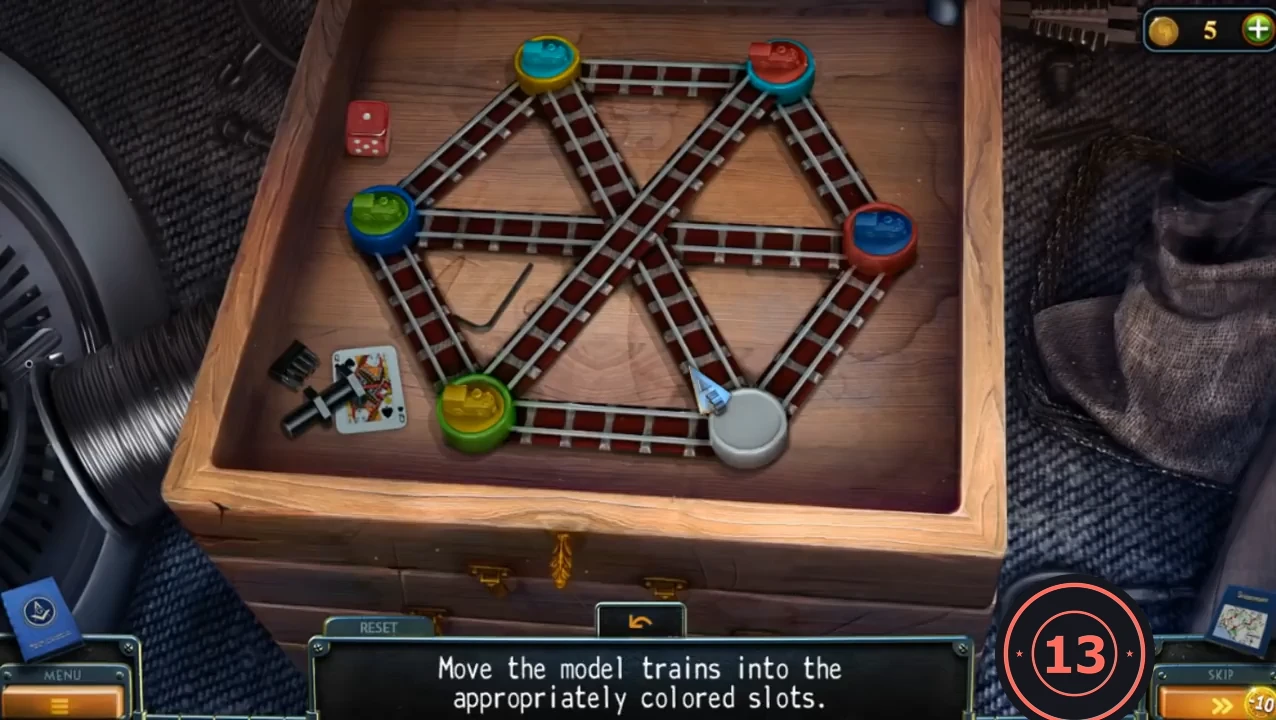
Goal: "Move the model trains into the appropriately colored slots." There are three boards in a row (a hexagon, a pentagon and a star). One slot is always empty: tap a train that is joined to the empty slot by a straight track and it drives into that slot. Every coloured slot needs the train of the same colour; the white slot has no train of its own and ends empty.
- Board 1 (hexagon; empty white slot bottom right). Move the trains in this order: YELLOW (bottom left) to the white slot; GREEN (left) to the green slot; BLUE (right) to the blue slot; RED (top right) to the red slot; CYAN (top left) to the cyan slot; YELLOW (white slot) to the yellow slot.CODEBoard 1: yellow, green, blue, red, cyan, yellow
- Board 2 (pentagon; empty white slot on the right). Move: BLUE (top left) to the white slot; GREEN (top right) to the yellow slot; YELLOW (bottom right) to the red slot; RED (bottom left) to the blue slot; CYAN (left) to the cyan slot; GREEN to the green slot; YELLOW to the yellow slot; RED to the red slot; BLUE (white slot) to the blue slot.CODEBoard 2: blue, green, yellow, red, cyan, green, yellow, red, blue
- Board 3 (star; empty white slot on the left). Move: BLUE (right) to the white slot; YELLOW (bottom left) to the red slot; CYAN (top right) to the cyan slot; BLUE (white slot) to the blue slot; YELLOW (red slot) to the white slot; RED (top left) to the red slot; GREEN (bottom right) to the green slot; YELLOW (white slot) to the yellow slot.CODEBoard 3: blue, yellow, cyan, blue, yellow, red, green, yellow
- Take the HANDLE OF THE GLOVE COMPARTMENT from the opened box.
- Use the HANDLE on the glove compartment and take the MASK (3/5).
Gate Cabinet, Battery and the Swan Ride
Open the gate cabinet, power the FLASHLIGHT and ride the swan into the dark tunnel, where the wiring puzzle starts.
- At the Park Exit, use the WRENCH on the bolts of the rusty cabinet left of the gate. Take the SCREWDRIVER. Inside is the gate mechanism; it is not greased and is missing parts.
- Return to the Dressing Room Trailer, zoom into the ballerina music box and use the SCREWDRIVER on its drawer. Take the BATTERY and put it into the FLASHLIGHT in the inventory.
- Go to the Water Channel and attach the HOOK-AND-LOOP to the swan ride's cable. Laura rides the swan into the dark tunnel and drops the flashlight.
- Pick up the FLASHLIGHT from the floor to light the tunnel. From the top of the electrical box take the RUBBER GLOVES and the POWER BREAKER. Open the box (the main breaker is missing), insert the POWER BREAKER and use the RUBBER GLOVES on the wires to start the wiring puzzle.
Tunnel Electrical Box Wires
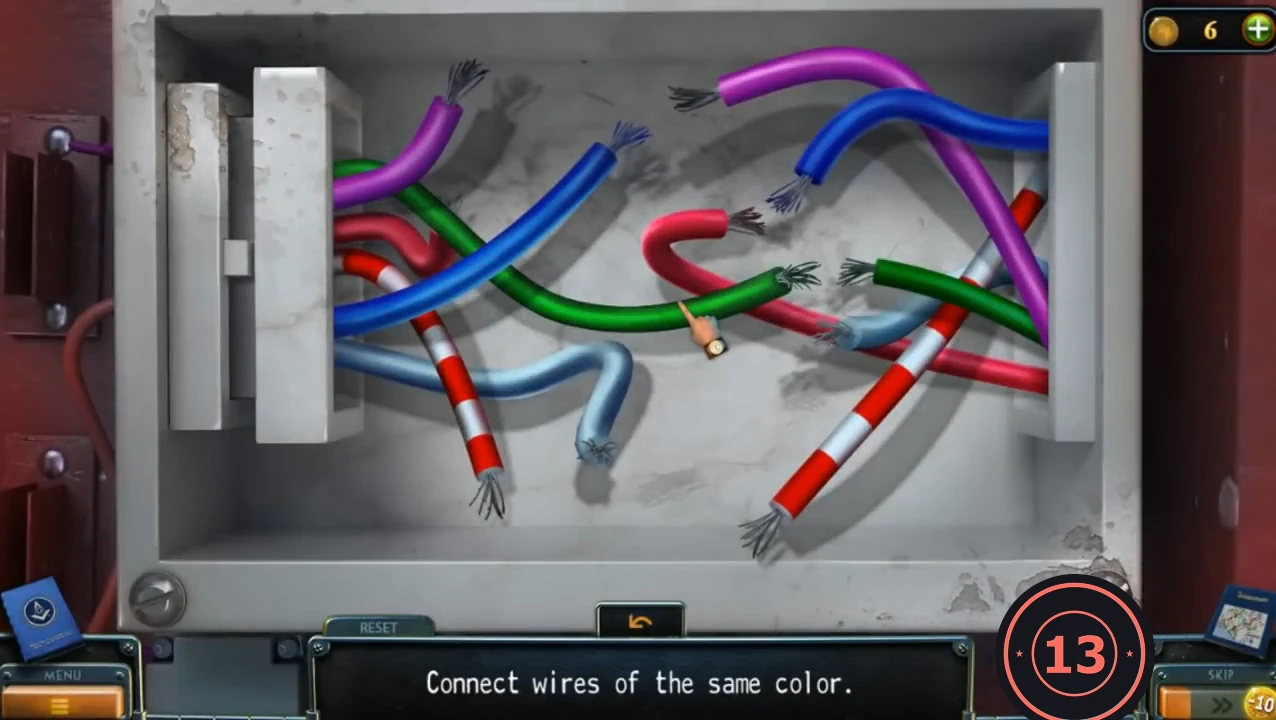
Goal: "Connect wires of the same color."
- Six wires are cut in two: the halves on the left run from the terminal block, the loose halves lie on the right. Drag the loose end of each right-hand wire onto the free end of the left-hand wire of the same colour; a joined pair snaps together with a metal sleeve. Join green, dark blue, purple, red-and-white striped, light blue and plain red. The order does not matter.CODEPairs: green, dark blue, purple, red/white striped, light blue, red
Tunnel of Love: Free Travis
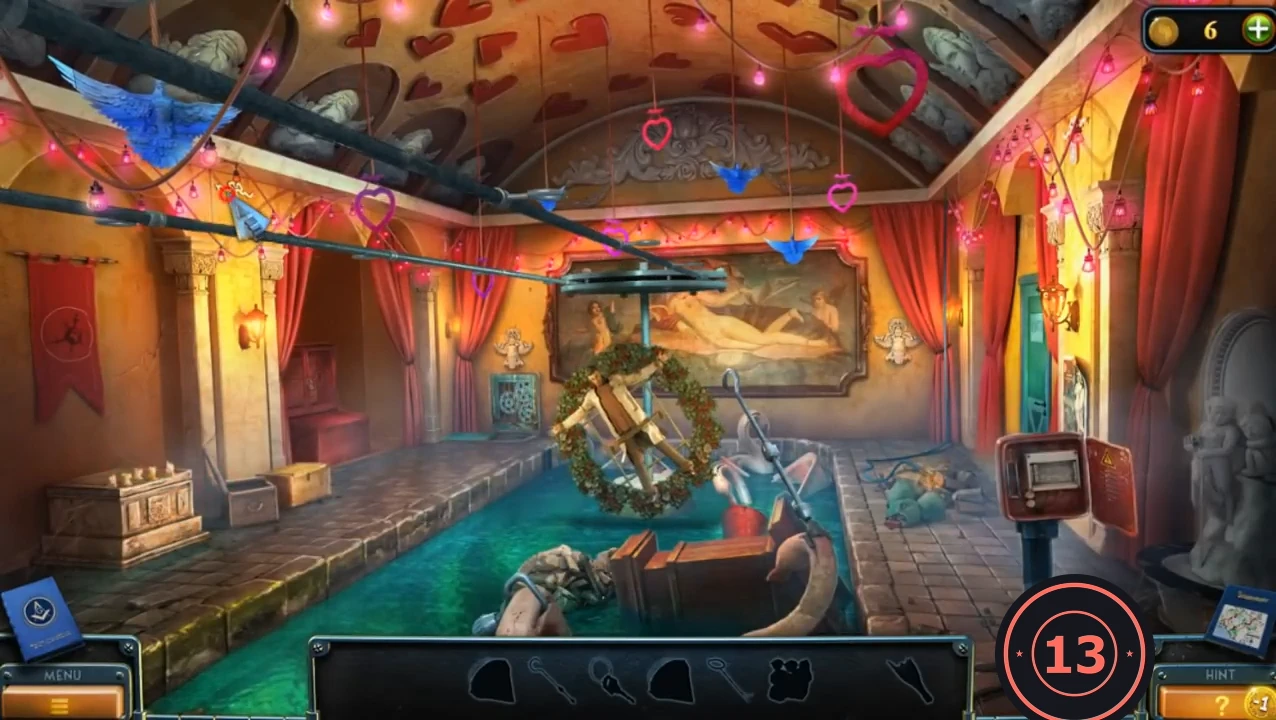
This room works like a small search scene: the inventory bar shows silhouettes of the items you need here (bucket, hook, pole hook, key, stones, glass shard). Travis is strapped to a rotating wheel and the green sacks are on fire next to live wires, so water is not an option.
- Pick up the HOOK lying on the right-hand walkway beside the burning sacks and the electrical box.
- Zoom into the pool edge and use the HOOK to pull out the red BUCKET.
- Zoom into the red cabinet on the left wall. Its upper grille is padlocked, but the trough below is full of sand: fill the BUCKET to get BUCKET WITH SAND.
- Use the BUCKET WITH SAND on the burning green sacks to put out the fire. Then take the KEY and the STONES from the sacks area.
- Zoom into the open hatch in the floor and drop the STONES into the gears. The jammed mechanism stops Travis's wheel.
- Use the KEY on the padlock of the red cabinet and take the POLE HOOK.
- Use the POLE HOOK to pry open the nailed wooden crate and take the GLASS SHARD from the broken bottles.
- Use the GLASS SHARD on Travis's ropes. He explains that a sect of scientists stole his antidote formula and intends to spread a modified plague.
Long Board and the Last Masks
Build the LONG BOARD to cross the broken bridge, oil the gate mechanism and collect the last two masks. Keep the COIN from the doctor's bag: it is needed in Chapter 2.
- At the Water Channel, zoom into the cupid statue and take the METAL ROD from its bow.
- Go to the Park Exit pier and use the POLE HOOK to pull the floating doctor's bag out of the water. Open it and take the COIN and the MACHINE OIL.
- Use the MACHINE OIL on the gate mechanism in the opened cabinet left of the gate.
- In the Amusement Park, the COIN does not fit the fortune-telling machine (it needs a special token). Keep the COIN; it is needed in Chapter 2.
- Zoom into the seesaw and place the METAL ROD against its axle. Pick up the brick lying on the ground in the same close-up and use it to hammer the rod. Take the LONG BOARD.
- At the Water Channel, place the LONG BOARD across the gap in the collapsed bridge and cross.
- Zoom into the rusty box with a slot and use the CROCHET through the opening to pull out the MASK (4/5).
- Zoom into the high striker. Choose the longest mallet (in the middle of the rack) and drag it onto the striker pad; the bell knocks down the MASK (5/5).
- Collectible: take the VINYL RECORD at the upper right of the Water Channel, on the bridge railing among the red heart decorations. The gate on this side does not open, so return to the trailer.
Puppet Theatre Masks
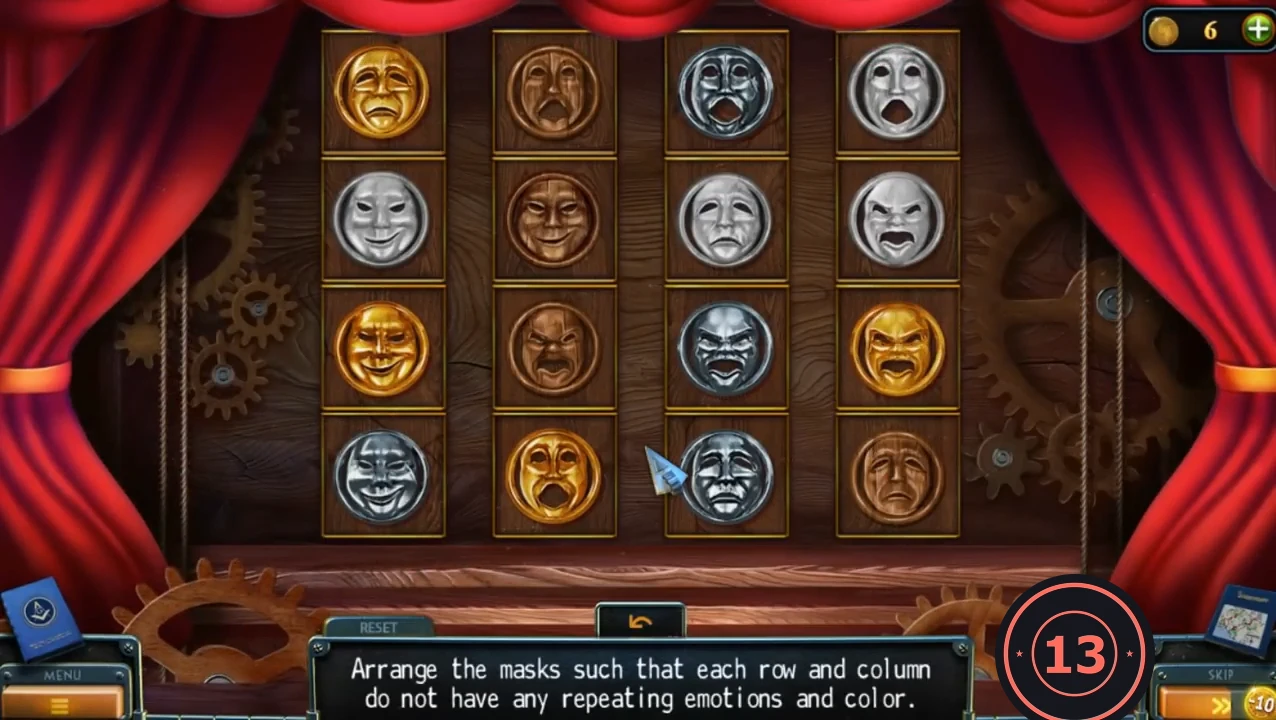
Requires all five MASKS. Goal: "Arrange the masks such that each row and column do not have any repeating emotions and color." There are 16 masks: four colours (gold, bronze, light silver, dark steel) and four faces (sad, happy, angry, wailing). Click two masks to swap them; RESET restores the start.
- In the Dressing Room Trailer, place the five MASKS on the puppet theatre to start the puzzle.
- Click one mask and then another to swap them. Work row by row: fill the top row with four different colours and four different faces, then build each following row so that no column repeats a colour or a face. The layout below is the one that completed the puzzle in the recording; it is not confirmed whether the game accepts other valid arrangements, so copying it is the safest target (if your masks start in different places, simply swap each mask into its listed position). Rows from top to bottom, masks from left to right: Row 1 gold-sad, bronze-wailing, silver-angry, steel-happy. Row 2 bronze-angry, gold-happy, steel-sad, silver-wailing. Row 3 silver-happy, steel-angry, gold-wailing, bronze-sad. Row 4 steel-wailing, silver-sad, bronze-happy, gold-angry. Finishing in fewer than 50 moves earns the Handyman achievement; swapping each mask straight into its listed square takes at most 15 swaps.
- Take the TOKEN from the drawer that opens in the puppet theatre.
Leave the Park
Use the TOKEN to get the GEAR from the fortune-telling machine and open the park gate to end Chapter 1.
- In the Amusement Park, put the TOKEN into the slot of the fortune-telling machine (right of the carousel). Its panel lights up green; take the GEAR it gives you. A card reads: "If you want to change something, you should act right now!"
- Go to the Park Exit and place the GEAR into the gate mechanism in the opened cabinet left of the gate. With the mechanism already oiled, it turns and the gate opens. (If you have not oiled it yet, Laura says it hasn't been greased in a while: use the MACHINE OIL from the doctor's bag first.)
- Click the open gate to drive out of the park with Travis.
- Cutscene: Travis and Laura drive to the city; Laura knows of a secret laboratory whose nearest entrance is in St. Patrick's Cathedral. Chapter 2 begins.