The Mansion Gate
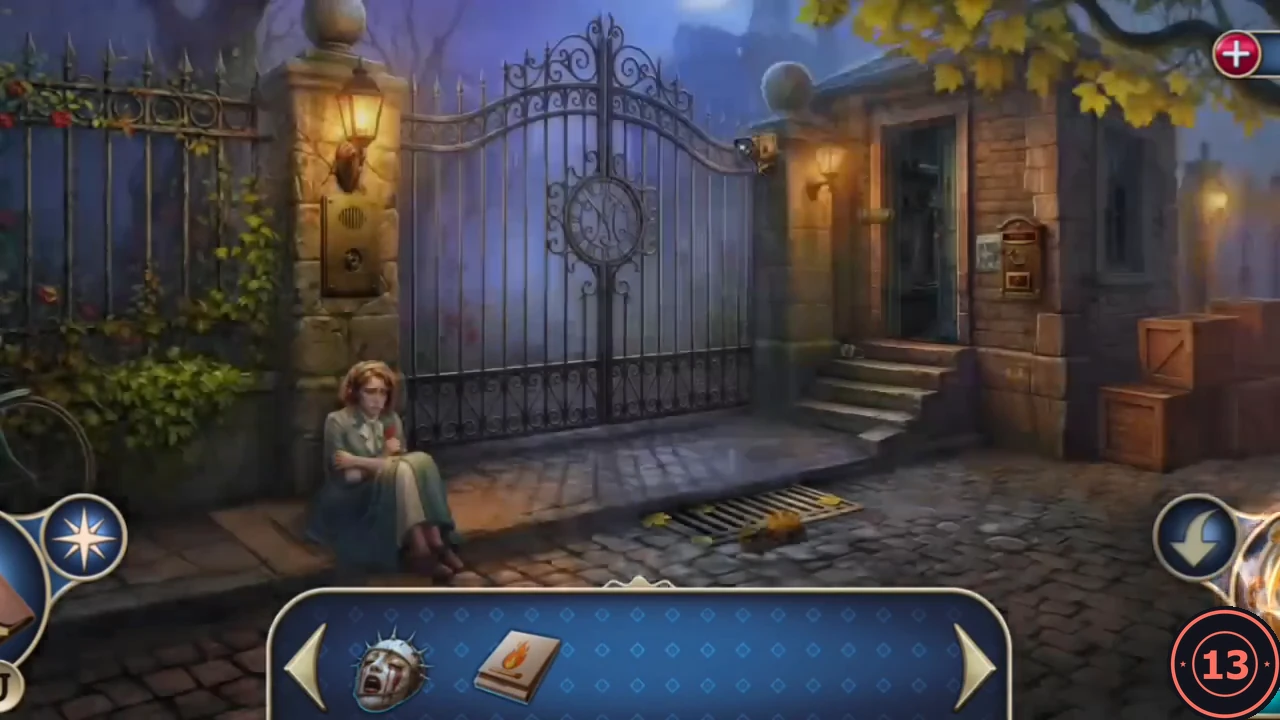
The client who called you is freezing outside the locked gate. Before you can help her, gather what you can from the street.
- When the game offers interactive help, choose either option. On the pavement in front of the steps, tap the flyer: it is a morph object for the Tinker's Collection (140 secret clues in total; see the Tinker's Collection part at the end of this guide). Take the Mask of Sorrow from the top of the brass mailbox and read the missing-persons poster. The mailbox itself is locked for now.
- Zoom into the storm drain at the kerb. Take the Cobblestone, then the Matches that were underneath it. Something else has fallen through the grate out of reach; you will come back for it.
- Zoom into the padlock on the green side door to the right and smash it with the Cobblestone. Go through the door into the study.
The Study and the Doll Cabinet
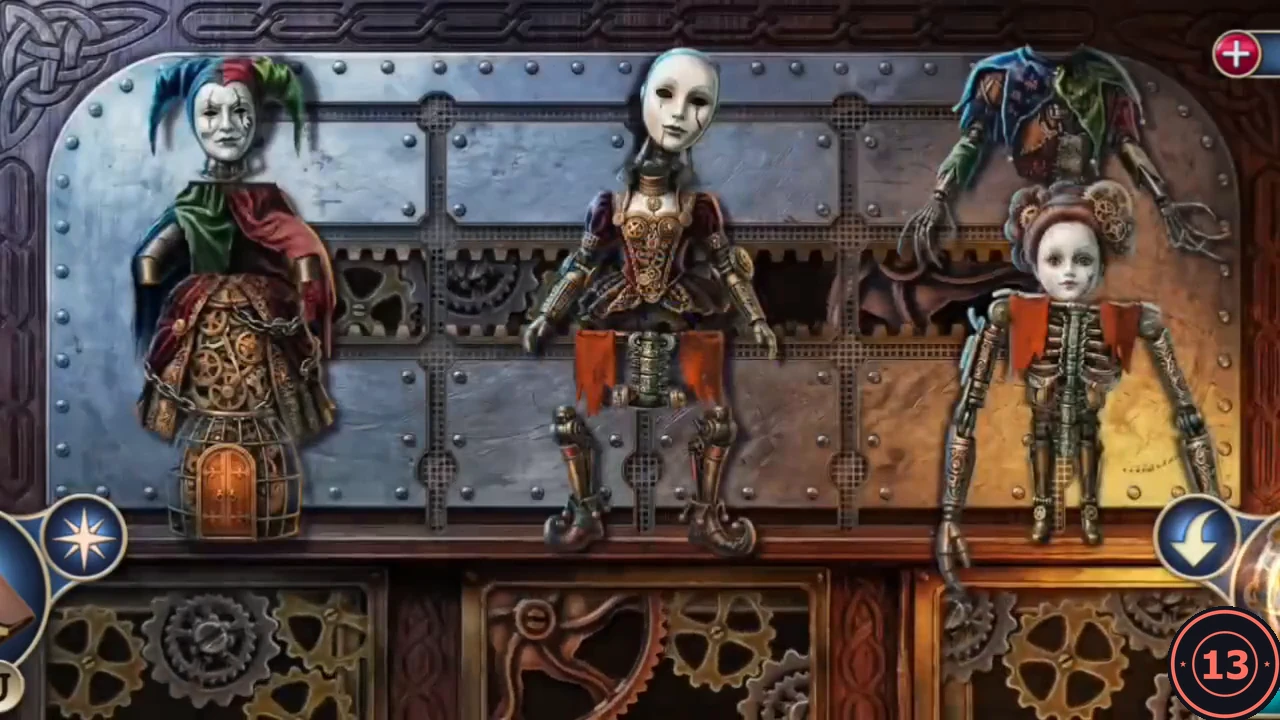
The study is dark when you enter. Light it first, then open the doll cabinet to find something warm for the girl.
- Use the Matches on the oil lamp on the desk to light the room. The Matches stay in your inventory.
- Zoom into the desk. Take the Mask of Excitement from the desk mat, open the drawer and take the Funnel, then read the opera diva dossier.
- Tap the tall cabinet to open the automaton doll puzzle. Drag heads, bodies and legs between the three stands until each doll is made of matching parts: left stand, the bare skeleton frame with the plain white mask; centre stand, the harlequin jester; right stand, the Victorian lady doll.
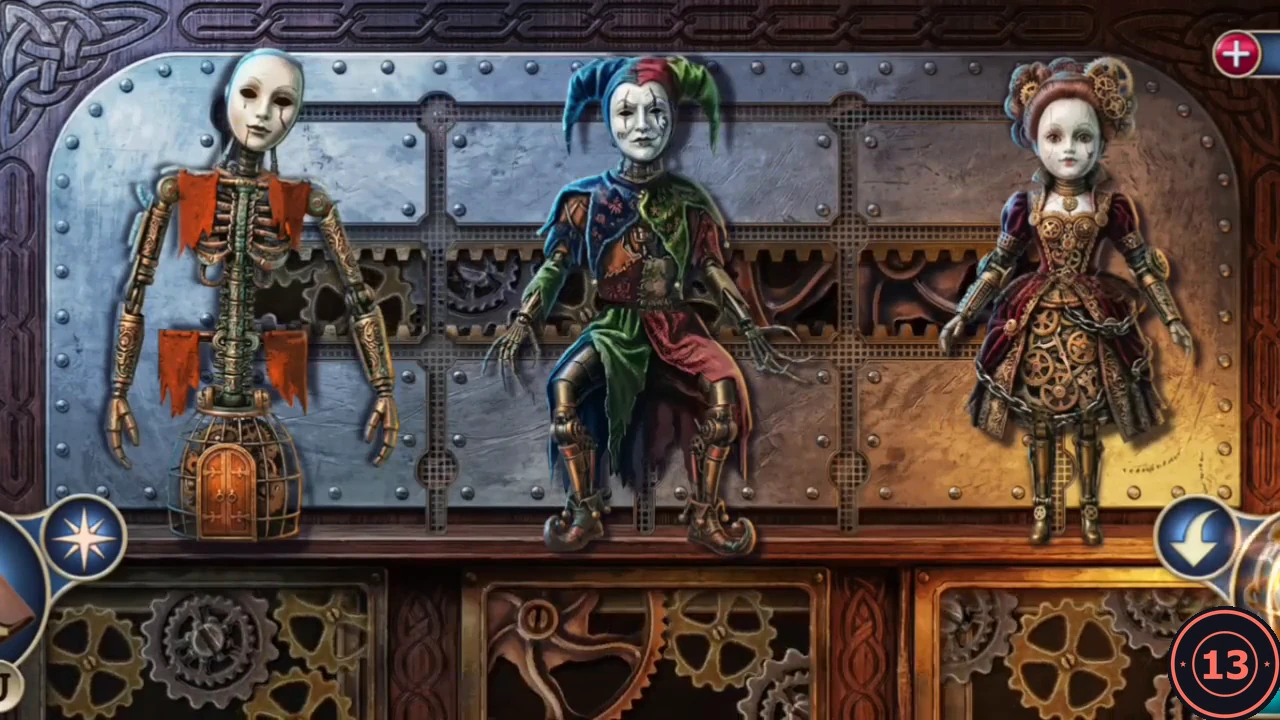
Solved: skeleton with the white mask, jester, Victorian lady. - Take the Wool Shawl from the opened cabinet. Look at the corkboard on the wall: a screwdriver shaft is pinned there, but it needs a handle.
- Go back out to the gate and give the Wool Shawl to the girl. She hands you the Intercom Button. Fit it into the intercom on the gate pillar and press it. A voice answers and the gate opens; go through into the courtyard.
The Courtyard and the Car
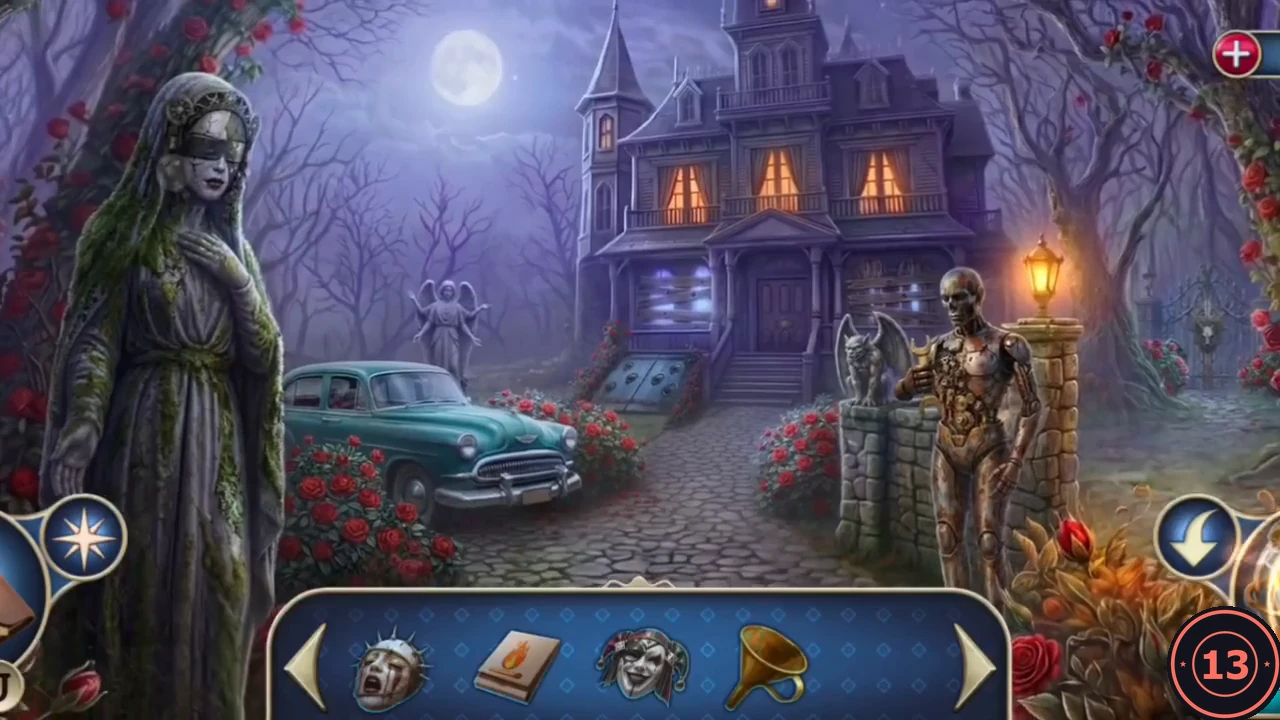
Someone slams the mansion door as you arrive. Look around the courtyard, then use a piece of wire from the study to get into the car.
- Take the Mask of Illusion from the weeping veiled statue on the left. Zoom into the skull gate: a horn is missing, and you can take the Mask of Fear from the hooded skeleton relief. Note that the car door is locked, the round hatch by the mansion holds a ring puzzle, and the automaton by the gate post needs a drive belt.
- Return to the study and zoom into the canvas satchel hanging by the window. Take the Wire from its side pocket. The green patch is sewn shut and needs a cutting tool.
- Back in the courtyard, use the Wire on the car window to unlock the door; it comes back as the Bent Wire. Open the car: read the sealed letter, take the Strange Drawing, the Mask of Shame, Gear (1/8) and the Empty Oil Can, and pick up the paper on the seat (a secret clue). The dial lock on the dashboard needs a clue you do not have yet.
- Collect the rest of the gears you can reach now. In the study, the corkboard has Gear (2/8) and a secret clue, and the desk drawer has Gear (3/8). At the gate, Gear (4/8) is between the bars of the storm drain and Gear (5/8) is on the mailbox.
The Mask Ring Lock
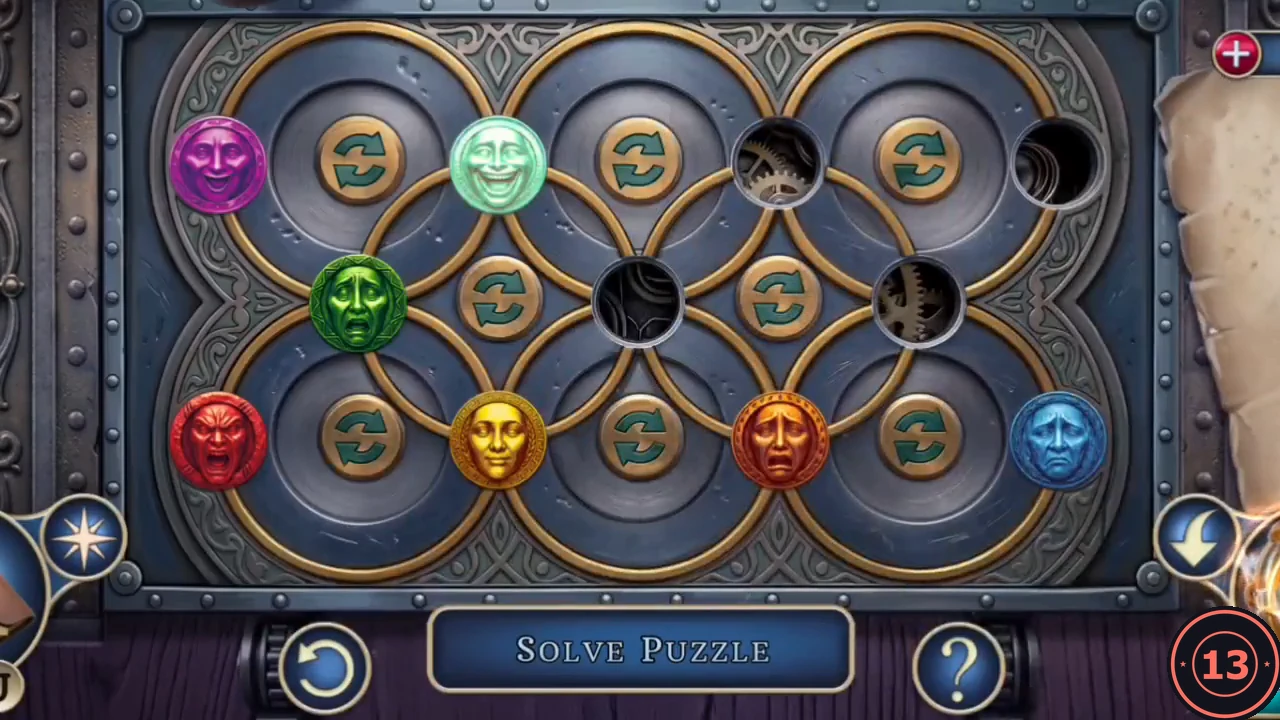
The round hatch in the courtyard is locked by seven mask tokens on interlocking rings. The Strange Drawing from the car shows where each face belongs.
- Zoom into the ring mechanism in the courtyard and place the Strange Drawing on it to see the target layout.
- Each round button in the middle of a ring turns that ring, carrying the masks that sit on it; masks on crossing points are shared between rings. Match the faces, not the exact colours: top row, laughing face left and angry face right; middle row, smiling face left, sad face centre and calm face right; bottom row, frightened face left and anguished face right. Turn the outer rings to bring faces into place, then fine-tune with the inner rings.
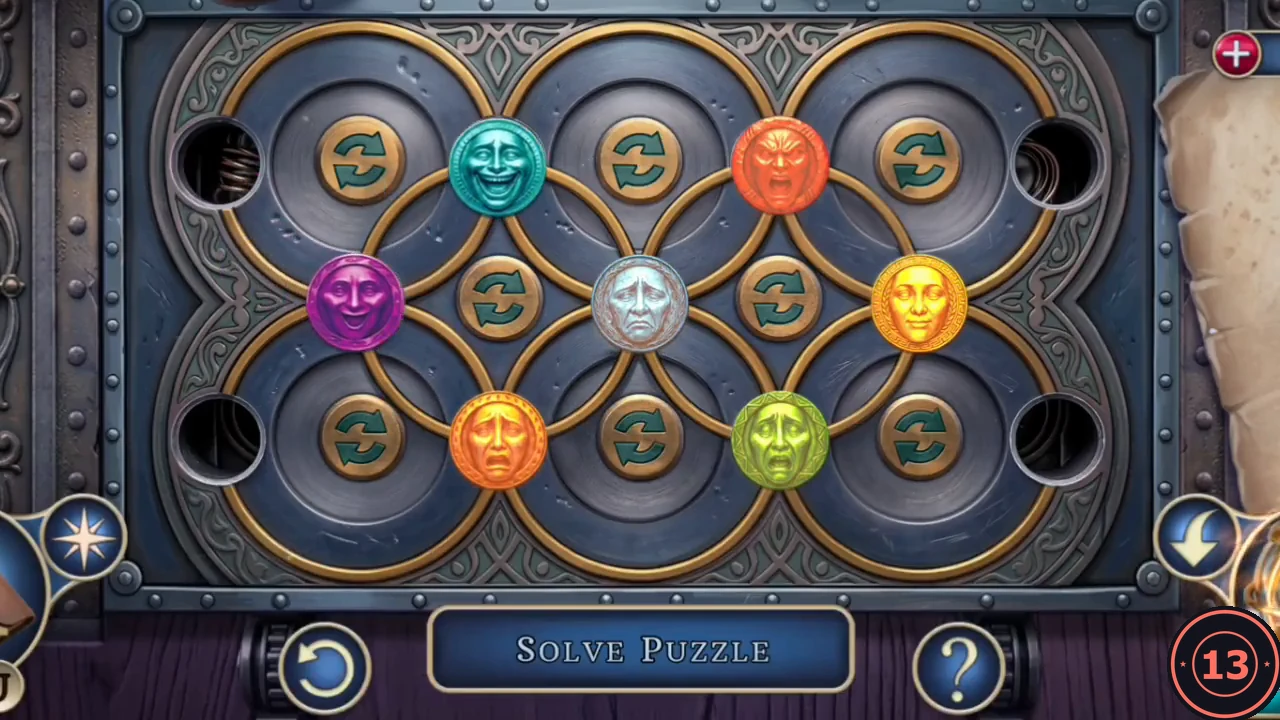
Solved: the faces in the positions shown on the Strange Drawing. - After the cutscene, zoom into the mansion front door and take the Door Handle. Your objective is now to enter the mansion lobby and save the opera diva.
The Pin Lock in the Study
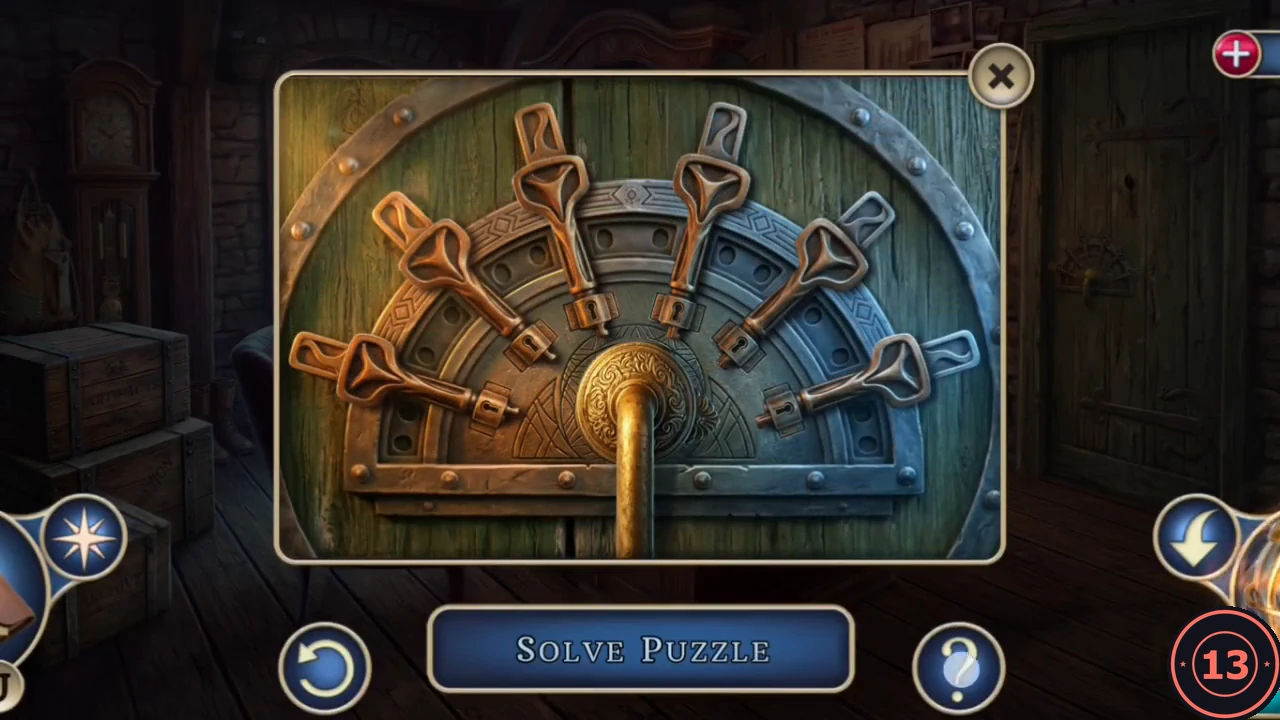
The locked door at the back of the study takes a special triangular wrench. You can make one from the Door Handle.
- In the study, take the File from the window ledge and Gear (6/8) from the satchel's side pocket.
- Open the Door Handle in your inventory and use the File on its square spindle to make the Triangular Key.
- Zoom into the wooden door on the right of the study and insert the Triangular Key. Six metal pins fan out around the handle, all pushed in at the start; the goal is to pull every pin out. Tapping a pin flips it and the next two pins to its right (tapping the far-right pin flips it and the two far-left pins). Number the pins 1 to 6 from left to right and tap pin 1, pin 6, pin 1 again and then pin 3. The order does not matter. If the pins do not start fully pushed in, press the reset button first.CODEPins 1, 6, 1, 3
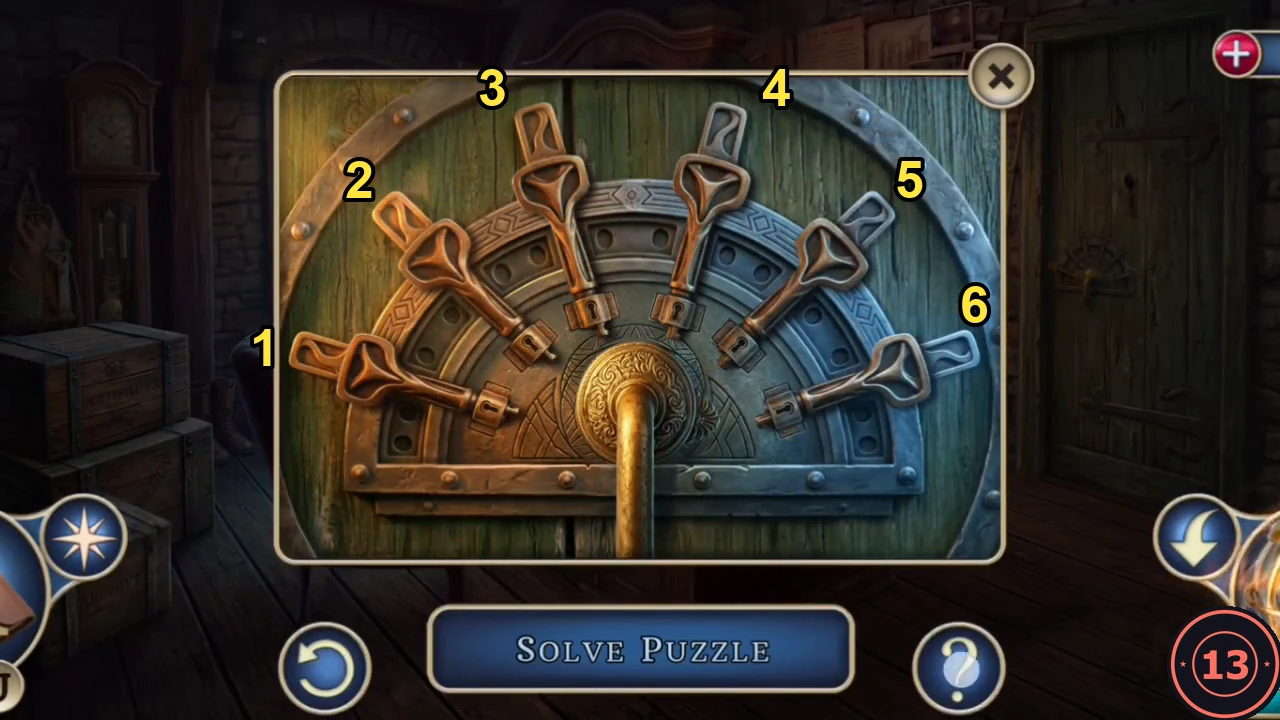
Pin numbers used in the solution: tap 1, 6, 1, then 3.
The Workshop
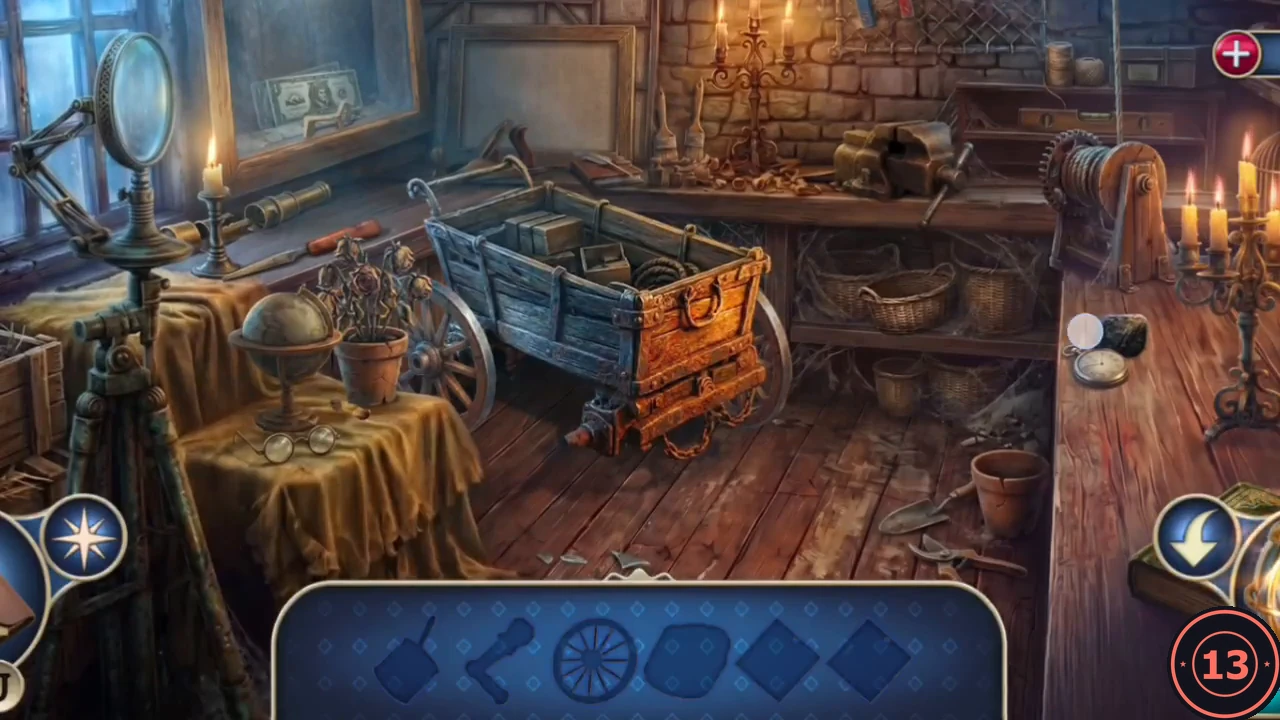
The workshop behind the study is an interactive search. The tray at the bottom shows the objects you need; find them in the room and use them where they fit.
- Use the Matches on the lamp to light the room and start the search.
- Collect the objects in the room, including the tin of grease with its brush, a blank sheet of paper, the awl and the horseshoe magnet.
- Zoom into the cart, fit the wheel on its axle and grease it. The cart rolls aside and reveals a wall compartment.
- Zoom into the keyhole on the front of the workbench cabinet. Lay the paper over it and rub it with the charcoal to take an impression.
- Zoom into the glass display case and push the horseshoe magnet through the hole in the glass to pull out the metal key blank.
- Zoom into the vice. Clamp the key blank, place the impression behind it and file the teeth to match. Use the finished key on the workbench cabinet and take the Mask of Despair.
The Masked Cellar Doors
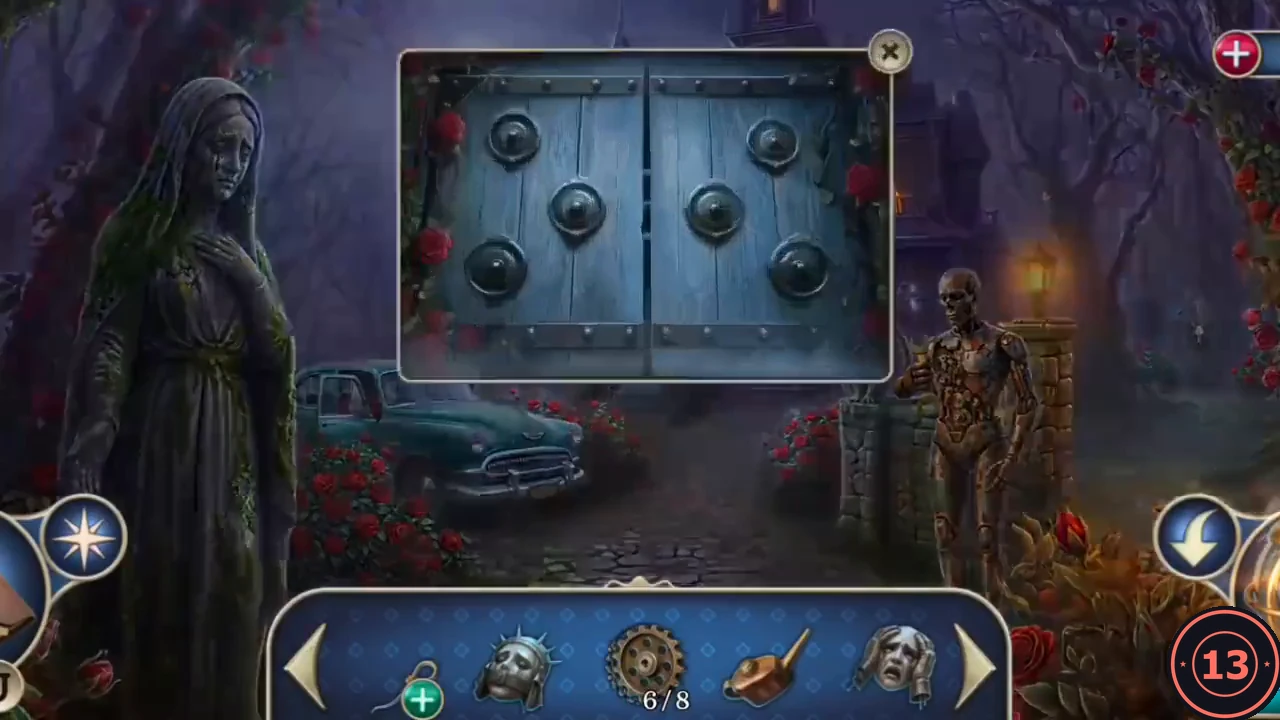
The double doors in the courtyard have six round sockets, one for each of the masks you have collected.
- Go to the courtyard and zoom into the double wooden doors with roses. Place all six masks in the sockets: Sorrow, Excitement, Illusion, Fear, Shame and Despair. The doors open and a flock of bats flies out.
- Go down the steps into the wine cellar.
The Wine Cellar Symbol Lock
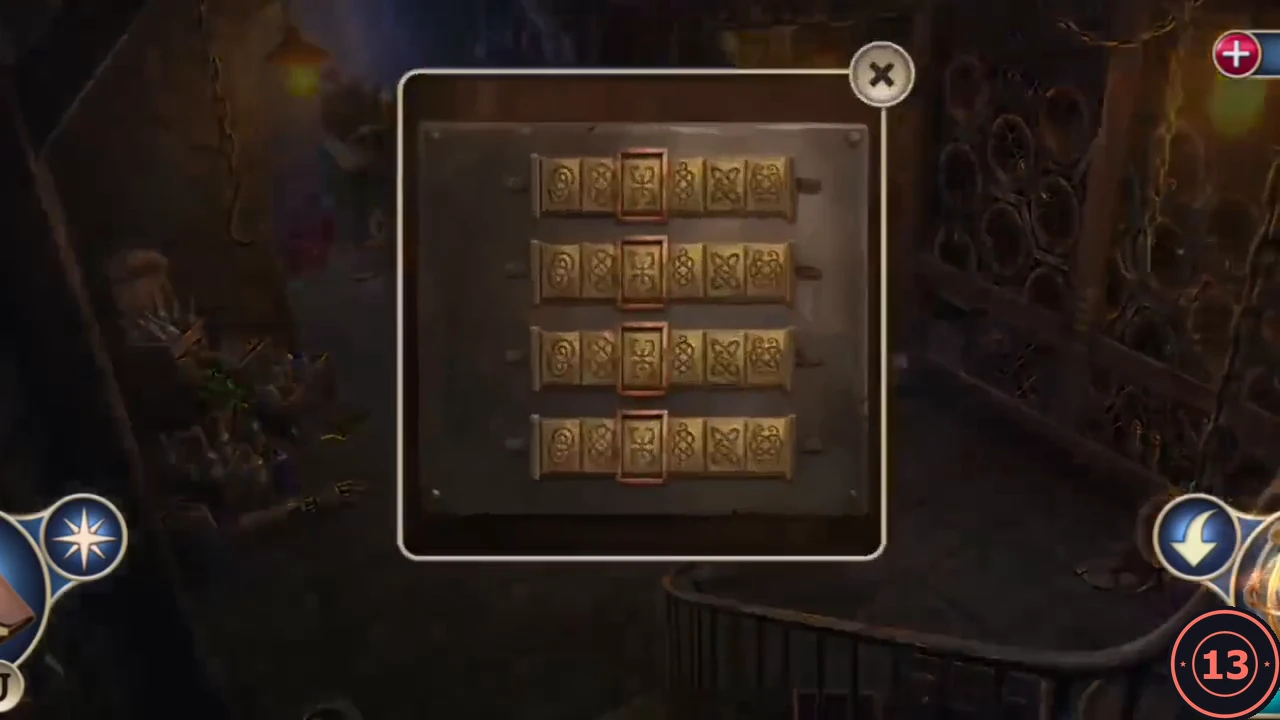
The cellar holds tools, a lathe with a missing cutter and a barred compartment locked by four symbol sliders. The code is pinned up in the study.
- Zoom into the bottle crate on the left and move the green bottle to find Gear (7/8). The broken glass needs hand protection; leave it for now.
- Zoom into the workbench on the far left and take the Pliers. The lathe is missing its cutting tool.
- Open the Bent Wire in your inventory and bend it into a hook with the Pliers. It is still too short to reach anything.
- Zoom into the slider lock on the barred compartment. The code is on the torn paper strip on the study corkboard, read from top to bottom: braided square knot, double ring, figure-eight loop and teardrop knot. Slide each row so its symbol sits in the highlighted frame, matching the strip from the top row down. The compartment opens and reveals a barrel tap.
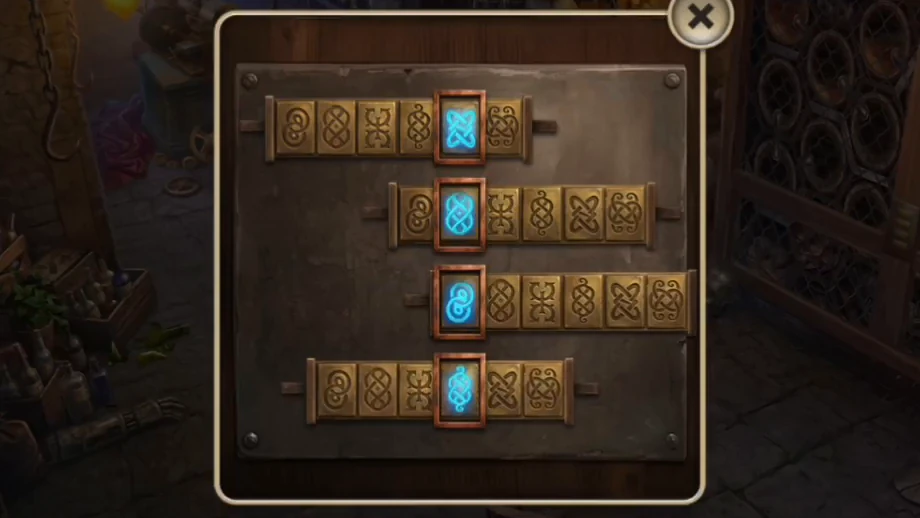
Solved: the four code symbols lined up in the lit column.
The Barrel Rack
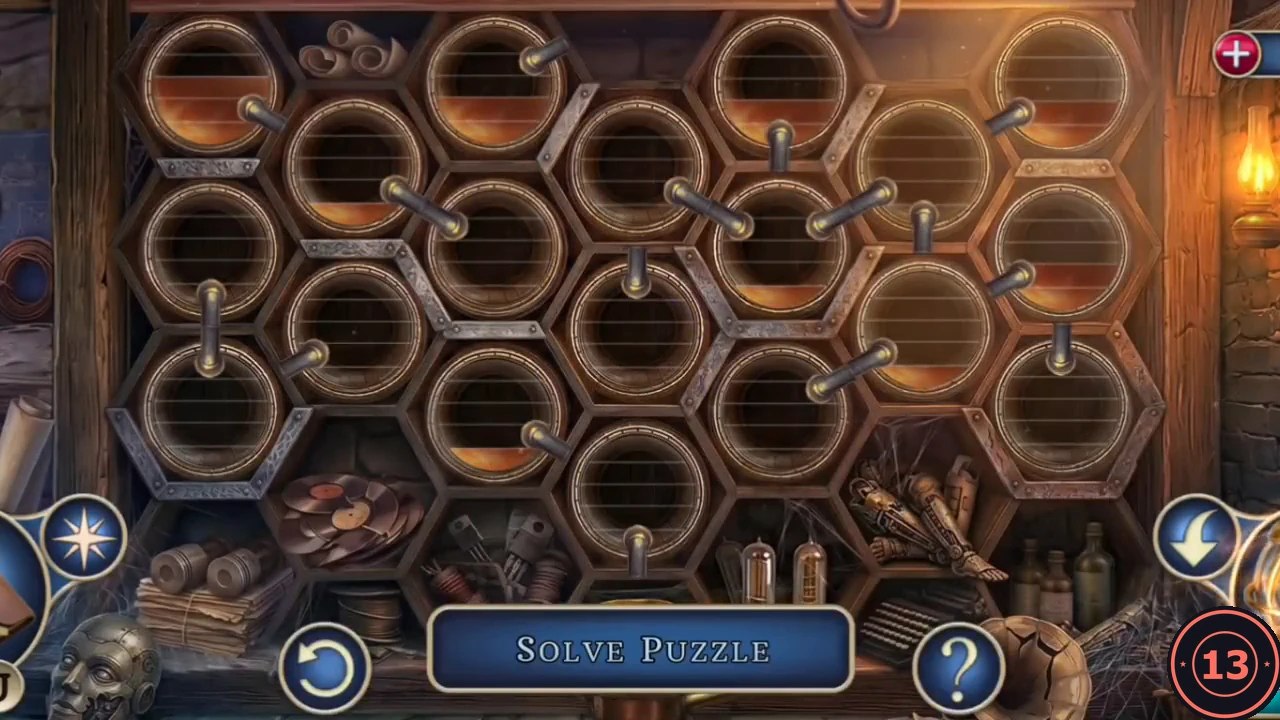
Behind the slider lock is a wine barrel with a tap. Catch the liquid with the oil can, then route the flow through the barrel rack.
- Zoom into the barrel tap. Put the Empty Oil Can under it and the Funnel in the can. The barrel rack puzzle opens.
- Tap the pipes between the barrels to turn them so they join neighbouring barrels. Lead the liquid from the filled barrels through the rack to the bottom barrel above the tap. Work one stream at a time and watch where each barrel drains before turning the next pipe.
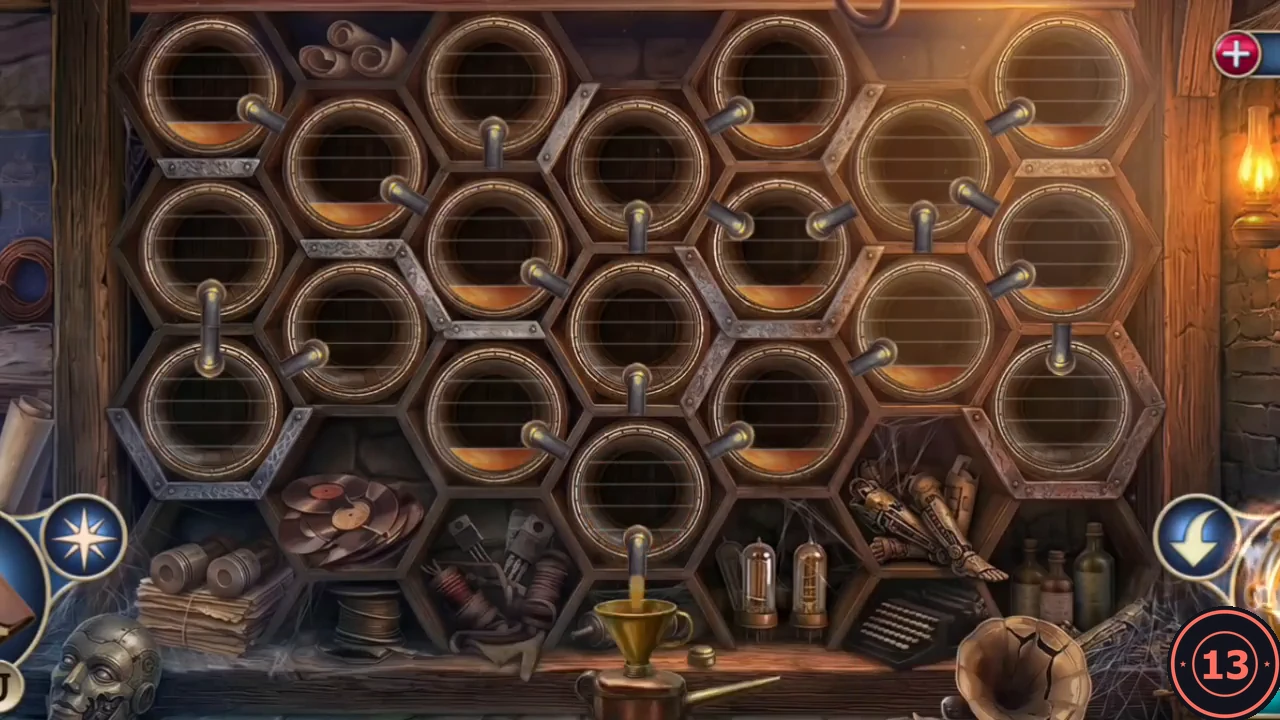
Example of a finished rack: the liquid runs down into the funnel and oil can under the tap. - Take the Cord and the filled Oil Can from under the tap.
- Zoom into the rusted automaton hanging on the cellar wall and oil its joints with the Oil Can. Its chest opens; take the TK Key.
- Go to the courtyard and unlock the mansion front door with the TK Key. In the lobby the opera diva is strapped into an electric chair; your objective becomes disabling the trap.
The Electric Chair
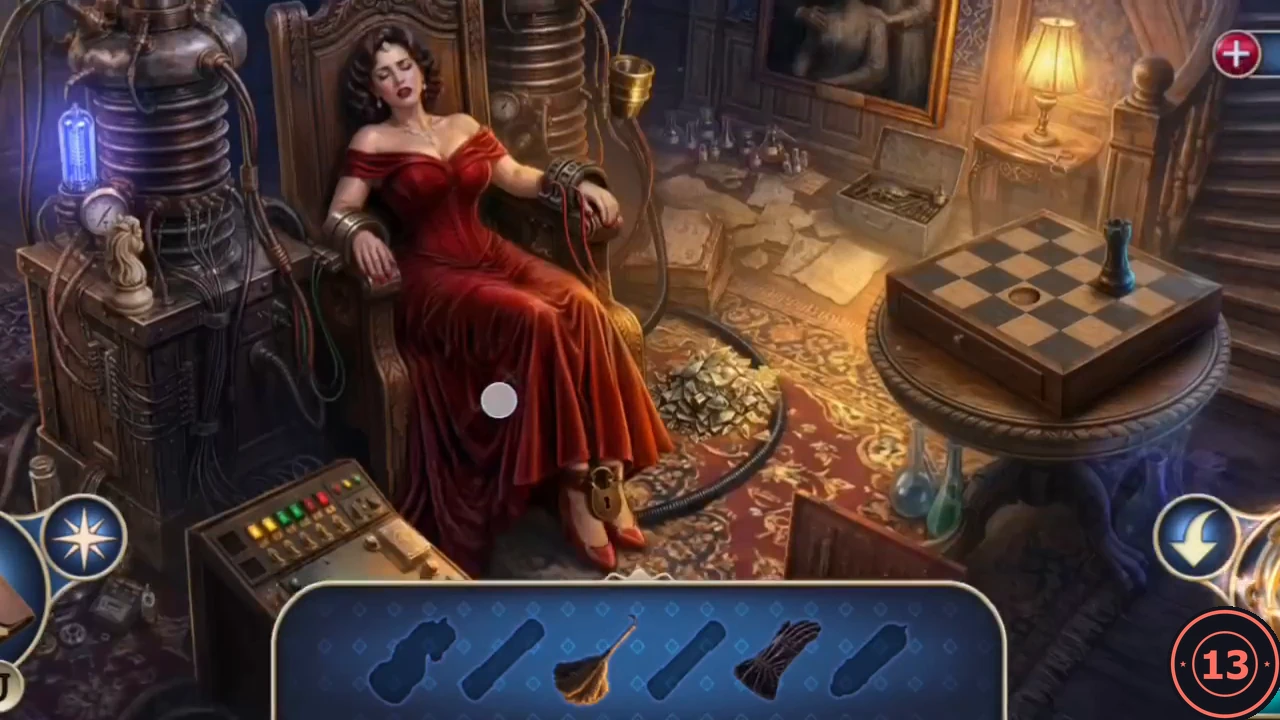
The lobby around the diva is another interactive search. Find the objects in the tray and use them to reach the four fuses.
- Take the feather duster from the chessboard table and the dark insulating cloth lying in the diva's lap. Sweep the debris under the chair with the duster to uncover a small key and a red fuse on the floor beside her skirt; take both. Pick up the white knight from the floor by the left machine.
- The vacuum tube in the left machine is live. Pull it out with the insulating cloth, then fit it into the empty socket of the machine behind the chair. Its light reveals a hidden wall compartment; take the tweezers.
- Put the white knight on the chessboard next to the black knight. A drawer pops open; take the green fuse.
- Zoom into the diva's feet and open the ankle padlock with the small key. Take the loose green fuse from the floorboards, and use the tweezers on the red fuse that is wedged between them.
- Zoom into the cuff on the diva's arm on the left of the screen and insert both green fuses. Then zoom into the other cuff and insert both red fuses. The arcs around the chair grow even stronger, so you cannot reach her yet.
The Hex Gear Lock and the Wrench
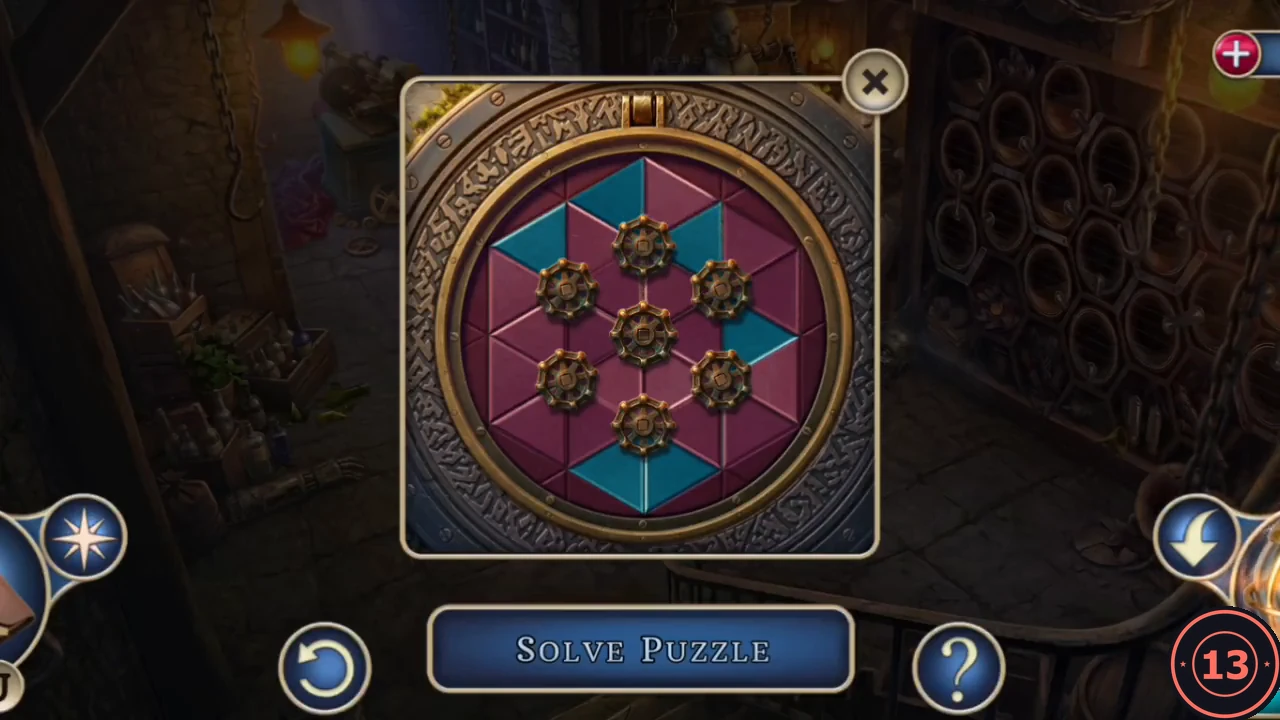
To shut down the trap you need the wrench held by the courtyard automaton. Getting it working takes several trips around the grounds.
- Open the Wire Hook in your inventory again, snip its loop with the Pliers and tie on the Cord to make a hook on a cord. If the game asks you to rate it, close the window.
- At the gate, lower the hook on the cord through the storm drain and pull up the Valve.
- In the wine cellar, fit the Valve to the round hatch in the floor to open its gear lock. Each gear turns the six triangles around it. Gather all six teal triangles into the hexagon around the centre gear. Take the Handkerchief and the TK Box from the open hatch.
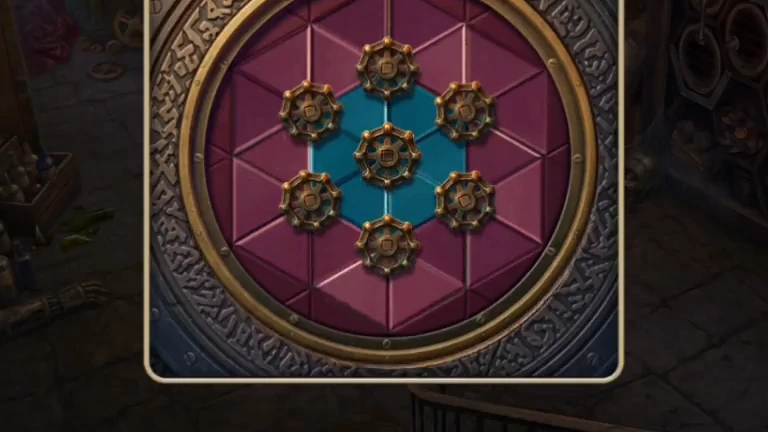
Solved: all six teal triangles around the centre gear. - Zoom into the bottle crate again and use the Handkerchief to pick up the Sharp Shard.
- In the study, cut open the green patch on the satchel with the Sharp Shard. Take the Lathe Tool and the T-shaped piece hidden inside, along with a secret clue.
- In the wine cellar, fit the Lathe Tool to the lathe and turn the wooden block to make the Screwdriver Handle. In the study, put the handle on the shaft pinned to the corkboard and take the Screwdriver.
- In the lobby, zoom into the pulley on the shoulder of the automaton sitting on the floor and unscrew it with the Screwdriver. Take the Pulley and the Timing Belt. Then zoom into the control panel by the chair: its bolts need a wrench, but you can take Gear (8/8) from its top-right corner.
- In the courtyard, zoom into the automaton holding the wrench. Fit the Timing Belt and the gears into its chest, then lubricate it with the Oil Can. It releases the Wrench.
The Trap Control Panel
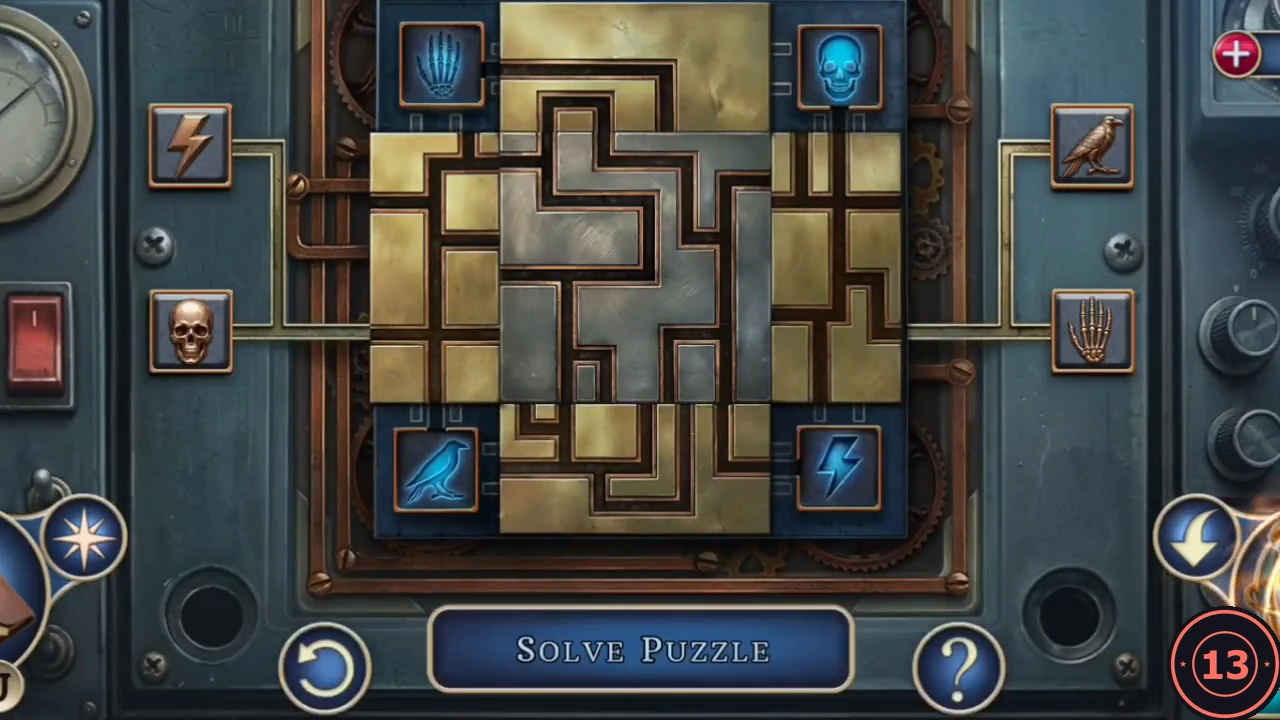
The control panel next to the chair hides a sliding maze. Guiding four symbol tokens to their sockets switches off the coils.
- In the lobby, unbolt the control panel with the Wrench to reveal the maze.
- Slide each token along the grooves and tap the centre block to rotate it whenever you need to join two paths. Take the tokens to the matching sockets around the edge one at a time: hand to the top-left socket, bird to the bottom-left, lightning bolt to the bottom-right and skull to the top-right. Each socket lights up when its token docks.
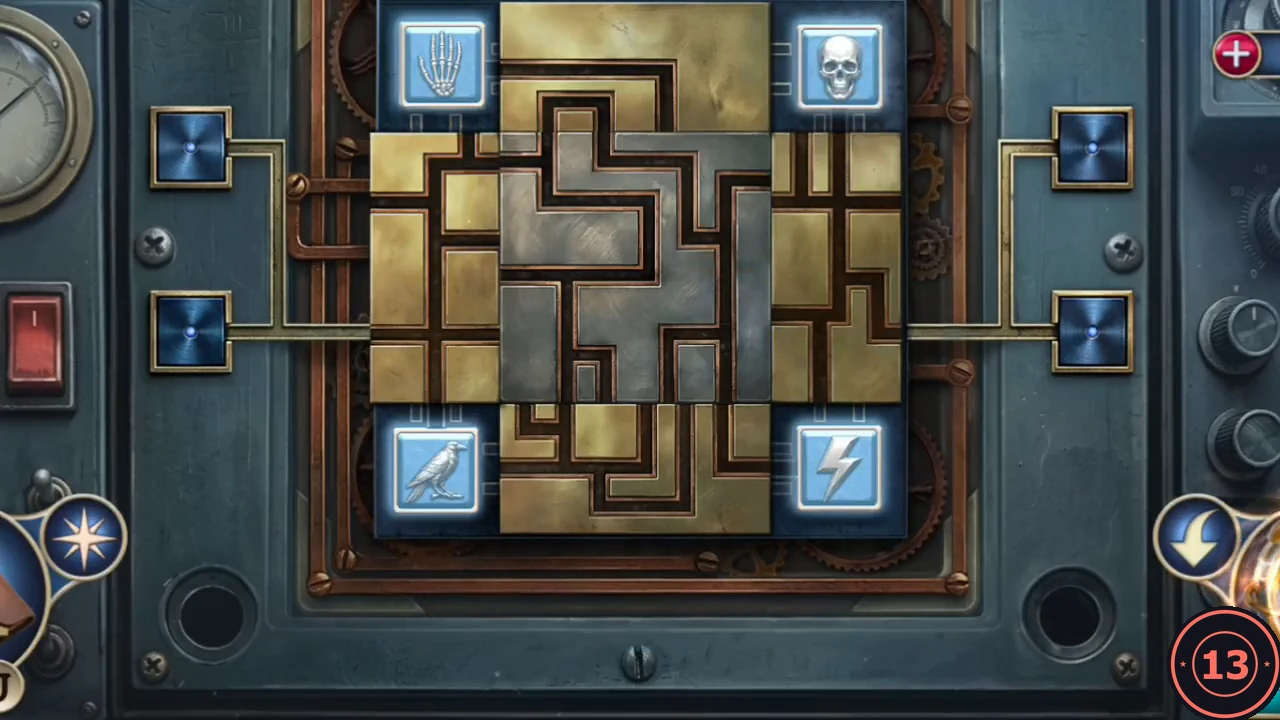
Solved: every token docked in its matching socket.
Reviving the Diva
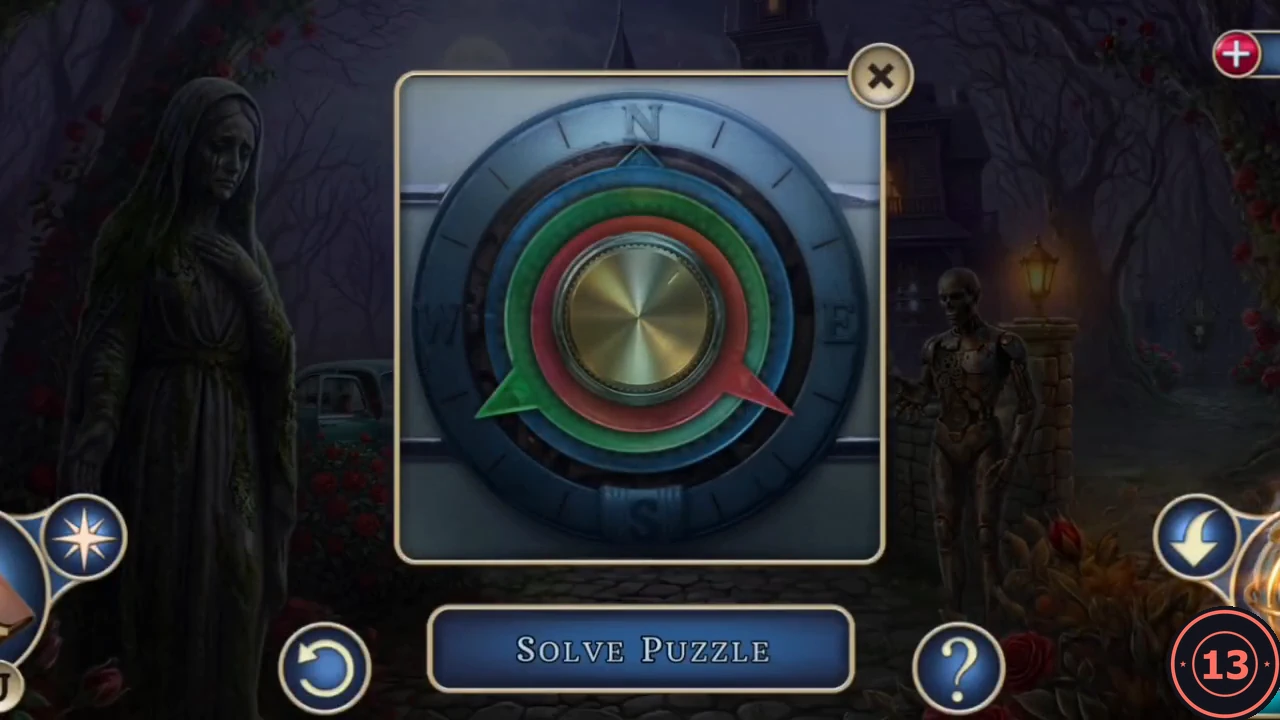
The diva is unconscious. A voice recording gives the code for the dial lock in the car, where her handbag is hidden.
- Zoom into the unconscious diva. A recording plays: 'Red: northeast. Green: south-southwest. Blue: west.'
- Go to the car in the courtyard and zoom into the dial lock on the dashboard. Turn the needles so red points northeast, green points south-southwest and blue points west. The glove box opens; take the Diva's Handbag.CODERed NE, Green SSW, Blue W
- The handbag's clasp is missing a decorative piece. In the lobby, take the Angel Necklace from the diva's neck and fit it to the clasp. Take the Snuff and the Compact Powder from the bag.
- Hold the Snuff under the diva's nose. She wakes, tells you she will wait in the car and that she heard other prisoners, and gives you a Playing Card that works as a key.