Past the gates near the cinema
Sylvia saw Mnemosyne's spirit pass by the cinema. The objective is Get past the gates near the cinema, and thick vines block the way.
- Listen to Sylvia in the editing room and take Coin 1/3 from her.
- Zoom into the burnt circle on the editing room floor and take the Metal eye.
- In the grand hall, zoom into the arm of the front seat and take the Oil jug.
- In the backstage hall, zoom into the small round table with the fruit press. Put the Oil jug on the table and take the Duster.
- In the cinema area, zoom into the vines on the iron gate to the left of the cinema and take the Jammed scissors.
- Zoom into the blue mailboxes and take the Hook.
- Zoom into the Medusa manhole cover and use the Hook on it. Cobwebs fill the pit underneath.
- Use the Duster on the cobwebs to clear them.
- Take the Helm crest and Coin 2/3 from the pit. Your character notes that a missing eye has to be found and secured here.
- Zoom into the armoured statue on the right and use the Helm crest on its helmet. Take the Golden bird and the Olive branch from its open hand.
- In the backstage hall, use the Olive branch on the fruit press and work the press. Take the Olive oil from the jug.
- Open the Jammed scissors in your inventory and pour the Olive oil over them to get the Garden shears.
- Use the Garden shears on the vines to open the gate, then walk through to the museum park.
Museum park: dog and gumballs
A man hangs tied to a tree, and two anomalies guard the path. Your character decides to help the man first.
- Zoom into the wooden frame beside the path and take the Broken ladder.
- Take Plank 1/4 from the ground beside the path.
- Zoom into the shell by the gravel flowerbed. Take the Tennis ball out of it, then take the Seashell.
- Take Plank 2/4 from under the bench.
- Zoom into the basket on the bicycle. A combination lock holds it shut, so you need a code first.
- Use the Tennis ball on the dog anomaly. The dog anomaly clears and leaves the Dog collar. Take it.
- Open the Dog collar in your inventory and take Coin 3/3 from its tag.
- Zoom into the gumball machine and use the three coins. Take the Suction dart and the Clay from the tray.
- In the cinema area, zoom into the pit and use the Clay and then the Metal eye on the empty eye socket. The eye puzzle opens.
- Optional morphing object: tap the newspaper on the park bench.
Coloured eye rays
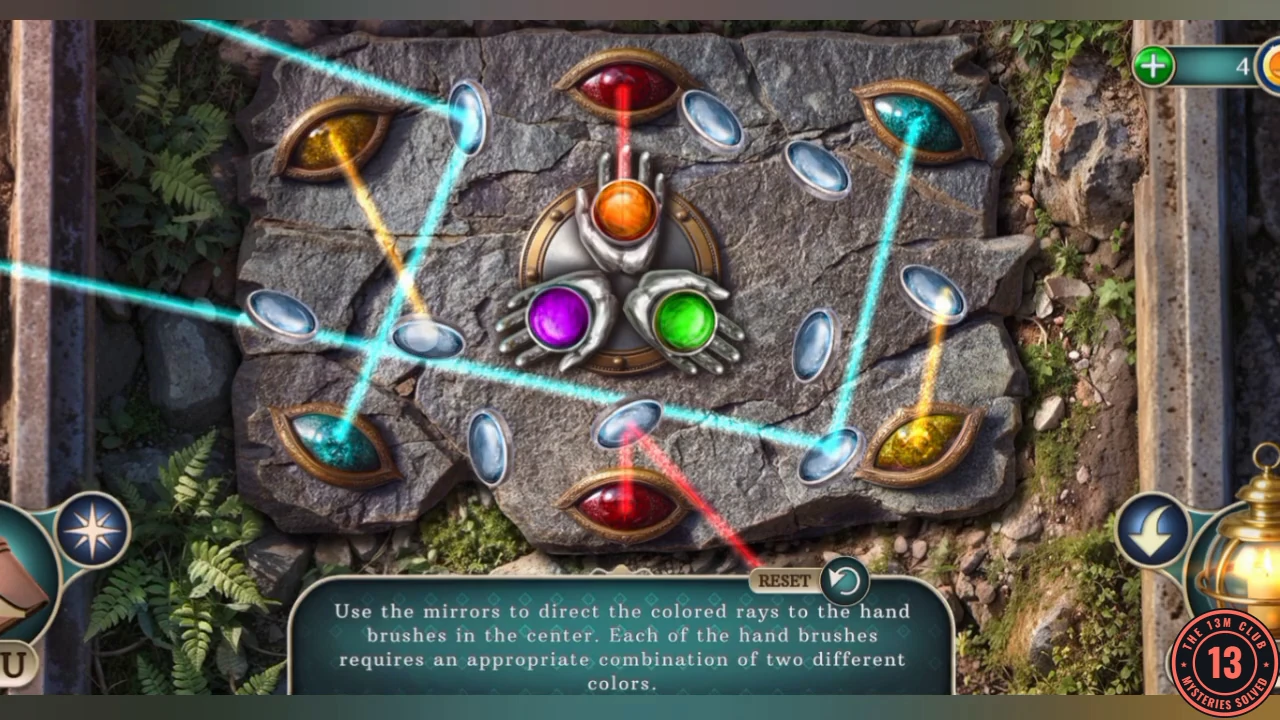
The instruction reads "Use the mirrors to direct the colored rays to the hand brushes in the center. Each hand brush requires an appropriate combination of two different colors." The stone eyes give two rays each of red, yellow and teal.
- Send one red and one yellow ray to the top orange brush.
- Send one red and one teal ray to the left purple brush.
- Send one yellow and one teal ray to the right green brush. When all three brushes light, the slab opens.
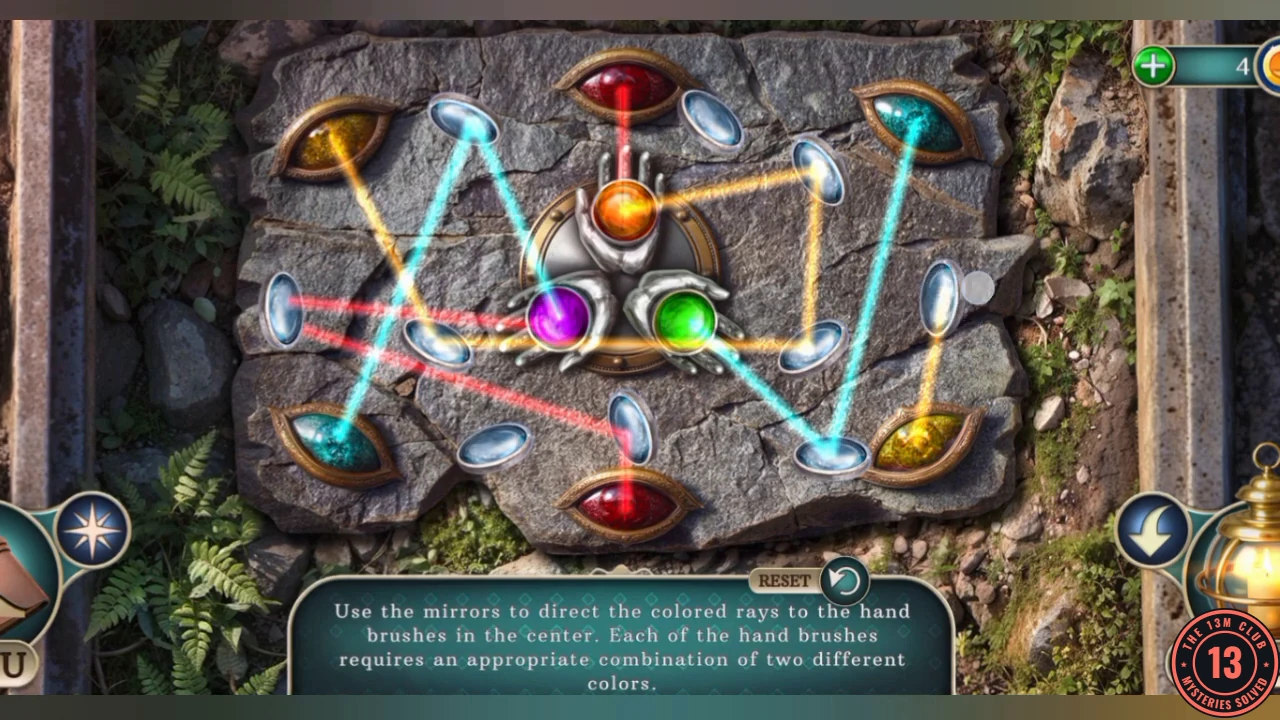
One working set of mirrors: all three brushes receive their two colours. A similar layout works as long as each brush gets the right pair. - Take the Fire symbol and Snake skull from the hollow.
The ladder and the man in the tree
Four planks, the statue's nails and a test roll finish the ladder.
- In the cinema area, take Plank 3/4 from beside the blue mailboxes.
- In the grand hall, zoom into the torn seat back and use the Snake skull on it to rip it open. Take the Billiard ball.
- Take the Shoe brush and Plank 4/4 from the same seat.
- Open the Broken ladder in your inventory and add all four planks.
- In the cinema area, zoom into the statue. Use the Shoe brush on its chest, then the Fire symbol. Take the Ancient nails and the Flint.
- Open the ladder again, add the Ancient nails and roll the Billiard ball along it to get the finished Ladder.
- In the park, use the Ladder on the tree, then use the Seashell to cut the man down.
- Talk to the man, Benjamin, and take the Lock code note. It reads 715.
- Zoom into the bicycle basket and enter 715 on the lock. Read the Offer letter and take the Vintage camera and Compact mirror.CODE715
- Give the Offer letter to Benjamin. His memory scene starts.
Benjamin's story scene
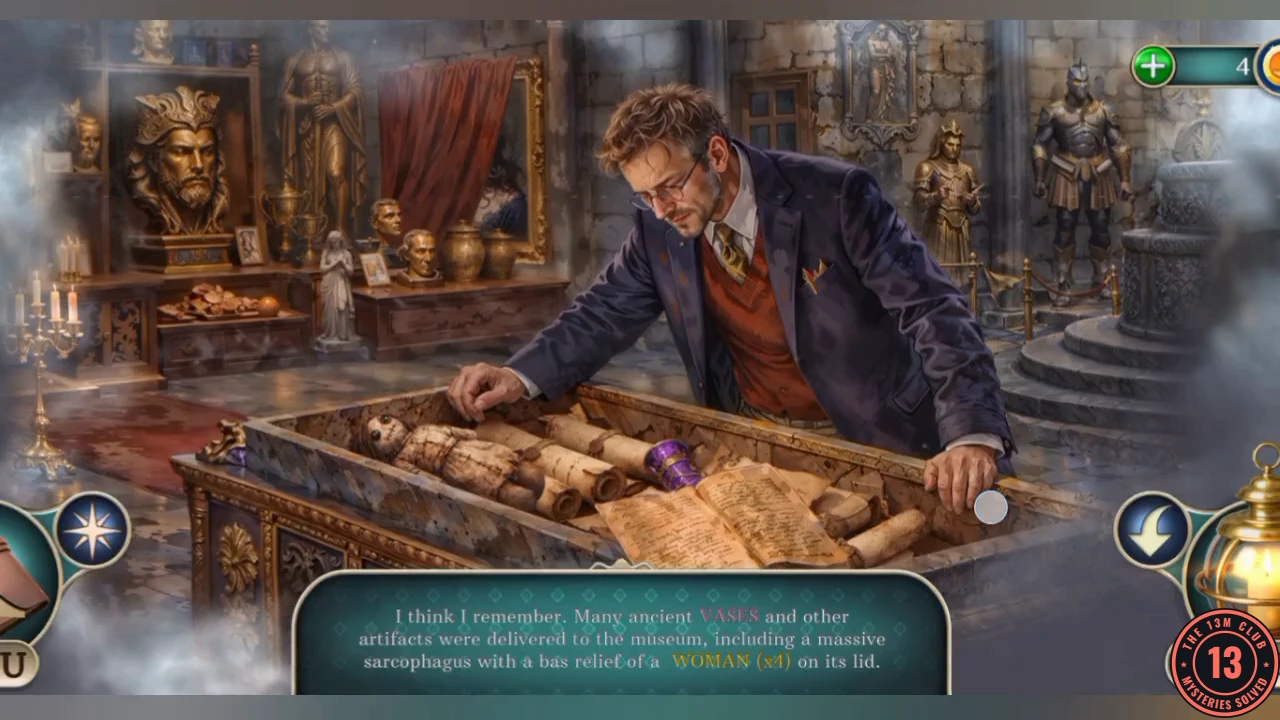
This hidden-object scene is told in three pages of text. Highlighted words name what to look for, and a number such as (x3) tells you how many there are.
- On each page, read the highlighted words and tap the matching objects in the picture. Move through the pages as they finish.
- Listen to Benjamin afterwards and take the Flash powder. He tells you to check the museum.
Assembling the flash
Benjamin's old camera can drive the remaining anomaly away, but it needs a working flash.
- Zoom into the birdhouse on the tree and take the Flash tray from the slot below it.
- Open the Flash tray in your inventory. Add the Compact mirror and Flash powder to get the Flash reflector.
- Zoom into the tripod by the flowers. Use the Vintage camera and Flash reflector on it. Your character says a spark is needed.
- Use the Flint on the camera to start the puzzle. You keep the Flint for later.
Striker on the camera screen
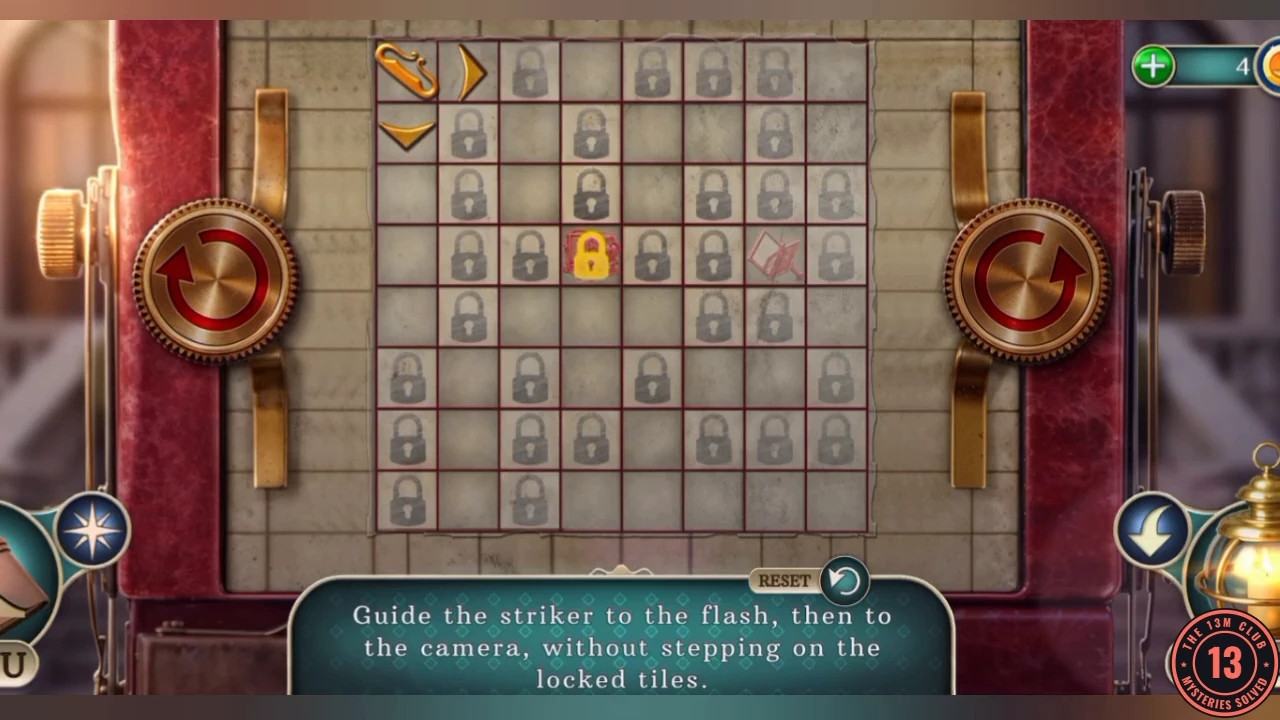
The instruction reads "Guide the striker to the flash, then to the camera, without stepping on the locked tiles." The route is long and can be done several ways, so this guide explains how it works rather than listing every move.
- Move the striker with the yellow arrows that appear beside it. Padlocked tiles block it, and the arrows only show the directions it can go.
- Reach the pale flash tile on the right side of the middle row. The gold padlock then turns into the red camera tile.
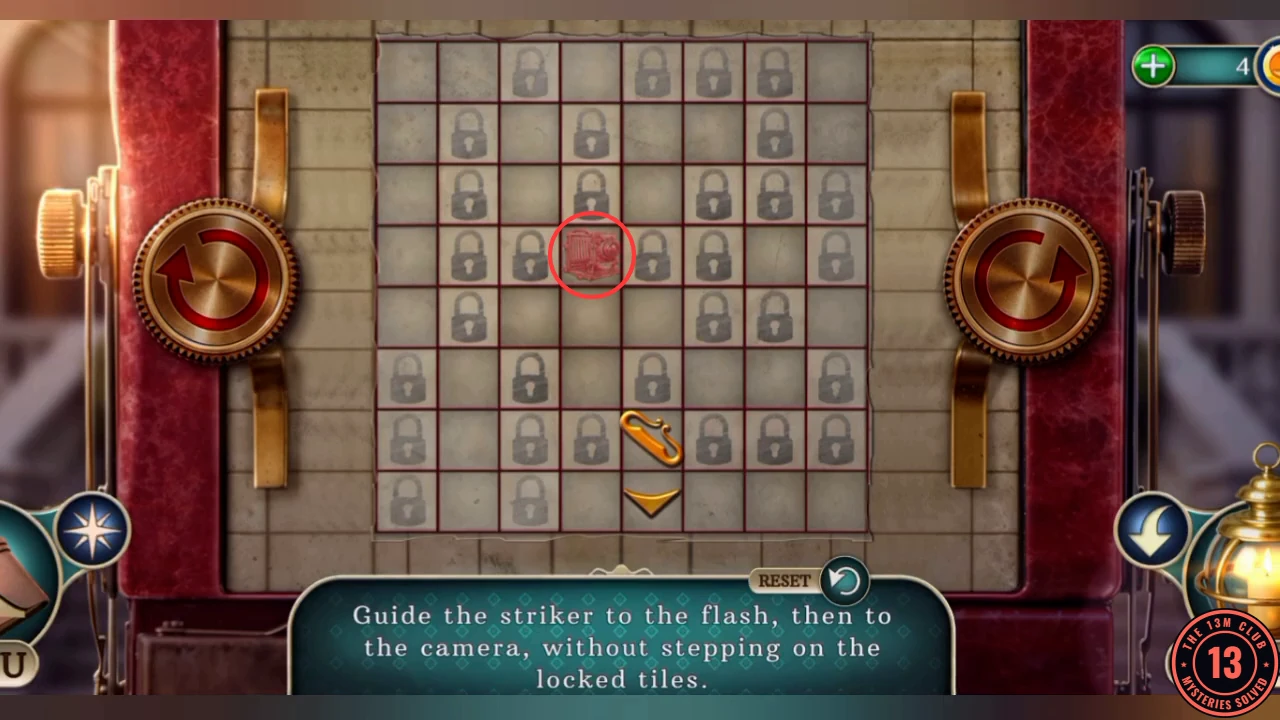
After you reach the flash tile, the gold padlock turns into the red camera tile, circled here. - When the camera tile looks boxed in, turn the dials on either side. The whole board rotates, which lets the striker run along routes that do not exist in the upright view.
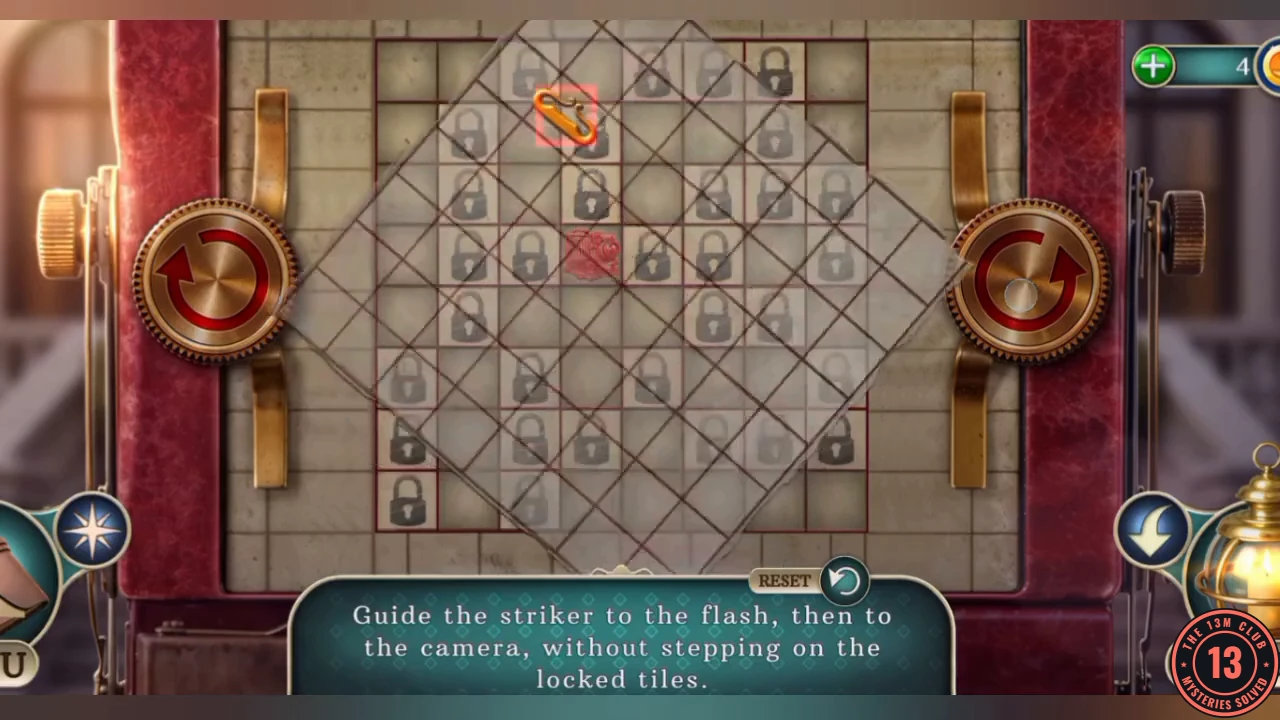
A dial being turned: the whole board swings round. Stop when it lets the striker reach the camera tile. - Bring the striker onto the red camera tile. The flash fires and the anomaly at the museum steps disappears.
Museum lobby
Mnemosyne waits at the top of the stairs. An anomaly blocks the staircase, so start at the reception desk.
- Zoom into the box on the reception desk. Take the Fire cabinet key and Museum ticket, then read the note. Your character says figurines matching the symbols on the box are needed.
- Zoom into the broken stairs and take the Torn toy. The blank spaces on the stair blocks are for four tiles.
- Zoom into the red fire box and use the Fire cabinet key. The key snaps off in the lock, leaving you the Flame emblem.
- Zoom into the ticket gate on the right. Take Patterned tile 1/4, then use the Museum ticket to open the gate into the Antiquity Exhibition.
- Optional morphing object: tap the shifting item on the carpet at the lower right. It may look like a sun-hat or a bag.
Antiquity Exhibition
The anomaly here is tied to a child's memory. A little girl stands inside it.
- Take the Compass rose from the green rug in front of the fireplace.
- Zoom into the girl in the anomaly and take the Ruler.
- Zoom into the tall wooden cabinet, read the caretaker's note and use the Ruler in the door gap to open it.
- Inside, take Patterned tile 2/4, the Glass cutter and the Thread and needle. The green box on the shelf is missing a decoration.
- In the lobby, zoom into the fire box. Use the Glass cutter and then the Suction dart to lift out the glass. Take the Fire extinguisher.
- In the exhibition, use the Fire extinguisher on the fireplace. Take Patterned tile 3/4 and the Silver bird from the ashes.
- In the park, use the Golden bird and Silver bird on the birdhouse perch. The lower compartment opens. Take the Plush ear. Something else is stuck between the boards, out of reach for now.
- In the grand hall, zoom into the torn seat and take the Synthetic fiber.
- Open the Torn toy in your inventory. Add the Synthetic fiber, then the Plush ear, and finish with the Thread and needle to get the Toy dog.
- In the exhibition, give the Toy dog to the girl in the anomaly. Take the Mute figurine and the Scoop from where she stood.
- In the park, use the Scoop on the gravel flowerbed. Take Mnemosyne key 1/2 and Patterned tile 4/4.
- Optional morphing object: tap the bust that shifts on the mantel to the left of the fireplace.
Stair blocks
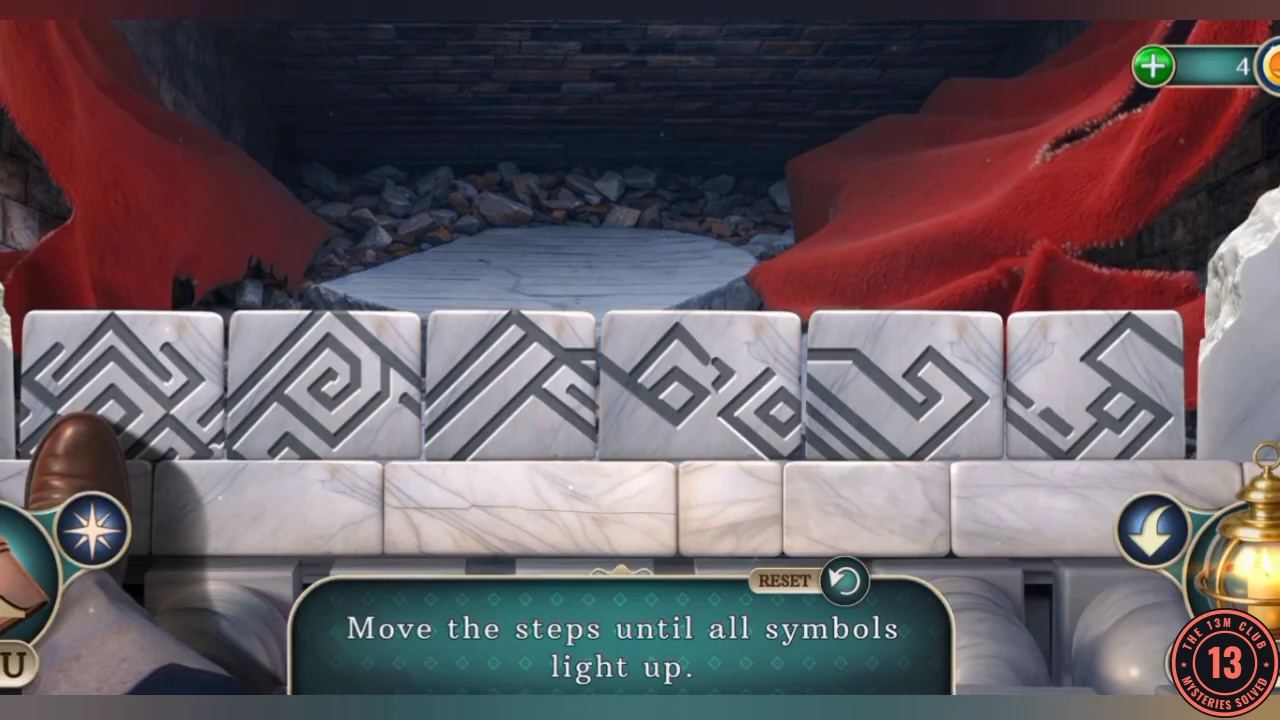
The instruction reads "Move the steps until all symbols light up." Tap one step and then another to swap them. A step glows once it is in its correct place.
- In the lobby, zoom into the broken stairs and place the four Patterned tiles on the stair blocks to start the puzzle.
- Number the steps 1 to 6 from left to right as they start. Arrange them in this order, left to right: 2, 6, 4, 1, 3, 5. The lines run continuously across the steps when it is right.CODE2 6 4 1 3 5
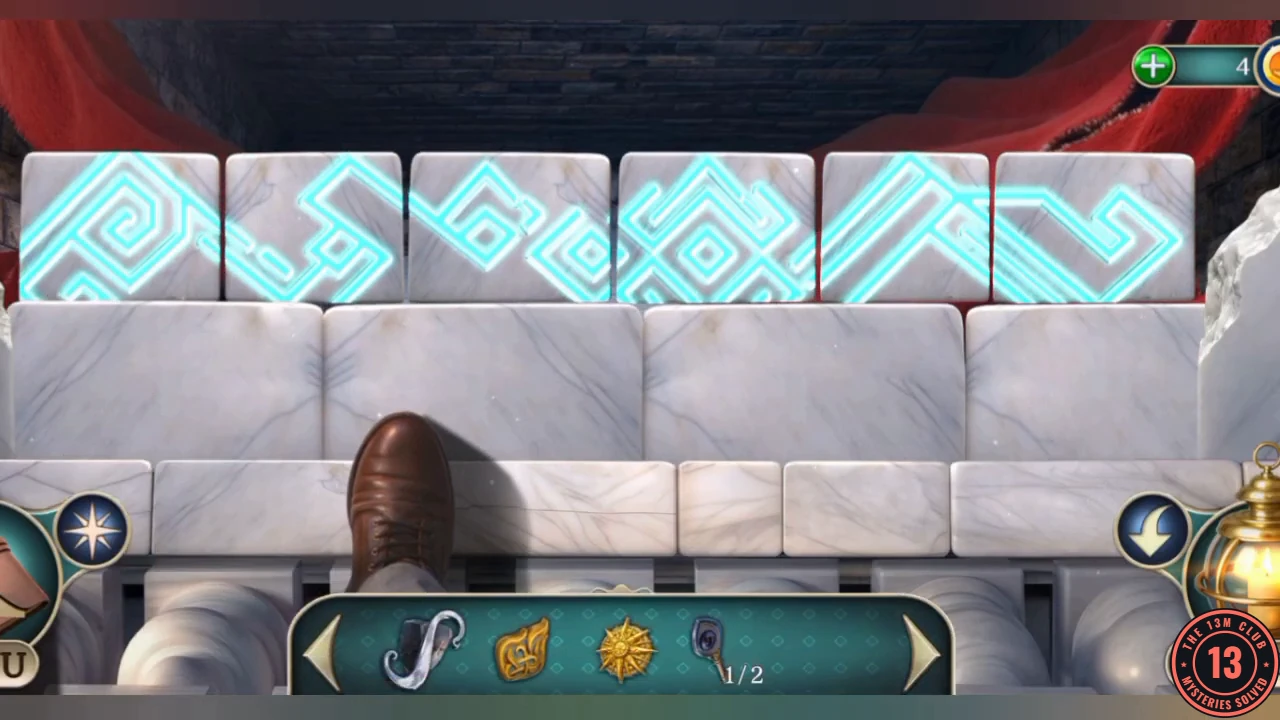
The finished stairs: the lines glow and run across all six blocks. - Take the Stained painting from the anomaly. The objective is Speak with the Artist about restoring the painting.