Repairing the stairs
The broken living-room stairs need four boards before you can reach the upper floor.
- In the living room, zoom into the green box and take the Gate lever.
- In the yard, take Boards 1/4, the loose board lying on the ground by the front steps.
- At the gate, zoom into the wall by the gate. Take two more boards and the Screwdriver, then fit the Gate lever into its slot.
- In the music hall, use the Screwdriver on the fireplace screen and take the last board.
- In the living room, use the four boards on the broken stairs and go up to the kid's room.
- Optional morphing object: tap the shirt on the wall hook in the kid's room.
Candles for the dark corner
Part of the kid's room is too dark to search. Build a candelabrum from three candles.
- In the kid's room, zoom into the armoire and take the brass Candlestick below the puzzle panel. Zoom into the toy chest and take the Key with crane. Zoom into the music box and take the Wax knife.
- In the music hall, use the Wax knife on the violin statue to get the first candle.
- In the living room, take the second candle from the shelf.
- At the gate, use the Key with crane on the crane's lantern and take the third candle.
- Open the Candlestick in the inventory, add the three candles and light them with the Matches to get the lit candelabrum.
- In the kid's room, place the candelabrum on the dark table. Take the Triangle figurine and Volume III.
- Use the Triangle figurine on the toy chest. Take the Oiler and Paint tube and read the note. The toy castle beside it is missing pieces, which you solve later.
- At the gate, use the Oiler on the gate mechanism to start the route map.
Path to the city
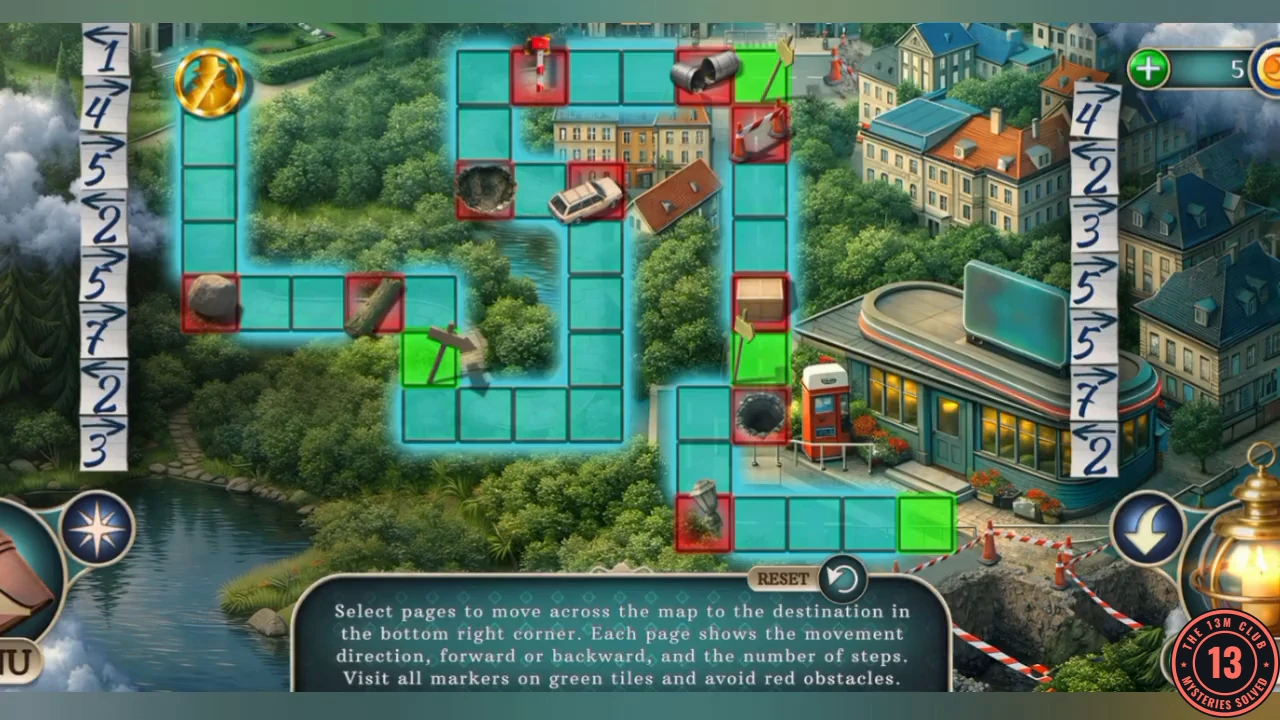
Pick all 15 movement pages in an order that takes the token along the track from the top-left start to the bottom-right destination. The token only moves after all pages are chosen. It must land on every green marker and must not land on a red obstacle.
- Select the pages in this order: +5, +4, +7, +7, +3, +5, -2, +5, -1, -2, -2, +5, +4, -2, +3. A plus page moves forward and a minus page moves backward. Other orders also work if they meet the rules.CODE+5 +4 +7 +7 +3 +5 -2 +5 -1 -2 -2 +5 +4 -2 +3
City center
The stranger's child was kidnapped somewhere around here. Search the square.
- Zoom into the stall window and take the Dancer figurine. The window has a lock you cannot open yet.
- Zoom into the library door. Take the Ice tongs and read the note. The green box beside the door needs a token.
- Zoom into the boarded door on the right of the square and take the Broken key. You need something to remove the boards later.
- Zoom into the vending machine and use the Ice tongs in the return slot. Take Buttons 1/2 and the Library token.
- Zoom into the car's number plate and take the Decorative horse from under it.
- Optional morphing object: tap the ice-cream sign on the diner roof.
- In the kid's room, place the Dancer figurine on the music box and take Volume VI from its drawer.
- Use the Decorative horse on the table drawer. Take the Protractor and Dancers 1/3. The drawer box lid is broken.
- At the library door, put the Library token in the green box. Take the Book with bookmark and open it from the inventory to get Volume IV and the Left lock part.
- In the living room, place Volumes III, IV and VI on the shelf and take the Melody note.
- In the music hall, use the Melody note and Broken key on the piano to start the puzzle.
Piano note puzzle
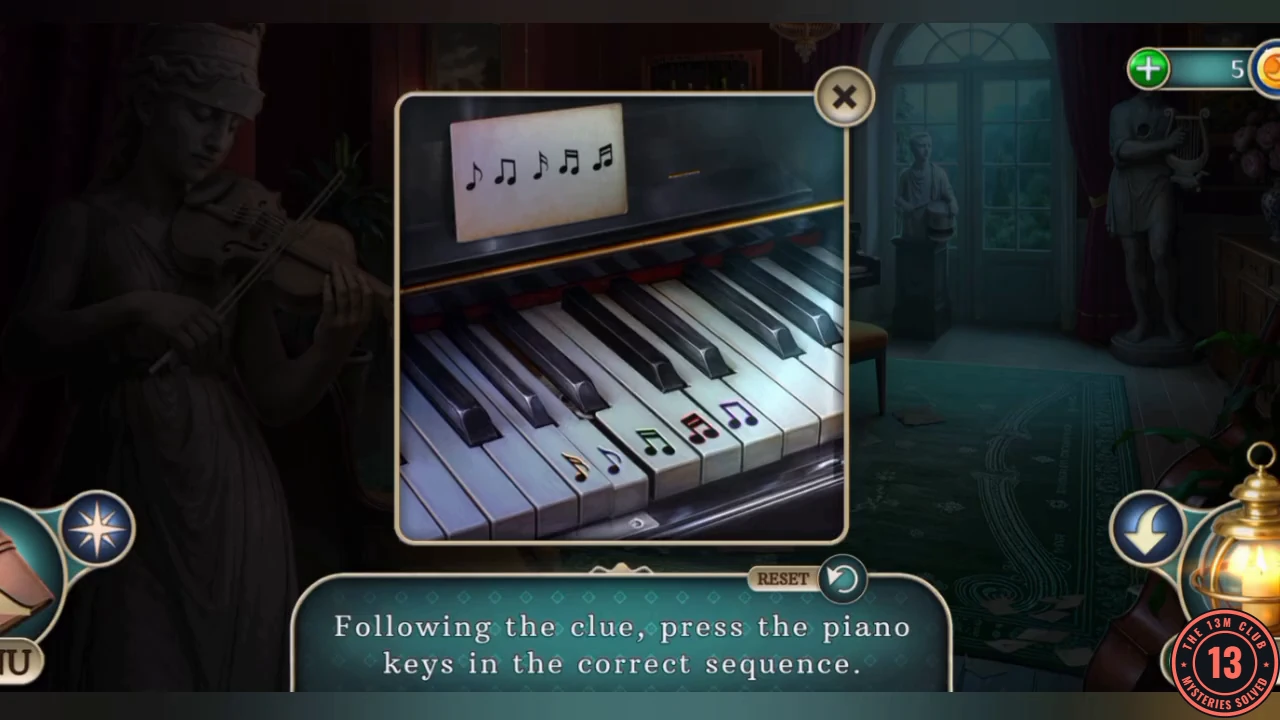
The Melody note shows five note shapes in order. Each of the five keys carries a coloured note. From left to right the keys are gold, blue, green, red and purple.
- Press the keys in this order: blue, purple, gold, green, red. That is key 2, 5, 1, 3, 4 counted from the left.CODE2-5-1-3-4
- Take the Car key from the opened compartment.
The armoire lock parts
The armoire needs two lock parts. The left one is already yours.
- In the city, use the Car key on the car trunk. Take the Cloth and the Pin.
- In the kid's room, use the Pin on the teddy bear and take the Right lock part.
- Place the Left and Right lock parts on the armoire to start the puzzle.
Armoire token puzzle
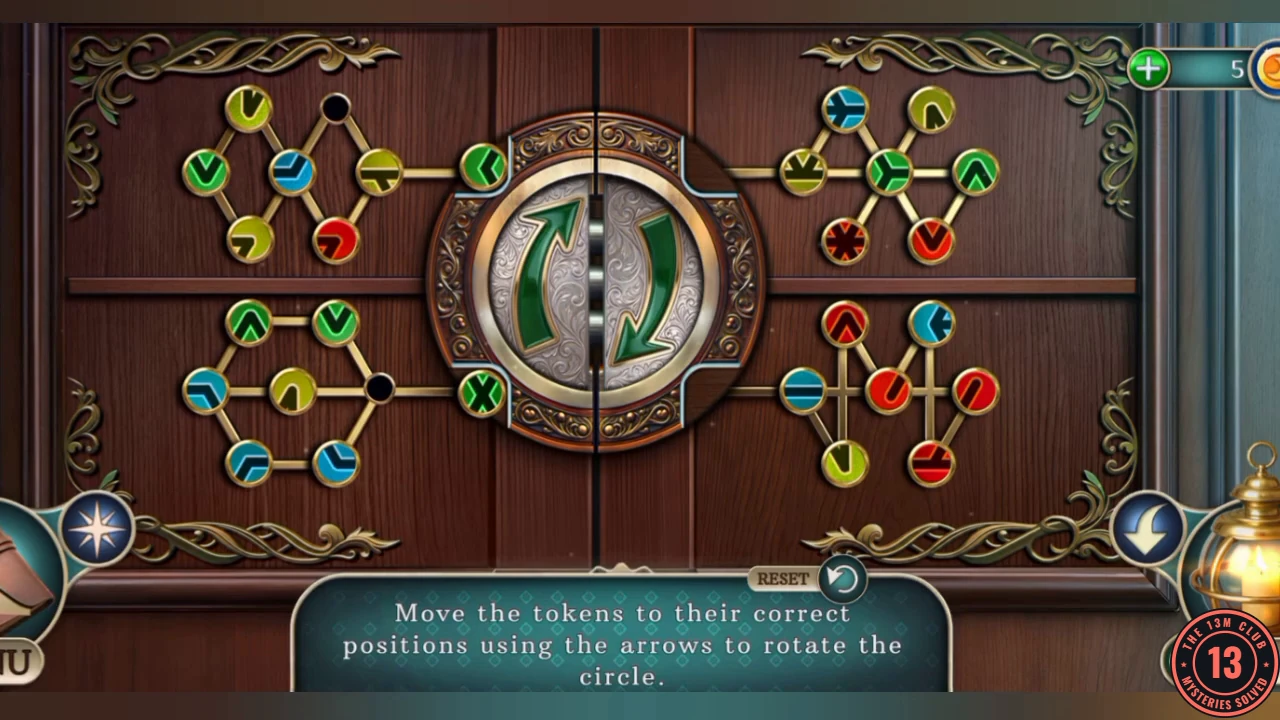
This is a very long sorting puzzle, so expect it to take a while. This guide gives the target and method rather than a move list, and your starting layout may differ.
- Goal: green tokens top left, red top right, teal bottom left and yellow bottom right. Inside each group, the rod shape drawn on a token must match the lines joining the node it sits on.
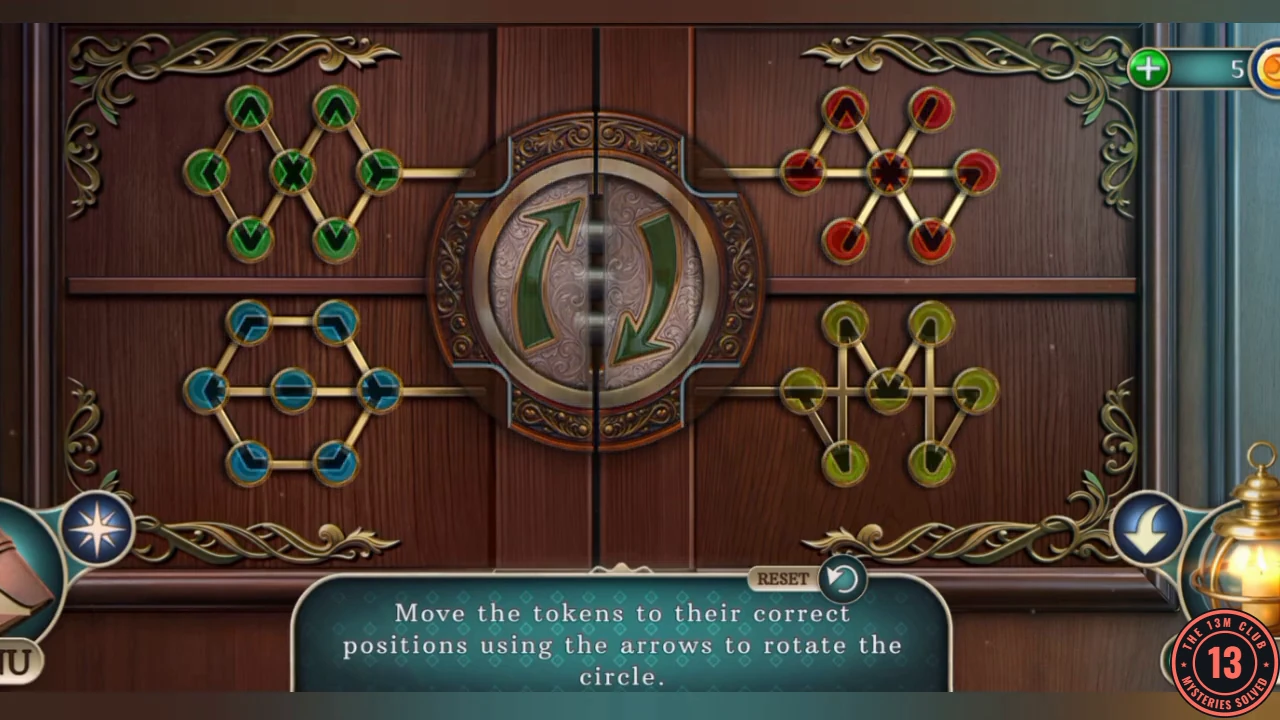
The finished armoire: green top left, red top right, teal bottom left and yellow bottom right. Each colour now fills its own pattern. - Controls: each quadrant has one empty black node. Tap a token next to it to slide it in. The central disc holds a token slot on each side and the two green arrows rotate it, moving tokens between quadrants.
- Method: sort colours first. Carry each wrong-coloured token on the disc to its own quadrant, one at a time. Then shuffle tokens inside each quadrant using the empty node until every rod drawing matches.
- Take the Dirty photo Frame from the opened armoire.