Cinema area: first visit
The boat drops you outside the cinema, where another anomaly blocks the entrance and a guard dozes on the bench.
- Zoom into the top of the mailboxes and take the Tiara. The message there says the small door is missing an owl-shaped piece.
- Use the Movie camera on the anomaly to clear the entrance.
- Zoom into the sleeping guard and take the Broken revolver and the Flashlight.
- Zoom into the chained cinema door and take the Cloakroom tag.
- Use the Cloakroom tag on the mailboxes and take the Mechanism belt. The lower box needs an ornament, so it stays shut.
- Zoom into the ticket booth shutter and use the Mechanism belt on the pulleys. Use the Flashlight in the dark booth and take the Earring.
- Use the Earring on the guard's pocket zipper and take the Blank key.
- Optional morphing object: tap the fire hydrant to the right of the bench. It can also appear as a flower pot.
Drawing the spare key
Owen knows the shape of the service entrance key and can sketch it from memory.
- On the embankment, show the Blank key to Owen. He asks for a pencil and paper.
- In the studio, zoom into the desk and take the Blank paper.
- Zoom into the paint box and take the Pencil.
- On the embankment, give the paper and pencil to Owen and take the Key diagram.
- In the basement, zoom into the machine with dripping paint. Use the Blank key and the Key diagram on it to start the puzzle.
Key cutter
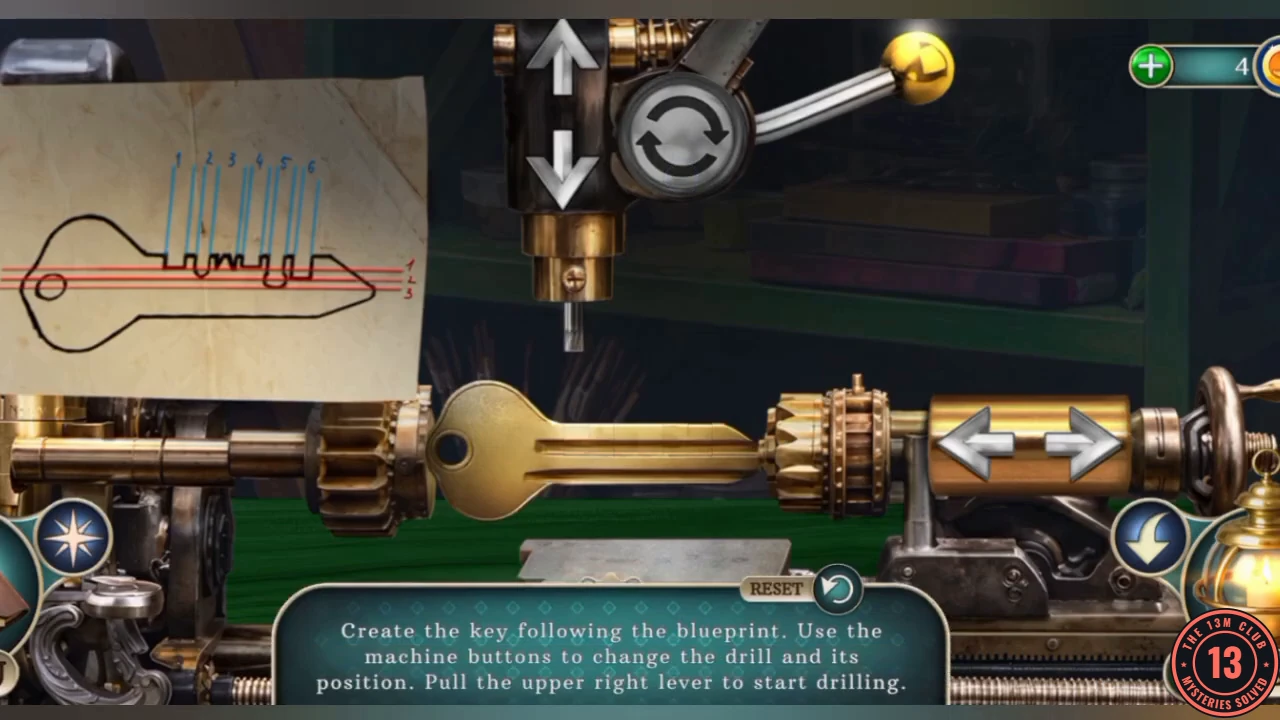
The instruction reads "Create the key following the blueprint. Use the machine buttons to change the drill and its position. Pull the upper right lever to start drilling." The up and down arrows set the depth, the left and right arrows pick the position, and the rotate button cycles through the drill bits.
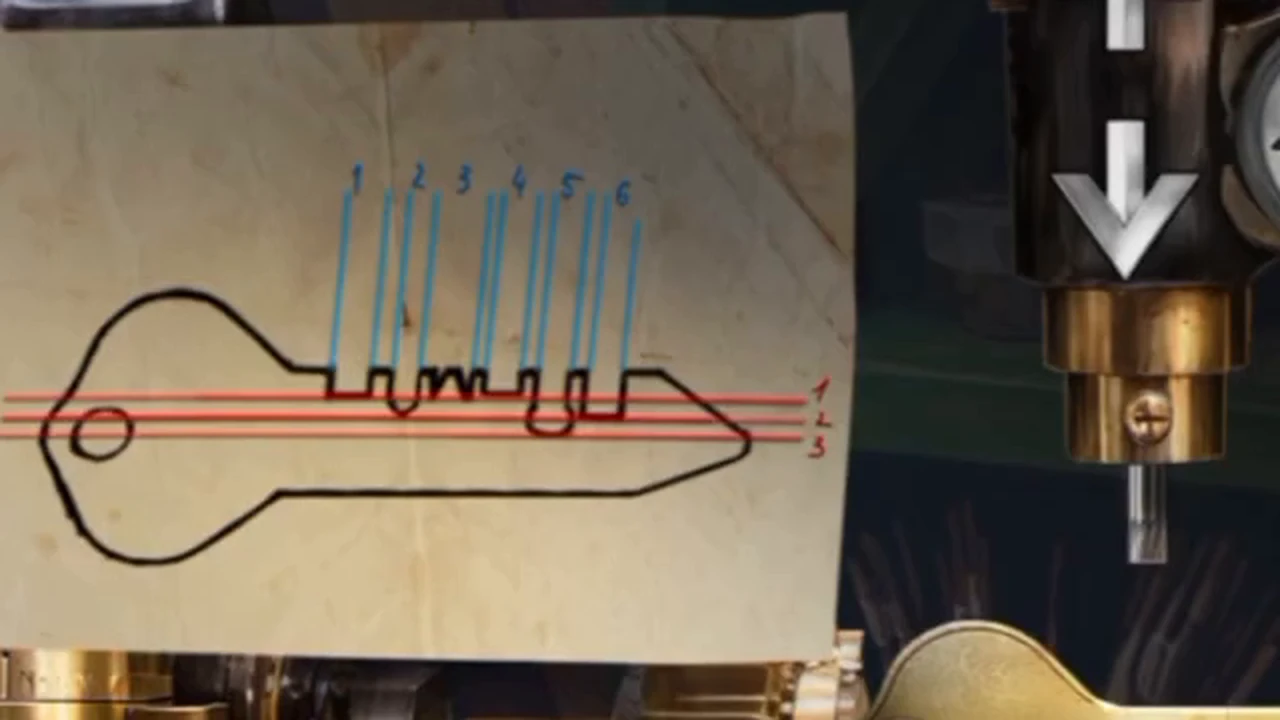
- Set the six positions from left to right to match the blueprint: 1 square bit, top depth; 2 pointed bit, middle depth; 3 forked bit, top depth; 4 square bit, top depth; 5 round bit, lowest depth; 6 square bit, middle depth. Pull the lever to drill each one.
- Take the Service entrance key.
Backstage hall: the fuse
The service entrance leads to a backstage hall with a locked keypad door, and that keypad has no power.
- In the cinema area, use the Service entrance key on the side door and enter the backstage hall.
- Zoom into the keypad on the star door. It has no power. Take the Trigger.
- Zoom into the shelf on the left. Take the Chisel and read the note. It says the actress set the office code from four facts about herself.
- Zoom into the broken spotlight and take Colored shard 7/8. The fuse inside is live, so you can't touch it yet.
- Zoom into the concession counter and take the Cash register button.
- In the cinema area, use the Cash register button on the register in the ticket booth. Take the Rubber gloves.
- In the backstage hall, use the Rubber gloves on the spotlight. The fuse will not budge, and your character says a tool is needed.
- On the embankment, use the Chisel on the rubble and take the Metal ornament.
- In the cinema area, use the Metal ornament on the lower mailbox and take the Medical clamp.
- In the backstage hall, use the Medical clamp on the spotlight and take the Fuse.
- Optional morphing object: tap the wall piece to the right of the two framed pictures above the shelf. It appears as a round plate on some visits and a blue landscape picture on others.
Office door keypad
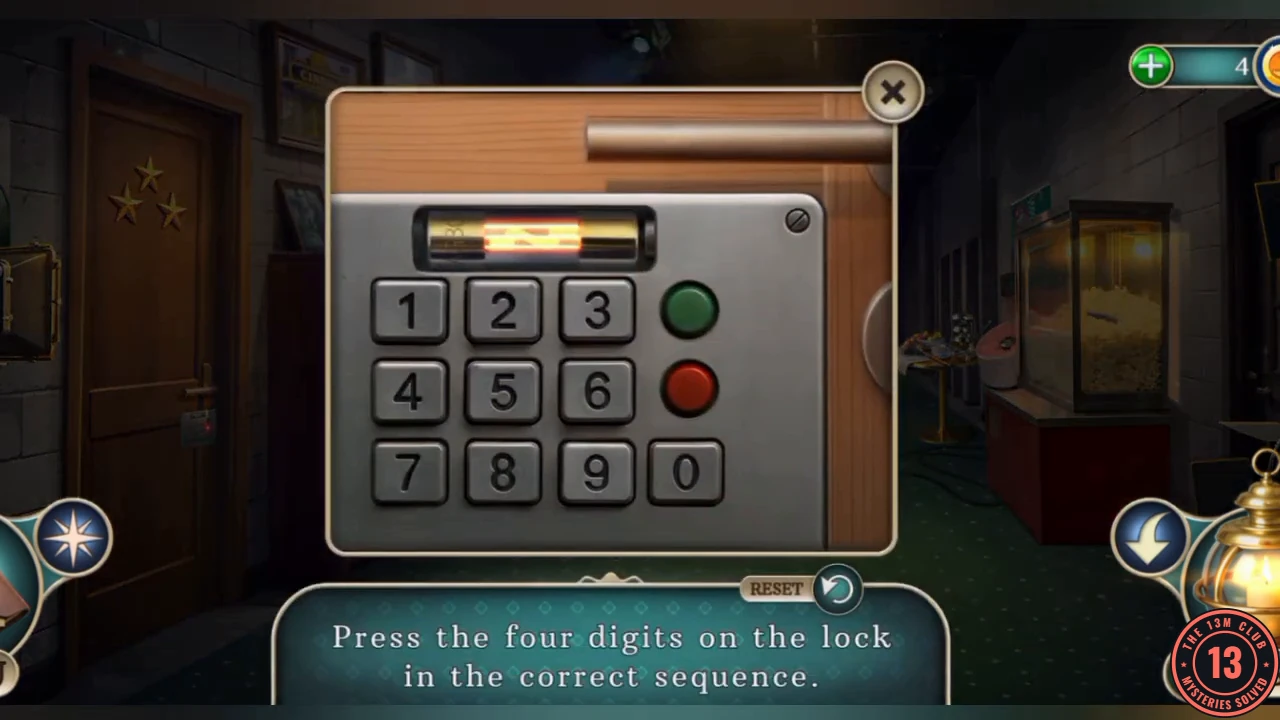
The note says: "I have two stars on the Walk of Fame. I received five awards. Four portraits of me were painted. And once I was named Actress of the Decade." Each number gives one digit, in order.
- Use the Fuse on the keypad to power it.
- Read the note again if you need it, then press 2, 5, 4, 1. The office opens.CODE2541
Sylvia's office
Sylvia appears out of the mist, but her memory is full of holes. She asks you to find her belongings.
- Watch the scene with Sylvia and take the Crane head she hands you.
- Zoom into the dressing table. Read the note about her reflection and take Sylvia's personal items 1/4. Remember the mirror for later.
- Zoom into the elephant on the desk. Take the Lightbulb and the Police whistle. The elephant is missing its tusks.
- Zoom into the skull on the side table and take the Wooden boy. The skull has slots you can't use yet.
- In the backstage hall, use the Wooden boy on the shelf box and take Sylvia's personal items 2/4.
- In the cinema area, use the Police whistle on the guard and take the Hook on cord.
- Use the Hook on cord on the cinema door and take the Stone mask.
- In the square, use the Stone mask and the Tiara on the faceless statue. The puzzle starts.
- Optional morphing object: tap the statuette on the wall ledge to the right of the posters.
Statue arms
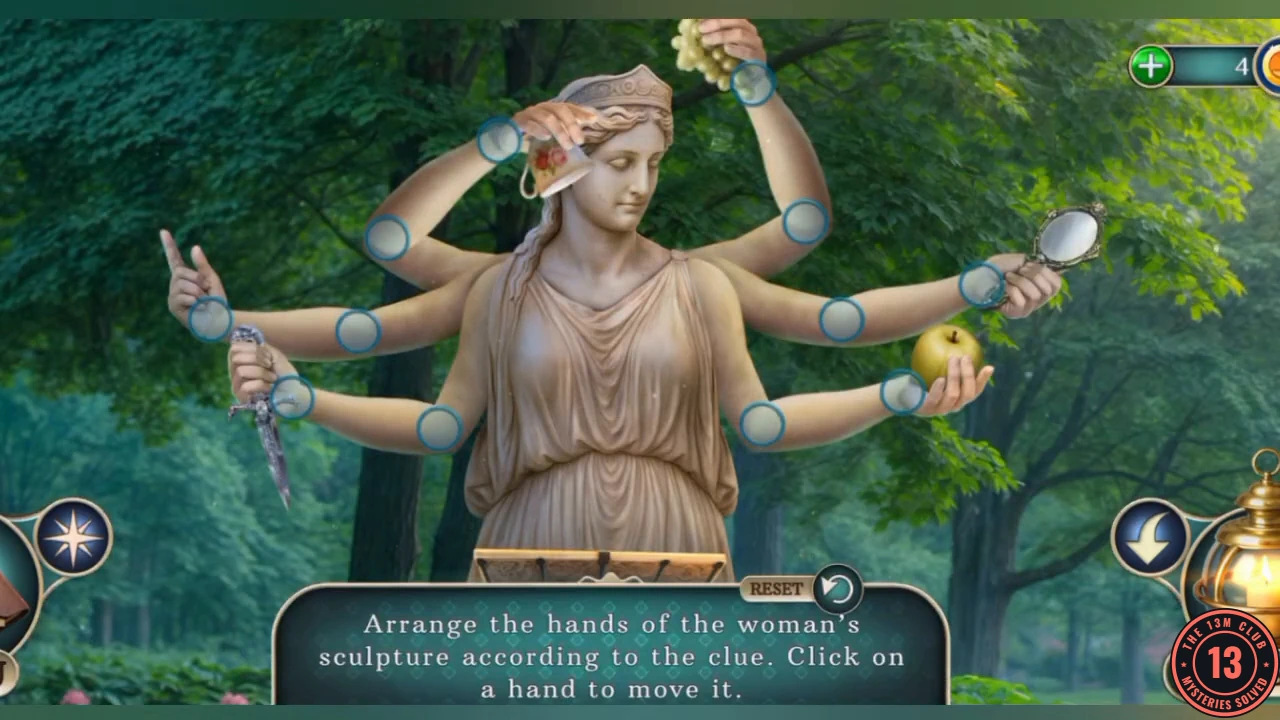
The instruction reads "Arrange the hands of the woman's sculpture according to the clue. Click on a hand to move it." The clue is the drawing on Joe's note in the framed hand painting by the bench. Close the puzzle to go and read it, then come back to the statue.
- Zoom into the framed hand painting by the bench and read the note with the drawing of the statue. Then return to the statue.
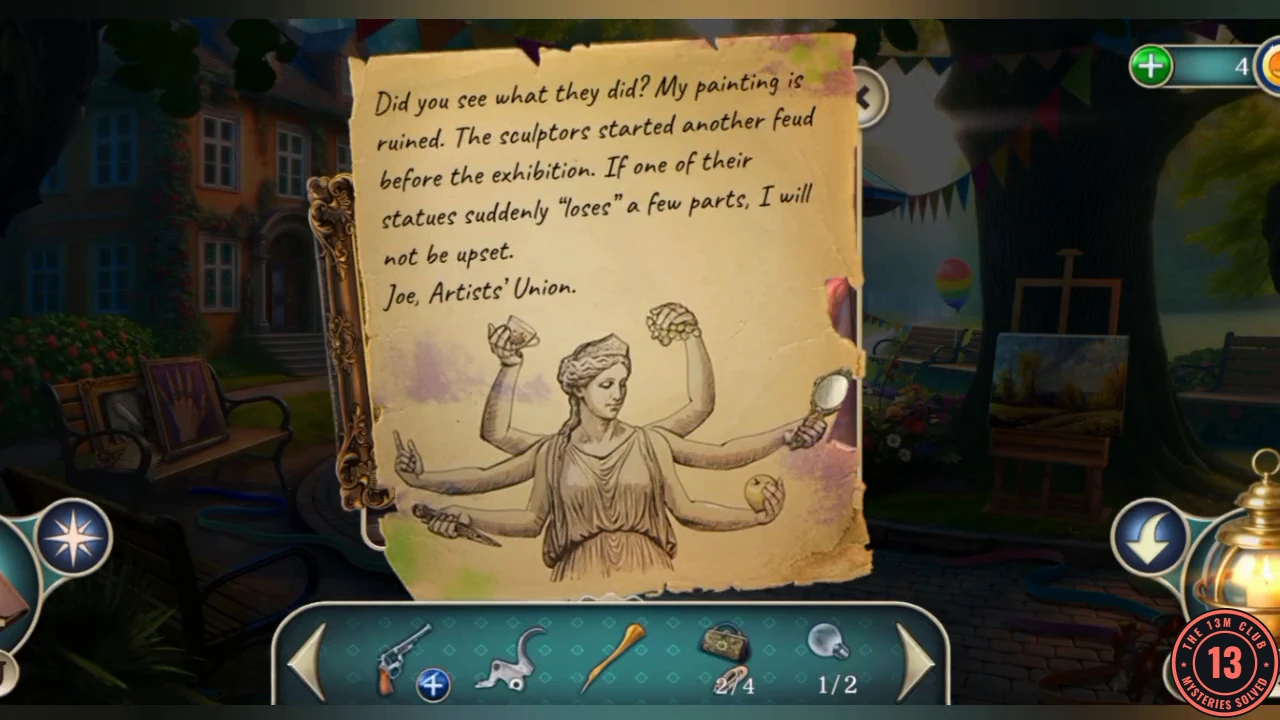
Joe's note from behind the hand painting. The drawing shows the pose to copy. - Tap each hand until its arm matches the drawing: top left holds the cup up, top right holds the grapes up, upper right holds the mirror out, lower right holds the apple out, upper left is raised and empty, and lower left holds the dagger out level.
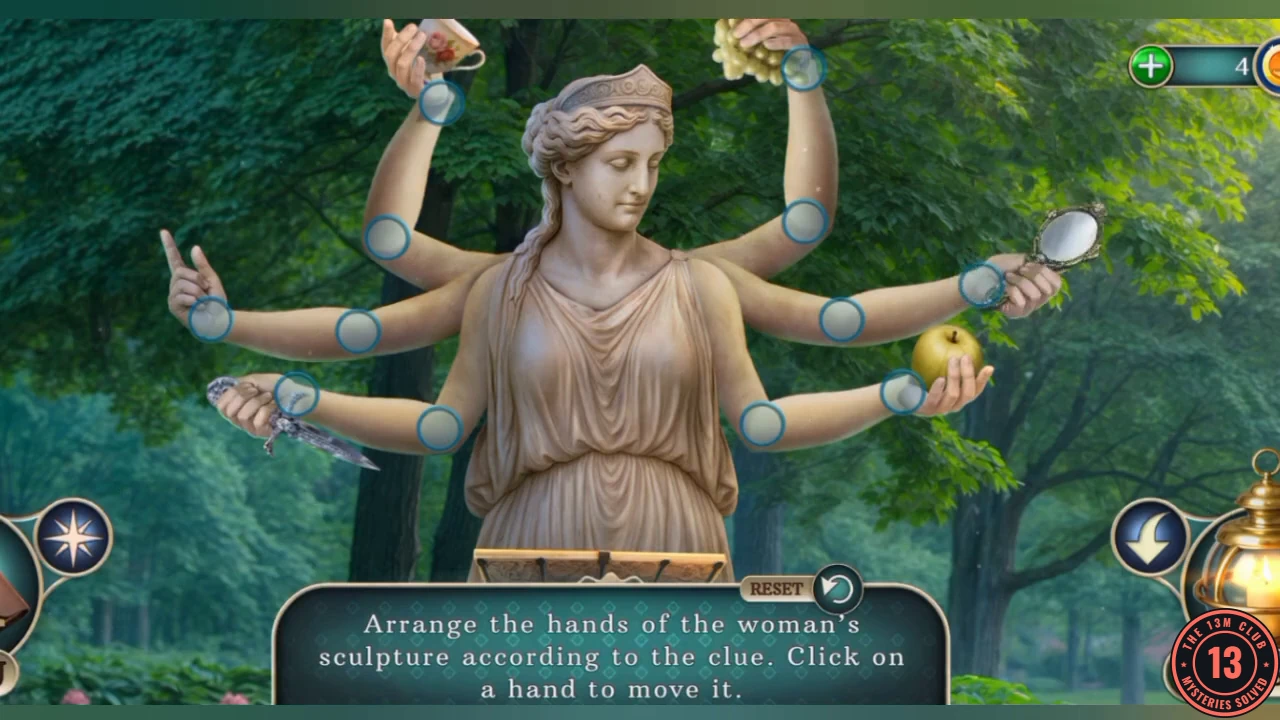
The finished pose, matching the drawing on the note. - Take the Ritual dagger and Sylvia's personal items 3/4.
Returning Sylvia's belongings
The mirror she can't bear to look at is hiding her last item.
- In the office, use the Ritual dagger and the Three hands talisman on the skull. Take the Decorative tusk and the Velvet scarf.
- In the backstage hall, zoom into the ceiling lamp and use the Velvet scarf to take the second Lightbulb.
- In the office, use both Lightbulbs on the dressing table mirror. The mirror shatters. Take the Crane body and Sylvia's personal items 4/4.
- Give all four personal items to Sylvia. She says something important is in the Grand Hall. Take the second Decorative tusk.
- Use both Decorative tusks on the elephant on the desk. A model town appears on the desk.
Tabletop town
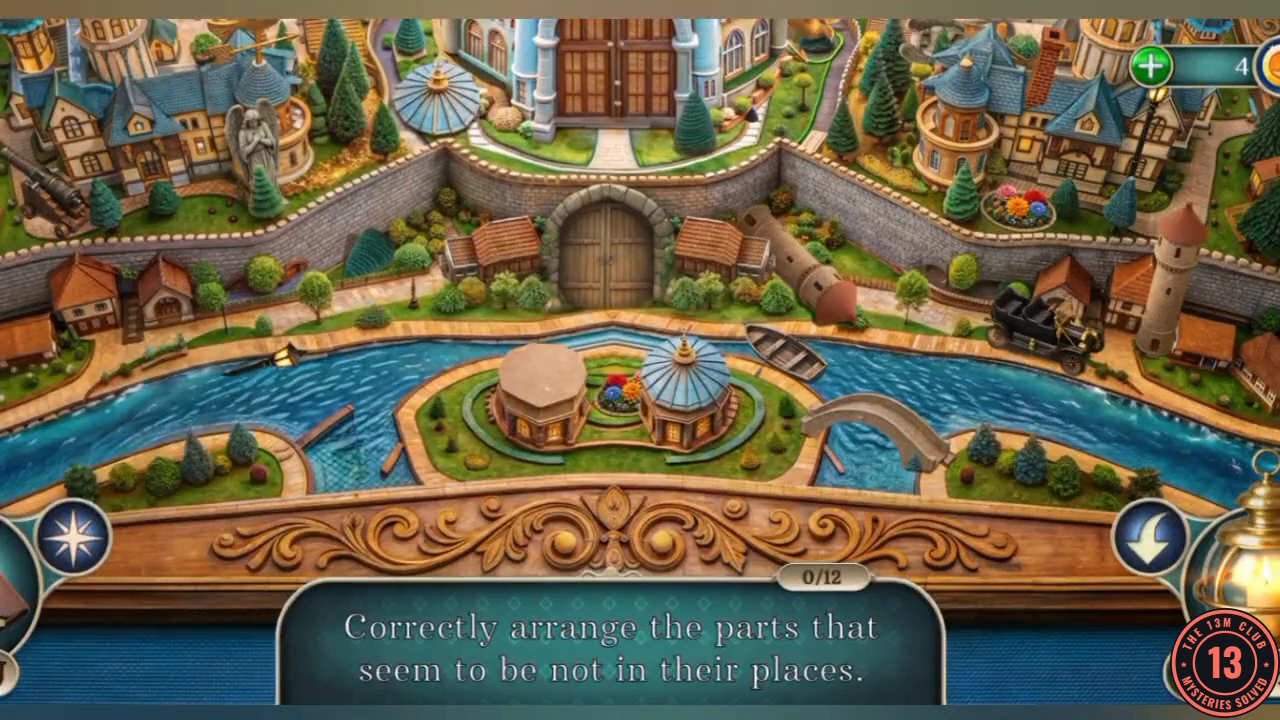
The instruction reads "Correctly arrange the parts that seem to be not in their places." A counter tracks 12 fixes. The finished town is mirror-symmetric, so look for anything that has no twin on the other side. Scroll up and down to see the whole model.
- Move each misplaced part so both sides of the town match. These include twin domed towers on the central island, a bridge and a boat each side of it, a car and a watchtower on each bank, and matching flower beds and statues above the wall.
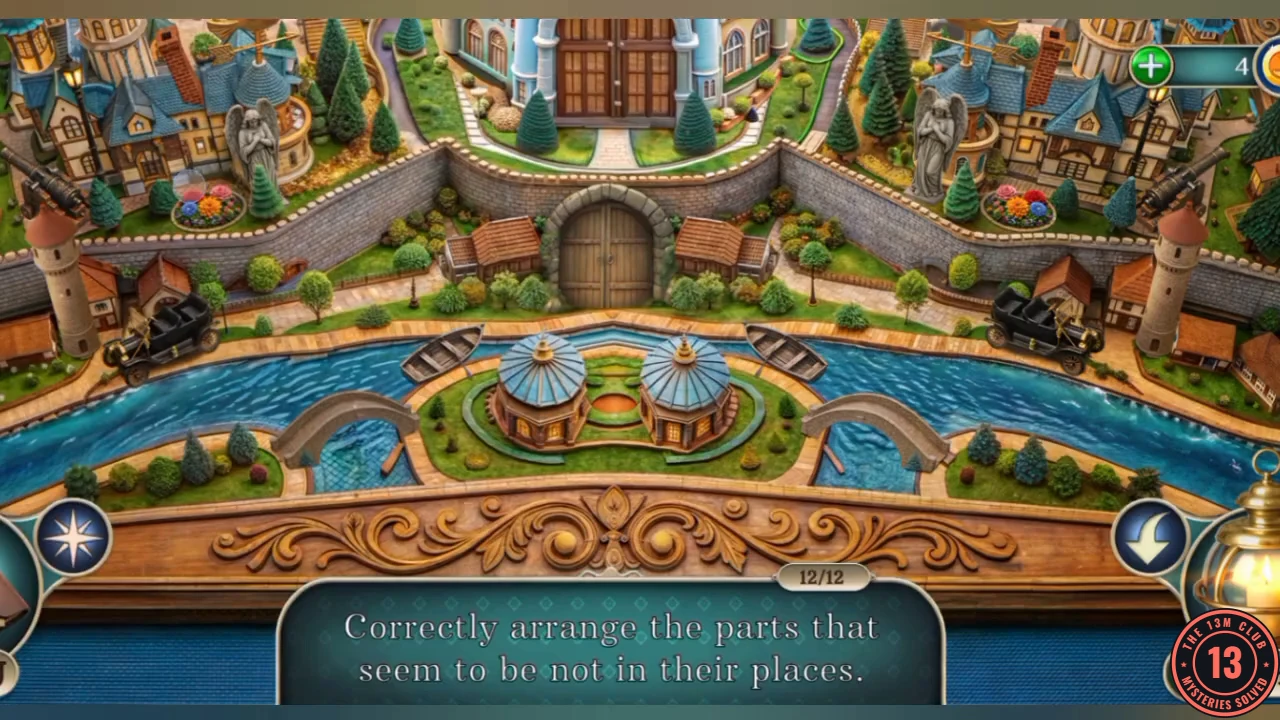
The finished lower part of the town at 12/12: each side mirrors the other. Scroll up to compare the upper part as well. - Take the Bullets and the Crane wings.
Flower tile door
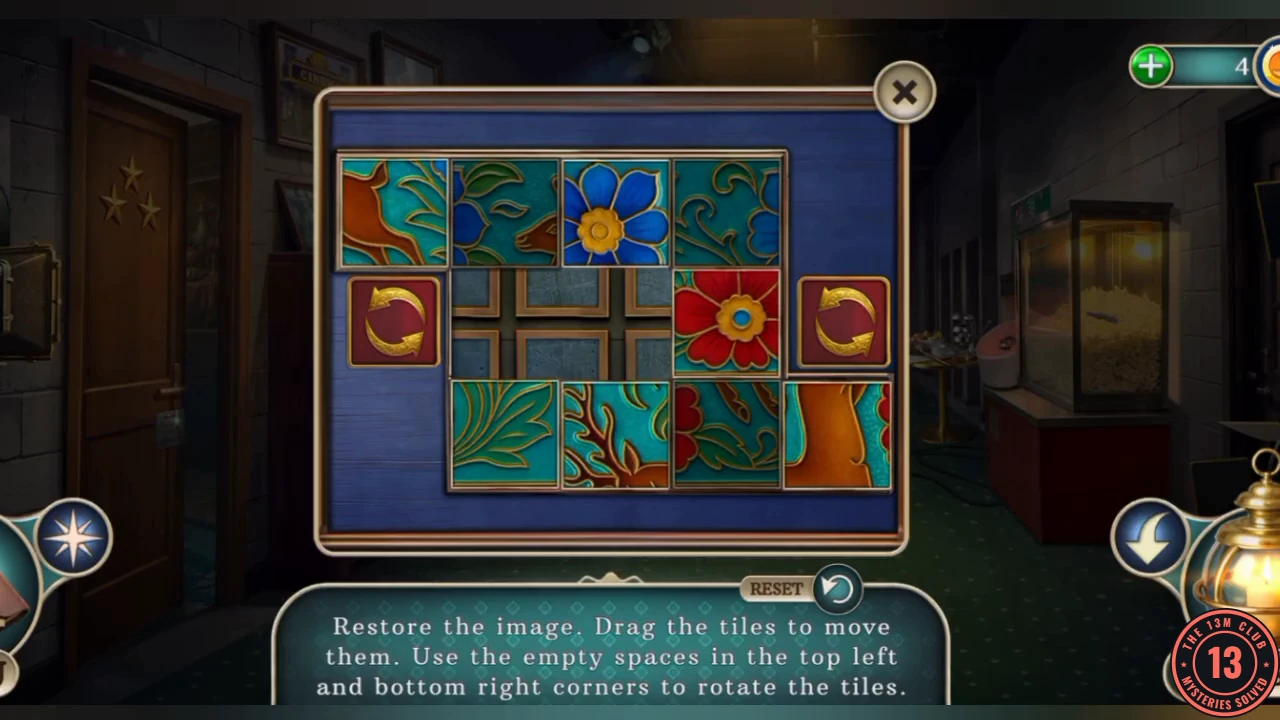
The instruction reads "Restore the image. Drag the tiles to move them. Use the empty spaces in the top left and bottom right corners to rotate the tiles." This is a long rearrangement, so this guide gives the finished picture rather than every move.
- In the backstage hall, use the Crane head, Crane body and Crane wings on the shelf. Take the Flower plate and use it on the door at the end of the hall.
- The finished picture has a leaping deer in the centre. Top row, left to right: blue flower, the deer's muzzle with leaves, its antlers, then a leafy swirl. Middle row: a cross tile in the second column, the deer's body, then its front legs. Bottom row: the second cross tile, the red flower, the end of the deer's legs, then the leaves. To turn a tile, drag it into the top-left or bottom-right corner space and tap the arrow button beside that corner.
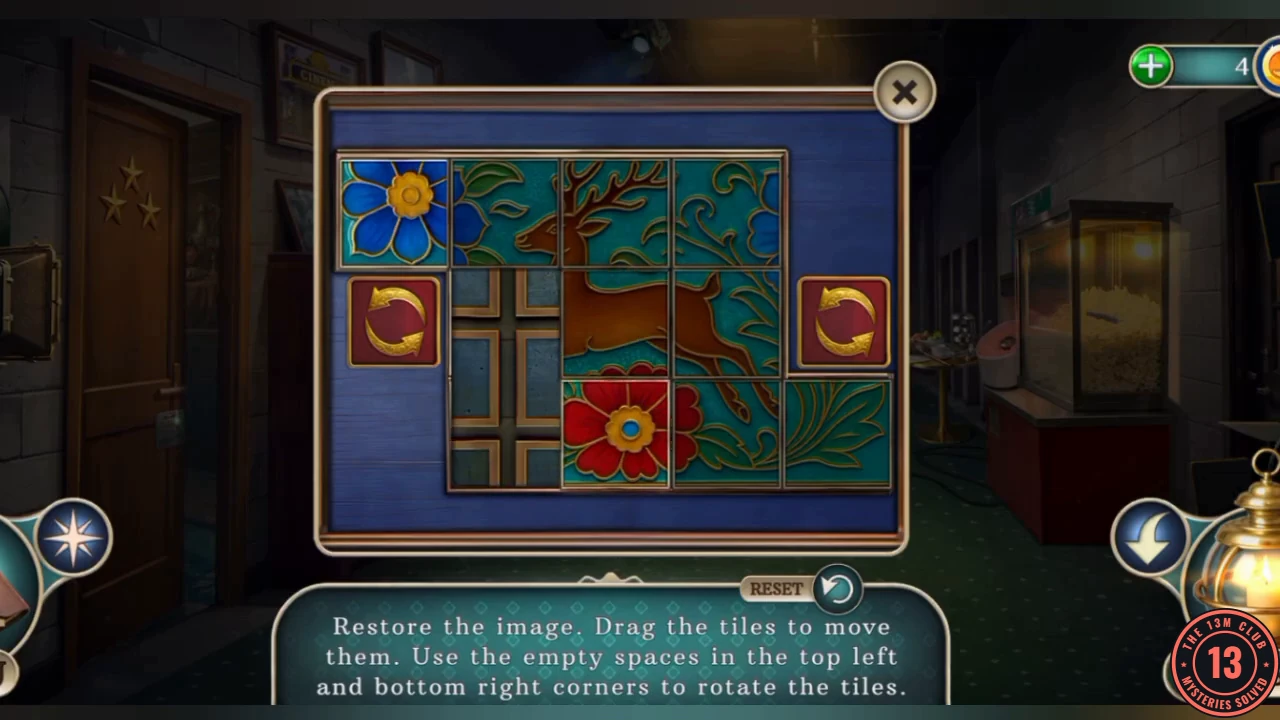
The finished picture: the leaping deer in the centre, the blue flower top left and the red flower in the bottom row.