Grand hall: faceless viewers
Rows of faceless viewers stare at the screen. Sylvia's memory film is here somewhere, and this anomaly needs three things.
- Zoom into the balcony wall and take the Ladder. The objective is Find the film with Sylvia's memories.
- Zoom into the floor by the front seats and take the Empty bucket and the Revolver drum. The hatch underneath needs a handle.
- Zoom into the anomaly and take the Empty cone from the right-hand figure. One viewer is missing a container and the group needs the right props.
- In the backstage hall, zoom into the concession stand. Use the Empty cone on the cotton candy and the Empty bucket on the popcorn to get Cotton candy and Popcorn.
- Add the Trigger, Revolver drum and Bullets to the Broken revolver in your inventory to get the Loaded revolver.
- In the grand hall, use the Ladder on the balcony railing and take the Pearl earring.
- Use the Popcorn, Cotton candy and Pearl earring on the anomaly. The viewers fade. Take the Old poster from the seats.
- A ghost appears over the seats. Use the Movie camera on it. The camera burns out, leaving you with the Burnt out camera.
- Use the Loaded revolver on the chandelier to bring it down on the ghost. Keep the revolver.
- Optional morphing object: tap the ornament on the balcony railing.
Poster wall safe
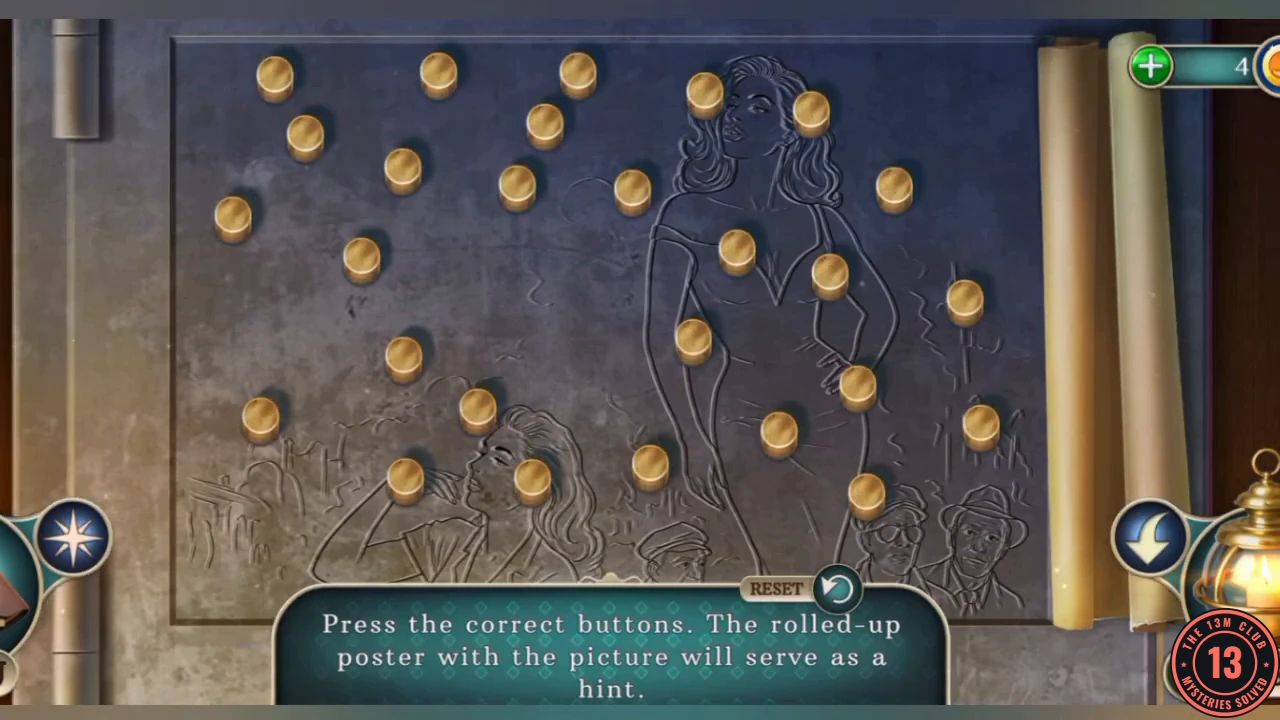
The instruction reads "Press the correct buttons. The rolled-up poster with the picture will serve as a hint." Tap the rolled poster to compare it with the buttons.
- In the office, use the Old poster on the wall safe panel to start the puzzle.
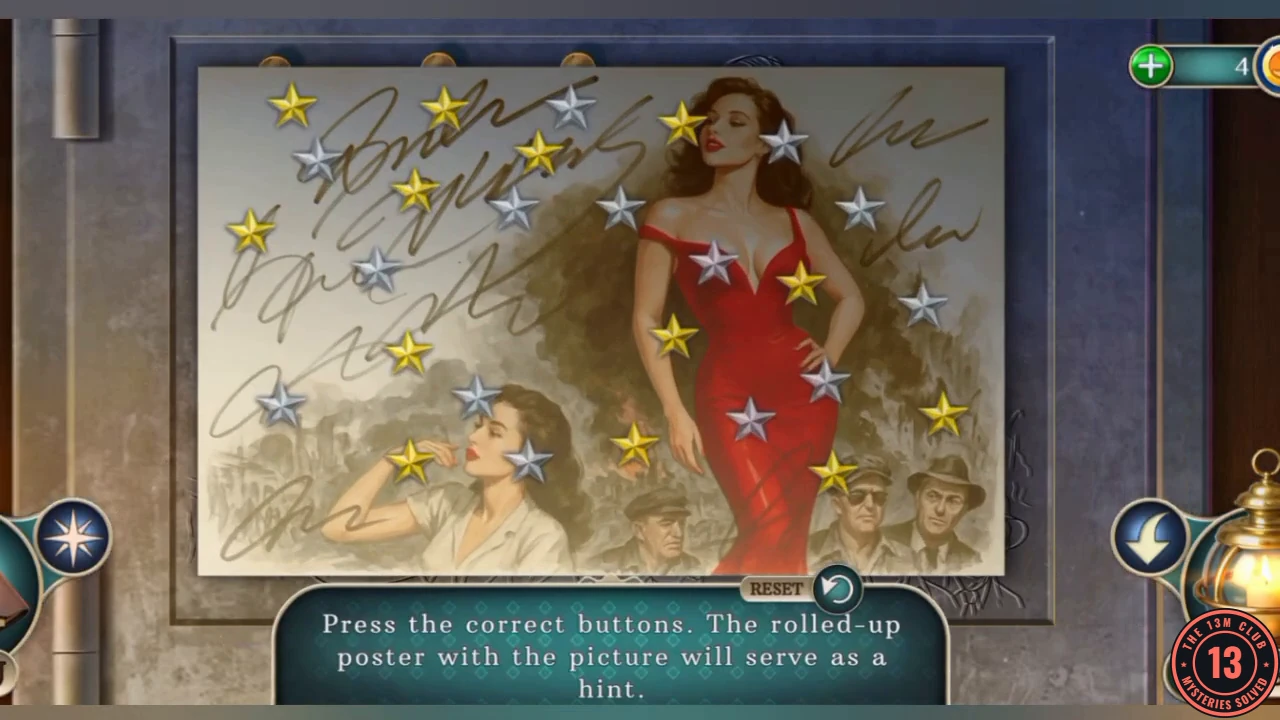
The unrolled poster. Press the buttons under the gold stars and leave the ones under the silver stars. - Press the buttons that match the gold stars on the poster and leave the silver ones. The safe opens.
- Take Sylvia's film. The new task is Show Sylvia her lost memories.
Showing Sylvia her memories
The Burnt out camera needs its broken mechanism fixed before it can play the film.
- Add Sylvia's film to the Burnt out camera in your inventory. Your character says the burned film and broken mechanism both need replacing.
- In the backstage hall, zoom into the concession stand and take the Black candle.
- In the office, use the Black candle on the empty candle holder beside the skull. Take the Spare gear.
- Add the Spare gear to the camera to get the Camera with memory.
- Give the Camera with memory to Sylvia. Watch her remember, then take the Sealing amulet. The new objective is to collect Mnemosyne's energy to enter the editing room.
Collecting Mnemosyne's energy
Each of the six glowing spots takes one use of the amulet. You need two of each colour.
- In the cinema area, use the amulet on the cinema door. Take Blue energy 1/2.
- In the grand hall, use the amulet on the floor hatch. Take Red energy 1/2.
- On the embankment, use the amulet on the rubble. Take Blue energy 2/2.
- In the studio, use the amulet on the paint box. Take Yellow energy 1/2.
- In the library, use the amulet on the desk box. Take Yellow energy 2/2.
- In the music hall, use the amulet on the harp statue. Take Red energy 2/2.
- In the grand hall, use all six energies on the door with the coloured rings to start the puzzle.
Tentacle seal
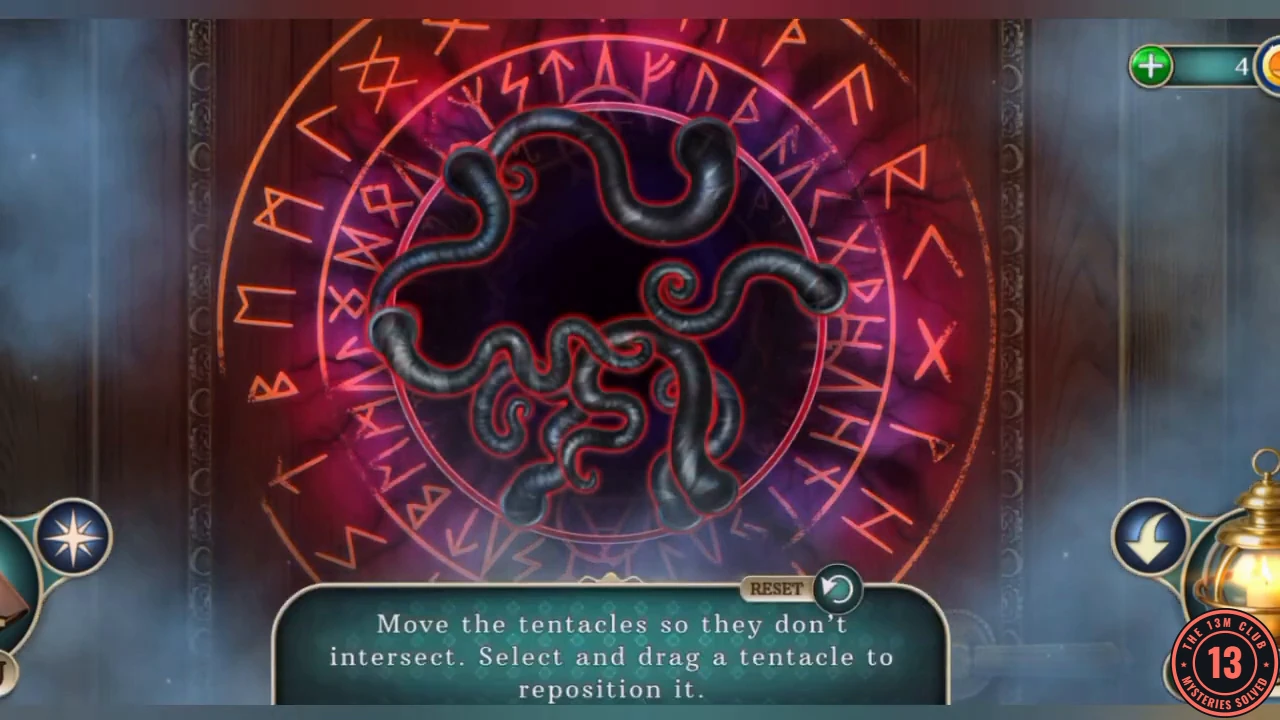
The instruction reads "Move the tentacles so they don't intersect. Select and drag a tentacle to reposition it." The shapes can be placed freely, so this guide gives an approach rather than exact positions.
- Drag each tentacle clear of the others. Start with the outer ones and work inward, leaving the tightest fit until last. The seal lights blue when no tentacles cross.
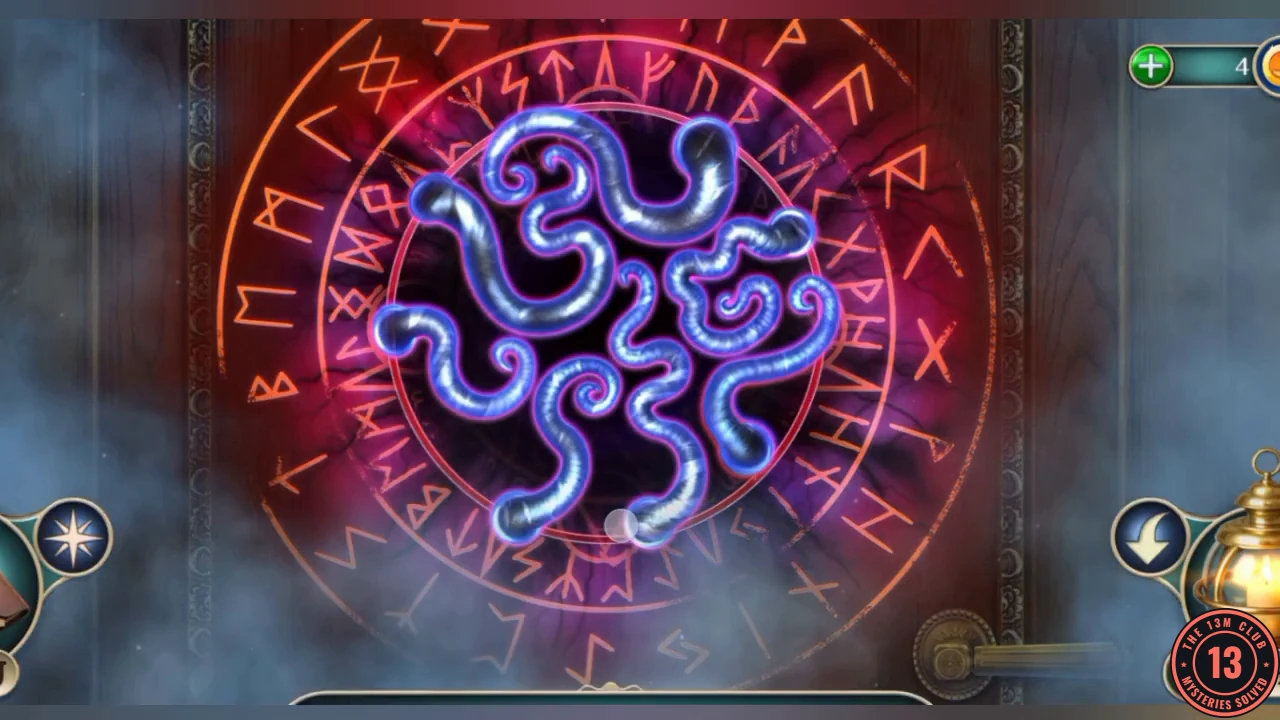
One example of a finished layout. No tentacles cross, and all of them have turned blue. Your own layout can differ.
Editing room: three idols
Three hooded idols surround the projector. Each sphere needs the right crystal before it can be destroyed.
- Look at the idols. Your character says each sphere needs the right crystal.
- Zoom into the console and take Sylvia's confession.
- In the office, give Sylvia her confession. She admits Mnemosyne promised her a new memory and a second chance. Take the Secret compartment handle.
- In the grand hall, use the handle on the floor hatch. Take the Crystal of sorrow, Crystal of love and Crystal of nostalgia.
- In the editing room, use each crystal on the matching idol: red, blue and yellow. The auras fade.
- Use the Loaded revolver on each idol's sphere, three shots in all.
- Zoom into the broken floor and take the Broken stained glass.
- Zoom into the red locker and take the two signs, Yin and Yang. The locker itself needs a key.
- In the office, use the Yin and Yang signs on the broken dressing table mirror. Take the Ritual film and the Silver owl.
- In the cinema area, use the Silver owl on the mailbox. Take the Blowtorch and the Panel switch. The objective is Find all memory films.
- In the editing room, use the Panel switch on the console to start the puzzle.
- Optional morphing object: tap the yellow danger sign above the console.
Console faders
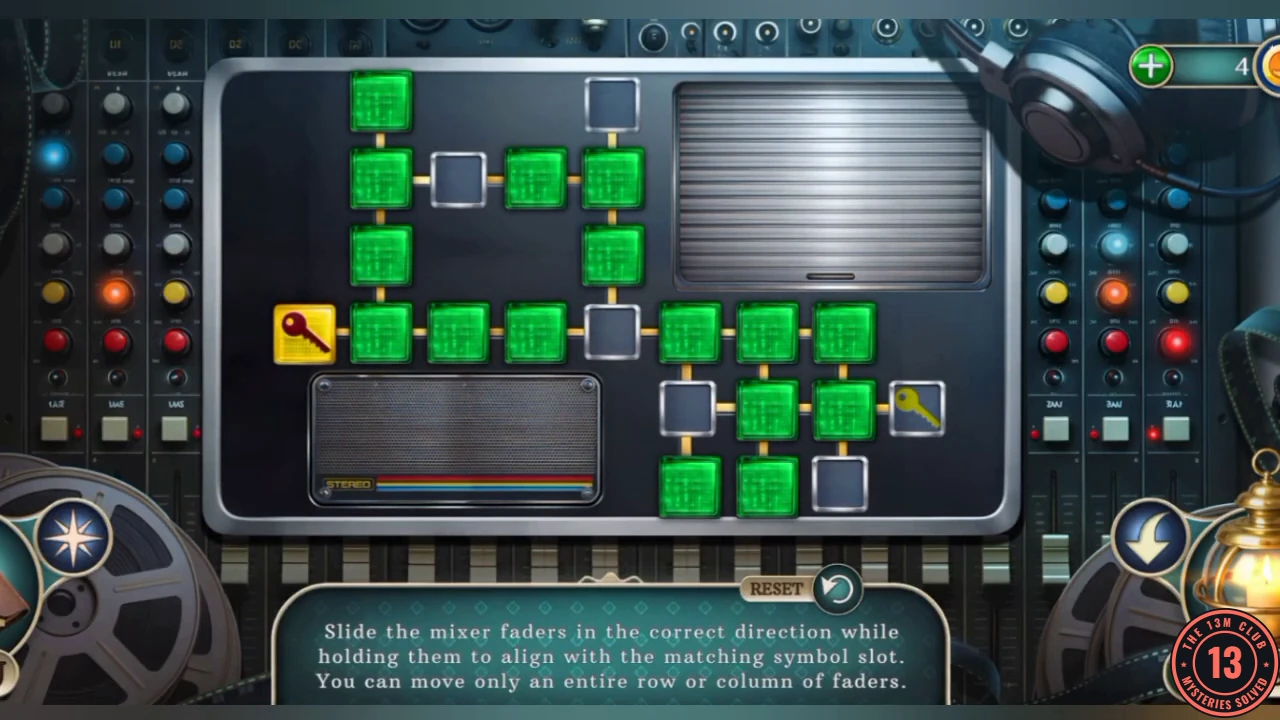
The instruction reads "Slide the mixer faders in the correct direction while holding them to align with the matching symbol slot. You can move only an entire row or column of faders." The gold key must reach the slot at the right-hand end.
- Shift whole rows and columns to open a clear path, then slide the key along until it drops into the slot on the right. Move the green faders out of the key's row first, then bring the key across.
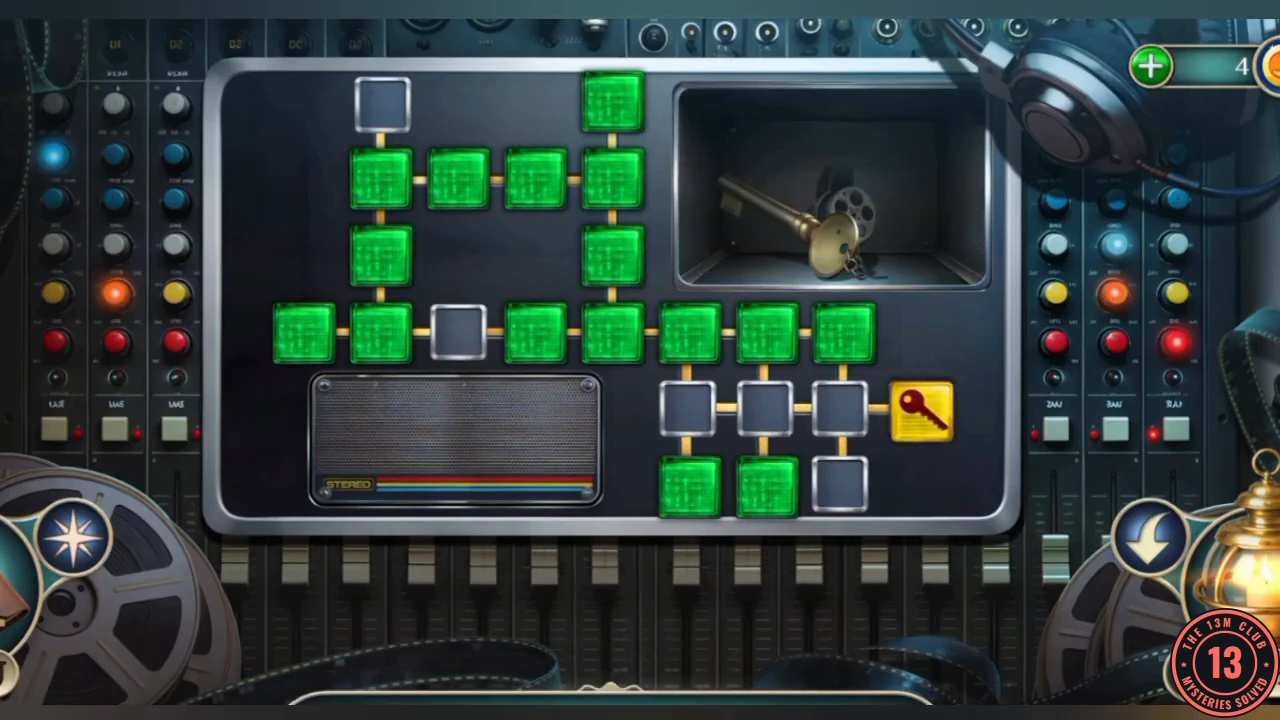
The key tile in its slot on the right. The shutter at the top opens to show the Shelf key. - Take the Shelf key.
Stained glass differences
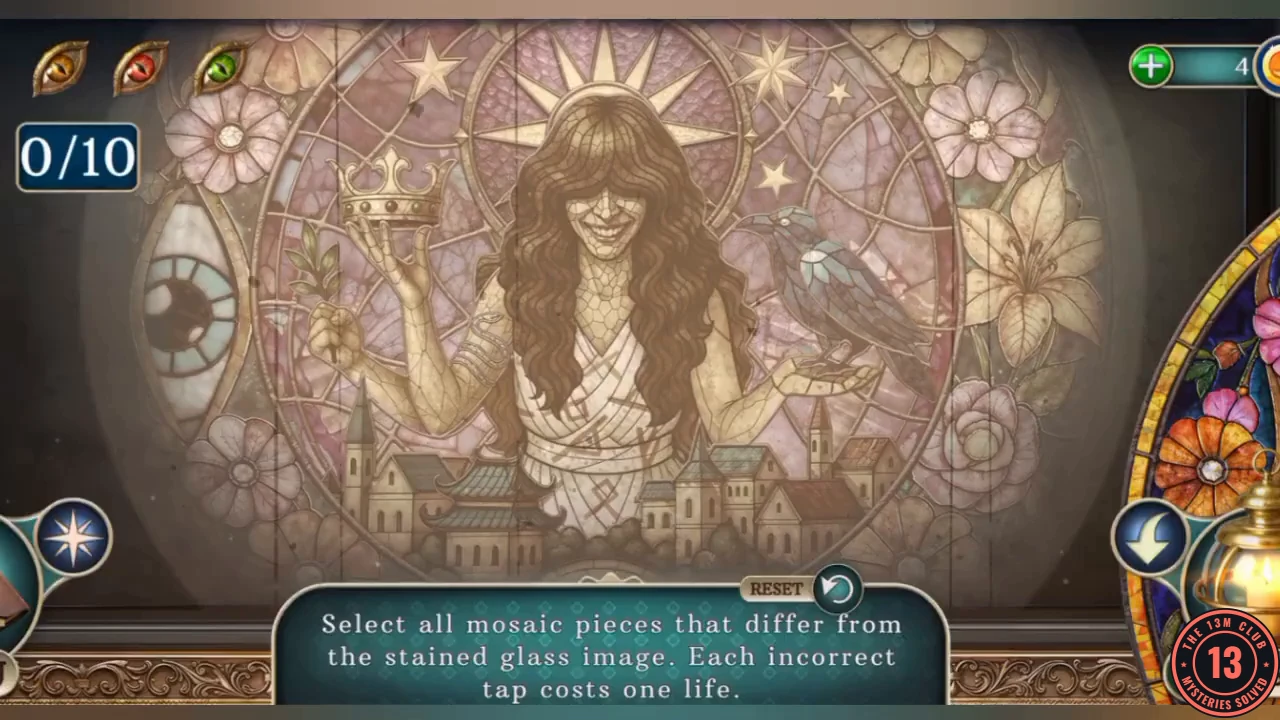
The instruction reads "Select all mosaic pieces that differ from the stained glass image. Each incorrect tap costs one life." There are 10 differences and three lives, so check each piece before tapping.
- Use the Shelf key on the red locker in the editing room. Take Colored shard 8/8 and the Handle piece.
- Open the Broken stained glass in your inventory and add all eight Colored shards to get the Ritual stained glass.
- In the grand hall, use the Ritual stained glass on the screen to start the puzzle.
- Tap the 10 mosaic pieces that differ from the stained glass. The ten differences are the eye panel at the left edge, the lily panel at the right edge, the crown, the leafy branch, the halo, the star at the top right, the bird, the snake and the rune marks on the dress, and the roof at the bottom left.
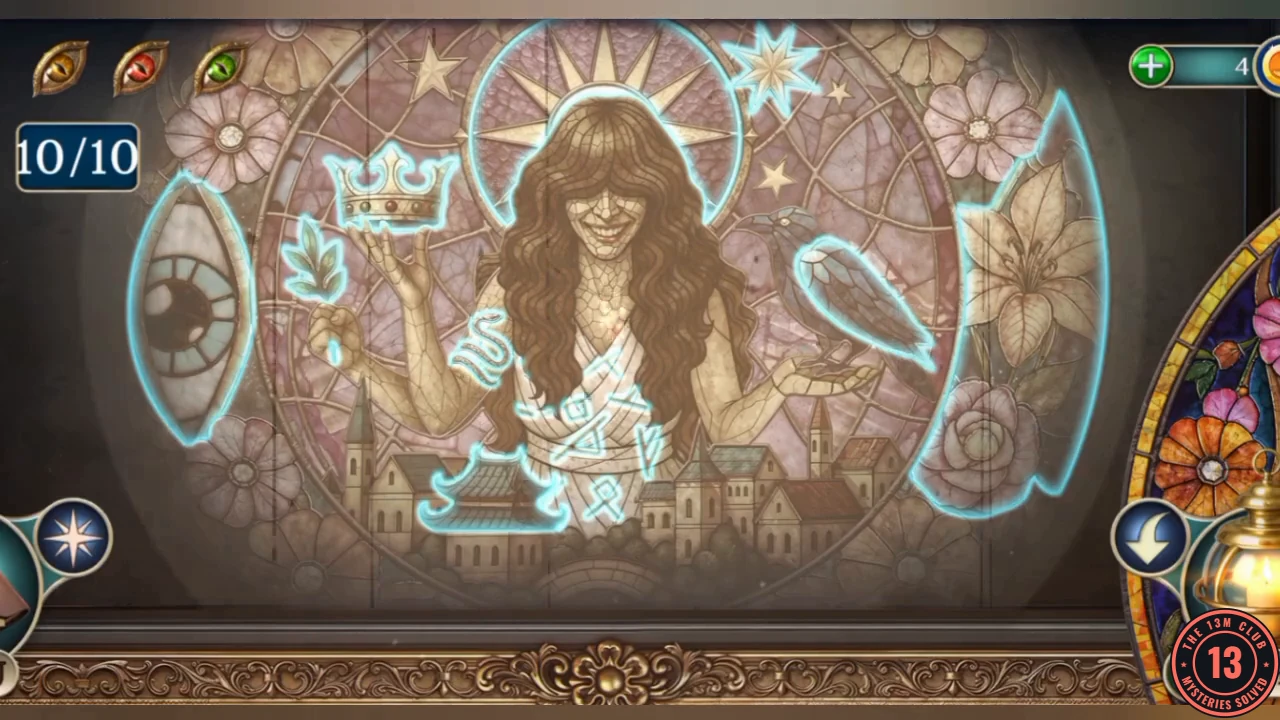
All ten differences found and outlined in blue: the eye and lily panels at the edges, the crown, branch, halo, star and bird, the snake and runes on the dress, and the roof at the bottom left. - Take the Half handle and the second Ritual film from the hole in the screen.
Burning the memory films
One last film is locked in the projector, and all three have to burn.
- In the editing room, use the Handle piece and the Half handle on the projector. Take the third Ritual film.
- Place all three Ritual films on the floor circle and use the Blowtorch on them. Chapter 5 begins with Sylvia's farewell.