Hall of the Priestess
Mnemosyne hovers over the altar with two men kneeling in front of her. On the left a hooded statue is wrapped in burning chains, and on the right a stone priestess holds an open book.
- Take the Rune eye from the star on the carpet and use it on the sarcophagus.
- Read the note in the sarcophagus and take the Dented lid, Moon symbol and Open amphora.
- Zoom into the priestess statue. Use the Moon symbol on her chest and the Stone book in her hands. Take the Photographic film.
- Open the Empty film camera in your inventory and load the Photographic film to get the Film camera.
- Use the Film camera on Mnemosyne to start the puzzle.
- Optional morphing object: tap the pterodactyl shape on the wall to the left.
Film camera plates
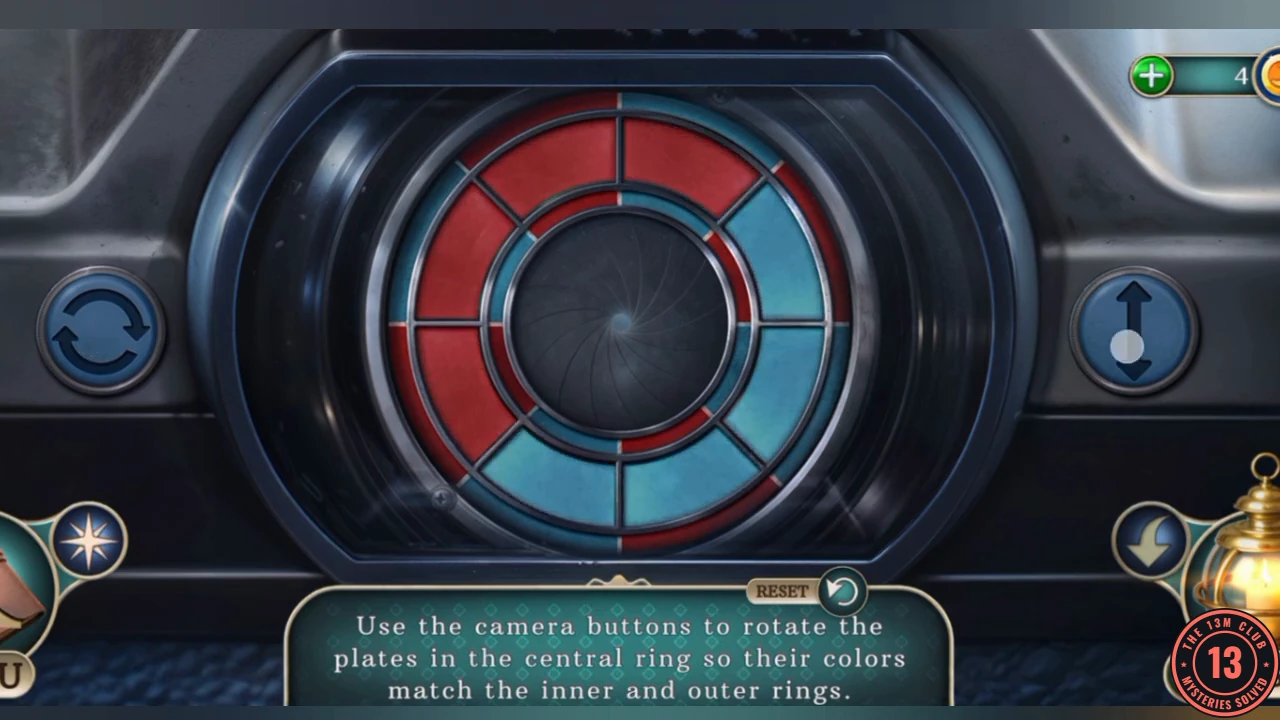
The instruction reads "Use the camera buttons to rotate the plates in the central ring so their colors match the inner and outer rings." The left button (circular arrows) turns the whole central ring one plate clockwise. The right button (up and down arrows) reverses the order of the four plates on the right half and leaves the left half alone. The finished ring alternates red and blue, with blue at the top right.
- If your ring starts with red at the top right, then four blue plates and three red plates going clockwise, press: left, left, right, left, left, right, left, left, right, left, right. If it starts differently, use the right button to break up runs of one colour, then the left button to bring the next plate round, until the colours alternate and every plate matches the thin rings on both sides. The lens lights when it is right.CODEleft, left, right, left, left, right, left, left, right, left, right
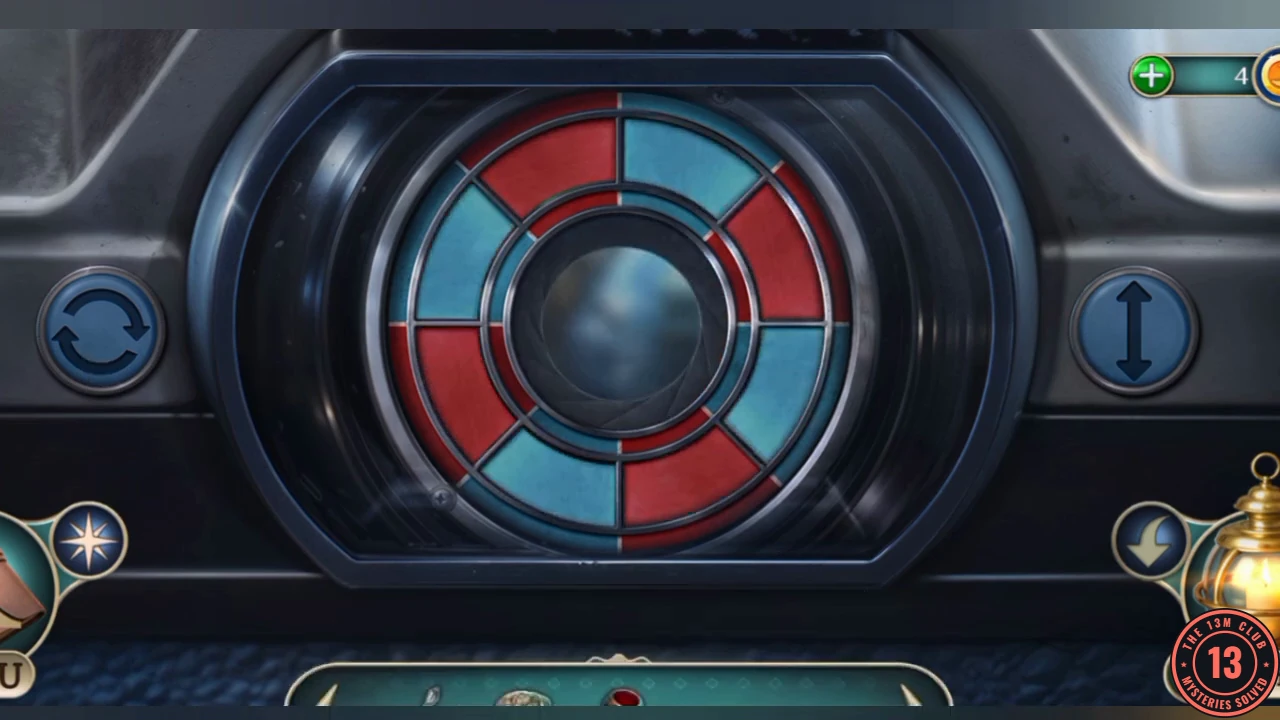
The solved ring: red and blue alternate and match the thin rings on both sides. The lens lights. - The camera photographs Mnemosyne and the two kneeling men collapse. Take the Spirit photo. Mnemosyne still floats free above the altar.
The five amphorae
Benjamin's note names the hiding places. The objective is Find all the priestess's amphorae and seal Mnemosyne in the altar.
- Zoom into the altar and read Benjamin's note: one amphora is buried in the mansion's backyard, another is in the library, and a third sank in the river by the embankment. Take the M monogram and the Bronze hammer. Your character says the altar needs an item connected to Mnemosyne.
- In the yard, zoom into the dug-up mound and open its lid with the Bronze hammer. Take Mnemosyne amphora 1/5, the green one.
- In the library, zoom into the desk and use the Bronze hammer on the box. Take Mnemosyne amphora 2/5, the yellow one.
- On the embankment, zoom into the tackle box and use the Bronze hammer. Take Mnemosyne amphora 3/5, the blue one.
- In the restoration workshop, zoom into the open chest. Use the Dented lid on the anvil and strike it with the Bronze hammer to get the Amphora lid.
- In the gallery, zoom into the pyramid and use the M monogram on it. Take Mnemosyne amphora 4/5, the purple one.
- Open the Open amphora in your inventory. Add the Resin and the Amphora lid to get Mnemosyne amphora 5/5, the red one.
- In the priestess hall, zoom into the altar. Place all five amphorae and the Spirit photo to start the puzzle.
Amphorae on the altar
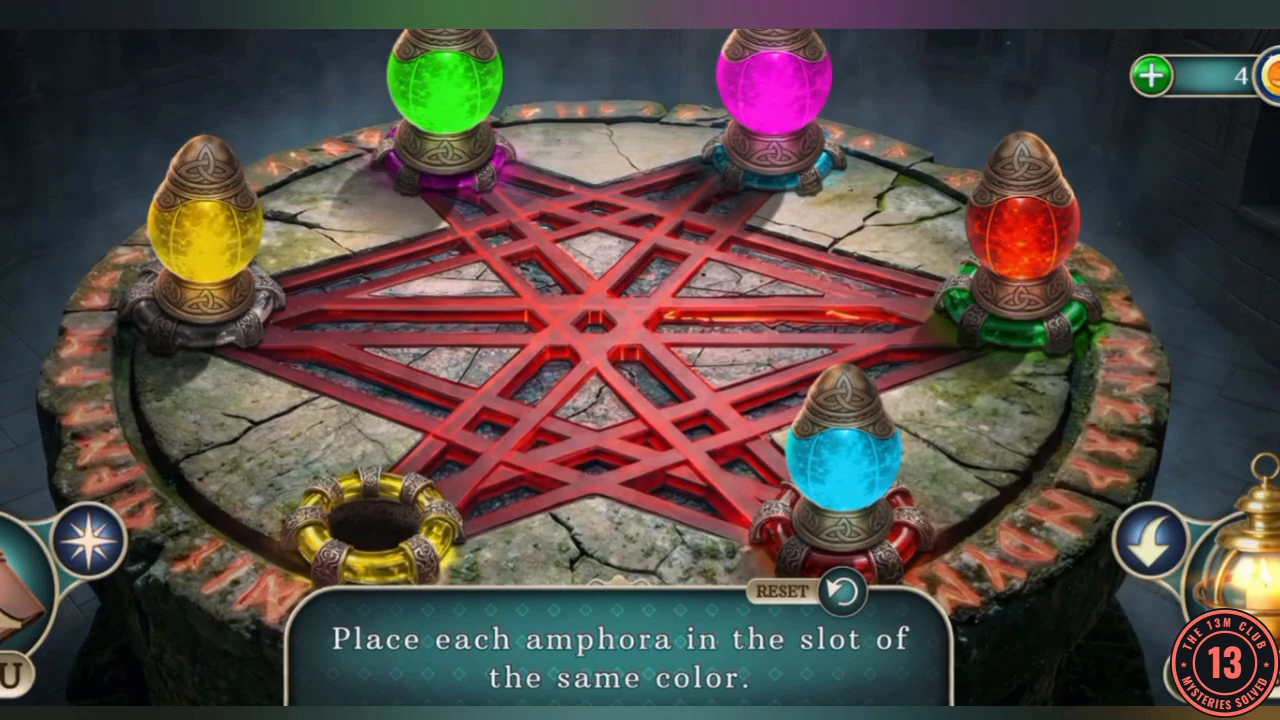
The instruction reads "Place each amphora in the slot of the same color." There is one spare slot. Tapping an amphora sends it along a red track into the empty slot, if a track connects them. The tracks form one loop: top left, right, bottom left, top right, left, bottom right and back to top left, with one extra track joining left and right. If your layout differs from the one below, walk the amphorae round this loop one tap at a time, using the extra track when two need to change places.
- If yours starts with green top left, purple top right, yellow left, red right, blue bottom right and bottom left empty, tap the amphorae in this order: red, green, blue, yellow, green.CODEred, green, blue, yellow, green
- Then tap: red, purple, green, yellow, blue.CODEred, purple, green, yellow, blue
- Repeat the same five-amphora sequence twice more: red, purple, green, yellow, blue. Each amphora should now sit in its own colour with the left slot empty.CODEred, purple, green, yellow, blue
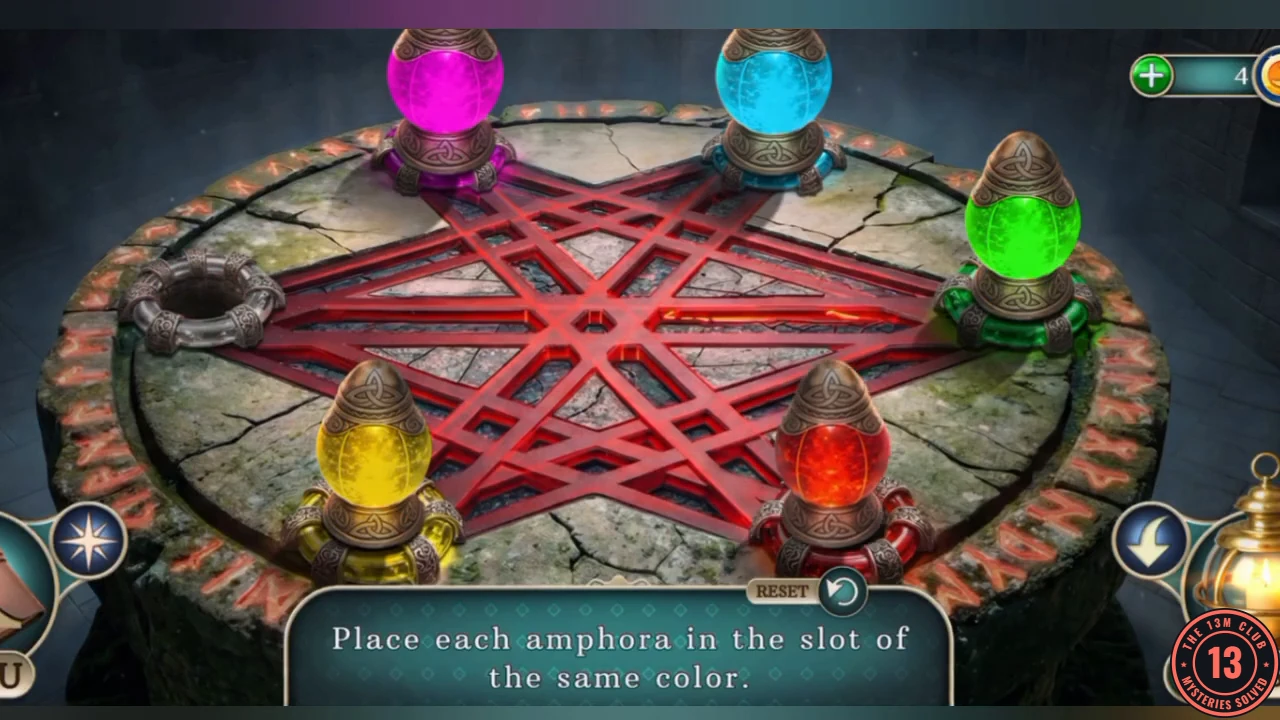
The finished altar: every amphora on its own colour, with the spare slot empty at the left.
Final battle: rebuilding the altar
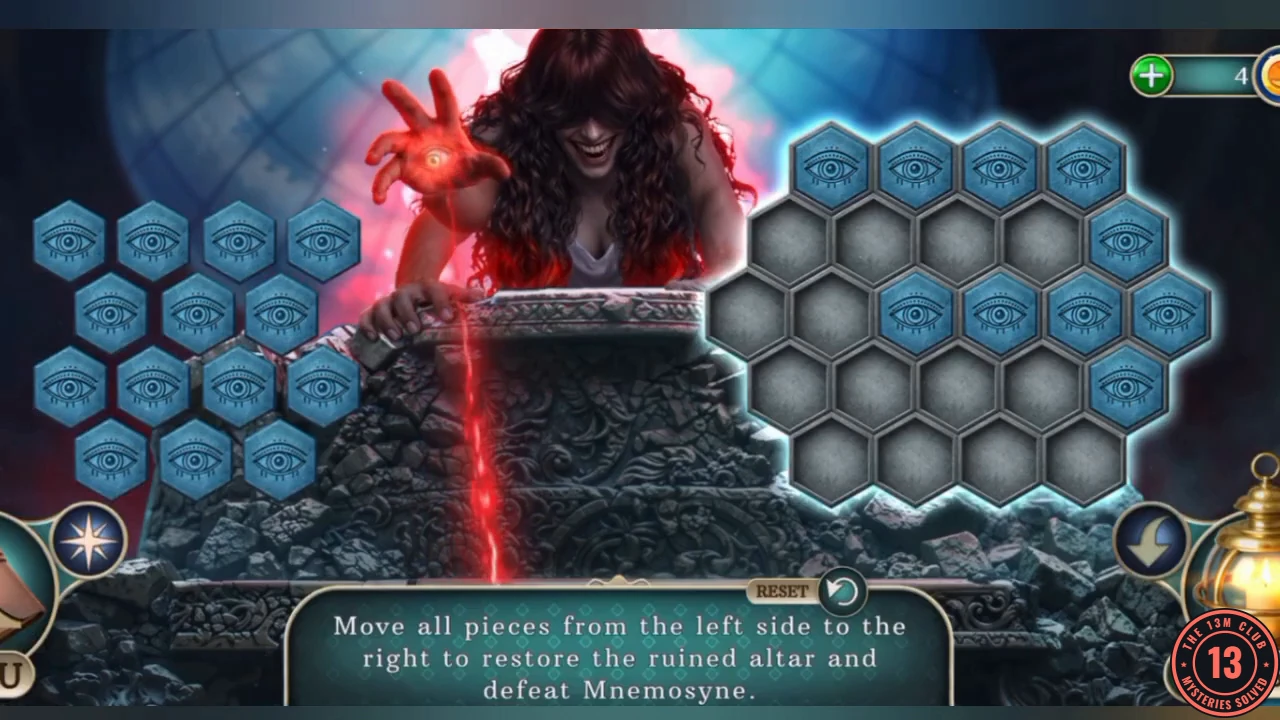
Mnemosyne breaks free. The instruction reads "Move all pieces from the left side to the right to restore the ruined altar and defeat Mnemosyne." The pieces come in various shapes, and more than one order works, so this guide gives an approach.
- Drag each hexagon piece from the left into the frame on the right. Pieces must fit the empty holes exactly. Fill the small, separated holes first, then the larger gaps.
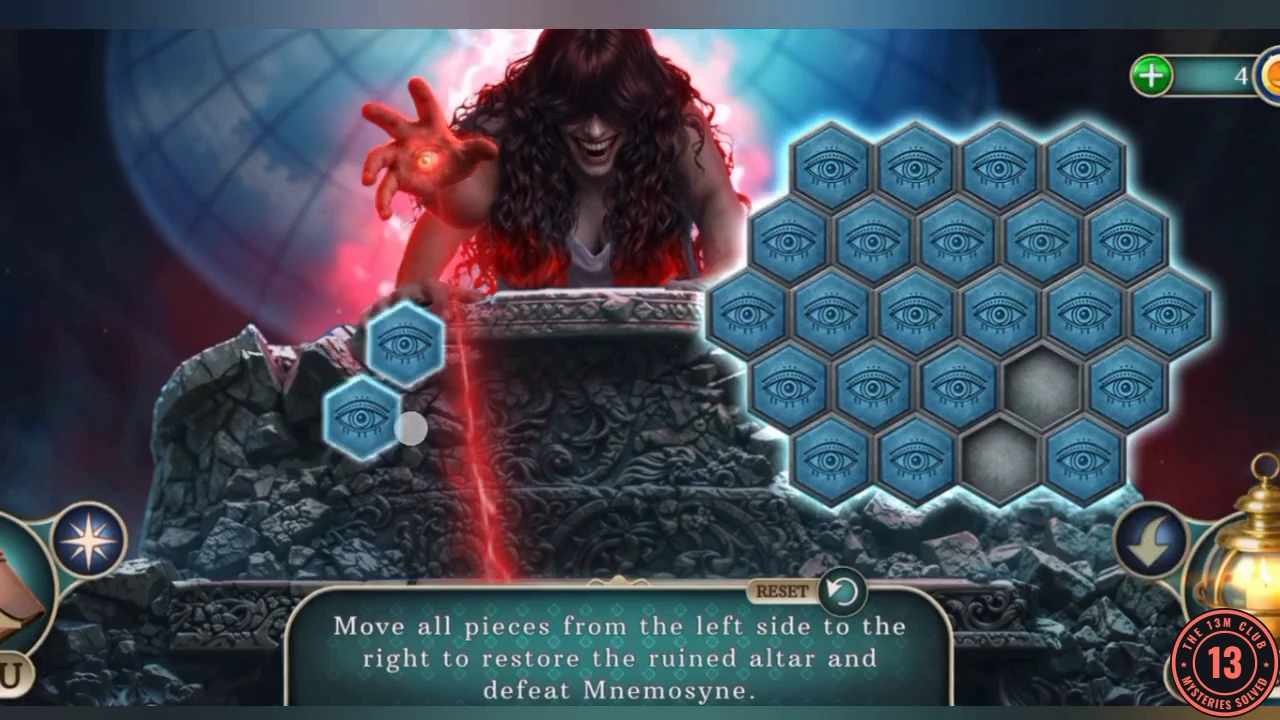
Close to the end. Pieces can span more than one hexagon, like this two-part piece going into the last holes.
Morphing objects checklist
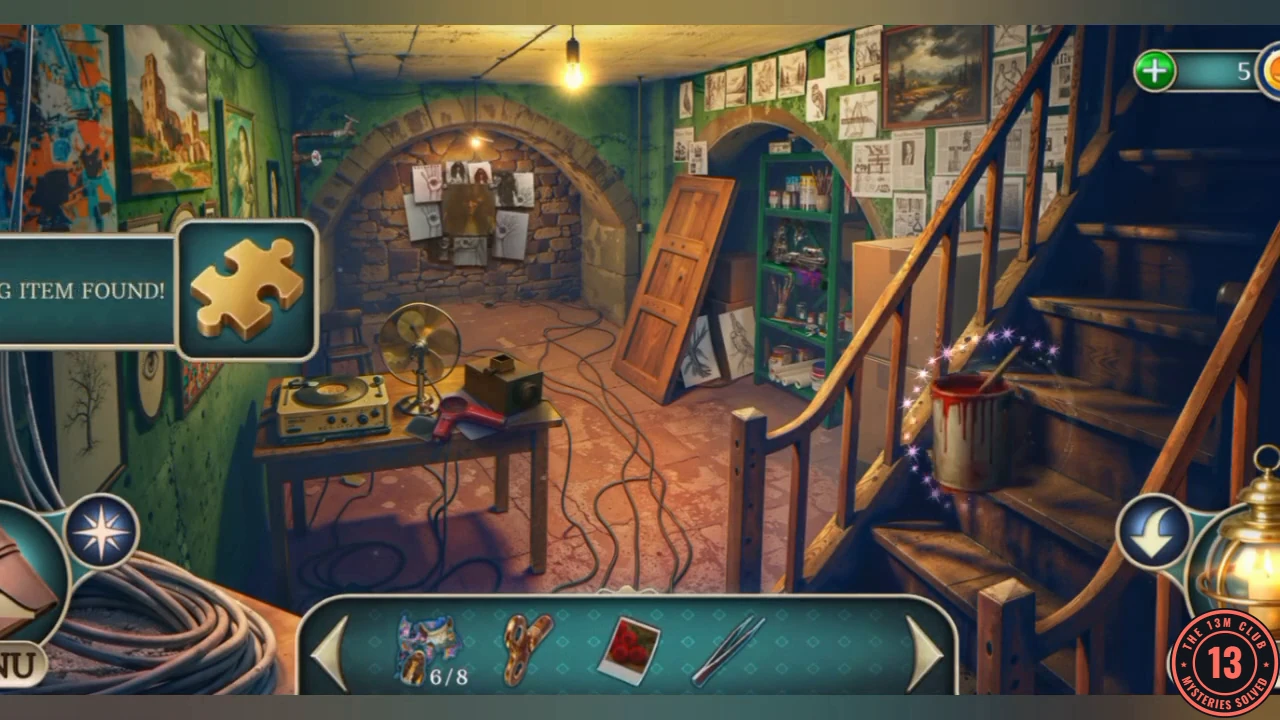
Morphing objects are optional collectibles that change shape between visits. Tap one when you spot it and a sparkle and an ITEM FOUND banner confirm it. The map marks locations that have them with a spiral Morph objects icon. Each object also appears in the guide at the scene where it sits. Because they change form, and some may only appear on a later visit, the object you see may differ from the description here, so use the spot as your guide. This list covers 27 objects in 25 locations.
- Chapter 1: gate, flower on the big tree trunk. Yard, white bucket in the flower bed and ball in the doghouse. Living room, hat near the window and ball of yarn in front of the cabinet. Stranger's shelter, book on the couch. Music hall, beetle on the statue. Upstairs kid's room, shirt on a hanger.
- Chapter 2: city center, ice cream sign on the roof. Diner, butterfly frame or round ornament on the wall. Library, wavy sword on the balcony fascia. Abandoned house, moose head or wall clock on the wall.
- Chapter 3: embankment, octopus or fish figure on the pedestal. Artists' square, star or rainbow balloon near the tree on the right. Studio, wall picture. Basement, paint can on the stairs.
- Chapter 4: cinema area, hydrant or flower pot to the right of the bench. Backstage hall, round plate or blue landscape picture to the right of the two framed pictures. Office, urn-like statuette on the wall ledge. Grand hall, railing ornament. Editing room, yellow danger sign above the console.
- Chapter 5: museum park, newspaper on the bench. Lobby, sun-hat or bag on the carpet. Exhibition, bust left of the fireplace. Restoration workshop, bust on the top shelf. Memory Gallery, gargoyle above the chandelier. Priestess hall, pterodactyl on the left wall.
The ending
Mnemosyne is sealed in the altar. The game offers no choice here, and this guide found no alternate ending.
- Watch Mnemosyne sink into the altar and the closing scenes outside the mansion, where the family is reunited. The story ends here.