Embankment: first visit
Charlene stays with the entranced artist while you look for a way across to his square.
- Watch the scene with Charlene and the artist, then tap the artist to take the Colored chalk. The objective becomes Get to the artists' square.
- Zoom into the teal chest. Take Bear claws 1/5 and the Fish key.
- Use the Colored chalk on the wall niche. Take the Toy tower. The blue box inside the niche needs a Golden hook, so come back later.
- Zoom into the red cover and fish statue and take the Iron dishes. Something hangs behind the statue, out of reach for now.
- Look at the boat and the electrical box with its warning sign. Both need parts, so leave them for now.
- Optional morphing object: tap the octopus figure on the pedestal at the embankment. It can also look like a fish.
Gathering the toy tower parts
The toy castle in the kid's room still needs three tower pieces.
- In the shelter, use the Iron dishes on the monkey painting. Take Bear claws 2/5 and the second Toy tower.
- Open the Book box from your inventory with the Fish key. Take the third Toy tower and the Leather strap.
- In the kid's room, zoom into the toy castle in the chest and place all three Toy towers to start the puzzle.
Toy tower
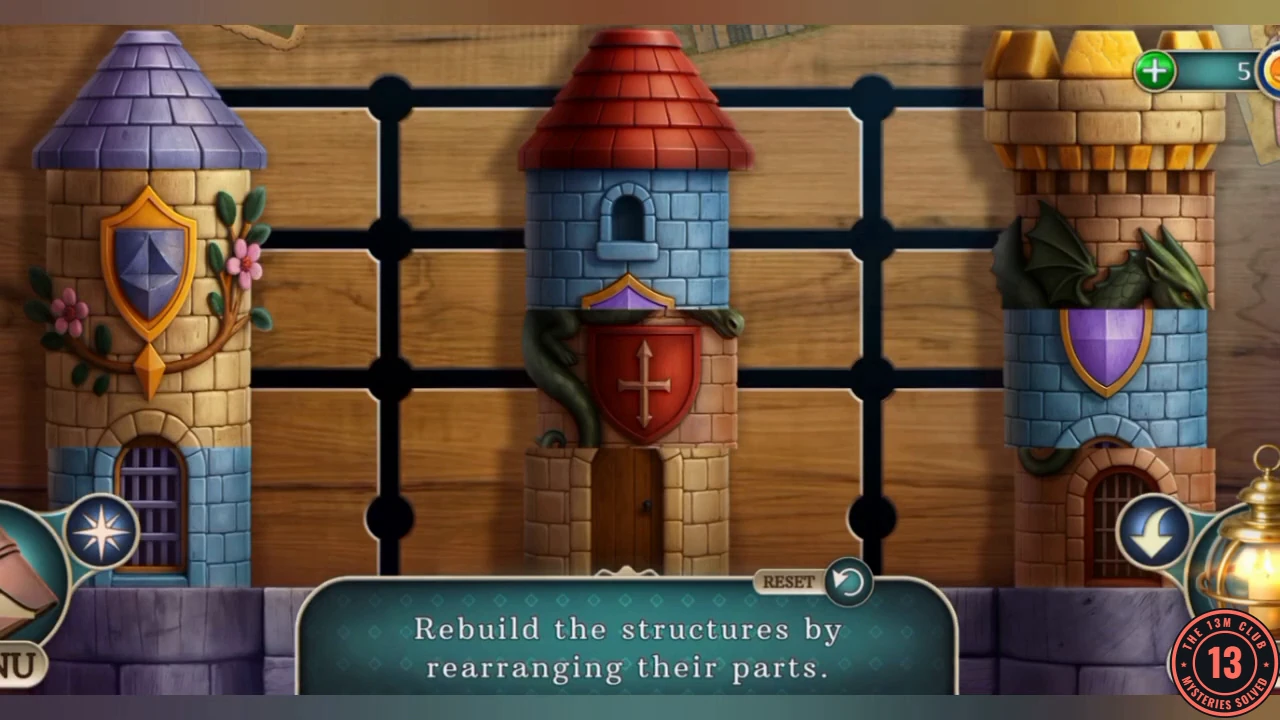
The instruction reads "Rebuild the structures by rearranging their parts." Pieces slide along a rail grid. This is a long rearrangement, so this guide gives the target rather than every move.
- Slide the parts until each tower is one matching stack: a purple roof on the blue body with the shield, gold crenellations on the tan body with the shield, and a red roof on the brick body with the dragon. Use the empty rails to park pieces while you sort them.
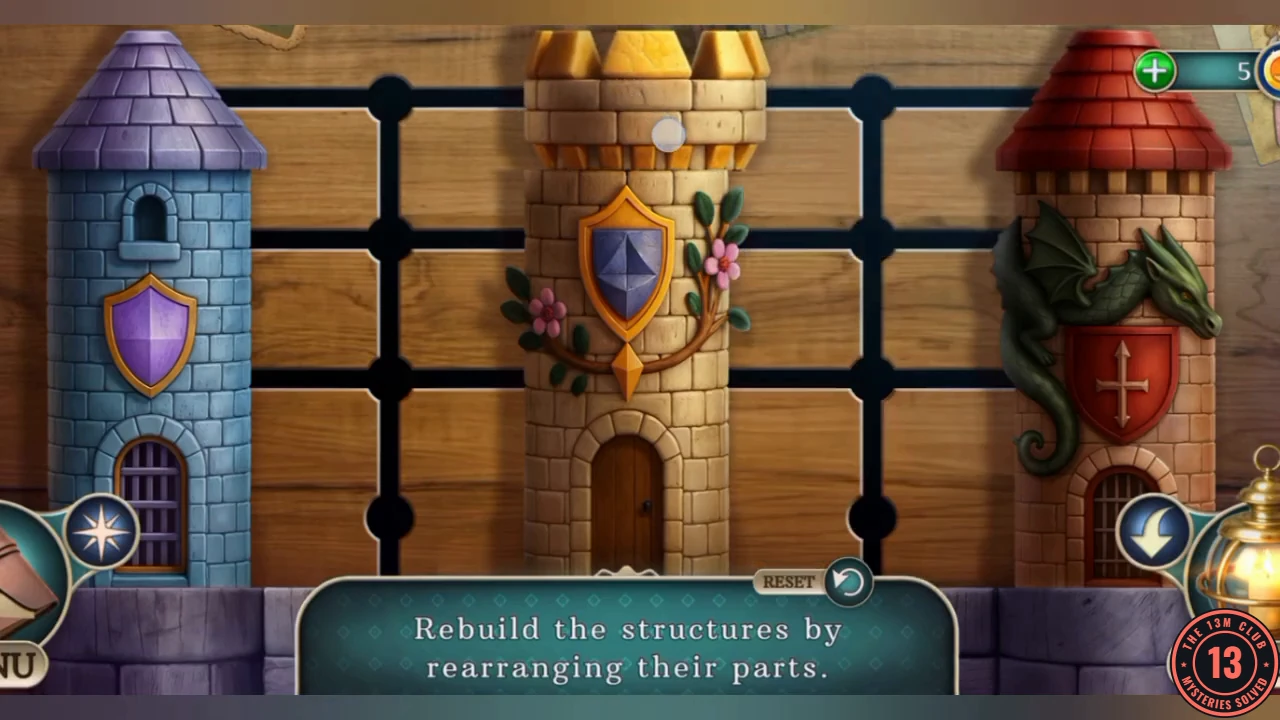
The rebuilt towers: purple roof on the blue tower, gold crenellations on the tan tower with the blue shield, and the red roof on the brick tower with the dragon. - Take the Golden hook from the finished castle.
Powering the electrical box
Two wires bring the grate on the embankment under control.
- In the abandoned house, use the Leather strap on the statue. Take the Broken cryptex and the Yellow wire.
- On the embankment, use the Golden hook on the blue box in the niche. Take Colored shard 5/8 and the Harpoon tip.
- Use the Harpoon tip on the boat and take the finished Harpoon.
- Zoom into the red cover and use the Harpoon behind the fish statue. Read the note and take the Green wire.
- Use the Yellow and Green wires on the electrical box to start the grate puzzle.
Grate bars
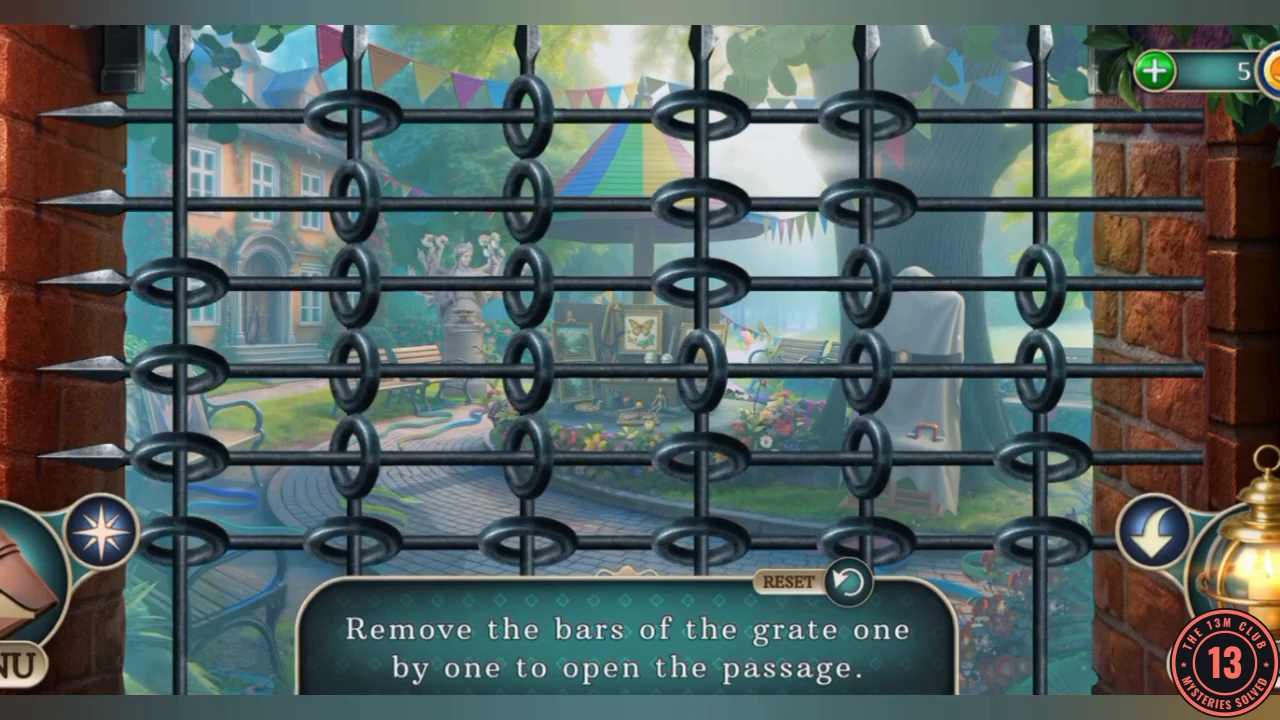
The instruction reads "Remove the bars of the grate one by one to open the passage." Only an unblocked bar can slide out. Below, H1 to H6 are the horizontal bars from top to bottom and V1 to V6 are the vertical bars from left to right.
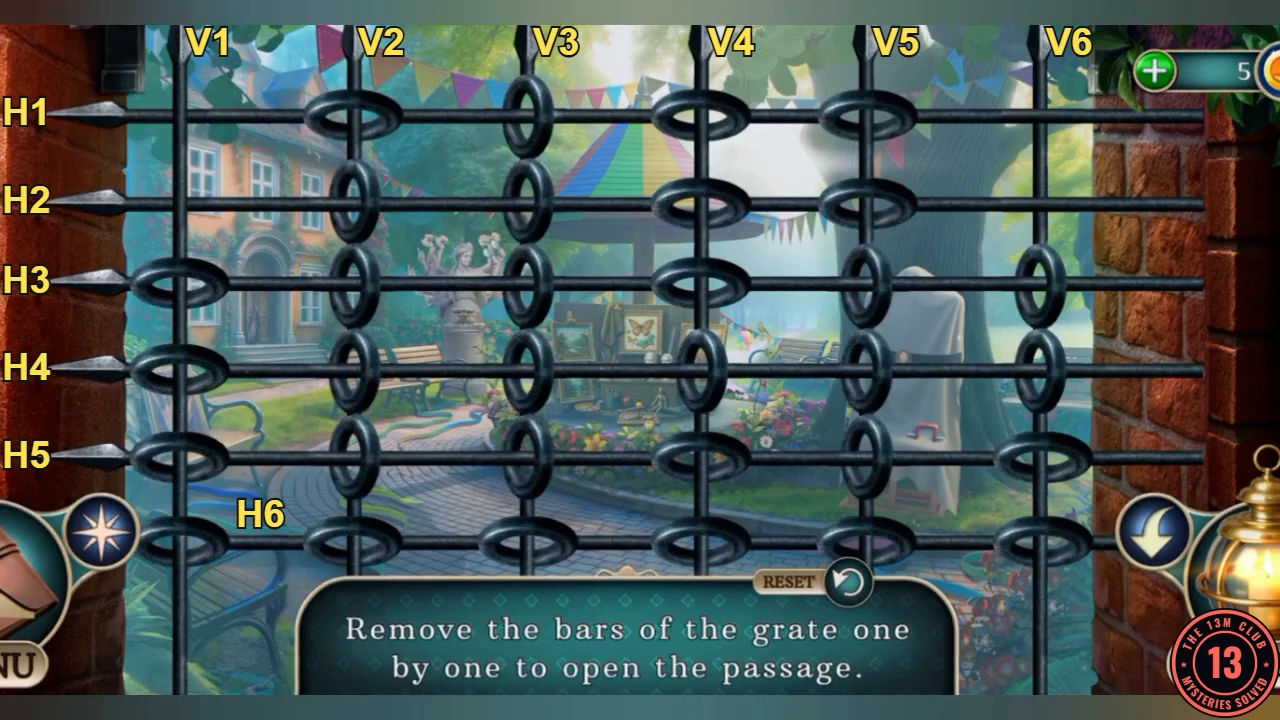
- Remove the bars in this order: H4, V4, H3, V1, V6, H5, V5, H2, V2, H1, V3, H6. The passage to the artist's square opens.CODEH4, V4, H3, V1, V6, H5, V5, H2, V2, H1, V3, H6
Artist's square: first visit
Only one of the artist's three belongings is in plain sight here. The rest take more work.
- Zoom into the framed hand painting by the bench. Take the Butterfly amulet and read the note.
- Take the Fake apple from the umbrella platform.
- Zoom into the house door and take Artist items 1/3.
- Zoom into the faceless statue and take Bear claws 3/5. It holds out empty hands, and its message says it needs adjustments.
- Zoom into the easel and take the Hatch handle.
- On the embankment, use the Hatch handle on the red cover. Take the Turpentine, the Fake grapes and the Glue solvent.
- Use the Butterfly amulet on the wall box by the steps. Take Bear claws 4/5 and the Pocket knife.
- Back in the square, use the Turpentine and then the Pocket knife on the frame by the bench. Take the Platform switch.
- Use the Platform switch on the umbrella platform to start the hidden object scenes.
- Optional morphing object: tap the object that keeps changing shape near the tree on the right. It can appear as a star or a rainbow balloon.
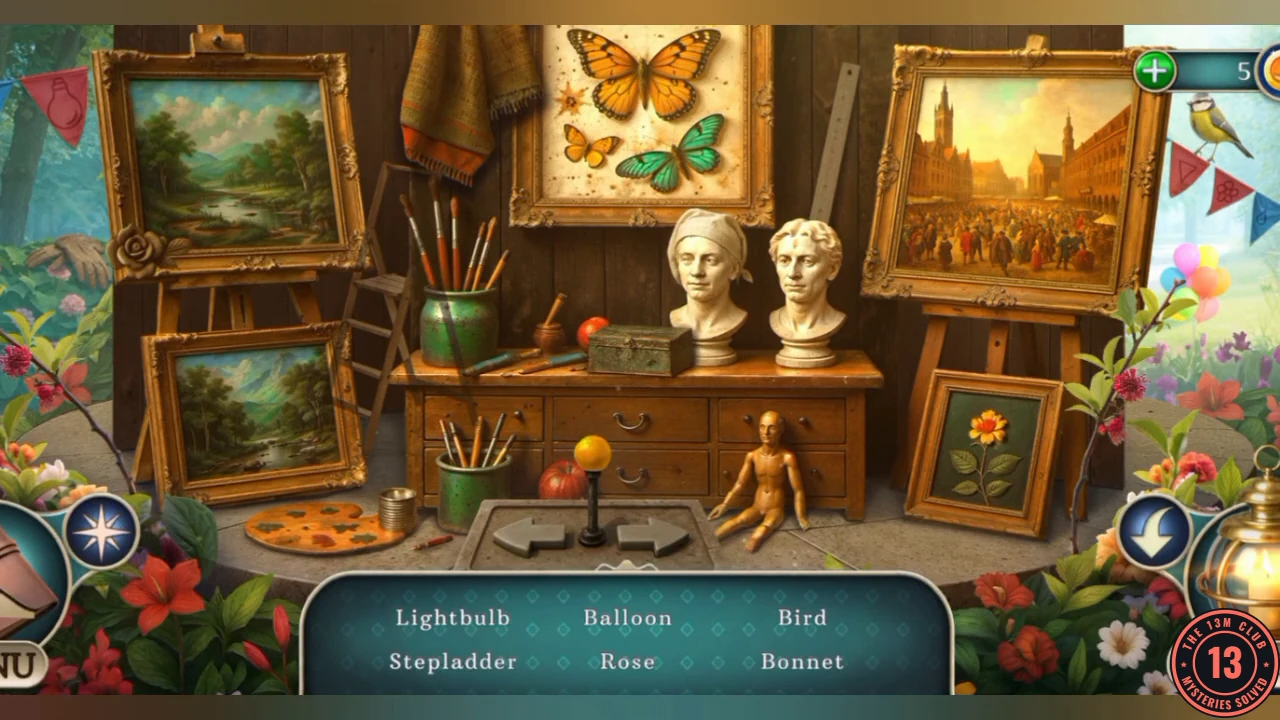
The artist's belongings
Finish the set of three items and return them to the artist on the embankment.
- Use the Muse amulet on the easel and take Artist items 2/3.
- In the diner, use the Glue solvent on the Elegant cup by the purse and take the cup.
- In the square, place the Fake grapes, the Fake apple and the Elegant cup in the statue's hands. Take Artist items 3/3.
- On the embankment, give the three Artist items to Owen. Take the second Cryptex ring. The new task is Get to the artist's studio.
- Add both Cryptex rings to the Broken cryptex in your inventory to start the puzzle.
Cryptex
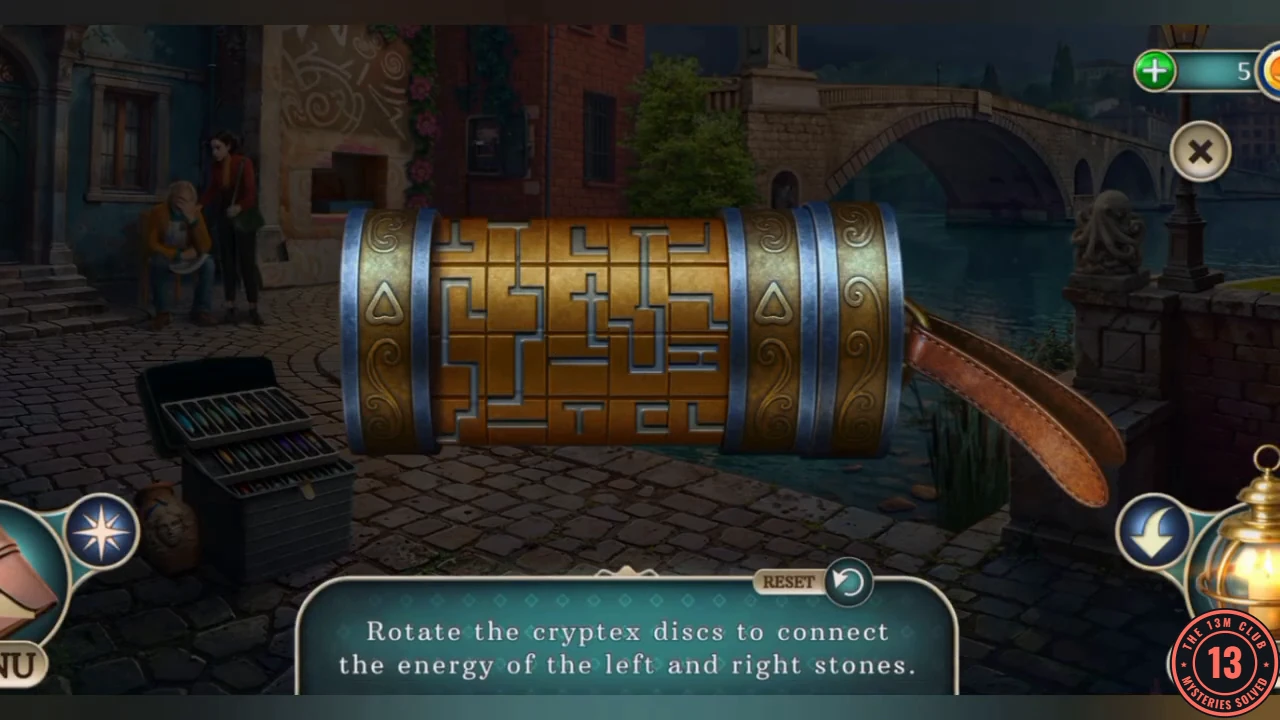
The instruction reads "Rotate the cryptex discs to connect the energy of the left and right stones."
- Rotate each disc until its channel lines up with the next one. The line lights up as it connects, so keep turning until it runs unbroken from the left stone to the right stone.
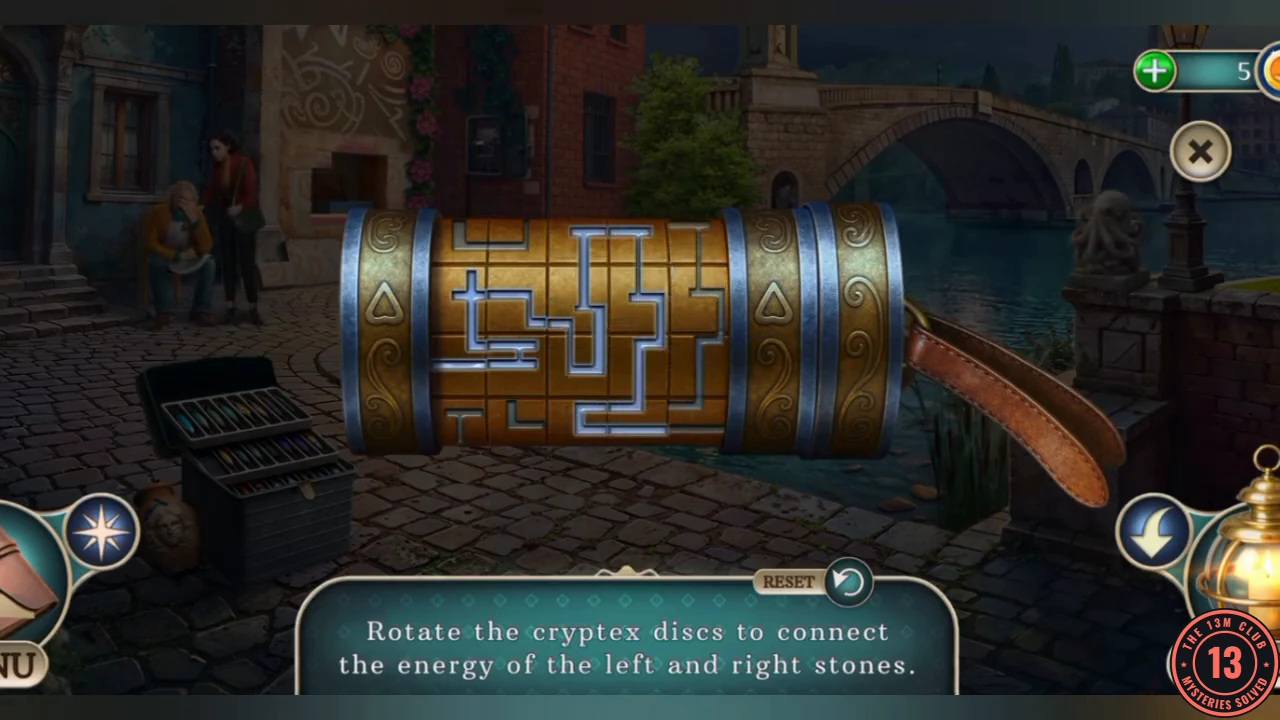
The discs lined up: the lit channel runs unbroken from the left stone to the right stone. - Take the Scratched film and the Police master key.
Studio door rune
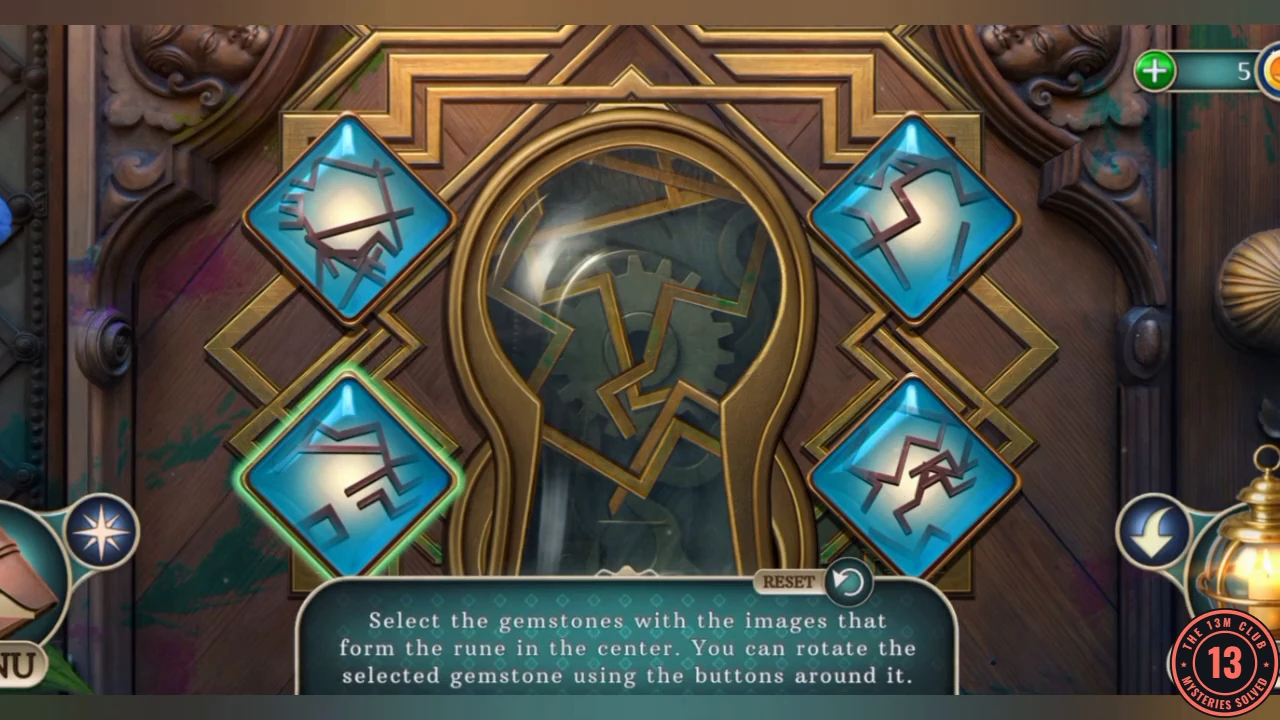
The instruction reads "Select the gemstones with the images that form the rune in the center. You can rotate the selected gemstone using the buttons around it." This takes some time, so this guide gives the method rather than each turn.
- In the square, use the Police master key on the house door to bring up the lock.
- Turn each of the four gemstones until the marks on it match the part of the centre rune it covers. Check each one against the centre: the finished lock looks like one continuous rune across all four.
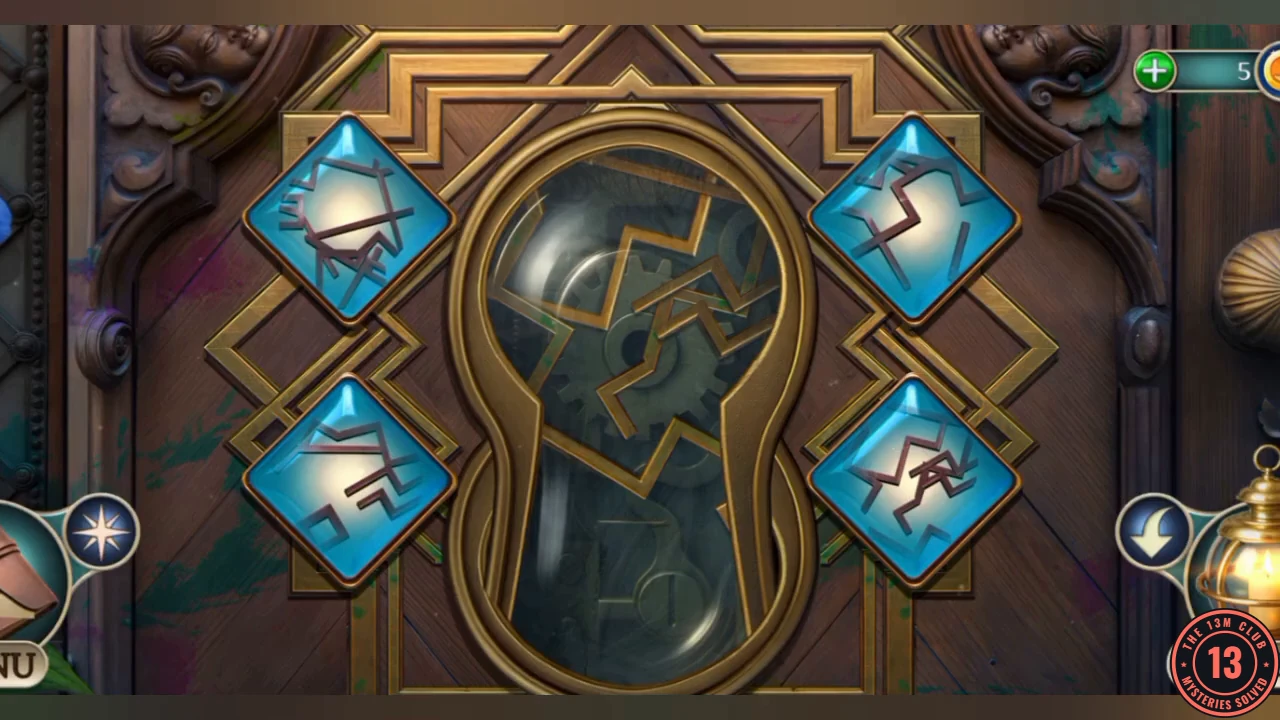
The finished lock: the marks on the four gemstones line up with the rune in the centre.