London Station: the magnet pool
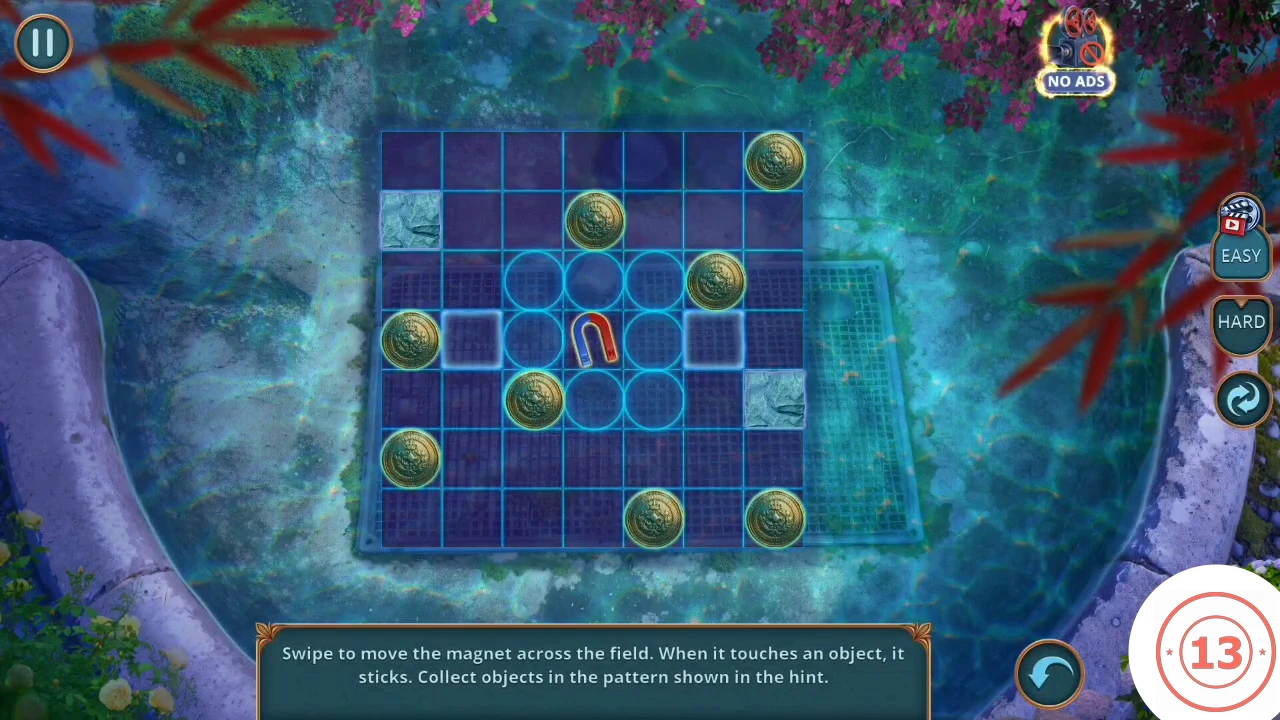
Build a rod, fish in the pool and win a horseshoe and a coin.
- Open the ticket window: "No free punches here, apparently."
- Open the luggage. Take the Fishing Line and the Fishing Rod, and the Pocket Watches (running count 65 of 70). Combine rod, line and Magnet in your inventory.
- Open the pool and use the Magnetic Fishing Rod.
- Swipe to move the magnet across the field. When it touches an object, it sticks. Collect objects in the pattern shown in the hint. In the solved example the objects form a 3 by 3 block in the blue rings at the center. You then receive the Horseshoe.
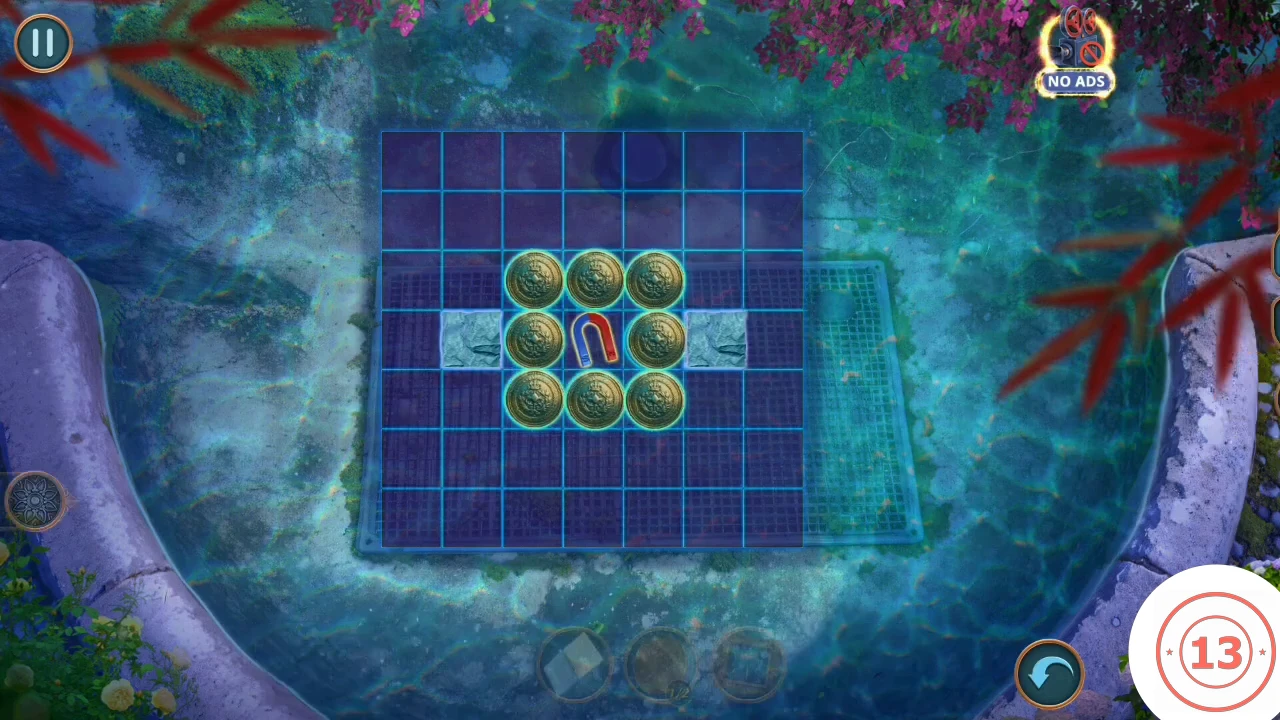
The solved pattern: a 3 by 3 block with the magnet in the middle.
London Station: the origami parrot
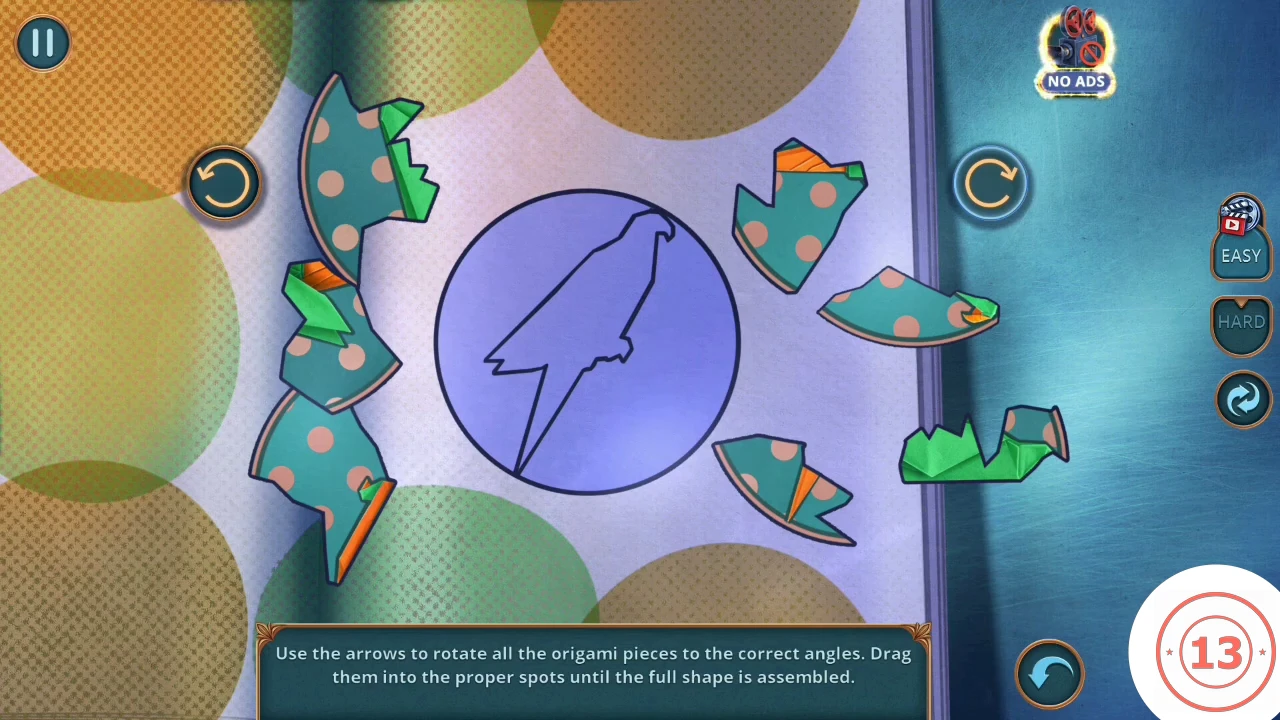
Two coins buy a punch card; the card opens the panel with the origami.
- Put a coin in the window's slot. Open the panel: "Access only by official punch card." Take the second coin from the panel's slot and put it in the window as well.
- Use the Punch Card on the panel. Take the Rubber Gloves. "I know I'll find the solution."
- Use the arrows to rotate each origami piece to the correct angle, then drag it into place until the full parrot is assembled. You then receive the origami parrot.
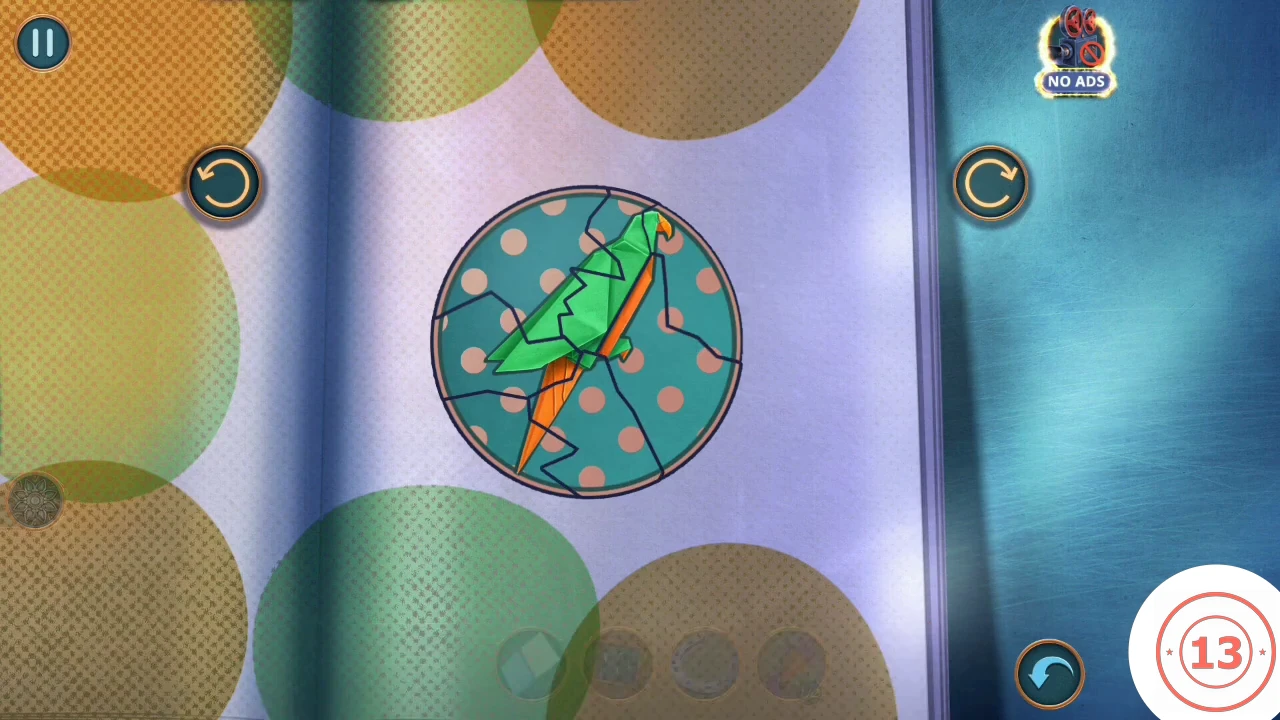
The finished parrot. - Put the origami parrot in the cage. The real parrot flies into the cage and leaves the red suitcase, which you can now open.
- Use the Phone Charger at the window.
London Station: the turnstile dial
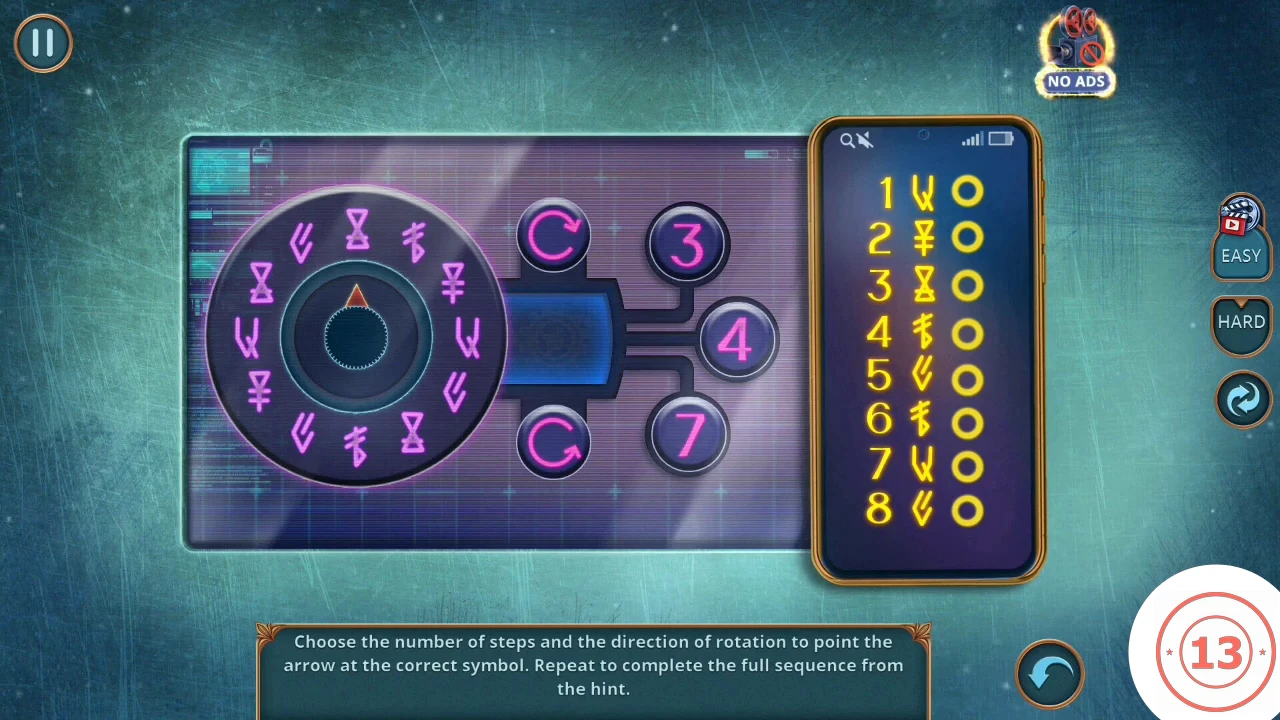
The phone shows eight symbols in order.
- Open the turnstile keypad.
- Choose the number of steps with 3, 4 or 7 and the direction with the arcs, so the arrow lands on the next symbol in the hint. Each correct symbol lights a green circle. There are 8 rows. After the last one, the turnstile opens.
- On the train Anna appears: "Gabriel... it's me. Anna. I must finish what was started." Decision (4 points): "Say nothing" gives 0, "Talk to Anna" gives +2, "Call out to Albert" gives +4. "The boy can't hear you. But you can still save him."
The Highlands: radio, tent and panel
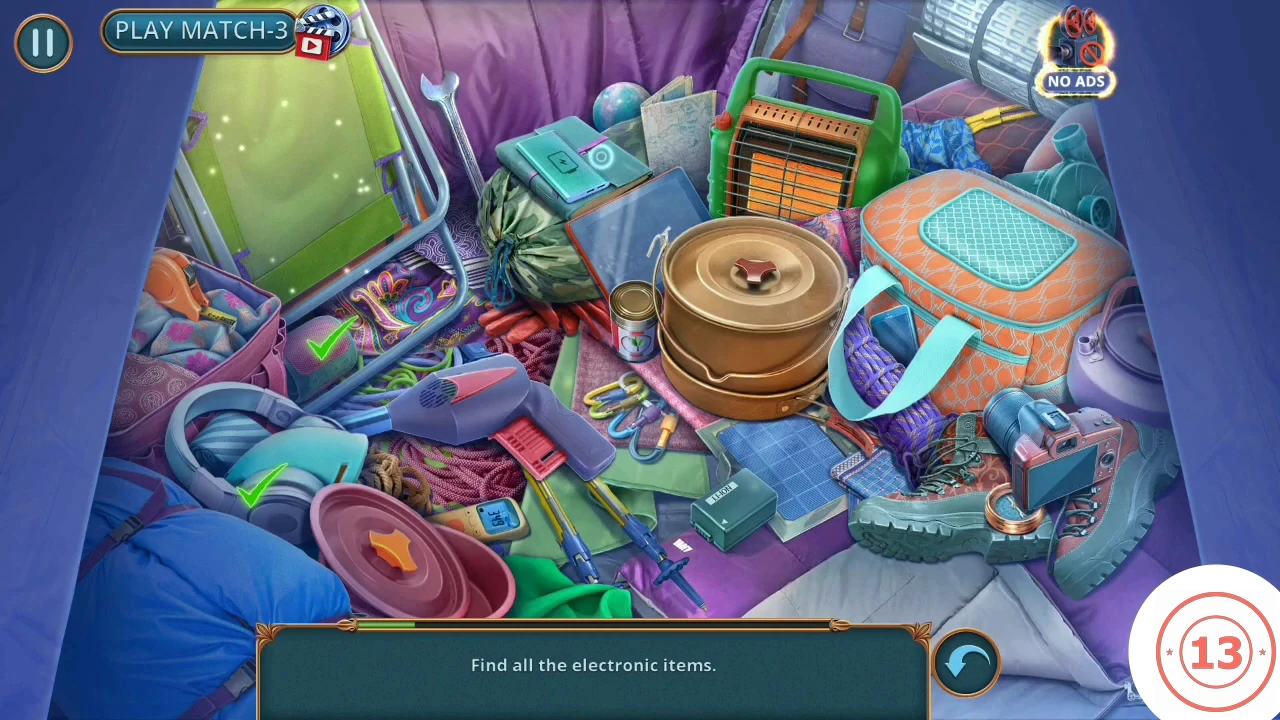
Glenna asks you to repair the cable car.
- Talk to Glenna. "Did she just hand me a repair job? Well, that's one way to welcome someone to the Highlands."
- Open the fire pack and press the Horseshoe into it.
- Open the radio and take the Insecticide.
- Open the control panel: "If it had a handle, I'd pull it. Since it doesn't... improvisation time?" Pull the cover off with the Sticky Horseshoe. "Handle with care, not with bare hands." Take the Foldable Support.
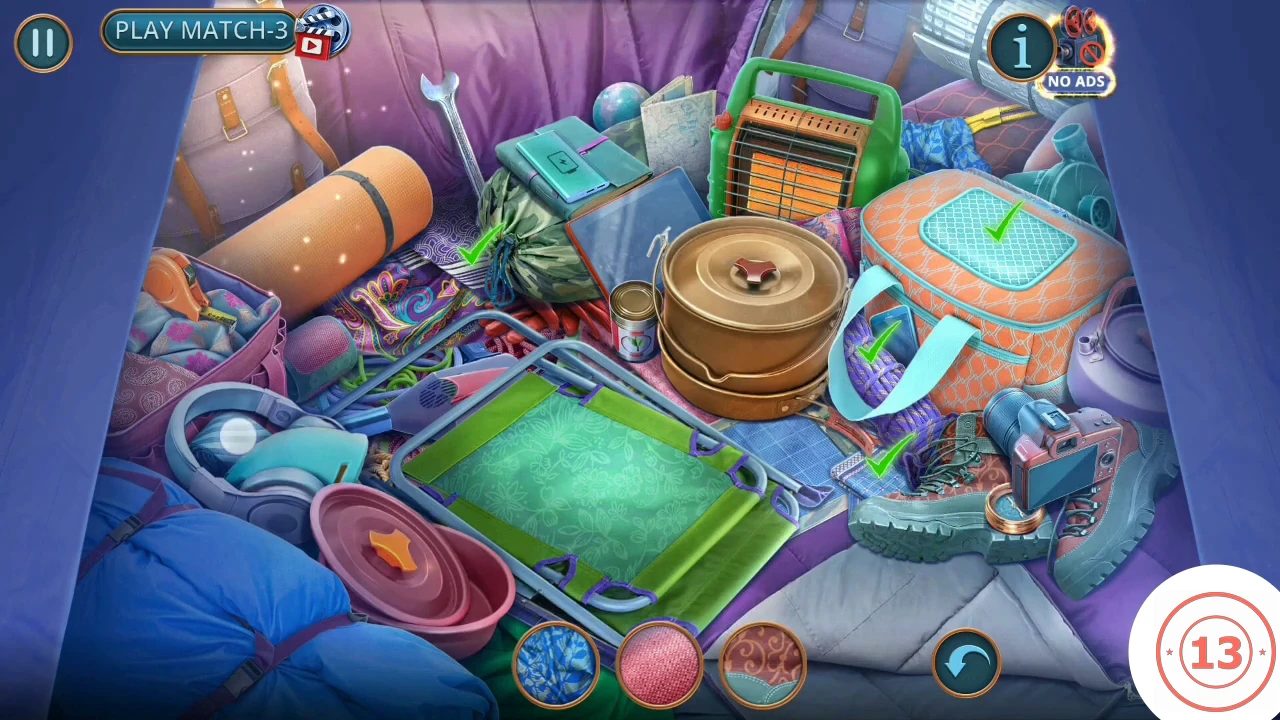
- Open the tent and find all the electronic items. Twelve count: the power bank on the teal organizer, the tablet, the green-framed heater, the pink speaker, the hair dryer, the headphones, the yellow meter with the blue screen, the green battery pack, the blue solar panel, the phone in the cooler bag's pocket, the camera on the boot, and the teal air pump at upper right.
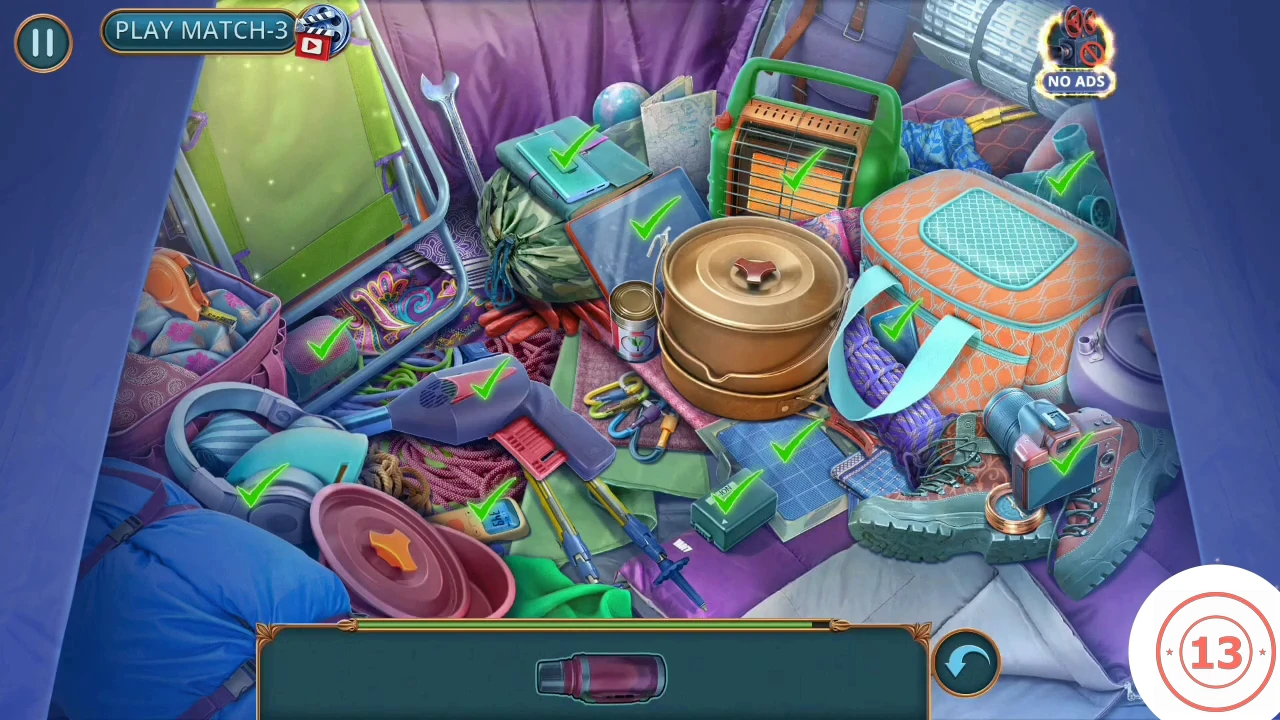
All twelve electronic items ticked. - Use the Hot Water on the trunk by the fire.
- Open the radio: "This thing speaks in dots and dashes. I should probably respond the same way." Fit the Fork and the Foldable Support.
- Open the control panel, put on the Rubber Gloves and fit the Electrical Component.
The Highlands: lightning tokens
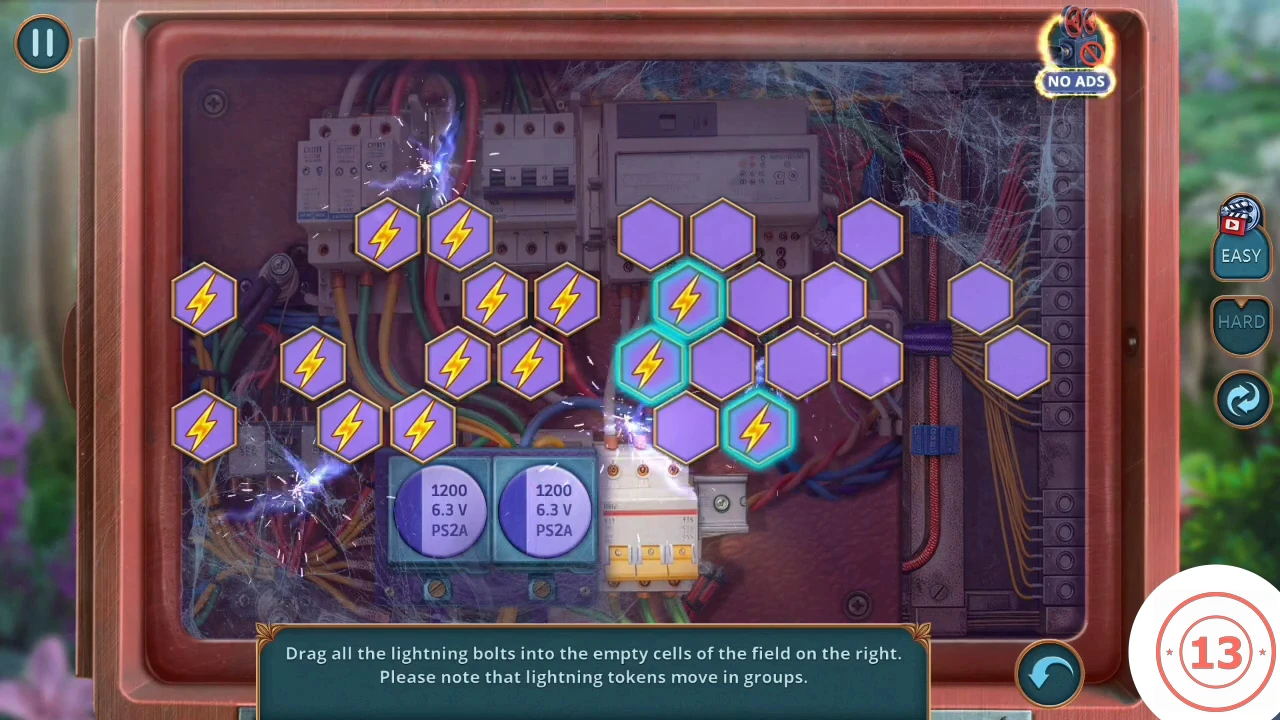
Tokens move as groups, so plan by shape.
- Drag all the lightning bolts into the empty cells on the right. Tokens move in groups, so start with the group that fits only one spot. The cable car then comes back to life.
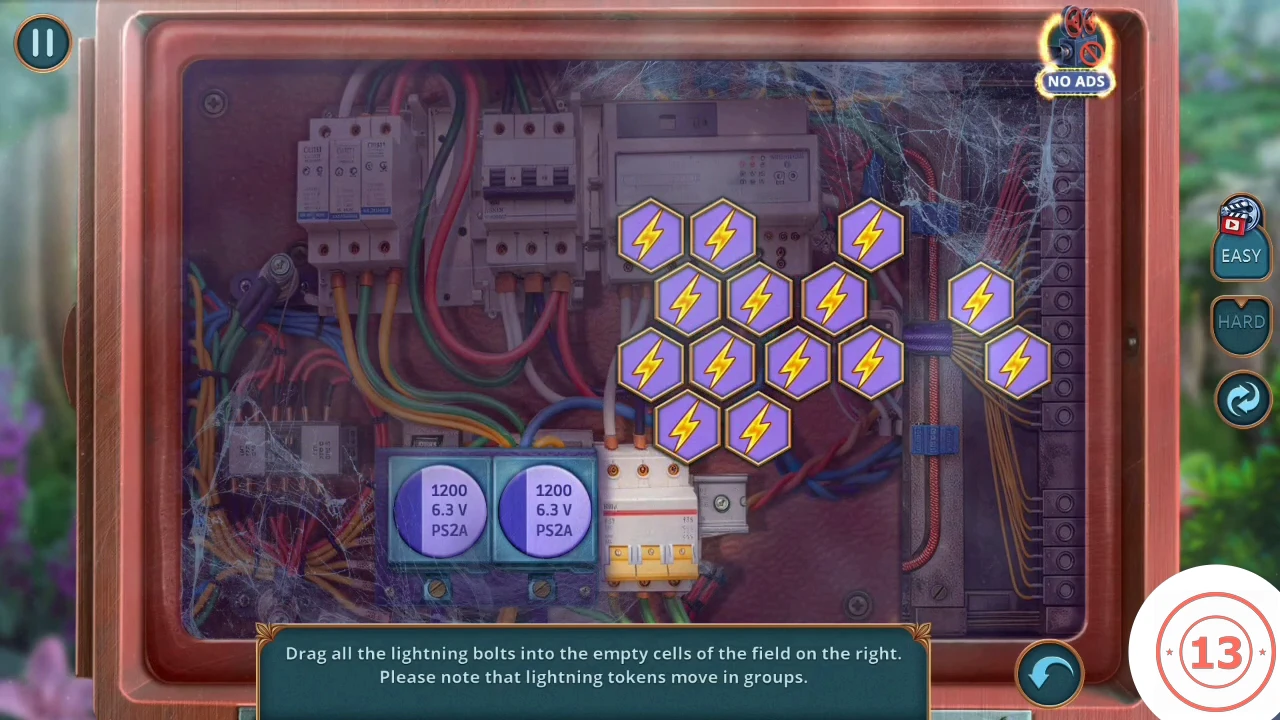
Every empty cell filled. - Talk to Glenna: "Brilliant! It's working again!" and "Bright, unnatural lights. I'm sure it's connected to the portrait." Deluxe owners can choose "I'll check it out right now." (+6) to open the ravine; "There's no time for this." gives 0 and she replies, "That's fair... though I believe it holds some answers."
Cliff: the ant rings
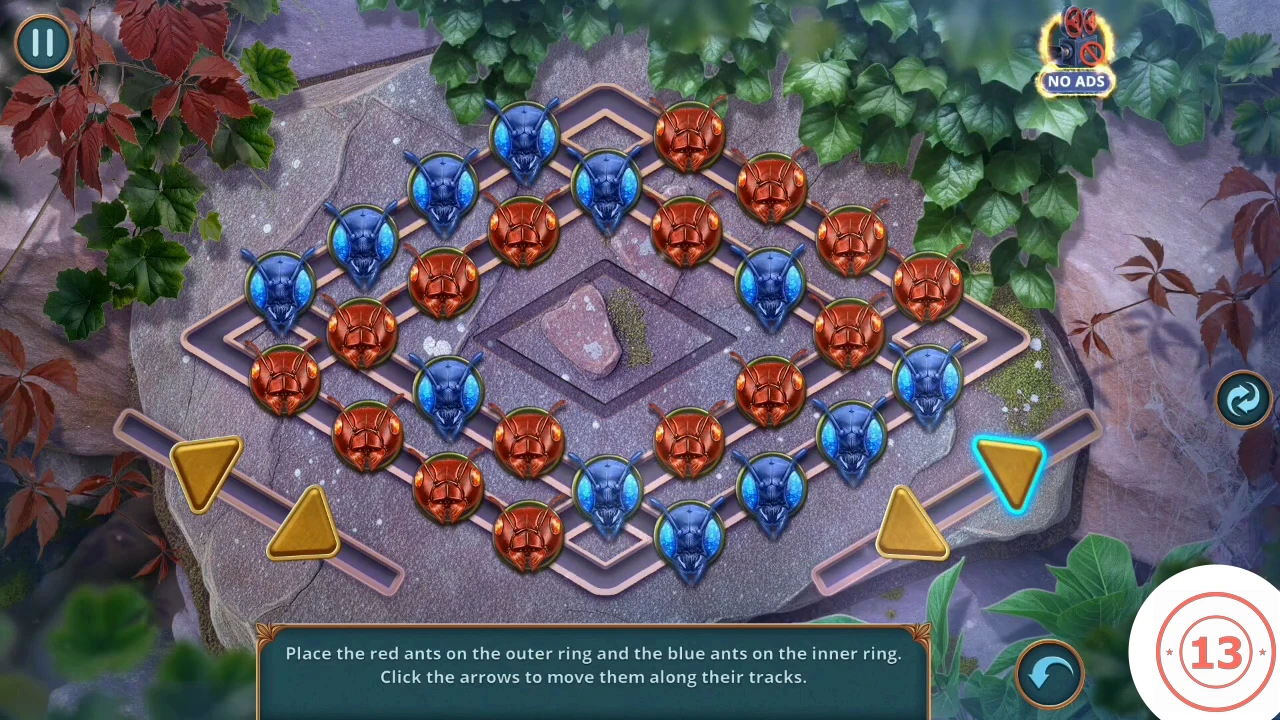
Clear the swarm from the stone. All 28 ants sit on two interlocked tracks, and each press moves one whole track by one spot, so a track carries ants from one ring to the other. The right-hand arrows drive the track made of the lower-right outer side, lower-left inner side, upper-left outer side and upper-right inner side. The left-hand arrows drive the track made of the upper-right outer side, lower-right inner side, lower-left outer side and upper-left inner side. The top, right, bottom and left corners of the inner ring belong to both tracks, and that is where an ant can change track.
- Go to the cliff. Open the stone: "A peaceful approach? Not with that swarm." Use the Insecticide.
- Lost Heirloom: click the small blue spot at the foot of the tree stump, at the right end of the red flower bed. The object is hard to make out, so if nothing happens, click around the base of the stump and watch for the banner. All ten unlock ECHOES OF THE PAST ("Collect all Lost Heirlooms!").
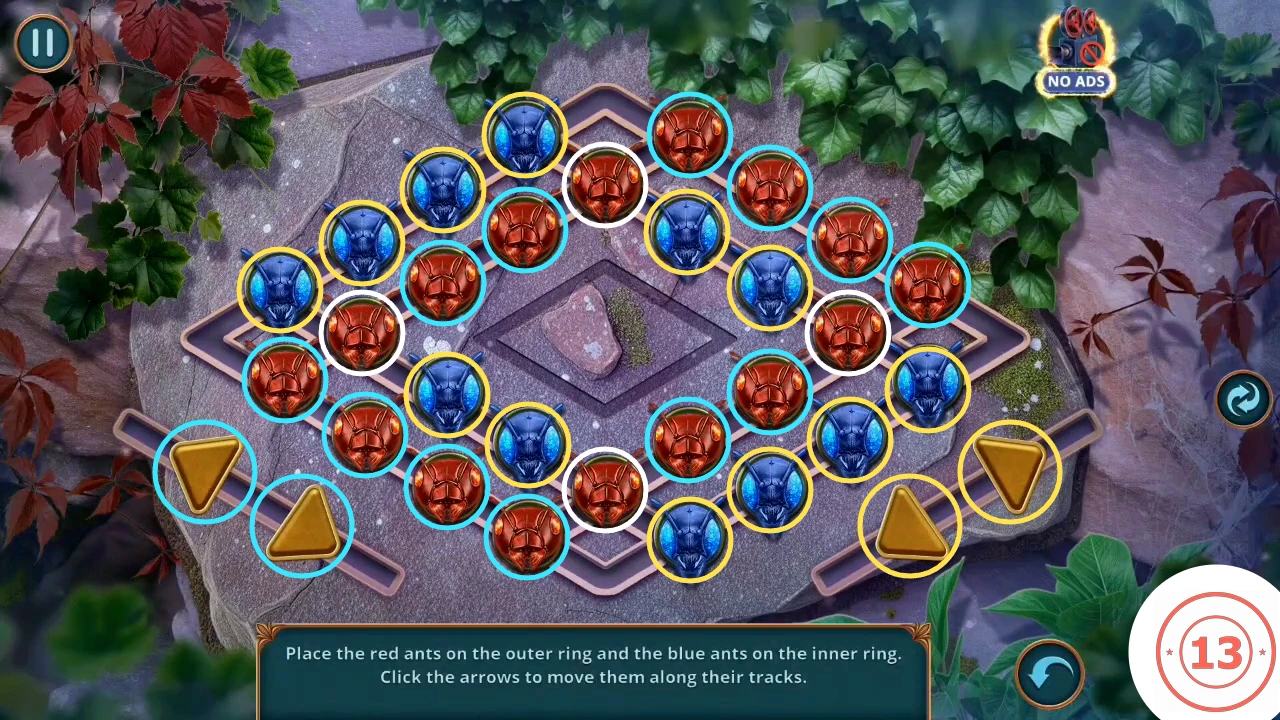
The two tracks at the start position used in step 3. Yellow: right-hand arrows. Cyan: left-hand arrows. White: the corners shared by both. - Place the red ants on the outer ring and the blue ants on the inner ring. The down-pointing right arrow and the up-pointing left arrow turn their tracks anticlockwise; the other two turn clockwise. Let each move finish before pressing again. If you start with the upper-right and lower-left outer sides red and the other two outer sides blue, press: right-hand down 3 times, left-hand down, right-hand down, left-hand down, right-hand down, left-hand up twice, right-hand down twice, left-hand down. We calculated this 12-press list from the track rules and checked those rules against a full recorded solve, but the list itself has not been played. If your start differs or the list goes wrong, use the rules directly: the ants at the end of an outer side enter the inner ring at a corner, and the inner ants ahead of them come out onto the next outer side. Turn a track until a red inner ant is about to come out and a blue outer ant is about to go in, then switch to the other track to hold what you gained. The board stays mirrored, so ants always change rings in opposite pairs. When every ant is home, the BEGONE! achievement unlocks.
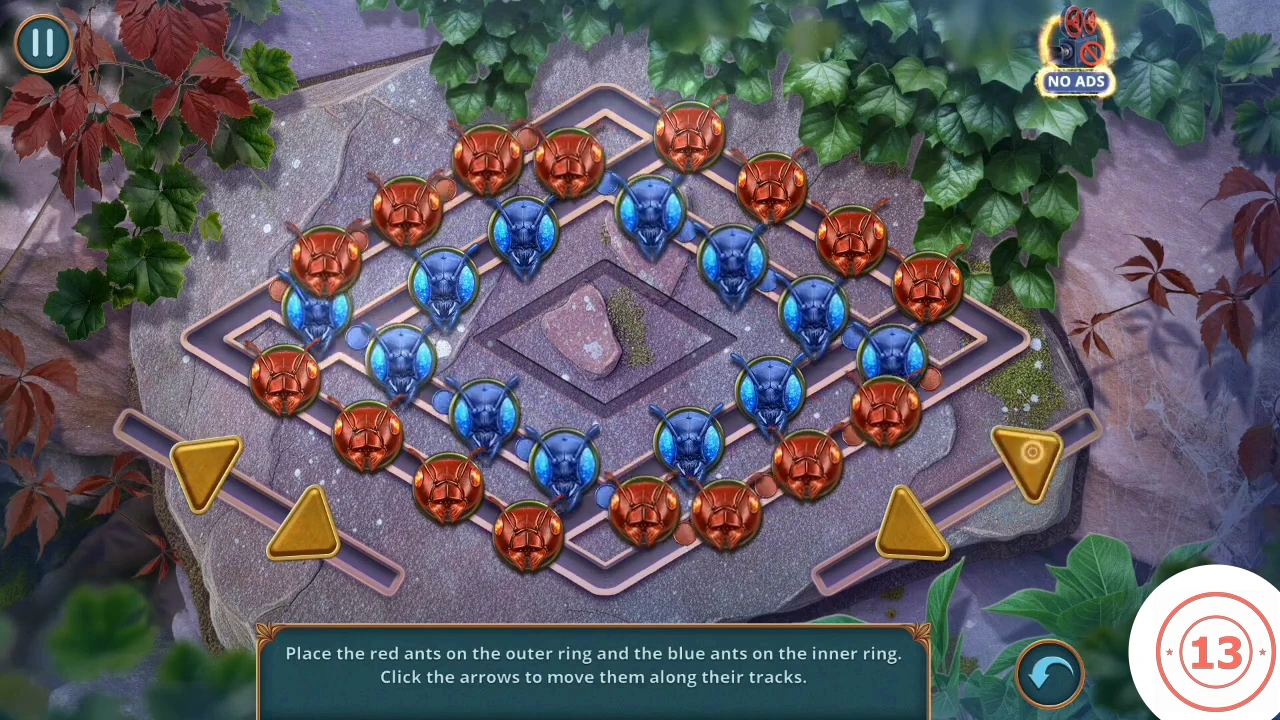
The target: red on the outer ring and blue on the inner ring.
Cliff and valley: axe, notebook and steak
Prepare the crampons, the code and the steak for the fox.
- Lift the stone. Take the Axe and the Pocket Watches (running count 67 of 70).
- Open the stump and chop the roots with the Axe.
- Lay the blue Notebook over the stone glyph at the stump and rub it with the pen.
- In the valley, open the red bag and use the Notebook with Password on its lock. Inside are the Pocket Watches (running count 70 of 70) and the Frying Pan. Pull the zipper of the inner pocket and take the Key.
- "Something just shifted... I should check the tent again." Open the tent. The tray holds 12 texture swatches rather than outlines; click the matching material in the scene. In tray order: teal mesh on the cooler lid; purple wave with white stripes on the cloth behind the green sack; the purple rope; blue check on the cloth by the boot; brown swirl with teal stitching on the boot; blue leaf cloth at upper right; pink mesh on the speaker; the paisley cloth; grey mottled paper on the map sheet; blue stripes on the headphone cushion; mint leaves on the cot; and pink flower on pale teal on the cloth in the open pink bag at left. Nothing needs revealing first. The Frozen Steak then appears at the cooler bag; take it.
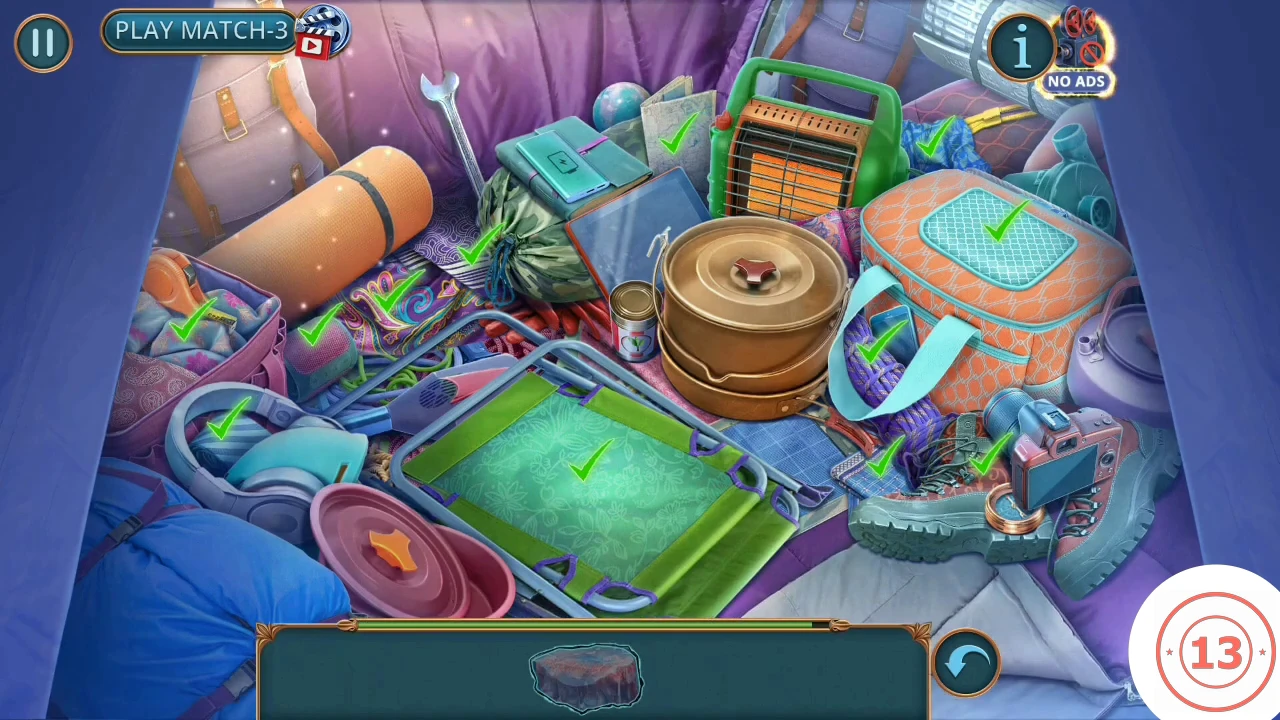
All twelve swatch matches ticked. - Open the fire, put the Frying Pan on it and add the Frozen Steak.
Deluxe: the ravine, first visit
Only with the +6 choice at the cable car. Start here before you climb the tree.
- Travel to the ravine by the map. "These symbols... There's something strange about them."
- Open the lamp and take the Fan.
- Open the weather vane, fit the Fan and take the Shoelaces.
- Open the box and take the Brush from its front.
- Open the rock art and clean it with the Brush.
- Back at the tree on the cliff, put the Ruby in the skull.
Cliff: chest, fox and the tree climb
Chalk, the fox and the tongs lead to the altar.
- Open the chest at the stump and unlock it with the Key.
- Open the fox and give it the Defrosted Steak. "With the right pieces in place, this ritual might actually work."
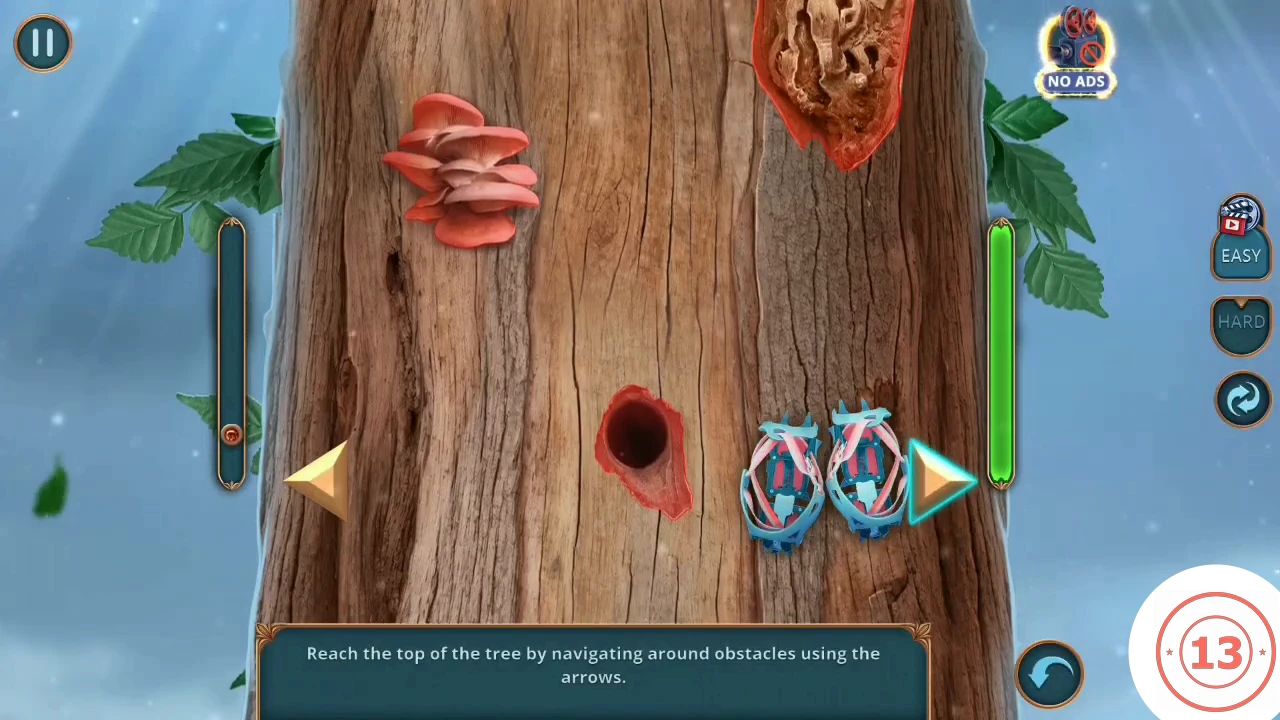
- Open the tree and use the Climbing Crampons.
- Reach the top of the tree by using the arrows to go around the obstacles. The Tongs are at the top.
Deluxe: the ravine, painting the symbols
Only with the +6 choice. Finish this before the altar. Harry Bankfort's note explains why the marks must go.
- Return to the ravine by the map. Open the box lock and fit the brass medallion.
- Read the book: "In the event that the ring or any other cursed object is destroyed, I have saved the symbols here. As long as they are seen, the curse will remain in effect. Even if the object is destroyed, its power will linger here in this gorge. Harry Bankfort." Take the Colored Foil and the Morse Code.
- At the valley fire, take a coal with the Tongs.
- Open the tool box by the valley bag and place the Morse Code paper on it. The paper fades and the drawer slides open by itself; you do not need to work the knob or enter a signal. Keep the Shoelaces. Take the Respirator Mask from the drawer.
- Open the green growth in the ravine, put on the Respirator Mask and burn it with the Tongs with Coal.
- Open the lamp, fit the Colored Foil and tie it on with the Shoelaces.
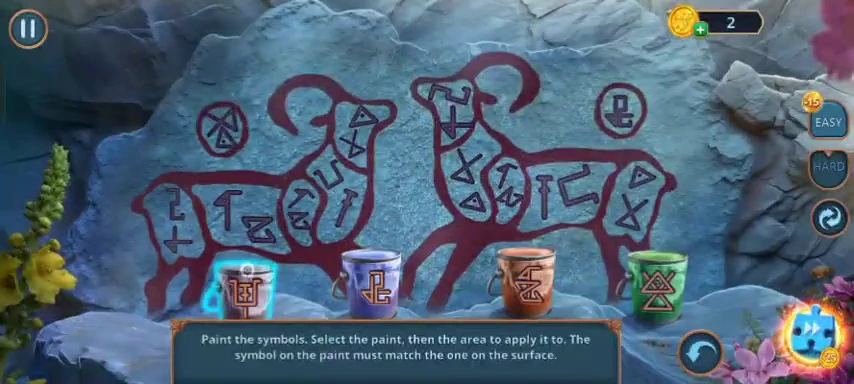
- Open the rock art. Select a paint, then the area to apply it to. The symbol on each paint must match the one on the surface.
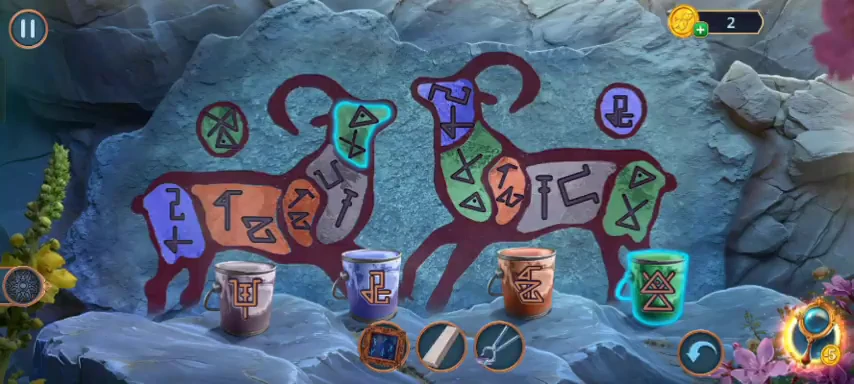
Every area painted. Each color goes on the areas that carry its pot symbol. - "Just a few marks left to erase and this nightmare ends."
Altar: collect the coals
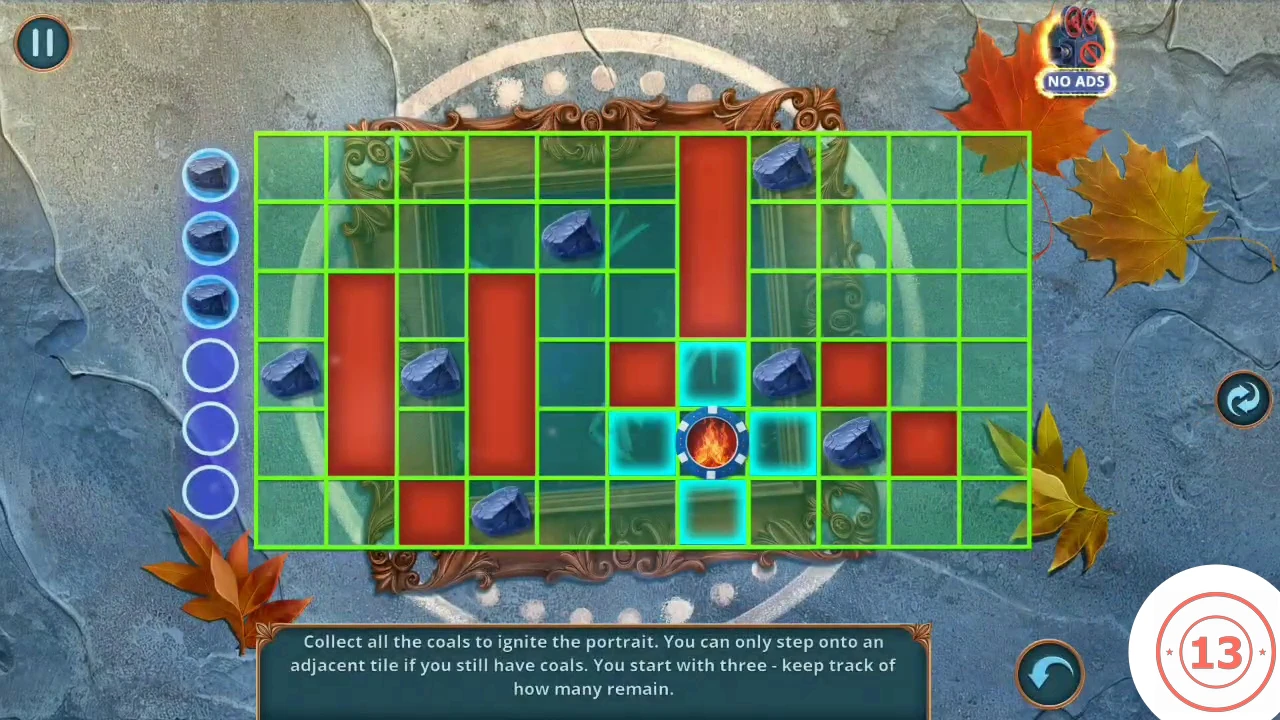
The last puzzle of the game, and the last warning. Finish the Deluxe ravine and every collectible first.
- Take a coal from the fire with the Tongs. At the altar, fill the three side slots with the coal, the Chalk and the portrait. Warning while you do this: "If you complete this task, you won't be able to go back to previous locations and find the remaining items." Press NO if anything is missing, YES when ready.
- Collect all the coals. You may step to an adjacent tile only while you still hold a coal, and you start with three. Example route on this fixed layout, which is 11 columns by 6 rows and starts at row 5 column 7: right to the coal at r5c9; back to r5c8; up column 8 through r4c8 to r1c8; back down to r5c8; left along row 5 to c5; down to r6c5 and left to r6c4; back and up column 5 to r2c5; left to r2c3; down to r4c3; up to r2c3; left to r2c1; down to r4c1.
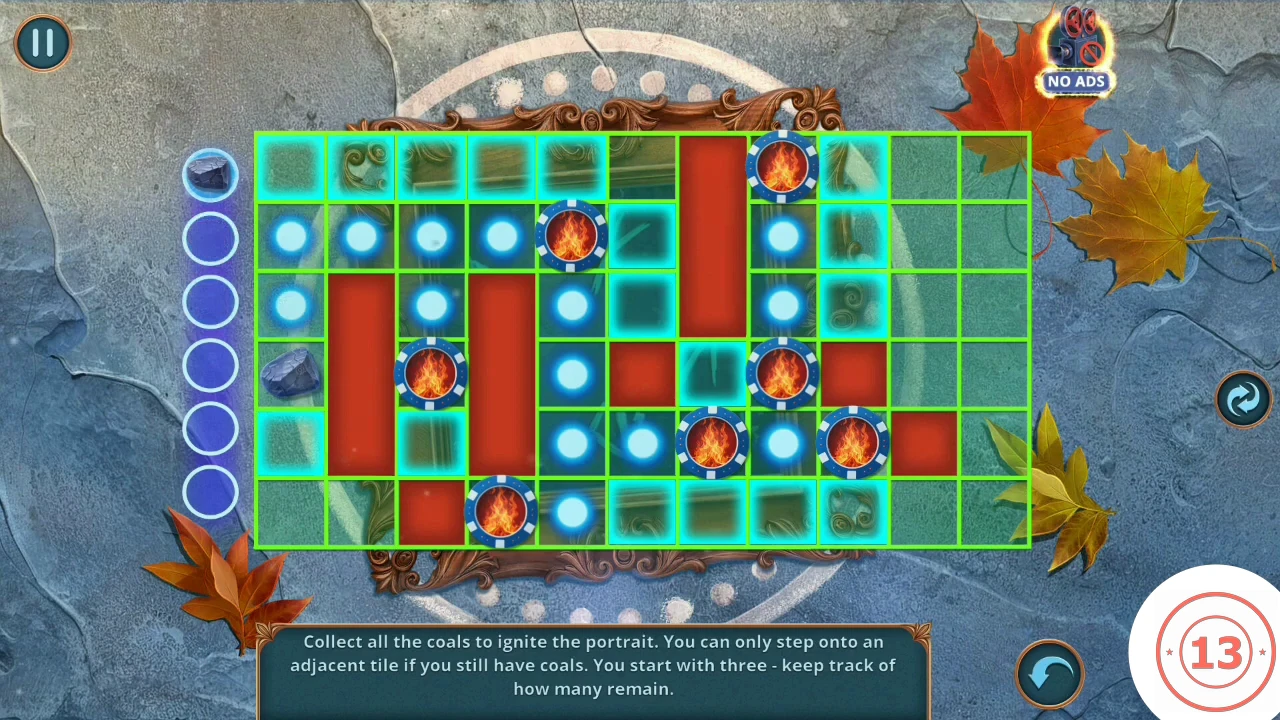
The example route just before the last coal, at the far left.
Bonus summary and ending
The summary scores the Bonus Chapter out of 13.
- The Decision Points screen lists: Don't believe Albert / Believe Albert +1; Be unsure / Be sure +1; Have no idea / Take a guess +1; Stay silent / Talk to Anna +2 / Call out to Albert +4; Refuse to go / Examine the ravine +6.
- Watch the ending, which ends the game. "I feel so much better now! And - wait for it - I saw Anna in a dream! She told me the curse is finally gone." "Thank you, Gabriel. Once again, you've saved me and my son!" With 13 of 13, Glenna also phones: "Good news! The glowing's gone! It's clear now: if something's wrong, you're the one to call."
Collectibles and achievements checklist
Everything below is also listed at the point in the walkthrough where you pass it. Use this to check what you still need before a warning closes a location.
- Overlooked Trinkets (10): 1 foyer tablet; 2 Laura's office, box on the green armchair; 3 Greystone library, teal vase on the floor; 4 police room, ring in the CONFIDENTIAL box; 5 Toronto hotel room, pink doll on the armchair; 6 Scottish hotel room, object under the foot of the bed; 7 Fortingall village, flowers on the paper; 8 Rock of Destiny field, red-rimmed object at the flower bed by the grey rock; 9 auction hall, food table close-up; 10 workshop, spoon-shaped object on the small round table.
- Lost Heirlooms (10): 1 Greystone grounds, red rosette; 2 Greystone study, booklet on the floor under the side table; 3 archive library, gold-rimmed box; 4 Toronto hotel lobby, sprig on the sofa; 5 Isabella's yard, on the swing; 6 airport departures hall, on the planter; 7 temple ruins, top of the steps; 8 Laura's office in the bonus, glass on the books; 9 workshop street, on the curb; 10 bonus cliff, foot of the tree stump.
- Pocket Watches (70), with the number each site gave: foyer lamp 3; office side table 2; Greystone vase table 3; study desk lamp 2; van 3; green safe 2; library shelf 2; police folder 2; police drawer 3; archive chandelier 2; archive ladder 3; Toronto green chest 3; tea set 2; Isabella's toy golf 2; Scottish hotel drawer 2; closet 3; lounge cooler 2; lounge low table 2; lounge booklet table 2; Fortingall well 2; fire bowl 2; shore stones 1; punch reward 2; auction table 2; office desk 3; street mailbox 2; office wall panel 3; station luggage 3; cliff stone 2; valley bag 3.
- Achievements. The Steam edition lists 39, and our Android footage never opens the in-game list, so this groups them by how far we could confirm them. Seen unlocking in Android play, with this wording. Story: SOMEONE, HELP! (receive a request for help), FIELD MEDIC (find a first-aid kit), CURSED ECHO (learn more about the Montgomery family; Deluxe museum), CODED IN THE STARS (figure out the code for the box), JUST IN CASE (find the spare keys), CALL ME! (get Laura's number), LONG TIME AGO (learn about the ring), LOVELY AROMA (smell the essential oil), WELCOME! (ring the bell), ANY WAY POSSIBLE (learn about the rituals; Deluxe hidden room), HEARTS OF HONOR (return the flag), TO THE SKIES! (get the tickets), KEEPER OF SECRETS (learn about the cult's archivist), CURSE BROKEN (discover how to break the curse), SECRETS AND MYSTERIES (discover Anna's portrait secret), LAYER BY LAYER (learn the restoration technique), FAMILY TREASURE (open the family stash), BEGONE! (get rid of the insects). Skill: REVELATION (complete a mini-game in one minute), PUZZLE MASTER (three mini-games in one minute each), PRECISE MOVES (no wrong selections in a hidden-object scene), DETECTIVE'S EYE (finish a hidden-object scene in two minutes), FLAWLESS INSTINCT (finish 3 hidden-object scenes in a row in one minute each), CATCH THE PAST (5 in a row in one minute each), CLUE HUNTER (find 20 objects), SECRET COLLECTOR (find 40 objects), SHARP EYE (find 3 hidden objects in 3 seconds), KEEN ATTENTION (5 hidden objects in 5 seconds). Collection: ELUSIVE PAST (all Overlooked Trinkets; its text says Morphing Evidence), ECHOES OF THE PAST (all Lost Heirlooms), MASTER KEY (find all collectibles in the game). Listed for Steam but not seen in our Android footage, so they may or may not apply to your copy: INSTANT SOLUTION (finish a hidden-object scene in one minute), HIDDEN TRAIL (in three minutes), ALTERNATE PATH (finish a hidden-object scene using only the alternate puzzle), EASY PREY (3 mini-games on EASY in one minute each), DAZZLING BLITZ (10 hidden objects in 10 seconds), BOOK THIEF (investigate the traces left by the thief), NOT HAPPENING! (ruin the backup plan) and SECRET HAVEN (furnish the boudoir). We could not find how to reach a boudoir: see the note on the Pocket Watch banner's button in the first collectibles step.