CHAPTER 2
Police station: the desk, the pipe and the drawer
Gabriel is held as the prime suspect. Everything you need to call Laura is in this one room.
- Answer the officer. Neither pair of replies carries a star: "Absolutely not!" or "I want a lawyer", then either explanation of your visit to Oliver.
- Open the desk. Take the Belt lying on the blue folder.
- Open the CONFIDENTIAL folder. Pocket Watches are in this close-up (running count 19 of 70). Read the case note and take the Photo and the Pencil.
- Open the drawer by the desk. Click the Pocket Watches at the upper left of the close-up (running count 22 of 70). The pouch's zip pull is broken: "Can I hook it up with something?"
- Open the coat on the stand. Tap the pocket flap to lift it, then take the Phone underneath.
- Open the leaking pipe. Use the Belt to strap the leak. When the steam clears, take the Utility Knife and the Paperclip resting on the pipe.
- Overlooked Trinket: in the main police room, click the gold ring with the green stone on the papers in the CONFIDENTIAL box at the lower right.
- Use the Paperclip on the drawer's zip and open the pouch. Take the Passport and Laura's Phone Number.
CHAPTER 2
Police station: the glitching phone
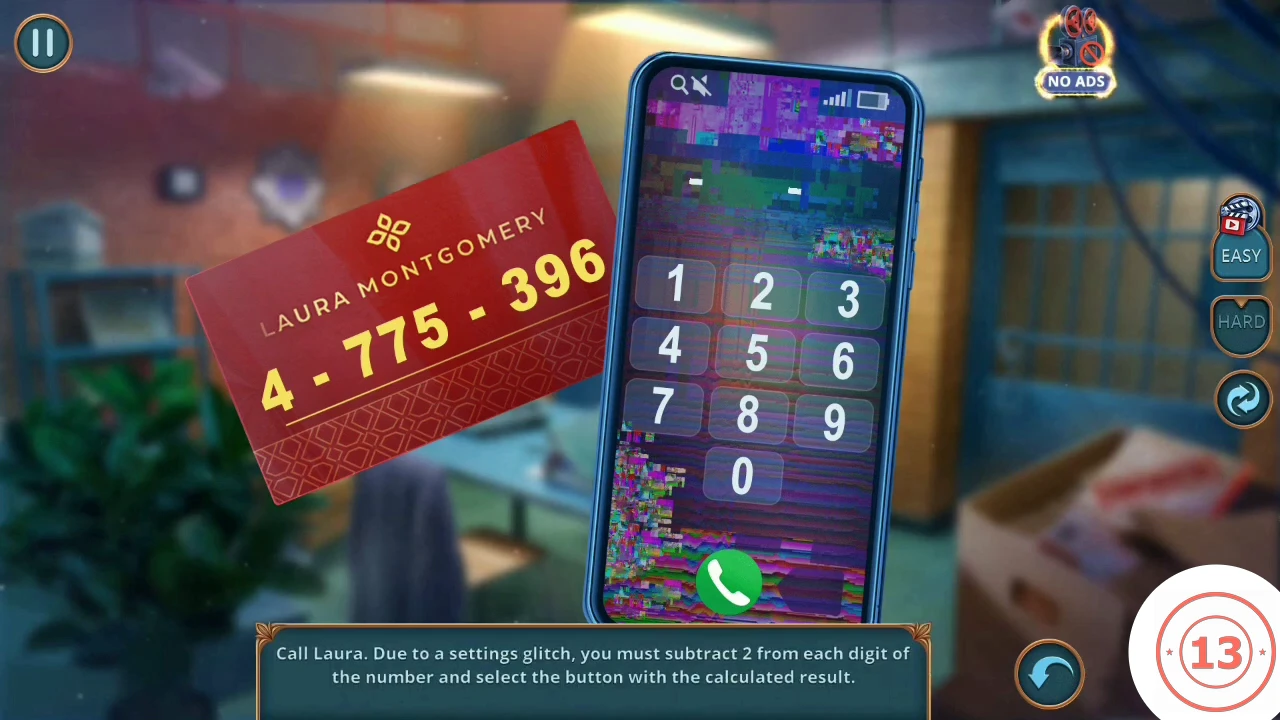
The phone has a "settings glitch": press the digit that is 2 lower than the digit on Laura's card.
- Open the Phone from your inventory to bring up its keypad, then use Laura's Phone Number on it.
- Subtract 2 from each digit and press 2, 5, 5, 3, 1, 7, 4. The screen shows the original number as you go, then the green button connects the call.CODE2553174
- Decision (1 point): "I'll catch the first flight out." gives +1; "Being your guest is getting quite dangerous..." gives 0. Laura sends you to the archive under her estate.
CHAPTER 2
Archive: the unpaired symbols
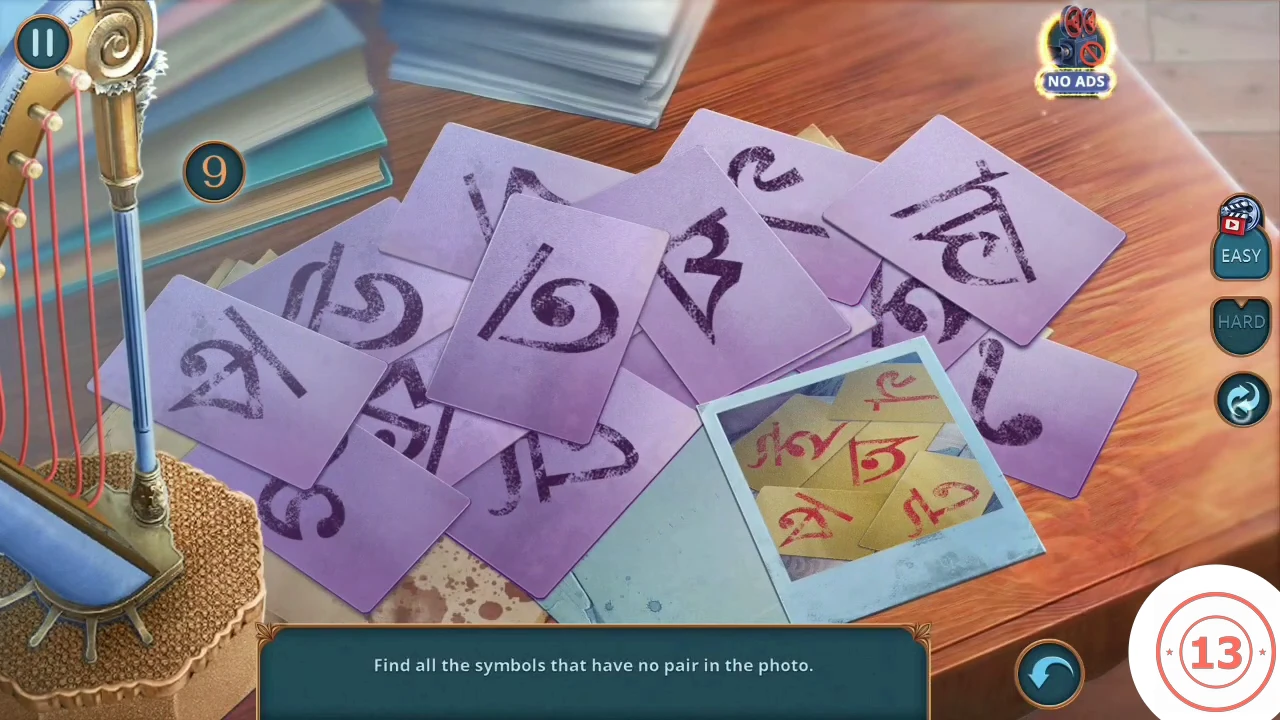
Lilac cards cover the harp desk. Use the Photo as a key: only the symbols shown on it count as paired.
- Open the toy stage on the left side of the room. It is empty for now.
- Open the harp desk and put the Photo on the cards. Gabriel says "I need a hint on what to look for here."
- Compare the cards with the Photo and click every lilac card whose symbol is NOT on the Photo. Each correct card blanks and the counter drops. On EASY the counter starts at 9. The HARD layout may differ, so judge by the Photo.
- Take the Instructions, a paper showing a dressed figure, from the desk.
CHAPTER 2
Archive: the cardboard man and the first stage show
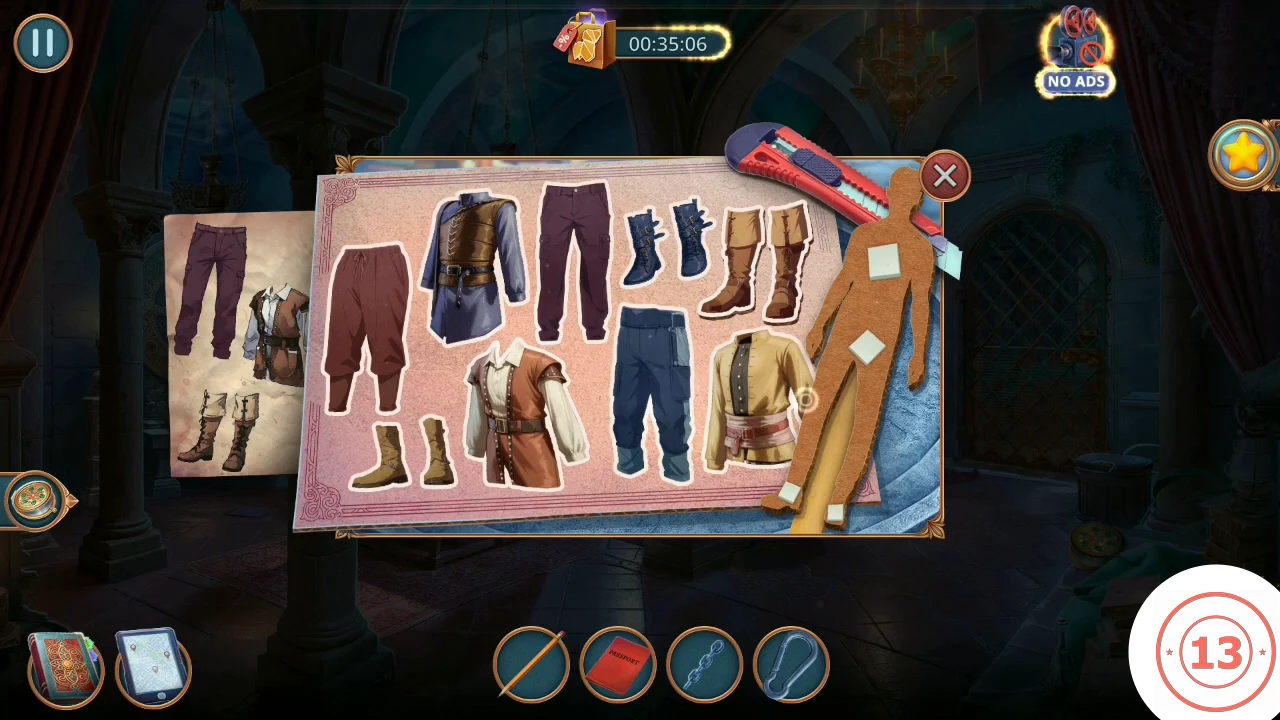
The toy stage needs a figure. You build it from a paper outfit, then play the story on stage.
- Open the iron grate on the right. Its latch must be cut before it will open.
- Open the papers pinned to the stone wall. Take the Chain and the Double-Sided Tape from the base of the wall.
- Open the pink craft board. Take the Carabiner lying on it. Place the Instructions on the board.
- Stick the Double-Sided Tape on the cardboard figure, then use the Utility Knife on the board.
- Dress the figure to match the Instructions: the plain plum trousers, the brown vest over a white shirt, and the tall brown boots. A green tick appears for each correct piece.CODEPlum trousers, brown vest with white shirt, tall brown boots
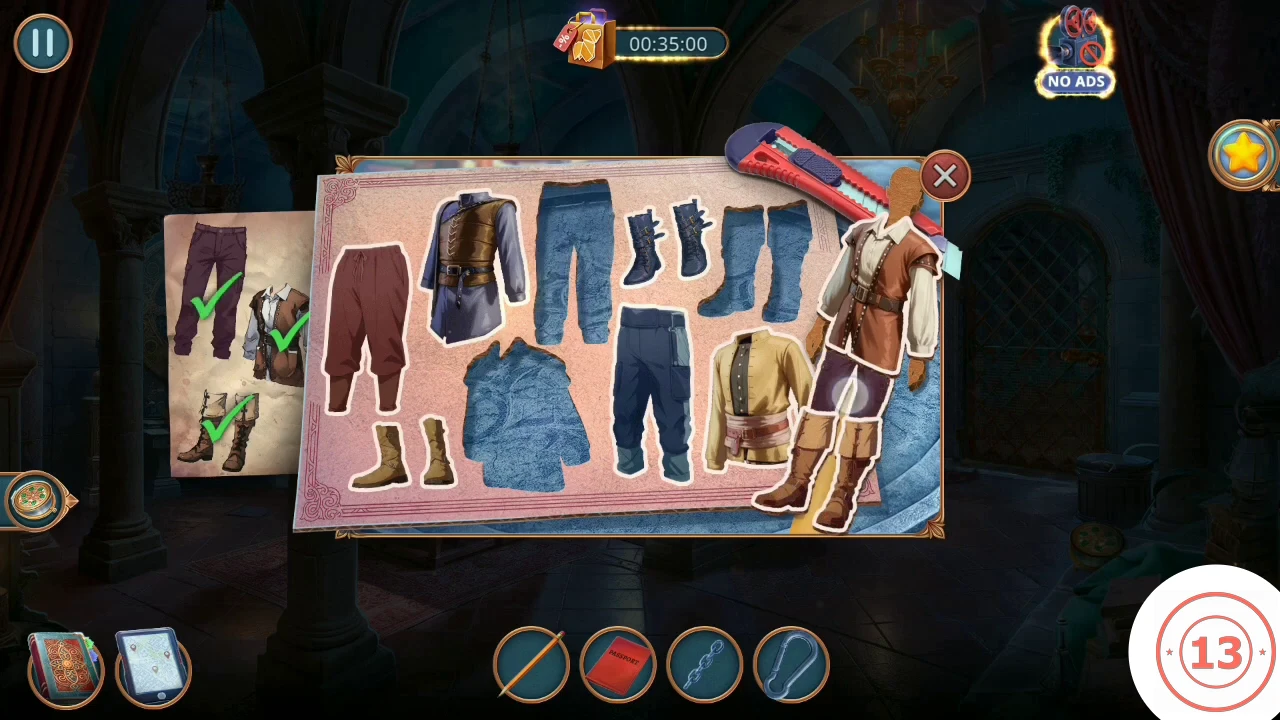
The dressed figure. A green tick on the Instructions confirms each correct piece. - Open the toy stage and place the Male Cardboard Cutout.
- Click the glowing spot in each scene and read the story of the ring as the scenes change. There are four scenes. A PLAY MATCH-3 option sits at the top left. At the end you receive the File.
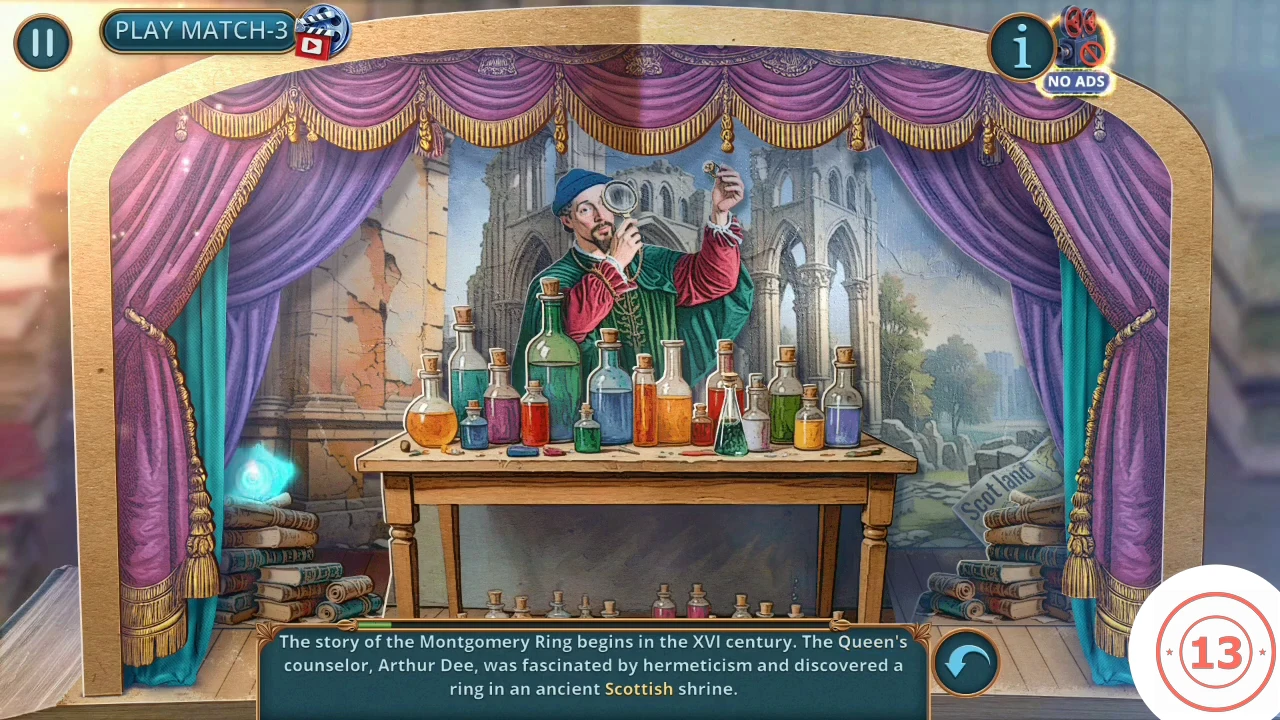
The first stage show. Click the glowing spot in each scene, such as the one at lower left here. - Use the File on the grate's latch.
CHAPTER 2
Archive library: chandelier, shields and ladder
Lift the fallen chandelier, then match the second shield to open the shelf the ladder needs.
- Lost Heirloom: click the round gold-rimmed box on the floor at the lower right, by the green cloth.
- Open the ladder at the bookcase. Its wheel is missing.
- Open the wall cabinet above the fireplace. It has one shield and one empty slot.
- Open the fallen chandelier on the right. Take the Perfume and the purple drawing compass caught in its frame.
- Attach the Chain to the ring on top of the chandelier, join it to the hanging chain with the Carabiner, then turn the crank.
- Take the Shield. Pocket Watches are found here (running count 24 of 70).
- Put the Shield in the empty slot of the cabinet. A drawer opens below it; take the Wheel.
- Open the ladder. Put the Wheel at its foot and pin it with the Pencil. The ladder stands up and rolls along the shelves. Take the stack of banknotes and the Putty Knife from the top shelf. Pocket Watches are here too (running count 27 of 70).
CHAPTER 2
Archive: the cardboard woman and the second stage show
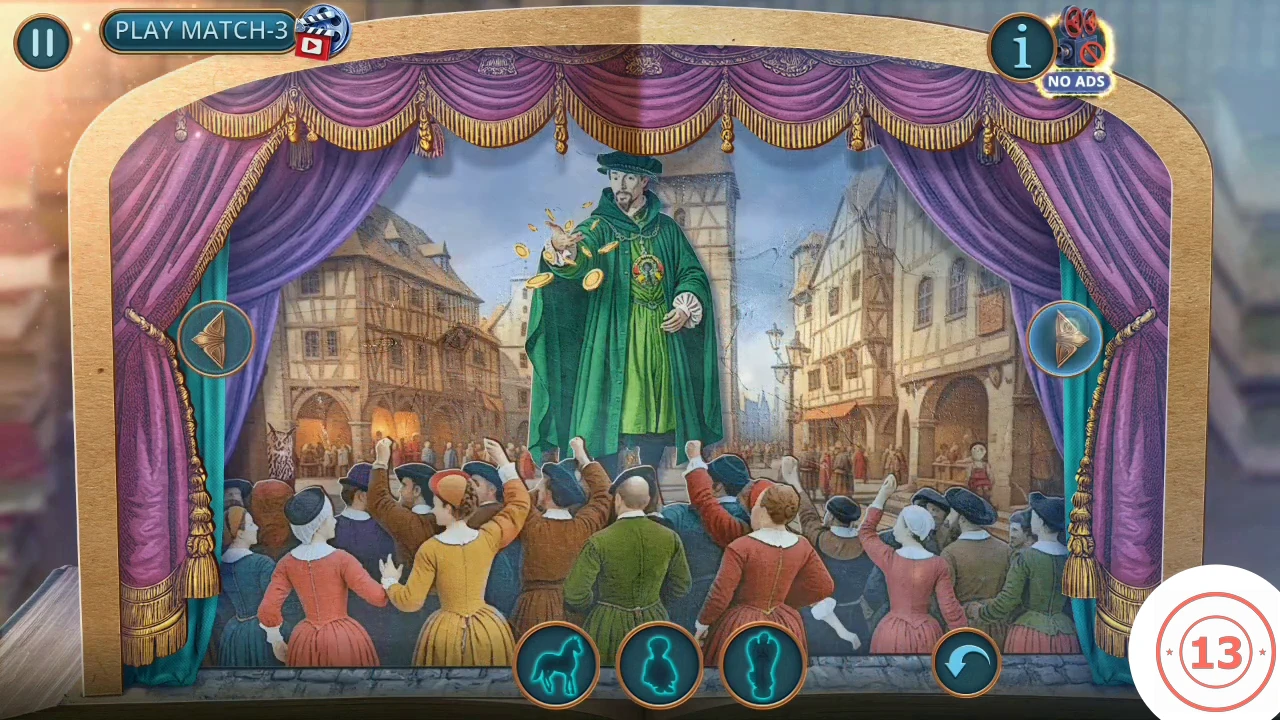
The woman's figure is hidden behind the wall of papers. The second show asks for items by silhouette.
- Back in the first room, open the papers on the wall. Spray them with the Perfume, then scrape them away with the Putty Knife. Take the red paper figure from the opening.
- Place the Female Cardboard Cutout on the toy stage.
- Use the side arrows to switch between the four scenes. The tray at the bottom shows silhouettes; click the matching object in any scene. The tray refills until the list is done. You then receive the Harp Tuner.
- Open the harp desk and fit the Harp Tuner to the harp.
CHAPTER 2
Archive library: the colored maze board
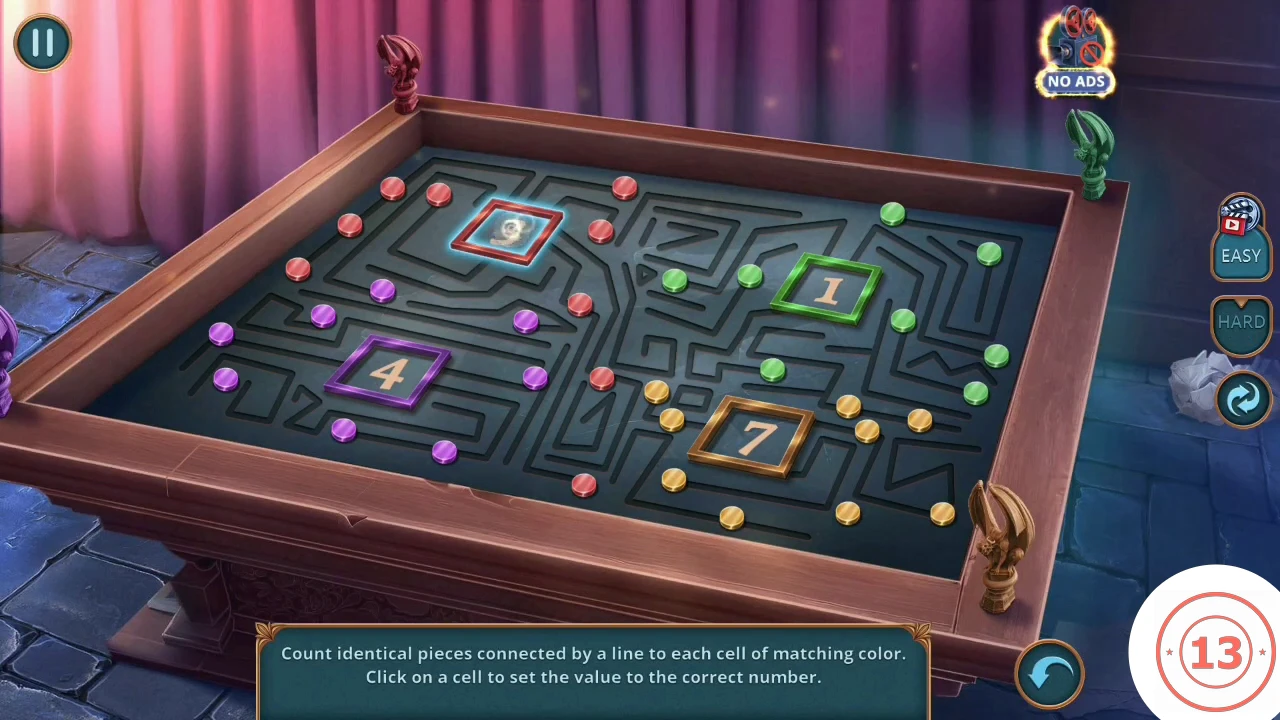
Each colored cell needs the number of same-colored pegs linked to it by maze lines.
- Open the board on the table in the library and put the Occult Statuette in its corner.
- Trace the lines from each colored cell and count the pegs of its color. Click a cell to change its number. On EASY the solved board reads red 9, green 3, purple 5, gold 5; if your board looks different, count your own pegs. The lines light up in blue and the board opens.CODERed 9, Green 3, Purple 5, Gold 5
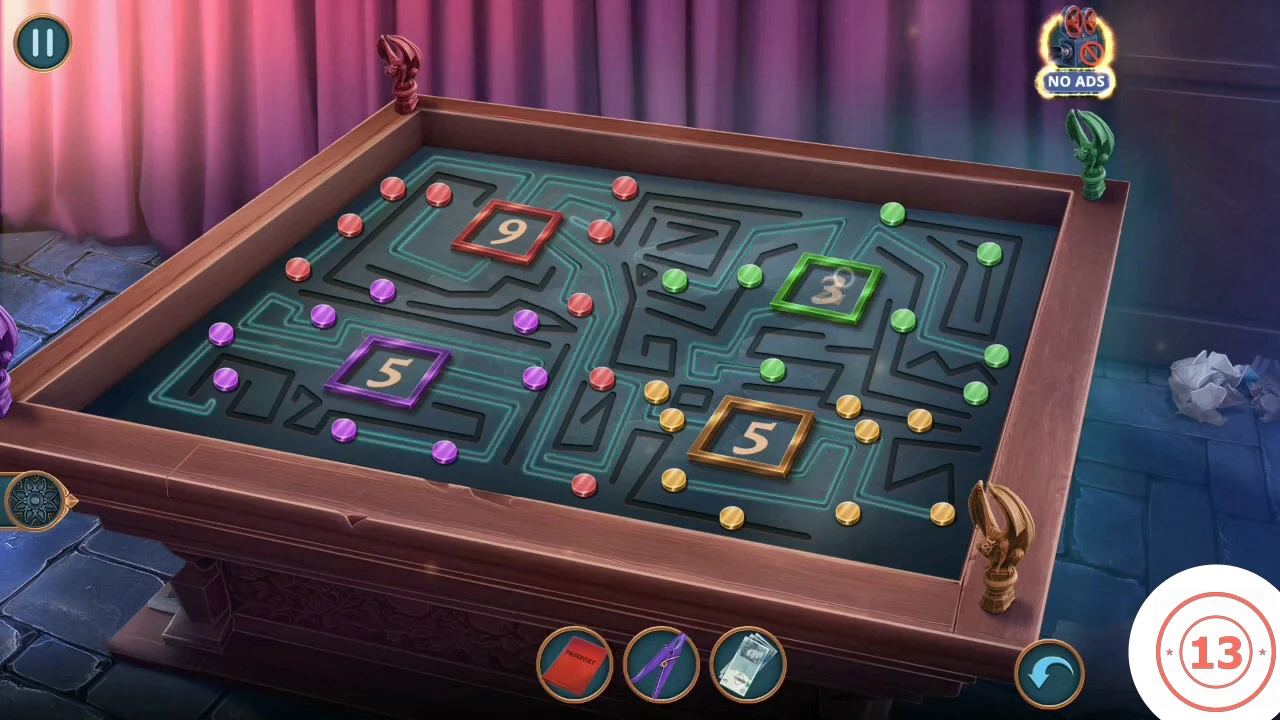
The solved board, with the lines lit and the cells reading 9, 3, 5 and 5. - Take the Manuscript and the pink cloth over it (Isabella's Scarf). Laura names Isabella Montgomery as the person to find. Decision (1 point): "Has she been into the occult?" gives +1; "You could be mistaken... Are you sure?" gives 0. Laura hands you the Letter of Assurance and sends you to Toronto.