CHAPTER 2
Toronto hotel: lobby and room key
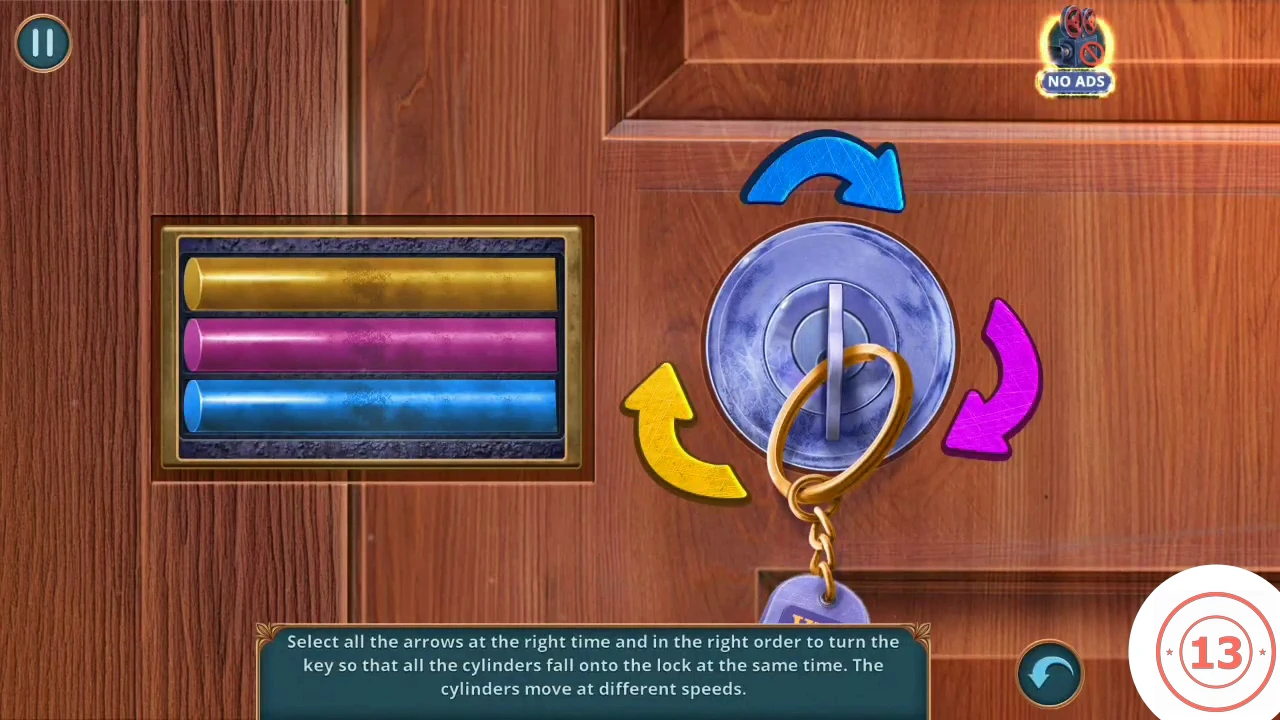
The clerk gives you a room, but your suitcase has gone astray. The room door has a timing lock.
- Talk to the clerk and give her the stack of banknotes and your Passport. She hands you the Room Key.
- Lost Heirloom: click the purple flower sprig on the red sofa seat, beside the teal cushion.
- Open the Security Office door. Gabriel notes that the key is stuck in the keyhole and needs pushing through. Take the first gold Numbers piece near the door.
- Open the computer on the reception desk. It has no power: "All I need is a working computer and some information!" Take the Clock Hands from the desk.
- Use the Room Key on the door at the back of the lobby.
- Three colored cylinders slide at different speeds, and they must all land at the same moment. Each colored arrow around the key releases the cylinder of that color. Press the arrow for the slowest cylinder first, then the others as the remaining lengths even out. If they do not land together, wait for the reset and retry. When all three drop, the door opens.
CHAPTER 2
Hotel room: chest drawer, clock and wrong suitcase
The bedroom holds the drawer, the clock and a suitcase that turns out to belong to someone else.
- Overlooked Trinket: click the pink doll on the blue armchair on the left of the room.
- Open the green chest on the bedroom cabinet. The drawer below has no handle: "Maybe I can use something soft but strong to pull it open?" Use Isabella's Scarf, the pink cloth from the Manuscript, on the drawer. The Clock Weight is stuck in the gap, so grab it with the purple drawing compass.
- Use the compass again on the small pouch in the drawer. Take the second Numbers piece. Pocket Watches are in this close-up (running count 30 of 70).
- Open the balcony. "These wasps won't let me near." You will need to drive them off later.
- Open the tall clock and hang the Clock Weight. The base drawer opens. Take the Magnifying Lenses Set. "That shard looks sharp", so use Isabella's Scarf on it to take the Vase Shard safely.
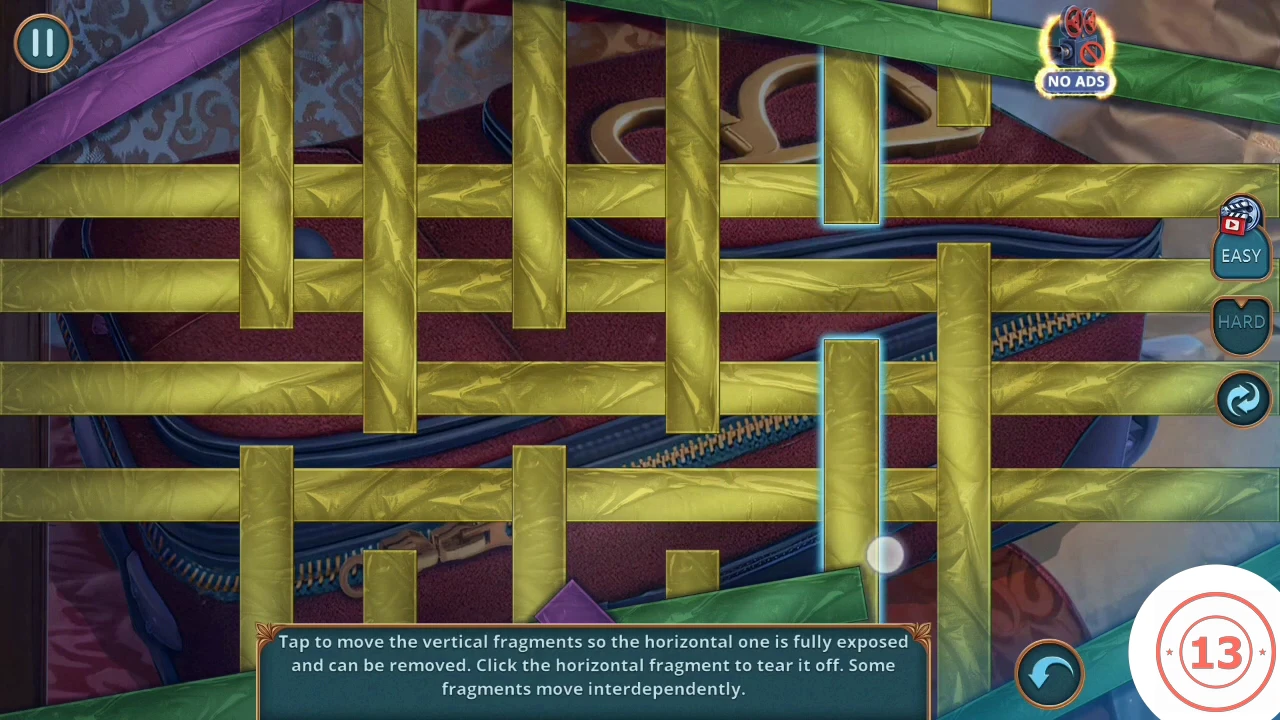
- Open the suitcase on the bed. Take the Newspaper from its top and use the Vase Shard on the straps.
- Move the vertical strips by clicking them. Some strips move together. When a horizontal strap is uncovered along its whole length, click it to tear it away. There are five horizontal straps, so clear them from the bottom or top one at a time. Starts can vary, so this guide gives the method rather than a move list: aim to open one complete row at a time. Once all five straps are gone you can look inside.
- Look inside. "That's not my suitcase! Great, now I need to look for it." Take the Family Photo and the thin rod from the suitcase.
CHAPTER 2
Lobby: security door, tea set and the sign
You have the tools to open the security office and finish the set of Numbers.
- Slide the Newspaper under the Security Office door, then push the key through the keyhole with the thin rod. Pull the Newspaper back with the key on it.
- Open the tea set on the side table. Take the last Numbers piece. "Red and blue... That reminds me of something."
- Open the framed picture and the plaque by the lobby's left wall. Fit the Numbers to the plaque so it reads "The hotel was founded in 1832." A niche opens; take the Screw and the second Clock Hands.
CHAPTER 2
Hotel room: the clock dial
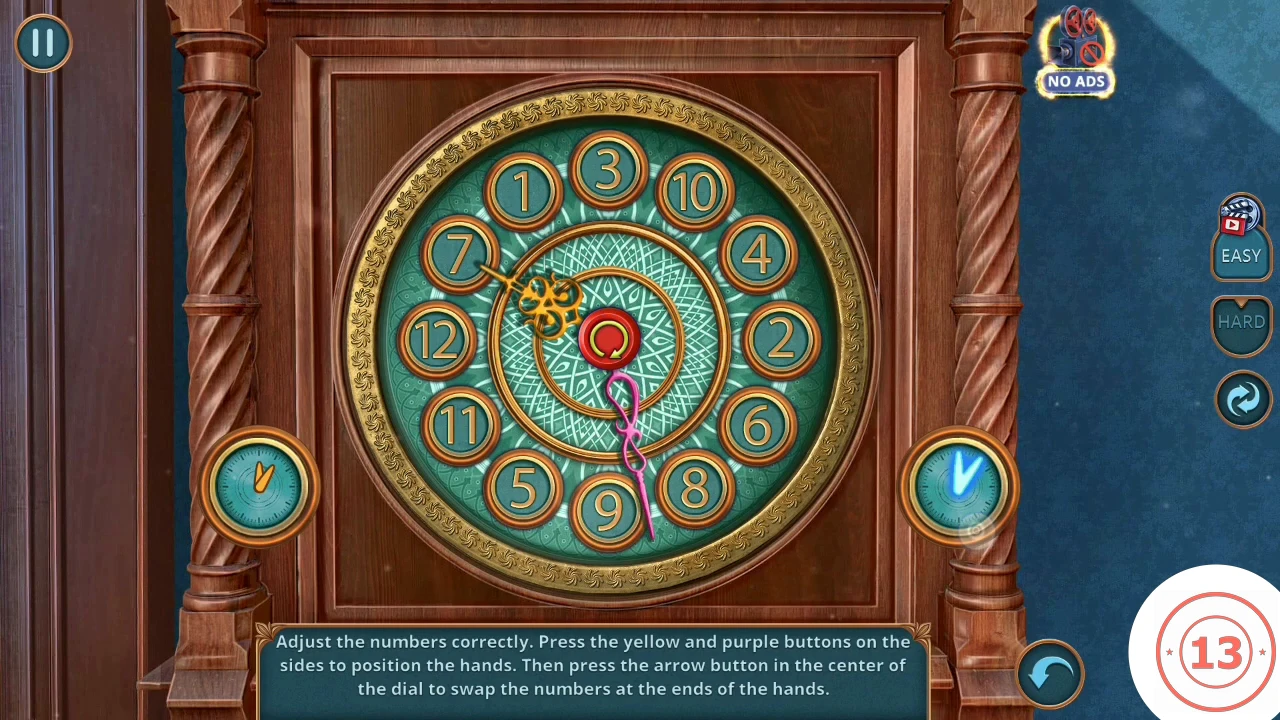
The dial's numbers are shuffled. Restore a normal clock face by swapping numbers with the two hands.
- Open the tall clock and fit the Clock Hands.
- The yellow and purple side buttons move the two hands. The arrow button in the center swaps the numbers at the ends of the hands. Point one hand at a misplaced number and the other at the position it belongs in, then swap. Correct numbers glow green. The target is an ordinary clock face: 12 at the top, 3 on the right, 6 at the bottom, 9 on the left. Starts can vary, so fix one number at a time.CODENormal clock face: 12 top, 3 right, 6 bottom, 9 left
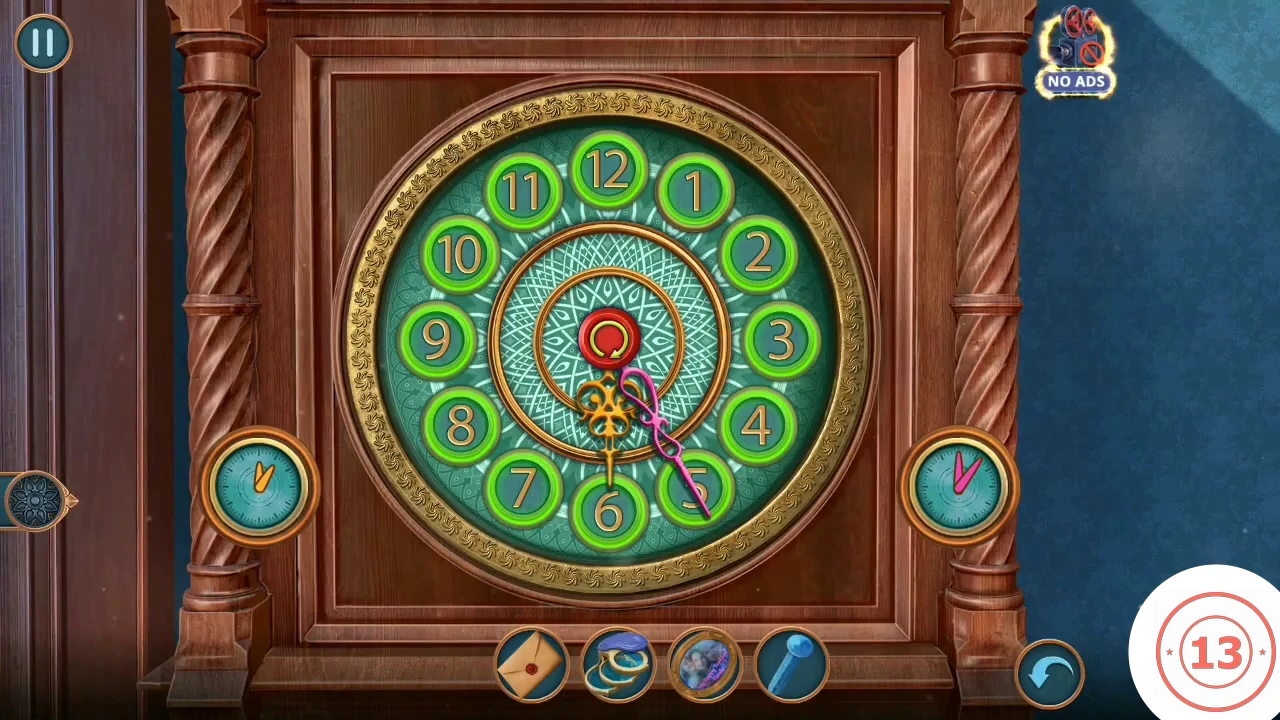
The target: an ordinary clock face with every number glowing green. - Use the Essential Oil on the lamp on the balcony.
- Close any advertising pop-up with its X. Take the Extension Cord from the balcony wall.
CHAPTER 2
Reception computer: suitcases and owners
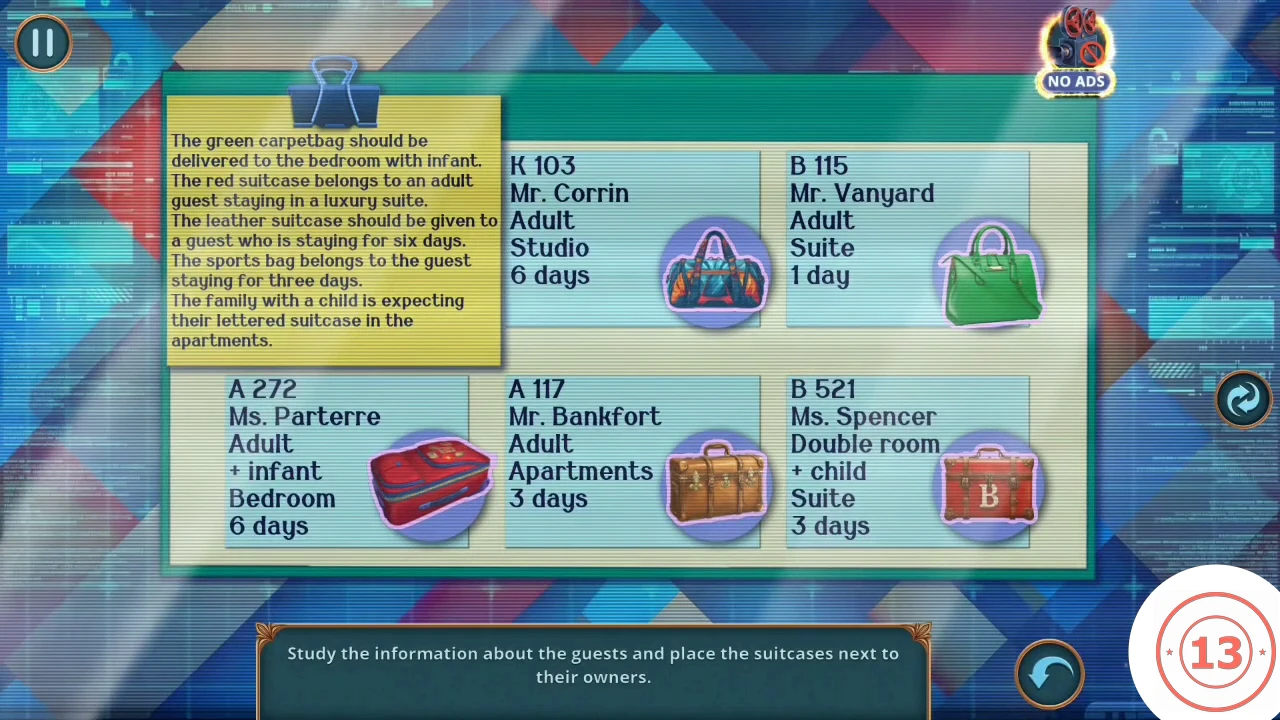
Give the computer power, feed it the Family Photo and match each suitcase to its guest.
- Open the reception computer and plug in the Extension Cord. "What should I try next?" Put the Family Photo on the desk.
- Place the suitcases by these clues. Green carpetbag goes to the guest in a bedroom with an infant. Red suitcase goes to the adult in a luxury suite. Leather suitcase goes to the adult staying six days. Lettered suitcase goes to the guest in the apartments, Mr. Bankfort. Sports bag goes to the other three-day guest, Ms. Spencer. The note's last line also mentions a family with a child, but the game accepts the lettered suitcase with Mr. Bankfort. You receive the Room Number Printout.CODECorrin: leather; Vanyard: red; Parterre: green; Bankfort: lettered; Spencer: sports bag
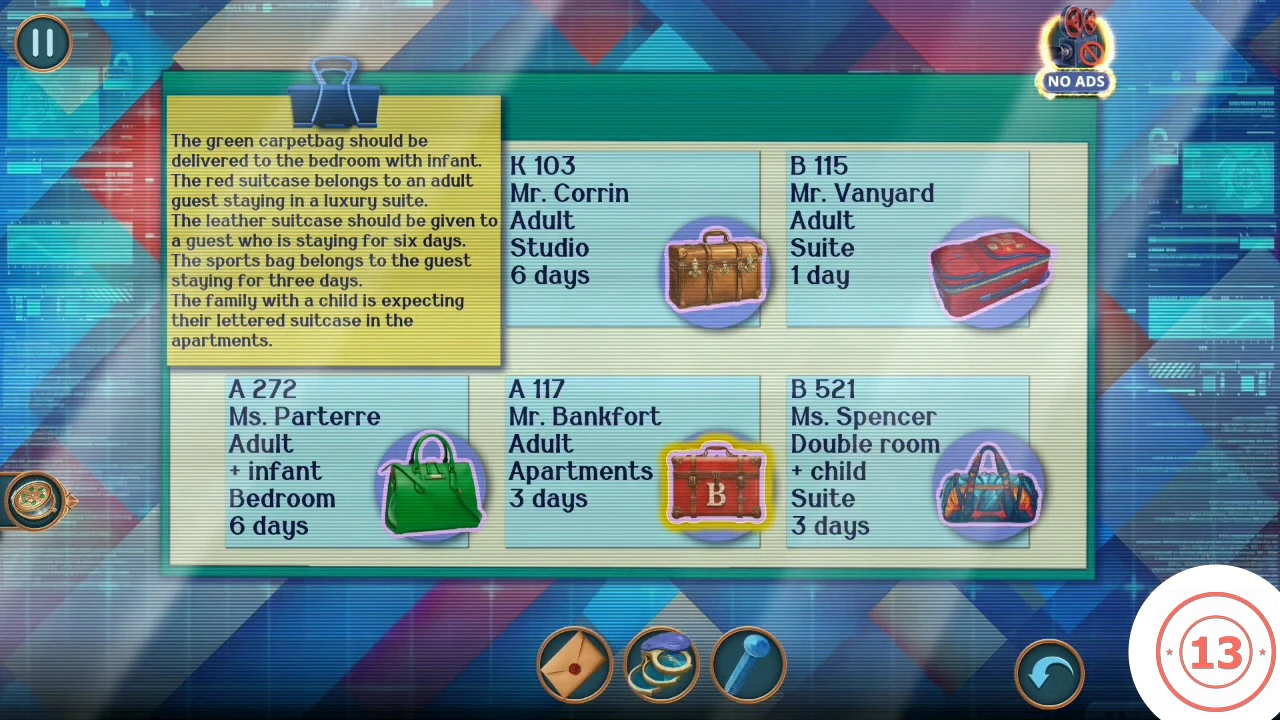
The accepted answer. The screen closes as soon as all five are right. - Use the Printout on the corridor door to knock. Decision (1 point): "The Montgomery family probably knows best what to believe in." gives +1; "Okay..." gives 0. The man gives you your suitcase.
- Open the Suitcase in your inventory and take the Occult Book.
- Open the Occult Book and add the Magnifying Lenses Set. "There might be something hidden on these pages... If only I had a way to reveal it."
CHAPTER 2
Lobby: the etching of the hotel
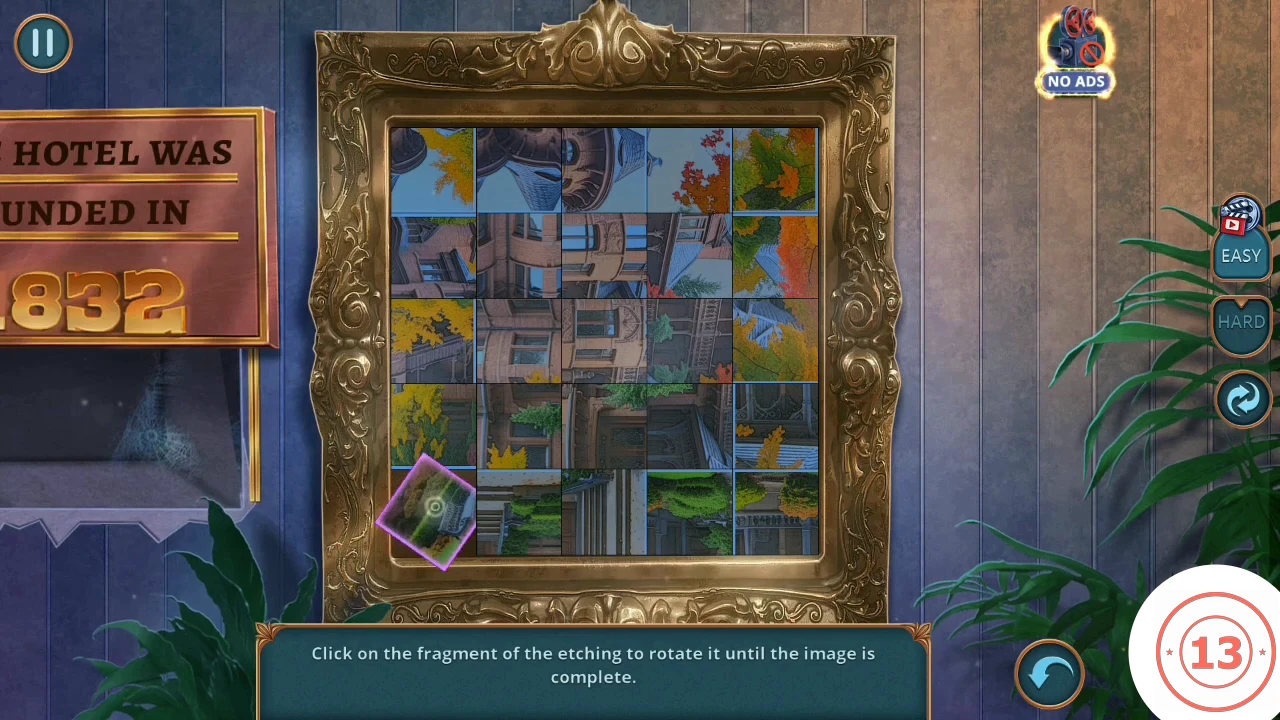
Sixteen square fragments are each rotated out of true. Click until the building lines up.
- Open the plaque and the etching on the lobby wall.
- Click a fragment to rotate it. Start with the building's roofline and the steps, then the leaves at the edges. Starts can vary, but the target is always the whole hotel picture. When it completes, take the Teacup.
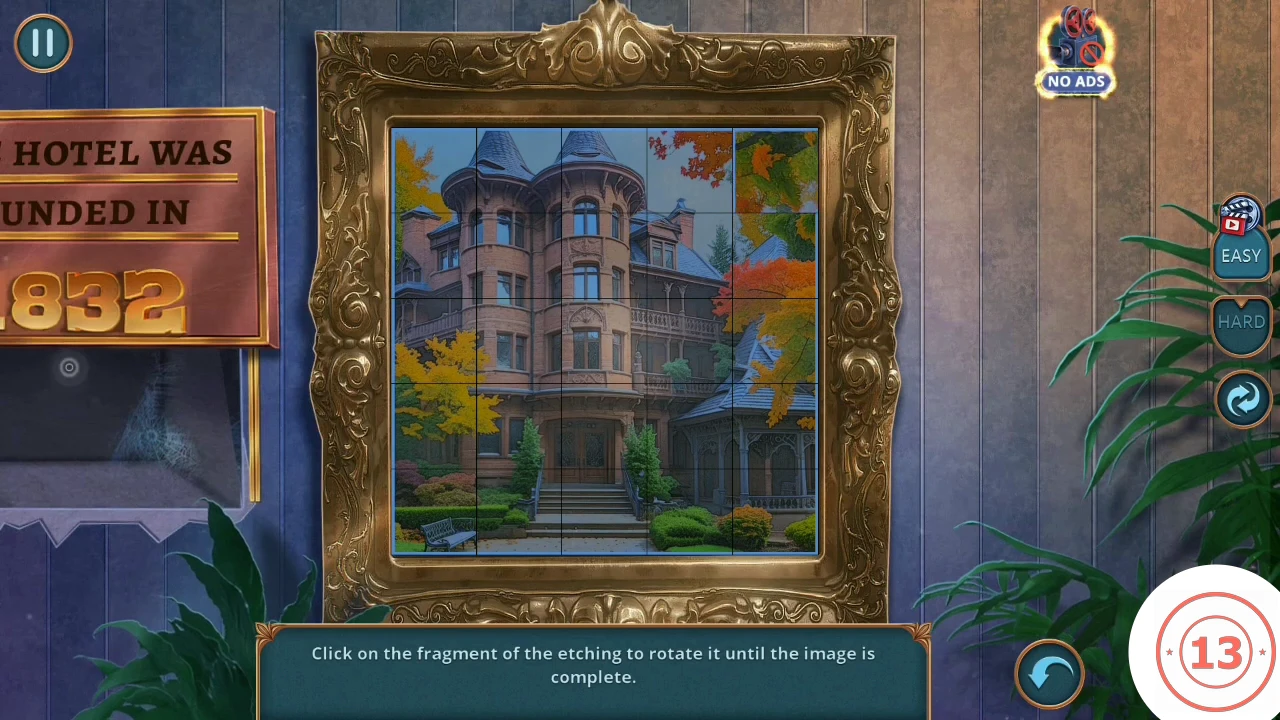
The target picture of the hotel. - Open the tea set and add the Teacup. Lift the tray and take the Bell and Matches from the hidden compartment. Pocket Watches are found here too (running count 32 of 70).
- Open the green chest and put the Bell on it. Take the Revealing Ointment from the opened lid.
CHAPTER 2
The Occult Book: the arrow path
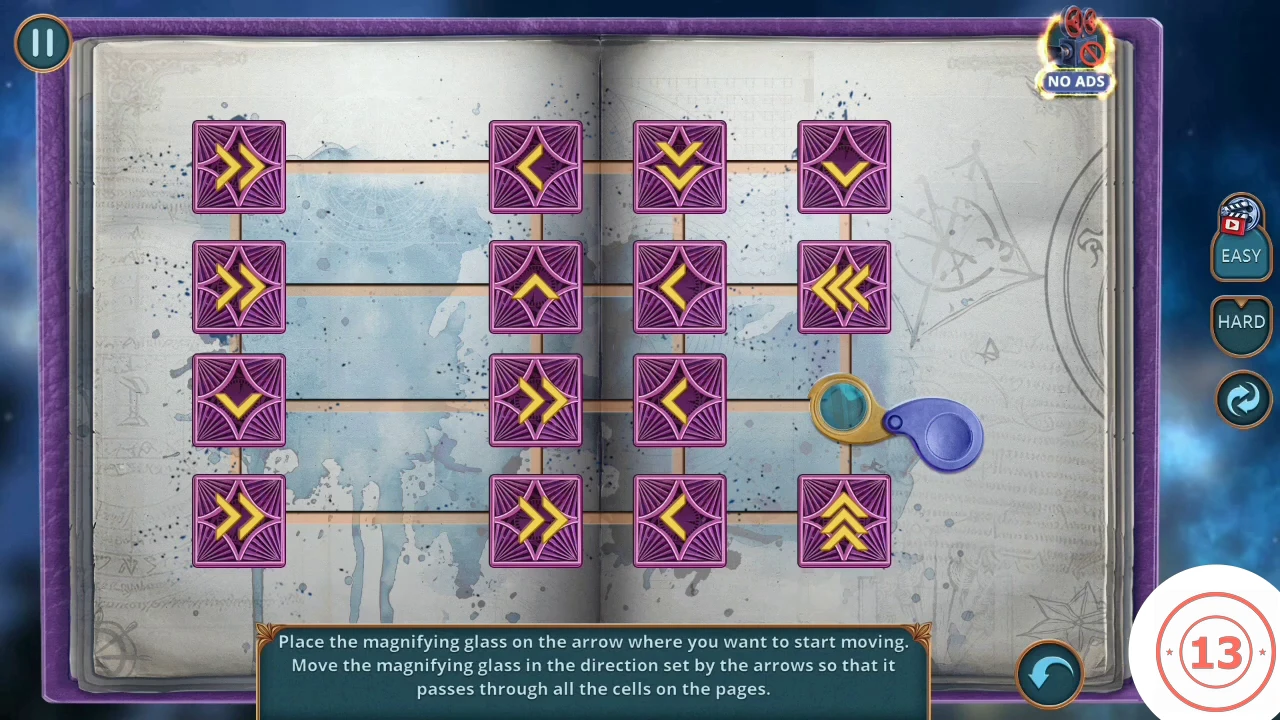
The ointment reveals a grid of arrows. The number of arrowheads tells you how many cells to move.
- Open the Occult Book and rub the Revealing Ointment across both pages.
- Click the arrow where you want to start, then click each next arrow in the direction it points. The number of arrowheads is the number of cells you move. Number the rows 1 to 4 from the top and the columns 1 to 4 from the left. A working order is R3C1, R4C1, R4C3, R4C2, R4C4, R1C4, R2C4, R2C1, R2C3, R2C2, R1C2, R1C1, R1C3, R3C3, R3C2, ending at R3C4.CODER3C1 R4C1 R4C3 R4C2 R4C4 R1C4 R2C4 R2C1 R2C3 R2C2 R1C2 R1C1 R1C3 R3C3 R3C2 R3C4
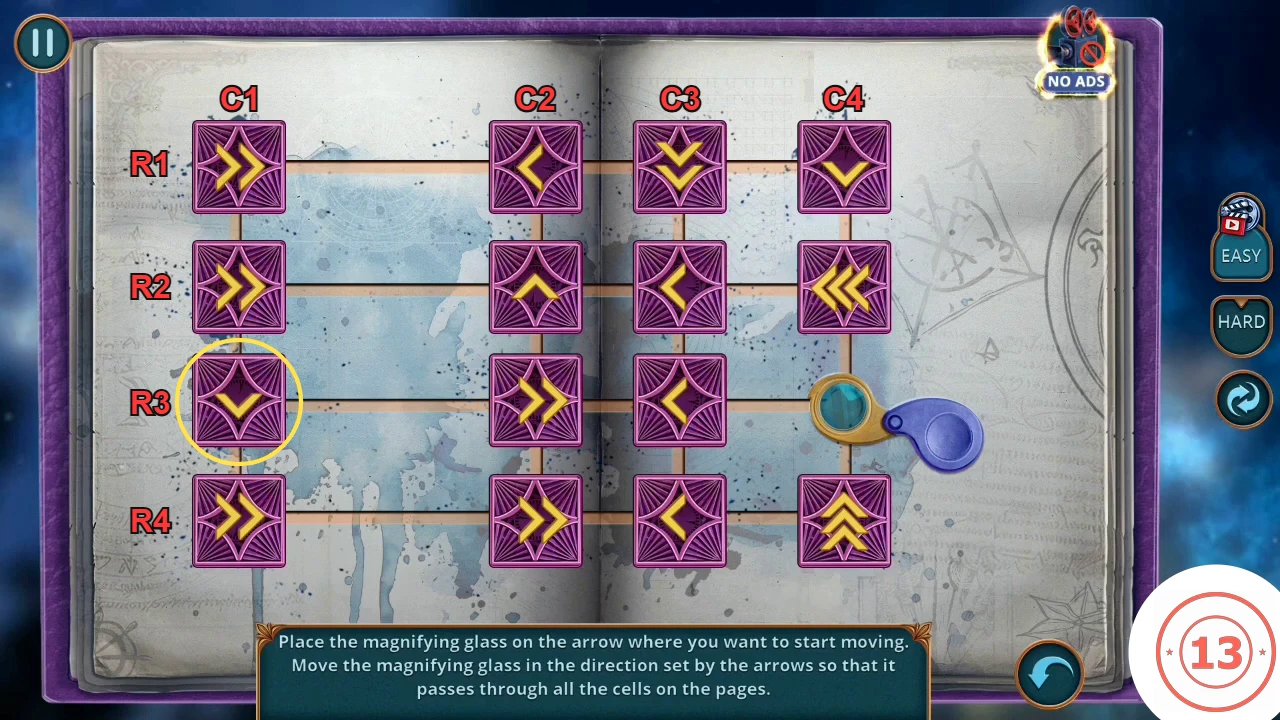
Row and column labels for the order above. The yellow circle marks the first tile, R3C1. - Laura calls: "Isabella... She's... dead!" Decision (up to 4 points): "Say nothing" gives 0, "Cheer her up" gives +2, "Comfort her" gives +4. She begs you to go to Isabella's house and you travel there.