Lizz's Apartment
Search the apartment to find out Lizz's plans (objective "Find out Lizz's plans").
- Collectibles: a faint animal at top right and one on the sofa blanket; morphing objects are the radio on the shelf and the scarf on the chair (Collector's Edition positions).
- Zoom into the flashlight on the bed and take the first tassel. The flashlight needs a lens and two batteries ("I need two working batteries here.").
- Note the two lanterns on the wall under the sign "Balance in All Things"; they need three tassels.
- Zoom into the laptop desk and take the aroma diffuser. Place it in the gap on the diffuser stand on the central table.
The Aroma Diffusers
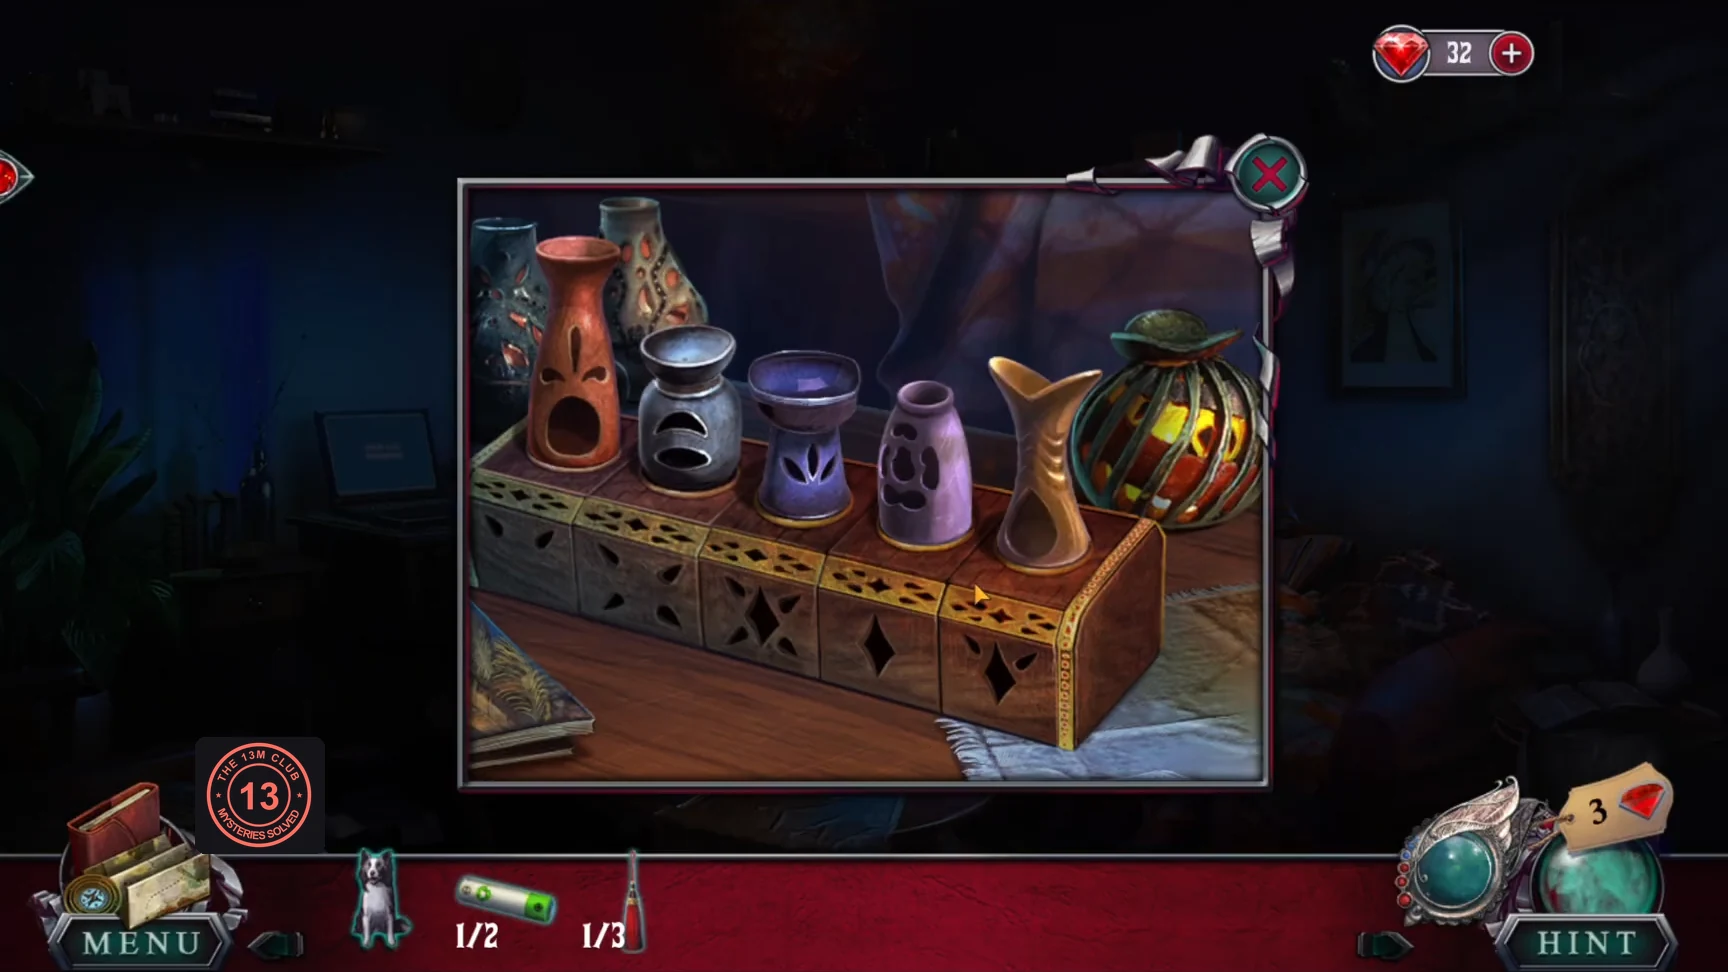
Five diffusers stand on a box with cut-out patterns. Each pattern below a diffuser shows how many holes the diffuser above it must have. Click two diffusers to swap them.
- Arrange them from left to right: grey (two crescent holes), orange (mouth and two slits), lilac (spotted), tan vase (one slot), blue bowl diffuser (leaf cut-outs).
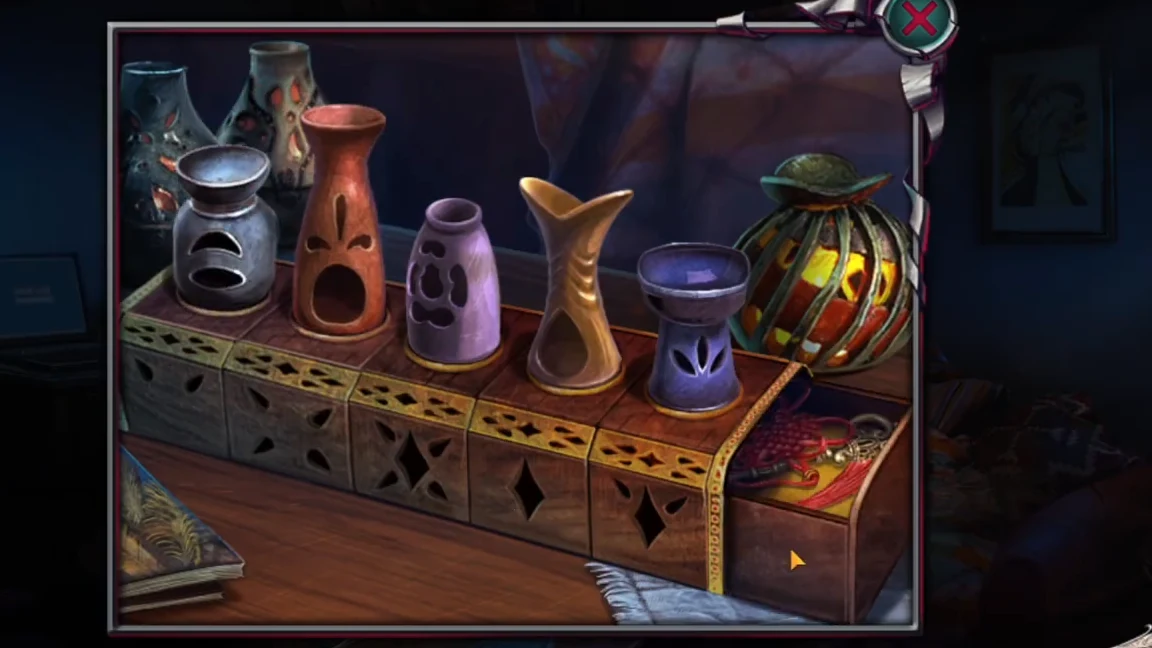
Solved order, left to right: grey, orange, lilac, tan, blue. The drawer opens. - The drawer at the right end opens. Take the diary key and the second tassel.
Lizz's Diary (Part 1)
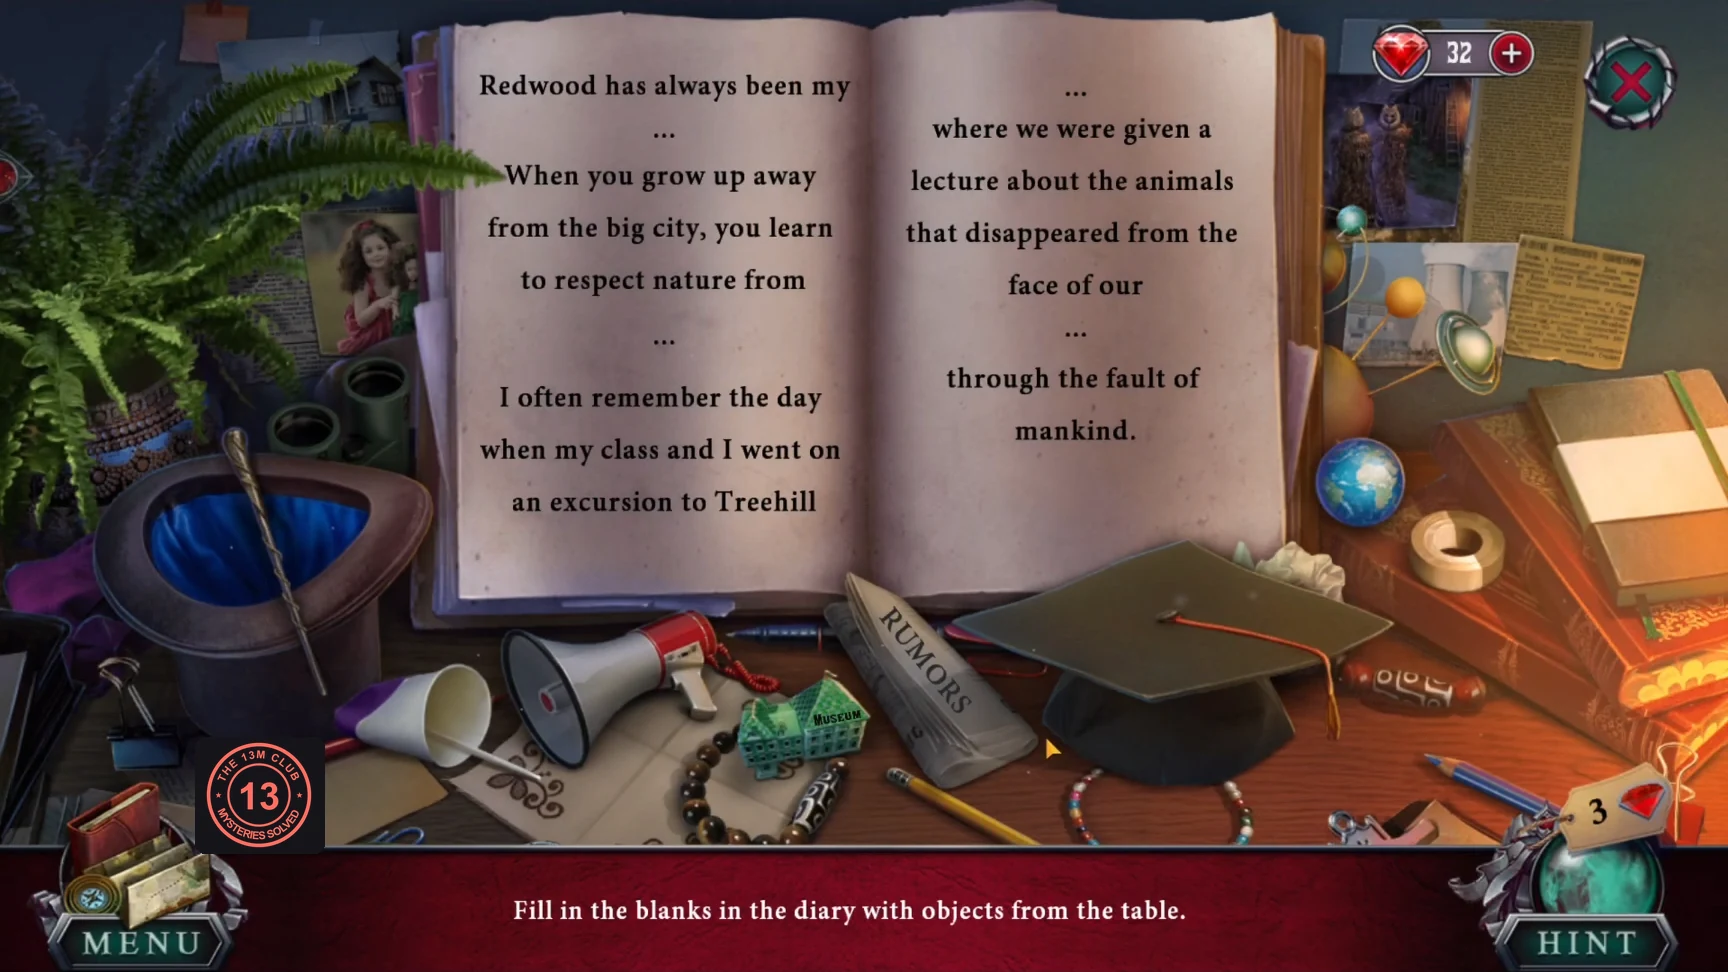
"Fill in the blanks in the diary with objects from the table." Each blank in Lizz's text needs the object from the desk that completes the sentence.
- Zoom into the diary on the left desk. Take the third tassel hanging from its clasp, then open the diary with the diary key.
- Page 1: drag the photo of the house (pinned top left) to "home", the photo of the little girl (left) to "childhood", the green Museum model to "museum" and the globe to "planet".
- Page 2: the graduation cap gives "studying", the megaphone "guide", the factory photo pinned at top right "plant" and the plastic cup "littering".
- Page 3: the RUMORS newspaper gives "rumors", the photo of the hooded figures (top right) "Children of the Forest", the binoculars behind the top hat "spy" and the magician's top hat "magic".
- Take the bookmark with the password: 3871.CODE3871
Lizz's Laptop
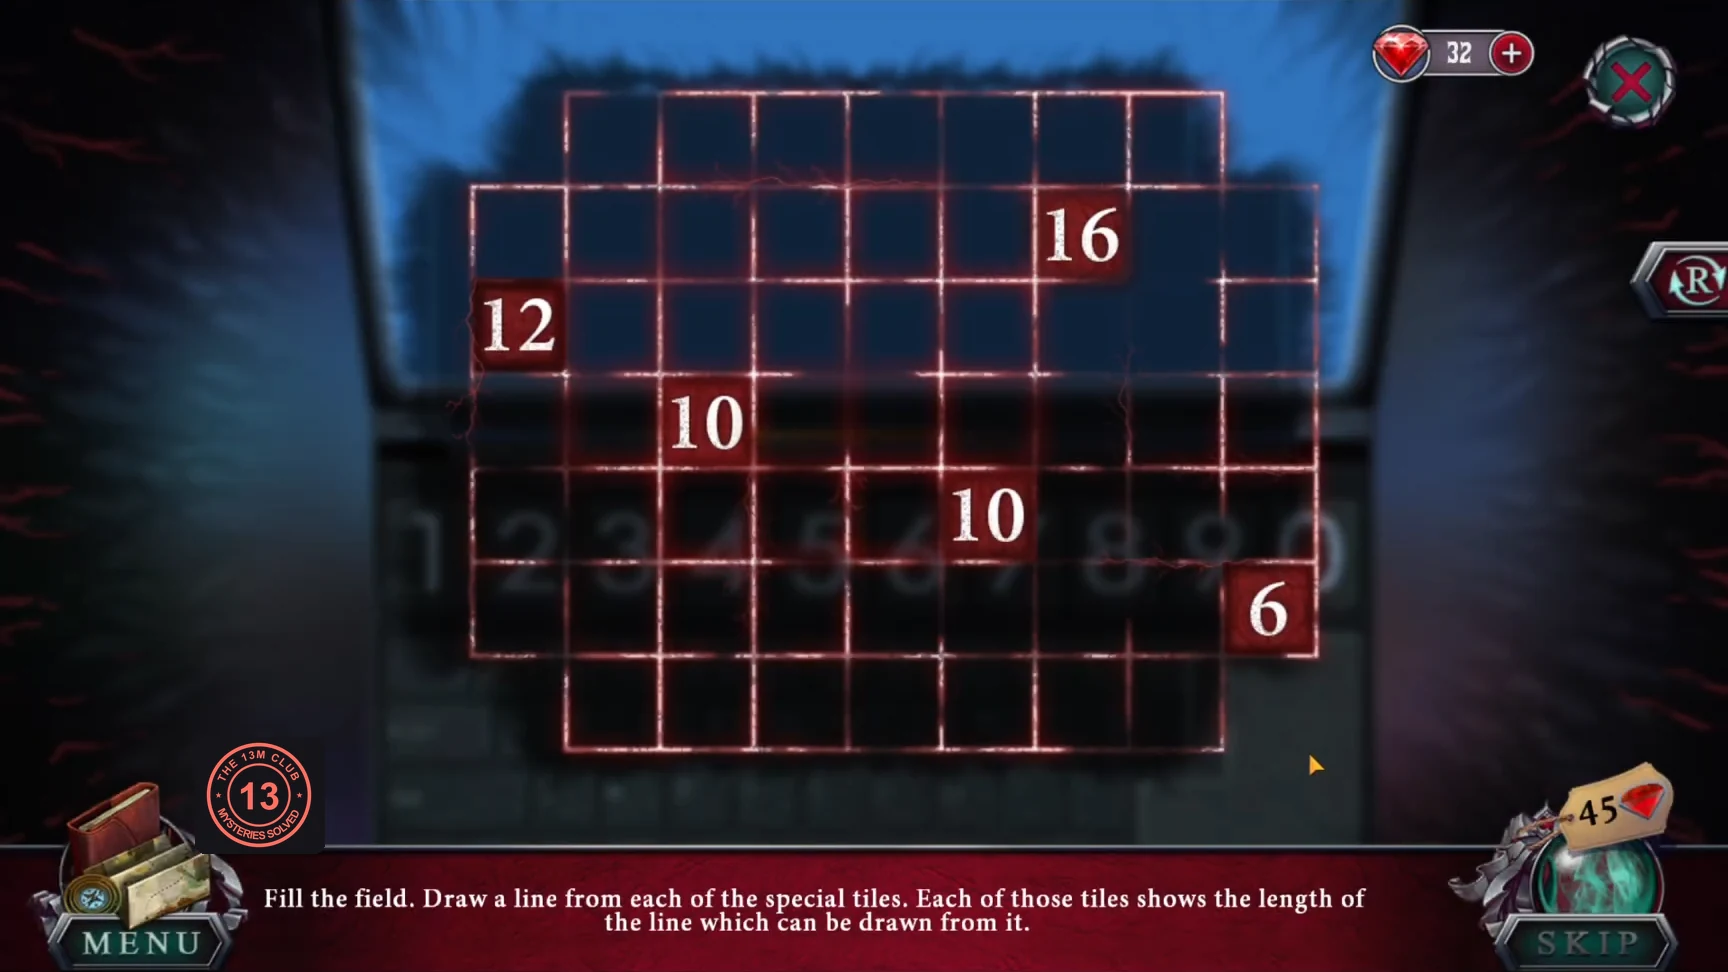
Place the bookmark on the keyboard and enter 3871. A line puzzle appears: "Fill the field. Draw a line from each of the special tiles. Each of these tiles shows the length of the line which can be drawn from it."
- Enter the password 3871 on the laptop.CODE3871
- Grid reference: rows r0-r6 from the top; rows r0 and r6 have columns c1-c7, rows r1-r5 have columns c0-c8. Numbered tiles: 12 at r2c0, 16 at r1c6, 10 at r3c2, 10 at r4c5, 6 at r5c8.
- 12: r1c0 r1c1 r0c1 r0c2 r1c2 r1c3 r0c3 r0c4 r1c4 r1c5 r0c5 r0c6. 16: r2c6 r2c7 r3c7 r3c6 r4c6 r4c7 r5c7 r5c6 r5c5 r5c4 r5c3 r6c3 r6c4 r6c5 r6c6 r6c7.
- 10 (r3c2): r3c1 r3c0 r4c0 r5c0 r5c1 r4c1 r4c2 r5c2 r6c2 r6c1. 10 (r4c5): r3c5 r2c5 r2c4 r3c4 r4c4 r4c3 r3c3 r2c3 r2c2 r2c1. 6: r4c8 r3c8 r2c8 r1c8 r1c7 r0c7.
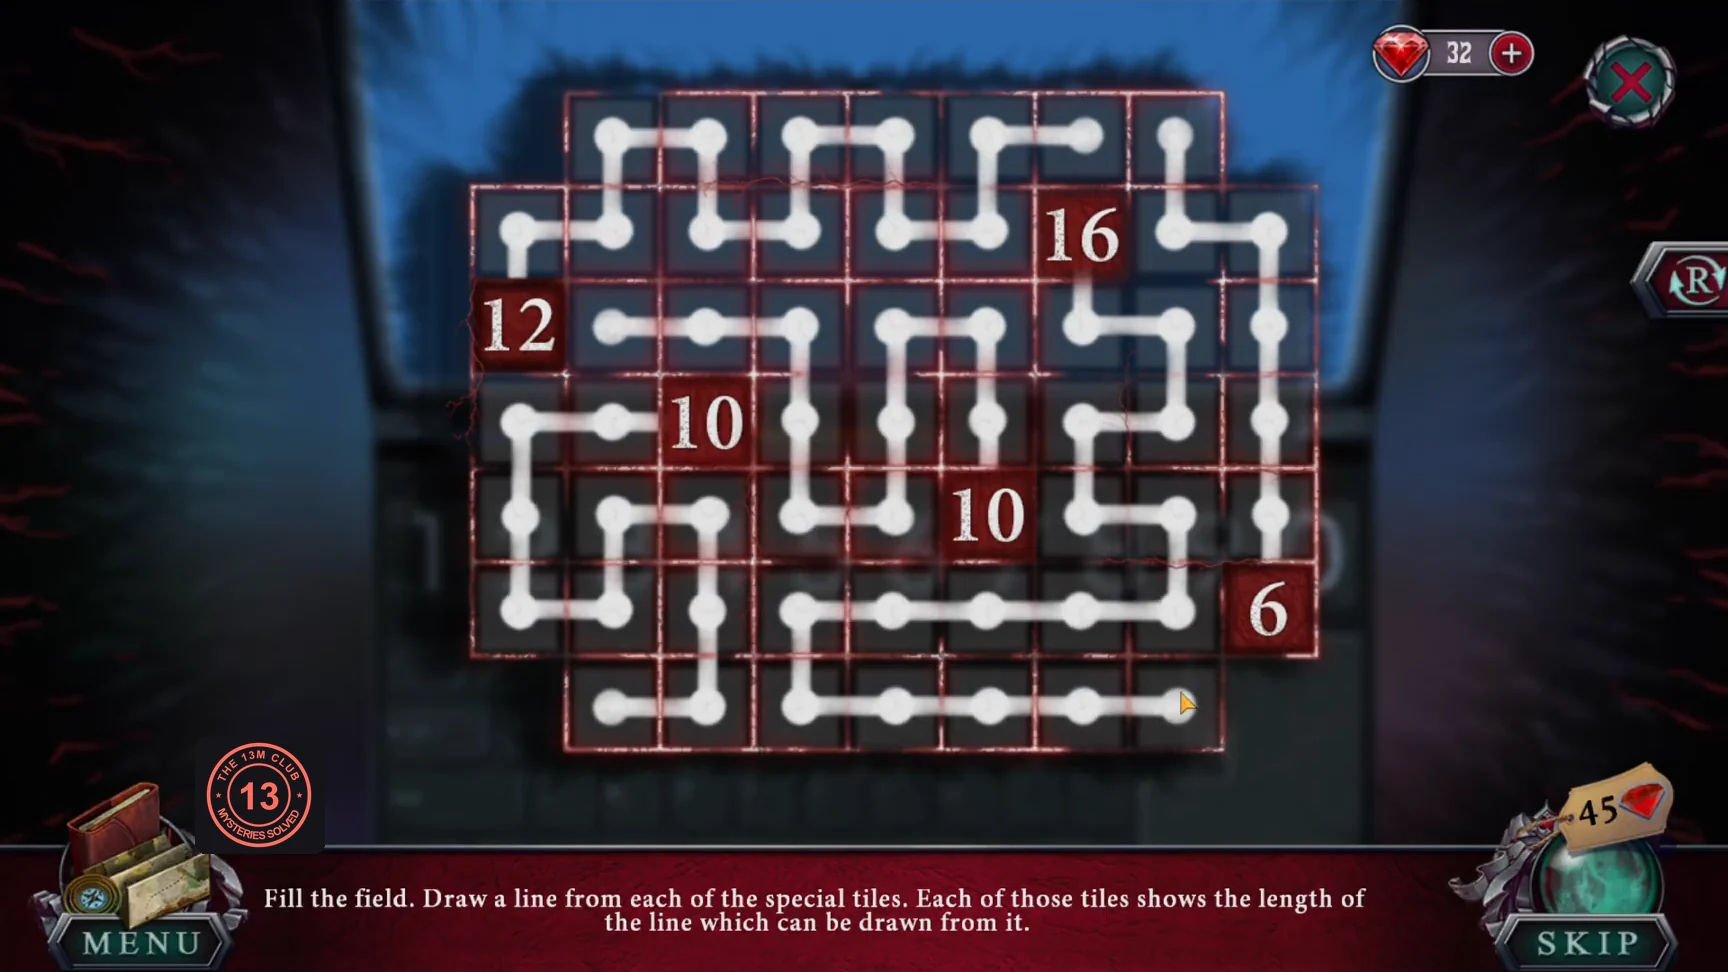
The completed field. - Read Lizz's message ("I will make the whole world green!"). Take the letter and the lens from the disk drive (objective "Finish reading Lizz's diary").
The Balance Lanterns
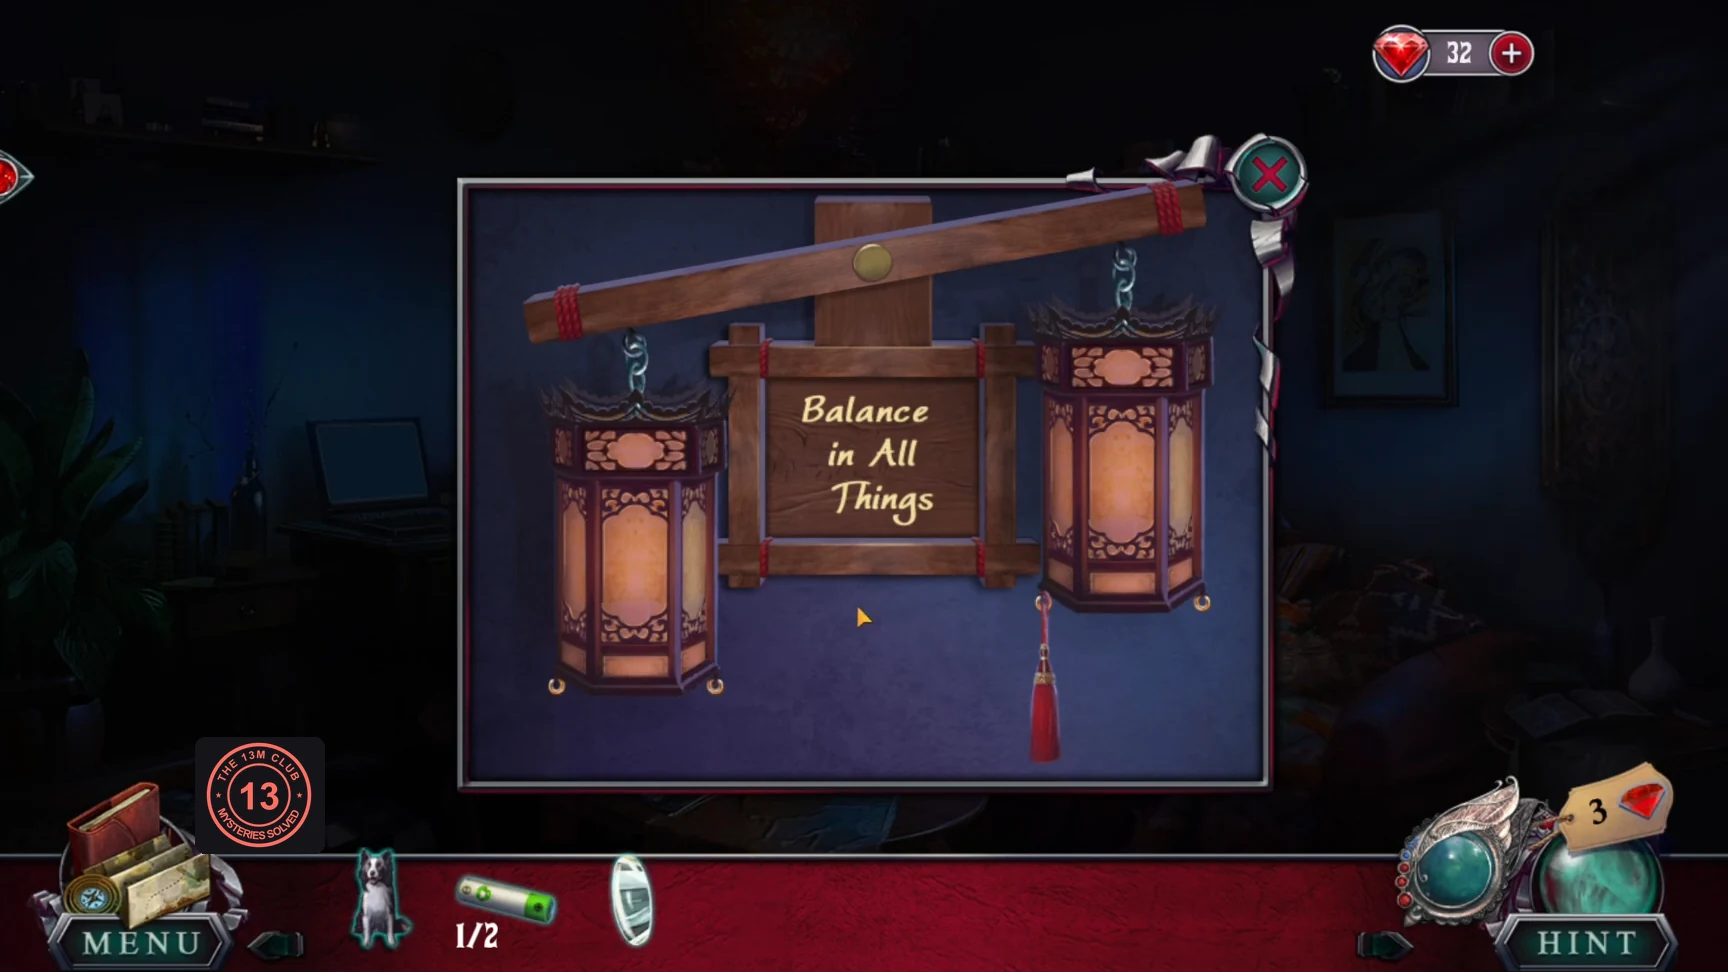
Two lanterns hang from a beam under the sign "Balance in All Things". Each lantern has two hooks.
- Zoom into the lanterns and hang the three tassels on the empty hooks. One tassel already hangs on the right lantern, so each lantern now has two.
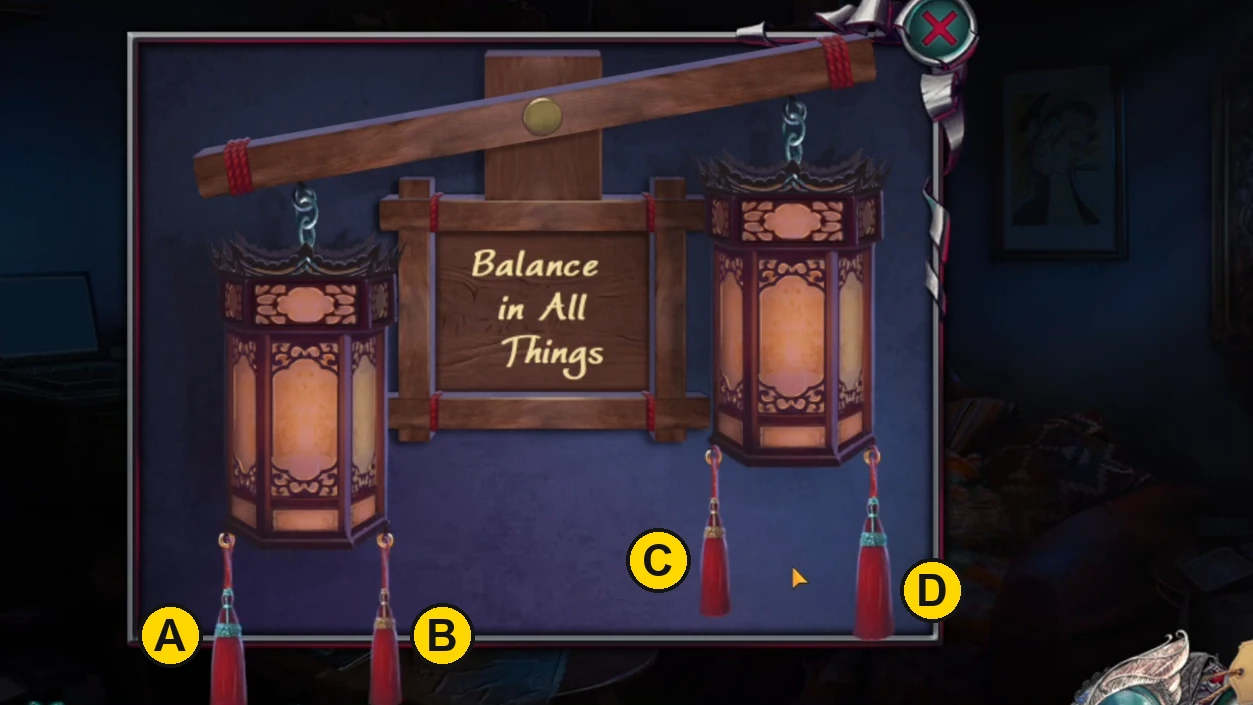
Tassels A to D after hanging all four. At the start the left end hangs one notch low. - Name the tassels from left to right: A and B hang under the left lantern (A on the outside), and C and D hang under the right lantern (D on the outside). Pulling a tassel tips the beam down towards its side: an outer tassel (A or D) moves it three notches, and an inner tassel (B or C) moves it two. The beam cannot tip further than three notches either way. After you hang the tassels, the beam starts one notch low on the left. Pull D (the beam tips steeply to the right) and then B. The beam is level and the puzzle is solved. Pulling A and then D also works from the untouched start. If extra clicks have confused the beam, pull A twice so that the left end drops as far as it can, then pull D once.
- The wall compartment opens. Take battery 2.
- Put the lens and both batteries into the flashlight on the bed and take it.
Lizz's Diary (Part 2)
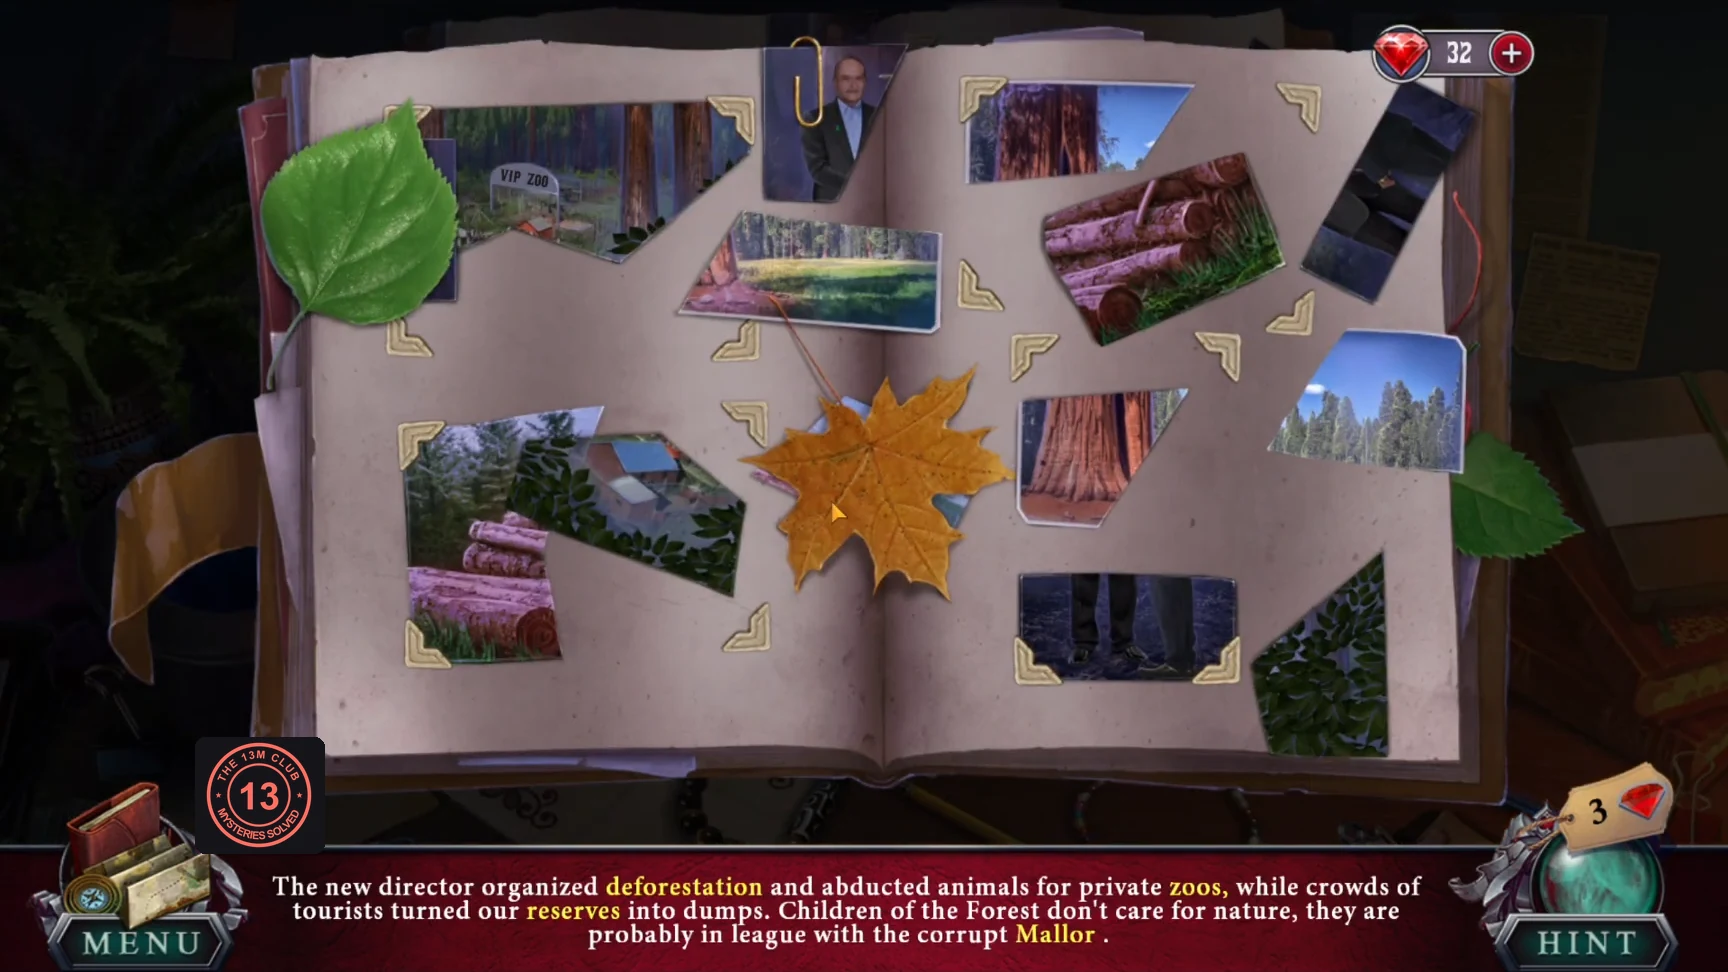
Use the flashlight on the diary to keep reading. Three spreads of torn photos must be reassembled.
- Light the diary with the flashlight.
- Drag the torn pieces into place to complete each photo. Remove paperclips to free pinned pieces and move leaves to uncover hidden pieces. Complete all three spreads.
- Take the picture with markings (a map with a tall tree circled).
- Leave the apartment. Outside, Tina and the sheriff are waiting. Show them the picture: "Of course, I know that place. It's Hyperion, the tallest tree on the planet." With the new objective "Get to Hyperion", ride with them to the tree.
The Foot of Hyperion
Lizz has turned the Keeper into a plant. The icy stairs lead up the tree.
- Collectibles (Collector's Edition positions): two animals, one faint at the top left and one by the stairs, and two morphing objects, a red object on the trunk near the information board and a megaphone at the bottom right. The free-to-play version has one animal on a branch by the information board and one morphing object on the trunk near the stairs.
- Take the rag from the lowest stair step.
- At the information board, put the rag on the broken glass and take the glass shard.
- At the Keeper on the left, send Gray to dig in the leaf pile and take the shovel handle.
- Cut the jammed bag in the Keeper's hands with the glass shard and pick up the pruning shears.
- Cut the vines at the foot of the stairs with the shears and take the shovel blade. Attach the handle to the blade in your inventory to make a shovel.
- Dig sand in front of the information board with the shovel.
- Spread the sand on the icy stairs. Amanda climbs to the broken bridge.
- Take the crowbar on the walkway. Go back down and pry a board off the information board.
- Lay the board over the bridge gap. Amanda climbs until vines block the stairs.
The Tangled Vines
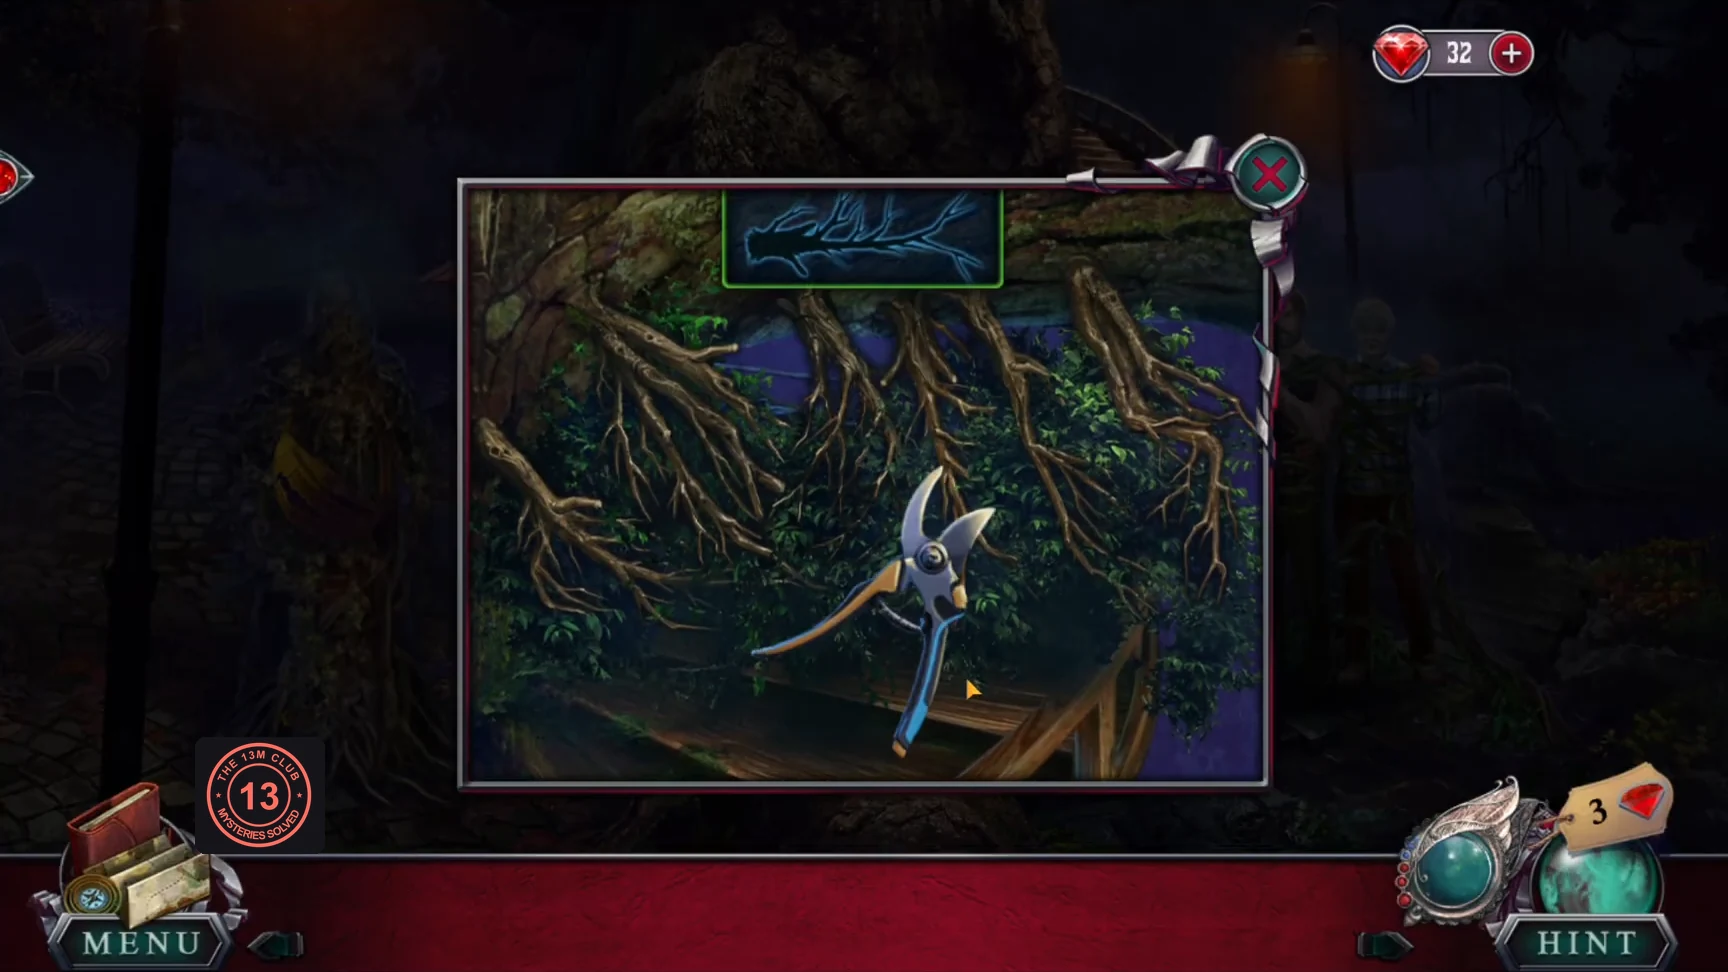
Use the shears on the vine tangle. A small green-framed picture at the top shows the silhouette of the vine to cut next.
- Find the vine matching the silhouette and cut it. The picture then shows the next vine. Repeat for all six vines.
Lizz's Vines
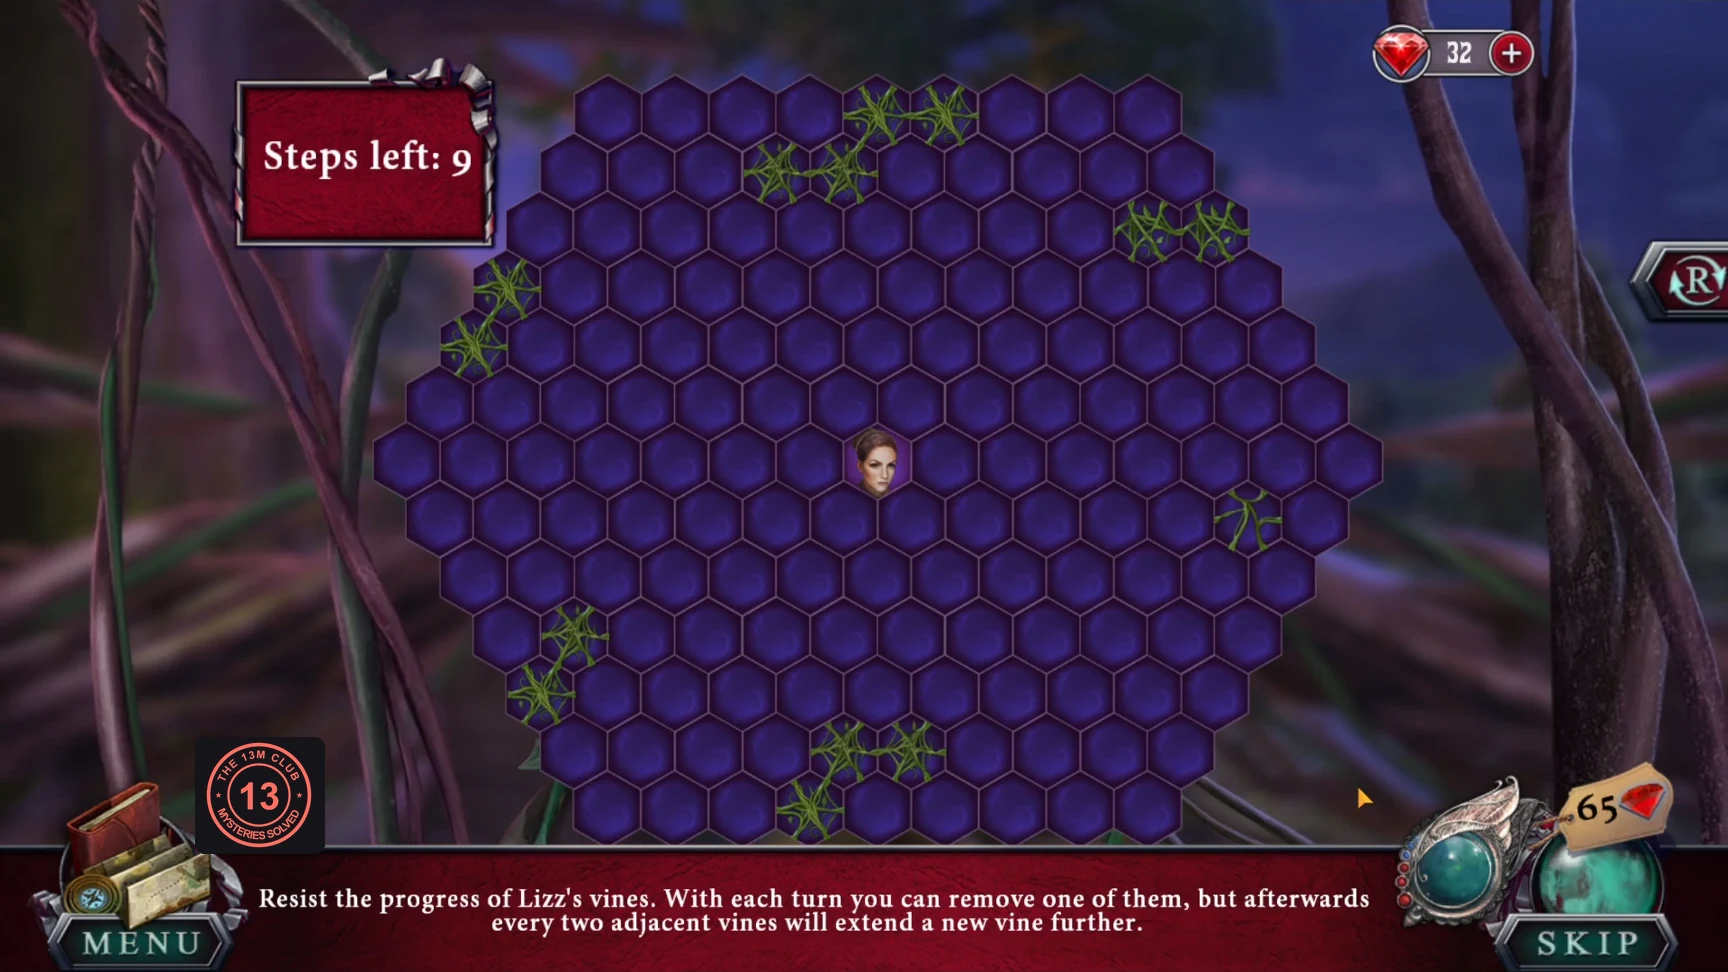
"Resist the progress of Lizz's vines. With each turn you can remove one of them, but afterwards every two adjacent vines will extend a new vine farther." The counter shows how many turns you still have to survive. It starts at 9 in the free-to-play version; the Collector's Edition is reported to start at 8.
- Collectibles on the peak (Collector's Edition positions): faint animals at the top and in the branches on the right; a string of lights on the trunk at bottom left and an object on the walkway.
- Talk to Lizz. She traps Amanda in the middle of a hex board.
- Each turn, click one vine to remove it; adjacent vine pairs then grow new vines. Start with the pair at the bottom, then always remove the vines that are about to reach the cells next to Amanda (in a successful run, the last turns cleared the cells directly above her). Win when the counter reaches 0 while Amanda's cell is still free. The R button at the right edge resets the board. This is a method rather than a fixed move list; an exact click for every turn is not documented here.
The Artifact
Lizz collapses after the vines fail.
- Click Lizz and take the two Artifact parts: "This might be my only chance to take the Artifact from her!"
- Open your own Artifact part at the bottom right of the screen and attach the two parts to reassemble the Artifact.
- Watch the epilogue: the transformed people return to normal, the culprits are punished, and Amanda becomes the new park director. Finishing the main game unlocks the Bonus Chapter.
Animals, Morphing Objects and Achievements
Scenes hide camouflaged animals and morphing objects. The store descriptions say that finding them unlocks special bonuses. In the Collector's Edition, Extras > Collections shows a forest scene whose five special animals come to life as your total of found animals (out of 52) grows, and its Play button starts a replayable hidden-object scene (see the next section). The Bonus Chapter is unlocked separately, by finishing the main game. The positions in each chapter follow the Collector's Edition; the free-to-play version places some of them differently, so trust the scene tracker if an item is not where described.
- Use the scene tracker on the left of the screen: "Animals to find here" (owl icon) and "Objects to find here" (flower icon). "There are no more animals here." / "There are no more objects here." confirms a scene is finished. Each chapter above lists the positions per scene.
- Click a morphing object to collect it: it flies to the flower icon and the object counter drops. Animals are camouflaged in the scenery, some only faintly visible; click one to send it to the owl icon.
- Achievements are earned during play; an "Achievement completed!" banner appears when you earn one. This guide does not list the individual achievements or their conditions.
The Collections Hidden-Object Scene
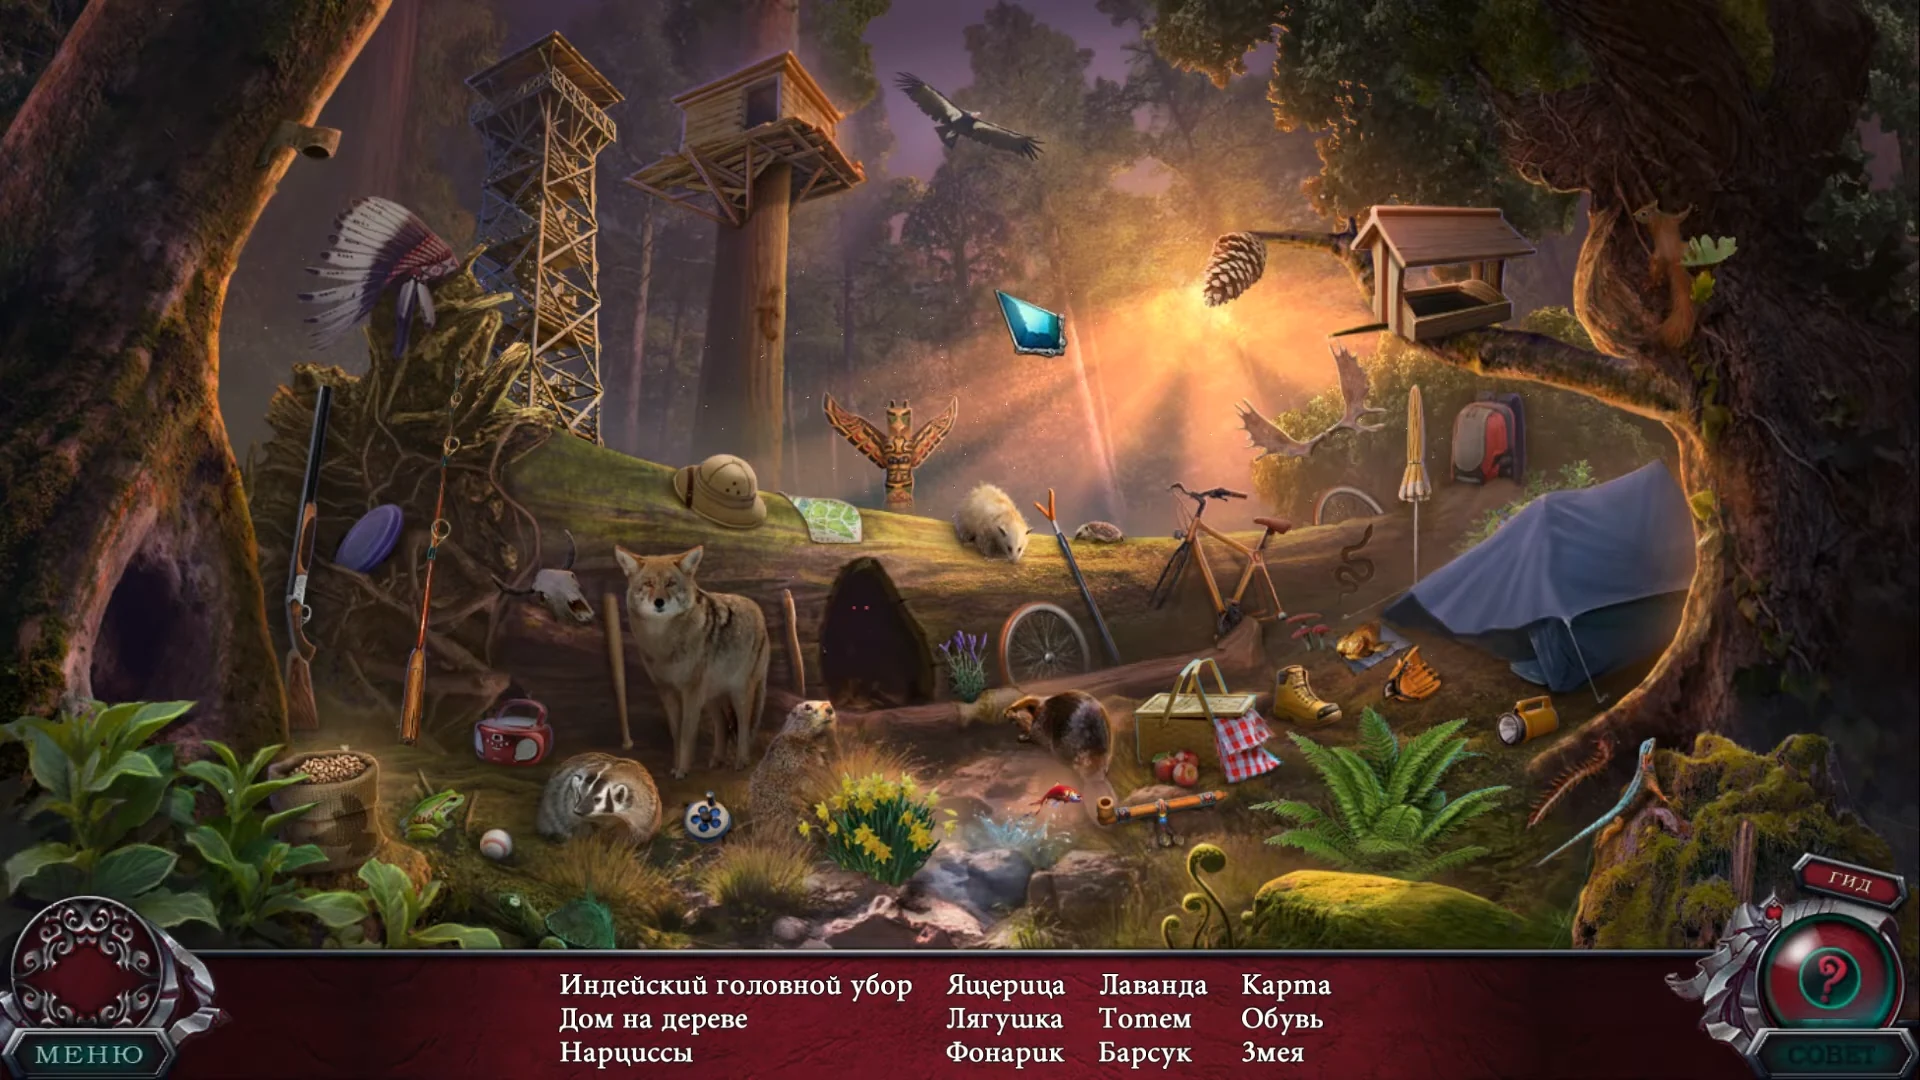
The Collector's Edition Collections page has its own replayable hidden-object scene: a sunlit forest clearing with a fire lookout tower, a treehouse, a fallen log with a den, and a camp with a blue tent. Each round gives a list of items at the bottom (12 in the example round below). When you finish, the game offers a new set of items, so your list will differ from the example below.
- From the main menu, open Extras and click Collections (the stack of books at the bottom right, next to Achievements).
- Collections shows five forest animals: an owl, a squirrel, a lynx, a deer and a porcupine. Each is a plant-covered sculpture until you have found enough hidden animals; point at one to see how many it needs (for example "Animals needed to unlock: 40"). While the animals are plant-covered, the badge at the top shows a counter out of 52 (00\52 in one locked view).
- When the animals have come to life, click PLAY at the top. In one recording the animals stayed plant-covered on the first visit, then came to life with PLAY showing after the page was closed and opened again; if that happens, reopen Collections.
- Find the listed items. Example round (wording and items vary): feathered headdress (on the root stump at upper left), treehouse (the hut on the tall trunk, top centre), totem (the carved winged totem on the fallen log), map (on the log beside the pith helmet), lavender (purple sprig beside the bicycle wheel), snake (dark snake right of the bicycle), boot (yellow hiking boot right of the picnic basket), flashlight (yellow, at the right in front of the tent), lizard (blue, on the mossy stump at lower right), badger (on the ground below and left of the coyote), frog (green, at lower left beside the sack of nuts), daffodils (yellow flowers at bottom centre).
- Because the list changes, sweep the scene in zones: the root stump and gear at the left (shotgun, fishing rod, purple frisbee, animal skull, baseball bat), the fallen log and its den in the centre, the camp at the right (tent, bicycle, red backpack, closed umbrella, baseball glove, picnic basket), the stream and plants along the bottom, and the treetops (large bird, bird feeder, pine cone, squirrel). Small animals and items are often half-hidden in leaves. If you are stuck, use the hint button at the bottom right; it needs to recharge after each use.
- After the last item, the game asks whether you want to play with another set of items. Choose Yes for a new round with a different list, or No to return to Extras.