Tina's Study
"The house is empty... Maybe she left some kind of message."
- Collectibles (Collector's Edition): an animal near the ceiling at top right, a figure on the left wall shelf, an object on the vase shelf and a book or box on the round table.
- Take the glue from the desk shelf.
- Open the book on the desk (Tina and the Keeper studied the Order's history) and take the tweezers from the back-cover pocket.
- Open the desk drawer and take the eagle badge.
- At the ship in a bottle, click the small knife beside it to cut the cork. Use the tweezers to take the chest token, then take the framed newspaper story "Local Woman Rescues Tourists".
- Put the eagle badge in the empty bottom slot of the glass cabinet. Take the owl wing from the lower shelf (the stone mould behind it is used later).
- Put the wing on the owl carving on the desk shelf and take Tina's notes. A box with coloured sockets slides out of the desk.
- Place the chest token on the trunk lid below the bottle.
The Trunk Cubes
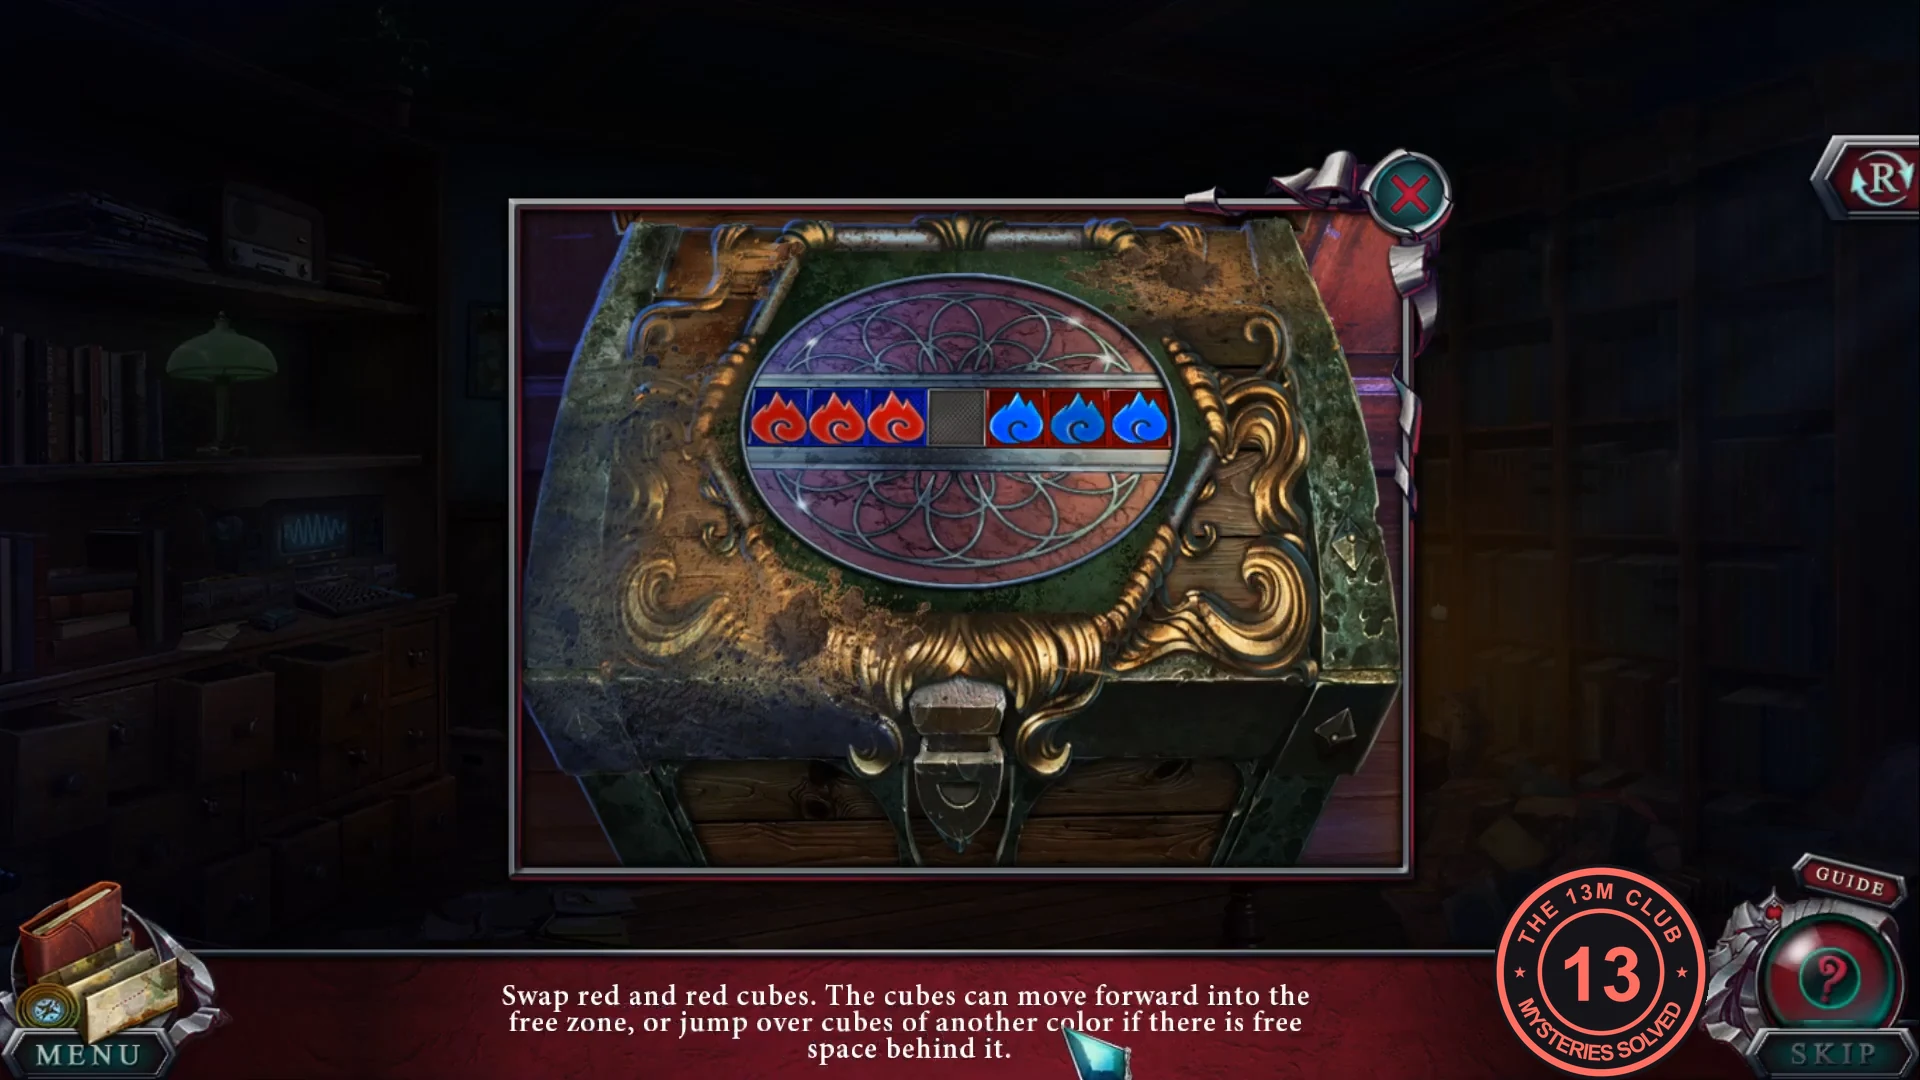
Seven slots, labelled A-G from left to right, start as red, red, red, empty, blue, blue, blue. A cube moves forward into the free slot or jumps over one cube of the other colour into the free slot behind it. Goal: blue on the left, red on the right.
- Click the cubes in these slots: E, C, B, D, F, G, E, C, A, B, D, F, E, C, D.CODEE, C, B, D, F, G, E, C, A, B, D, F, E, C, D
- Take the cauldron, the smoke recipe and the whetstone. Click the coloured stones in the trunk to gather them.
- Put the coloured stones into their matching sockets in the desk box and take the clapper.
Tina's Notes
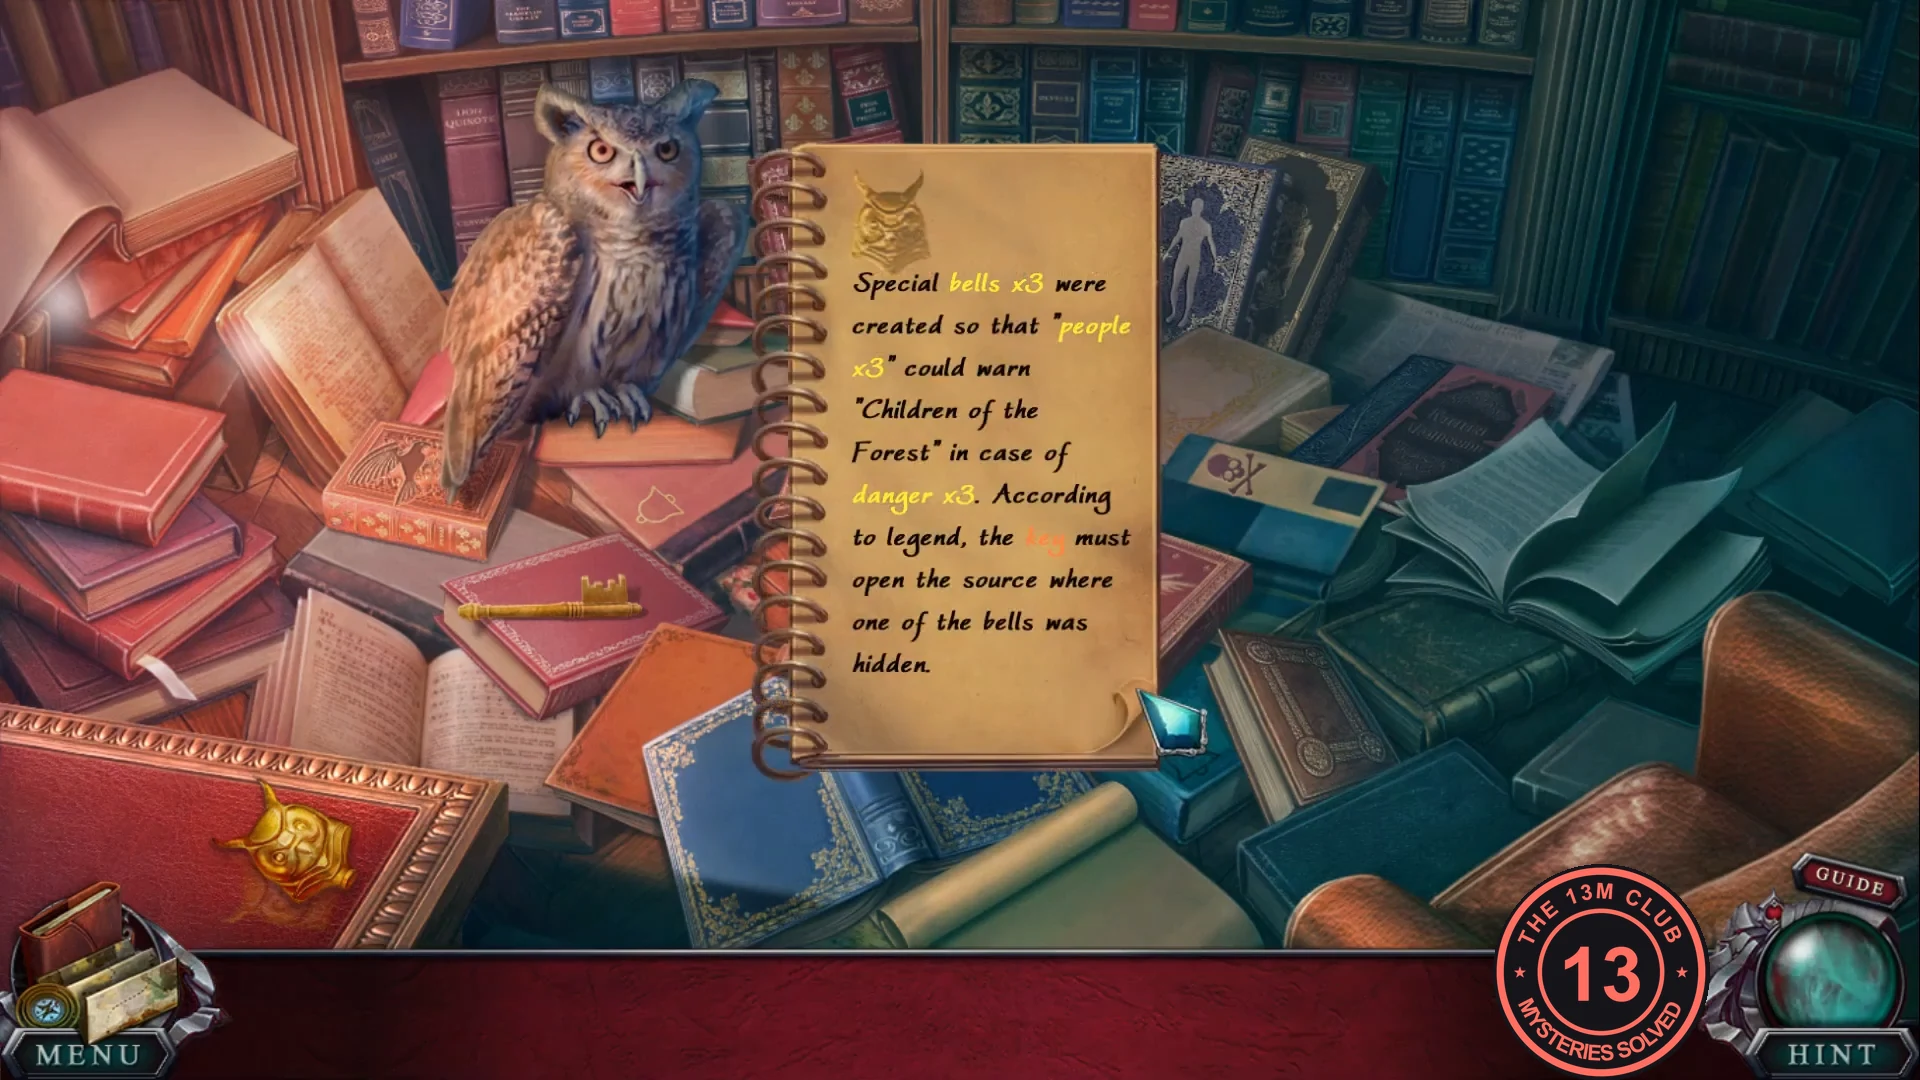
Place Tina's notes on the pile of books by the owl statue. Click objects that match the highlighted words in the notes. Some books open to reveal more objects.
- Place the notes on the book pile and click them.
- First text: find 3 bells, 3 people, 3 danger symbols and the key (orange word: join the two key halves in the pile, then click the key). The number after each highlighted word counts down as you find its items, so trust the counters in your own notes: a word is finished when it loses its highlight. Some pictures are inside the storybooks in the pile; click a book to open it and look at its pages (the forest book holds skull-and-crossbones danger symbols).
- Second text: find the sequoia, 2 protective symbols, 3 magical animals and Amanda (Amanda's). A word loses its highlight once all its items are found.
- Take the antique key: "Maybe the owl that saved me in the woods was Great-Aunt Tina! ... First, I need to restore the bells."
Restoring the Bells
The old bells of the Order hang in the Keeper's bell loft, guarded by wasps.
- At the well, unlock the grate with the antique key and fill the cauldron with water.
- At the planter on Tina's porch, water the plants so they bloom, then place the smoke recipe (lavender + pine branch with cones = wasps). Pick the lavender and the pine branch and take the bundle as kindling. Take the cracked bronze pot from the shelf.
- In Tina's house, put the bronze pot in the stone mould from the glass cabinet, glue the broken piece and close the mould. Take the bronze bell.
- At the crates in front of the eco shop, put the kindling in the smoker can and light it with the matches. Take the bee smoker.
- Go up to the bell loft and drive off the wasps with the bee smoker. Take the clamps and the rake head.
- At the crates, fix the rake head to the bamboo pole with the clamps. Take the rake.
- Fish the silver bell out of the well with the rake.
- In the bell loft, hang the silver bell and the bronze bell, then fit the clapper from below.
- In Tina's house, open the bookshelf by the owl statue.
The Bookshelf Symbols
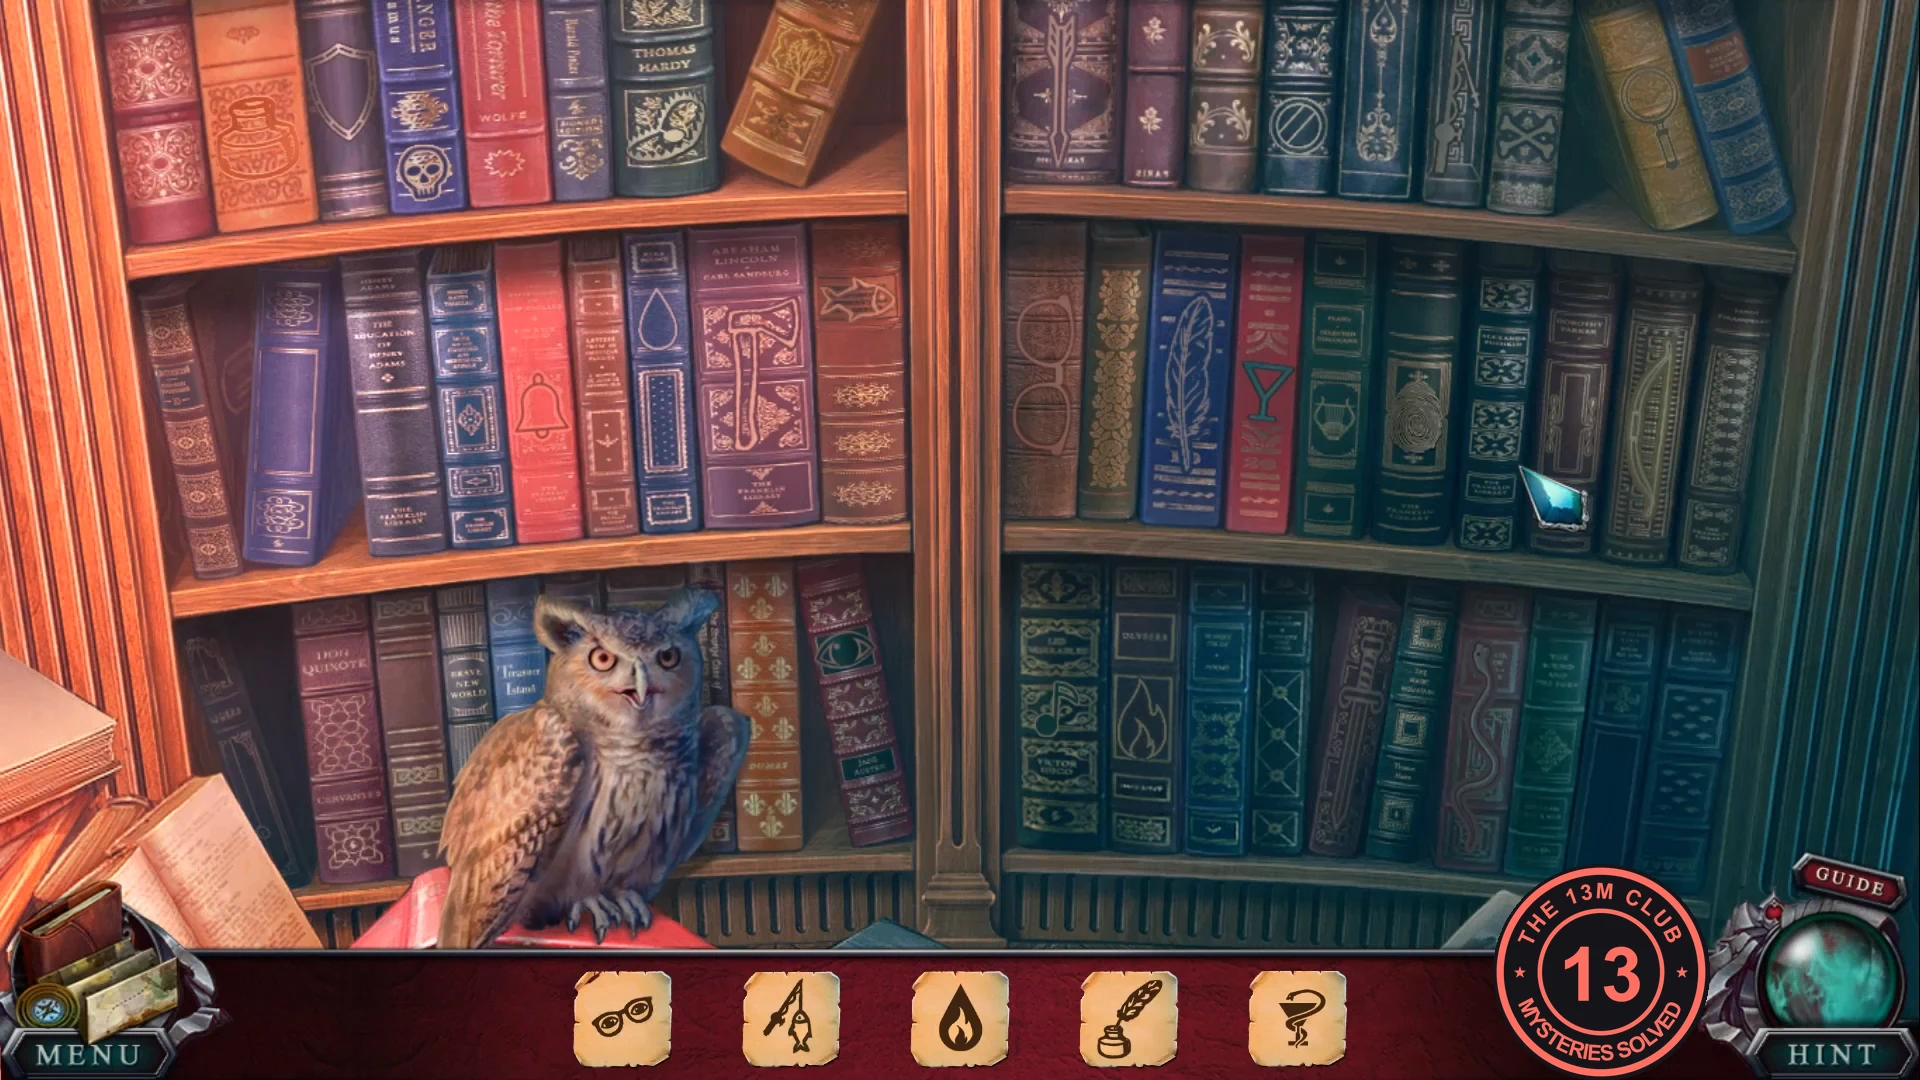
The bar at the bottom shows about six symbols at a time. Find each one on the book spines. Found symbols are replaced by new ones.
- Find each symbol on the spines. If a symbol isn't on any spine, make it by clicking one spine picture and then another to combine them (for example, the slashed circle on a top-shelf spine plus the cross on a blue spine make the crossed circle).
- When the bar is empty, an open book appears. Take the note (the bell hint).
The Bell Clappers
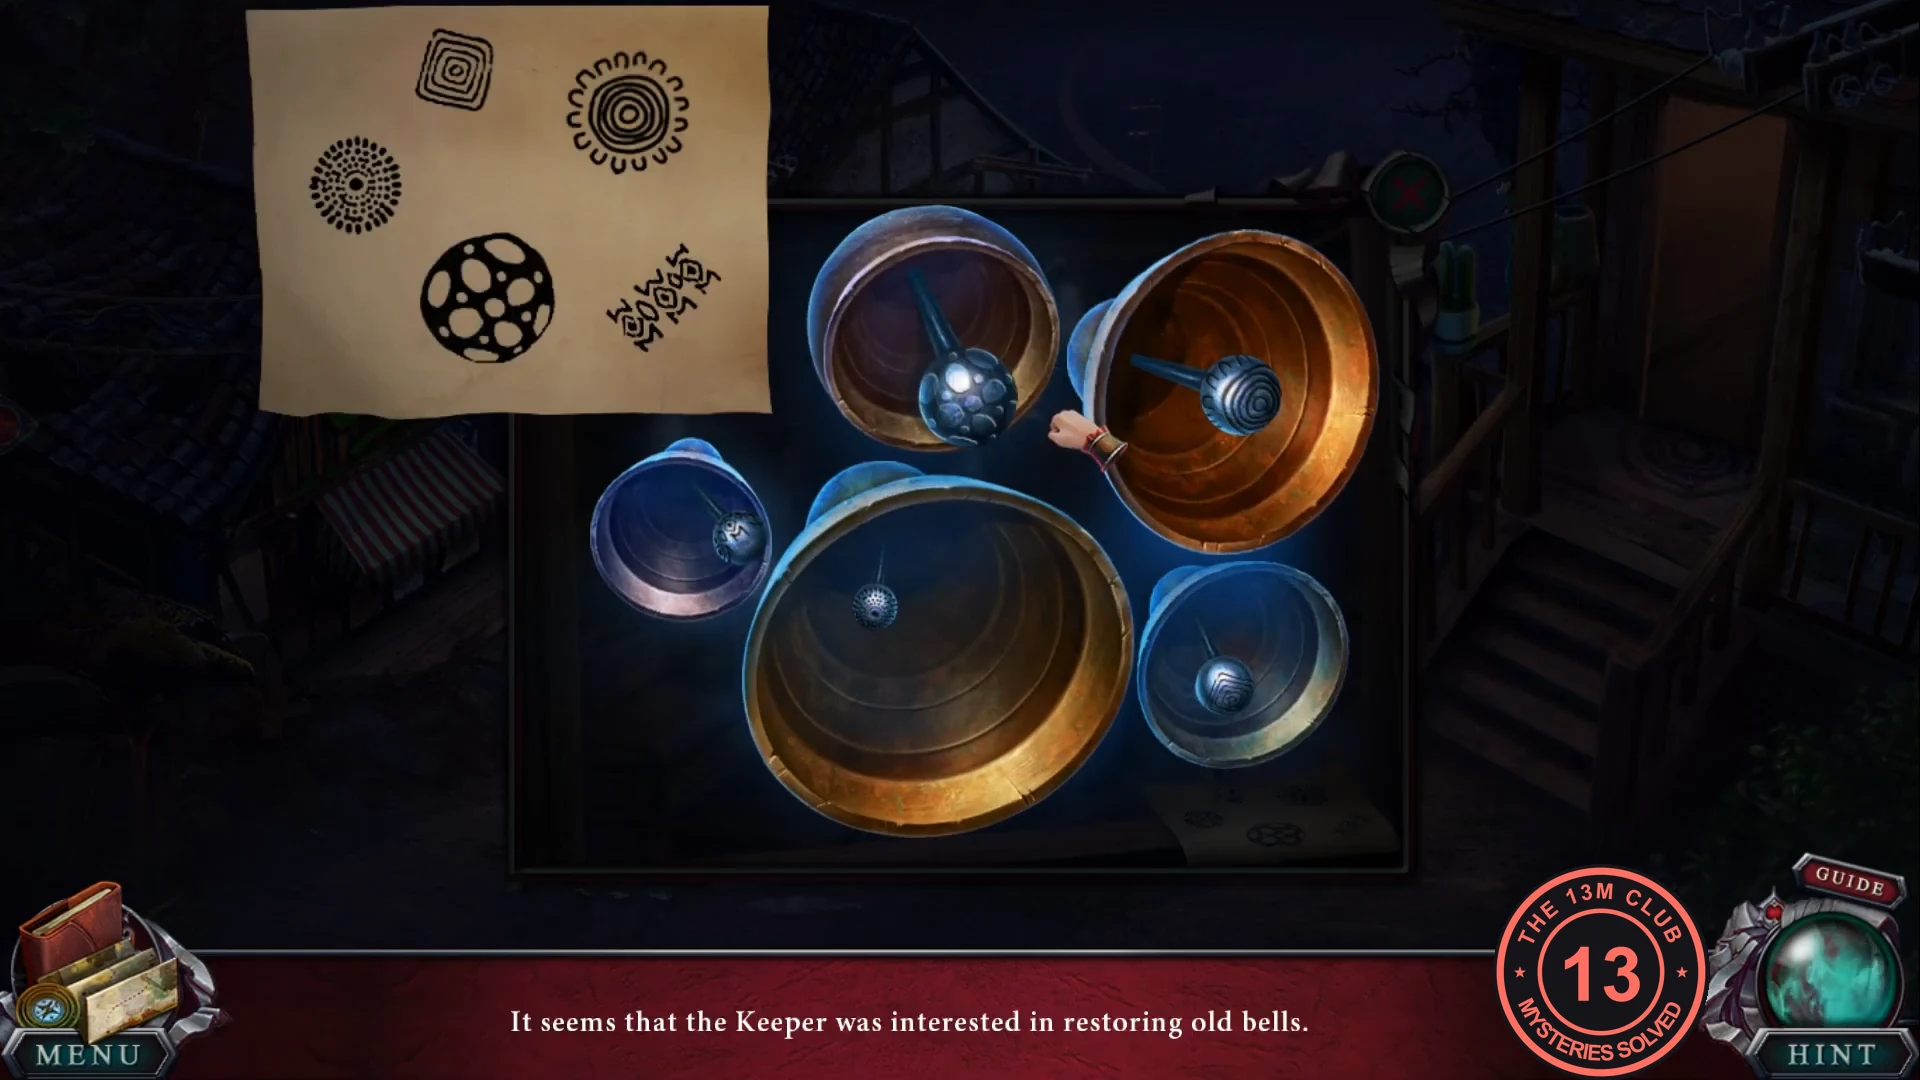
View the bells from below and place the hint note. "It seems that the Keeper was interested in restoring old bells." Click two clappers to swap them. The note's layout matches the bells.
- Place the bell hint by the bells.
- Target: small left bell = radial-dots clapper; top middle = square spiral; top right = sun/concentric rings (already correct at the start); big lower bell = spotted ball; lower right = zigzag. In the image below, each numbered note symbol matches the bell with the same number.
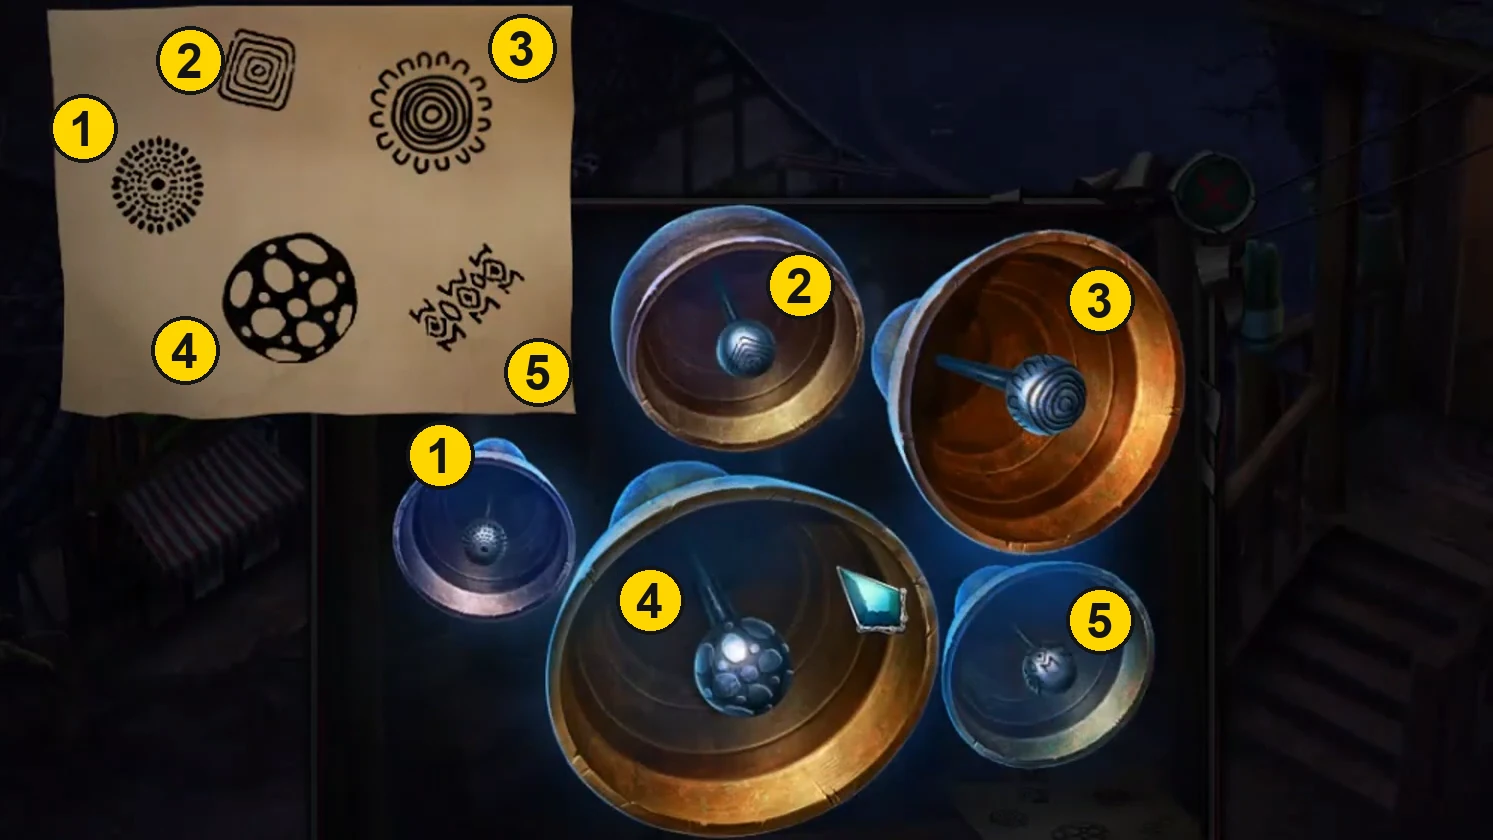
Solved: each numbered note symbol matches the bell with the same number. - The bells ring and an owl arrives. Show it the newspaper story with the sheriff's photo. The owl brings back the sheriff's driver's licence: "The owl found him and can show me where he is."
The Sheriff's Car
The sheriff's pickup has crashed on a forest road. The giant boar has him trapped in a nearby clearing.
- Collectibles (Collector's Edition): two animals in the trees, a figure by the fence on the left and a soccer ball by the sign post. The forest path with the bear trap (left path from the road) has four more, all faint and easy to miss: (1) on the bark of the big tree trunk at the left edge, about halfway up, level with the bottom of the misty pine in the middle; (2) in the mist at the far end of the path, just right of that pine and in front of the thin dark trunks, above the large mossy rock; (3) high on the rocky cliff in the top-right corner; (4) a blue helmet on the rock just below the tree stump on the right.
- Take the spring beside the police light bar on the road. Use the licence on the burnt half of the light bar to open it.
- On the left path, put the spring in the open bear trap, sharpen it with the whetstone and take the coil spring trap.
- Follow the right path to the clearing: "The Sheriff's trapped!" The flare gun lies on the ground.
- Use the coil spring trap on the yellow warning sign's wire and take the wire hook.
- In the clearing, unzip the sheriff's wallet with the wire hook. Take the sheriff's badge, the car key and the clamp.
- Unlock the truck door with the car key and enter the cab.
The Truck Cab Pairs
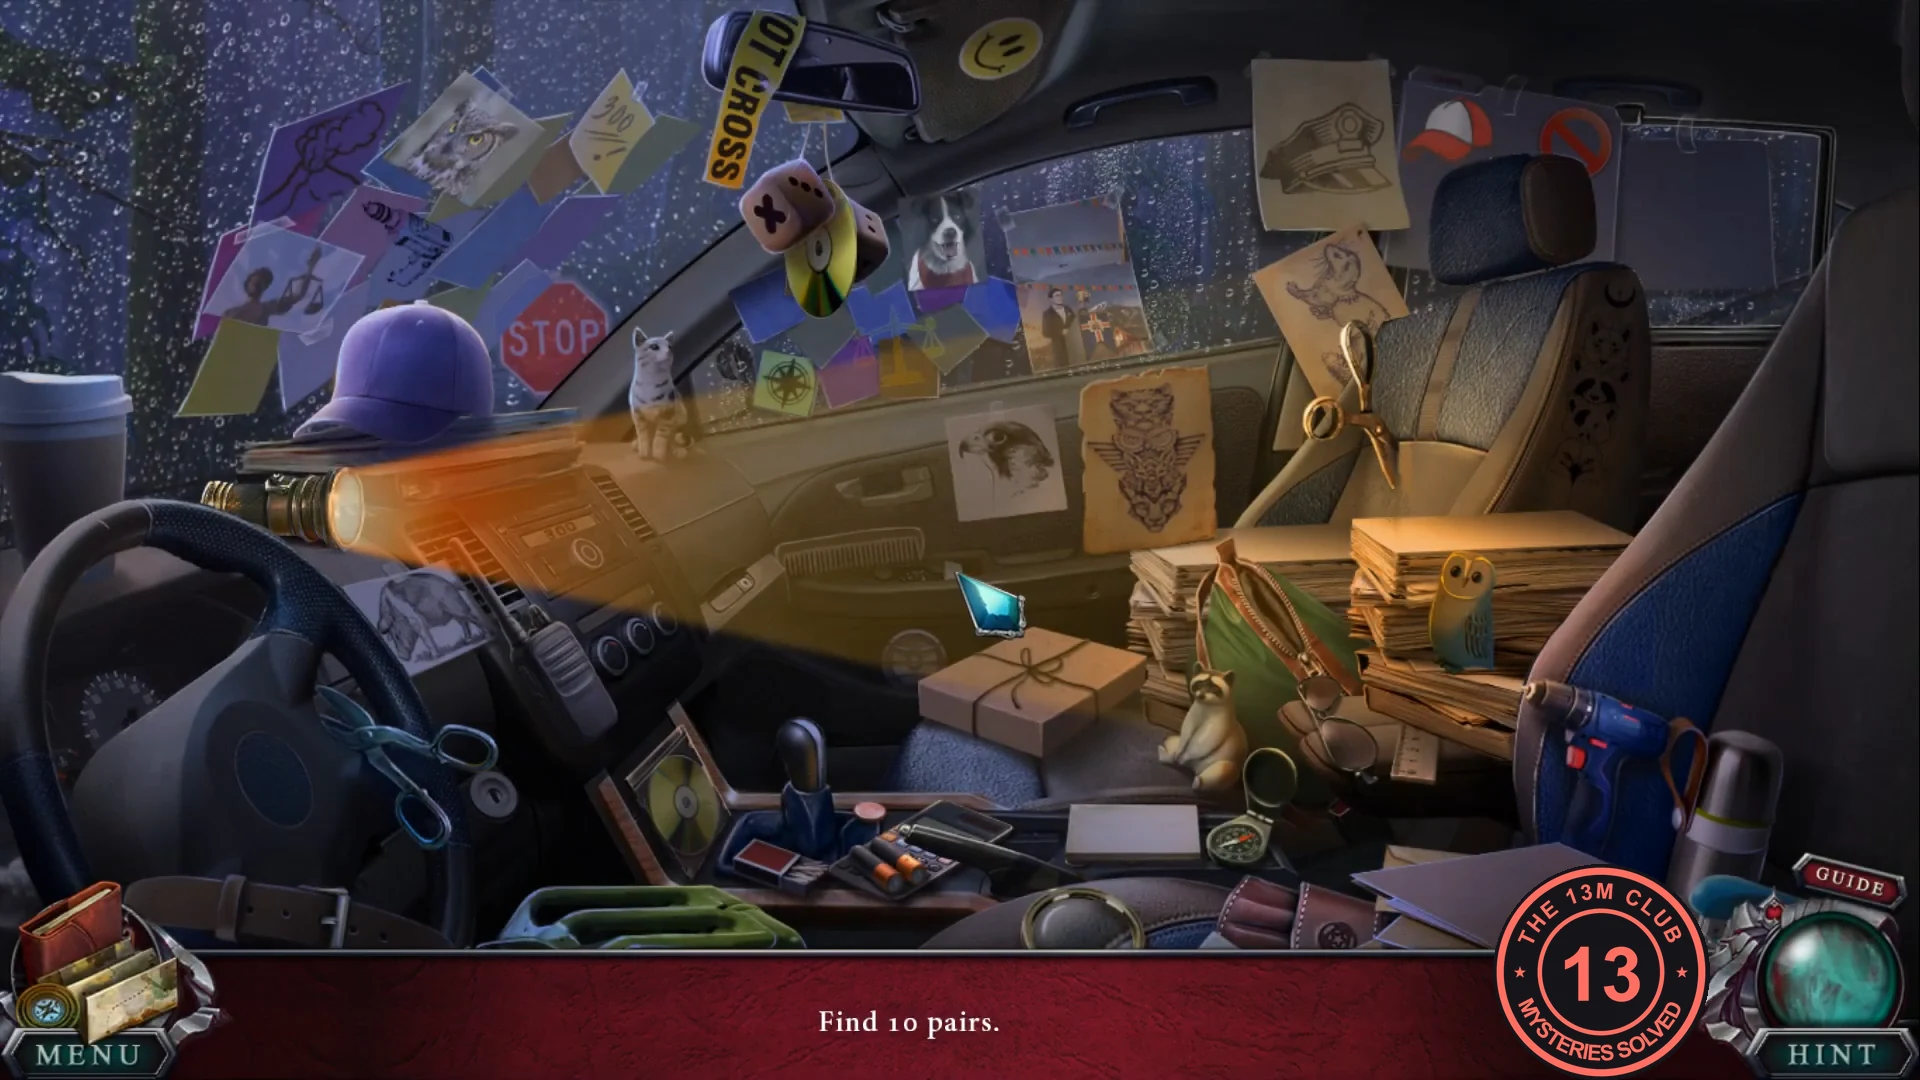
"Find 10 pairs." Click two matching objects in the cab to remove them.
- Find all ten pairs of matching objects. Completing the pairs gives you the drill.
Building the Trap
Prepare a pit trap for the boar.
- Remove the truck-bed bolts with the drill. Take the ground cloth and the crowbar.
- On the left path, pry open the wrapped stump with the crowbar. Read the trap plan and take the tent pegs, the cleaning rod and the clothespin.
- In the clearing, clear the flare gun barrel with the cleaning rod and take the explosive charge.
- At the pit beyond the clearing, peg the ground cloth over the pit with the tent pegs and cover it with ferns.
- At the truck bed, connect the explosive charge to the dynamite wires and take the explosives.
- Enter the cab again for the item list.
The Truck Cab Search
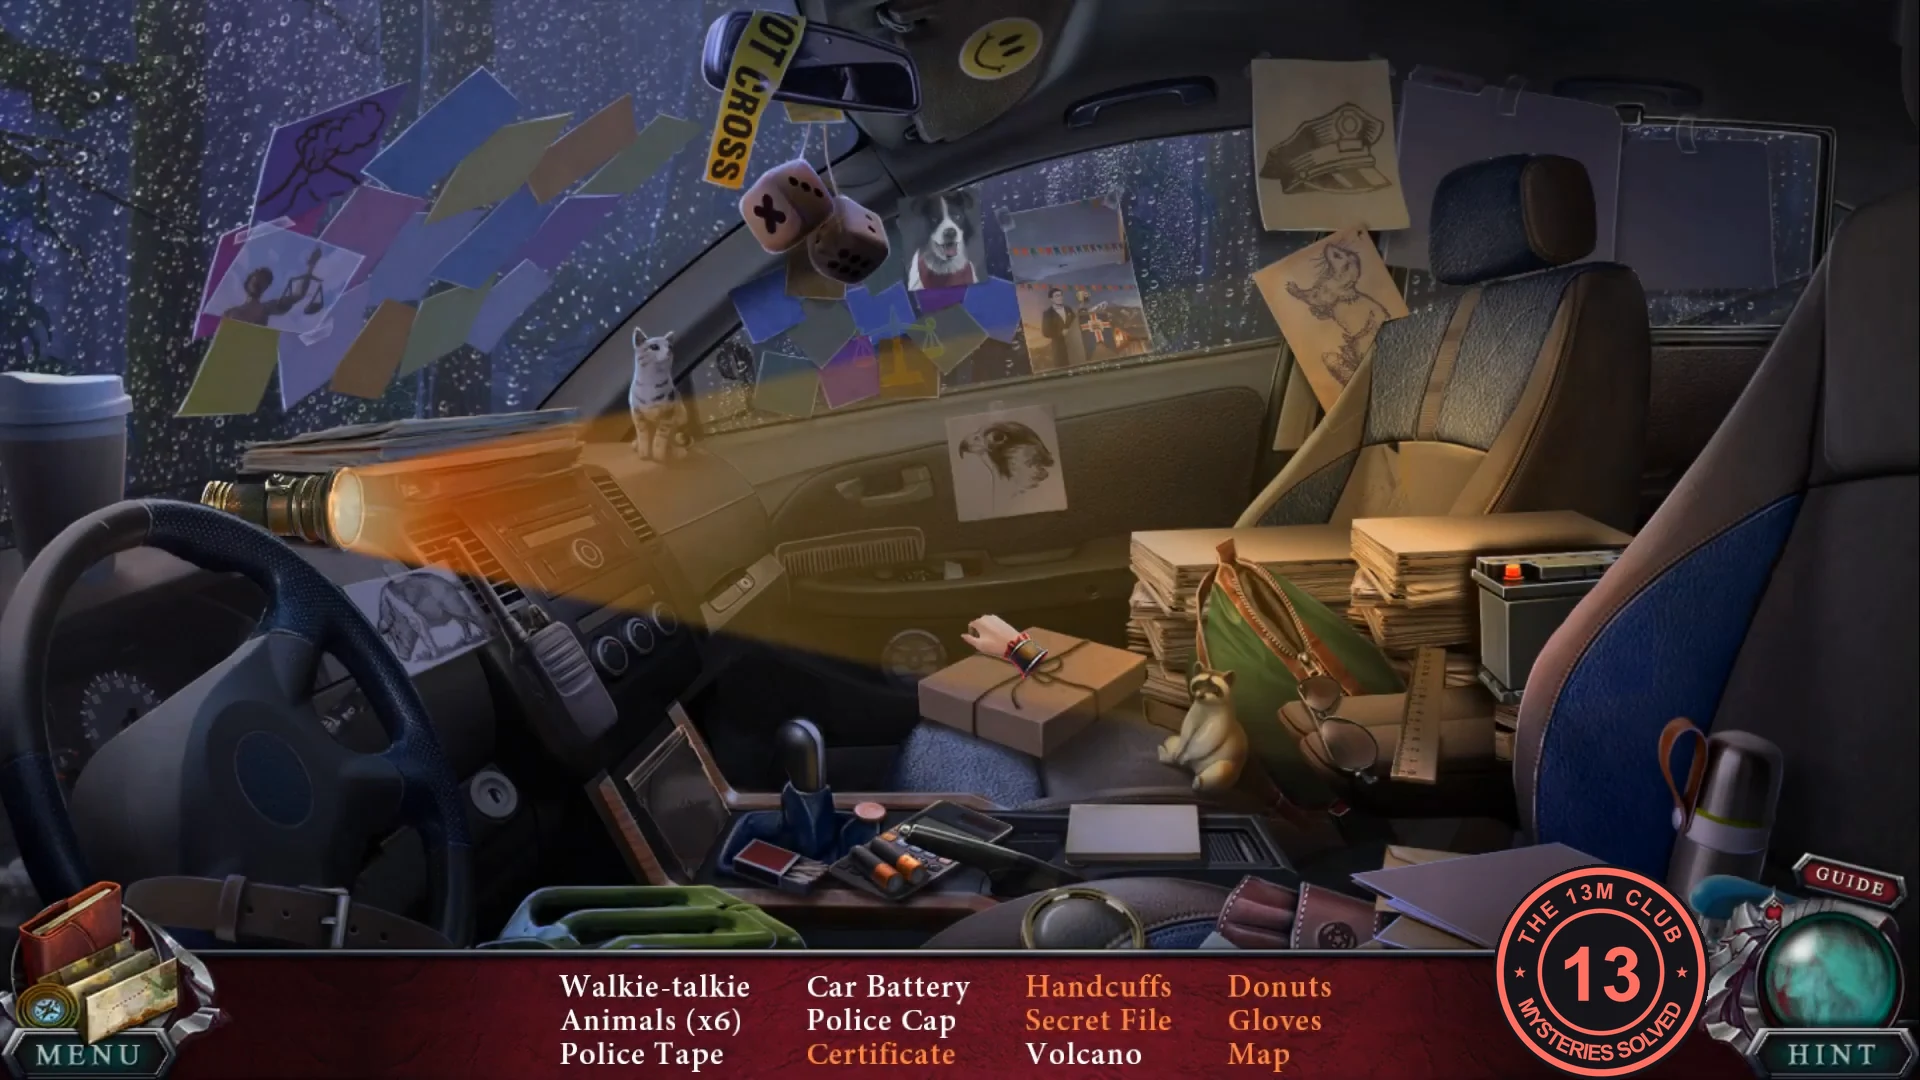
List: Walkie-talkie, Car Battery*, Handcuffs*, Donuts*, Animals (x6), Police Cap, Secret File*, Gloves*, Police Tape, Certificate*, Volcano, Map* (* = needs an extra action or a zoomed area).
- Find the plain items; the car battery is on the right behind the stacked boxes. The orange items need an action first: open the glove compartment to take the handcuffs, the Top Secret file and the map; open the box on the dashboard for the donuts; open the bag in the cab so the gloves and the certificate can be found.
- Take the battery.
Siren and Explosives
Lure the boar into the pit.
- Unscrew the LED strip from the warning sign with the sheriff's badge.
- At the light bar, fit the LED strip and the battery, then the clamp on one side and the clothespin on the other. Take the police siren.
- Place the police siren by the big tree at the pit: "I can lure him with flashes of light."
- Place the explosives on the stones in the clearing, then press the red detonator button. The boar charges into the pit.
Taming the Boar
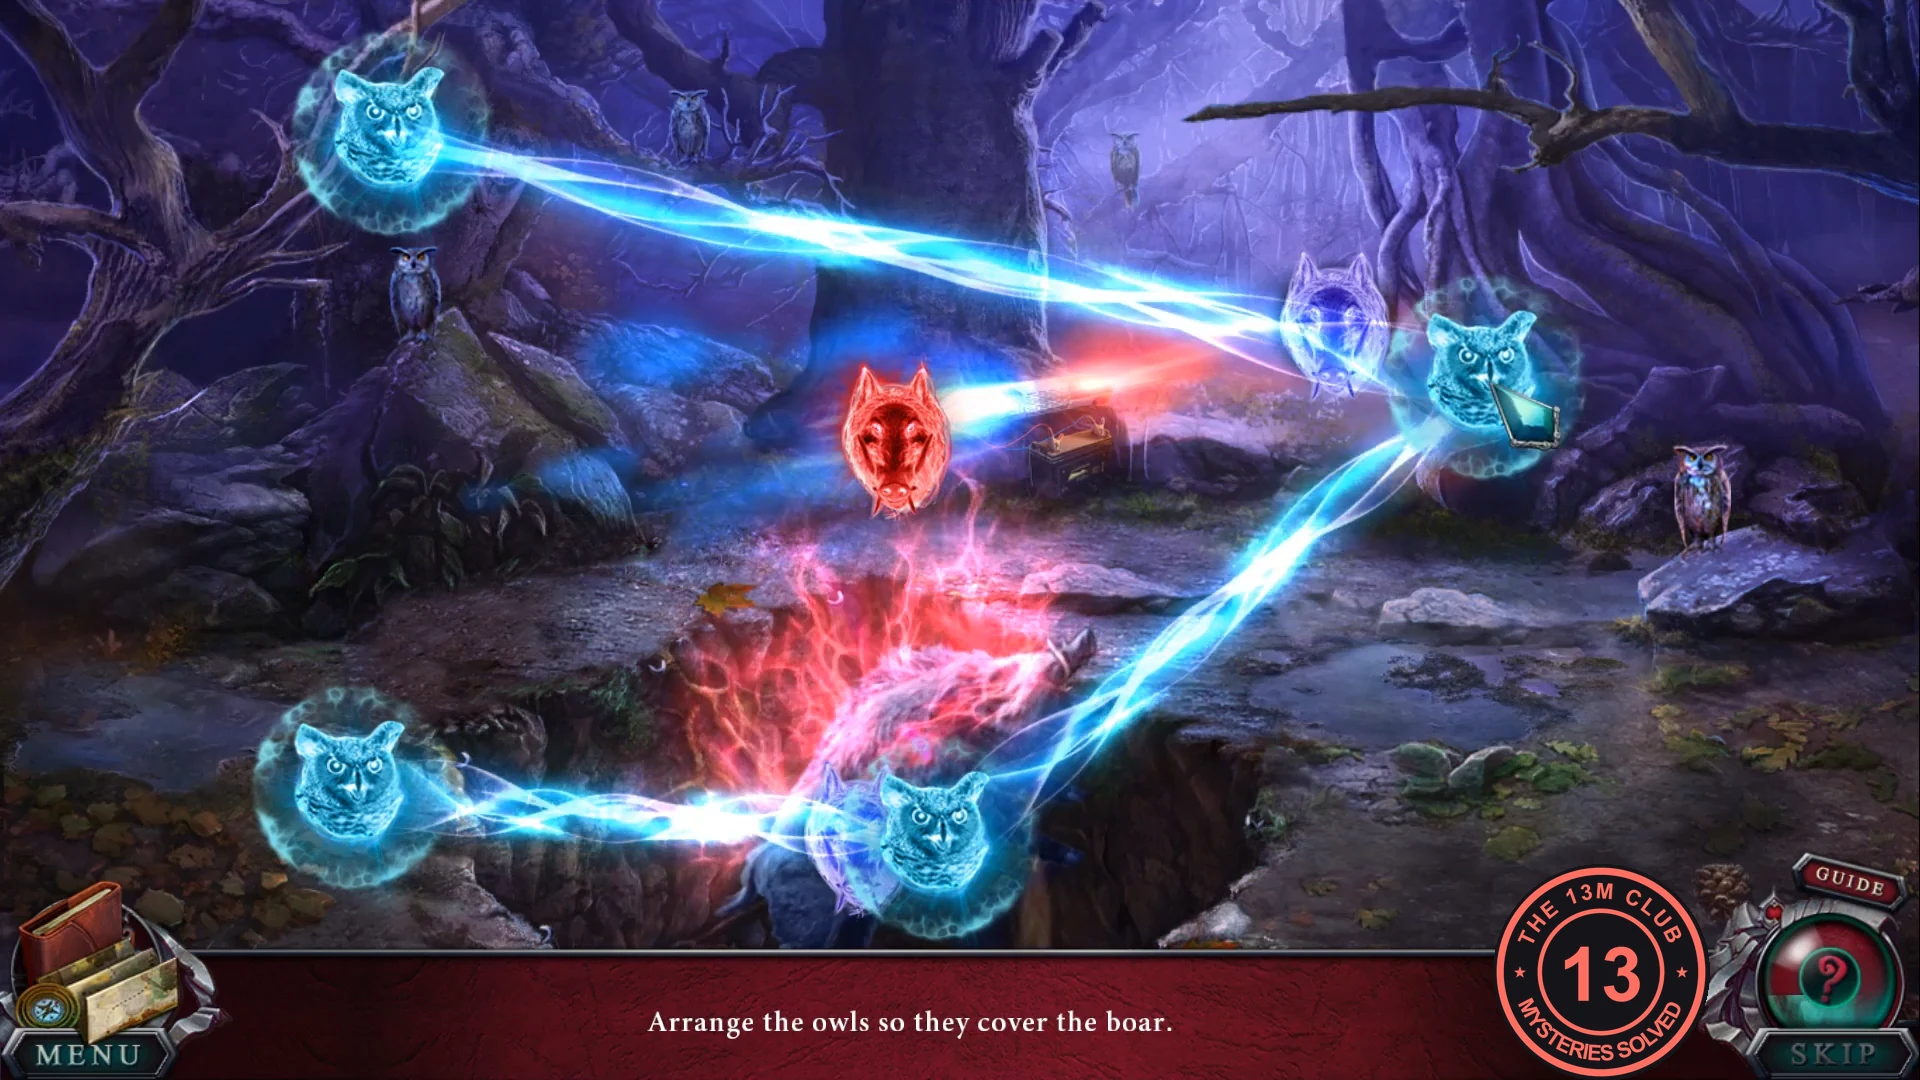
"Arrange the owls so they cover the boar." Glowing owl tokens are linked in a closed loop of light beams. Red boar-head markers turn blue when a beam crosses them. Drag owls to reposition them. There are three rounds.
- At the pit: "The only ones it can't scare are The Children of the Forest." Start the puzzle.
- Round 1 (4 owls, 2 markers) and round 2 (4 owls, 4 markers): move owls so the beams between neighbouring owls cross every red marker.
- Round 3 (5 owls, about 7 markers): spread the owls around the outside of the markers so the closed loop of beams passes over all of them; drag one owl at a time and check which markers are still red. The layout can differ in detail, so use the method rather than fixed positions. A Skip button is available.
The Scared Pig
The boar shrinks into a frightened piglet.
- Watch the ending: Tina and the owl-cloaked Order arrive ("Fear can turn anyone into a monster"), Amanda frees the piglet, and the sheriff thanks her before everyone heads to Treehill.