Protest at the Park Gates
Sheriff Taylor asks you to break up the protest without anyone getting hurt, and gives you the key to his car trunk.
- Talk to Sheriff Taylor and receive the trunk key. The objective becomes "Disperse the protesters at the gates."
- Collectibles (tracker: 2 animals, 2 objects): a lynx in the bushes left of the left tree and an animal face on the arch above the left totem. The morphing objects are on the right gate post and on the ground at bottom right. Placement differs between editions.
- Open the sheriff's car trunk with the trunk key. Inside is an open toolbox with tool-shaped outlines.
The Sheriff's Toolbox
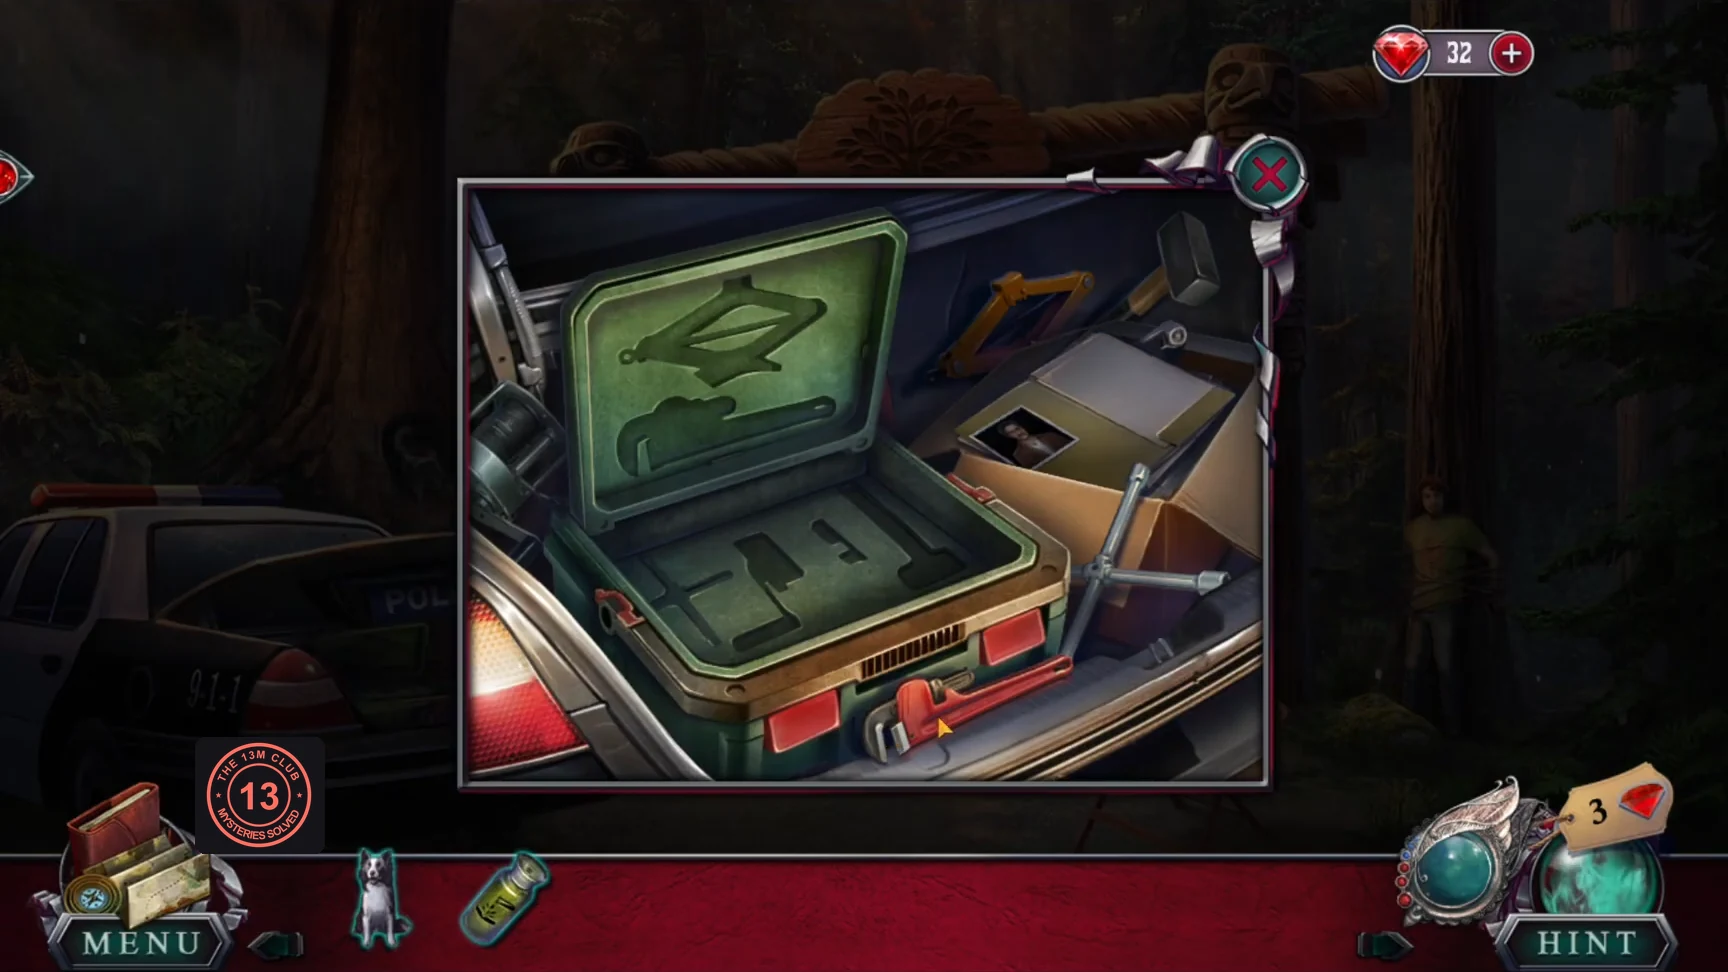
The toolbox lid and base have five green outlines. The loose tools lie around it in the trunk.
- Drag each tool into the outline with the same shape: the red pipe wrench into the lower outline in the lid, the orange scissor jack into the upper outline in the lid, the cable winch reel into the middle of the base, the cross-shaped lug wrench into the left of the base and the hammer into the right of the base.
- The box closes and reveals a rusty first aid kit; take it. Read the three missing-person files in the cardboard box (climber, journalist, young tourist), then take the roll-up gate handle from under them.
The Rusty First Aid Kit
Clean the first aid kit and find the symbol that opens it.
- At the protest table, take the lollipop, move the bottles and read the note. Its back has first-aid instructions: bandage, cotton ball, disinfectant, ointment.
- Pour the acid on the first aid kit lid to remove the rust.
- At the tree hole with the injured skunk, put down the lollipop to distract the ants and take the medical symbol.
- Place the medical symbol on the first aid kit lid to start the number puzzle.
First Aid Kit Magic Square
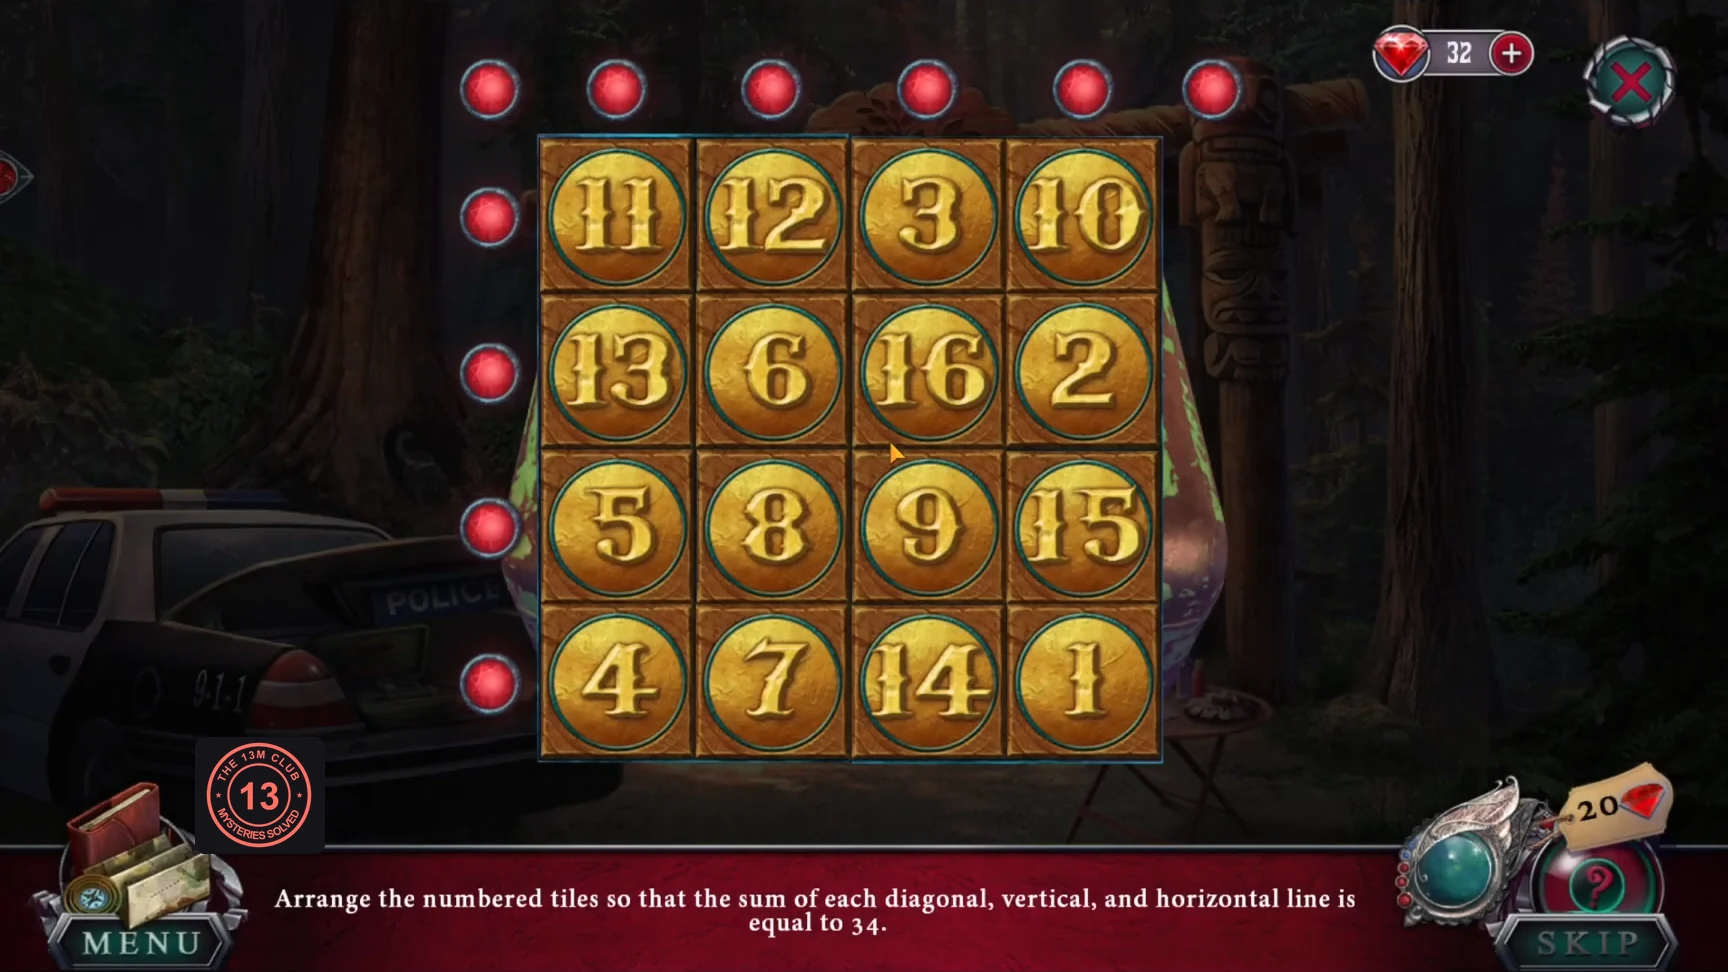
"Arrange the numbered tiles so that the sum of each diagonal, vertical, and horizontal line is equal to 34." Swap tiles until every row, column and diagonal lamp is green.
- Observed start (rows top to bottom): 11 12 3 10 / 13 6 16 2 / 5 8 9 15 / 4 7 14 1.
- Swap tiles to reach the solved square (rows top to bottom): 7 12 1 14 / 2 13 8 11 / 16 3 10 5 / 9 6 15 4. When every lamp is green, the kit opens.CODE7 12 1 14 / 2 13 8 11 / 16 3 10 5 / 9 6 15 4
The Skunk's Help
Make a bandage for the skunk, then use its ability to clear the gates.
- Take the syringe from the kit. Place the instructions beside the kit, then make the bandage: bandage, cotton ball, disinfectant, healing ointment.
- Use the bandage on the skunk's paw in the tree hole.
The Skunk's Memory
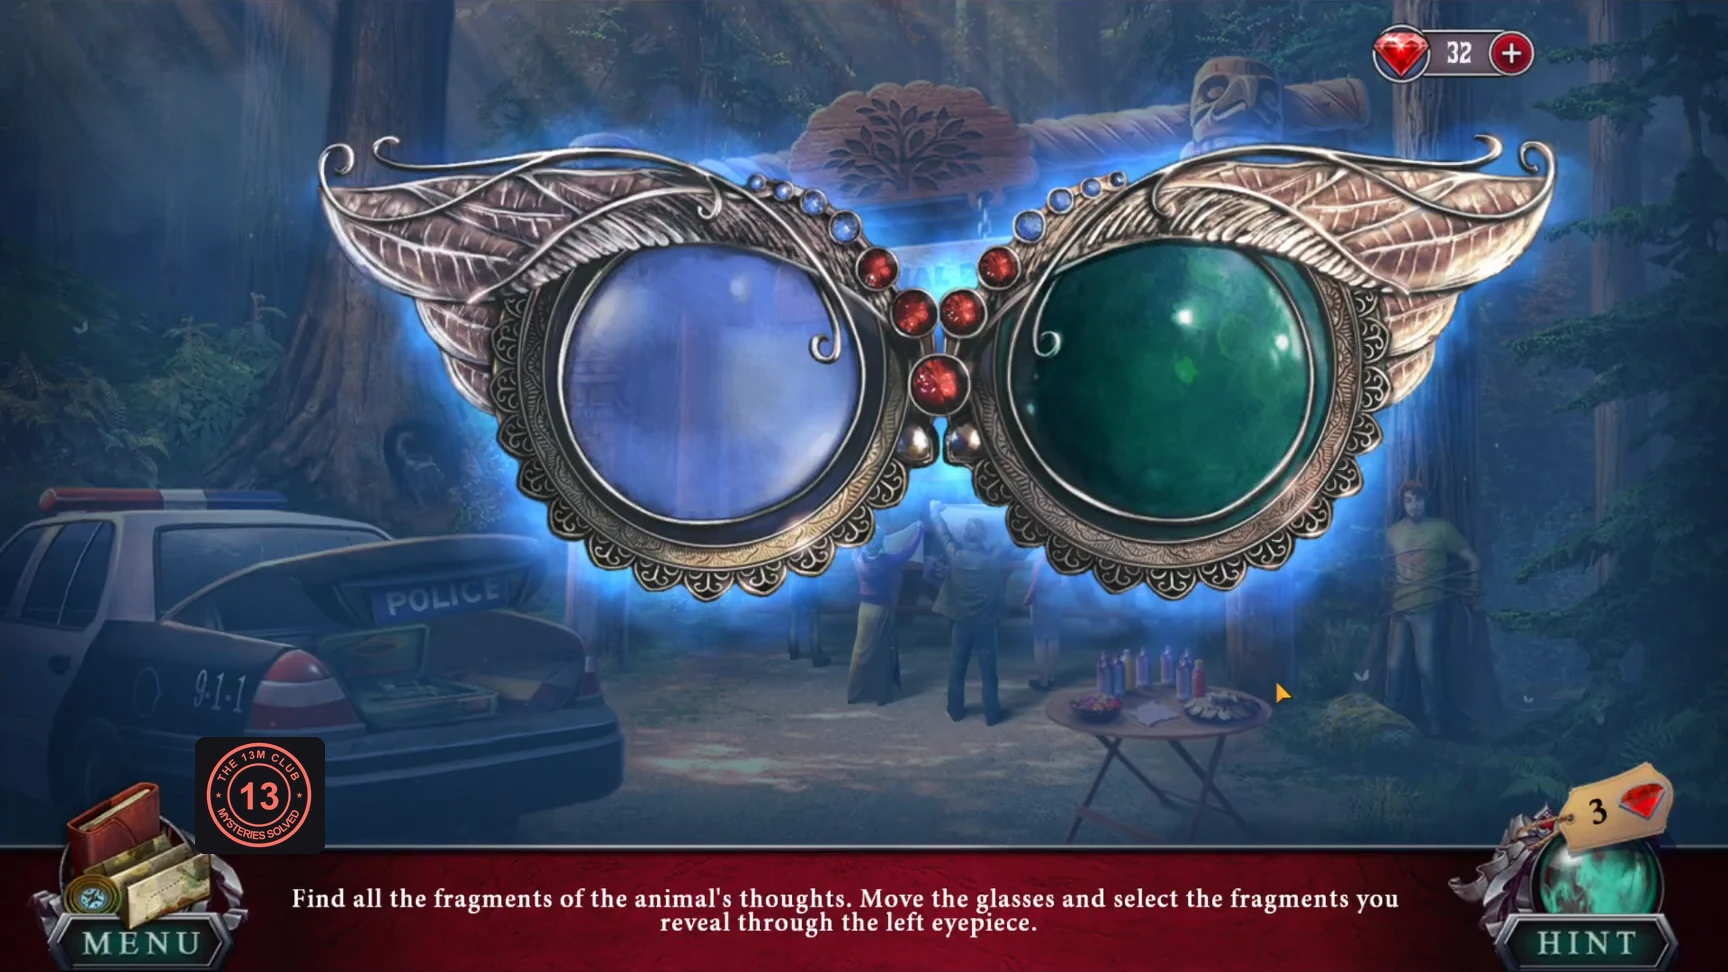
With its paw bandaged, the skunk trusts you. Read its memory with the glasses, then use its ability to clear the gates.
- Use the glasses and find the skunk's memory fragments. After the memory, take the Skunk Smell ability.
- Use Skunk Smell on the protesters to disperse them.
- Send Gray to the leaf pile to find the knife, then cut the tied protester free. He gives you a gate key.
- Talk to the sheriff for the second gate key. Use both keys on the gate lock.
The Park Overlook
Director Mallor won't open the lodge door until you prove who you are.
- Knock on the lodge door. Mallor wants proof that you are not a protester (objective "Confirm your identity").
- Collectibles: moose antlers on the lodge roof and an animal on the tram shelter roof; morphing objects near the tram post on the right and by the lodge stairs (Collector's Edition positions).
- Open the electricity box by the train and read the note about the fuses. Take the oil can.
- Zoom in on the carved owl recess on the closed souvenir kiosk doors and take the first statue eye.
- Raise the stand's roller shutter with the gate handle and take the second statue eye.
The Totem's Teeth
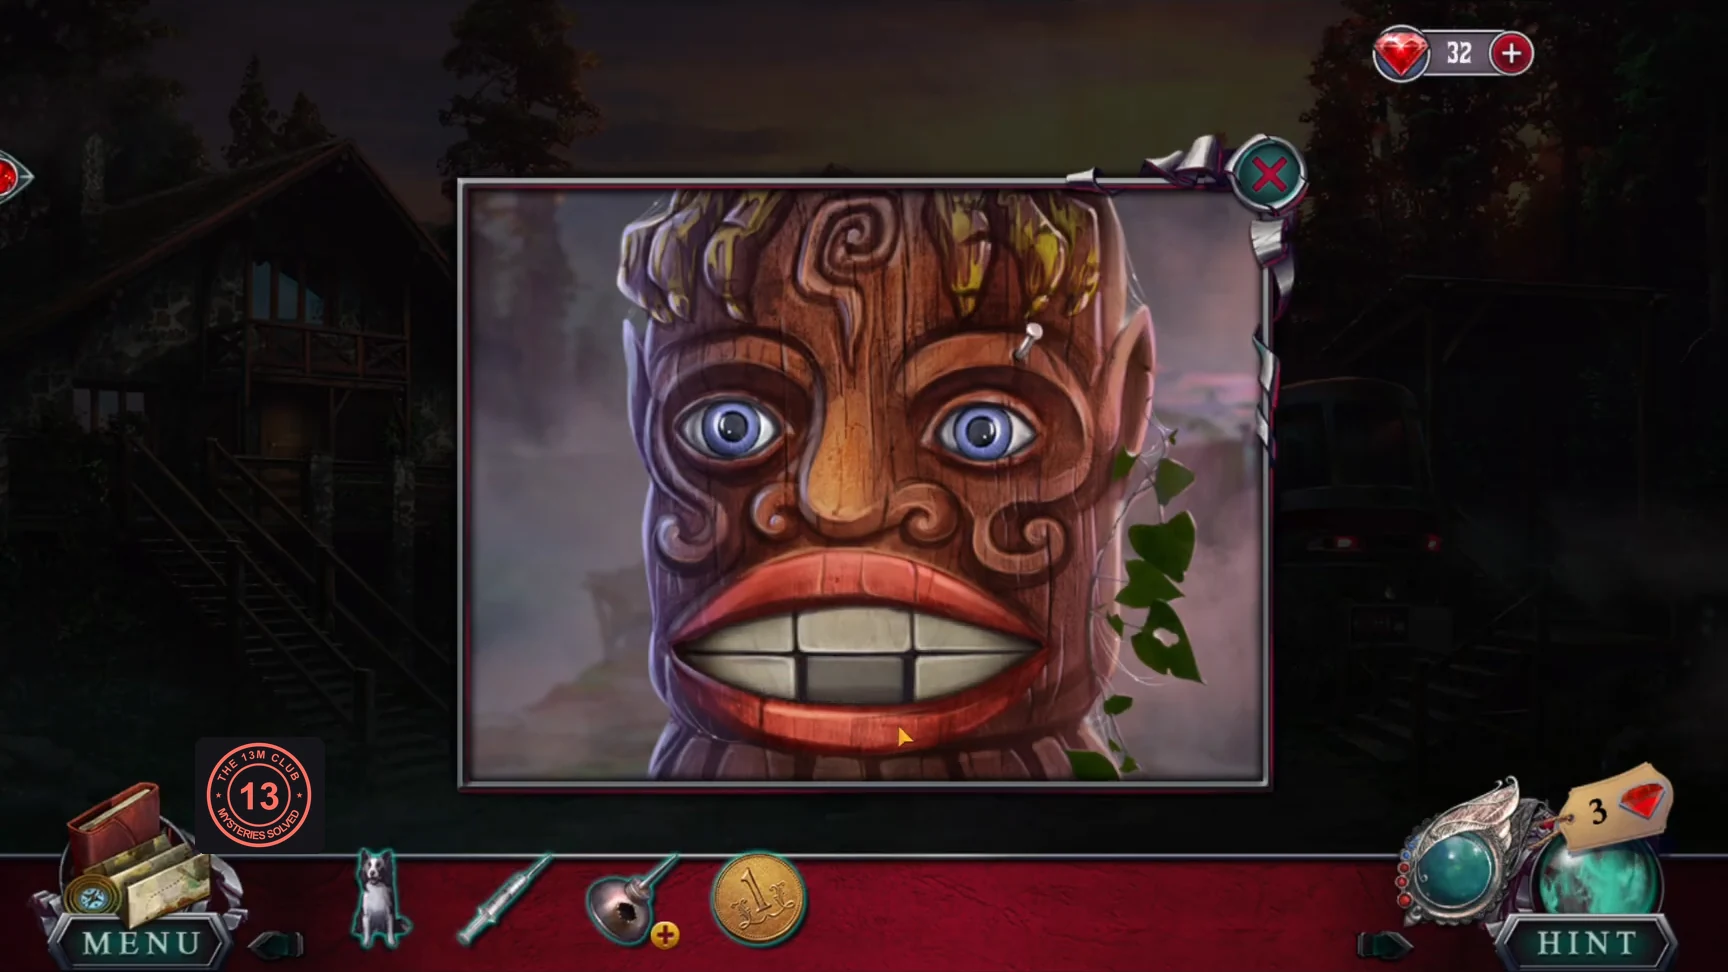
Put both eyes in the totem. Its mouth opens with a coin inside, then snaps shut when you take it, showing six teeth.
- Place both statue eyes in the totem's sockets and take the coin from its mouth.
- Press the teeth in this order: lower middle, upper right, upper middle, lower left, upper left, lower right. A wrong press resets the sequence. The mouth opens again; take the owl mechanism.CODElower middle, upper right, upper middle, lower left, upper left, lower right
Binoculars and the Newspaper
Get Mallor to talk by showing him who you are.
- Zoom in on the coin-operated binoculars at the railing and take the screw stuck in them (you need it later for the bolt cutter).
- Put the coin in the binoculars and watch the view of the strange plants. Afterwards, take the spring from the binoculars.
- Inspect the spring and bend it into a lockpick.
- Inspect the oil can and draw oil into the syringe.
- At the stand, oil the newspaper case lock and open it with the lockpick. Take the newspaper page ("World Renowned Botanist To Visit Redwood").
- Knock on the lodge door and show Mallor the newspaper. He tells you to take the train to the exploration site and gives you a fuse.
The Owl Mechanism
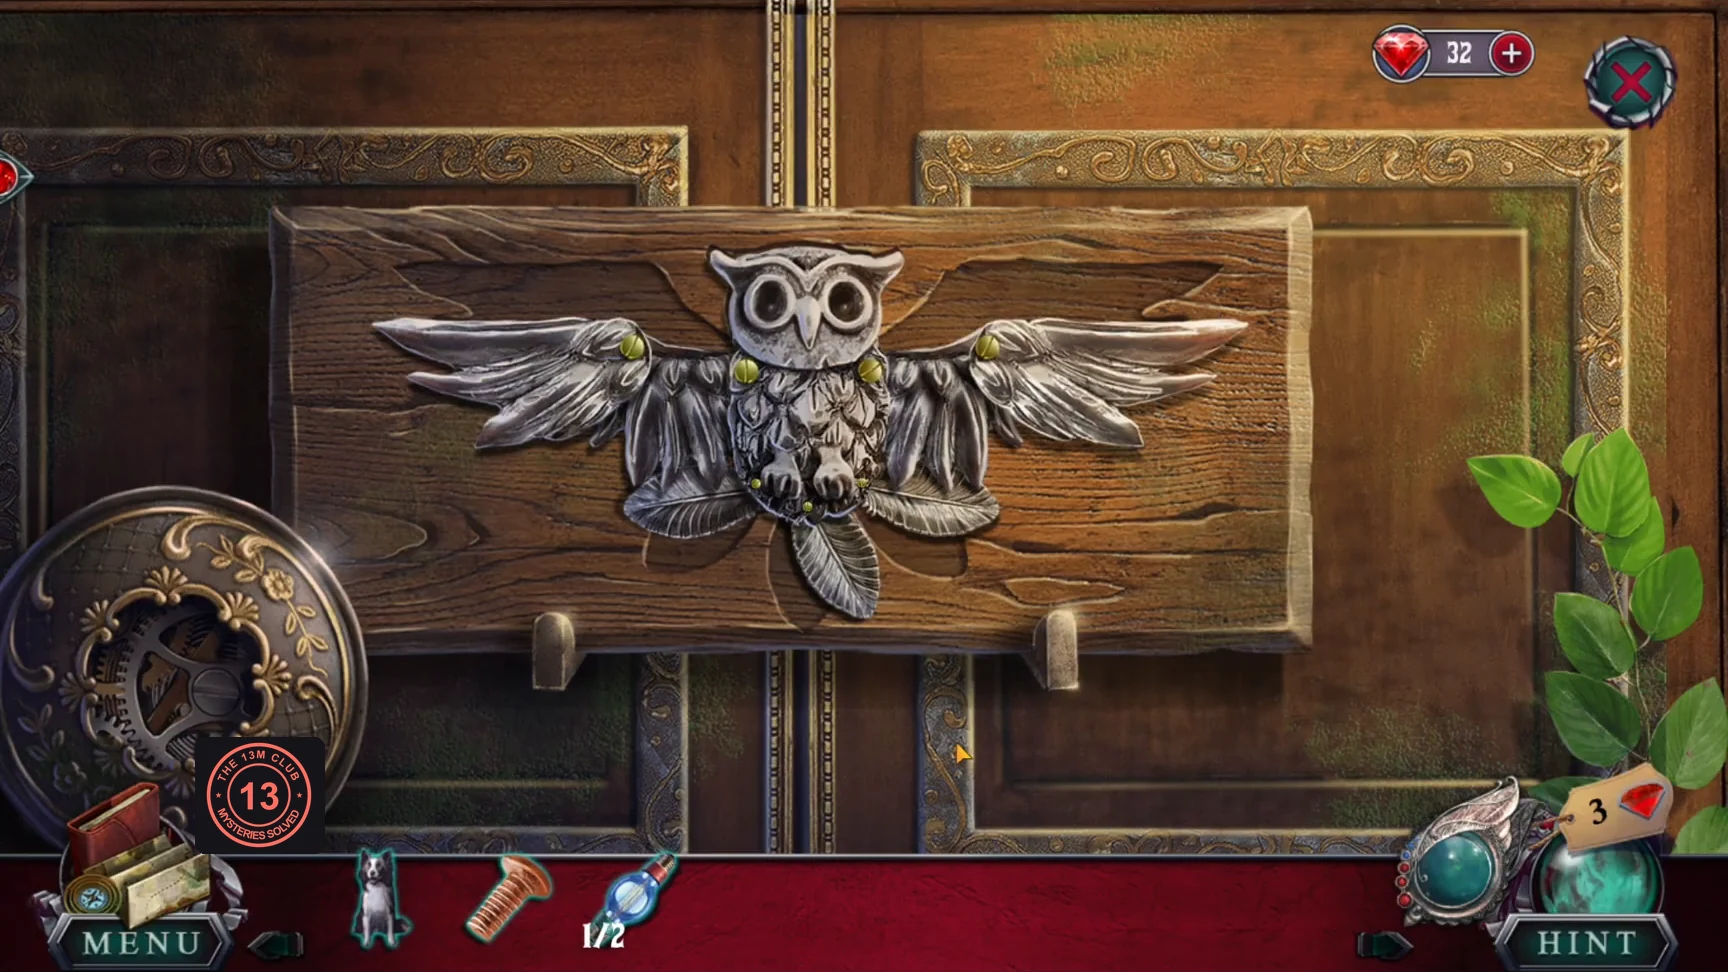
Put the owl mechanism in the carved owl recess on the souvenir kiosk. Click its seven parts to rotate them until the owl matches the carved outline with its wings spread.
- Place the owl mechanism in the recess.
- Rotate the left wing, inner wings, right wing, both lower feathers and the tail until every part fits the outline. The starting rotations may vary, so match the shape rather than counting clicks. The kiosk opens to reveal a puppet theatre.
The Puppet Theatre
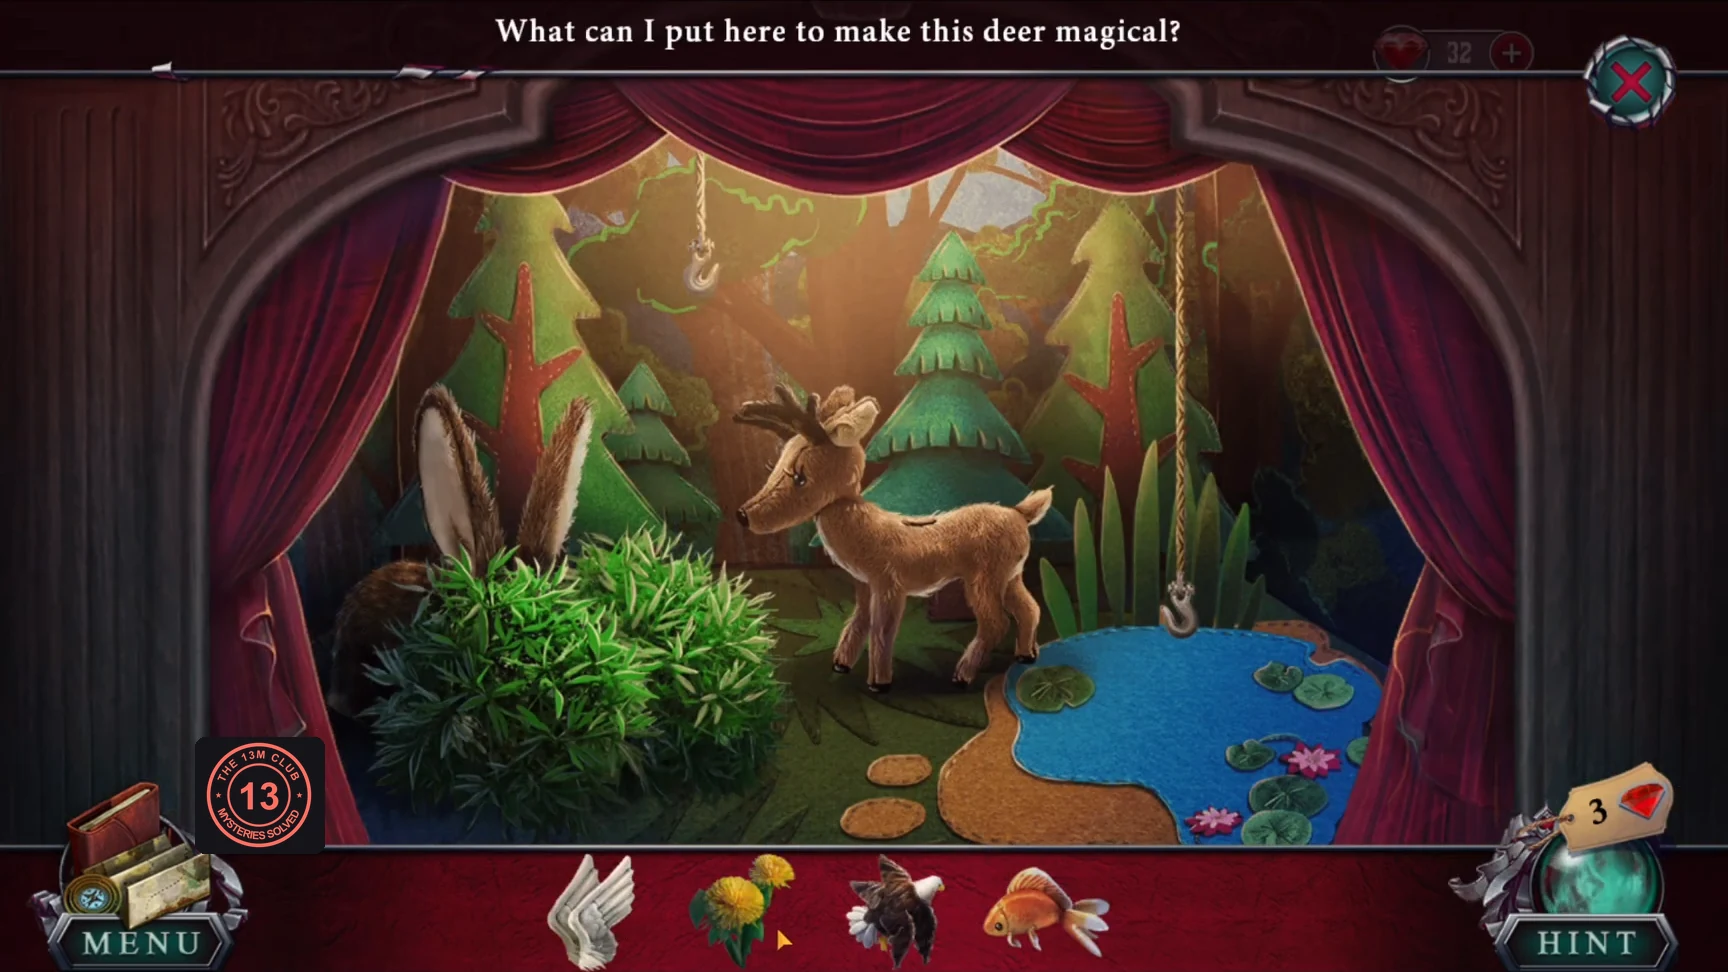
The theatre has three stages. Place the tray pieces to tell the story of the Order of the Children of the Forest.
- Stage 1: hang the eagle on the upper-left hook and the goldfish on the hook over the pond. Put the dandelions beside the rabbit in the bush and the wings on the deer.
- Stage 2: put the fire on the crossed firewood and the saw on the log between the loggers. Fit the wheel on the cart. Take the mallet from the cart and knock out the axe stuck in the tree so the tree falls, then put the lumberjack on the fallen trunk.
- Stage 3: fit the window into the hole in the left house and give the fox to the middle robed Child. Hang the moon on the upper-right hook, put the lamp top back on the street lamp and the candle inside. After the story ends, take the fuse.
The Tram Fuse Box
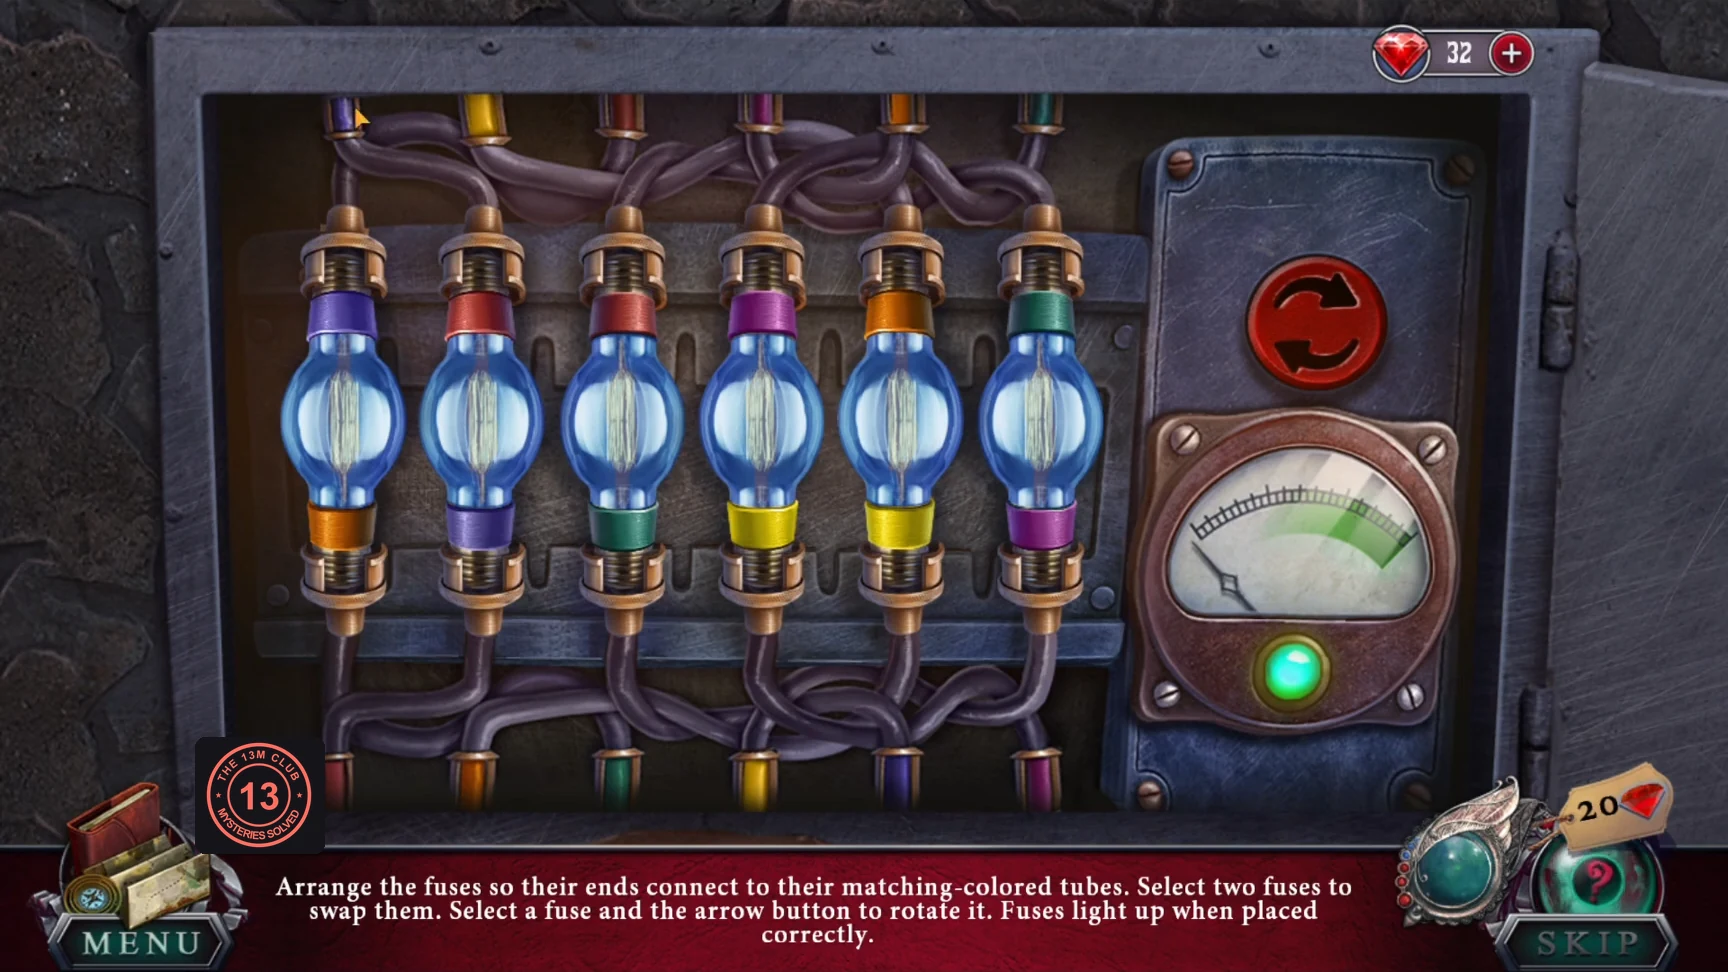
"Arrange the fuses so their ends connect to their matching colored tubes. Select two fuses to swap them. Select a fuse and the arrow button to rotate it. Fuses light up when placed correctly."
- Place both fuses in the electricity box by the tram.
- Start (slots 1-6 left to right, top/bottom caps): purple/orange, red/purple, red/green, purple/yellow, orange/yellow, green/purple. Swap slots 1 and 3; rotate slot 2; rotate slot 3; swap slots 4 and 6; rotate slot 4; rotate slot 5.CODEswap 1-3, rotate 2, rotate 3, swap 4-6, rotate 4, rotate 5
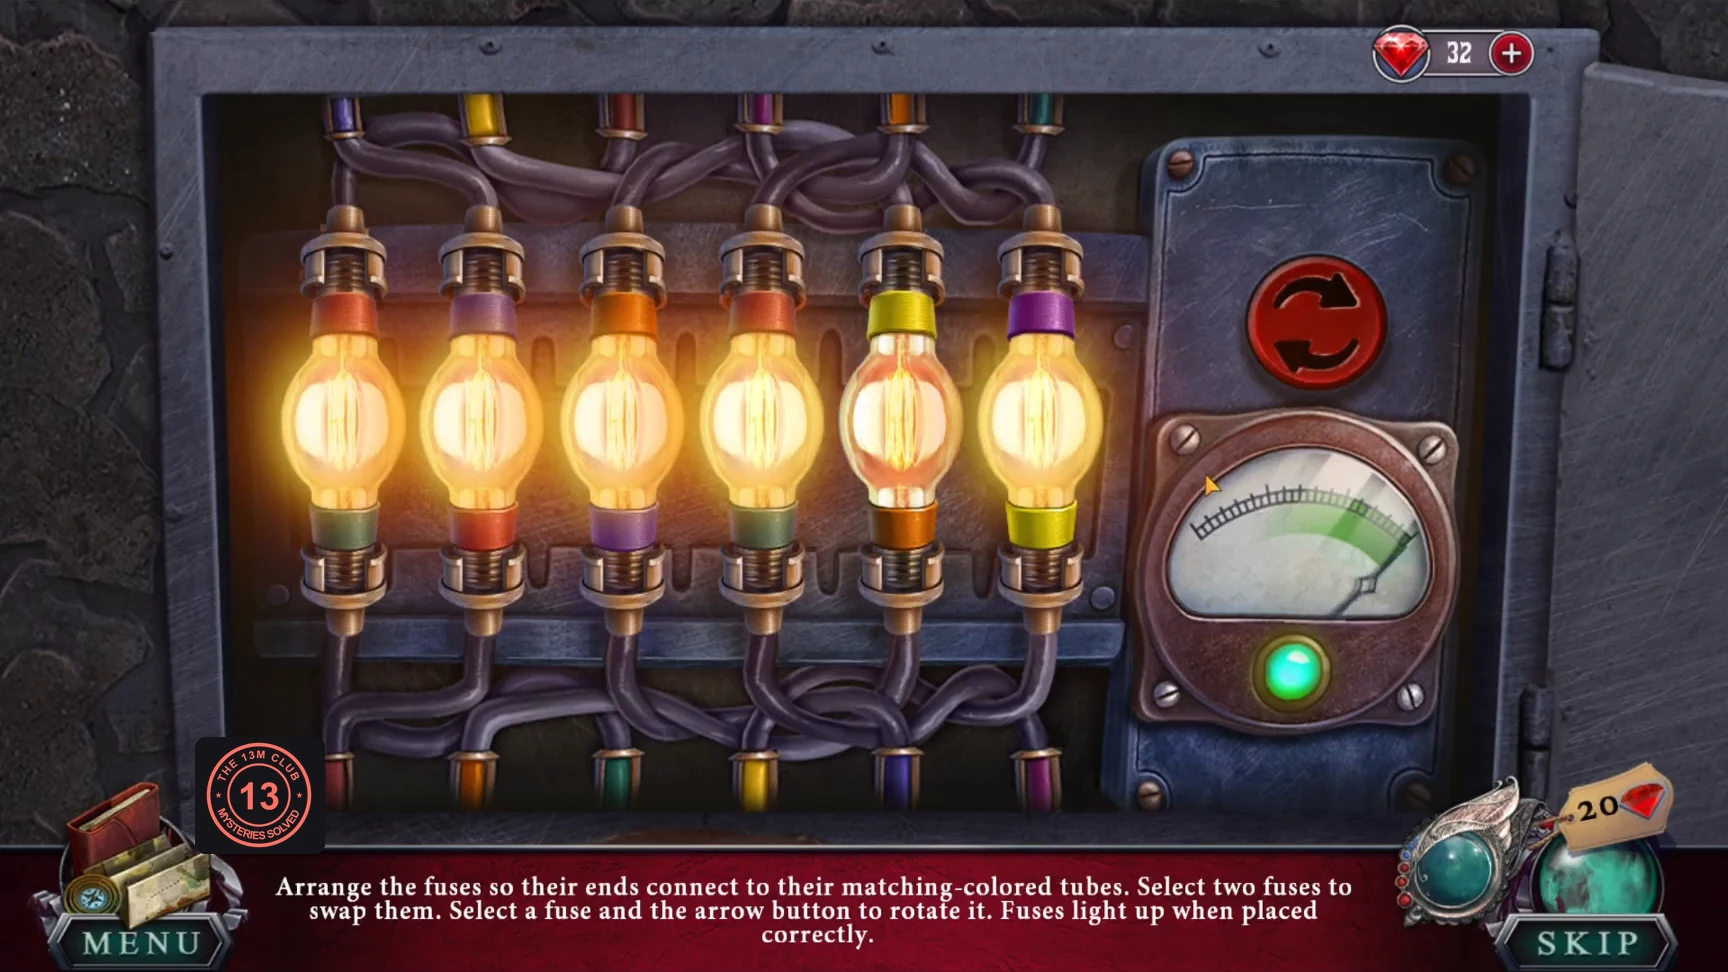
Solved: every fuse lights up when its caps match the tubes. - Board the tram to the exploration site.