The Exploration Site
The tram takes you to the exploration site. A winged deer is chained up there, and loggers have been turned into plants.
- Look at the winged deer. Collectibles here: animals in the tree at top left and by the deer and logs; morphing objects are the binoculars on a log and the hard hat on the ground (Collector's Edition positions).
- Zoom in on the chainsaw on the stump and read the note: "The fuel tank's empty." Send Gray to dig in the loose earth in front of the stump and take bolt cutter part 1.
- Take the locked phone from the hand of the plant-covered man beside the tram. Its pattern lock is unknown for now (objective "Look for clues on the phone").
- Zoom in on the tram interior ("Wow, there are more anomalies!"). Take the red fuel canister from the seat, read the letter held by the left anomaly and take bolt cutter part 2 from it.
- Inspect bolt cutter part 1 in the inventory, add part 2 and fix them with the screw from the binoculars.
- Fill the chainsaw with the fuel canister. The chainsaw shakes something loose in the earth; take the box inlay.
- In the tram, put the box inlay on the toolbox on the floor, open it and read the logger's diary. One page has an imprint: "There's something imprinted here, but how do I reveal it?"
- Use the bolt cutter on the deer's chains to start the chain puzzle.
The Deer's Chains
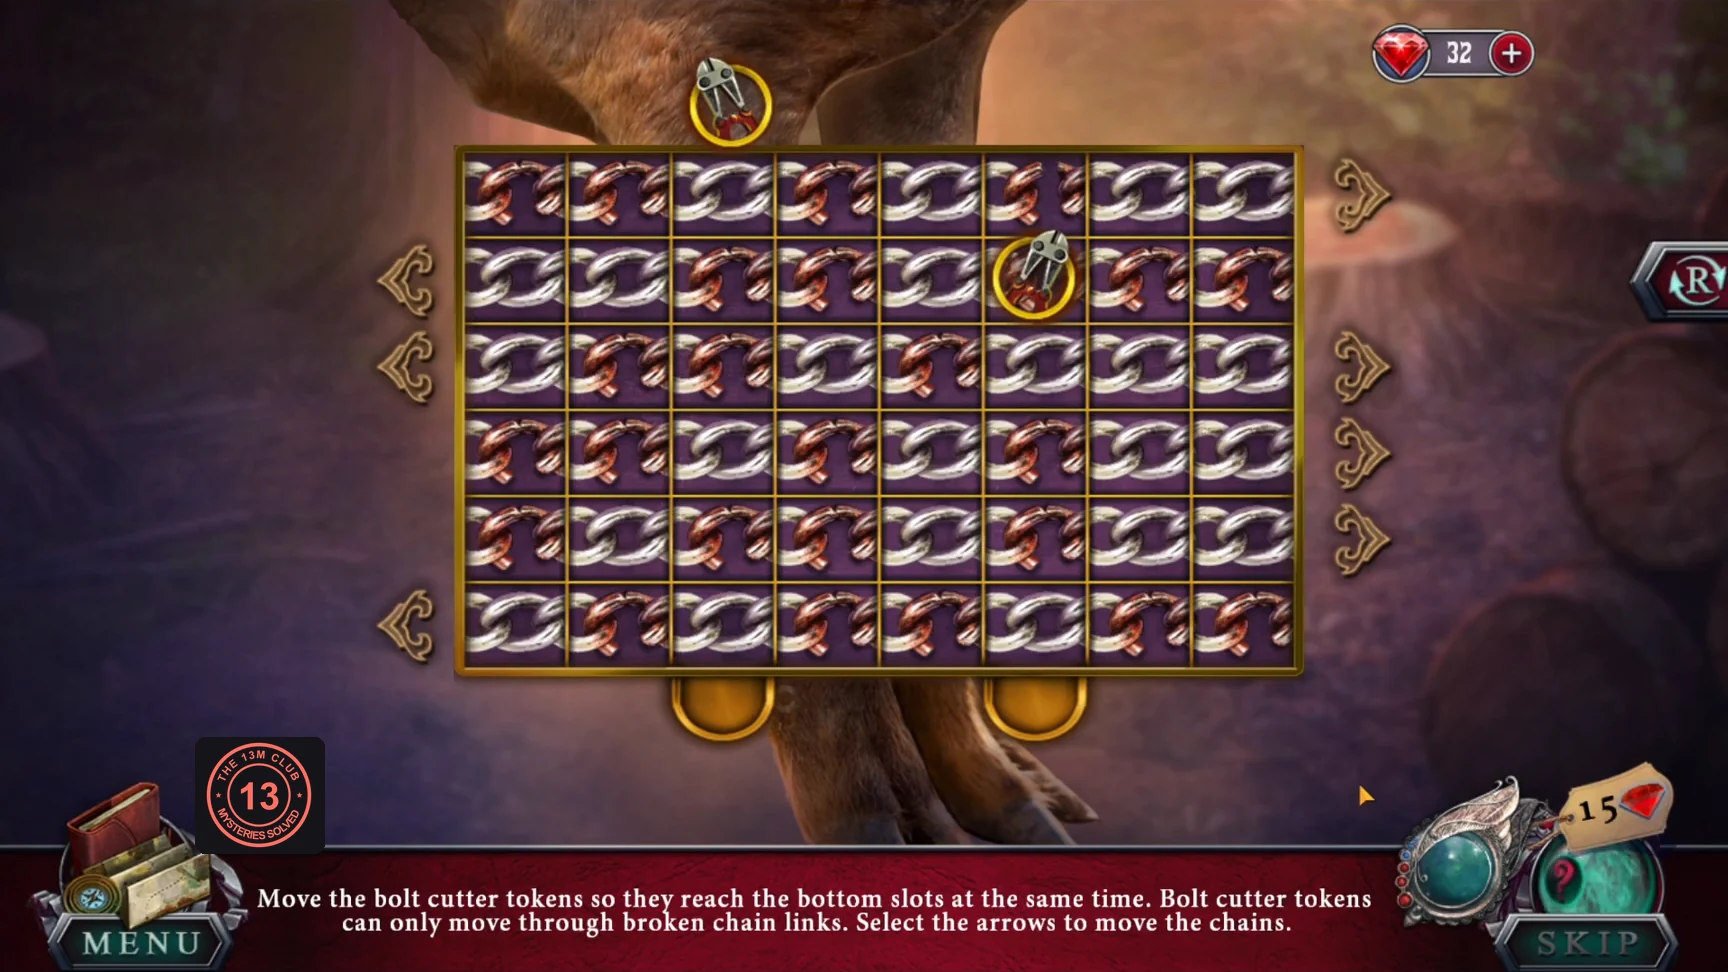
"Move the bolt cutter tokens so they reach the bottom slots at the same time. Bolt cutter tokens can only move through broken chain links. Select the arrows to move the chains." Each arrow shifts a whole chain row one link sideways, wrapping around. A token drops automatically through any line of broken links below it. Rows are numbered 1-6 from the top; the image marks the rows and the four arrows in the order you use them.
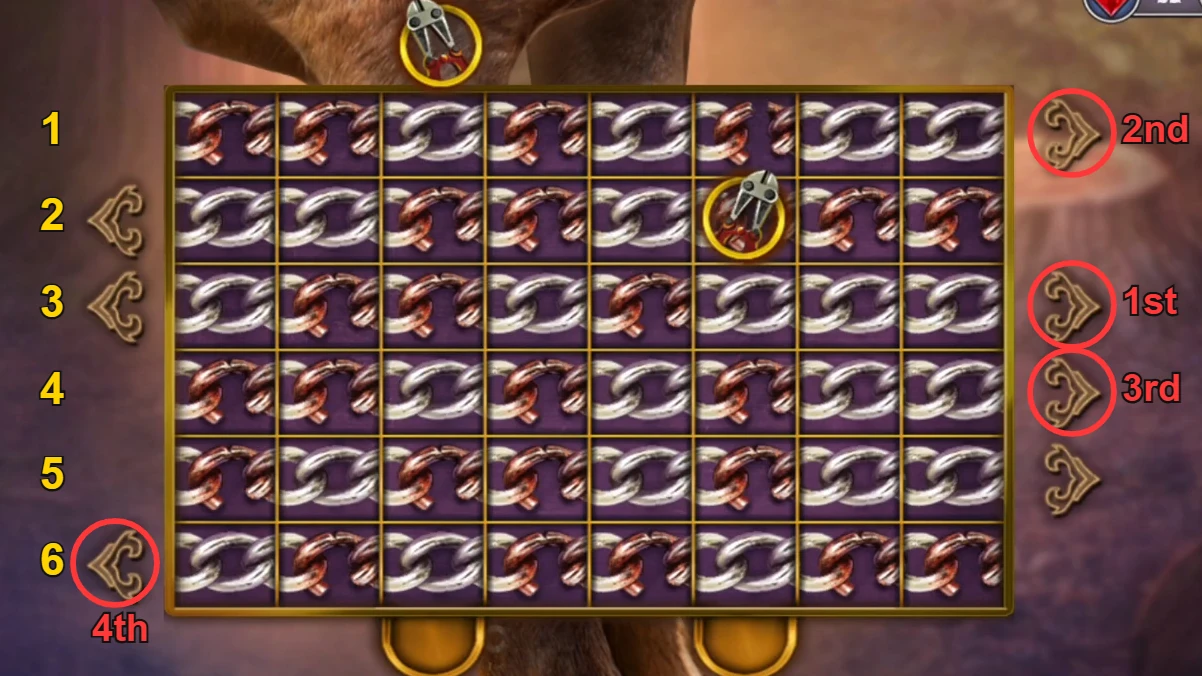
- Shift row 3 right once. The right token drops down to row 5.
- Shift row 1 right once. The top token enters and falls to row 3.
- Shift row 4 right once. The left token falls to row 5.
- Shift row 6 left once. Both tokens fall into the bottom slots together. Row 6 must be the last move.CODErow 3 right, row 1 right, row 4 right, row 6 left
The Deer's Memory and Gift
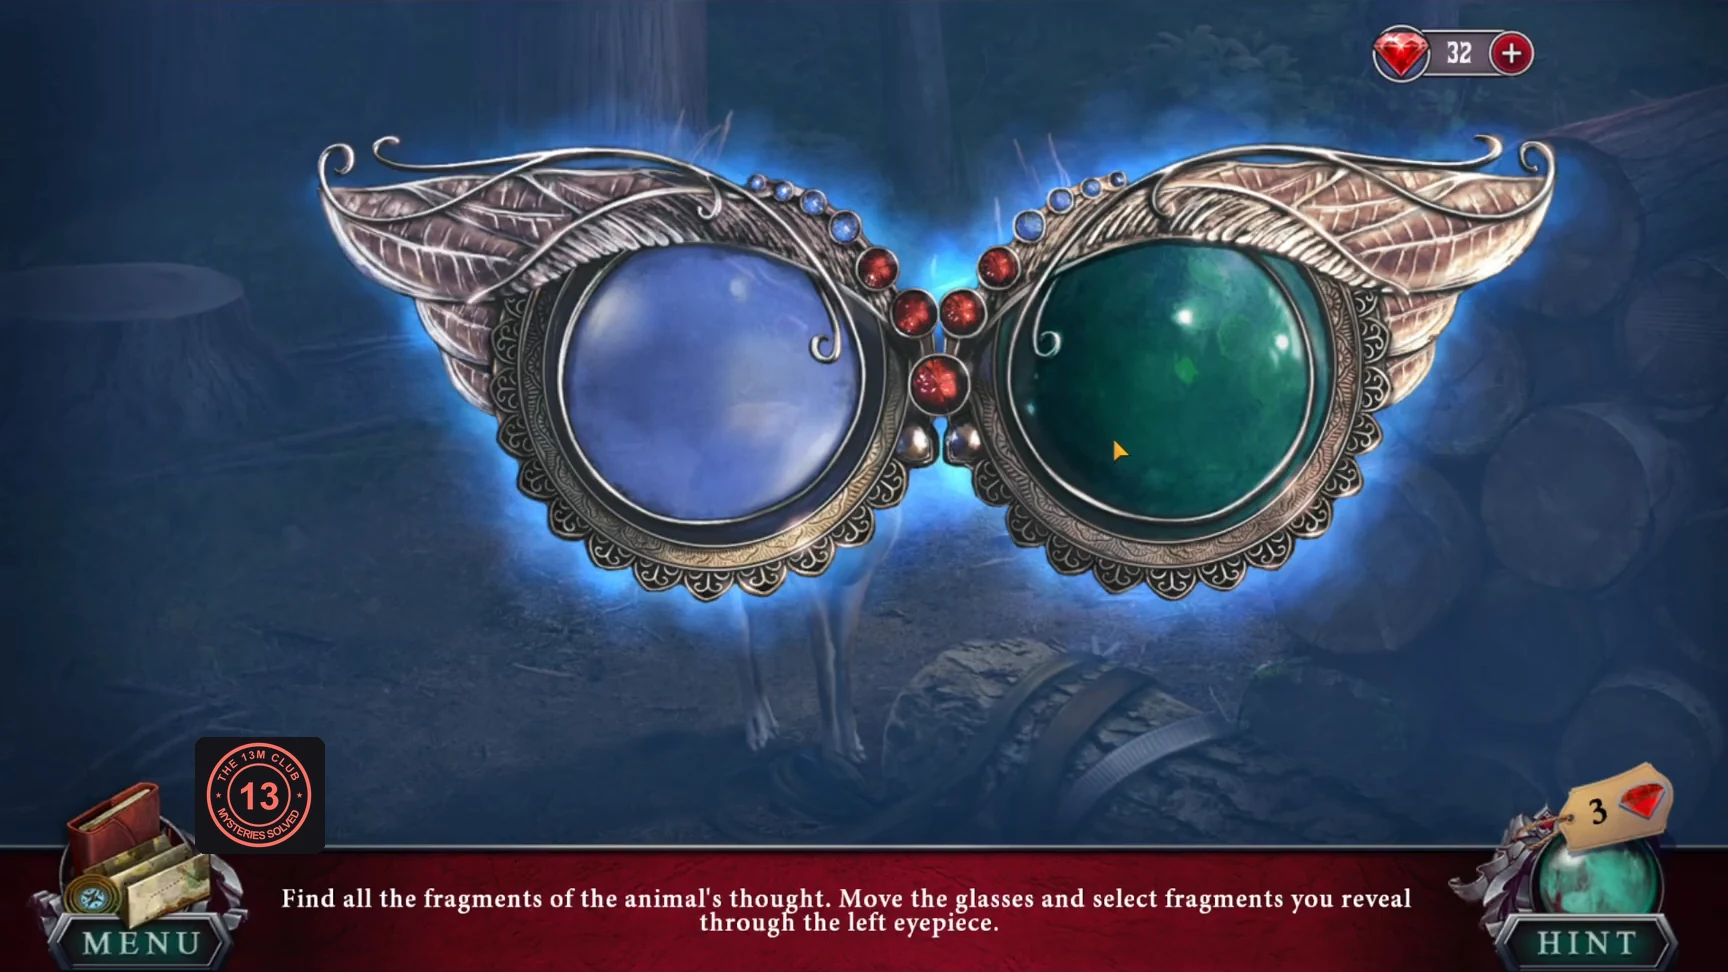
The deer's memory shows where the poachers struck, and you gain the ability to fly short distances.
- Use the glasses and find the deer's memory fragments. After the memory, "Look! The deer has something for me.": take the glowing wing from the deer. This is the Swiftness ability, not an ordinary item.
- Pick up the pencil that sparkles on the ground by the logs.
- Return to the diary in the tram toolbox and rub the imprinted page with the pencil to reveal the phone pattern.
The Logger's Phone Pattern
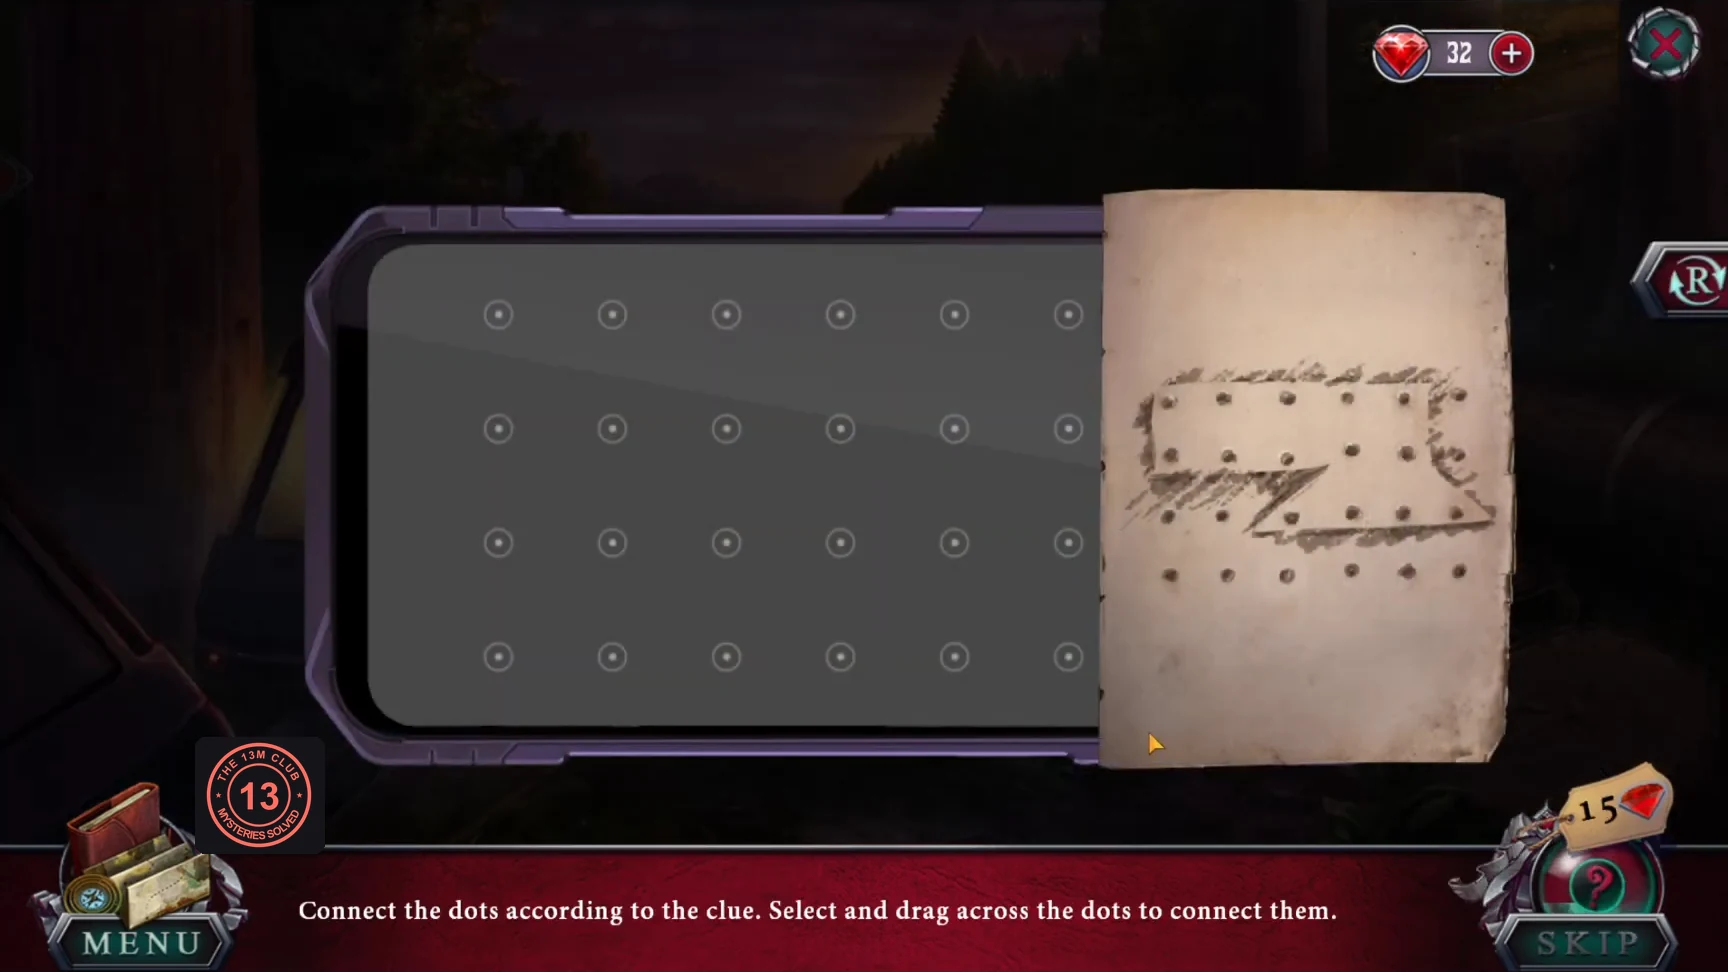
Inspect the locked phone and place the pattern clue beside it. The pattern grid has 6 columns and 4 rows.
- Draw this path (row, column, counting from the top-left dot): r2c1, r1c1, r1c5, r2c5, r3c6, r3c3, r2c4, r2c3.CODEr2c1-r1c1-r1c5-r2c5-r3c6-r3c3-r2c4-r2c3
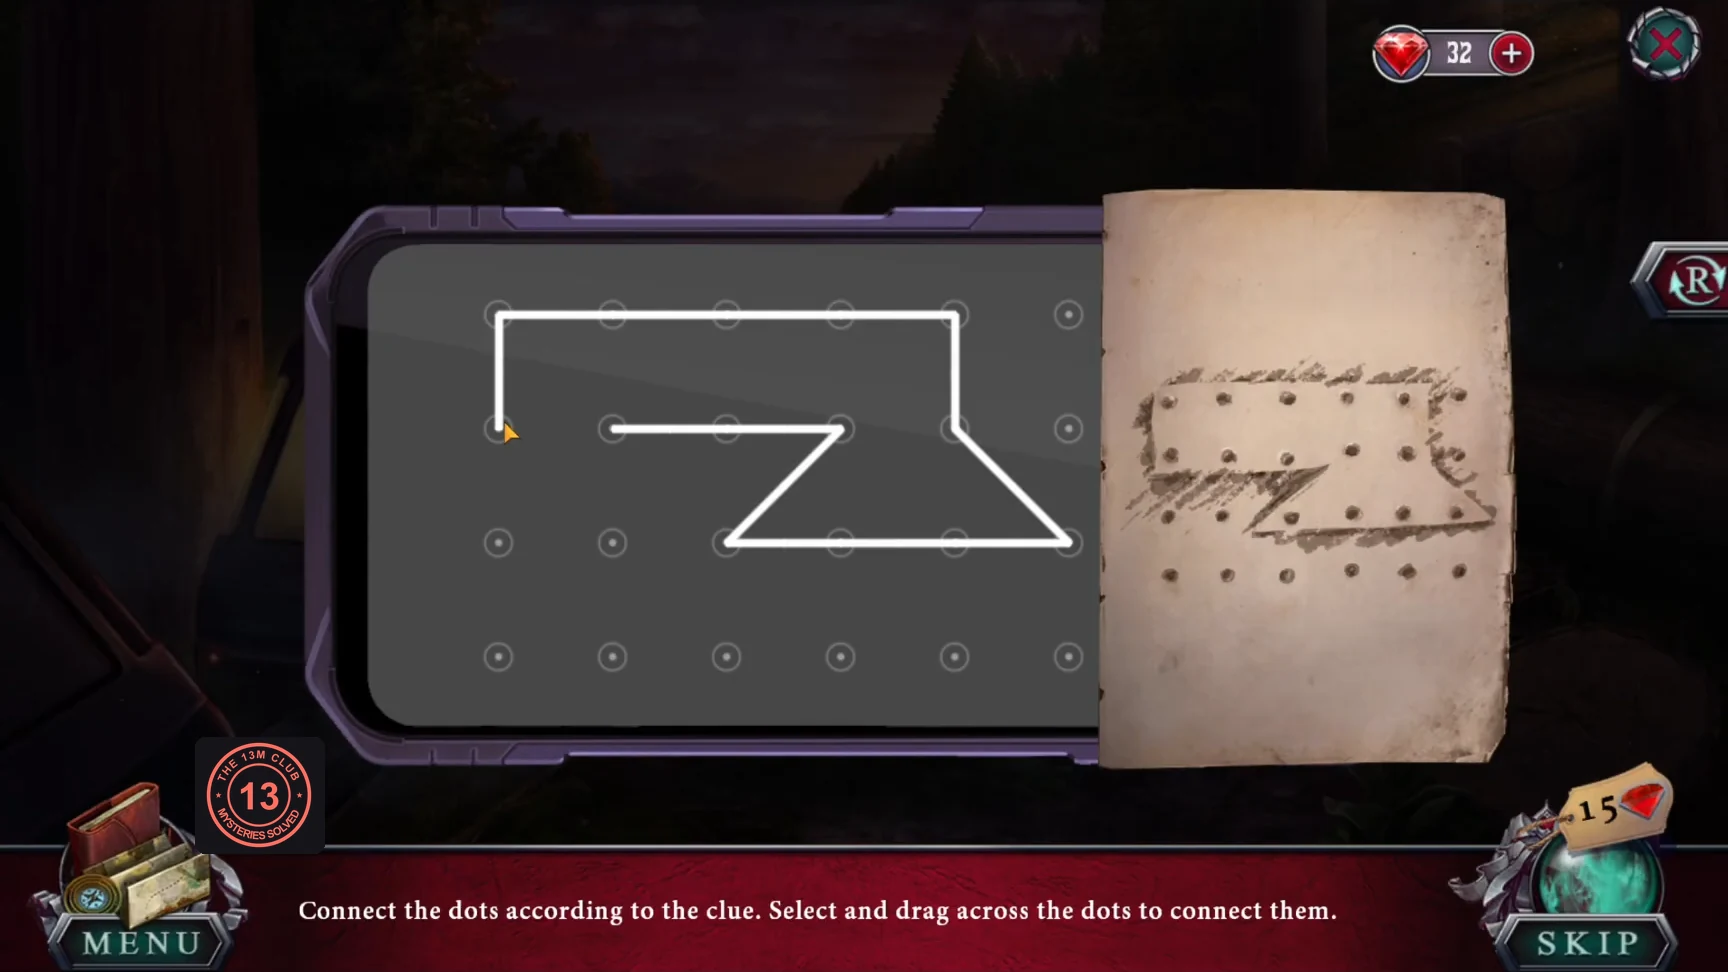
The completed pattern matches the clue. - Press Play to watch the loggers' video, then call the sheriff. Gray runs off, and the Order takes Amanda to the village by the river.
The Children of the Forest's Village
Great-Aunt Tina is one of the Children of the Forest. Poachers have stolen the magical animals, and a falcon is hiding nearby. First you need its glove.
- Talk to Tina. The objective becomes "Find the falcon glove".
- Collectibles (tracker: 1 animal, 1 object in the free version; the Collector's Edition marks more): two animals, one at the top of the shed roof and one faint on the ground just right of the big tree trunk on the left; two morphing objects, the yellow object on the table and the shimmering teal crystal on the dirt path at the bottom right, left of the jetty and tackle box.
- Open the tackle box by the river to start the bait pairs.
The Tackle Box
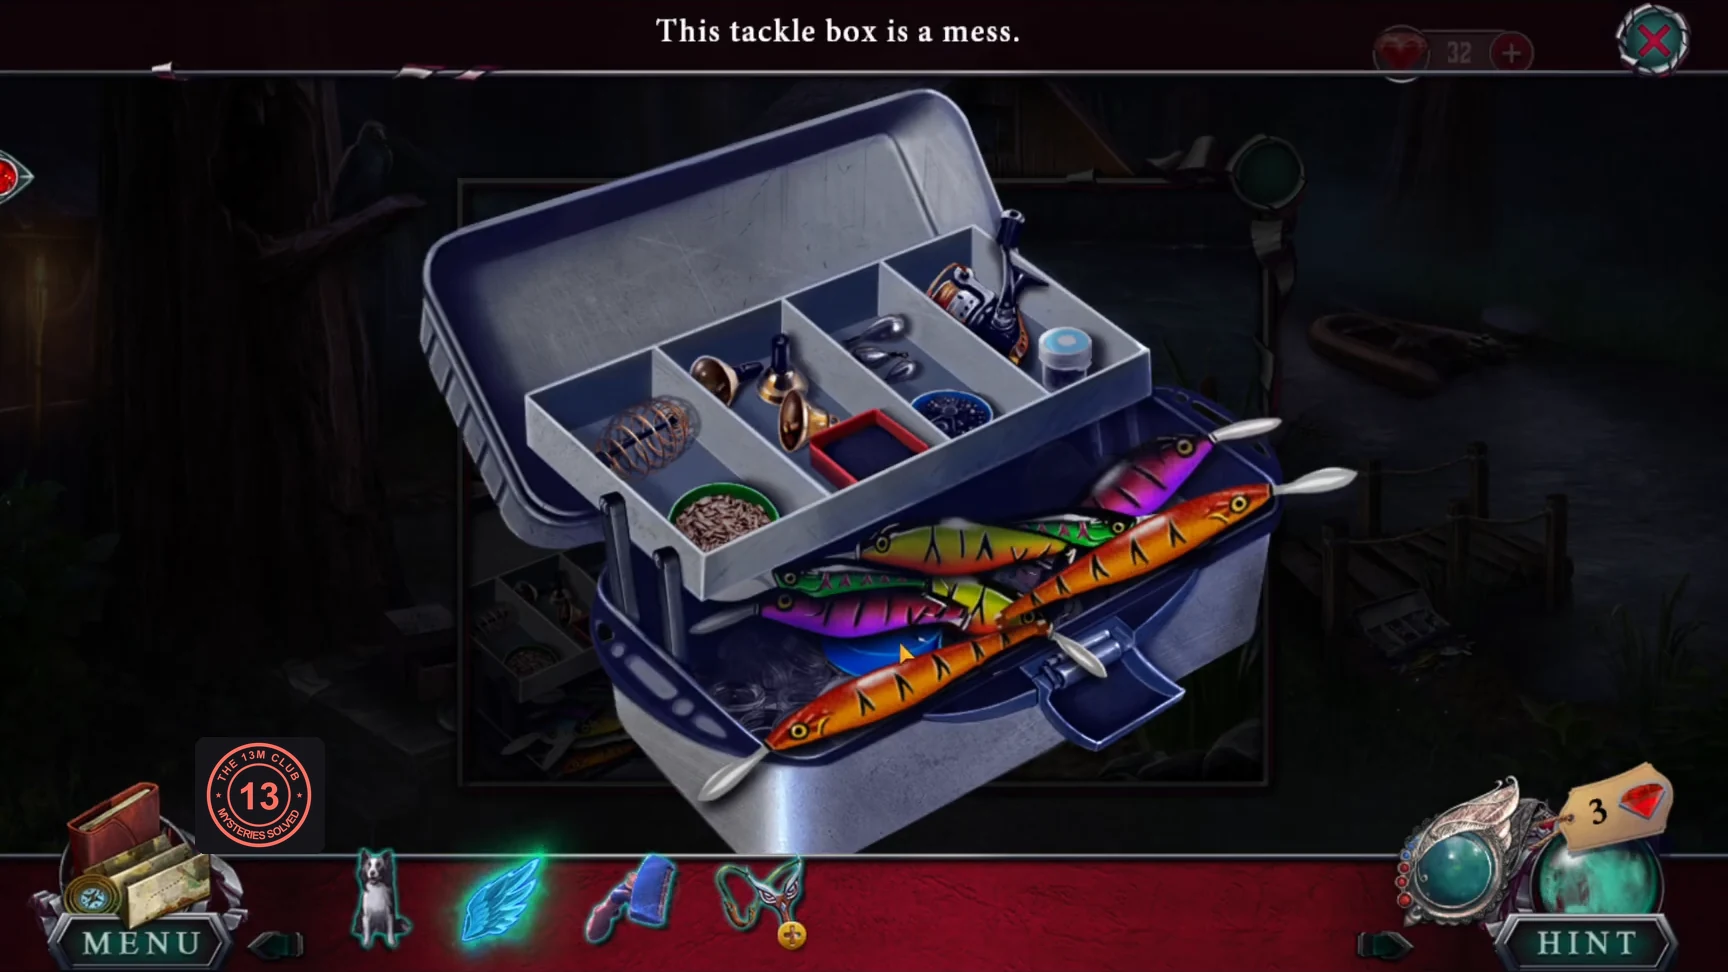
"This tackle box is a mess." Remove the fishing baits in identical pairs.
- Click two identical baits to remove them. Repeat until the box is empty, then take the tape.
The Squirrel and the Crow
Clean a squirrel and scare off a crow to reach the tree hollow.
- At the table on the left, take the dirty brush and the empty slingshot from the drawer.
- Clear the leaf pile by the shed to find the squirrel. Read and remove the poster, then take the ladder.
- Wash the brush in the river, then clean the squirrel. Take the scrap paper from its tail.
- Load the slingshot with the scrap paper and use it to scare the crow from the tree on the left.
- Put the ladder against the tree and take the hook from the branch. Then open the tree hollow.
Tree Hollow Search
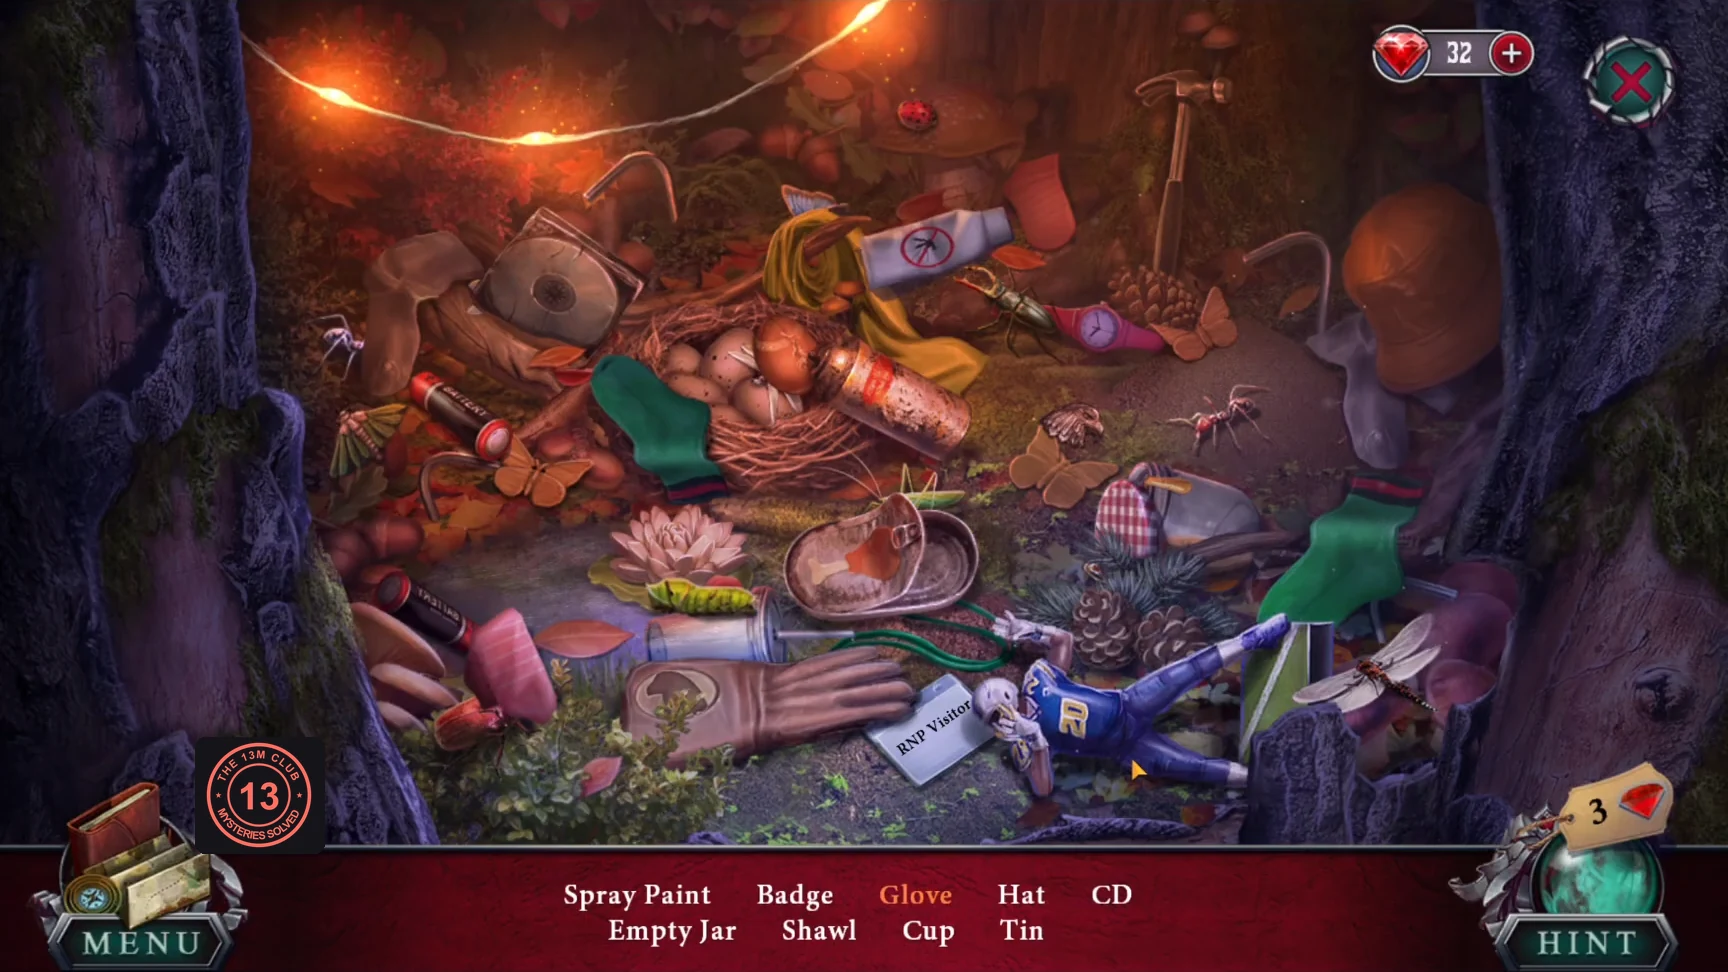
Find the items in the two lists at the bottom. Orange names need an extra action.
- List 1: Spray Paint, Badge, Glove, Hat, CD, Empty Jar, Shawl, Cup, Tin. List 2: Pairs of Socks (x3), Rods (x4), Statuette, Batteries (x2), Repellent, Watch.
- The Glove (orange in list 1) is the brown leather glove at the bottom left; its cuff has an empty round recess. Find the bronze falcon-head emblem on the ground right of the egg nest, between the copper can and the red ant, just above a brown wooden butterfly. Click it to fit it into the glove's recess, then click the glove to collect it.
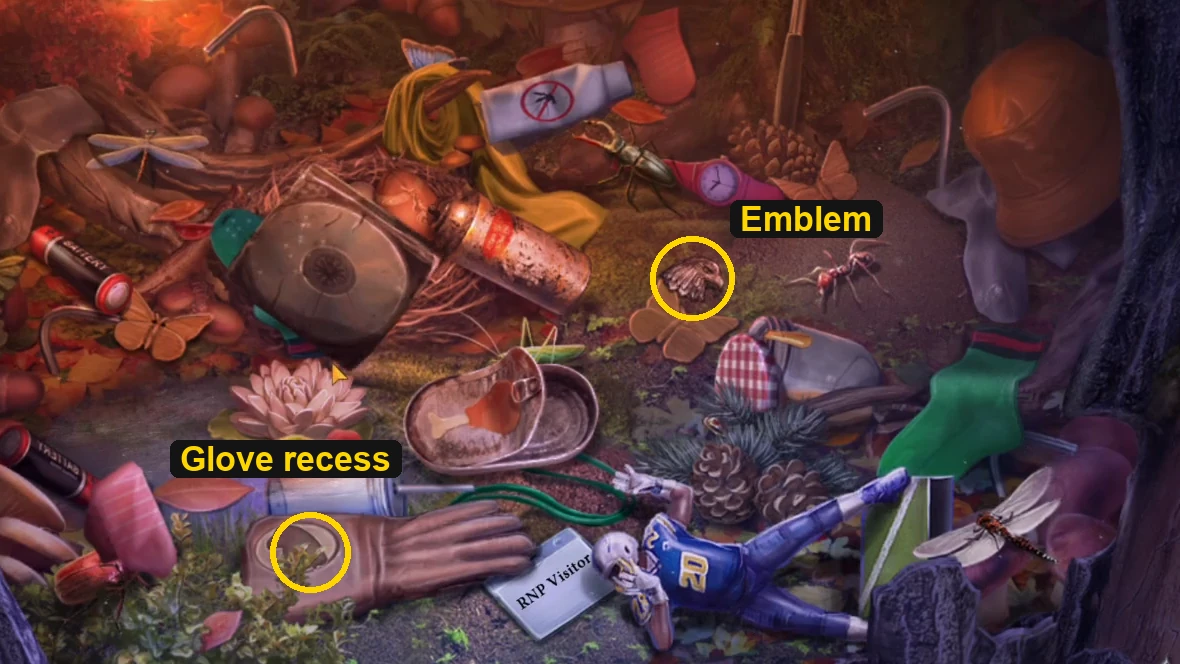
The falcon-head emblem lies above the wooden butterfly; it fits the round recess on the glove cuff. - Socks count only as matching pairs. To collect each rod, drag the hammer (stuck in the ground at the top right) onto the rod. The Statuette is the football player figure at the bottom right: put the brown football in its raised hand to collect it. When both lists are complete you receive the Falcon Glove.
Soothing the Falcon
The falcon is temperamental, and something tasty could win it over.
- Give the falcon glove to Tina and listen to her story (objective "Soothe the falcon").
- When the falcon spreads its wings on Tina's glove, it drops a blue-and-white feather. Take the falcon feather.
- The river is "too dangerous to swim". Use the Swiftness ability to fly across to the boat and take the broken fishing rod.
- Inspect the broken fishing rod ("I just need to fix the rod and craft some kind of float."): attach the hook to the line, add the falcon feather as a float and wrap the crack with the tape.
- Fish at the river left of the tackle box and take the fish. Feed it to the falcon.
The Falcon's Memory
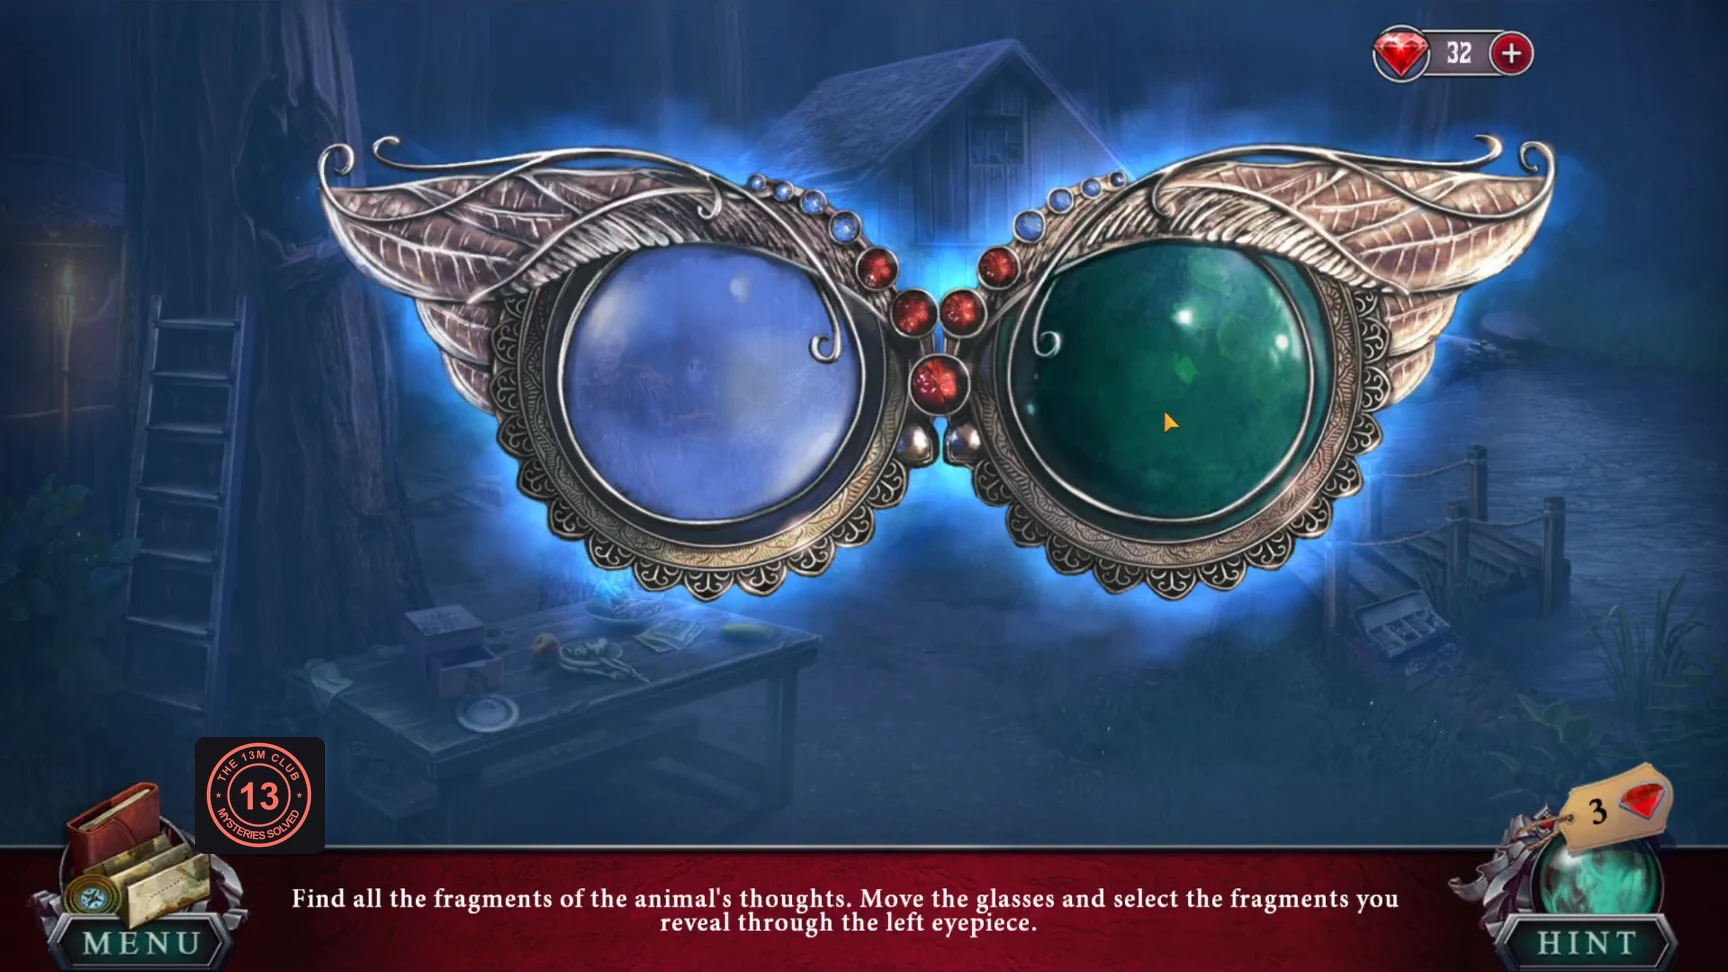
Once fed, the falcon lets you read its memory with the glasses.
- Use the glasses for the falcon's memory (the village attacked, animals caged). Take the Falcon Vision ability and use it to find the path behind Tina.
Following the Poachers (Path Tiles)
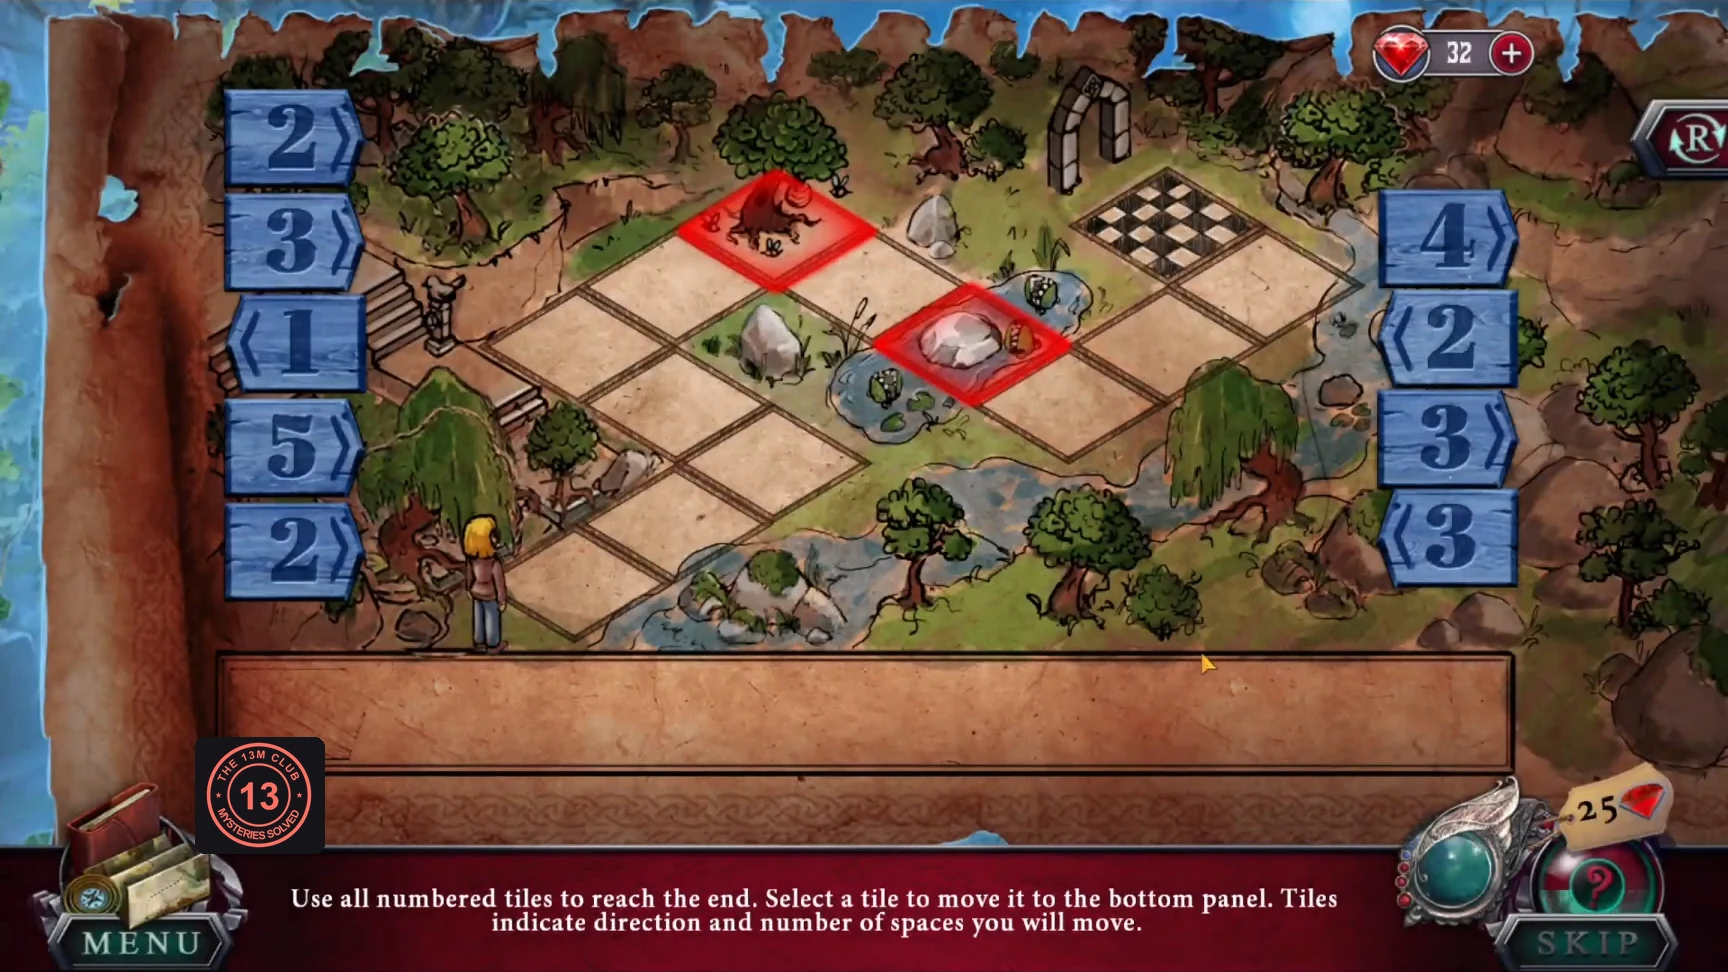
"Use all numbered tiles to reach the end. Select a tile to move it to the bottom panel. Tiles indicate direction and number of spaces you will move." Red cells are hazards.
- Available tiles: 2>, 3>, <1, 5>, 2> (left column) and 4>, <2, 3>, <3 (right column).
- Place the tiles in this order: 5>, 3>, 2>, <2, <3, 3>, 4>, <1, 2>. Amanda walks the path to the end.CODE5> 3> 2> <2 <3 3> 4> <1 2>