The Poachers' Road
The poachers' truck and livestock trailer sit on the road, and the poachers have become plants. Tina fixes the cable while you start the van.
- Talk to Tina (objective "Pull out the van"). Collectibles: an animal on the trailer and a large faint animal at bottom left; morphing objects are a small red sign at the top and a pick on the stump (Collector's Edition positions).
- Zoom in on the truck's fuel tank. Read the note ("The lid of the tank is missing, plug it with something temporarily"), take the squirrel toy from the filler and the screw from the side of the tank.
- Zoom in on the plant-covered poachers and take the empty canister from the ground.
- At the anomalies, move the white hard hat and take the coin (needed later for the vending machine).
- In the truck cab, read the start instructions on the windshield and take the solvent spray from the floor.
- At the blue fuel tank by the bushes, the faucet is rusted ("Stuck. The rust must be removed if I want to use it."). Spray it with the solvent and take bolt 1.
- Inspect the canister and patch the hole with the tape ("Some kind of hose would come in handy here."). At the fuel tank there is something like a snake in the grass: send Gray to fetch the hose, then attach it to the canister.
- Fill the canister at the fuel tank faucet and pour the fuel into the truck's tank.
- In the cab, follow the instructions: "1) Fuel the truck, 2) Push the button, 3) Pull the lever and 4) Step on the pedal." The van is pulled out.
- Back in the village, give the toy to the squirrel and take bolt 2.
- Open the tree hollow again for the insect search.
Tree Hollow Insects
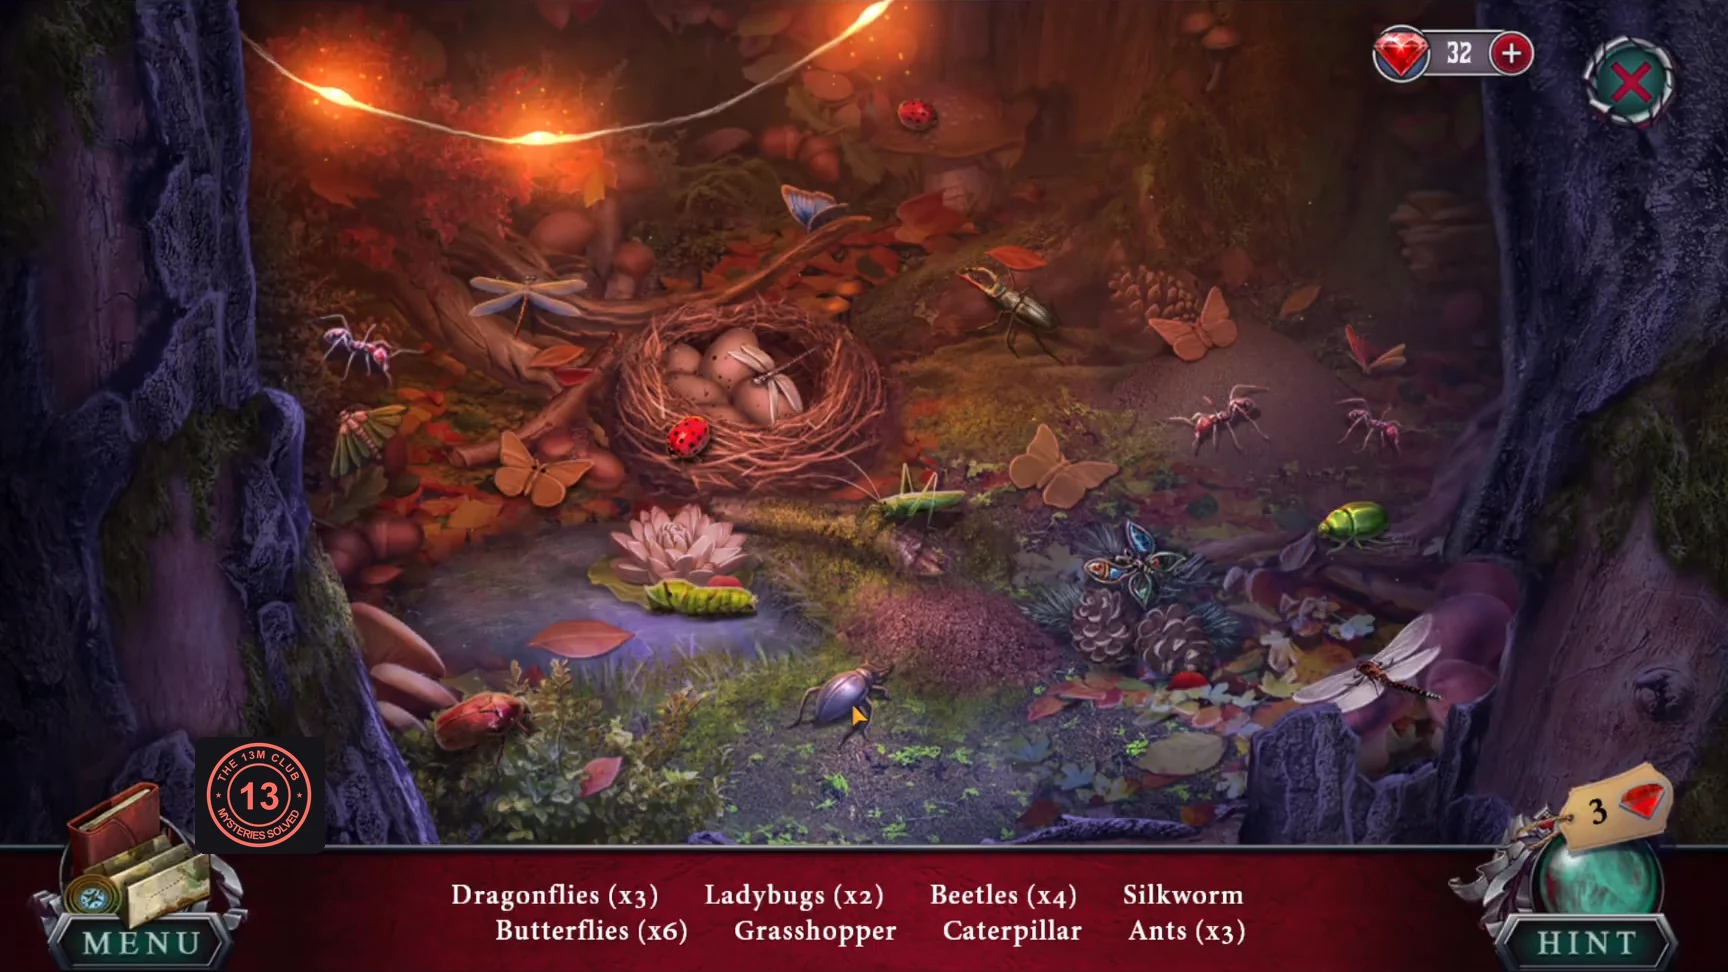
A second hidden-object search in the village tree hollow.
- Find: Dragonflies (x3), Ladybugs (x2), Beetles (x4), Silkworm, Butterflies (x6), Grasshopper, Caterpillar, Ants (x3). Then take the antlers inlay that appears.
- In the truck, open the glove compartment with the antlers inlay. Take the flashlight and bolt 3.
The Van Bolts
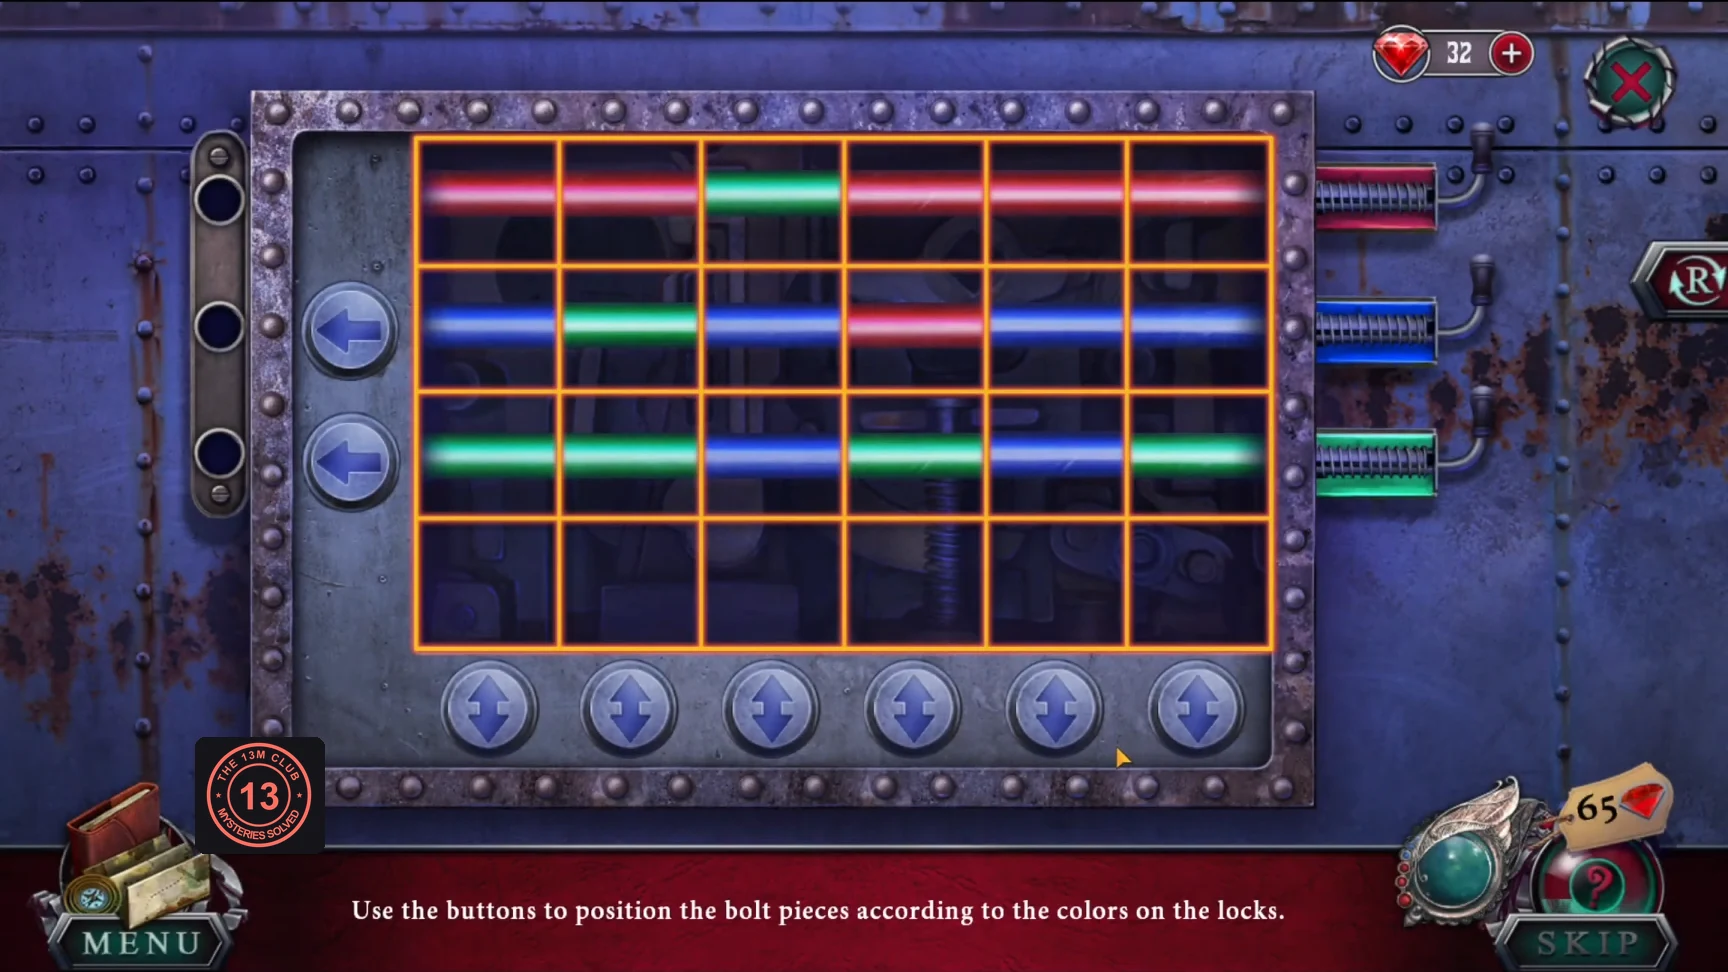
Fix the loose lock with the screw and insert the three bolts. "Use the buttons to position the bolt pieces according to the colors on the locks." The grid has 6 columns and 4 rows (the bottom row starts empty). Row buttons on rows 2 and 3 shift that row left, wrapping around. Column buttons move a column up or down, wrapping through the empty row.
- Fix the loose lock with the screw, then place bolts 1-3.
- Observed start (columns left to right). Row 1 (red lock): R R G R R R. Row 2 (blue lock): B G B R B B. Row 3 (green lock): G G B G B G.
- Example solution from that start: column 3 down; row 2 left; column 3 up; column 2 down; row 3 left; column 2 up; column 1 down; row 3 left three times; column 1 up. When every row matches its lock colour, the van opens.CODEc3 down, r2 left, c3 up, c2 down, r3 left, c2 up, c1 down, r3 left x3, c1 up
- Talk to Tina. Mallor is blaming the Order, and you must find the elder, the Keeper, whose door has an owl on it.
The Village Centre
The village centre is dark, and the Keeper's house is on fire.
- Use the flashlight and find the switch to turn on the streetlight. The Keeper's doorway is burning (objective "Extinguish the fire").
- Collectibles: two faint animals in the sky over the roofs; morphing objects are a blue basin by the shop and a garden tool by the porch steps (Collector's Edition positions).
- On Tina's porch, take the ribbon and read the note about the fertilizer delivery. Lift the carpet and take a coin.
- In the tram, read the eco shop leaflet and take the headphones beneath it. Take the straw from the cup.
- At the eco shop window, tie back the curtains with the ribbon and the headphones. Take the gloves and the plant food, and read the newspaper.
- On the rails behind the tram, take seedling tag 1 and a coin.
The Tram Vending Machine
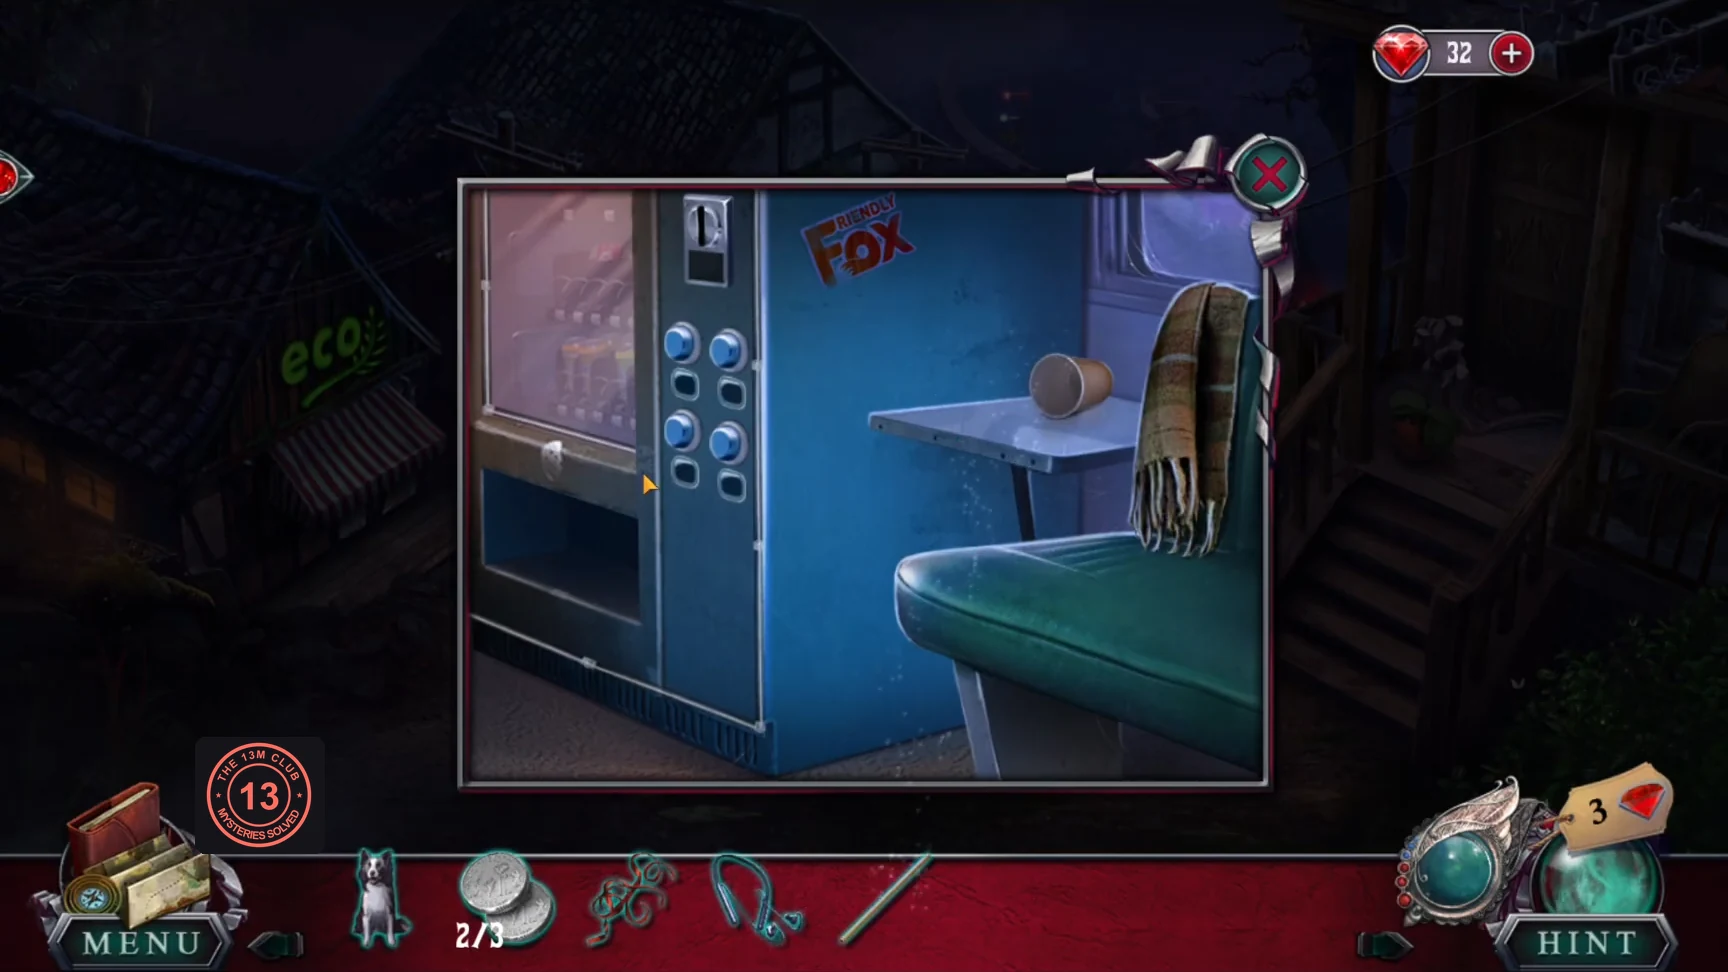
The vending machine in the tram has four buttons in a 2x2 group and needs three coins.
- Press the buttons in this order: lower left, upper left, upper right, lower right. All four light green.CODElower-left, upper-left, upper-right, lower-right
- Insert the three coins and take the water.
- Pour the water on the fire at the Keeper's door and pick up the empty plant spray (objective "Enter the Keeper's House").
- With the gloves, take the owl key (1 of 3) from the hot coals at the doorway.
- Open the plant spray, add the plant food and attach the straw. Spray the orchid on Tina's porch and take seedling tag 2.
The Keeper's Door (Seedling Tags)
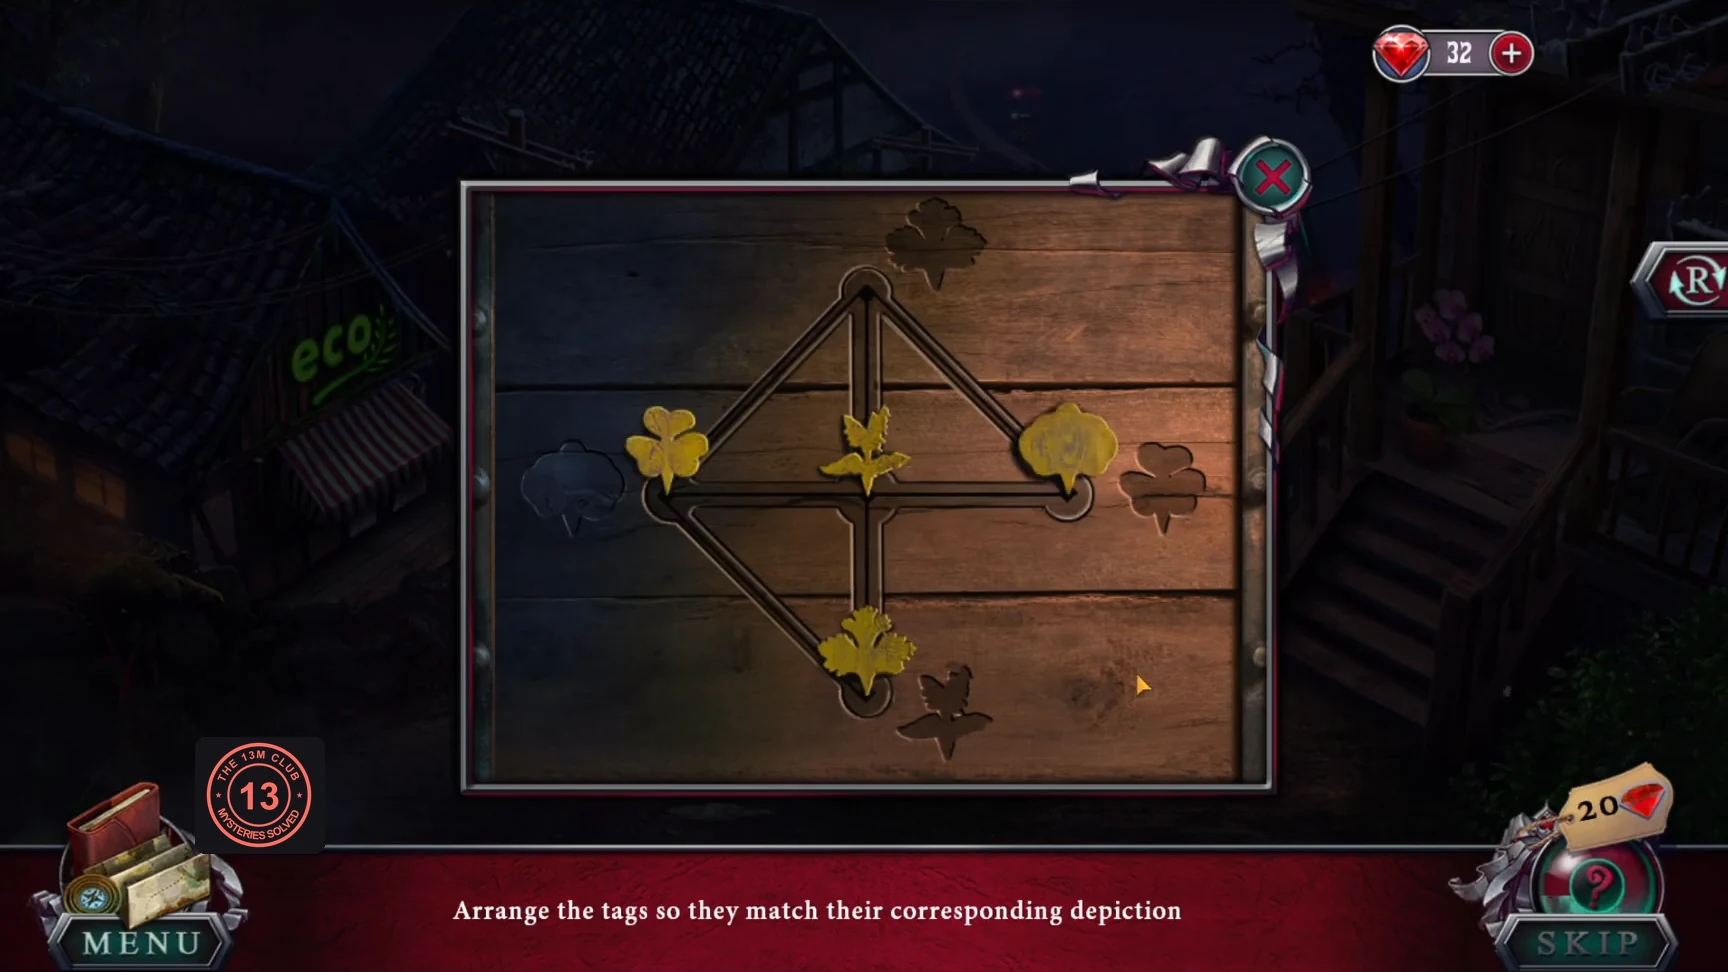
"Arrange the tags so they match their corresponding depiction." There are five spots: top, left, centre, right and bottom. Tracks link top-left, top-right, left-bottom, top-centre-bottom and left-centre-right; there is no right-bottom track.
- Place both seedling tags on the door. Start: left clover, centre bird-shaped leaf, right round flower, bottom parsley-like leaf, top empty. Targets: top parsley, left round flower, right clover, bottom bird leaf.
- Moves: clover left to top; parsley bottom to left; bird leaf centre to bottom; round flower right to centre; clover top to right; parsley left to top; round flower centre to left. The door opens.CODEL->T, B->L, C->B, R->C, T->R, L->T, C->L
Inside the Keeper's House
The Keeper is missing. Look for evidence of the Order's innocence.
- Collectibles: animals on the top-left beam and on the left shelf; morphing objects at the top middle and by the fireplace desk (Collector's Edition positions).
- Take the broom leaning beside the chessboard ("This place is full of secrets. Is it my turn now!"). At the crack in the floorboards, take the pipe and the mountain lion figure. On the desk by the owl carving, take the oil can.
- Oil the pipe in the inventory to loosen it.
- Put the mountain lion on the chessboard and slide it right. Take the second owl key from the drawer.
The Feather Dreamcatcher
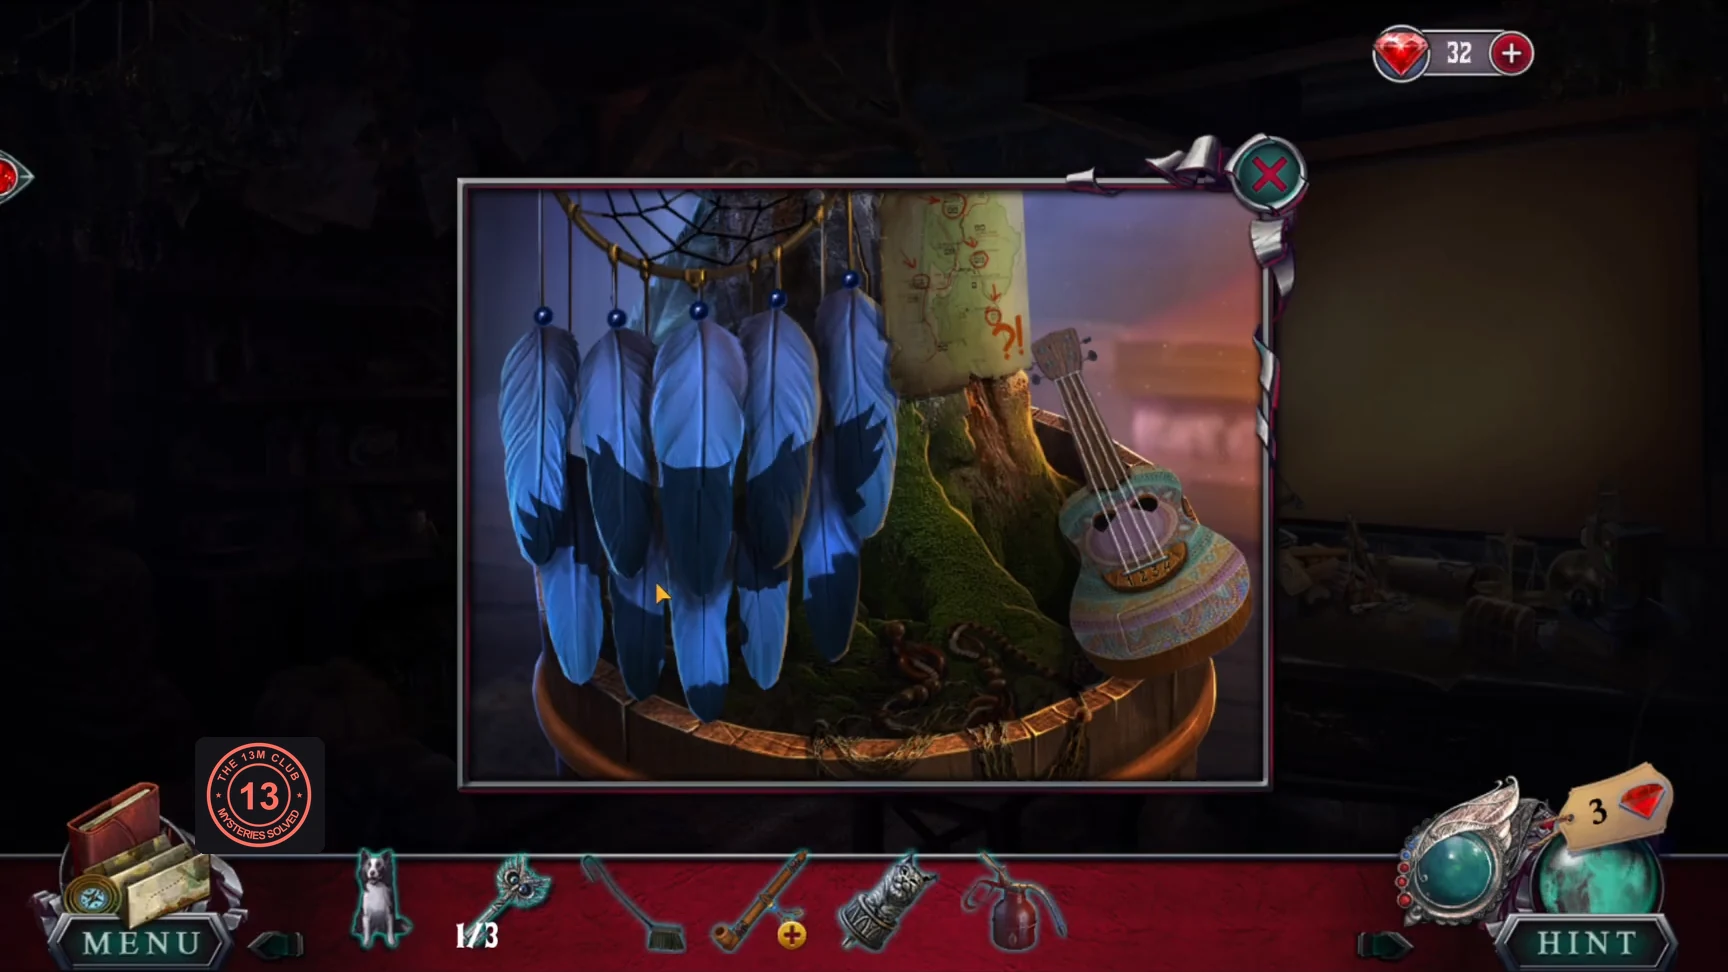
The tree in the centre of the room holds blue feathers. Clicking a feather flips it and changes its dark markings.
- Flip feathers until the dark markings form an owl shape. You can click the feathers in any order; there is no fixed sequence. The completed owl is shown in the image for this step.
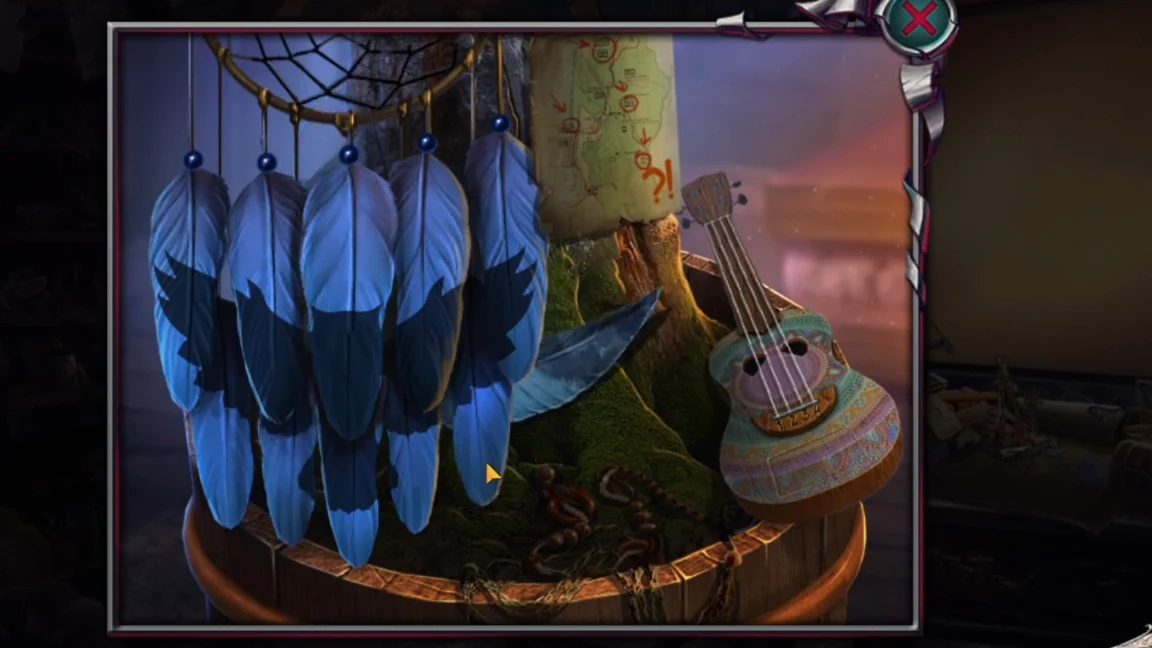
Solved: the dark markings form an owl. - Take the blue feather that drops. Push the stuck note out of the pipe with it and read both sides: "Someone's trying to set us up! But I have photos..." and, on the back, 4132 with a ukulele drawing.
The Ukulele
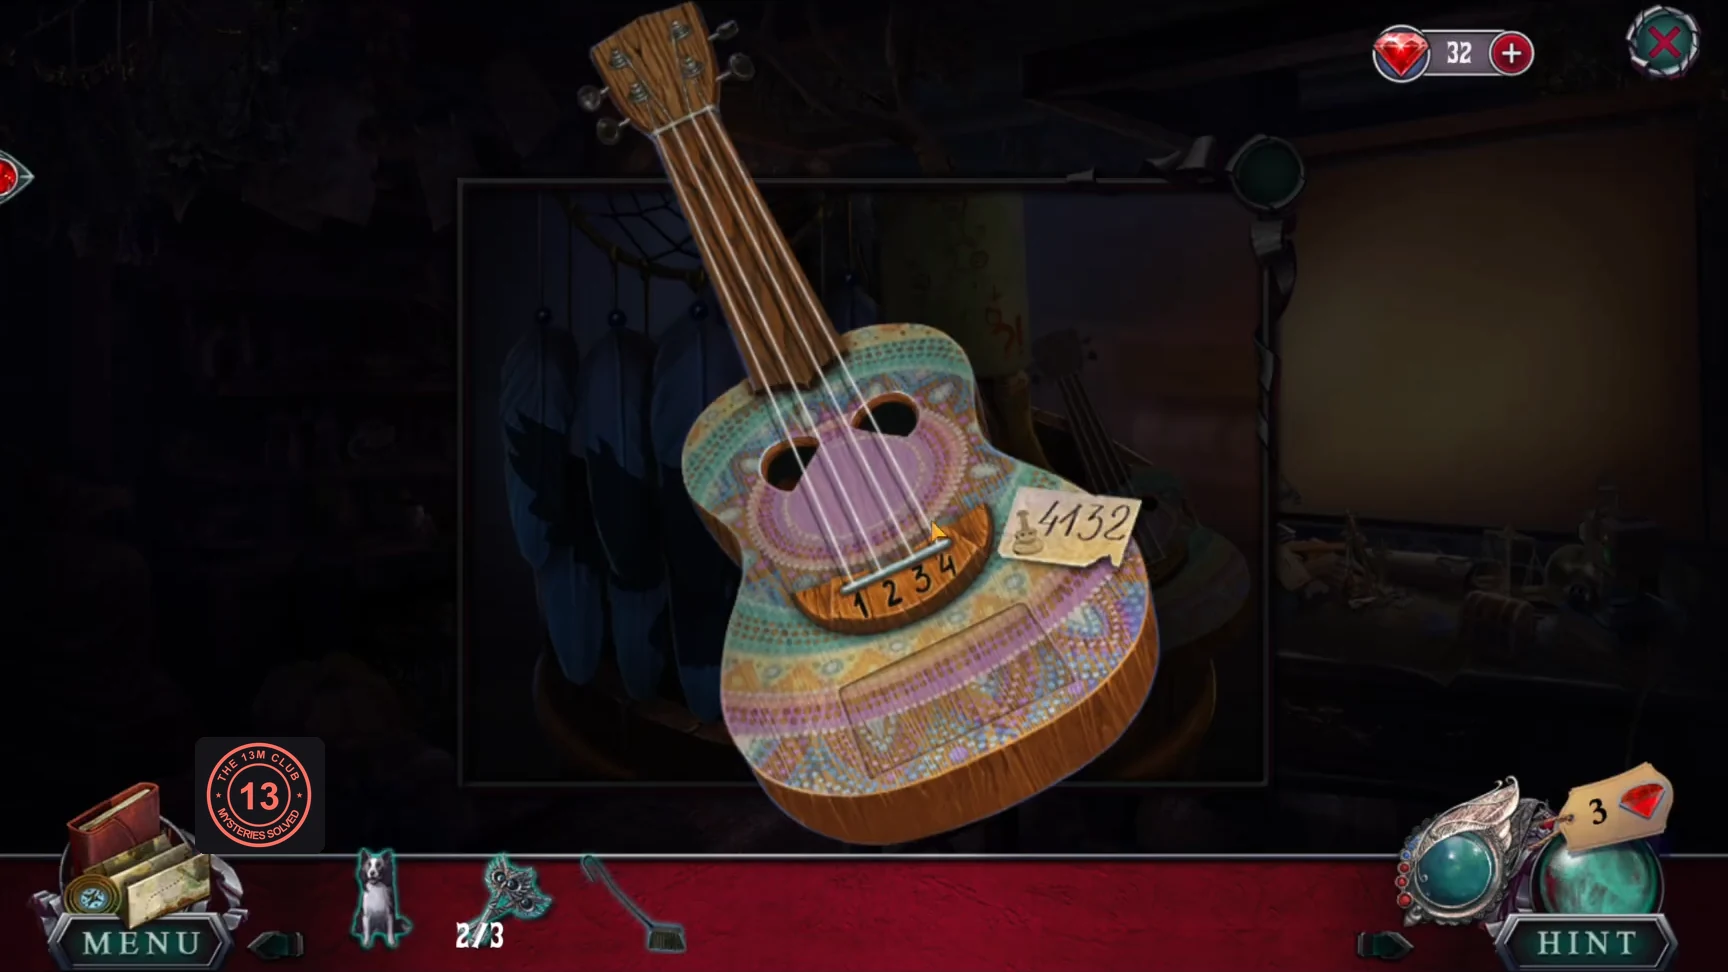
The ukulele next to the blue feathers has numbered strings.
- Place the note on the ukulele and play strings 4, 1, 3, 2. Take the slides from the compartment.CODE4132
The Projector Slides
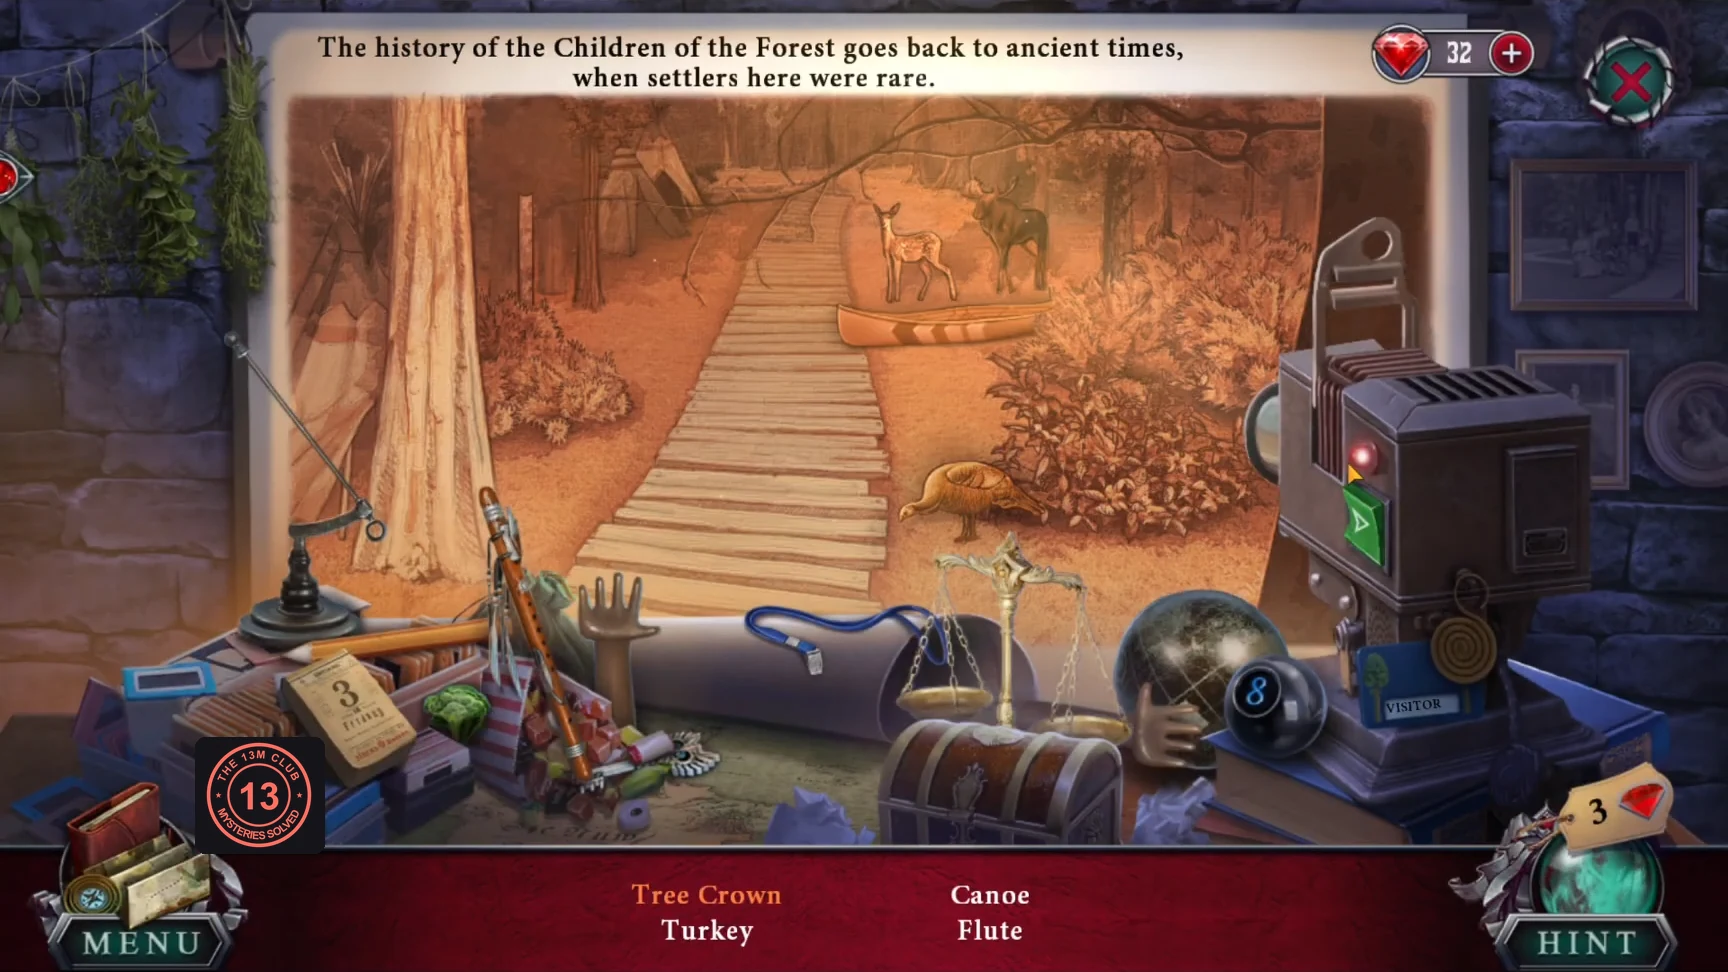
Put the slides into the projector on the right desk. Each slide lists objects to find. Starred items need a shadow made first.
- Slide 1: Tree Crown, Canoe, Turkey, Flute. Move the broccoli beside the tree trunk so its shadow forms the crown, then click it.
- Slide 2: Totem, Waterfall, Amulet, Scales. Move the pencil so its shadow completes the totem, then click it.
- Slide 3: Cage, Key, Car, Axe. Move the wheel from behind the projector beside the car to cast its shadow, then click the car. Take the third owl key.
The Photos and Tina's Confession
The Keeper's chest holds the proof.
- Use the three owl keys on the chest under the left desk. Read the letter and take the photos.
- Go outside and give the photos to the sheriff. Tina falsely confesses to the attack on Dr. Finch and asks you to find the Keeper (objective "Find the Keeper").
- Read the letter on the ground and take the squirrel token beneath it.
- Unlock the left door in the Keeper's house with the squirrel token and go down into the dark cellar.