CHAPTER 2
Inside the Trailer
Search Dr. Finch's trailer. Its phone charger is under the clutter on the bed.
- Collectibles: animals by the skylight top left, on the top-middle shelf and on the top-right shelf; morphing object = the mug in the sink.
- Take the tape player (boom box) from the right desk. The cassette is stuck; you need something long and thin to press eject.
PUZZLE
The Unmade Bed (Book Pairs)
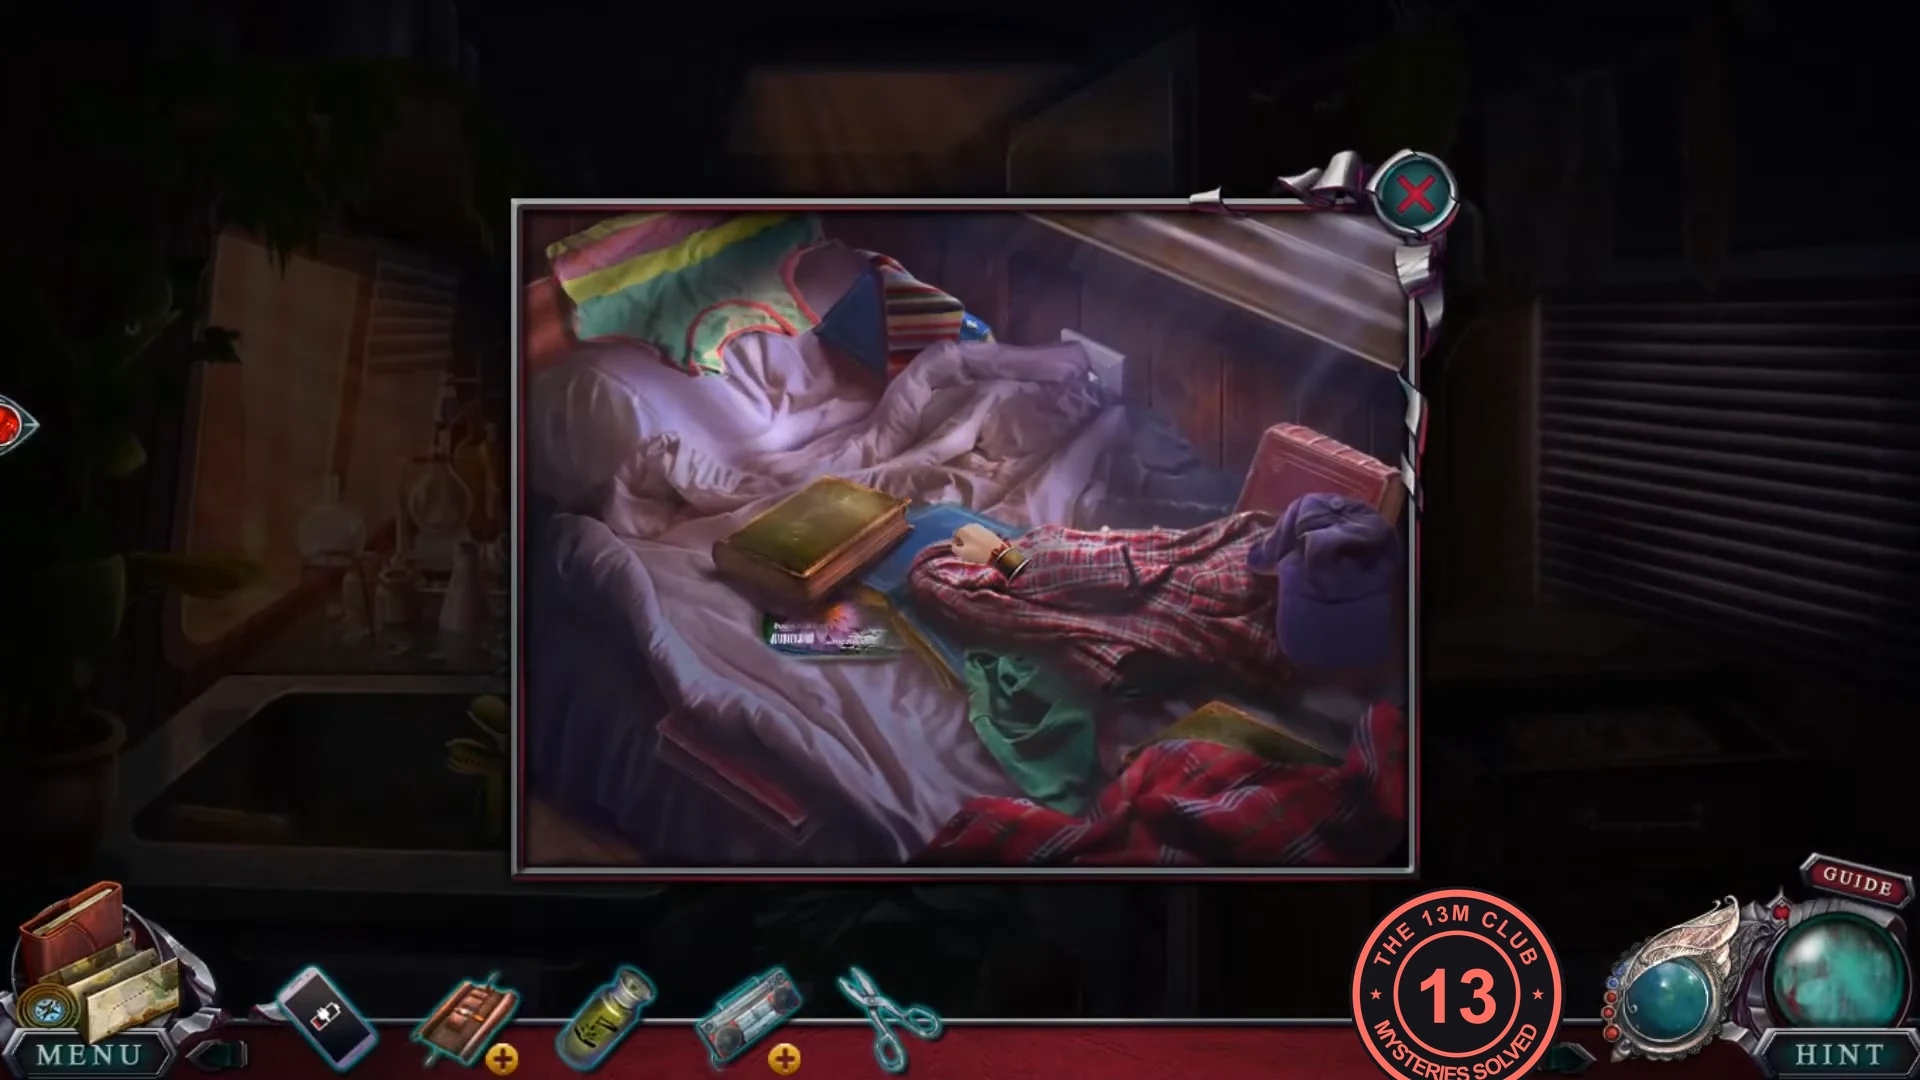
Dr. Finch's bed is covered with books and clothes. The phone charger is underneath.
- Collector's Edition: remove the books in pairs by clicking two books with the same cover colour. The two gold-brown books lie on the plaid shirt at the left and at the bottom right under the red blanket. The two red books lie on the right by the purple pillow and at the bottom left. The two blue books lie under the rainbow blanket at the top and under the plaid shirt. When all three pairs are gone, only a magazine with pink flowers on its cover remains. In the free version there are no book pairs; the plant book and the novel can be opened straight away.
- Read the plant pages ("Despite centuries of study...") in the flower magazine, then the illustrated novel "Bridge to Another World". Take the deer note tucked inside the novel (deer drawing, 2, 1, 3).
- Move the blanket and clothes and charge the phone. Take it to call Sheriff Taylor. Gray senses someone behind the bookcase and joins your inventory.
- At the bookcase, take the flower plate and pull out the broken lever (click twice).
- Outside, place the flower plate in the desk recess and take deer inlay 1.
PUZZLE
Flowerpots and the Flytrap
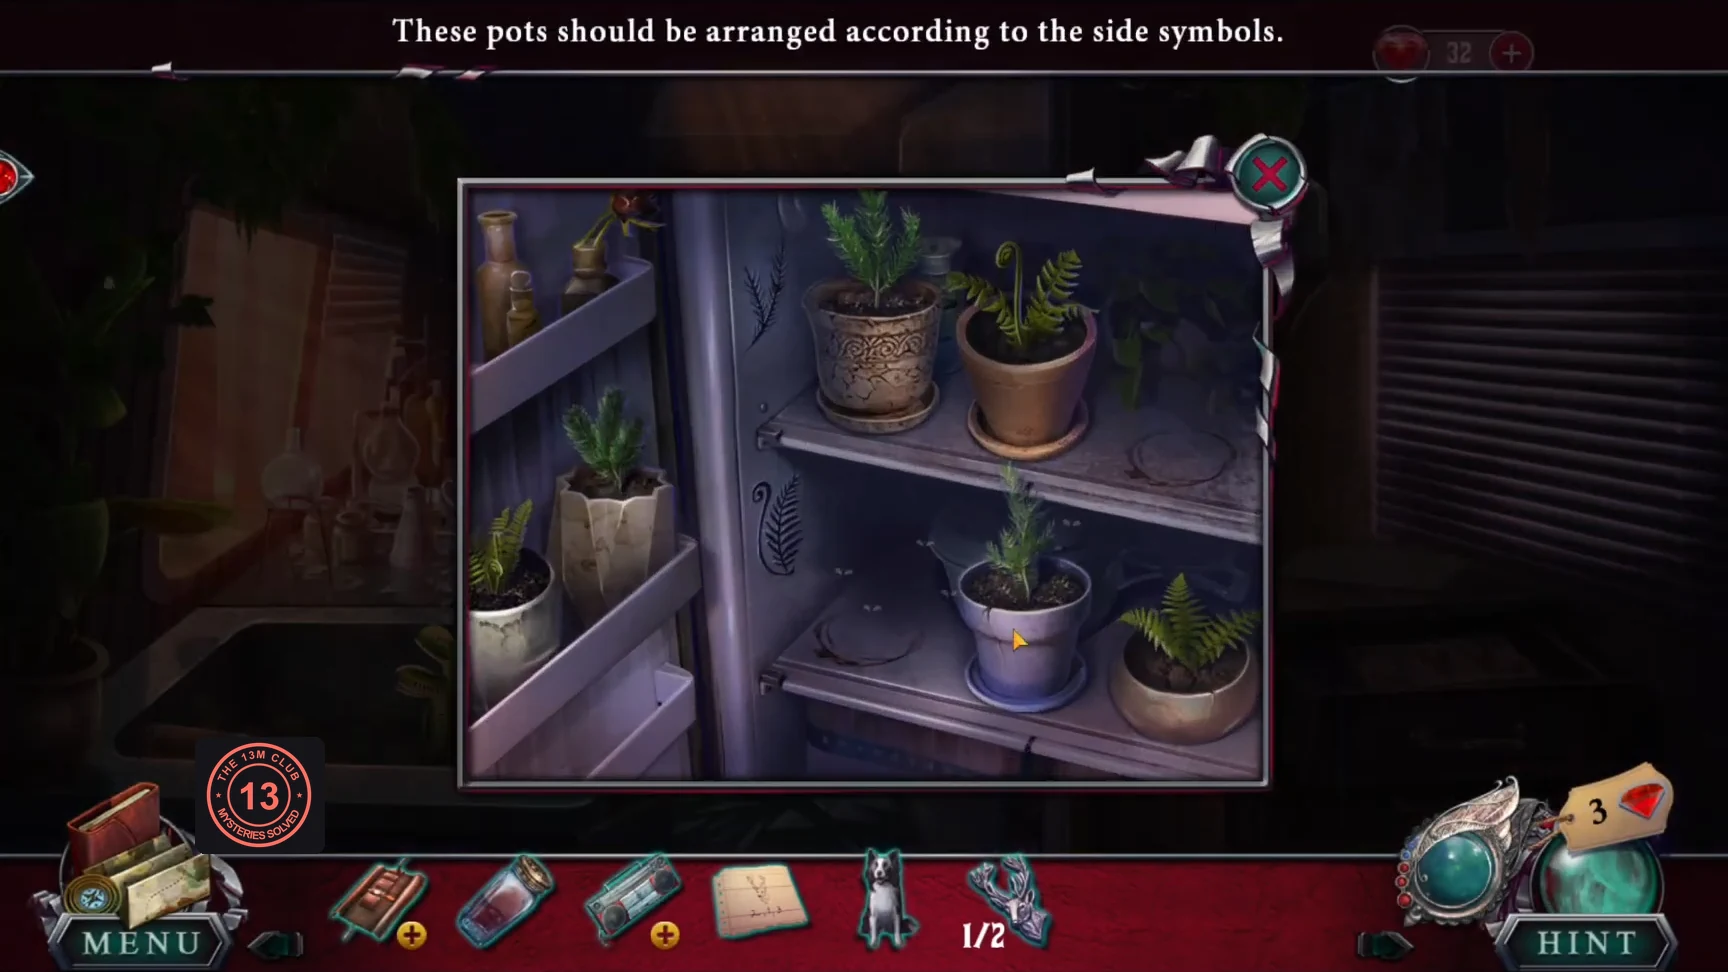
The fridge shelves in the trailer hold flowerpots. "These pots should be arranged according to the side symbols."
- Put the three needle-leaf plants on the upper shelf (needle symbol) and the three ferns on the lower shelf (fern symbol). The pots disappear; take the acid from the shelf.
- Use the empty jar to catch the flies and feed them to the carnivorous plant on the left desk. Take the scissors from its pot.
- Cut the patched part of the mattress with the scissors and take deer inlay 2.
PUZZLE
The Deer Box
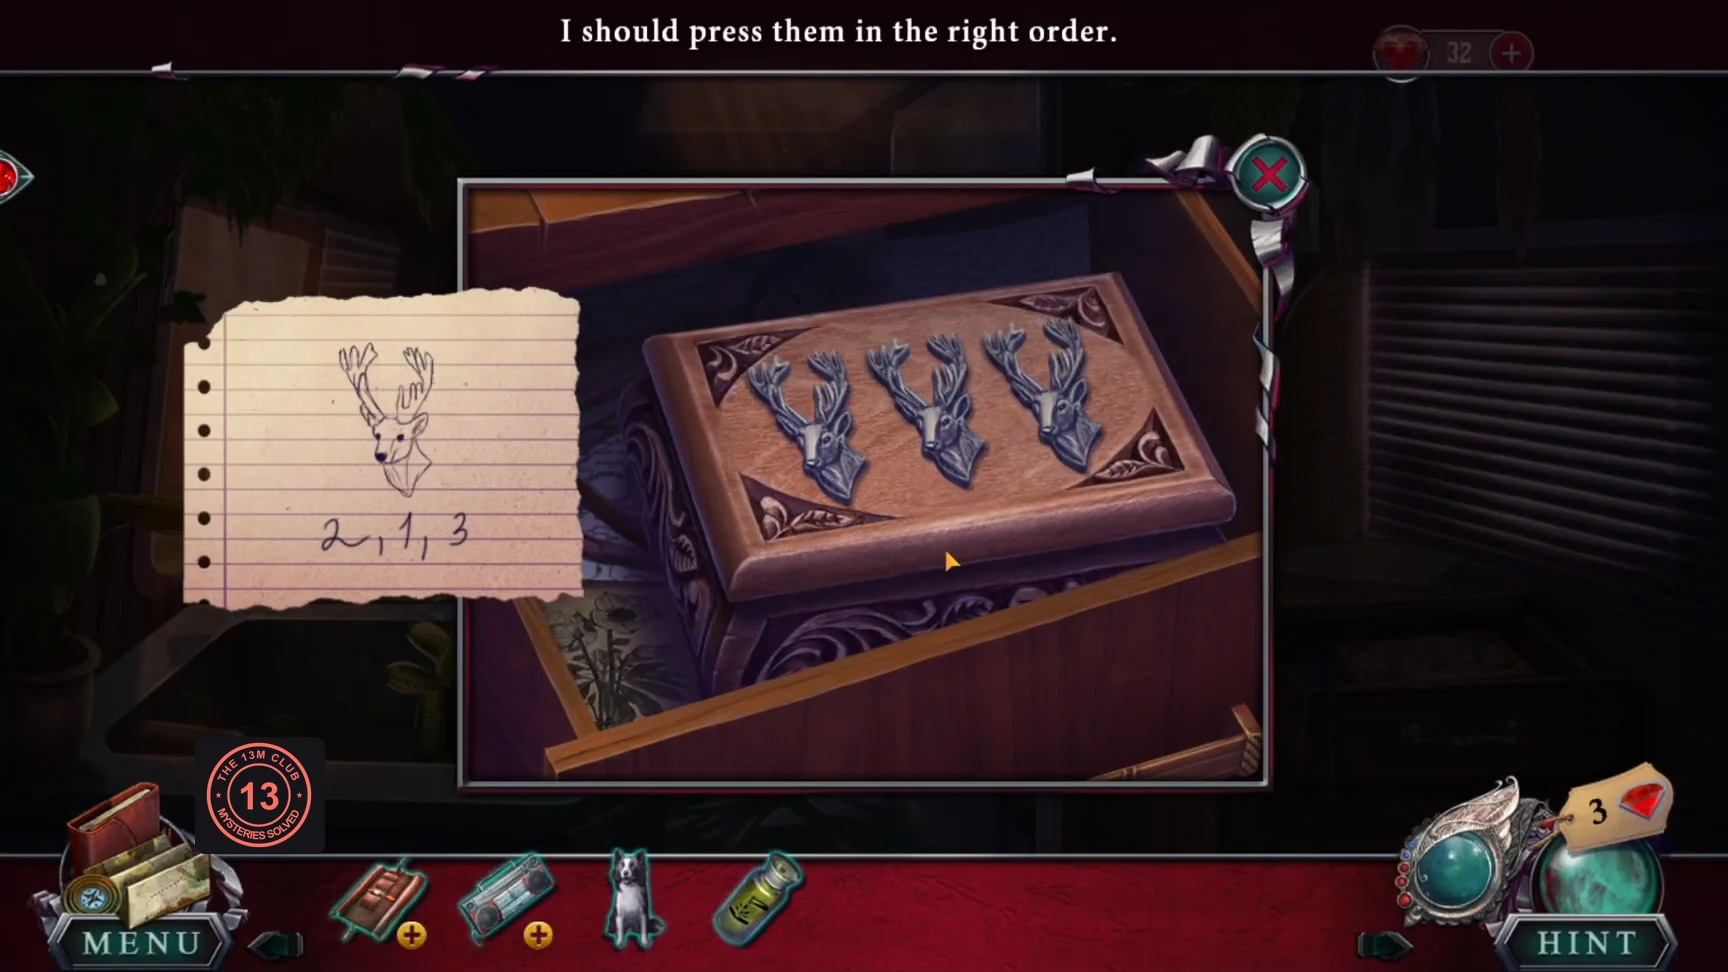
The wooden box in the right-hand drawer has three deer inlays and opens with a sequence.
- Place both deer inlays on the lid. The deer note from the novel shows 2, 1, 3. Press the middle deer, then the left, then the right.CODE2-1-3
- Read the letter and take the tool badge. Put the badge in the toolkit slot to get the screwdriver.
- Inspect the tape player and press eject with the screwdriver. Take the audio cassette.
PUZZLE
Dr. Finch's Lab Recordings
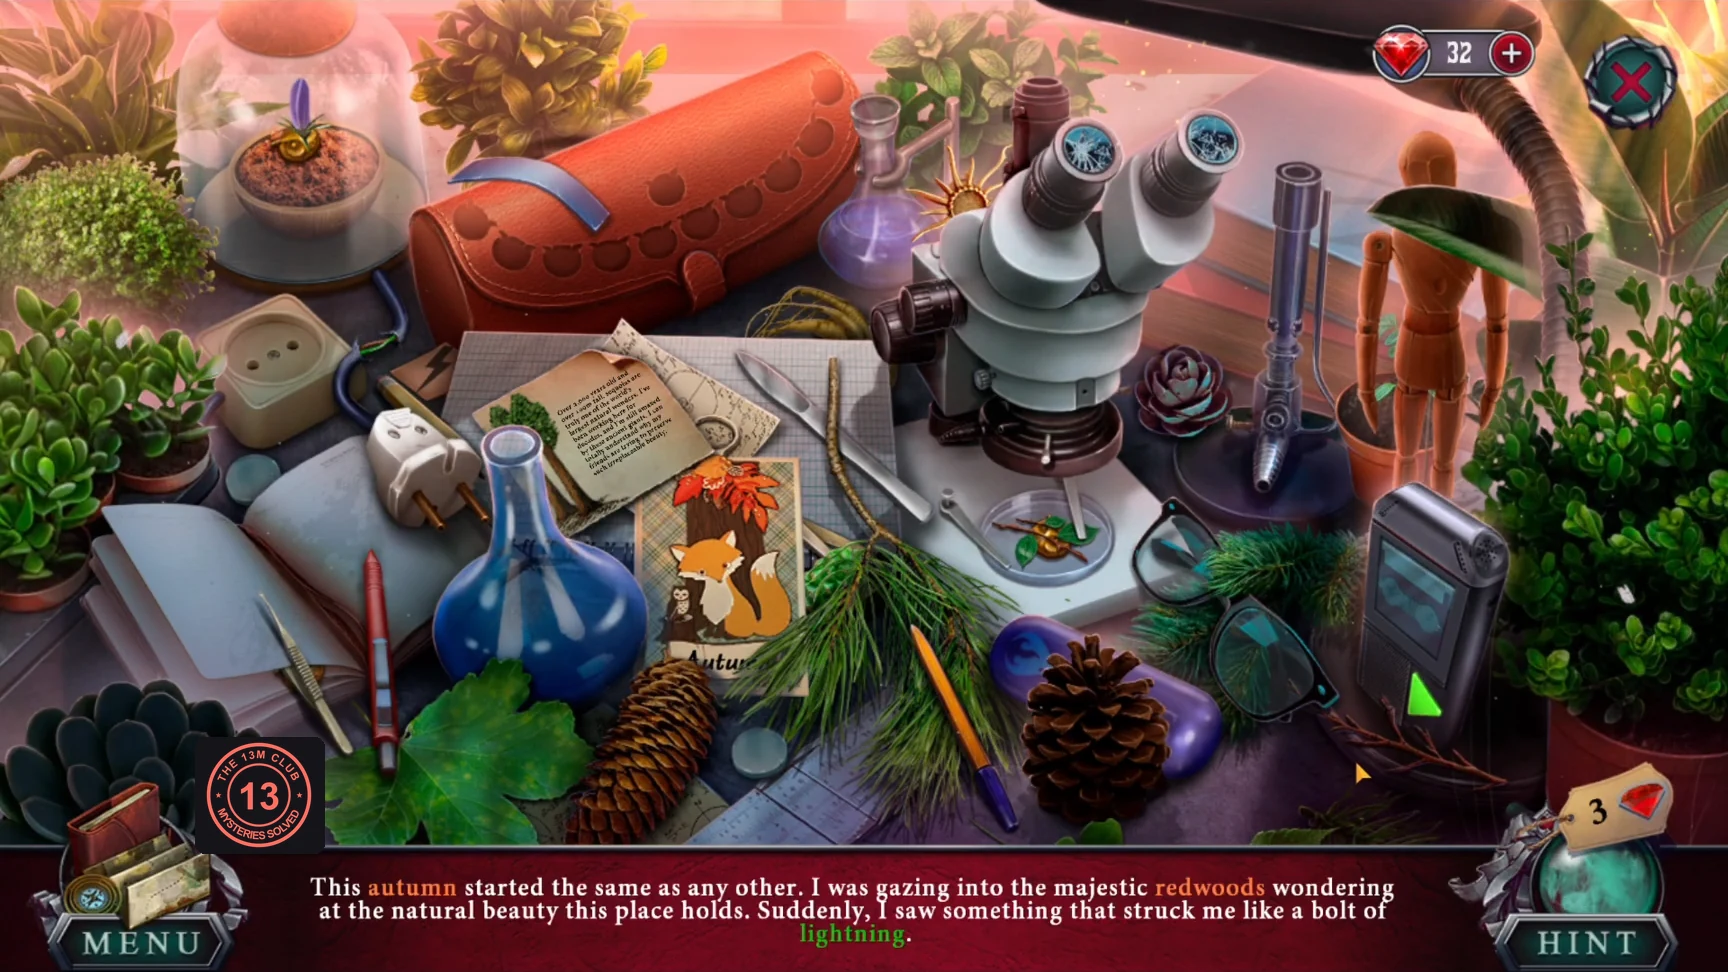
Insert the cassette in the lab table player. Story text appears at the bottom, and its coloured words name things to find or use on the desk.
- Green words are objects to click; orange words need an extra action first. Passage 1: open the fox card to reveal "Autumn"; read the sequoia note so the redwood trees appear; click the lightning. Passage 2: click the human figure and the glasses. For "flowers", plug the loose white plug into the beige wall socket at the top left; the lamp under the glass bell jar lights up and a purple flower blooms in its pot. Click the flower.
- Passage 3: click the sun and the tweezers. For "DNA", click the eyepiece of the microscope in the middle of the desk; in the magnified view, click the DNA strand. Passage 4: light the burner with the blue gas flask for the flame, then click the root. Passage 5: find all 11 owls.
- Find all the owl tokens to unlock the bag and take the lever.
CHAPTER 2
Behind the Bookcase
Fit the new lever to open the hidden space.
- Attach the lever to the bookcase and pull it. Lizz, an activist, is freed. She gives you a tourist map.
- Use the map outside the trailer to start the forest walk.
PUZZLE
Through the Forest (Map Walk)
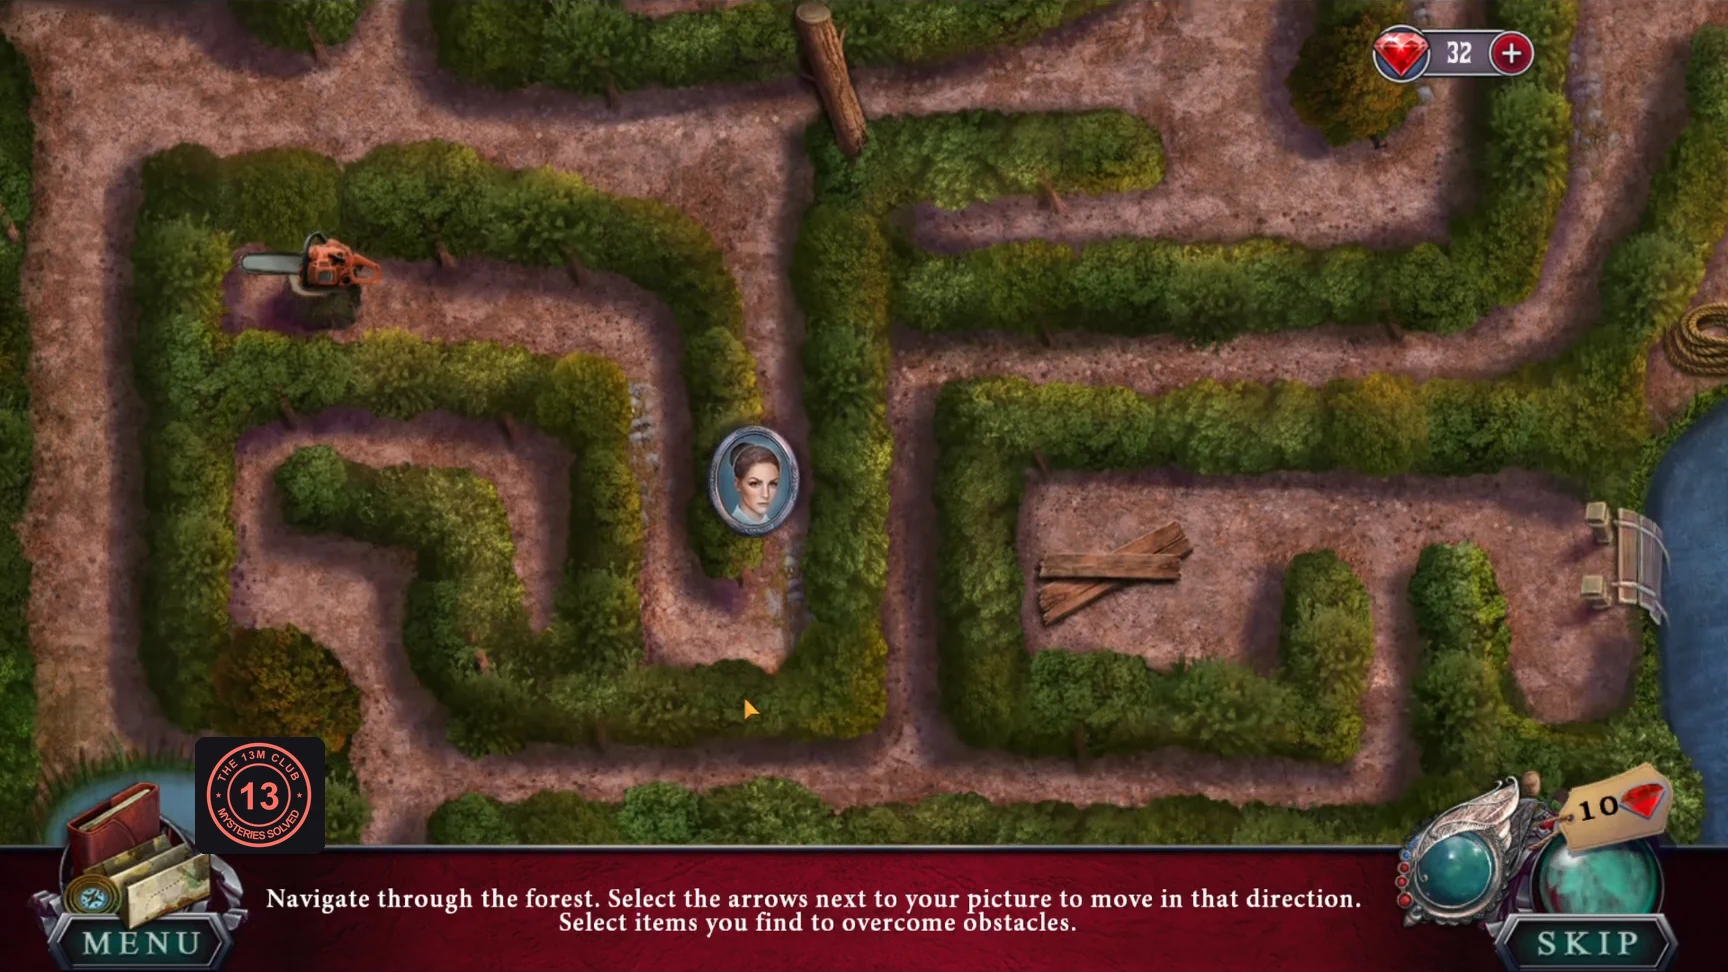
"Navigate through the forest. Select the arrows next to your guide to move in that direction. Select items you find to overcome obstacles."
- Take the chainsaw at the stump dead end (lower left) and cut the fallen log blocking the path.
- Collect the rope by the stream and the planks in the clearing, then repair the broken footbridge and cross.
- Pick up the stick. Combine it with the broken net by the pond on the east bank to make a net.
- Go back to the pond at lower left and catch a fish with the net.
- Give the fish to the mountain lion blocking the upper-right path, then exit right to the park gates.