Mallor's Office
The sheriff collects evidence. You need an authorization card to view the surveillance recordings.
- Talk to the sheriff (objective "Find an authorization card"). Collectibles: a faint animal at top right and a cat on the rug; morphing objects are the vase on the bookcase and the framed portrait (Collector's Edition positions).
- On the balcony table, take the salt packet and the cloth.
- At the aquarium control panel, take the pump, then pull off the "Out of Order" note and take the pin that held it.
- Attach the aquarium handle to the shutter, raise it and click the aquarium.
Aquarium Net (Part 1)
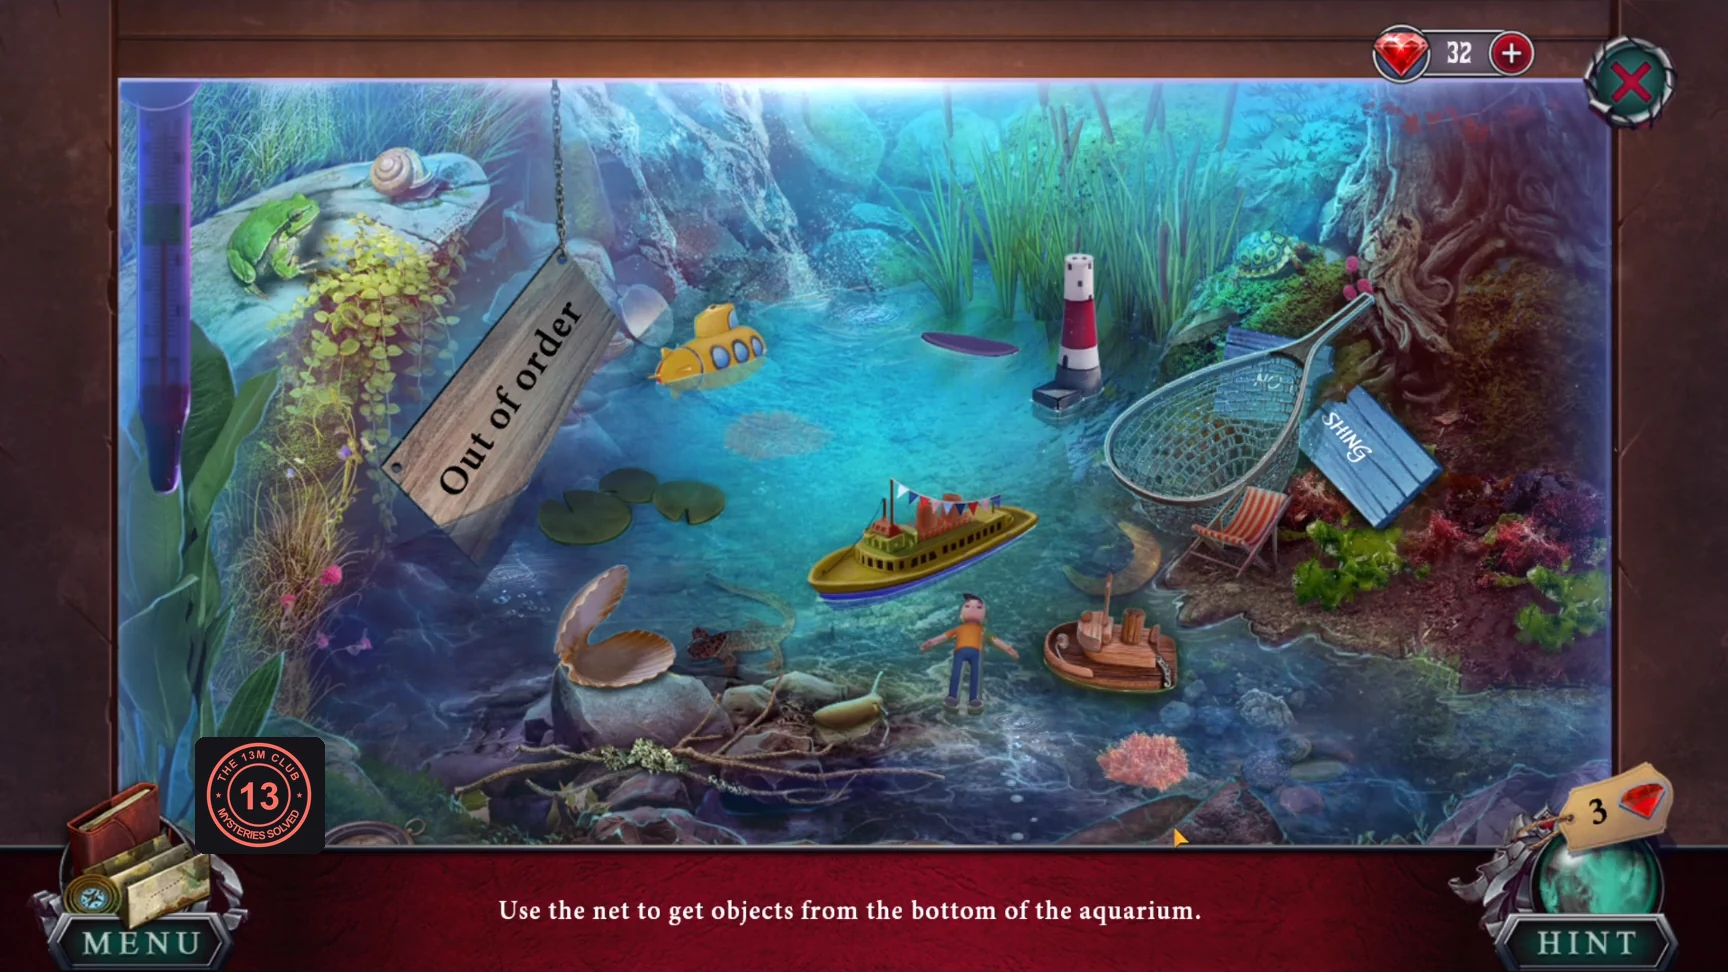
"Use the net to get objects from the bottom of the aquarium." Silhouettes of the wanted objects are shown in the bar at the bottom.
- Drag the net into the water, then click the objects in the net that match the silhouettes. Repeat for three netfuls. The last netful gives you the wrench.
The Desk, the Bust and the Globe
Open Mallor's desk, bust and globe.
- Open the desk compartment with the wrench. Read the note and take the Africa piece.
- Pick the lock of the small orange box on the desk with the pin and take the tree badge. Put it in the empty slot on Mallor's bust ("Mallor's badge should be here."), read the note ("Scan a card with the director's seal to get full system access.") and take the authorization card.
- Clean the globe with the cloth and fit the Africa piece. Read the note about the VIP zoo and hotel, and take the stamp from the opened globe.
- Use the stamp at the desk to start the stamp sheet.
The Stamp Sheet
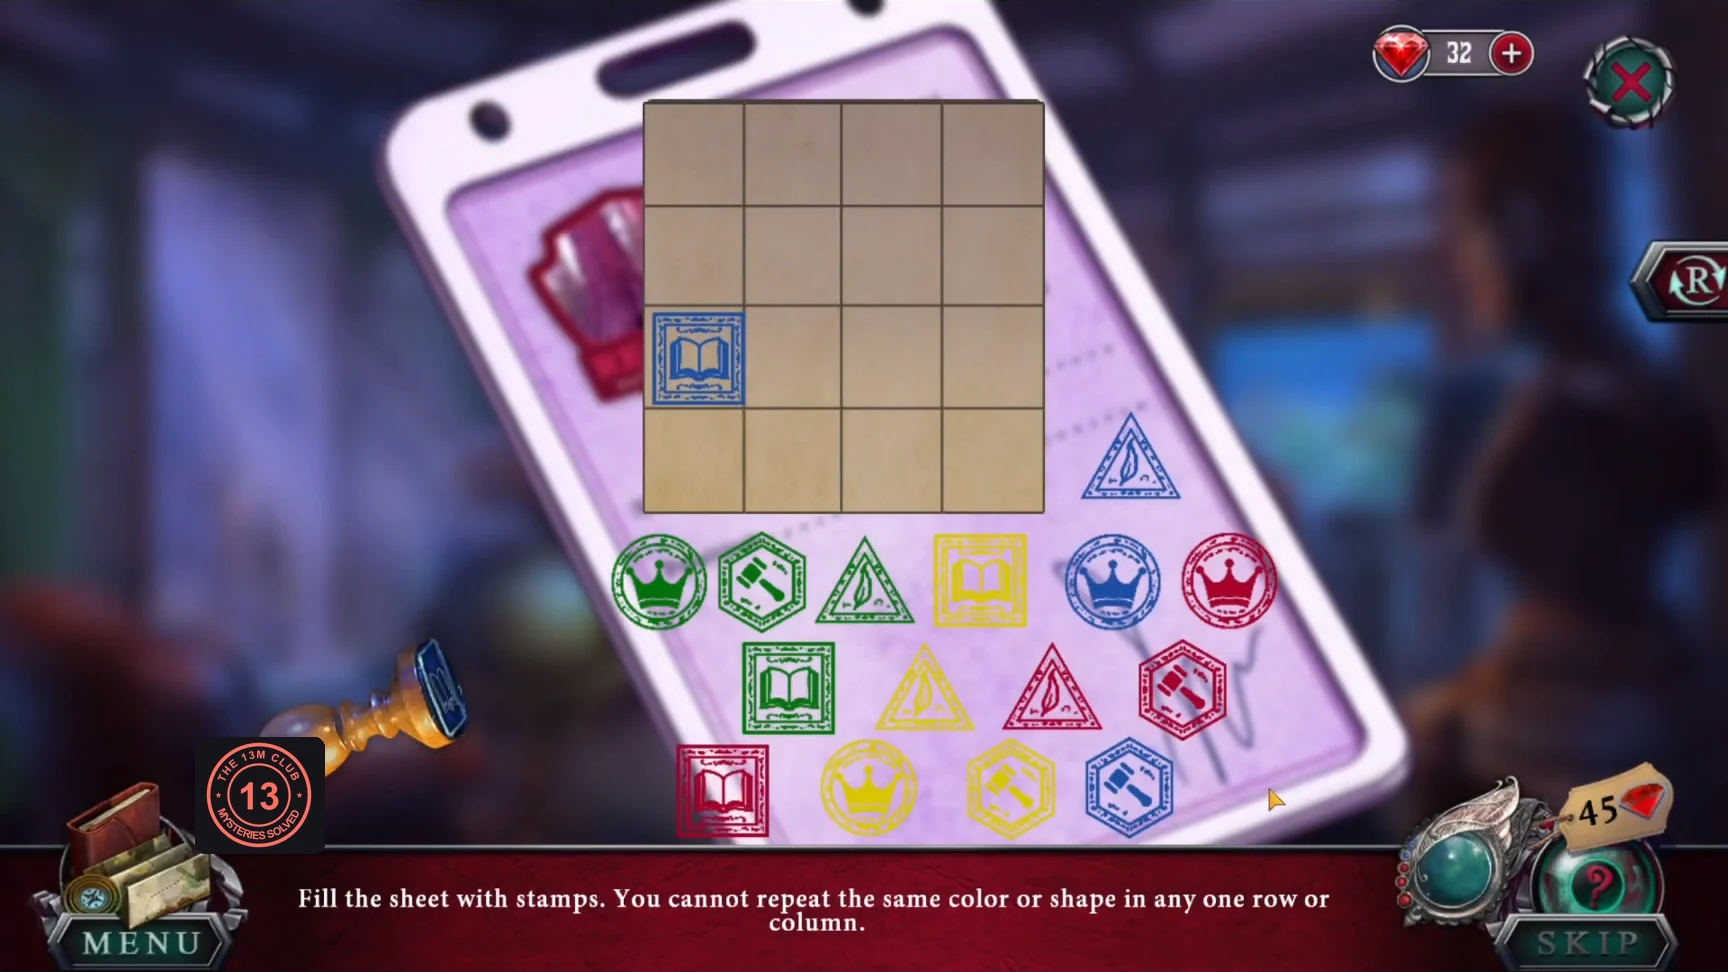
"Fill the sheet with stamps. You cannot repeat the same color or shape in any one row or column." The grid is 4x4 with four colours (green, yellow, red, blue) and four shapes (crown, hammer, book, quill). A blue book is pre-placed in row 3, column 1.
- Row 1: green crown, yellow hammer, red book, blue quill. Row 2: red hammer, blue crown, green quill, yellow book.
- Row 3: blue book (given), red quill, yellow crown, green hammer. Row 4: yellow quill, green book, blue hammer, red crown.
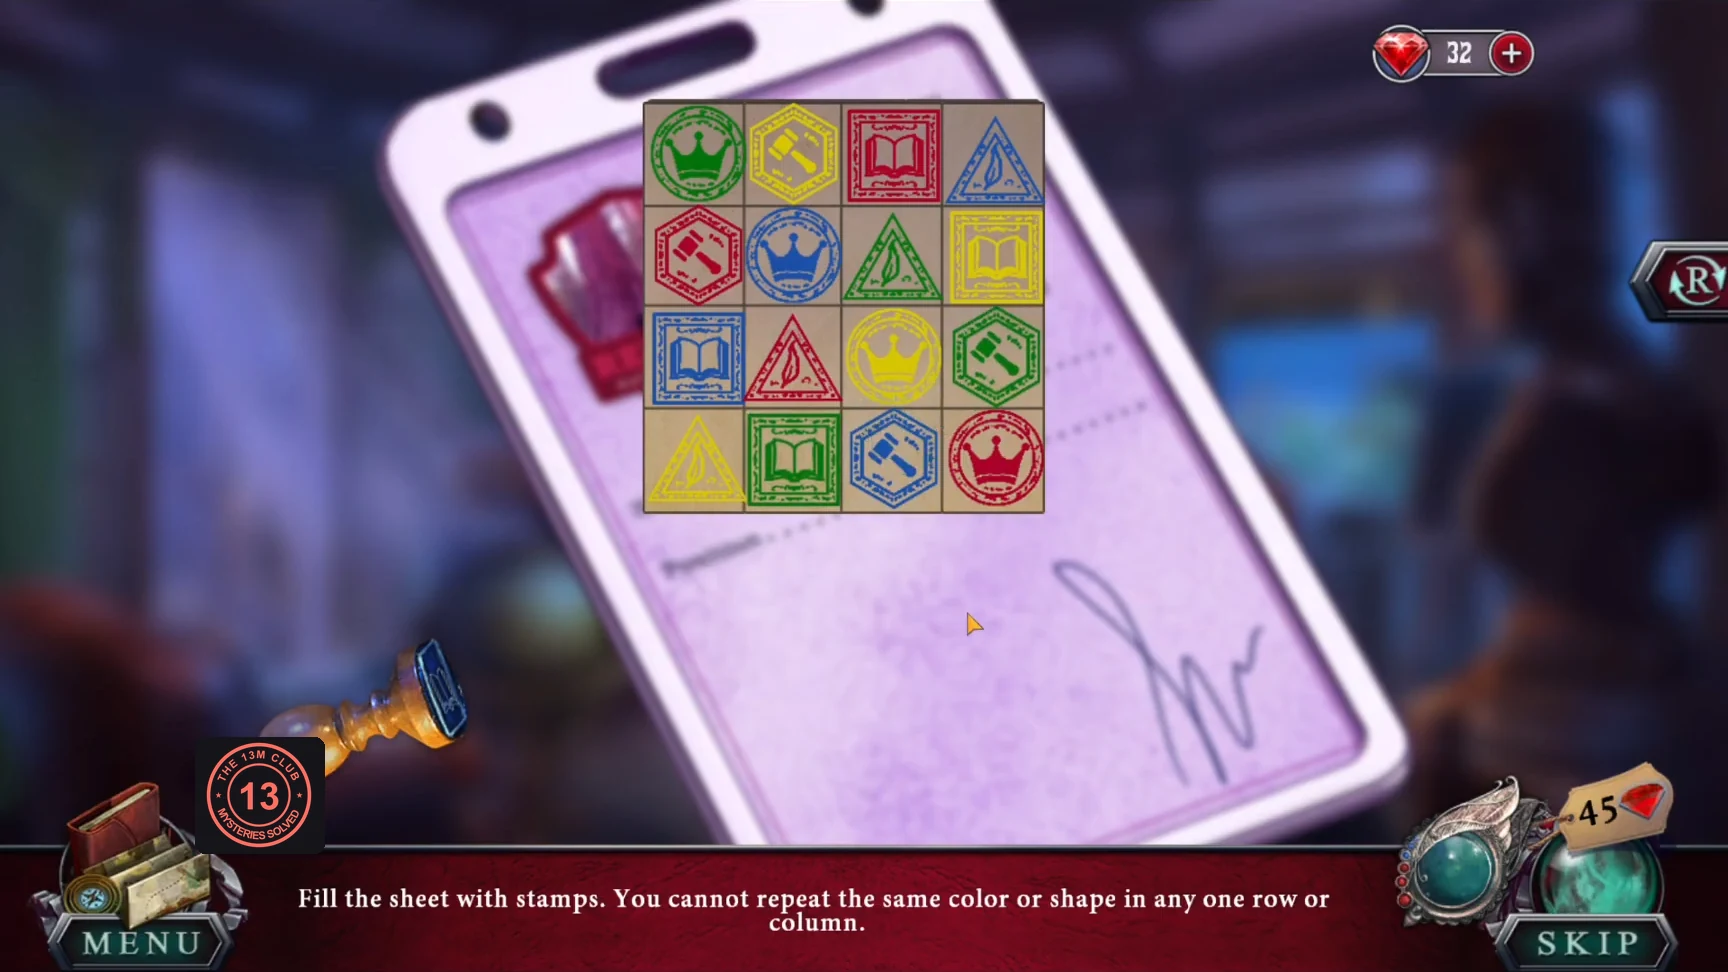
The completed sheet: no colour or shape repeats in any row or column. - Stamp the authorization card: "Perfect! Now I should scan it at camera point in the lobby."
The Surveillance Recordings
Find out who attacked Mallor.
- Downstairs at the lobby PC, scan the stamped card ("They are using multi-level authorization here") and watch the recording of the hooded figure.
- It's Lizz, the activist from Dr. Finch's trailer. Download the recording to your phone and show it to the sheriff upstairs.
- Talk to the sheriff at his car: someone damaged it. He fixes the engine; you patch the tire. He mentions glue in Mallor's office near the aquarium (objective "Fix the tire").
- Go back to the aquarium and click it again.
Aquarium Scene (Part 2)
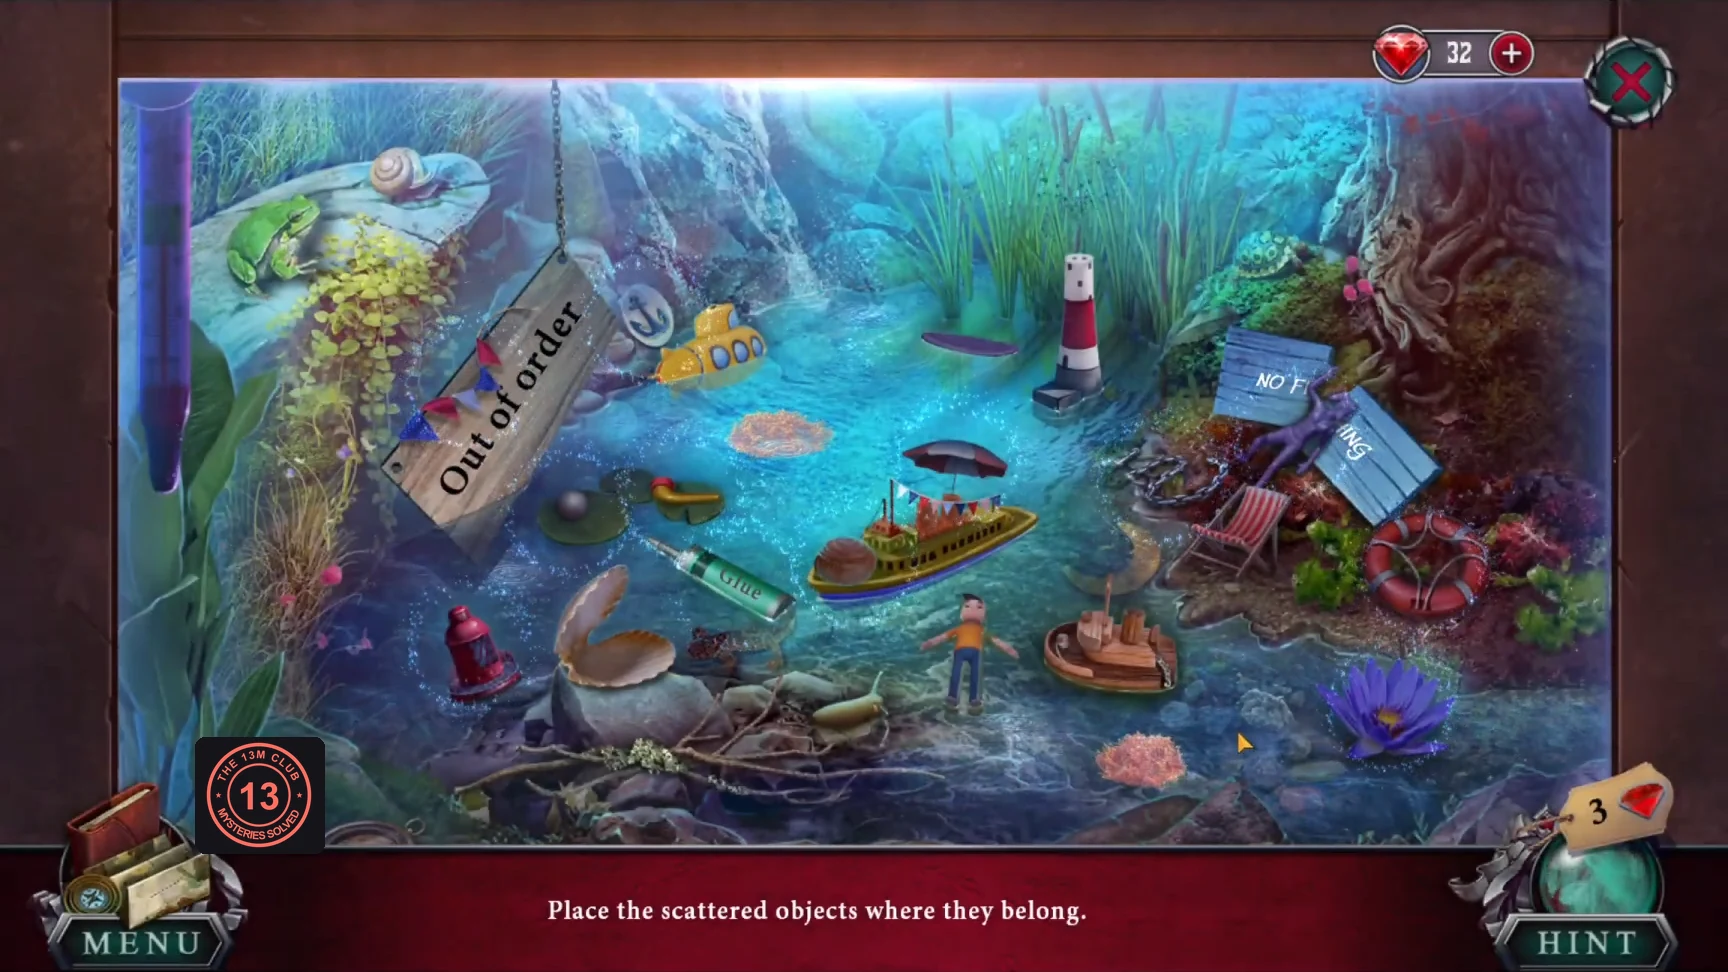
"Place the scattered objects where they belong." Items from the bottom bar go back into the aquarium scenery.
- Give the man the life preserver, put the pearl in the seashell and the surfer on the surfboard, and give the snail its shell. Attach the anchor to the ship's chain, the lamp to the lighthouse and the periscope to the submarine.
- Fix the left sign with the chain and the right sign with glue. Put the umbrella by the chair, the flags on the big boat and the lily on the plants. Take the glue.
- At the sheriff's car, glue the tire hole and pump it up. Ride to Treehill.
Treehill
Lizz lives in Treehill. The sheriff goes to look for a missing patrol and leaves you at her building.
- Listen to the sheriff (objective "Get into Lizz's apartment"). Collectibles: an animal on the roof at top left and one in the distance on the right; morphing objects are a green ball on the porch and a can on the van roof (Collector's Edition positions).
- A bear cub is trapped in the window well. The crate in the pickup needs unscrewing.
- At the claw machine, take battery 1 and read the note about used batteries. Insert the machine token.
The Claw Machine Path
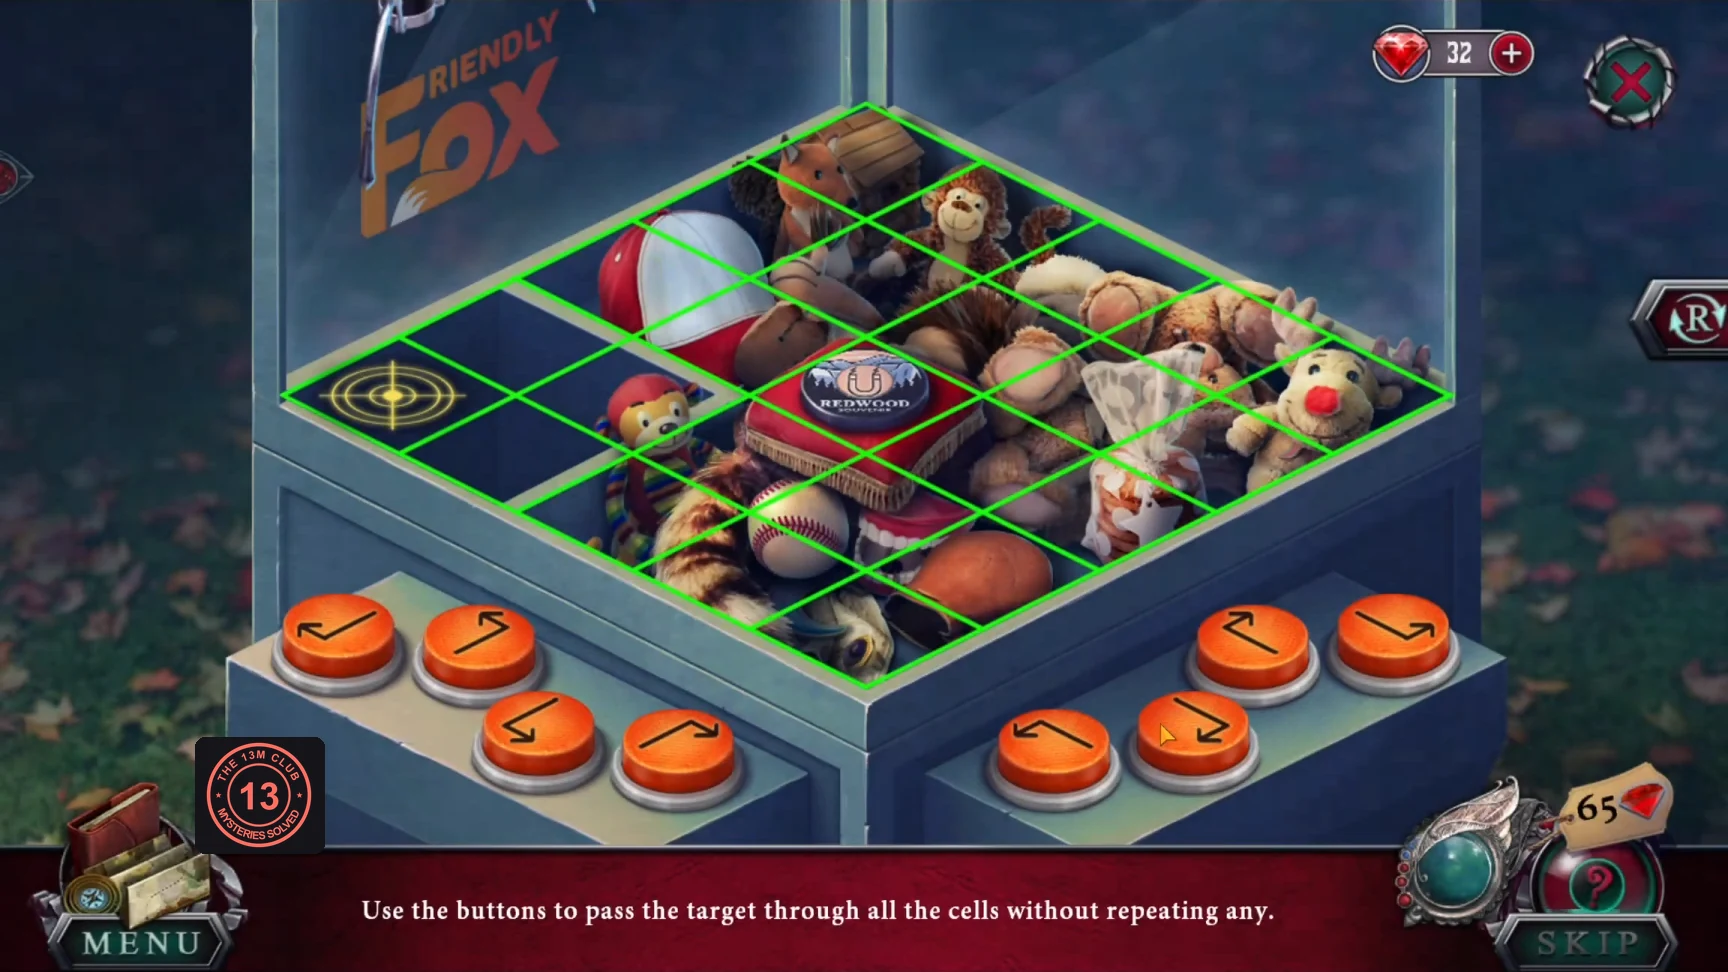
"Use the buttons to pass the target through all the cells without repeating any." The grid is a 5x5 diamond. The eight L-shaped arrow buttons move the target like a chess knight. It starts in the left corner, and the badge is in the centre.
- Number each cell (u, v): u counts steps toward the top corner, v counts steps toward the bottom corner, and the left corner is (0,0).
- Visit in this order: (0,0) (2,1) (4,0) (3,2) (4,4) (2,3) (0,4) (1,2) (2,0) (4,1) (3,3) (1,4) (0,2) (1,0) (3,1) (4,3) (2,4) (0,3) (1,1) (3,0) (4,2) (3,4) (1,3) (0,1), and finish on the centre (2,2). The image numbers the cells in this order, from 1 at the start to 25 on the badge. The claw grabs the prize: a magnet.CODE(0,0) (2,1) (4,0) (3,2) (4,4) (2,3) (0,4) (1,2) (2,0) (4,1) (3,3) (1,4) (0,2) (1,0) (3,1) (4,3) (2,4) (0,3) (1,1) (3,0) (4,2) (3,4) (1,3) (0,1) (2,2)
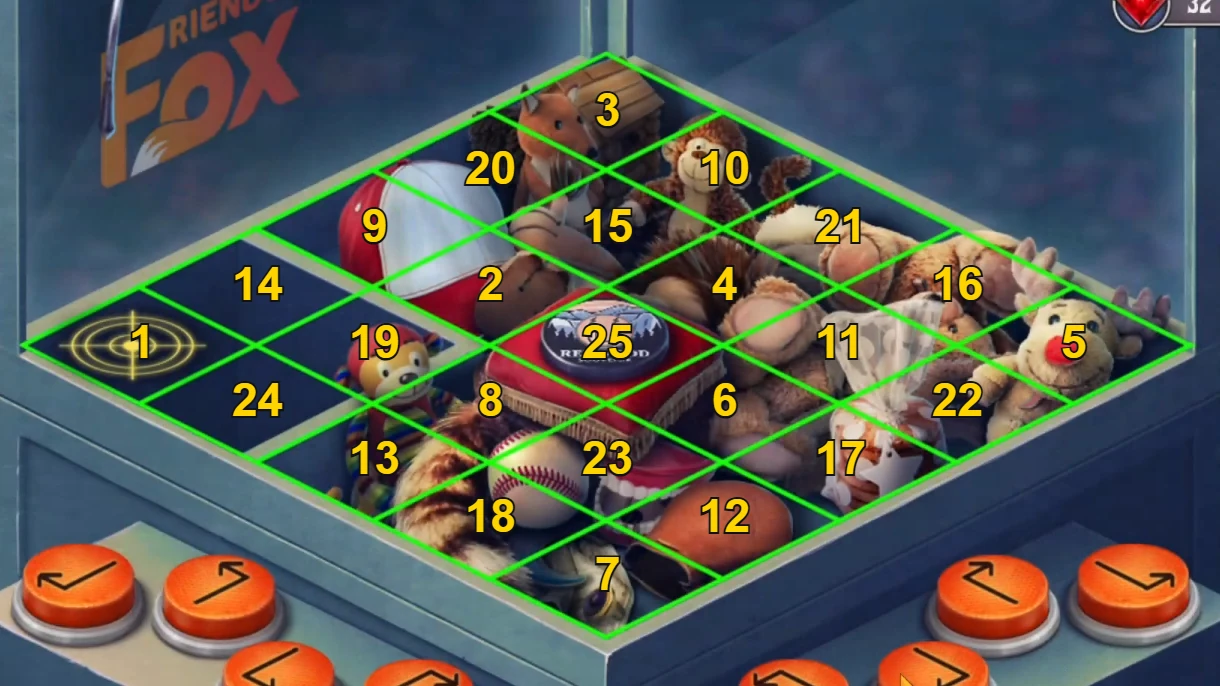
Move the target through the cells in number order, from 1 in the left corner to 25 on the badge.
The Bear Cub and the Weed Killer
Rescue the cub, then make weed killer to clear Lizz's window.
- Use the magnet on mailbox 15 to pull out the coin.
- Use the coin to turn the lock of mailbox 9, open it and take the vinegar and the note: "For effective weed control just mix sanitizer, salt and vinegar!"
- Unscrew the crate in the pickup with the coin. Take the folding ladder and the sanitizer.
- Put the folding ladder in the window well so the cub can climb out.
The Bear Cub's Memory
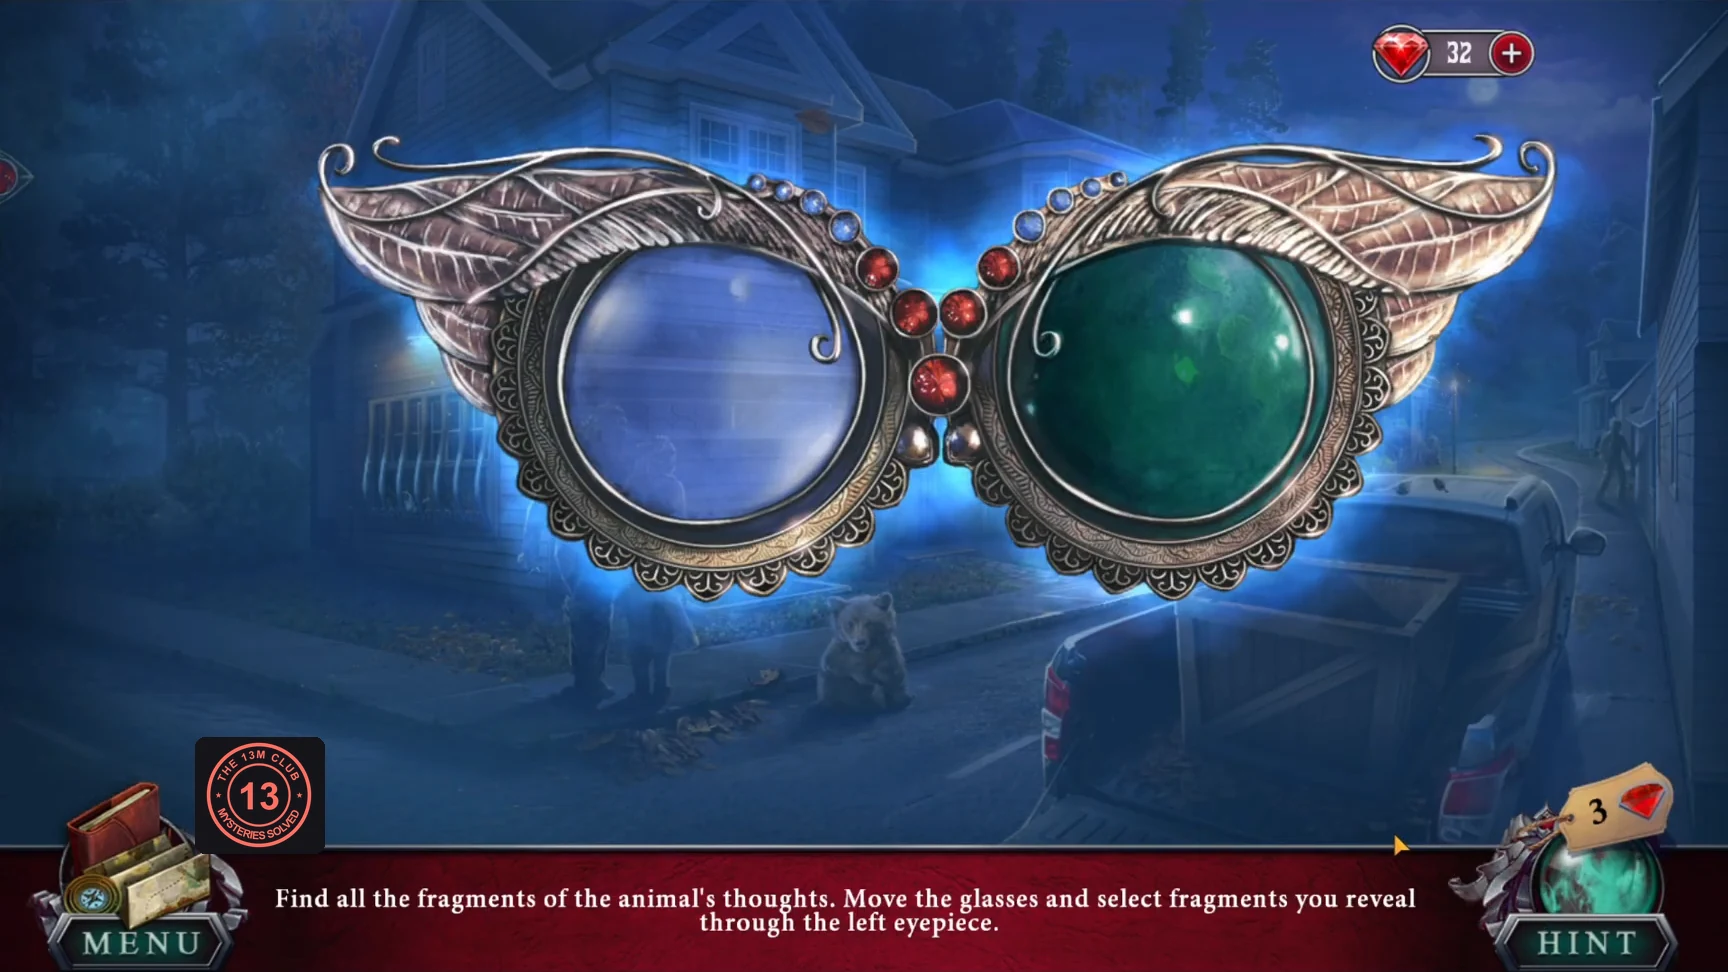
Safe out of the window well, the cub lets you read its memory with the glasses. Its strength opens the way into Lizz's apartment.
- Use the glasses for the cub's memory (Lizz used smoke to turn people into plants), then take Bear Strength.
- Rip off the sturdy window grate with Bear Strength and take the watering can.
- Combine the watering can with the vinegar, sanitizer and salt to make weed killer. Spray the plants blocking Lizz's window and climb in.