CHAPTER 3
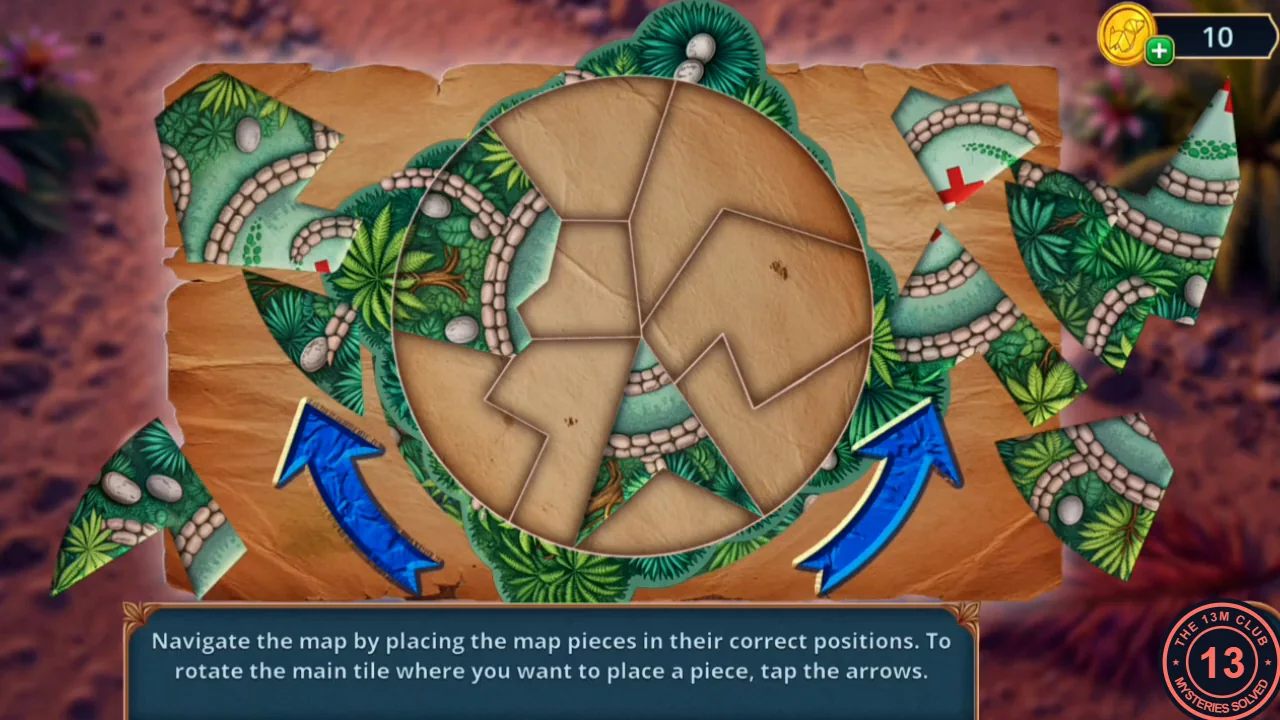
Forest Clearing: The Forest Paths Map
Eli searches the beach by the stilt hut for Jules.
- Open the sandcastle and take a Shell from its top. Open the chain hanging on the cliff and use the wooden Clothespin (from the fountain base in Chapter 2) on the rope to free it; take the Rope. Take the Chisel from the porch by the blue cooler.
- Pry the loose porch board with the Chisel. Read the note about moving the ritual to the lagoon and take the Forest Paths Map.
- Use the map at the path fork. Rotate the centre disc with the arrows and drag each torn piece into the slot where its paths line up.
CHAPTER 3
Seabridge Bay Forest: The Camper Van
Eli reaches the forest and meets a man by a purple camper van.
- A man by a purple camper van talks to Eli. Decision point: "You're wandering around here, too. All alone." costs 60 coins and gives 2 stars; "Things aren't what they seem." is free and gives none.
- A Shell is in the foliage left of the road. At the checkerboard take the Boards (a Shell is on the rock above). Put the Rope in the first slot of the trail sign.
- Open the checkerboard again and use the red-and-green striped stick from Eli's inventory on the crack in the white rock above it. Take the Key.
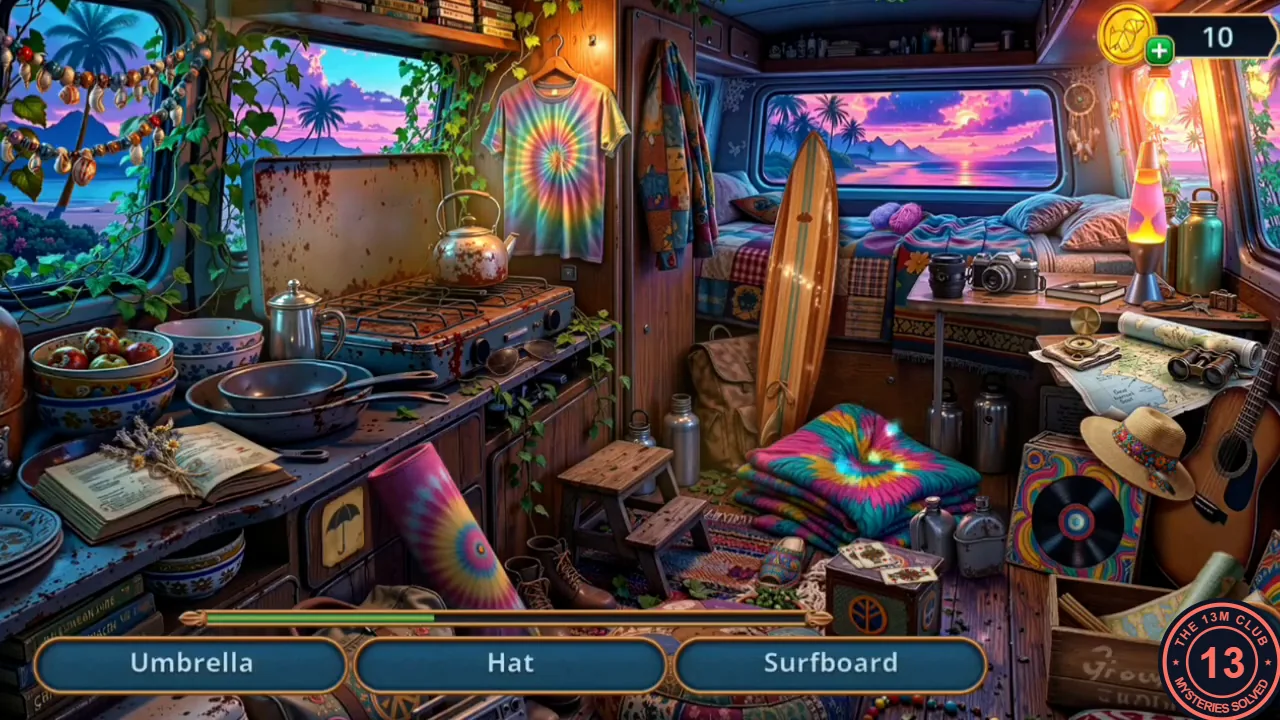
- Open the van door with the Key and find the listed objects (three names show at a time). In the order the recording found them: Camp Chair – the folded chair leaning beside the surfboard in the middle; Suitcase – the small case on the shelf at the upper right by the window; Spare Wheel – the tyre on the right behind the guitar; Headlight – the round lamp on the floor by the boots, under the wooden step stool; Baseball Cap – the tie-dye cap on the pile of tie-dye blankets right of centre; Surfboard – the board leaning in the middle; Hat – the straw hat by the guitar on the right; Sunglasses – on the camping stove left of centre; Dream Catcher – hanging at the top right; Lava Lamp – right of the window; Bouquet – the dried flowers lying on the open book at the lower left; Umbrella – the umbrella picture on the small cabinet door below the book. You receive the Grass Trimmer.
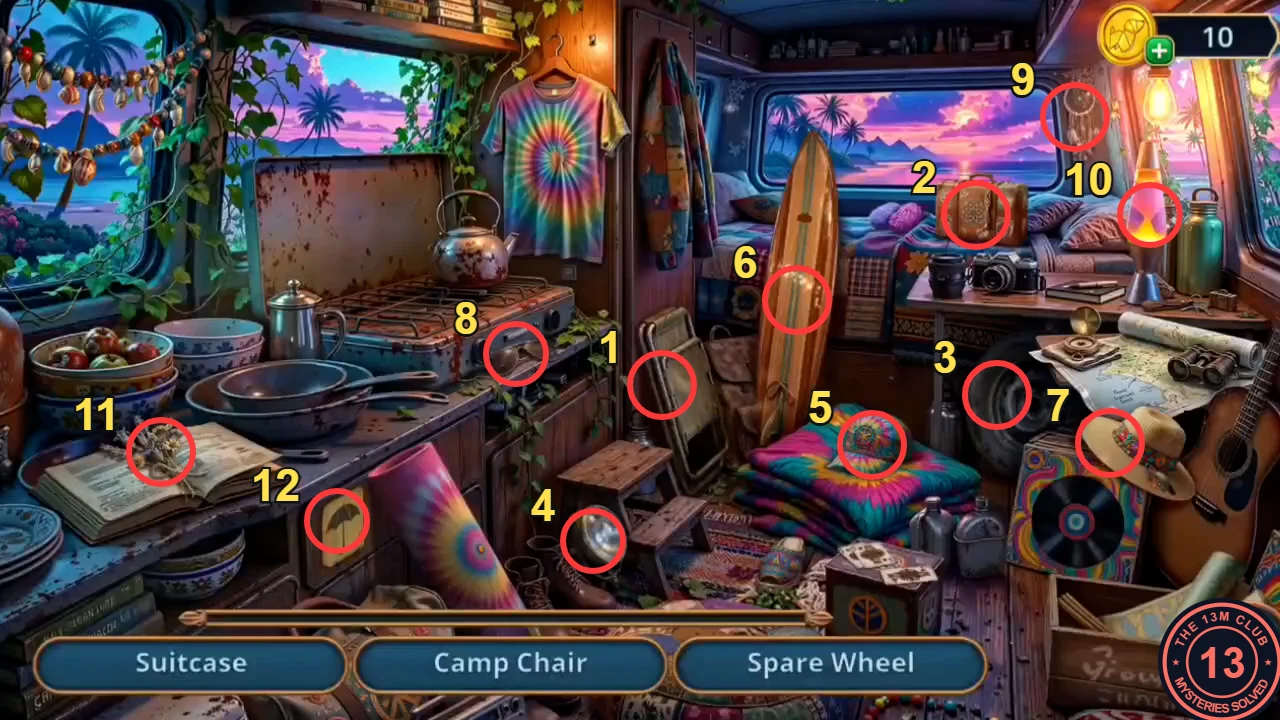
Numbers follow the order of the list above, 1 Camp Chair to 12 Umbrella.
CHAPTER 3
Seabridge Bay Forest: The Timed Path
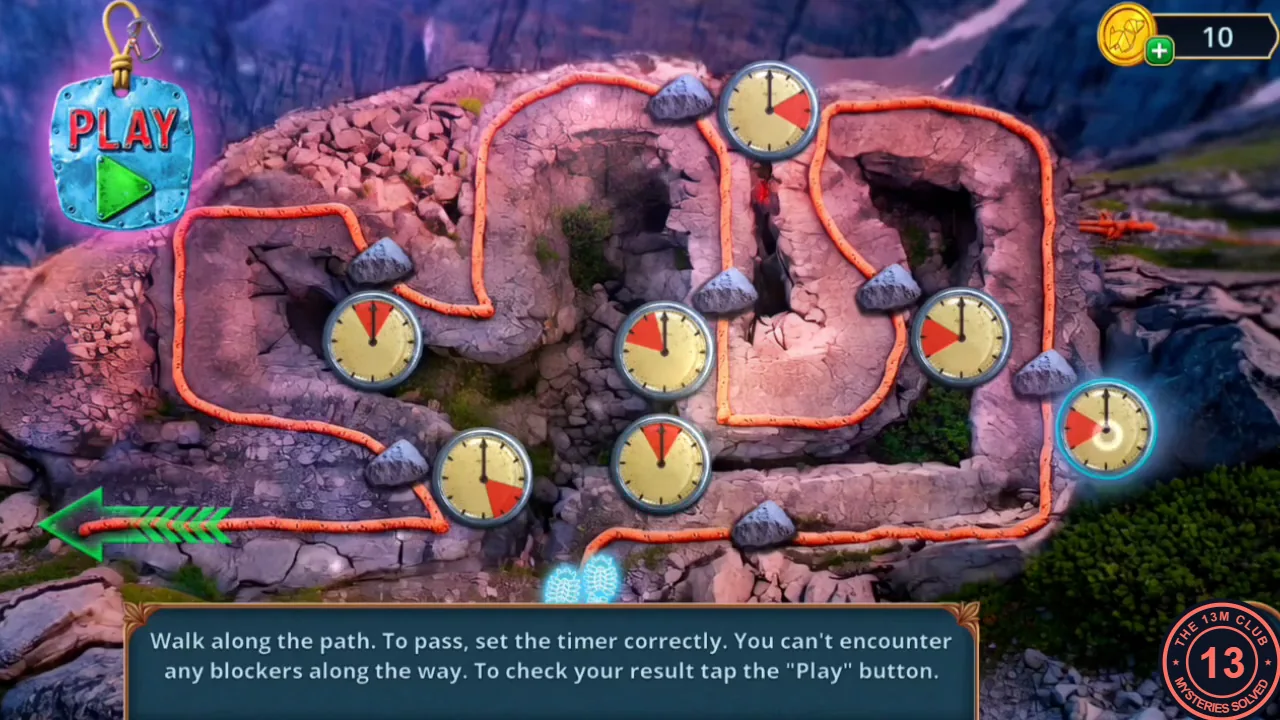
Clear the bush and set the clocks so you can walk the timed path.
- Cut the bush with orange flowers with the Grass Trimmer. Take the Studded Boots (2/2) and the Cult Figurines.
- Put the Studded Boots in the second slot of the trail sign.
- Tap the seven clocks to turn their red sectors; the footprints walk from the bottom of the path to the green arrow on the left, and a clock's setting decides whether its rock blocks the way when the walker arrives. While you set them, every clock hand points to 12; after you tap Play the hands turn as the walker moves. The setting that worked was the same in two recordings (red sector positions read like a clock face): top clock red between 3 and 5 o'clock; left clock between 5 and 7; upper middle clock between 3 and 5; lower middle clock between 11 and 1; right middle clock between 2 and 4; far right clock between 12 and 3; bottom-left clock (next to the exit) between 7 and 9. Tap Play to send the walker.
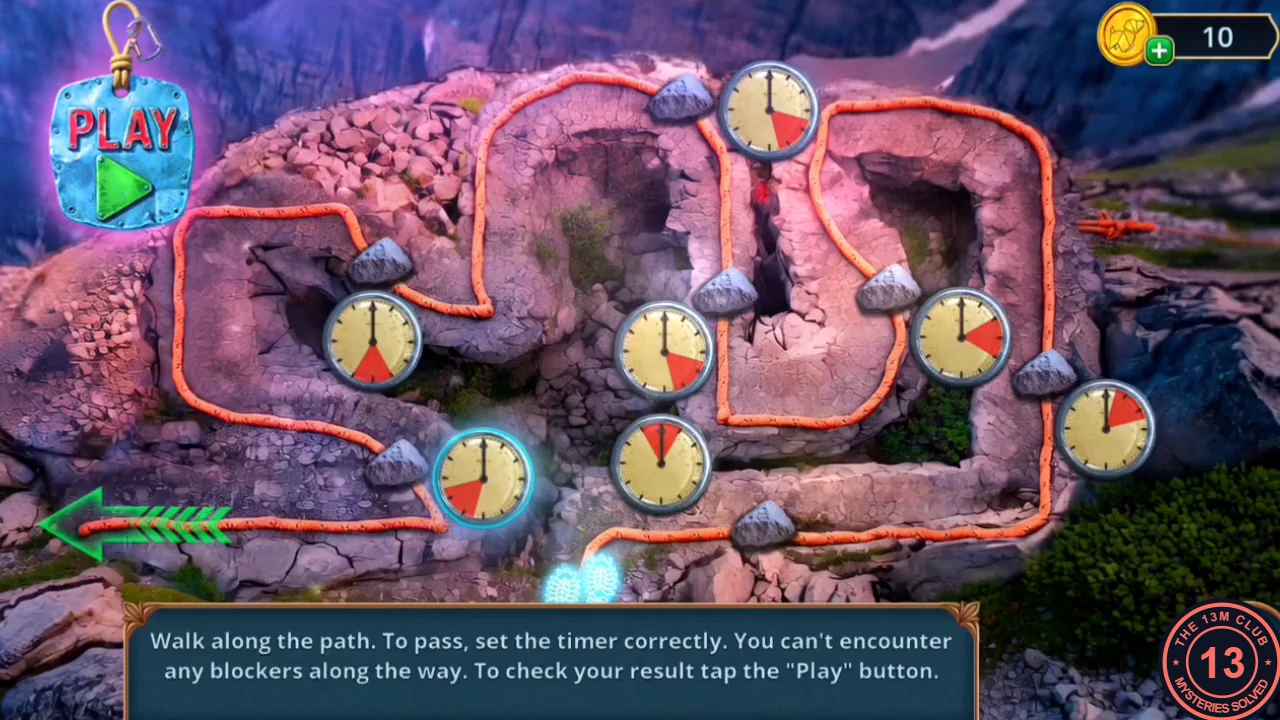
The clock settings that worked, just before tapping Play. - Decision point: "Those who have something to hide." costs 60 coins and gives 2 stars; "Standard safety precautions." is free and gives none.
CHAPTER 3
Near the Cave Entrance: The Lookout Tower
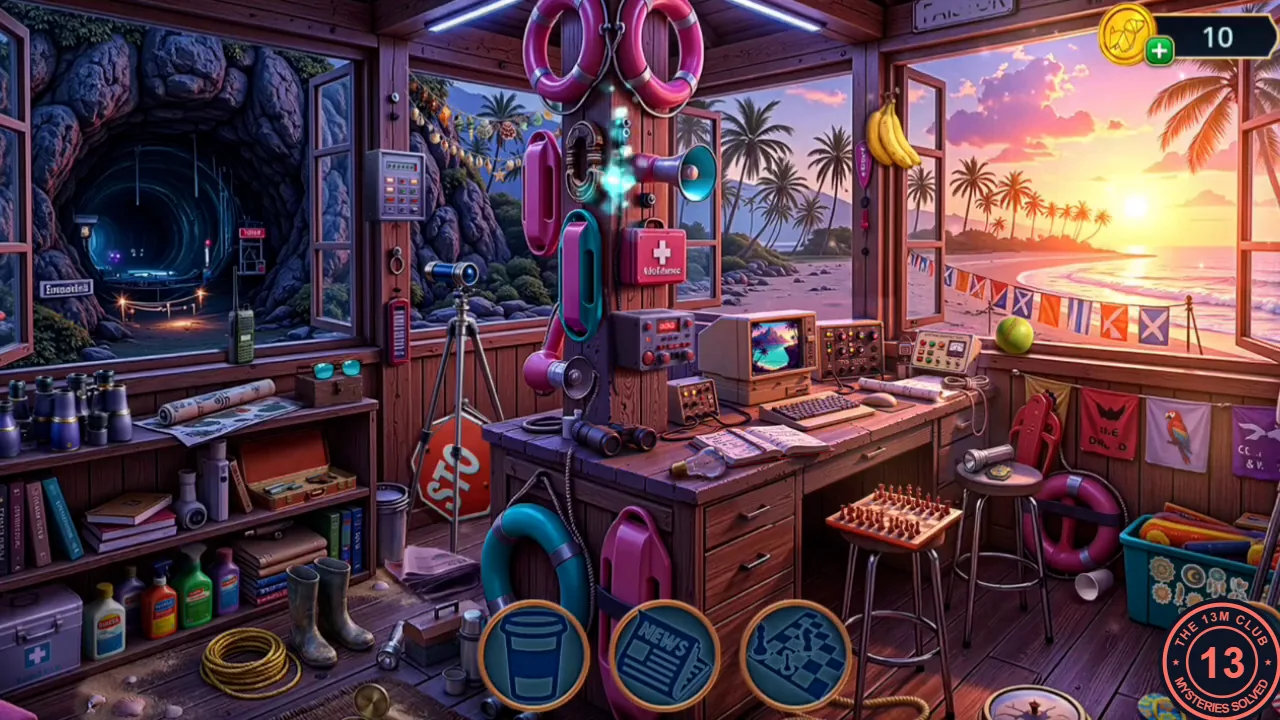
Search the pit and barrel near the cave, then climb the lookout tower.
- Open the barrel beside the dark pit by the pond. Take the red Hand Pump and the metal ring (Chain Link) lying on its lid.
- Open the pit beside the barrel. Read the incense note and take Fresco Fragments (1/2). Use the Brush (from the arcade prize in Chapter 2) on the rock to reveal symbols. Open the teal incense tube and take the Corks. The basket at the bottom is out of reach.
- Push the Corks into the four holes of the lookout tower wall. They stick out too far ("Oops!"), so hammer them in with the Thick Pipe (from the fountain in Chapter 2), then lay the Boards on them to climb up.
- Each round slot at the bottom shows the silhouette of an item; tap it in the lookout room. The twelve in the order the recording found them: the P sign – tap at the top edge of the red STOP sign beside the tripod; the model ship on the left bookshelf; the small robed figurine on the desk beside the computer; the yellow whistle hanging on the post by the megaphone; the chess board on the stool by the desk; the parrot on the flag in the bunting at the right; the green ball by the window bunting at the right; the folded newspaper on the floor next to the boots; the paper cup on the floor by the bar stools; the bananas hanging by the right-hand window; the light bulb on the desk beside the binoculars; and the walkie-talkie on the windowsill in front of the cave tunnel (upper left). You receive the Glow Stick.
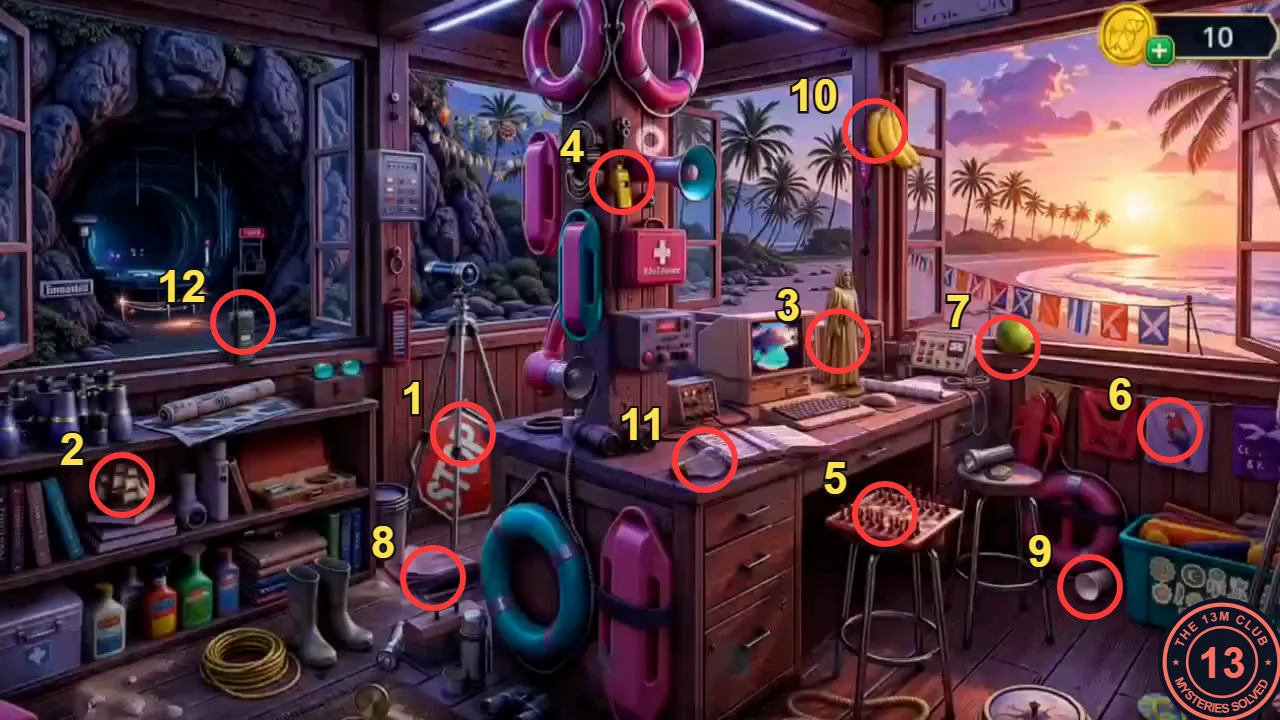
Numbers follow the order of the list above, 1 P sign to 12 walkie-talkie.
CHAPTER 3
Forest Clearing: The Symbol Chain
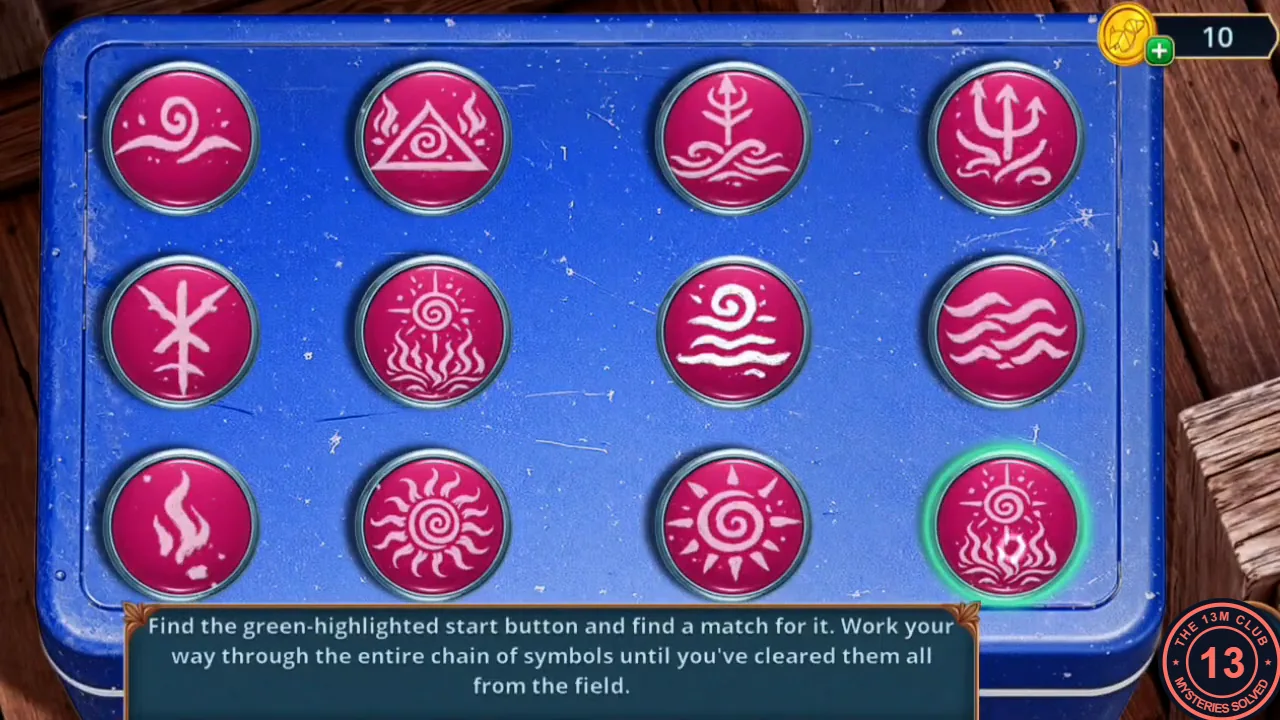
The Glow Stick lights a hole holding the Symbol Button for the cooler on the hut porch.
- Light the hole by the barrel with the Glow Stick and take the Symbol Button.
- Insert the Symbol Button in the cooler lid on the hut porch. Tap the green-highlighted button, then its identical twin; continue along the chain until all buttons are cleared.
- Take a Shell and the Sand Castle Part. Complete the sandcastle with it and take the Drill.
CHAPTER 3
Seabridge Bay Forest: The Camper Van Again
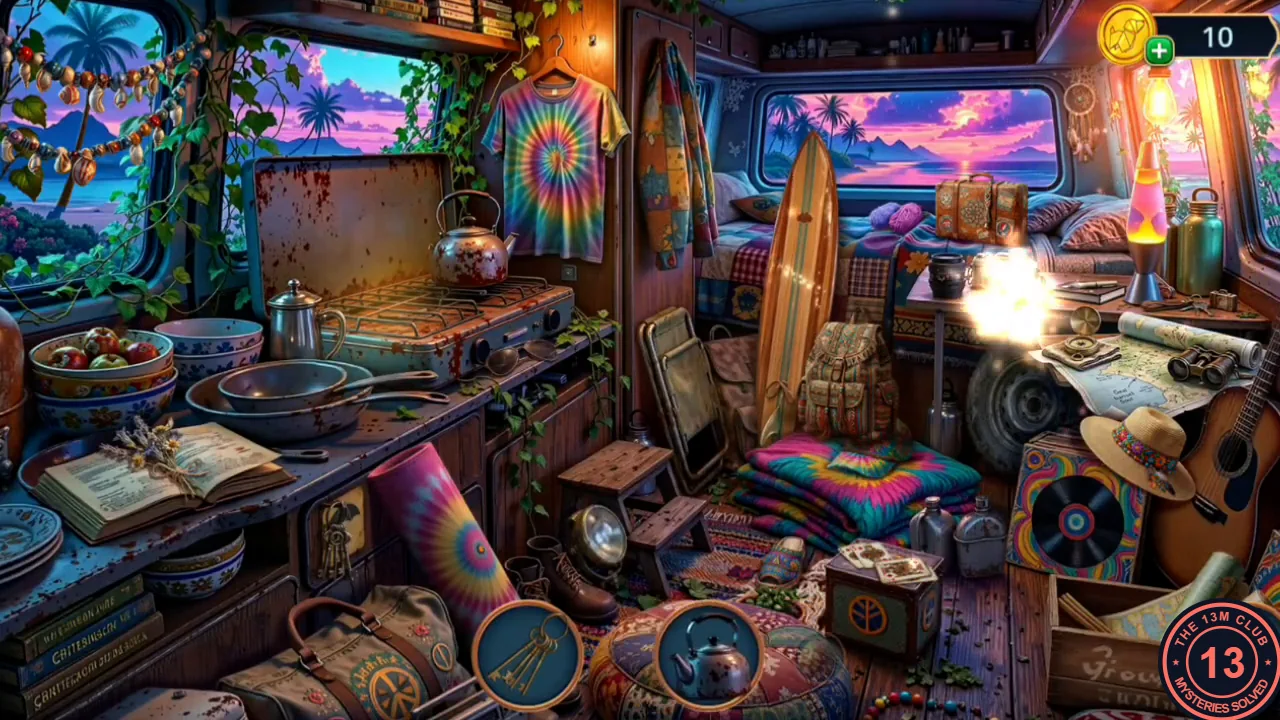
Drill the barrel to drain it, then search the camper van again.
- Open the barrel beside the glowing pit and drill a hole low in its side with the Drill. The water drains out, the lighter barrel can be pushed aside, and you can take the Hook from the ground behind it.
- Search the camper van again. This time the round slots show items that are missing from the van: drag each one to the spot where it belongs (three show at a time). In the recording: the patterned backpack goes on the pile of tie-dye blankets in the middle; the playing cards on the small box with the peace sign on the floor; the striped strap on the table in front of the camera; the keys on the hook in the cabinet under the open book at the lower left; the kettle on the camping stove; the red fruit in the bowl at the far left; the frying pan in the dish pile below the stove; the cat T-shirt over the tie-dye shirt on the hanger; the slipper beside the other slipper on the floor by the step stool; the ball of purple yarn on the bed next to the other yarn; the conch shell on the shell garland by the window; and the red vinyl record on the record sleeve at the lower right. You receive the Insect Repellent.
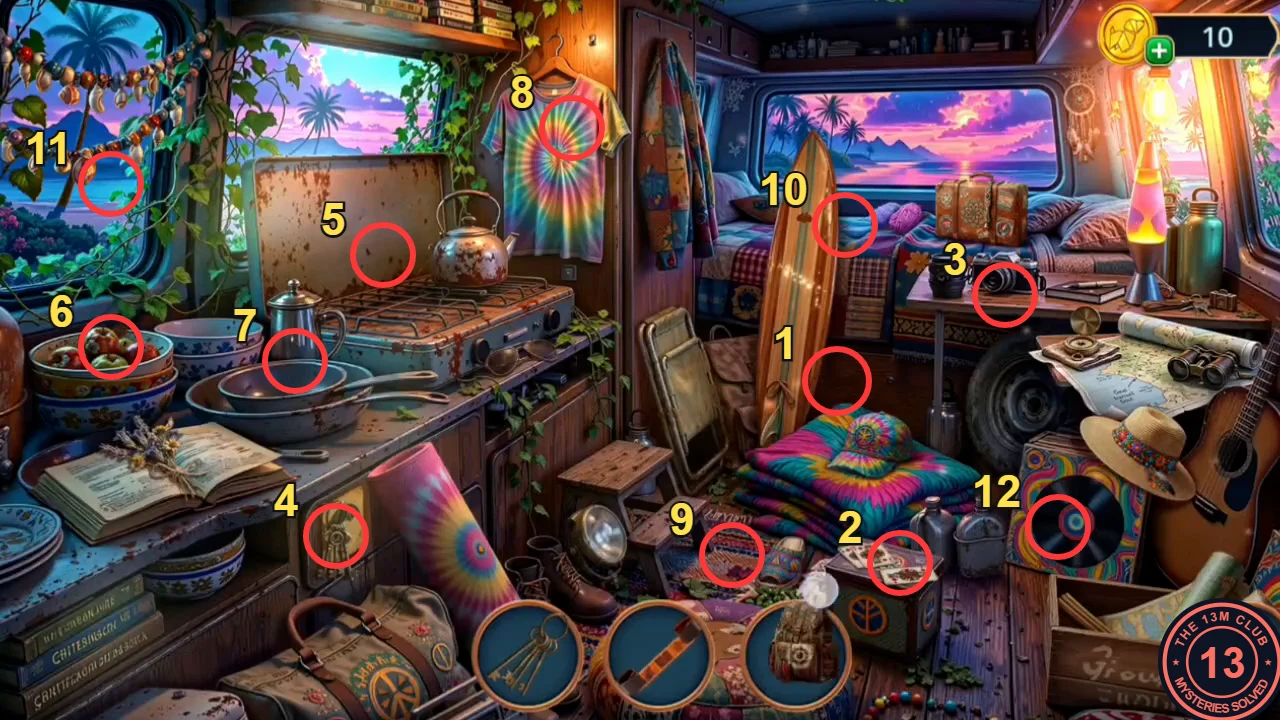
Where each missing item goes, numbered in the order of the list above (1 backpack to 12 record). - Spray the bees on the stone altar with the Insect Repellent and take the Rubber.
CHAPTER 3
Seabridge Bay Forest: The Totem Board
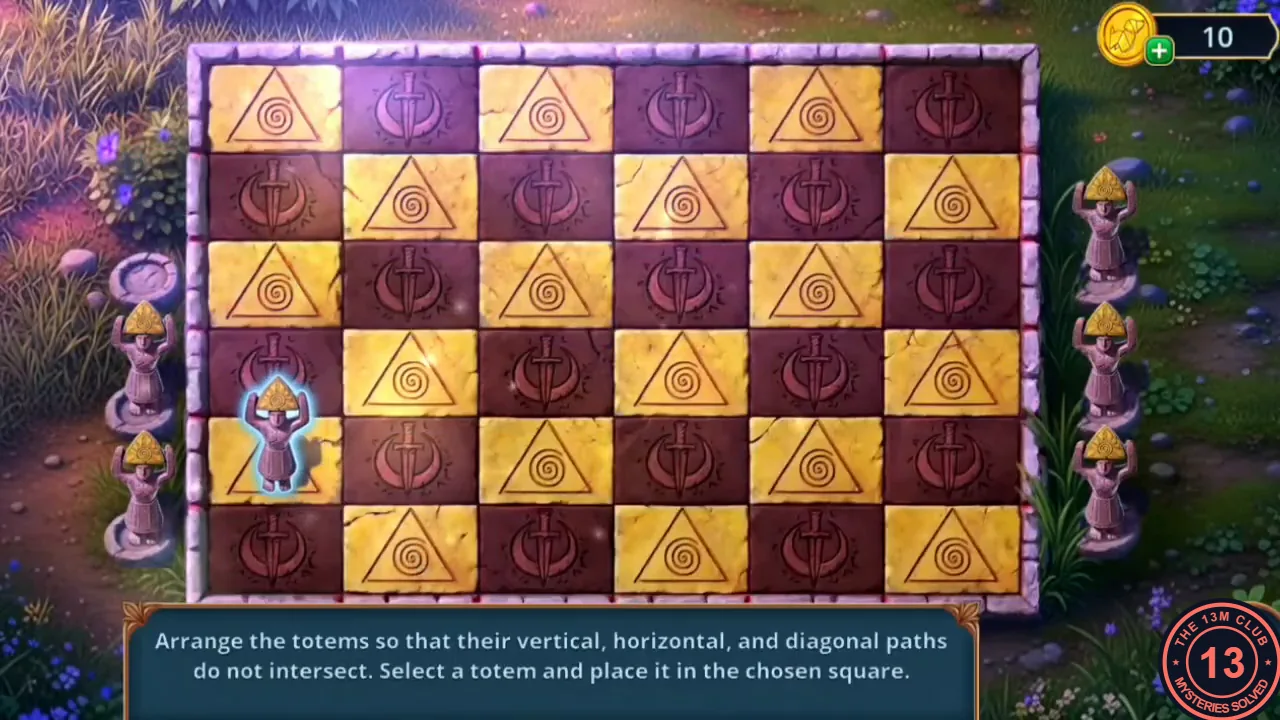
The Cult Figurines go on the checkerboard in the forest.
- Place the Cult Figurines on the checkerboard. Put the six totems on the 6×6 board so that no two share a row, column or diagonal: tap a totem, then the square. The arrangement that solved it in the recording, counting rows from the top and columns from the left: row 1 – column 3; row 2 – column 6; row 3 – column 2; row 4 – column 5; row 5 – column 1; row 6 – column 4.
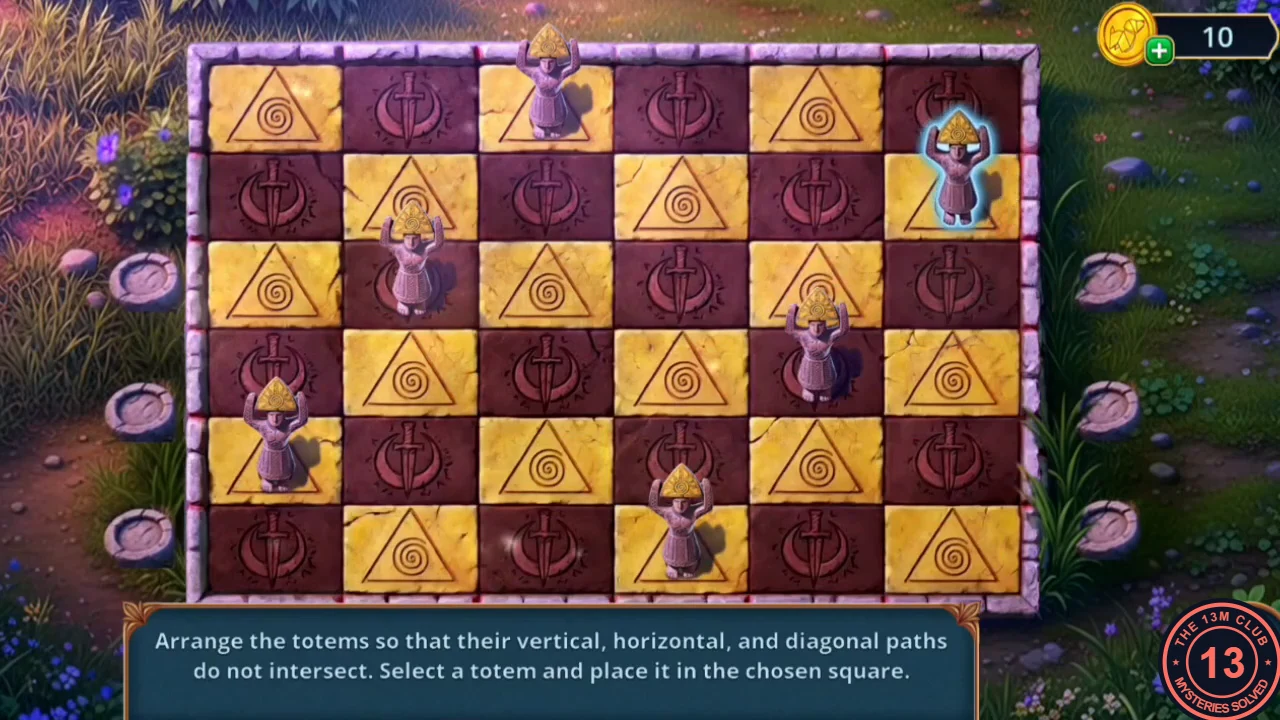
The solved board from the recording. - Take the Coconut. Dig in the sand by the sandcastle with it and take the Carabiner.
- Attach the Carabiner to the chain on the beach cliff. The sack opens; take the Foil.
CHAPTER 3
Near the Cave Entrance: Spot the Differences
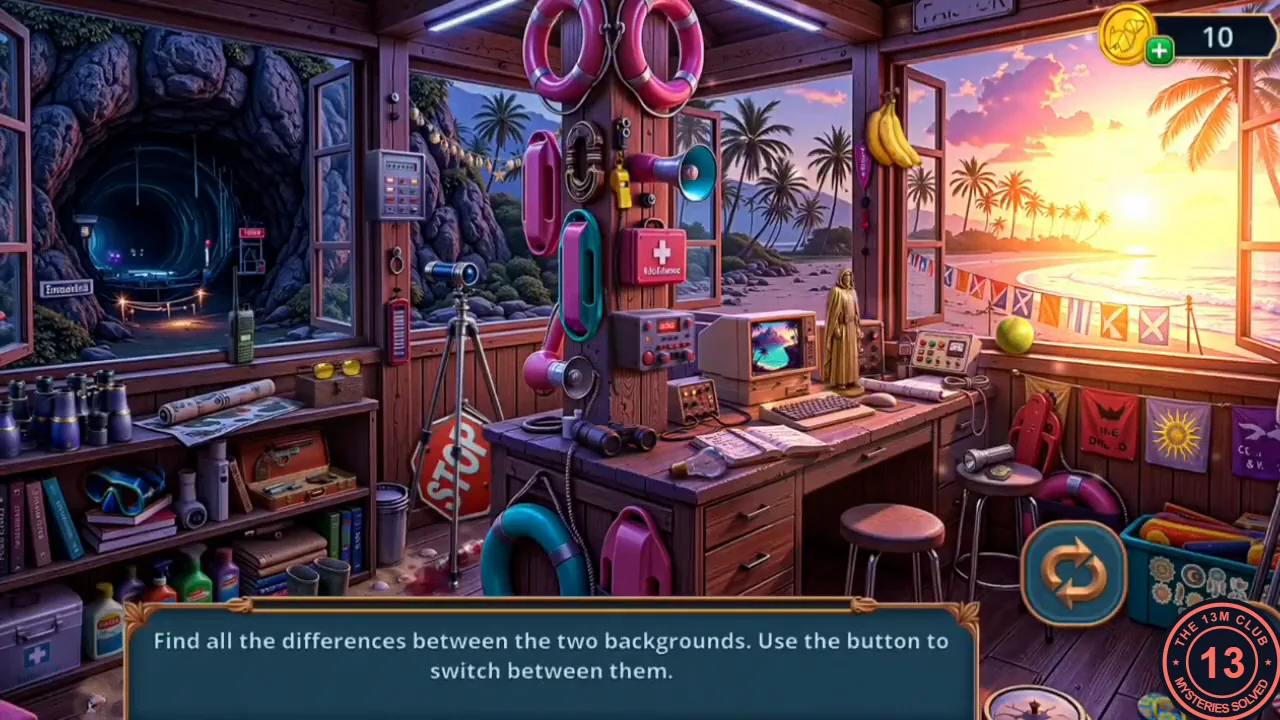
Climb the lookout tower again for a spot-the-differences scene.
- Climb the lookout tower again. Find all differences between the two pictures; use the round button to switch between them, and tap a changed spot to tick it. The twelve the recording ticked: the view through the middle window at the top (palm trees in one picture, a garland of shells in the other); the curtain beside the megaphone; the instrument on the tripod (blue telescope or green binoculars); the teal telephone on the post; the sunglasses on the small box on the shelf (yellow or teal); the computer screen (beach picture or green text); the item on the left shelf (diving mask or blue coral); the contents of the open case on the shelf; the floor beside the STOP sign (red spill); the seat of the stool by the desk (whole or with a hole); the flashlight on the bar stool at the right; and the flag on the right-hand wall (sun or crescent moon). You receive the Grabber Hand.
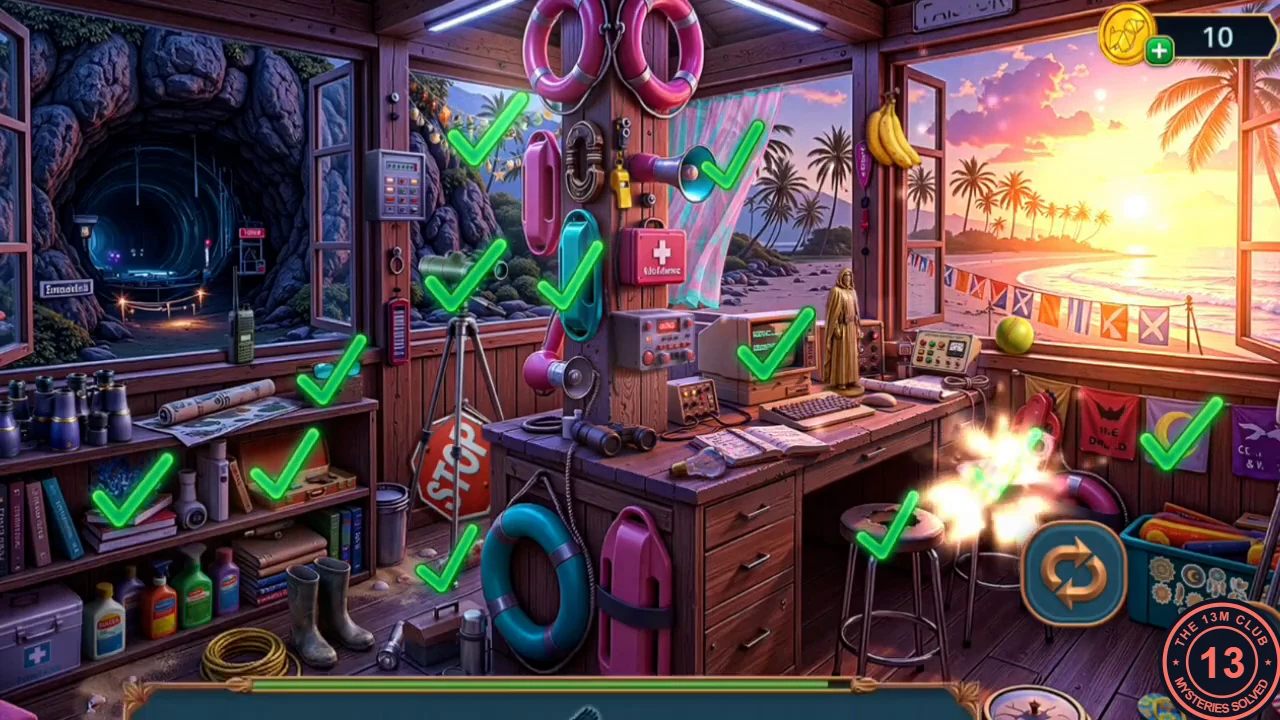
All twelve differences ticked. - Grab the basket in the pit with the Grabber Hand and take the Lever from it.
CHAPTER 3
Near the Cave Entrance: The Cave Door Timers
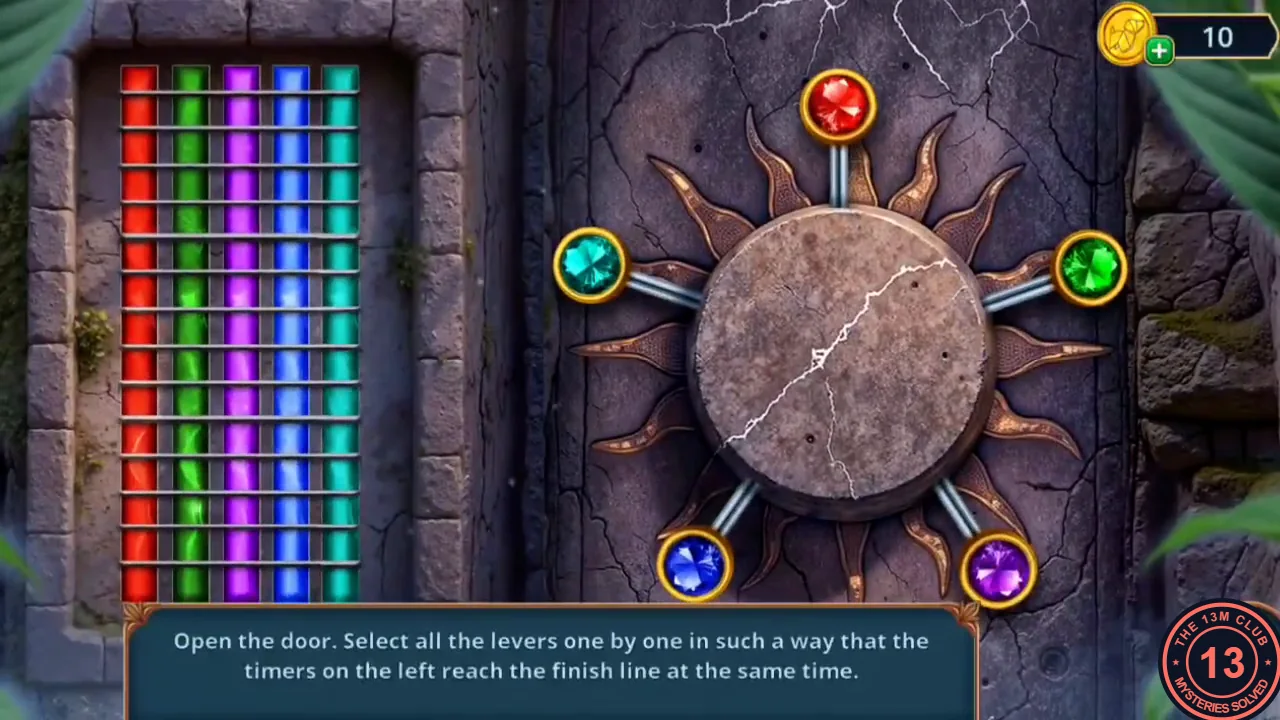
Use the Lever on the sun disc of the cave door and time the five levers to open it.
- Insert the Lever in the sun disc on the cave door.
- Each lever starts a timer that drains at its own speed. Start the slowest (red) first, then green, purple, blue and finally the fastest (teal), spacing them so all timers reach the finish line together.
- Chapter 3 ends with the Decision Points journal (0, 4 and 10 star outcomes). James, the man from the van, has Eli captured.