Eli's Room: The Suitcase Story Scene
Eli shows Jules a photo of his missing sister Emily and says the answers are in his suitcase. Jules is playable.
- Take the Oil from the window sill. Open the fish-tile cabinet on the desk and use the Oil on the jammed corkscrew to get the Broken Corkscrew.
- Look up at the ceiling fan and throw the Paper Airplane at the key on the blade. Take the Key from the nightstand.
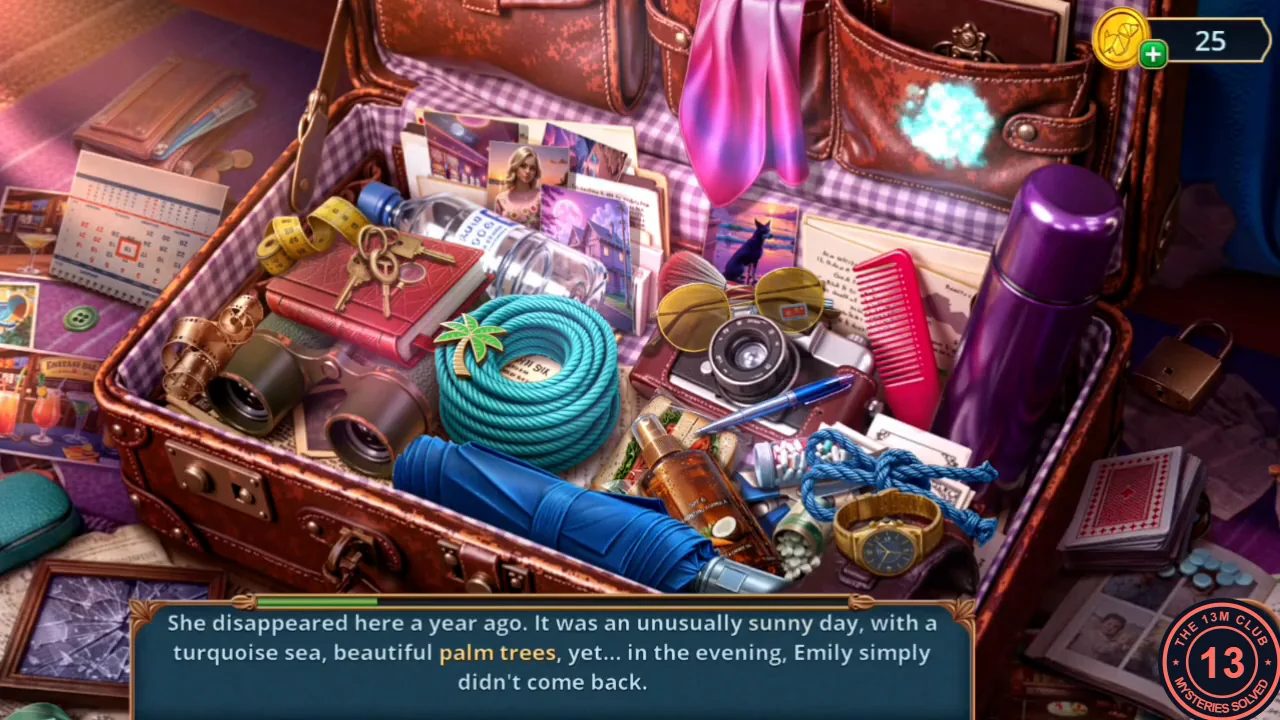
- Use the Key on the purple suitcase to start the story scene. The story appears one page at a time; tap the object for each highlighted word, and the next page follows when both are found. Page 1: "Seabridge Bay" – the Seabridge Bay postcard at the upper right of the suitcase, beside the comb; "my heart" – the red heart by the bunch of keys on the red book, upper left. Page 2: "sunny" – the sun emblem stamped on the brown leather pouch at the top right; "palm trees" – the little palm-tree charm on the coil of turquoise rope. Page 3: "Blonde" – the photo of a blonde woman among the papers at the top left of the suitcase; "blind" – the round yellow sunglasses with a price tag, next to the camera. Page 4: "find" – the small magnifying glass hanging on the key ring on the red book; "game" – the deck of playing cards on the floor at the lower right, outside the suitcase. Page 5: "connected" – the knotted blue rope by the gold wristwatch at the lower right; "shut yourself off" – the padlock on the floor right of the purple thermos. Page 6: "year" – the desk calendar outside the suitcase at the top left; "oil" – the orange bottle of tanning oil at the lower middle, by the blue umbrella. Finally a photo appears among the letters at the upper right, next to the comb; tap it to see the 1976 photo of Eli and Emily.
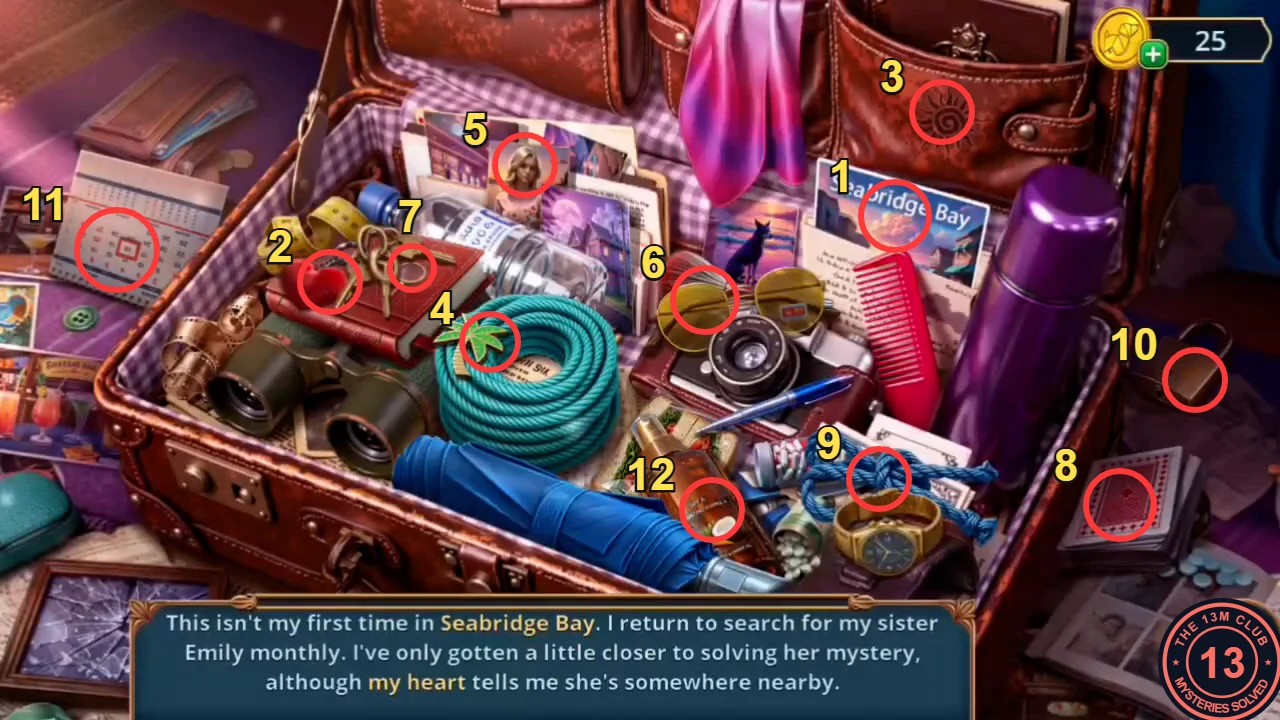
Numbers follow the page order above: 1 postcard, 2 heart, 3 sun emblem, 4 palm charm, 5 blonde photo, 6 sunglasses, 7 magnifier, 8 playing cards, 9 knotted rope, 10 padlock, 11 calendar, 12 tanning oil. The 1976 photo then appears where the postcard (1) was. - Decision point with Eli: "I feel the same." costs 60 coins and gives 2 stars; "Right now, we'd better focus on finding our loved ones." is free and gives none. Eli hands over Emily's Bag.
Eli's Room: The Fish-Tile Line
Open the desk drawer in Eli's room to get the amulet for the fish-tile cabinet.
- Open the Bag in your inventory and take the Occult Figurine and the Map Part (a palm-patterned piece that comes out of the bag next). Open the window and take the Corkscrew Handle from the sill; the thorny vines still block the window.
- Combine the Broken Corkscrew with the Corkscrew Handle to make the Corkscrew. Use it on the knob of the desk drawer and take the Fish Amulet.
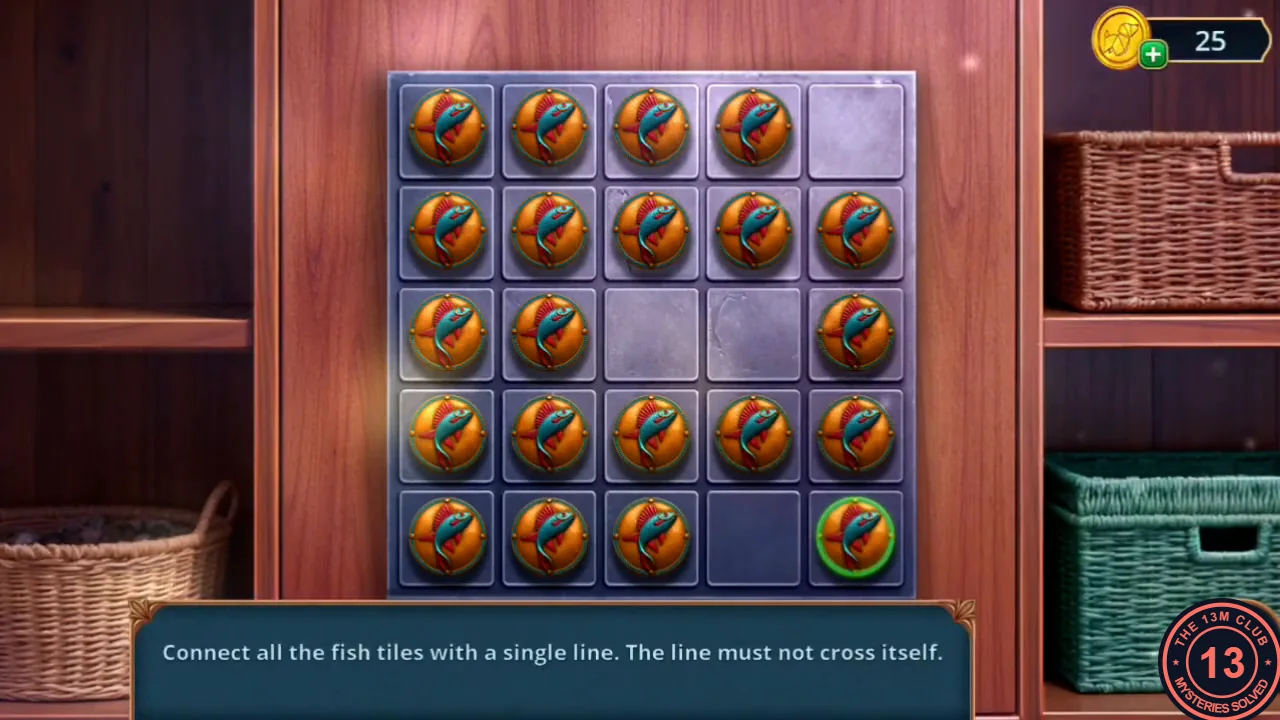
- Place the Fish Amulet in the fish-tile cabinet. Connect all fish tiles with one line that never crosses itself. Number the rows 1 to 5 from the top and the columns 1 to 5 from the left; the cells R1C5, R3C3, R3C4 and R5C4 are empty. The line starts at the ringed tile R5C5. Draw it through: R4C5, R4C4, R4C3, R5C3, R5C2, R5C1, R4C1, R4C2, R3C2, R3C1, R2C1, R1C1, R1C2, R2C2, R2C3, R1C3, R1C4, R2C4, R2C5 and finish at R3C5.
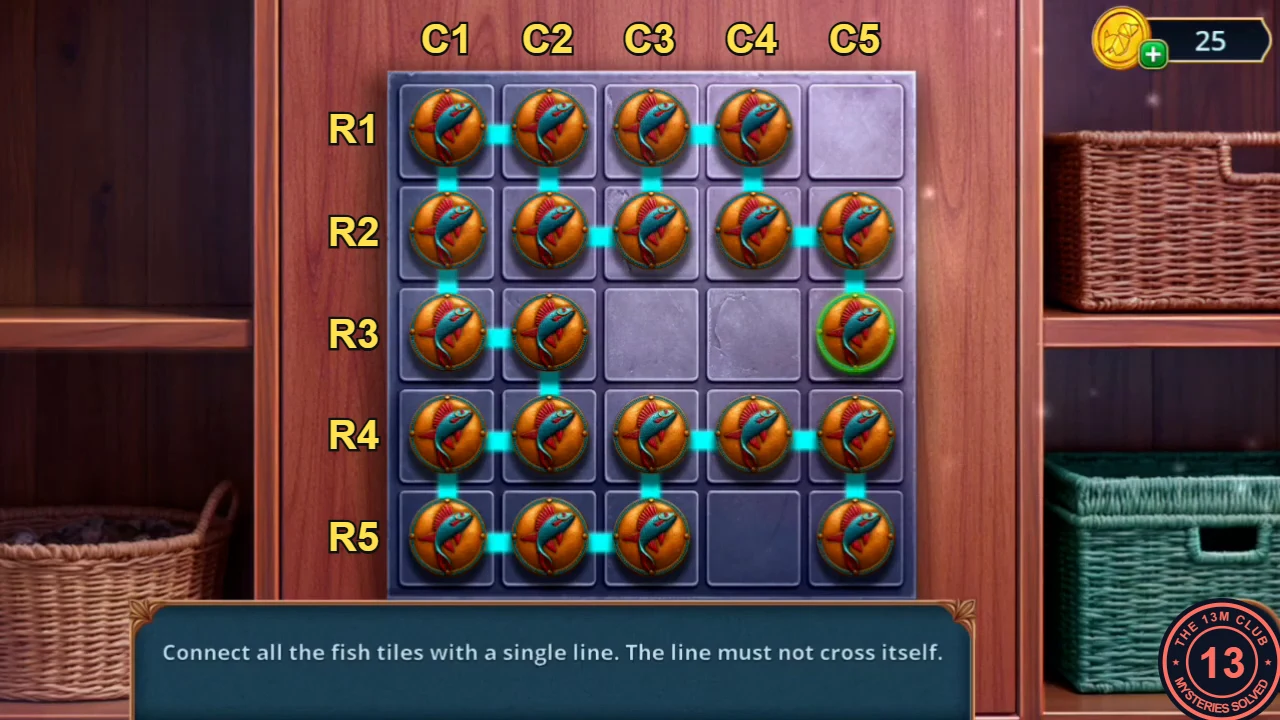
The finished line, labelled as in the route. It starts at R5C5; the green ring follows the line's end and finishes on R3C5. - Take Emily Gilbert's photo from the cabinet.
Eli's Room: Map Fragments in the Suitcase
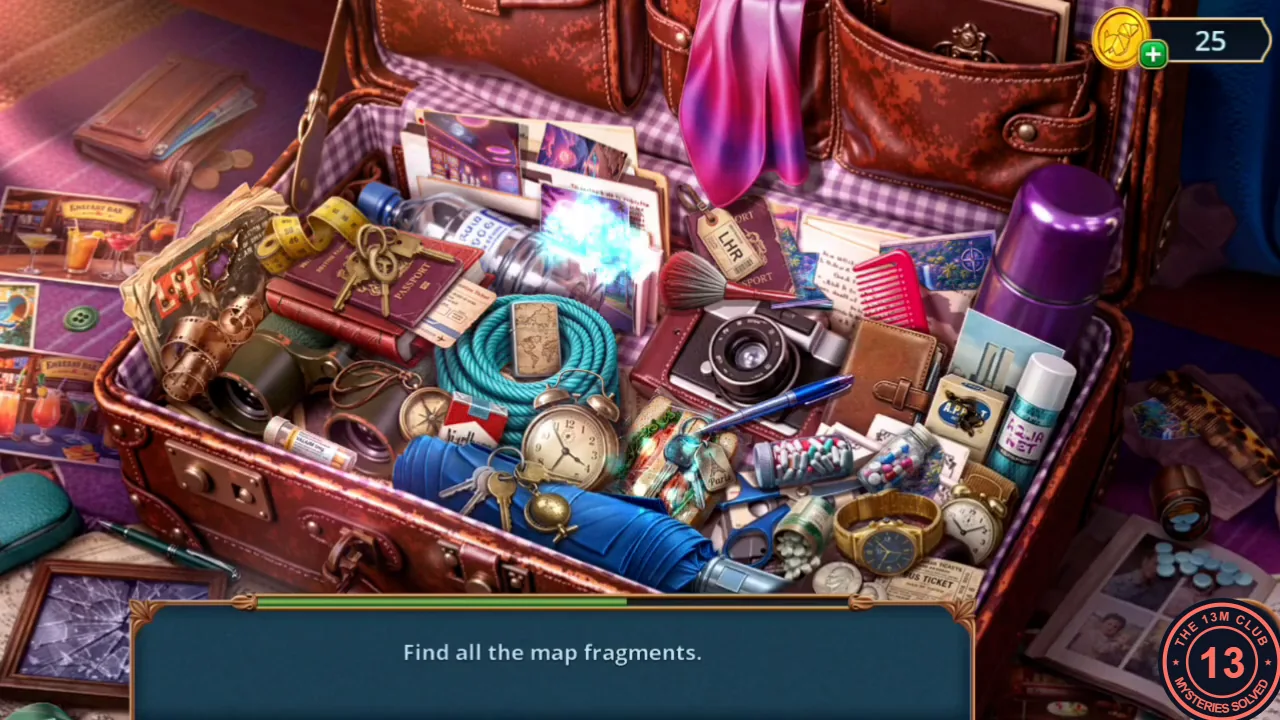
Clear the vines at the window, then search the suitcase for the pieces of a map.
- Pick up the Shirt lying by the bed and use it on the thorny vines at the window. Take the Tape that was caught in them.
- Open the suitcase and place the Tape and the Map Part in its two slots to start the scene.
- Find the map fragments hidden in and around the suitcase. Each fragment is a small blue-green paper scrap that flashes when tapped; tapping too quickly at random triggers a five-second wait. In the recording they were: outside the suitcase at the top left, just below the brown wallet; outside at the bottom left, by the teal glasses case; inside at the top left, by the yellow measuring tape and the red diary; at the back on the left, among the postcards; lower left inside, between the binoculars and the blue umbrella; bottom middle, just right of the alarm clock; top middle, on the postcards between the glass bottle and the LHR luggage tag; top right, on the postcards just right of the pink comb; on the floor to the right of the suitcase; and bottom right inside, just above the wristwatch. The fragments assemble into the Map; Eli says the marked place is linked to the kidnappings.
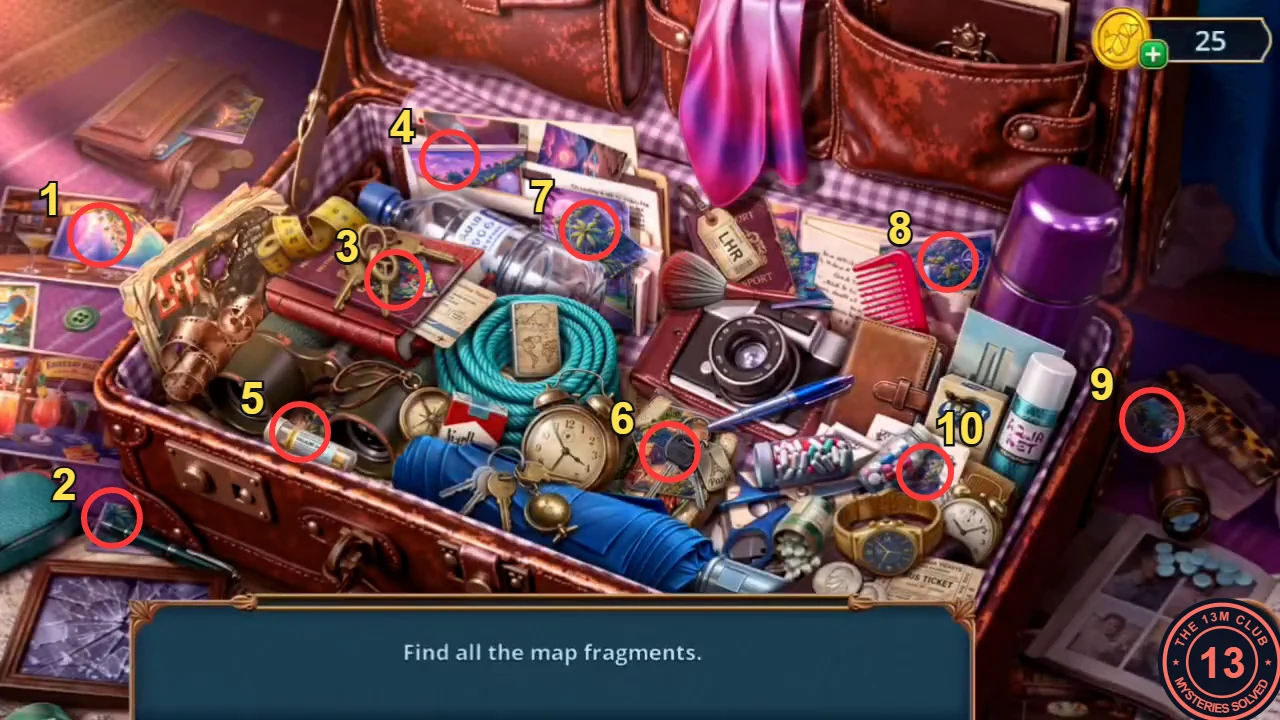
The ten fragment spots, numbered in the order of the list above. The view drifts slightly during the scene.
Hotel Grounds: Climbing the Cliff
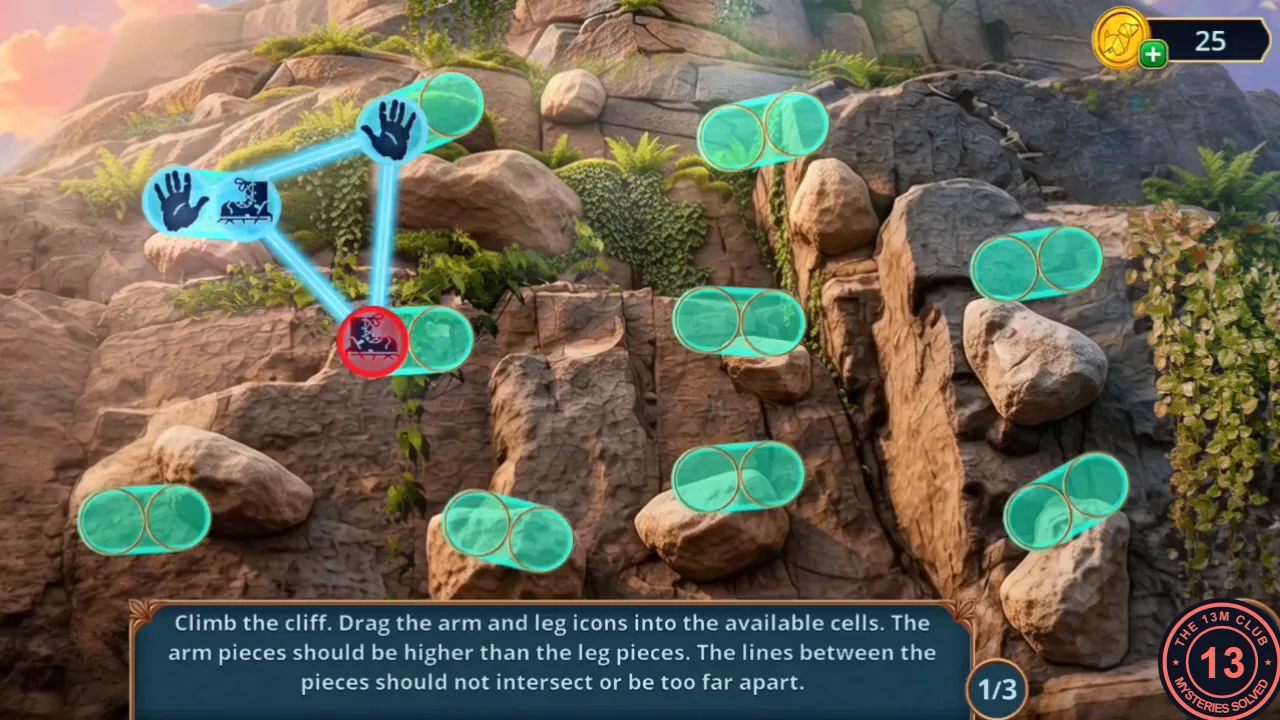
Next morning Jules is at the Hotel Grounds by the pool.
- Open the poster board and take the Rock and the Disassembled Jack.
- Open the wooden box with the broken handle. Lay the Ribbon across the handle holes and fix it with the Stapler. Open the box: a Shell is inside; take the Carabiner.
- Attach the Carabiner to the rope at the base of the cliff to start the climb.
- Drag the arm and leg icons into free holds. Arms must stay above legs, the lines between them must not cross, and limbs cannot be too far apart (red means invalid). Move one limb at a time upward to reach the top. There are three stages.
Top of the Mountain: The Cave Scene
At the top there is a cable-car booth, a tent and a cave.
- A Shell appears when you open the junction box by the cable-car booth. Read the torn poster beside it: a brick wall with a sun and two rows of arrows. Jules needs to copy it later.
- Lift the tent fabric: take the Goblet and then the Coal. The hook above has nothing to hold the fabric.
- Open the green handbag hanging on the rock and pick its clasp with the Hairpin. Take the Small Valve and the Spatula.
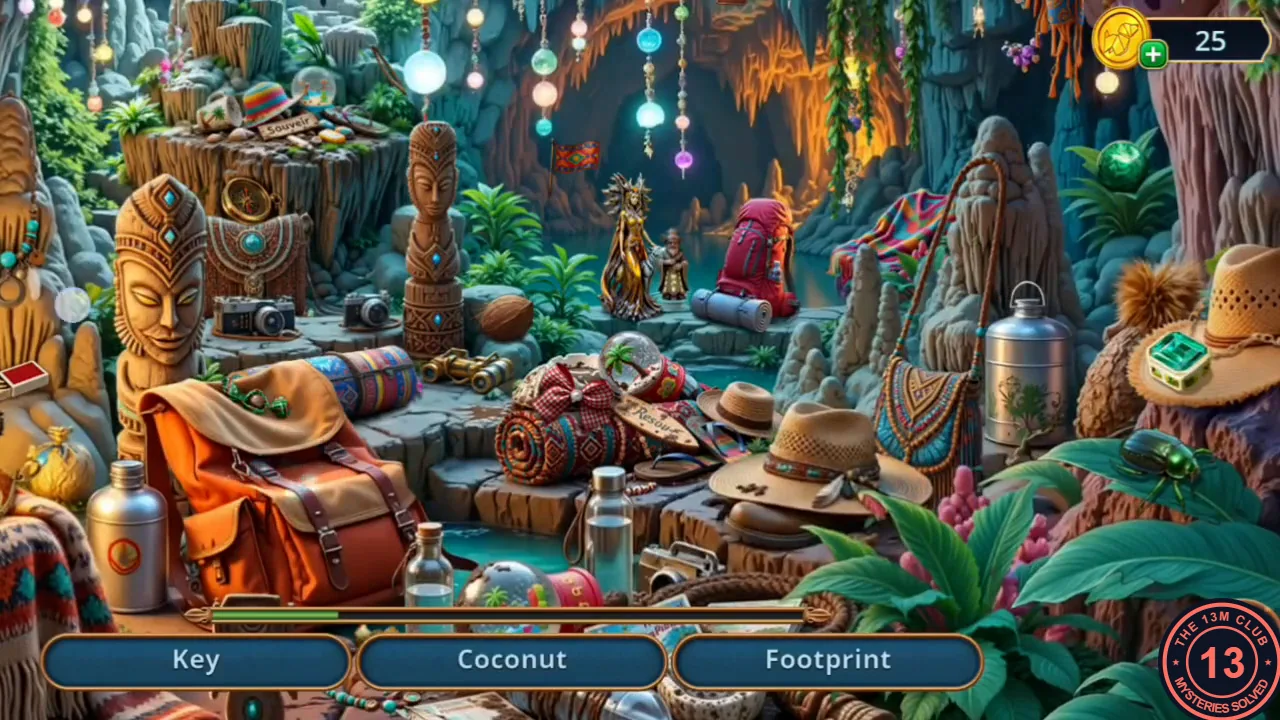
- Fit the Small Valve to the oil lantern to light it. Enter the lit cave and find the listed objects. The cave is wider than the screen, so drag to look left, right and up. Key and Footprint stay listed throughout; the middle name changes as you find items. Locations in the recording: Tambourine – top left, on the rock ledge left of the blue bell; Moon – the moon picture on the silver canister at the right, beside the straw hat; Wristwatch – on top of the orange backpack; Coconut – on the ledge behind the cameras in the middle; Matches – just right of the lit lantern at the far left; Ball – at the far left edge, above the lantern; Bow Knot – on the round patterned bedroll in the middle; Bug – the green beetle on the leaves at the lower right; Flag – in the middle of the cave, above the small golden figurines; Compass – on top of the large carved mask on the left; Footprint – on the cave wall at the upper right; Key – at the top of the cave, among the hanging beads right of the blue bell.
- You receive the Flower Garland.
Top of the Mountain: The Jack and the Boulder
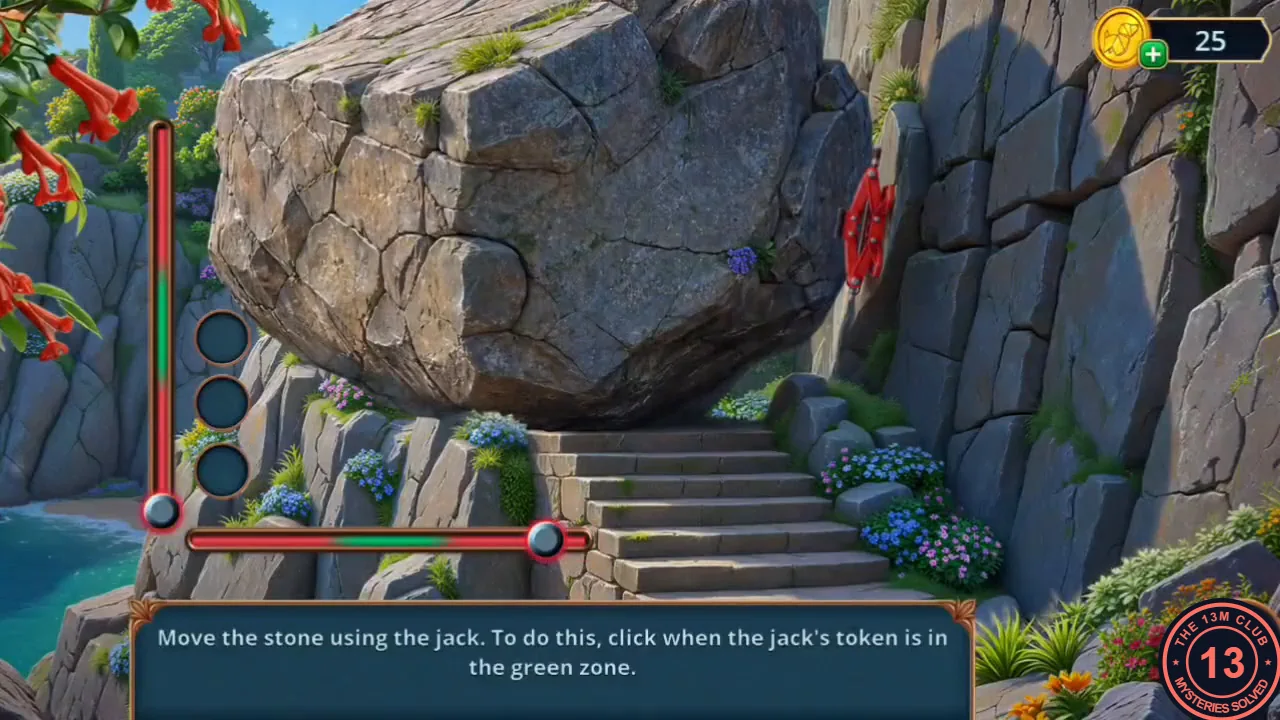
At the Top of the Mountain, repair the jack and move the boulder blocking the stairs.
- Hang the Flower Garland on the hook by the tent so the fabric lifts. A box with a disco figure appears; pry the box with the Spatula, collect the Shell inside and take the Screw.
- Open the Disassembled Jack in your inventory. Put the Screw into the upper empty slot and the threaded metal rod Jules picked up from the side table by Eli's lounger in Chapter 1 into the lower slot. The jack is assembled.
- Place the Jack under the boulder by the stairs. Tap when the moving token is in the green zone; three hits roll the stone away.
- Near the Old Chapel Jules sees two hooded figures. Decision point: "Stand still" is free (0 stars); "Hide" costs 30 coins (2 stars); "Brace yourself" costs 60 coins (6 stars).
Near the Old Chapel: The Bell and the Second Cave Visit
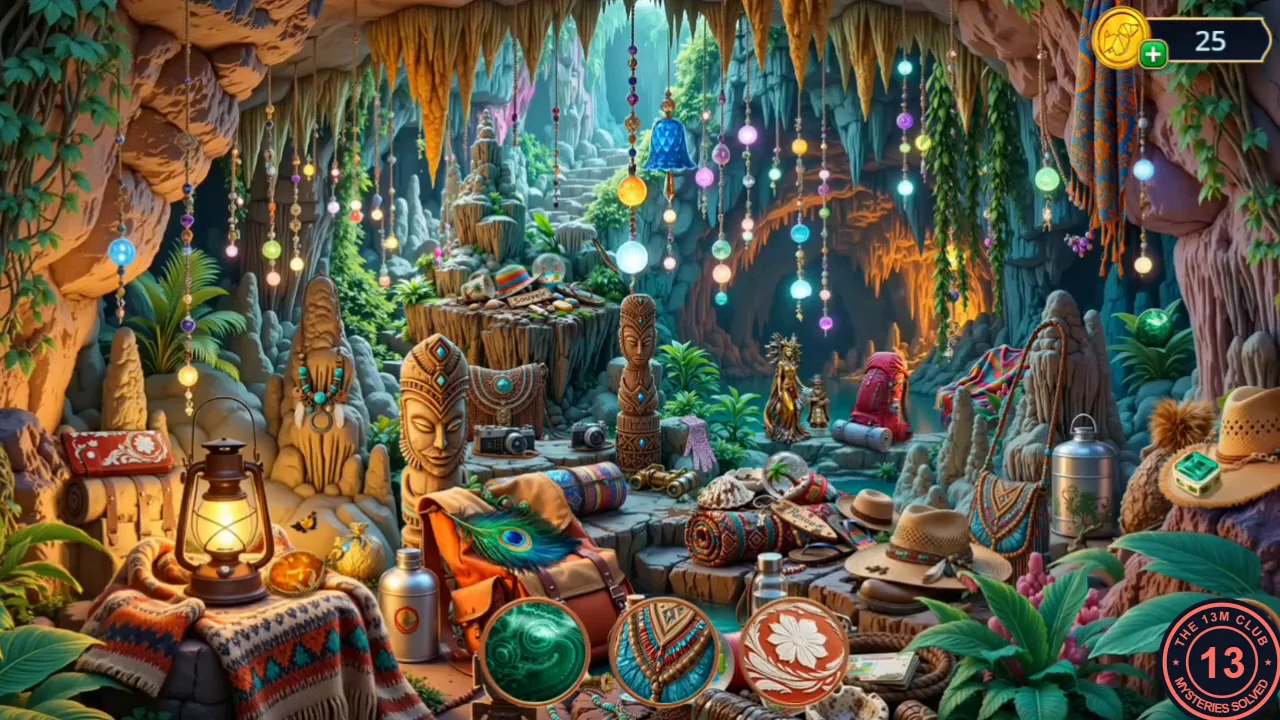
Lower the chapel bell, then return to the mountain cave for a second search.
- Take the Sewing Kit from the vines by the chapel. Use it on the burlap sack with the hole.
- Open the sand at the statue base (a Shell). Scoop the sand into the sack with the Goblet to get the Sand Bag.
- Put the Sand Bag in the crate on the bell frame. It is not heavy enough, so add the Rock. The bell lowers; take the Magnet, the Ball and the Rings. A Shell is on the chapel view.
- The chapel door is locked. Return to the Top of the Mountain and enter the cave again. Each round slot at the bottom shows a close-up of part of an object; tap the matching object (it flashes and a new close-up replaces it). The objects stay in the scene, and the slots are filled in this order in the recording: amber orb – the orange stone right of the lit lantern, lower left; reddish fabric – the red backpack in the middle right; red cloth with white flowers – the cushion above the lantern at the far left; chevron pattern – the patterned shoulder bag hanging beside the silver canister; peacock eye – the peacock feather on the orange backpack; blue scales – the blue bell hanging at the top; lilac knit – the lilac glove beside the carved pillar in the middle; brown disc with turquoise stone – the turquoise-studded carved panel between the big mask and the pillar; orange-and-blue pattern – the scarf hanging at the top right; green square – the green box on the straw hat at the right; rainbow stripes – the striped blanket on the rock right of the red backpack. The green swirl slot stays until last: it is the green glass orb among the leaves on the rock at the upper right, left of the large tree trunk (drag the view right if needed). Then a silhouette of a dancing figure appears: the patterned shoulder bag beside the silver canister opens to show a small figure; tap it. You receive the Disco Figurine.
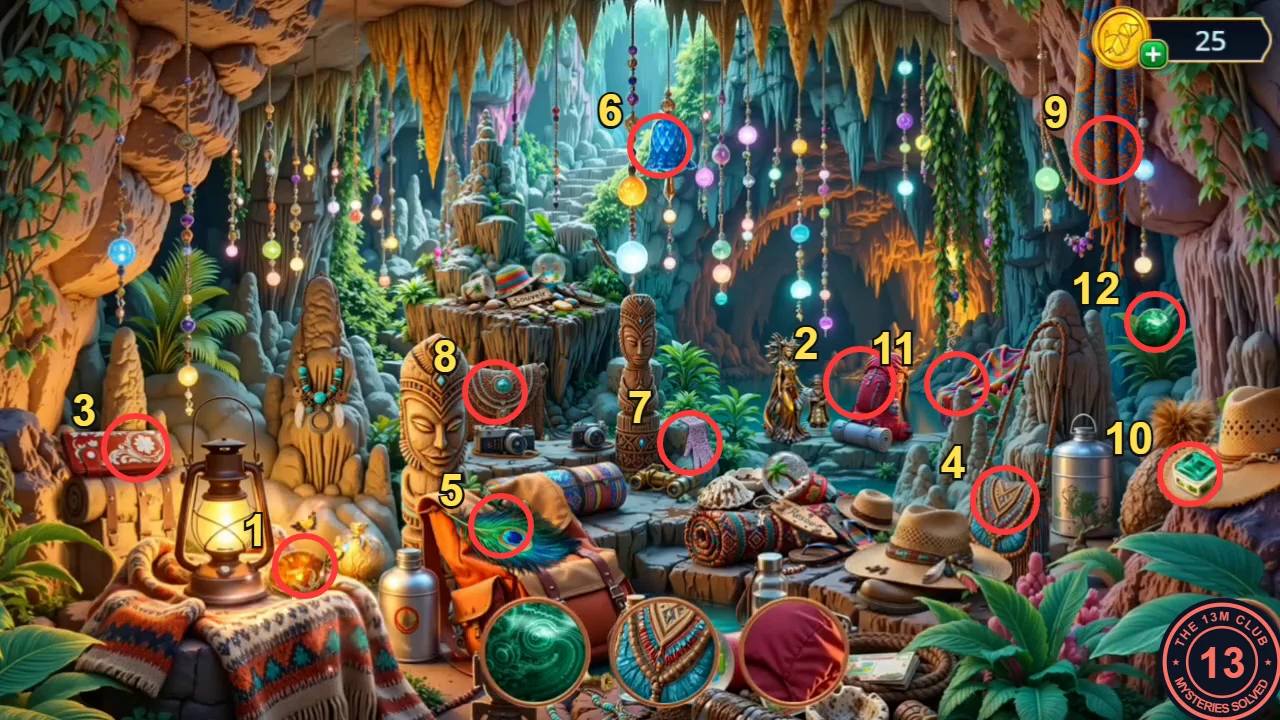
Numbers follow the order of the list above, 1 amber orb to 12 green glass orb. The dancing figure then appears in the shoulder bag at 4. - Place the Disco Figurine on the tent box next to the other figure. Take the Tape and the Perfume from inside.
Hotel Grounds: The Newspaper Box
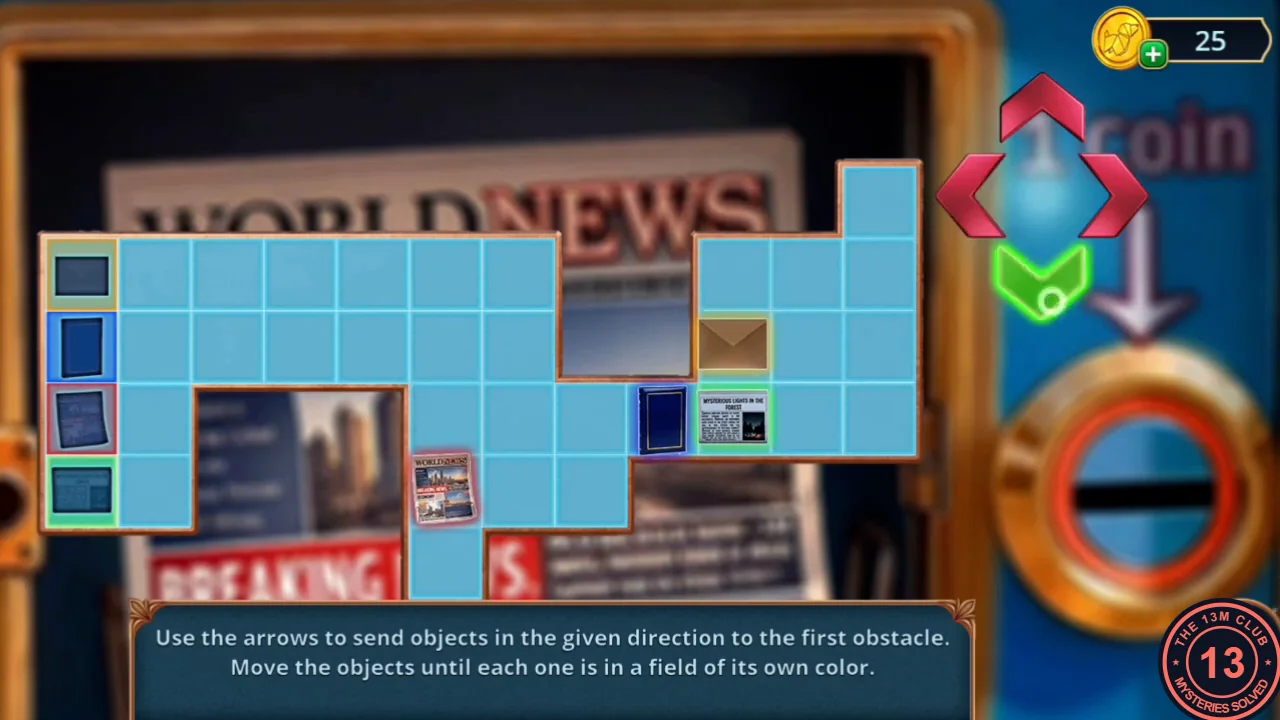
At the Hotel Grounds, a coin from the pillar opens the newspaper box.
- Back at the Hotel Grounds, scrape the posters off the pillar with the Spatula and take the Coin. Behind them is a brick safe with symbols.
- Put the Coin in the newspaper box. The four objects must reach the coloured squares in the far-left column: envelope to the beige top square, blue card to the blue square, red-framed magazine to the red square and green-framed newspaper to the green bottom square. Every arrow tap moves all objects together; in the recording each tap moved them one square, objects stopped against walls or another object, and an object resting on its own colour stayed put. The start position was the same in both recordings. This tap sequence solved it: Left, Left, Left, Down, Left, Down, Left, Up, Up, Up, Left, Left, Up, Left, Left, Left, Left, Left, Down, Down, Left, Up, Up, Up, Left. If a tap goes wrong, steer the envelope last: once the other three are locked in place, bring the envelope up the second column and tap Left.
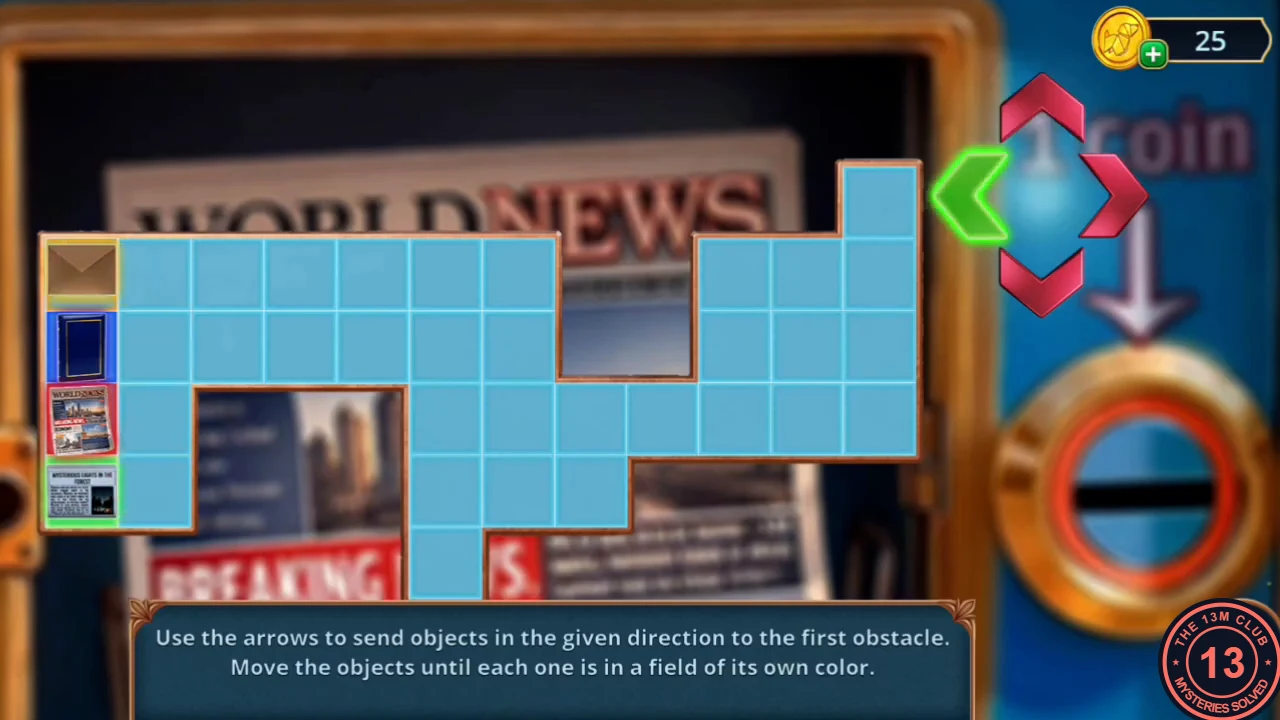
The solved box: envelope, blue card, magazine and newspaper each on their colour. - Read the newspaper about mysterious lights in the forest, collect a Shell and take the Empty Paper.
Hotel Grounds: The Brick Safe
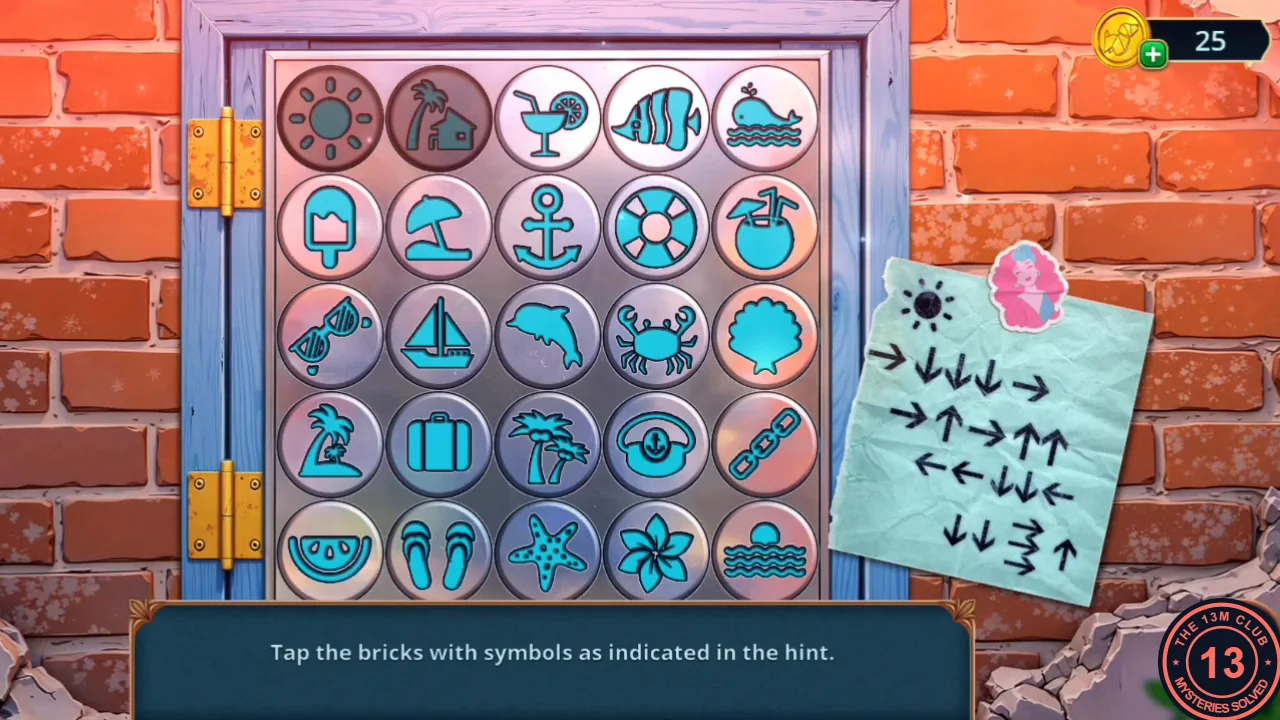
Copy the code from the torn poster and use it on the brick safe behind the posters.
- At the Top of the Mountain, put the Empty Paper over the torn poster and rub it with the Coal to copy the Code. The button of the junction box is missing.
- Use the Code on the brick safe at the Hotel Grounds. Start on the sun brick (top left) and follow the arrows, tapping the brick at each turn: sun, palm-tree house, suitcase, captain's hat, crab, shell, whale, cocktail, dolphin, sailboat, flip-flops, waves, chain.
- Look at the wedding photo and note, and take the Ear Tube.
Near the Old Chapel: The Statue's Rings
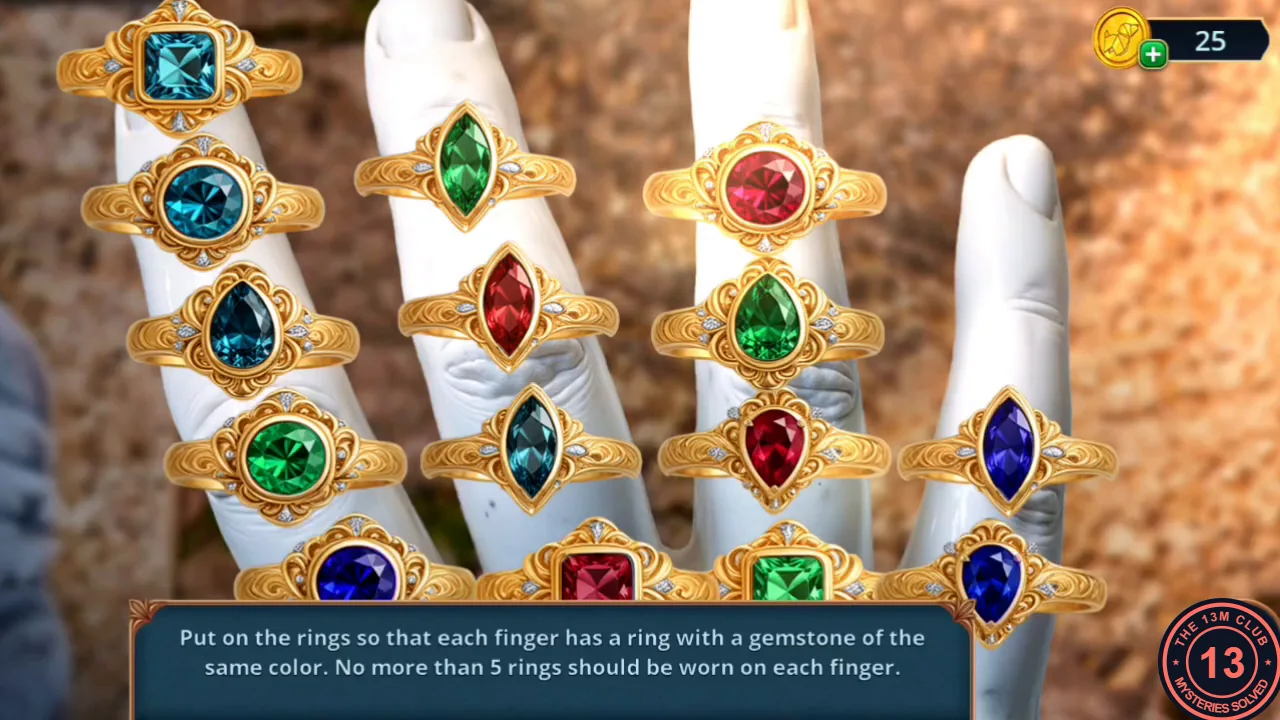
The statue by the chapel needs its rings arranged by gem colour.
- Put the Rings on the statue's hand by the chapel. Tap a finger to lift its top ring (the one nearest the fingertip), then tap another finger to slide it on there; no finger may hold more than five rings. The goal is for every ring on a finger to share one gem colour, so the four fingers end as four single-colour stacks: all teal, all red, all green and all blue. A matching top ring alone is not enough. Work on one colour at a time: first move the few rings of the rightmost finger onto fingers that still have room, so you have an almost empty finger to build on; then dig out every ring of the chosen colour and stack them there, parking unwanted rings on any finger with fewer than five. Leave finished single-colour fingers alone and repeat with the next colour. In the recording the solved hand had teal on the leftmost finger, red on the second, green on the third and blue on the rightmost.
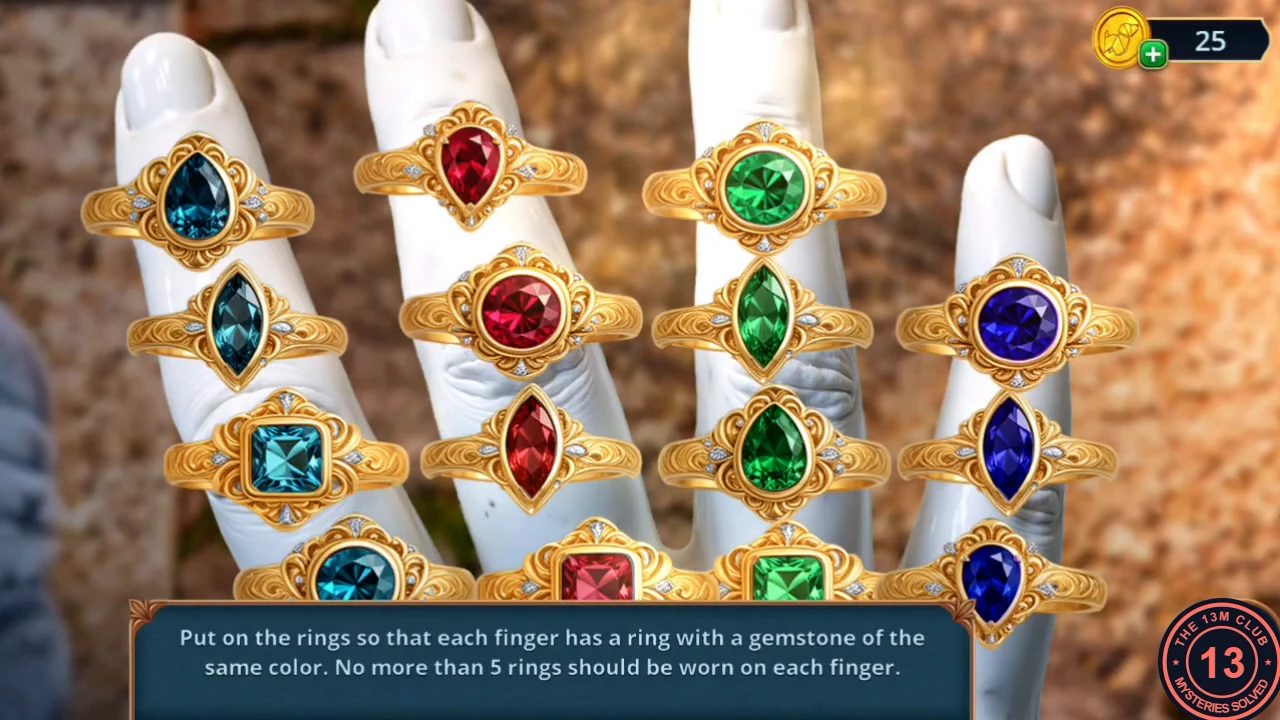
The solved hand: one gem colour per finger. - Take the Shears.
Old Chapel: The Key Maze on the Door
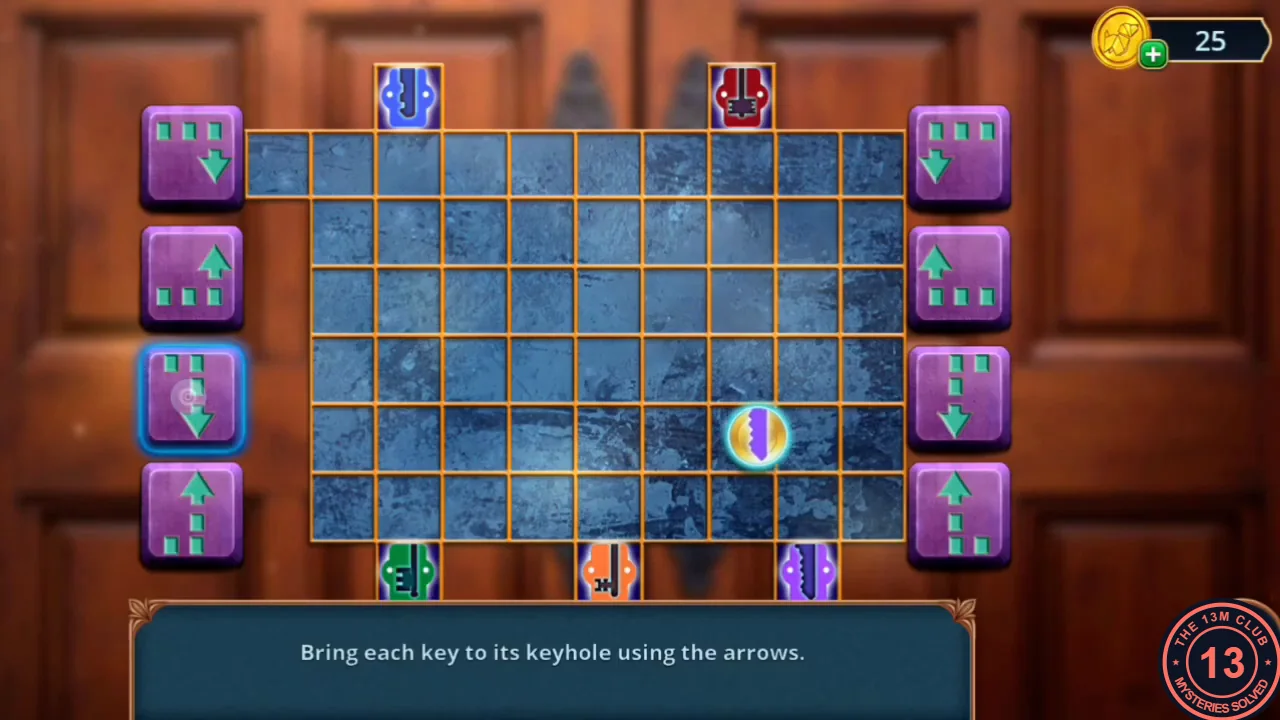
Find the lost keys in the planter and guide them to the locks on the chapel door.
- Cut the vines in the planter by the chapel with the Shears. Read the note about losing the keys and take the Keys. A Shell is in the planter.
- Use the Keys on the chapel door. The keys enter one at a time on the extra square at the top left, and each must reach the keyhole of its colour above or below the board. Each of the eight side buttons moves the current key in an L-shape, like a chess knight, following the dots and arrow on the button. Left-side buttons move the key to the right; from top to bottom they are L1 = two right, one down; L2 = two right, one up; L3 = one right, two down; L4 = one right, two up. The right-side buttons do the same towards the left; only the top one is needed here, R1 = two left, one down. The recording's working sequence: purple key L3, L3, L1, L4, L1, L3; green key L3, L3, L1, R1; blue key L2; red key L1, L2, L1, L4; orange key L1, L1, L1, R1, L3.
- Decision point with Eli: "You want to be my knight in shining armor?" costs 60 coins and gives 2 stars; "Yes, I'm scared and I could use some protection." is free and gives none. Eli goes first, and you now play as Eli.