Hotel Room: The Wardrobe Hidden-Object Scene
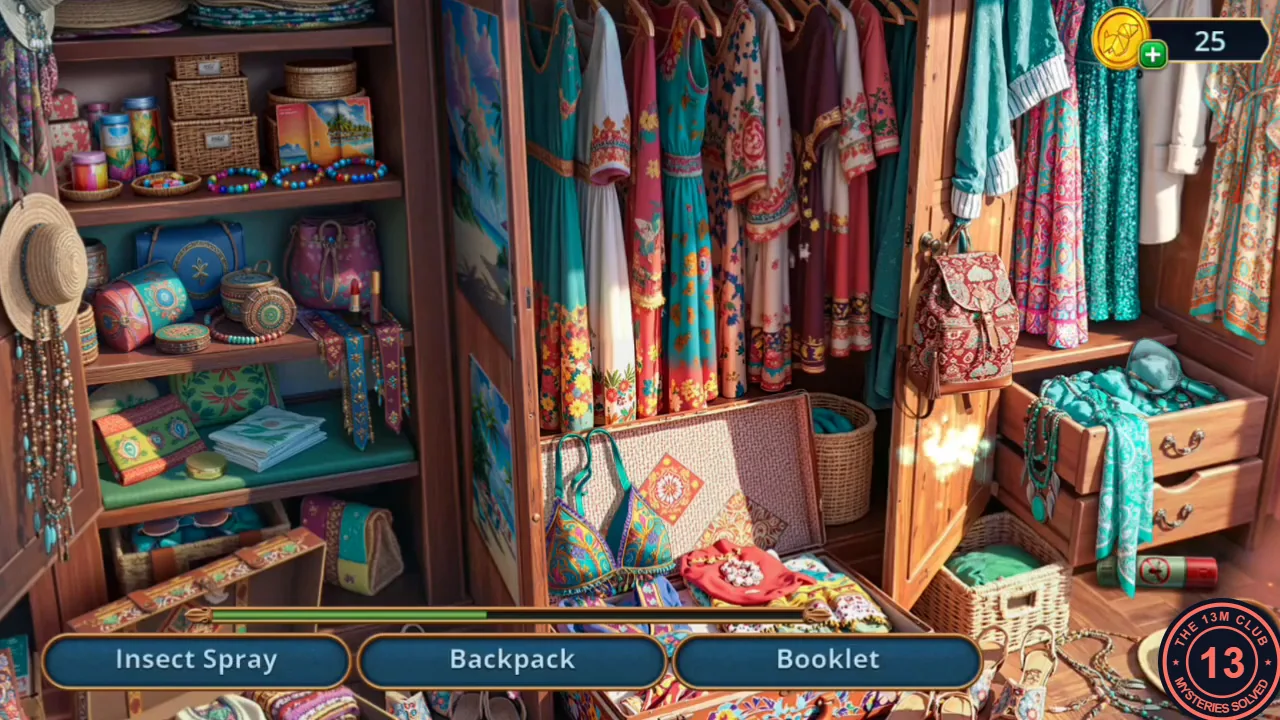
Jules is getting ready for a beach party in the room she shares with Mallory. The pink bag on the floor is locked; Jules needs something thin to open it.
- Open the air conditioner on the wall and take the Bracelet and the Air Conditioner Switch from its top.
- Put the Air Conditioner Switch into the orange panel at the lower left of the air conditioner. A Dolphin Figurine blows out of the vent; take it.
- Open the wardrobe and place the Dolphin Figurine on the empty left handle to start the hidden-object scene.
- Find the objects named at the bottom; three names show at a time and new ones replace those you find. Locations: Alarm Clock – teal clock on the second shelf on the left; Book – open book on the third shelf on the left; Booklet – picture card on the top shelf on the left; Brush – pink hairbrush on the bottom-left shelf; Sunglasses – in the open box on the bottom-left shelf; Box of Chocolates – in the right half of the open suitcase; Swimsuit – bikini lying on the suitcase lid; Room Keys – in the wicker basket on the floor right of the suitcase; Beach Umbrella – small umbrella leaning by the drawers on the right; Mirror – in the open top drawer on the right; Backpack – red patterned backpack hanging on the right-hand door; Insect Spray – can on the floor at the lower right. When the list is empty, the Badge appears on the third shelf on the left (left of the books); tap it.
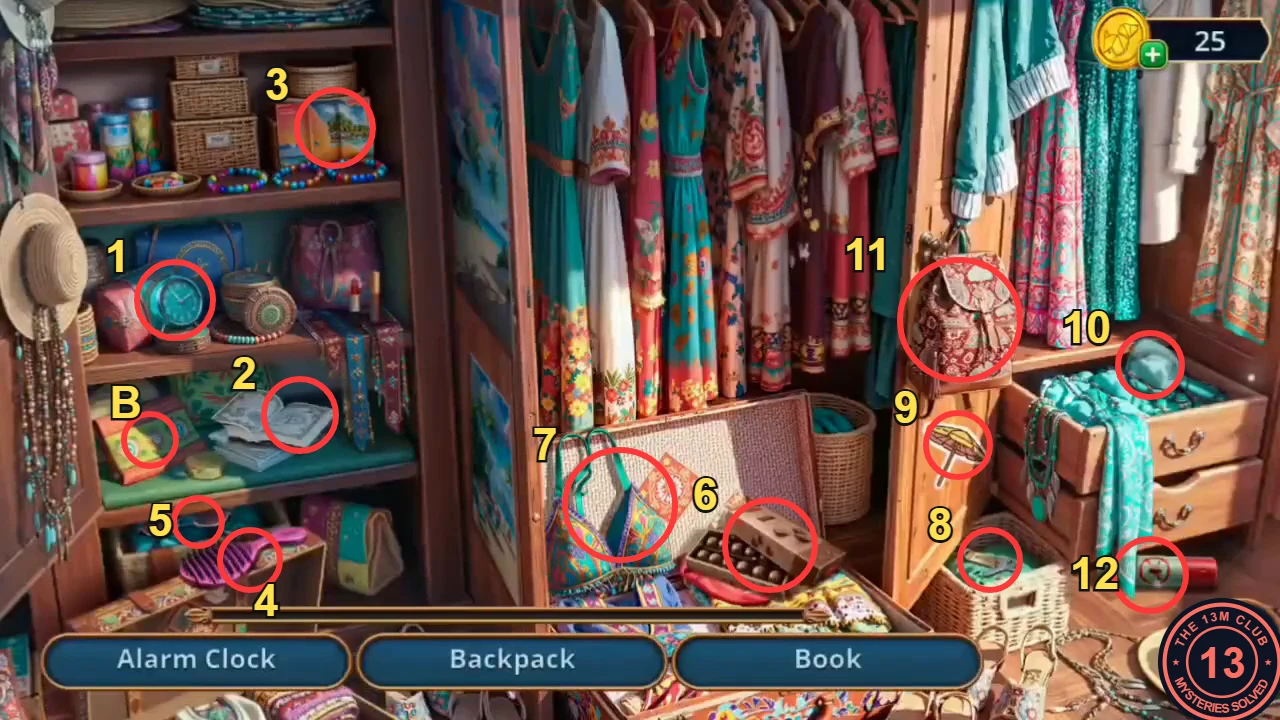
Numbers follow the order of the list above: 1 Alarm Clock, 2 Book, 3 Booklet, 4 Brush, 5 Sunglasses, 6 Box of Chocolates, 7 Swimsuit, 8 Room Keys, 9 Beach Umbrella, 10 Mirror, 11 Backpack, 12 Insect Spray. B: where the Badge appears at the end.
Seabridge Bay Beach: Photo Fragments
Open the pink bag, then head down to the beach where Mallory points out the musician Eli Gilbert.
- Use the Badge pin on the lock of the pink bag. Take the Flower Decoration, Hand Pump and Instant Camera. A short scene moves Jules to the beach.
- Open the Seabridge Bay sign and take the Fins (1/2).
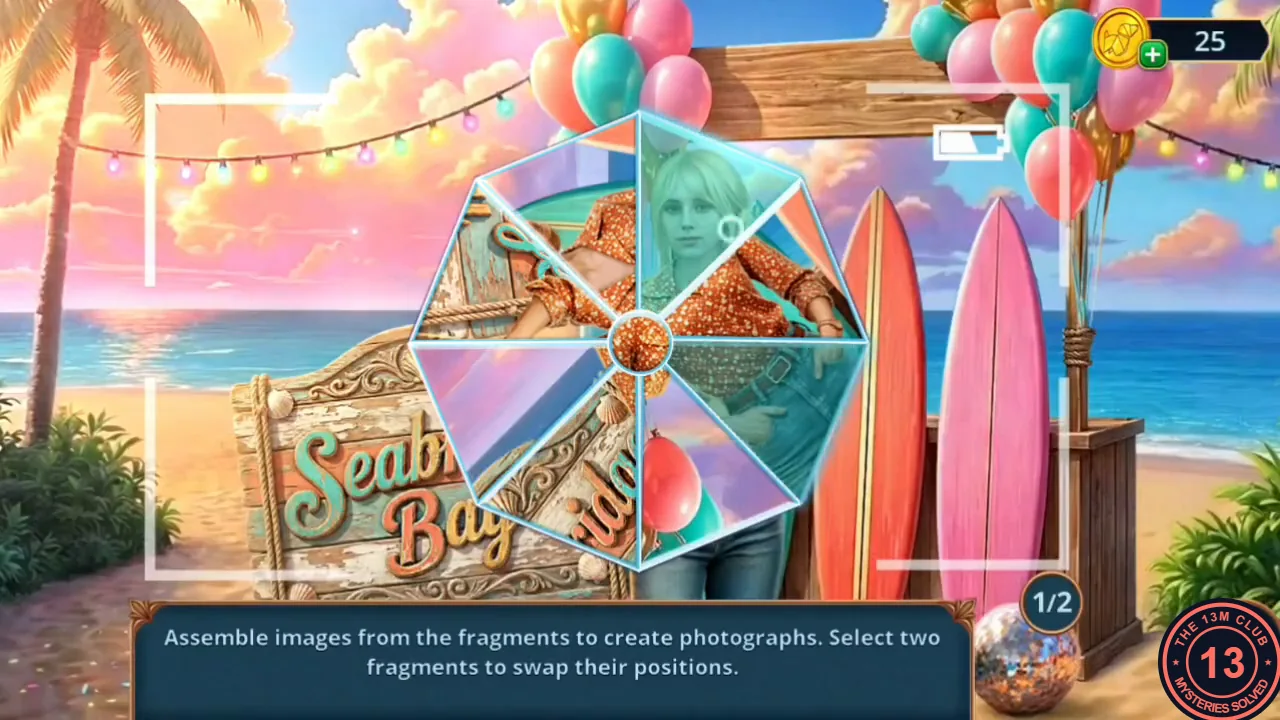
- Use the Instant Camera on the sign. In the photo puzzle, select two fragments to swap them; keep swapping until both photos are complete.
- Take the Poorly Developed Photo. The Make pictures task is complete.
Hotel Room: Fabric-Matching Scene for the Hair Dryer
Eli is sitting by the beach bar. Jules wants to bring him an ice cream and a cocktail, but first she wants to fix her hair.
- Open the chest by the lifebuoy and take the Deflated Volleyball. Use the Hand Pump on it and give the inflated ball back to the players.
- Open the cocktail machine and take the Fins (2/2) from the poster area. The drawer below has no handle: attach the Bracelet as a handle, open it and take the Wet Wipes.
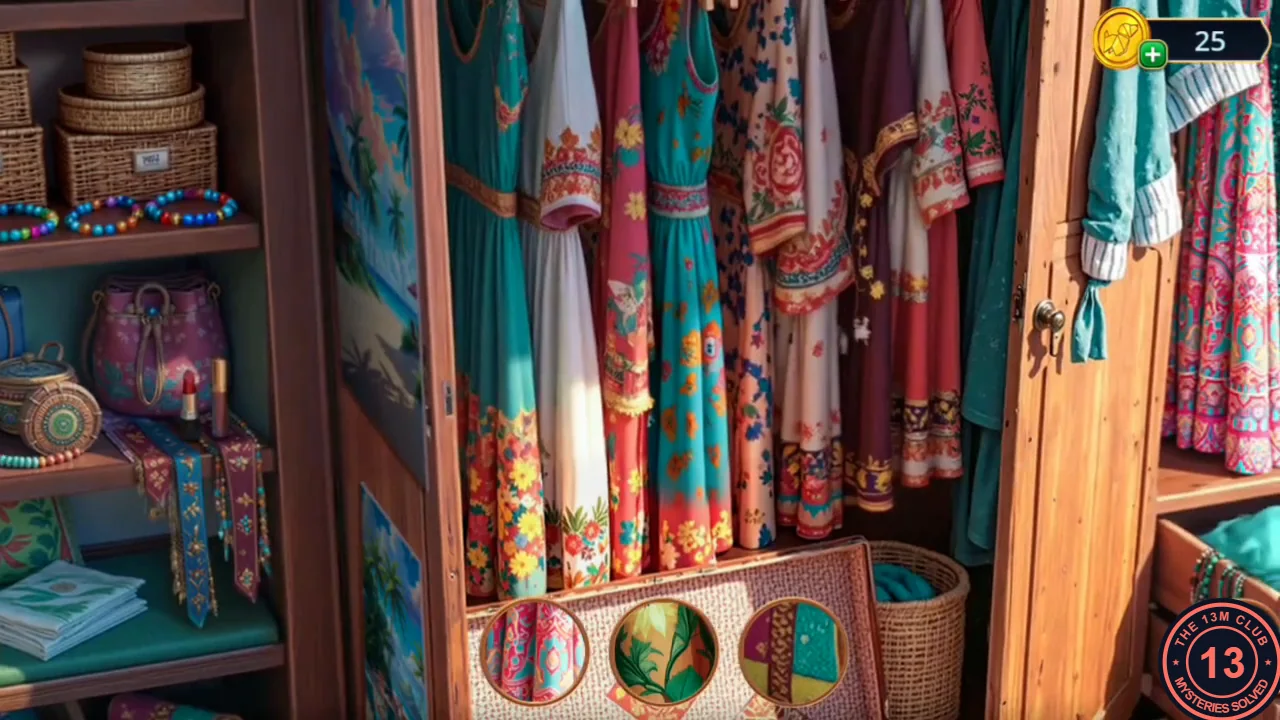
- Jules remembers a hair dryer in the room. Go back to the bedroom and open the wardrobe again. In this scene, match the fabric patches to the round swatches shown at the bottom. You receive the Hair Dryer.
Beach Bar: The Cocktail Machine
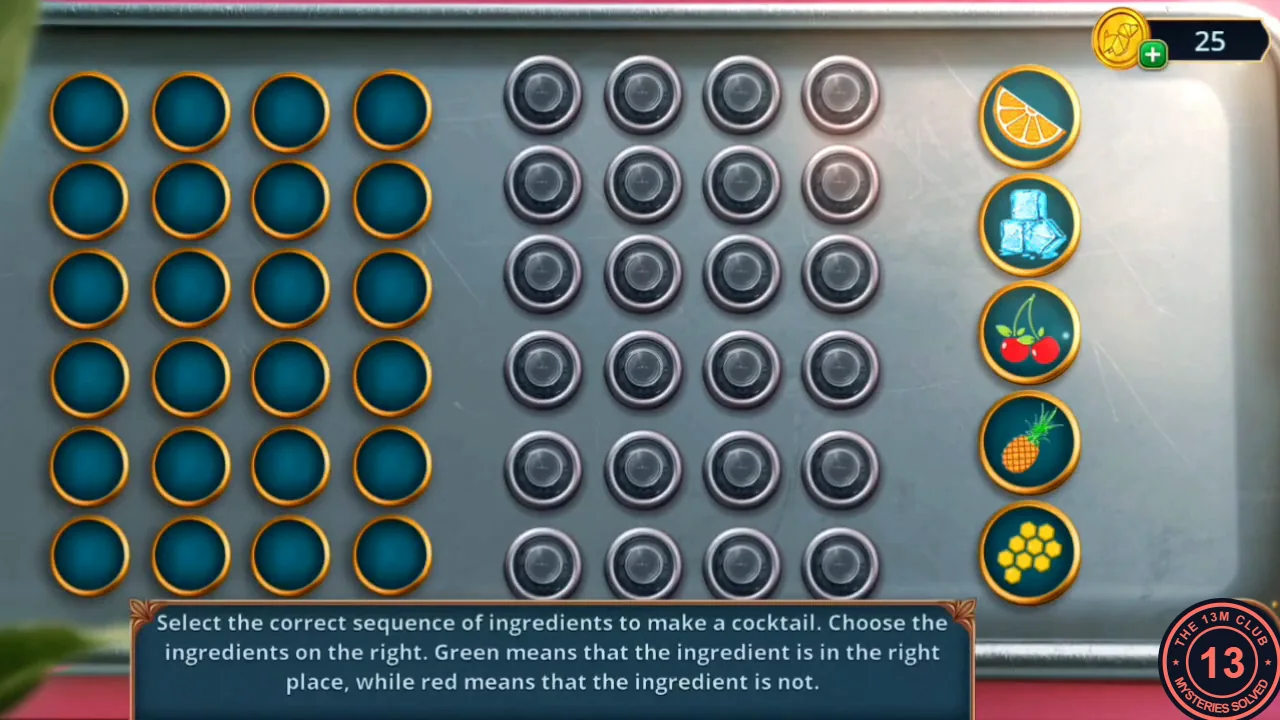
Jules needs an ice cream and a cocktail for Eli.
- In the bedroom, open the iced-over mini-fridge and use the Hair Dryer on it. Take the Ice Cream and the Frozen Berries.
- Return to the beach and add the Frozen Berries to the cocktail machine. Choose four ingredients in order from orange, ice, cherry, pineapple and the yellow dotted fruit. After each row, the lamp beside each position turns green if that ingredient is right for that position and red if not; keep the green ones and change the rest. Example from two recordings, which both ended with the same all-green row: cherry, yellow dotted fruit, ice, orange. If any lamp stays red for you, keep using the lamp feedback. Take the Cocktail.
- Place the Cocktail and the Ice Cream on Eli's table. Decision point: "And now I'm acting here, and you're my only audience." is free and gives 2 stars; "People tell me that a lot." gives none. Eli gives you the Meeting Point drawing.
Hotel Room: The Starfish Panel
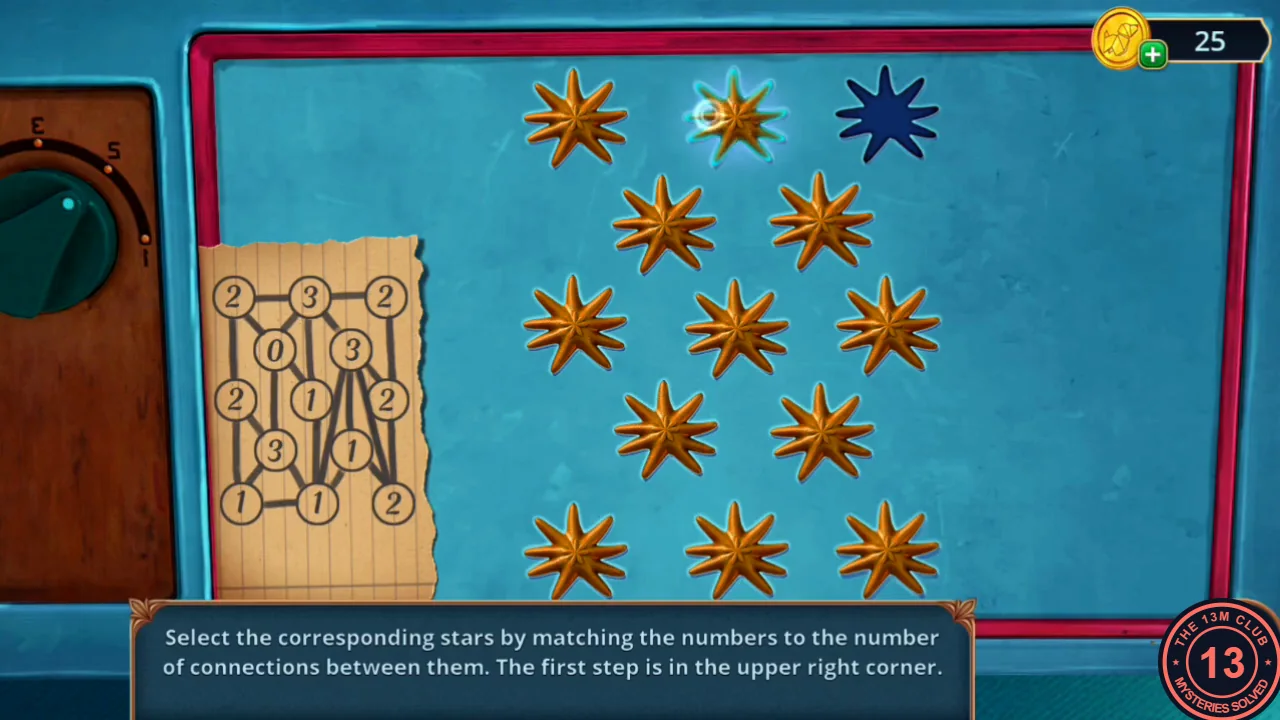
Back in the bedroom, Jules gets ready for her date. The mirror needs three things: a photo, a flower decoration and make-up.
- Open the mini-fridge door and take the Stapler, the Starfish Magnet and the Photo of Jules.
- Place the Starfish Magnet on the star panel of the air conditioner. The note shows the same 13-star layout with the number of connections for each star. Tap the stars in this order (rows of 3-2-3-2-3 from the top): top right, row 3 right, bottom right, row 2 right, top middle, top left, row 3 left, row 4 left, bottom left, row 4 right, bottom middle, row 3 middle. Leave the row 2 left star (number 0) alone.
- Take the Paper Airplane and the Sunscreen (purple tube) from the opened compartment.
Hotel Room: Make-Up at the Mirror
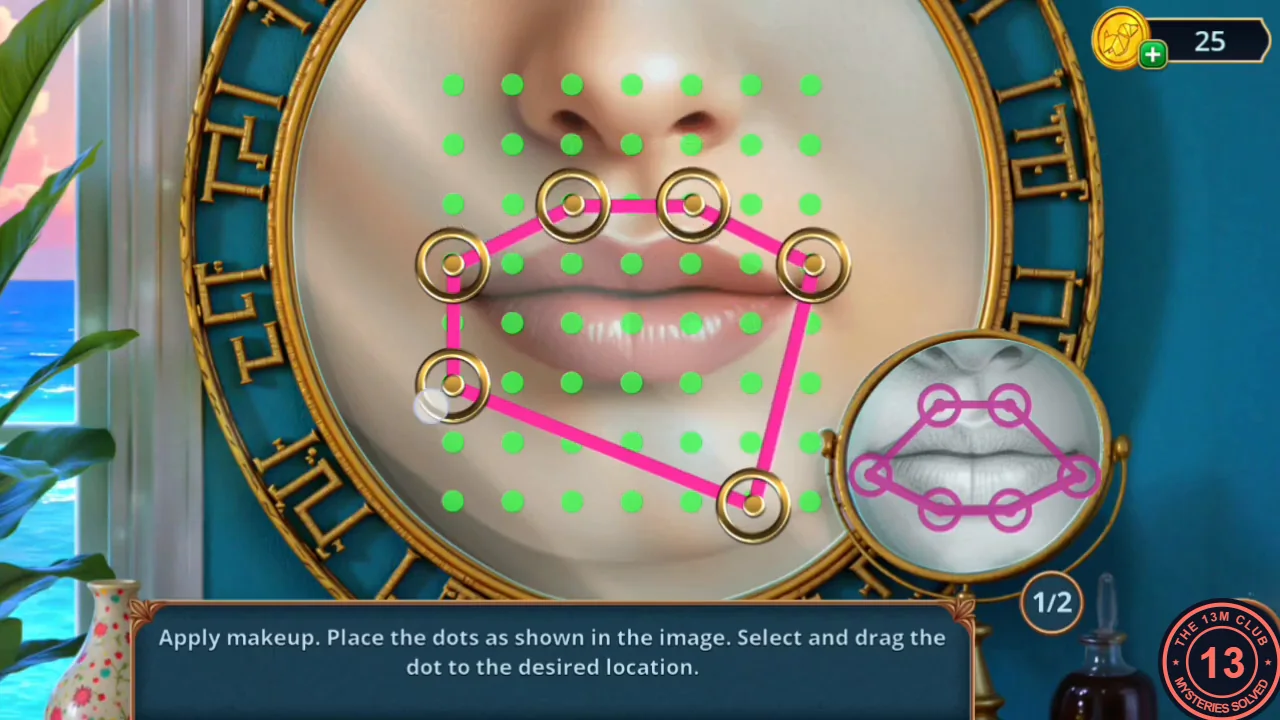
Jules finishes getting ready at the mirror, which needs the Photo, the Flower Decoration and the Make-Up.
- Open the pink bag on the floor by the bed and use the Sunscreen on the zip of its inner pocket. The zip slides open; take the Make-Up.
- Open the mirror and place the Photo in the top slot, the Flower Decoration in the middle slot and the Make-Up in the bottom slot. Drag the gold dots so the pink lines match the pattern in the round inset: first the lips, then the eyes.
- Mallory gives Jules the Hotel Map. Look at it together with the Meeting Point: the meeting place is near the hotel.
- At sunset Eli suggests surfing. Decision point: "Of course! That sounds great!" is free and gives 1 star; "No, I prefer low-key dates." gives none.
Surf Beach: The Lighthouse Password
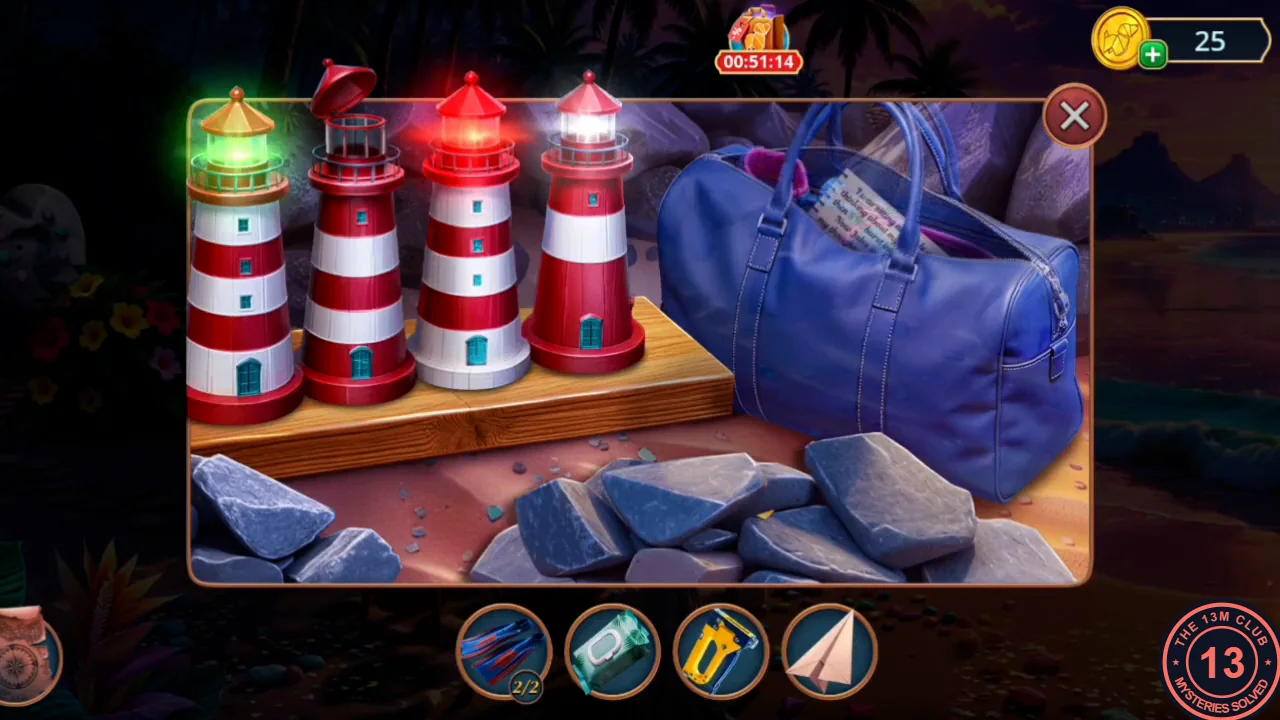
Eli wants to go surfing and asks Jules to look in his bag and find a couple of surfboards.
- Open the blue bag beside the lighthouse figures and take the Surf Suit.
- Open the heart-shaped rock on the left and take the blue Light Bulb from the heart socket.
- Open the lighthouse figures and put the Light Bulb into the second lighthouse. A drawer opens; take the Telescope Handle.
- Attach the Telescope Handle to the telescope and look through it. The distant lighthouse flashes white, blue, green, red.
- Return to the lighthouse figures and set their lights to white, blue, green, red from left to right. The compartment under the board opens; take the Sand Scoop.
Sunset Beach: The Underwater Scene
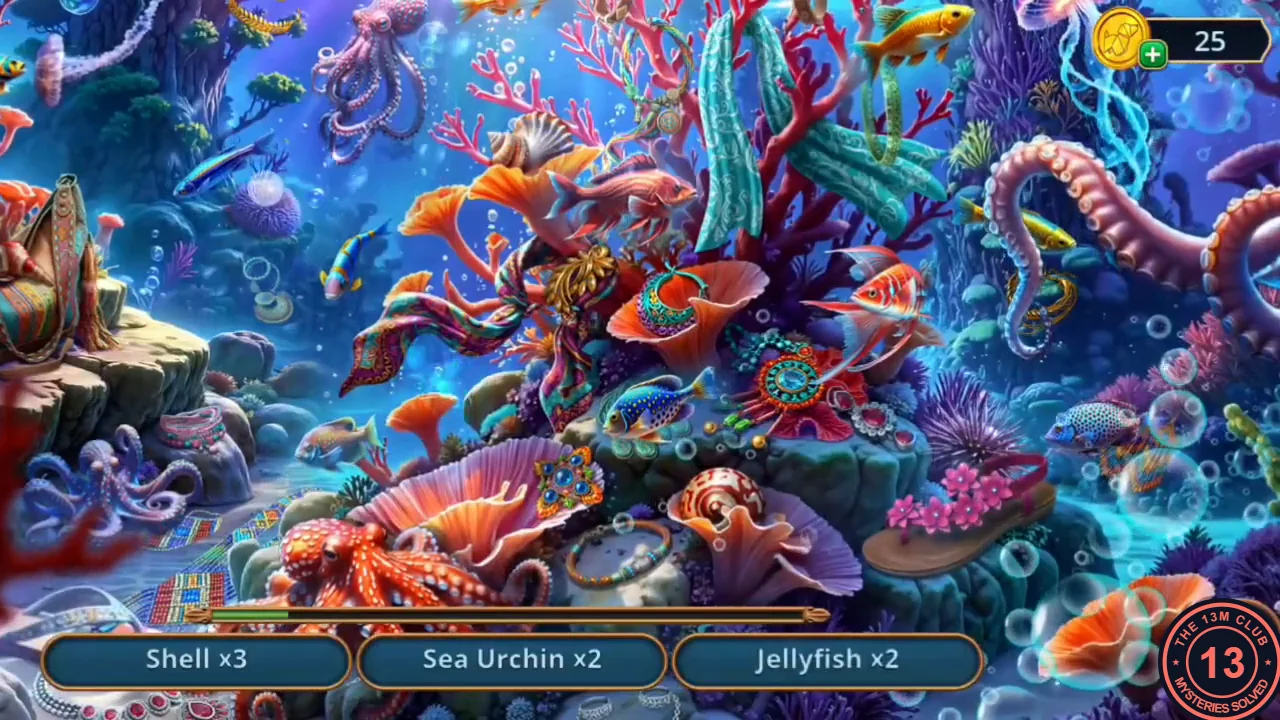
Jules joins Eli at the sunset beach and borrows a snorkel mask for a dive.
- Go to the sunset beach with Eli's lounger and open the lounger. Take the Wind Chimes (a tangled string, still incomplete) from the sand under it, then dig the sand with the Sand Scoop and take the Heart Stone from the hole. Take the threaded metal rod and the 50 Cents coin from the small side table on the left.
- Open the Equipment rental desk and give the 50 Cents to receive the Snorkel Mask.
- Use the Snorkel Mask on the water near the guitar stand to dive. The list asks for three each of Shell, Sea Urchin and Jellyfish, then three pieces of Lost Jewelry; the counter shows how many are left. The scene is wider than the screen, so drag sideways to see both edges. Locations in the recording: Sea Urchins – the big purple urchin on the reef floor at the bottom centre, a small purple urchin floating left of the central coral above the rock with the bag, and one beside the pink flowers at the lower right. Jellyfish – a small one in open water left of the central coral, the large glowing jellyfish at the top right, and a small one beside the pink octopus tentacle on the right. Lost Jewelry – a gold bracelet on the pink tentacle at the right, a gold brooch in the middle of the central coral, and the last piece at the far upper left. Shells – inside the patterned bag on the rock at the left, one on top of the orange coral fans in the centre, and the spiral shell on the reef floor at the bottom centre. You receive the Bottle with Message.
Sunset Beach: Find All the Fish
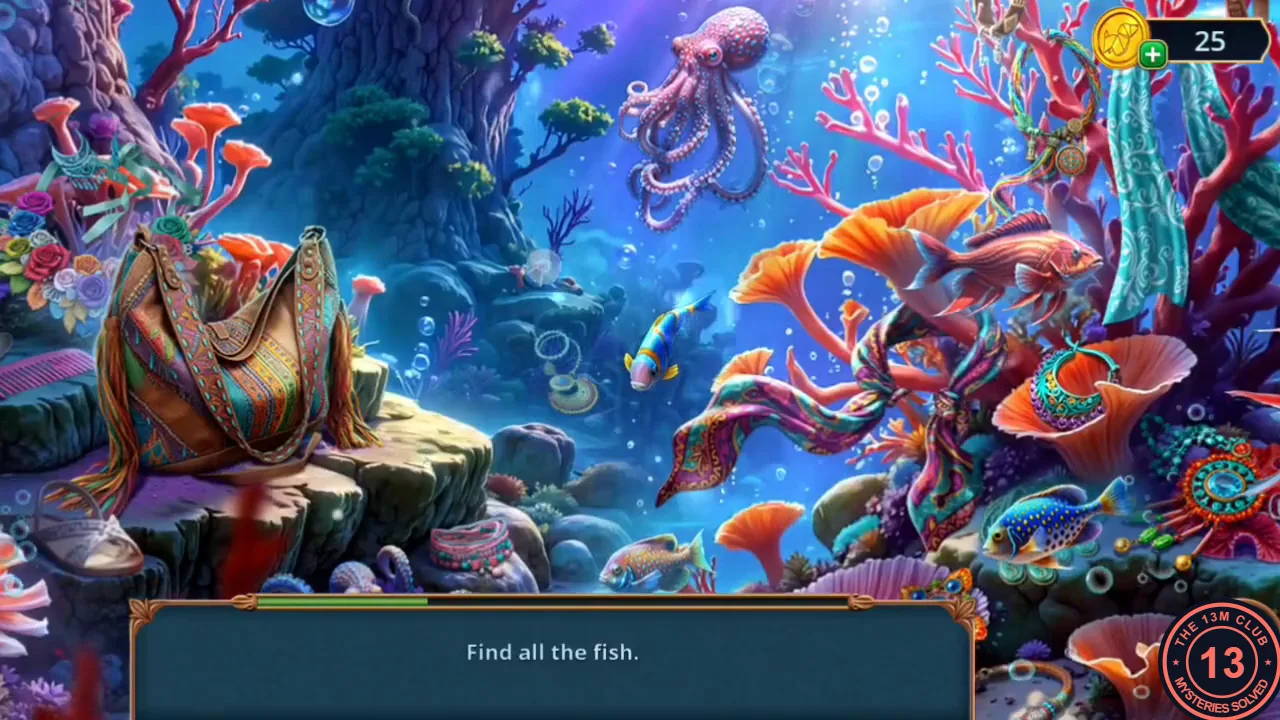
A drawer in the rental desk and a second dive are next.
- Open the Bottle with Message in your inventory to get the sun-shaped Amulet.
- Put the Amulet into the sun-shaped slot on the front of the rental desk. A drawer opens; take the Ribbon.
- Dive again. This time there is no list: tap every fish, and the bar in the panel fills as you go. Drag sideways to see the edges of the scene. Fish found in the recording, about a dozen: the yellow fish near the top centre; the long blue fish in open water left of the small purple octopus; a small fish by the flowers at the far left; a small striped fish in open water right of the bag; a small fish on the sea floor left of the big orange octopus; the blue spotted fish in the coral at the bottom centre; an orange fish on the right side of the central coral; a pink fish among the orange coral fans on the left; a yellow-orange fish at the top right of the coral; another blue spotted fish among the bubbles at the lower right; and the yellow fish beside the pink octopus tentacle on the right. If the bar is not full, look for fish you skipped near the edges. You receive the Whistle.
Surf Beach: The Surfing Maze
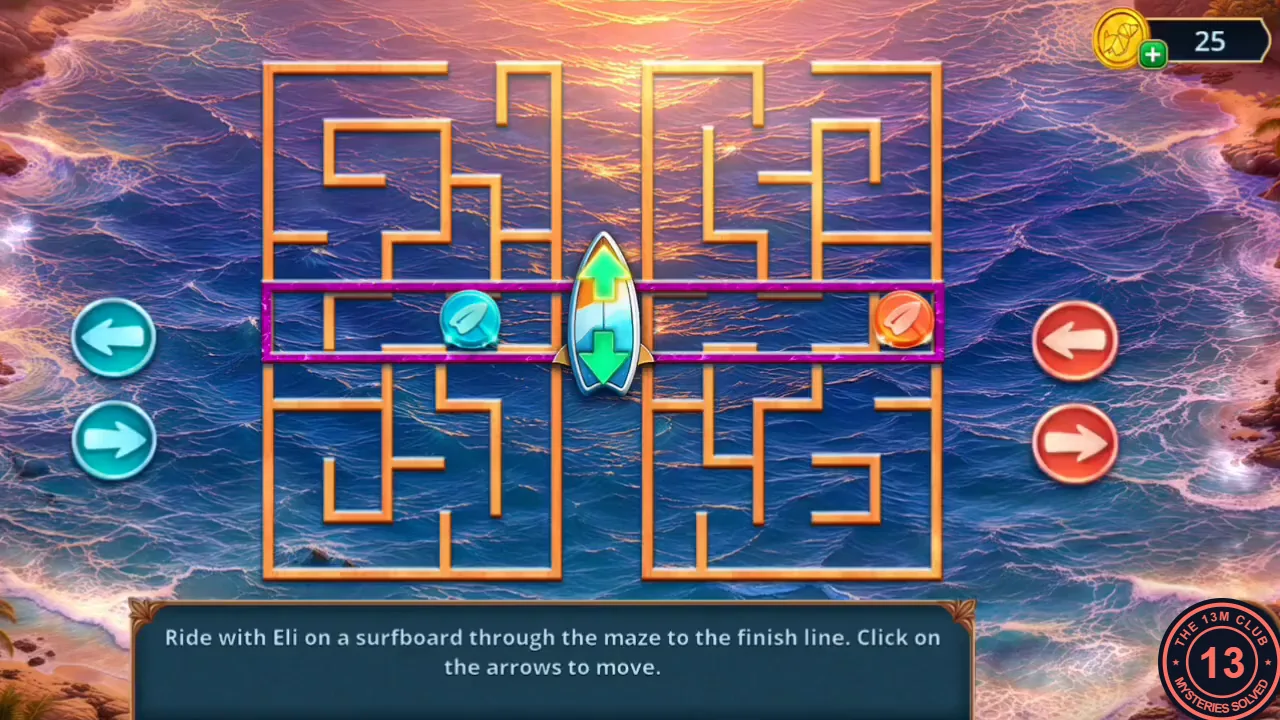
Eli suggested surfing. Jules needs coupons for surfboards, then rides through the surfing maze.
- Open Eli's lounger and blow the Whistle at the seagull. When it flies off, take the seashells it was guarding on the cushion.
- On the surf beach, place the Heart Stone in the heart-shaped rock to open a drawer. Take both things inside: the yellow Coupons (1/2) and the silver Tie Clip.
- Open the lighthouse figures close-up. A yellow coupon is wedged between the rocks; use the Tie Clip to prise it out and take the Coupons (2/2).
- Give the Coupons at the rental desk to get the Surfboards and place them on the sand of the surf beach. Then drag the Surf Suit onto the boards; its inventory icon is the purple cord with a loop (picked up from the blue bag by the lighthouses), and it attaches to the board as a leash. Scroll the inventory with the arrows if it is out of view.
- Surfing maze: the board stays in the middle while two mirrored mazes scroll past. The blue arrows slide the blue token along the highlighted row of the left maze and the red arrows slide the orange token in the right maze. When both tokens stand under an opening, the board moves up one row. Keep lining both tokens up under open gaps until you reach the top.
Sunset Beach: The Guitar Melody
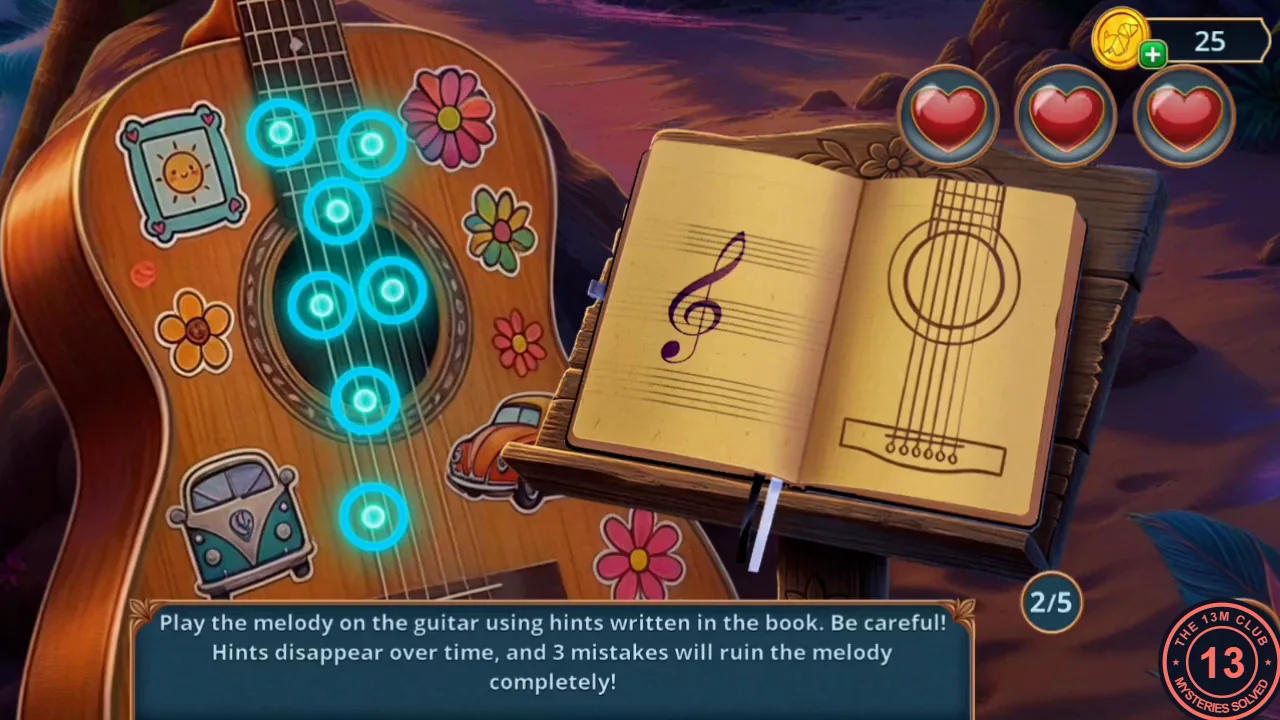
Back at the sunset beach, the guitar stand plays a melody once the Wind Chime is hung on it.
- Open the tangled Wind Chimes in your inventory. The close-up has two empty slots: drag the Ribbon (from the rental-desk drawer) into one and the Seashells into the other. The chime untangles; the Ribbon is returned to your inventory and you keep it for later.
- On the sunset beach, hang the Wind Chime on the hook of the guitar stand to start the melody puzzle.
- Each of the five rounds shows the order in the book as red numbers on the guitar diagram. Memorise it before the hint fades, then tap the matching points on the guitar in that order. The three hearts at the top right are your mistakes allowance; the rules warn that three mistakes ruin the melody. The order changed in each round of the recording, so read it from your own screen while the numbers are visible.
- Back at the room, Jules sees hooded figures behind the door. Decision point: "Get scared" is free (0 stars), "Shout at Mallory" costs 30 coins (2 stars) and "Threaten to call the police" costs 60 coins (6 stars).