Decision Points and Chapter Endings
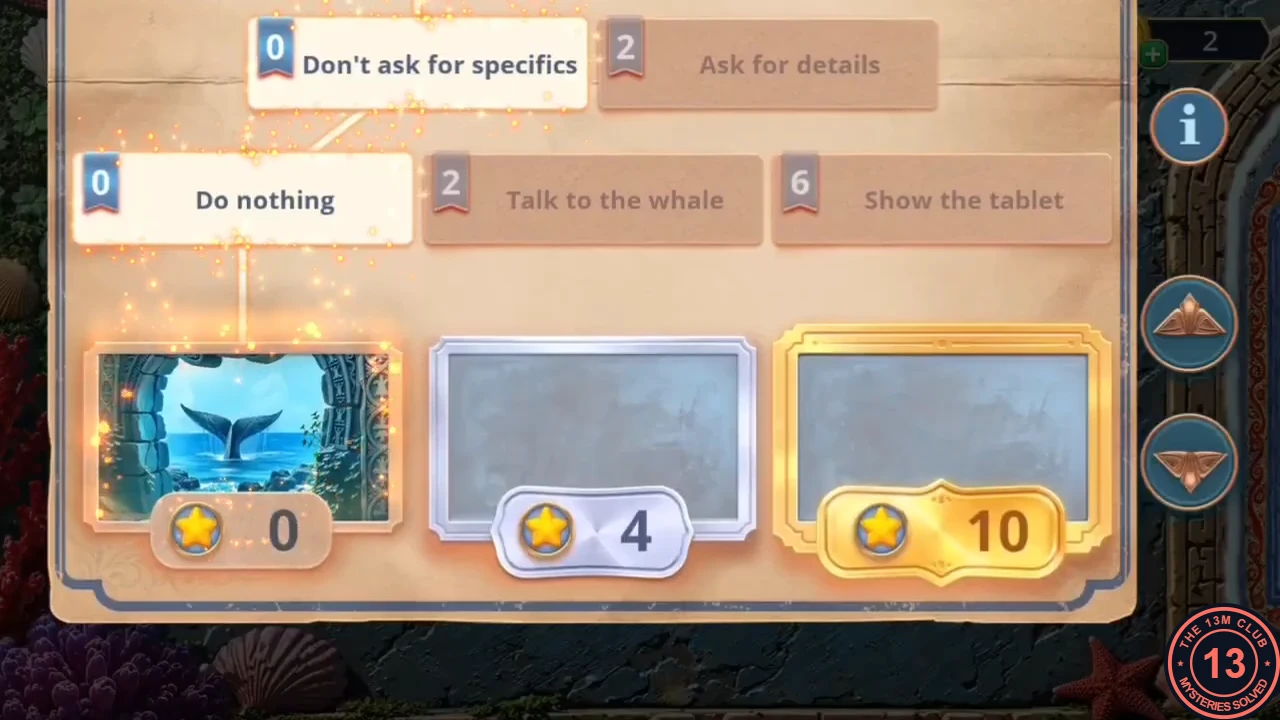
Each chapter has dialogue decisions worth 0, 1, 2 or 6 decision points. When the chapter ends, a Decision Points summary lists your answers and shows three outcome cards marked 0, 4 and 10 points. The card you reach decides how the short closing scene of the chapter plays out. The story and puzzles are the same whichever card you get. Chapter 1 has 13 points available and Chapters 2-4 have 12 each, so you need the highest-scoring answer in almost every decision to reach the 10-point card. In some versions of the game, the point-giving answers (other than the first decision) show a coin price. A paid answer can only be chosen if you have enough coins.
- Chapter 1 (13 points available). For the 10-point card, answer "Aye. The tavern is a good place to start." at the pier, "It doesn't just attack. It reacts to something specific." to Mateo, "We leave no one behind, mate..." to Esteban, "A sensible idea. Let's take a look at the chapel." at the chapel and "Go and have a look around" when the whale appears. With 10 or more points, Raphael grabs Inara's hand and saves her from a wave, and she thanks him. With fewer than 4 points, Inara simply says "Great! Let's take a look around here more.", and Mateo then mentions that this has happened before.
- Chapter 2 (12 points available). For the 10-point card, answer "Be careful, and don't even think about hiding it if you find anything!" to Esteban, "Please, tell us what else you noticed..." to the lighthouse keeper, "Lighting the fire and finding a hiding place could be the key to everything." to Inara, and choose "Protect Inara" at the end. With 10 or more points and with fewer than 4, the outcome scene is the same: Raphael pulls Esteban out of the surf with a rope and asks if he is alright. Only the card differs. The story then continues to the town of San Esteban.
- Chapter 3 (12 points available). For the 10-point card, answer "We came to stop this. If you know anything else, tell us." in San Esteban, choose "Help" when Inara runs to the screams, answer "We saved you. It's time to return the favor..." to Yari and "Let's look for the tablet..." in the Pier House. With 10 or more points, the friends study the carved tablet together indoors before setting out to find Esteban. With fewer than 4 points, the closing scene shows the ship caught in a huge wave.
- Chapter 4 and the final ending (12 points available). For the 10-point card, answer "You've already covered up the truth. Now tell me everything you know about the bay." on Esteban's ship, "You know the habits of merchants. Where would they most likely hide it?" on the wreck, "We must return the tablet according to its pattern." to Inara and choose "Show the tablet" when the whale surfaces. With 10 or more points, Inara says the guardian takes back what was taken, Esteban realises the whale was only protecting the sanctuary, the whale returns to the sunken city, and Raphael says it is time for a new adventure. With fewer than 4 points, the tablet is set into the glowing wall, the whale dives away through the stone gate, Inara says the guardian takes back what was taken, and the game ends on the title card.
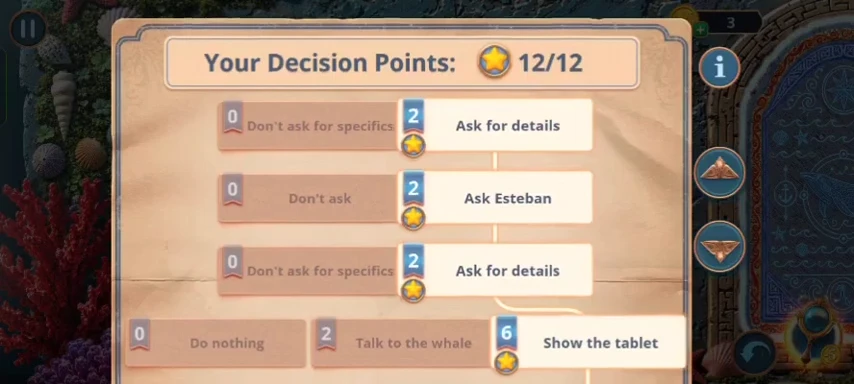
Chapter 4 with all 12 points: the highest answer chosen in every decision.
Shells (140)
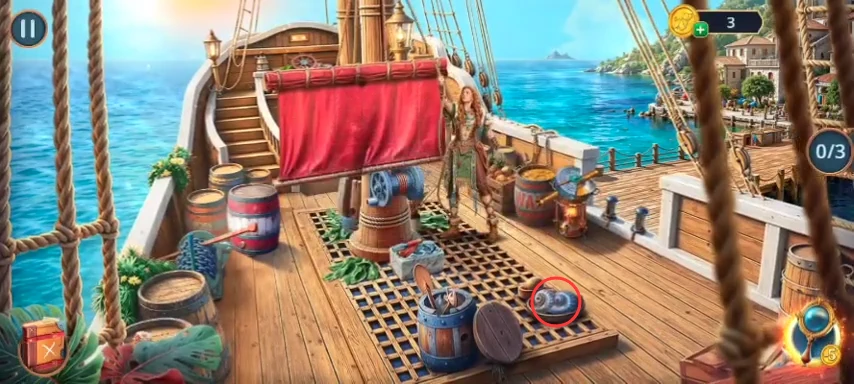
There are 140 shells, 35 in each chapter. Tap a shell to collect it; a banner shows the running count (Shells x/140). Shells appear both in the main scenes and in close-up views, often two together, and a close-up's shells can only be collected while that close-up is open. Collecting all 140 unlocks the extra mini-game. The lists below give a landmark for every shell that could be made out in the checked recording; where a spot could not be made out, only the number left to find in that scene or close-up is given, so search that view until its count is complete.
- Chapter 1 (35 shells). My Ship's Deck (2): a spiral shell on the round tray beside the deck grate, and one by the red-and-white barrel left of the winch. Winch close-up: 3 more (exact spots not visible in the checked recording). Santa Marilla's Pier (2): a blue spiral shell on the stones beside the mooring post at the boat's bow, left of the crab, and one at the waterline by the left end of the red-and-white crate. Crab/crate close-up (3): two (pink and blue) at the bottom-left corner of the crate, plus one more. Santa Marilla's Streets (3): two on the broken wooden ladder lying left of the fruit cart, and one at the cart's right-hand wheel. Well close-up: 2 more. "By the Pier" Pub (3): one on the right end of the bar counter beside the coral, one at the left end of the fireplace grate, plus one more. Fireplace close-up (1): a pink spiral shell under the head of the fish skeleton. Elder's House garden (2): one on the path stones just below the leafy plant in front of the well, and one among the red flowers right of the carved door steps. Cactus/stump close-up (2): a grey shell beside the sack at the foot of the cactus, plus one more. Abandoned Chapel (2): a pink spiral shell on the floor at the end of the front-left pew, and one on the left-hand stairs by the ivy-covered pillar. Altar close-up: 2 more. Inside the Elder's House (2): one on the floor under the front-left corner of the table, and one in the middle of the wall shelf. Parrot statue close-up: 2 more. Lagoon's Shipyard (2): one at the end of the left-hand jetty by the plants, and one inside the burning workshop doorway, right of the flames. Green satchel close-up: 2 more.
- Chapter 2 (35 shells). Santa Marilla City Pier (3): a spiral shell on the thatched roof of the boatyard hut, one on the jetty posts by the nets at the left near the welcome sign, plus one more. Octopus basket close-up: 2 more. Mateo's deck (3): two on top of the barrels behind the mast on the right, and one on the deck grate in front of the gull's nest. Gull-nest close-up (2): both at the top-right corner. Lighthouse Island path (3): a spiral shell on the path at the foot of the barrel by the cliff, one on the rocks just above that barrel, plus one more. Brass cylinder close-up (2): one at the left edge by the log, plus one more. Sunken Ship (2): a pink spiral shell on the netted pile at the lower right, and one beside the shark skull at the top-left edge of the pool. Shark skull close-up: 2 more. Outside the lighthouse (4, collected in two visits around the flowerpot close-up): one at the foot of the cart wheel at the bottom-left of the steps, one in the grass beside the steps near the round stone hatch, plus two more. Keeper's room (2): one on the chest at the foot of the spiral stairs and one on the desk under the round window. Desk close-up (2): both behind the rum bottle beside the dolphin figure. Lantern room (2): one on the floor by the barrel left of the lantern base, and one on the table by the window behind the toy boat. Toy boat/shell box close-up (2): two small shells beside the toy boat. Coastal Path beach (3): a spiral shell among the rocks at the lower left, one by the rocks under the vines on the right, plus one more. Cart-wheel close-up (1): a red spiral shell left of the wheel.
- Chapter 3 (35 shells). My Ship's Deck (2): one on the deck grate at the foot of the mast (right side), and one on the left rail beside the stairs above the barrels. Shark cage close-up (2): both at the upper left of the cage by the yellow flowers. San Esteban Coast (3): a spiral shell on the open crate in front of the barrels at the foot of the stairs, one on the stones at the left of the holy spring well, plus one more. Holy spring close-up (2): both at the lower left of the well base. San Esteban Streets (3): one at the left end of the spice stall counter, one on the tree trunk by the houses at the upper left, plus one more. Vase shelf/barrels close-up (2): a pink shell at the right-hand barrel, plus one more. Fish Market beach (3): two purple shells in the shallows between the two rowboats, and one on the sand at the bow of the left rowboat. Boat/sand close-up: 2 more. San Esteban Pier market quay (2): one on the small wooden crate in the middle of the paved square, and one under the bench by the stalls. Fish/jar table close-up: 2 more. Boat Workshop (2): one on the stern seat inside the boat, and one on the workbench beside the blue box. Red coral/model boat close-up: 2 more. Flooded Warehouse (2): one on the red cloth hanging from the roof beam, and one in the water at the foot of the slanted beam. Potted tree/padlocked chest close-up (2): both at the top-left of the tub. Pier House (2): one on the high shelf above the fireplace at the upper right, and one among the leaves of the potted plant. Armchair/hearth close-up: 2 more.
- Chapter 4 (35 shells). My Ship's Deck (3): one on the post at the top of the left-hand stair rail, one on the barrels at the foot of the stairs, plus one more. Water barrel/green crate close-up: 2 more. Deck of Esteban's Ship (3): one on the carriage of the right-hand cannon, one at the left edge of the net on the table by the red chest, plus one more. Red chest/net close-up (2): both at the lower left under the net. Captain's Cabin (3): two on the table at the foot of the telescope, and one beside the chair leg right of the mannequin. Mannequin close-up (2): a blue shell at the right edge by the chair, plus one more. Cove Among the Rocks (2): one on the broken planks left of the red flowers, and one at the mossy rock. Tiki/hot cannonball close-up: 2 more. Wrecked Merchant Ship (2): both on the green rail at the right, by the cliff. Mermaid statue close-up (2): both at the top-left corner behind the statue's head. Cave in the Rocks (2): one on the big tree trunk at the upper left, and one at the foot of the rope post by the altar. Panther/coral altar close-up (2): both in the water at the lower left by the panther. Hidden Lagoon (2): one on the rocks at the lower left beside the red trumpet flowers, and one at the foot of the left waterfall where the boardwalk starts. Waterfall walkway close-up: 2 more. Underwater Sanctuary (2): one in the coral right of the sunken pit, and one inside the sunken pit in front of the whale. Stone mortar close-up (2): a blue spiral shell at the top beside the statue, plus one more; the banner then reads 140/140.
Extra Mini-Game
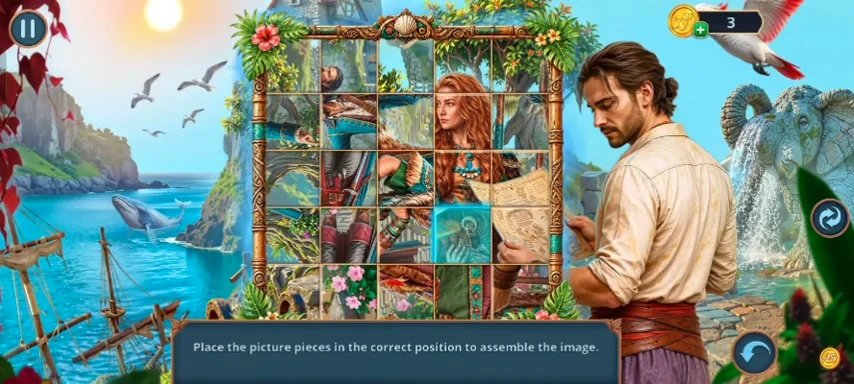
A bonus picture puzzle that becomes available once all 140 shells have been collected.
- With all 140 shells collected, the MINI-GAMES panel shows "Shells 140/140 - Extra mini-game" with a Play button. In the run checked, this panel appeared straight after the final title card. Press Play.
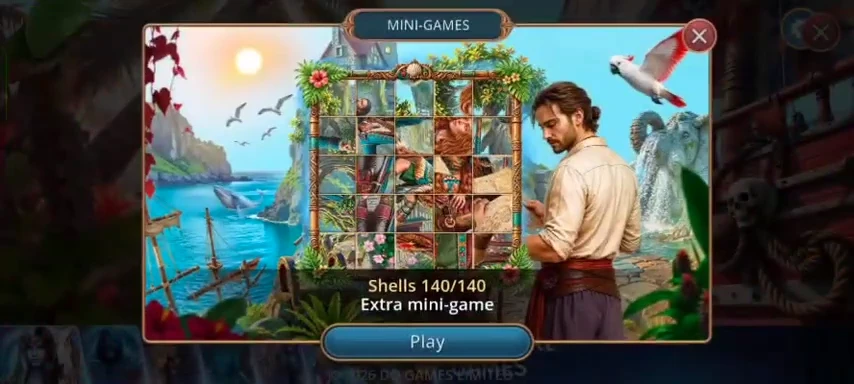
The MINI-GAMES panel after all 140 shells. - Picture puzzle: "Place the picture pieces in the correct position to assemble the image." The grid is always full, so every move is a swap: tap a piece (it glows) and then tap the piece in the place where it belongs, and the two change places. The picture shows Inara with Esteban, Raphael and a map inside a vine frame. Start with the most recognisable parts, such as faces, Inara's red hair and the map, then complete the remaining rows one at a time. The finished picture and any reward are not described here.