The jazz club
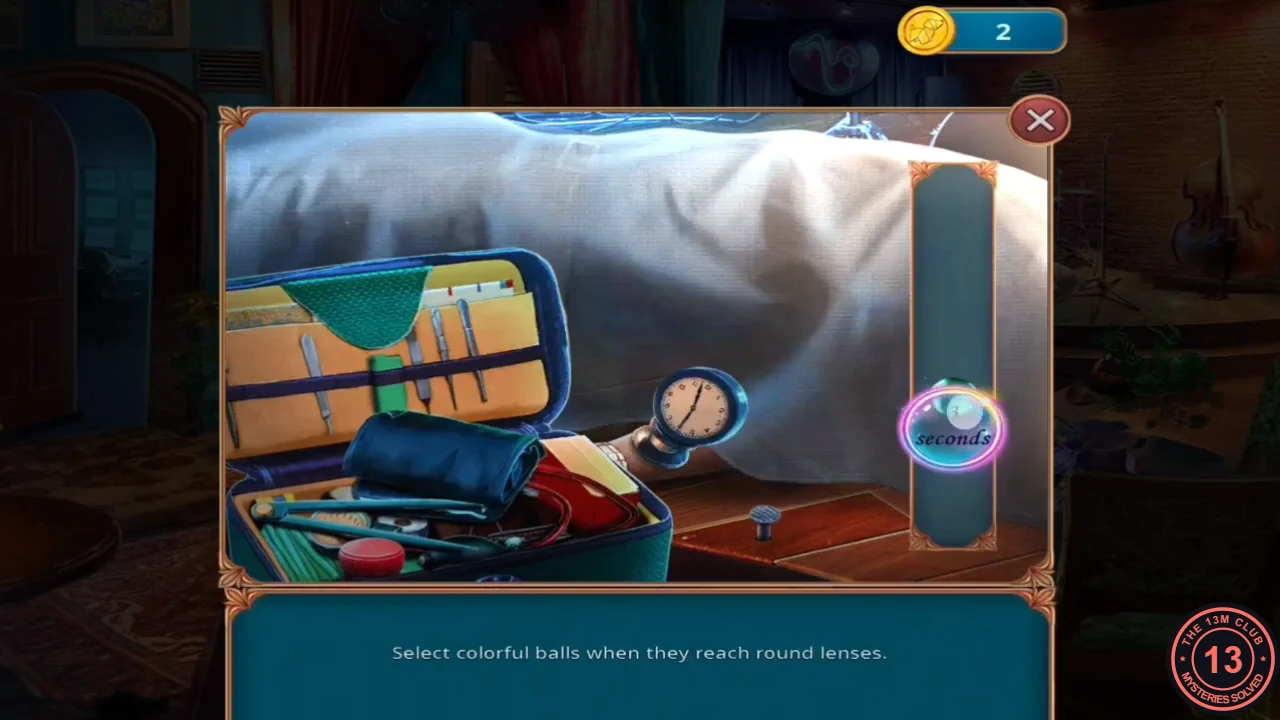
Jazz musician Harry Fishman has been found dead on stage. The first task is Establish cause of death.
- Zoom into the forensic case on the left table. Take the UV Lamp, the Bill and the Forensic Equipment, and read Sandra Parsons's note about dating a death from the colour of bruises.
- Use the Forensic Equipment on the body. Tap each coloured ball as it reaches its round lens. The notepad then records 21:30 and you receive the Time of Death.
- Zoom into the security desk on the left. Take the Screwdriver and the Torn Photo, then place the Time of Death to view the footage.
Security footage differences
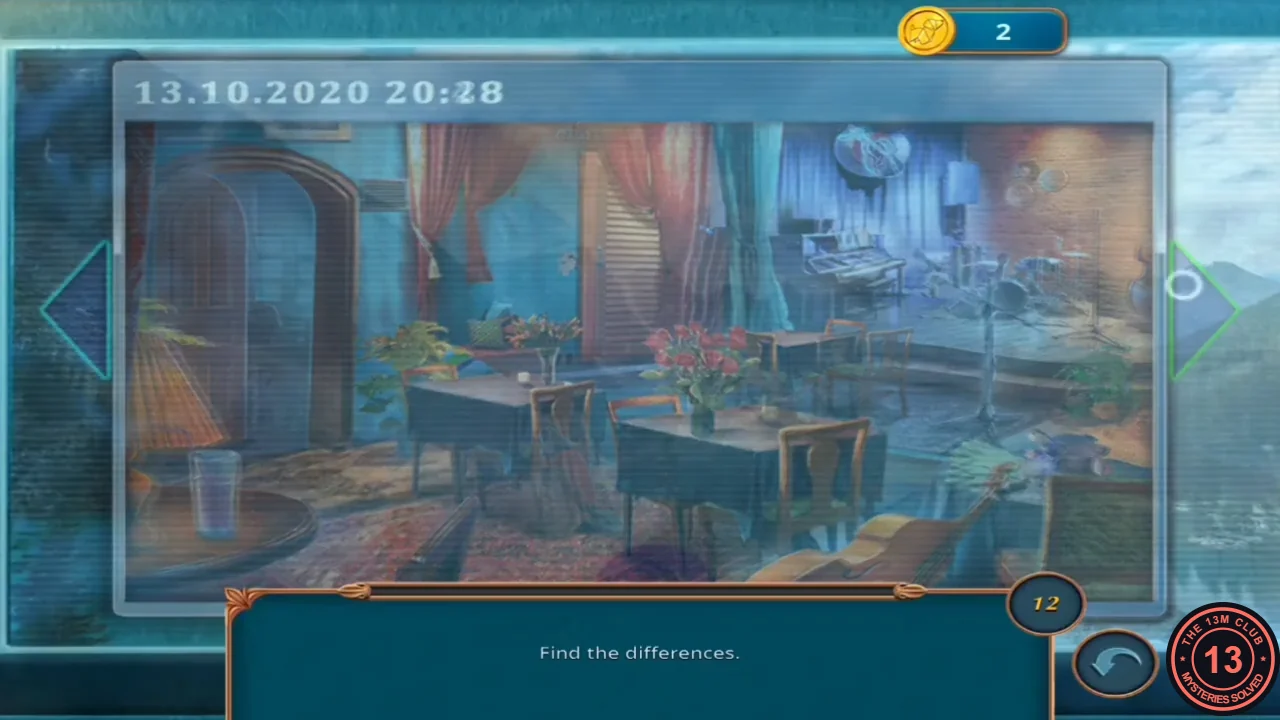
Compare the footage from 20:28 and 20:48 and find the 12 differences.
- Find all 12 differences. They are spread around the room: the left door area, a glass and an item on the floor at the bottom left, the chair or guitar case and a seat in the middle, the heart sign and wall light at the top right, and the music stand, microphone stand, drum, plant and stage edge on the right. All 12 are marked in the image. You receive the Security Footage Photo.
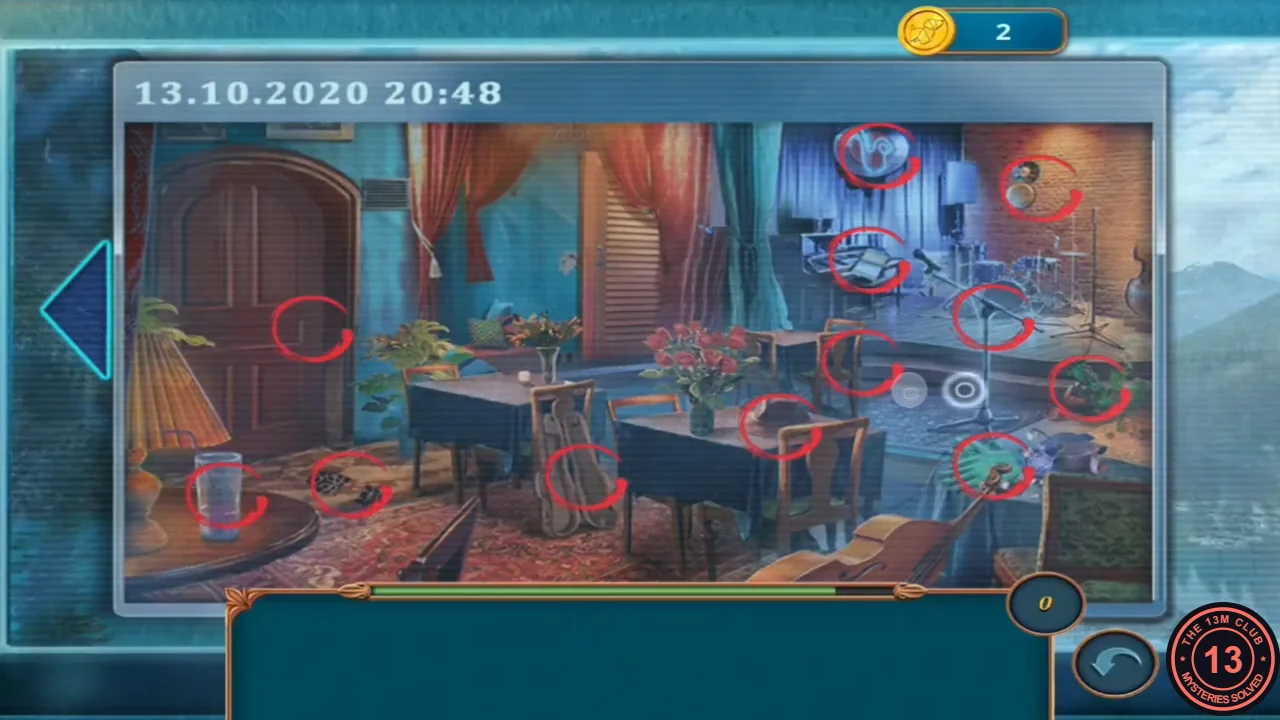
All 12 differences marked.
Luke and the dressing room
Sandra suspects poisoning with a volatile gas. Harry's agent, Luke McFarland, is waiting in the dressing room.
- Unscrew the grille of the round wall vent to the right of the stage with the Screwdriver. Take the Bottle of Unknown Liquid. There is an emblem behind the fan that you cannot reach by hand.
- Talk to Sandra and give her the Bottle of Unknown Liquid. She identifies a volatile gas and suspects wilful poisoning, then offers to find out where it could have come from. The coin-priced answer is "Yes, it would be great! Thanks, Sandra. I'll be waiting to hear from you." and the free answer is "I'm not sure... We may lose lots of time barking up the wrong tree." The coin-priced answer is one of the three Chapter 4 answers that lead to the Multi-Tool Pocketknife (see Darren's room). Scott then tells you that Harry's agent, Luke McFarland, is waiting in the dressing room. Go through the left door into the dressing room and talk to Luke. You receive the Toy Saxophone. The new task is Search the dressing room.
- The vanity drawer has no handle. Shine the UV Lamp on the patterned tiles above the mirror to open a tile, then read Luke's note and take the Toy Violin.
- Zoom into the clown music-box trunk on the right. Take the Glue (lying on the record) and the Vinyl Record. Give the Toy Saxophone to the left clown and the Toy Violin to the right clown. They play and a spring box opens: read Earl Jordan's letter to Harry and take the Screw. The red box with a 4-digit lock stays shut for now.
- In the jazz club, fix the hinge of the toolbox on the floor (left) with the Screw and take the Bottle Opener.
- Open the compartment beside the body's arm with the Bottle Opener and take the Half of Photo.
- In your inventory, join the Torn Photo and the Half of Photo with the Glue to make the Photo. Place it in the heart-shaped frame on the left wall of the dressing room.
Photo frames
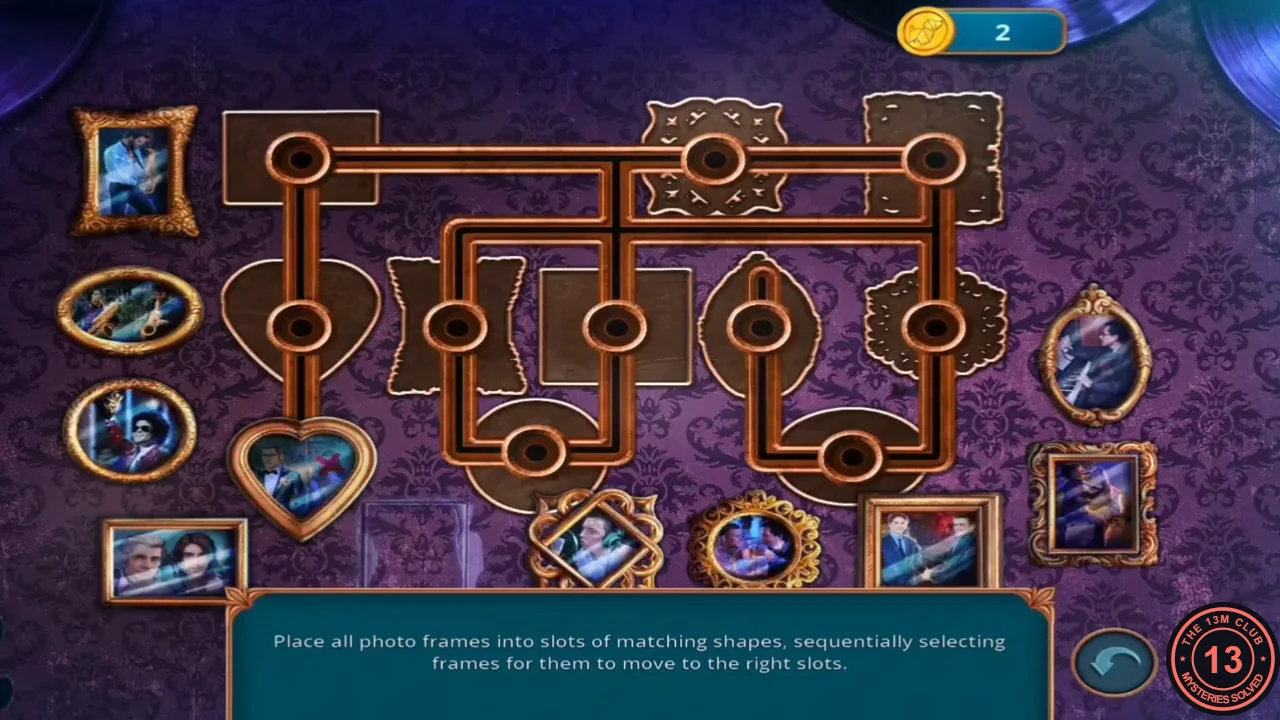
Put every photo frame into the slot with the matching shape. Select frames one after another to move them to the right slots.
- Move the frames until each shape sits in its matching slot, as in the solved image. A wall niche opens: take the Cigar Dagger.
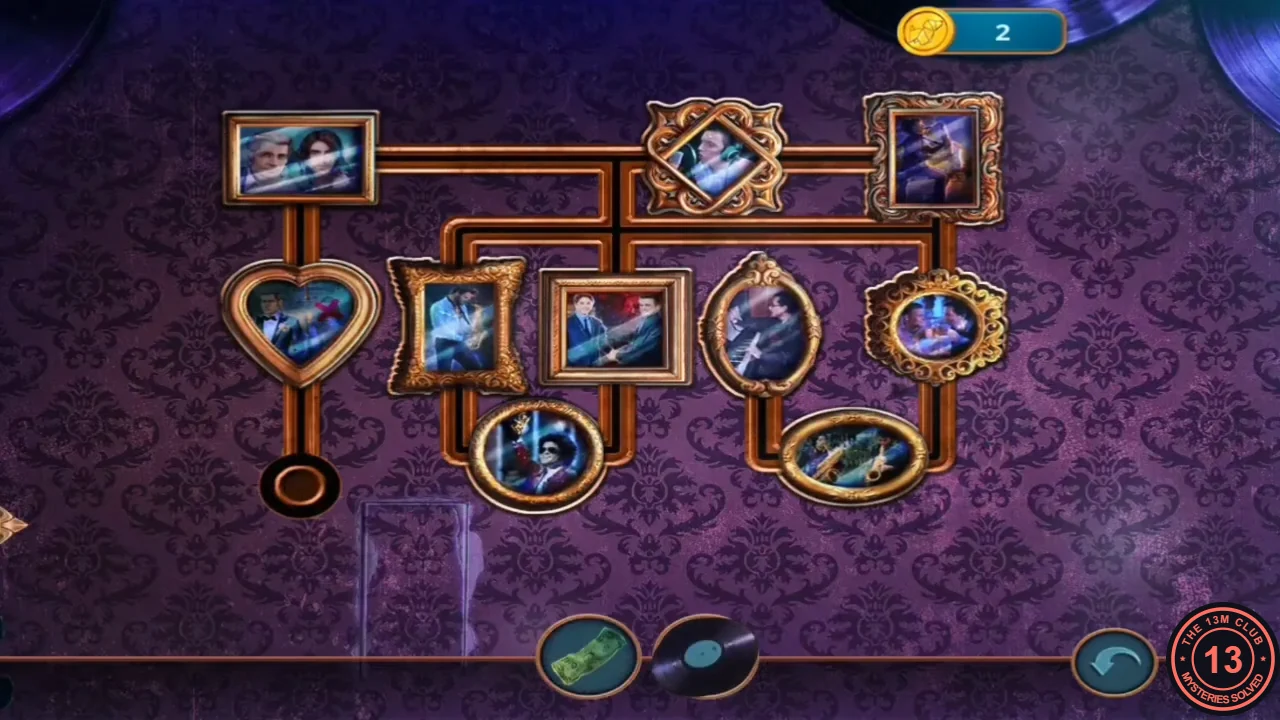
Solved photo frames.
Harry's bag emblem
Open the vanity drawer and get the emblem out of the vent.
- Put the Cigar Dagger into the vanity drawer as a handle, open it and take the Stick.
- In the jazz club, pull the emblem out from behind the vent fan with the Stick to get the Metal Disk.
- Put the Metal Disk into the emblem on the red doctor-style bag on the dressing-room floor (right).
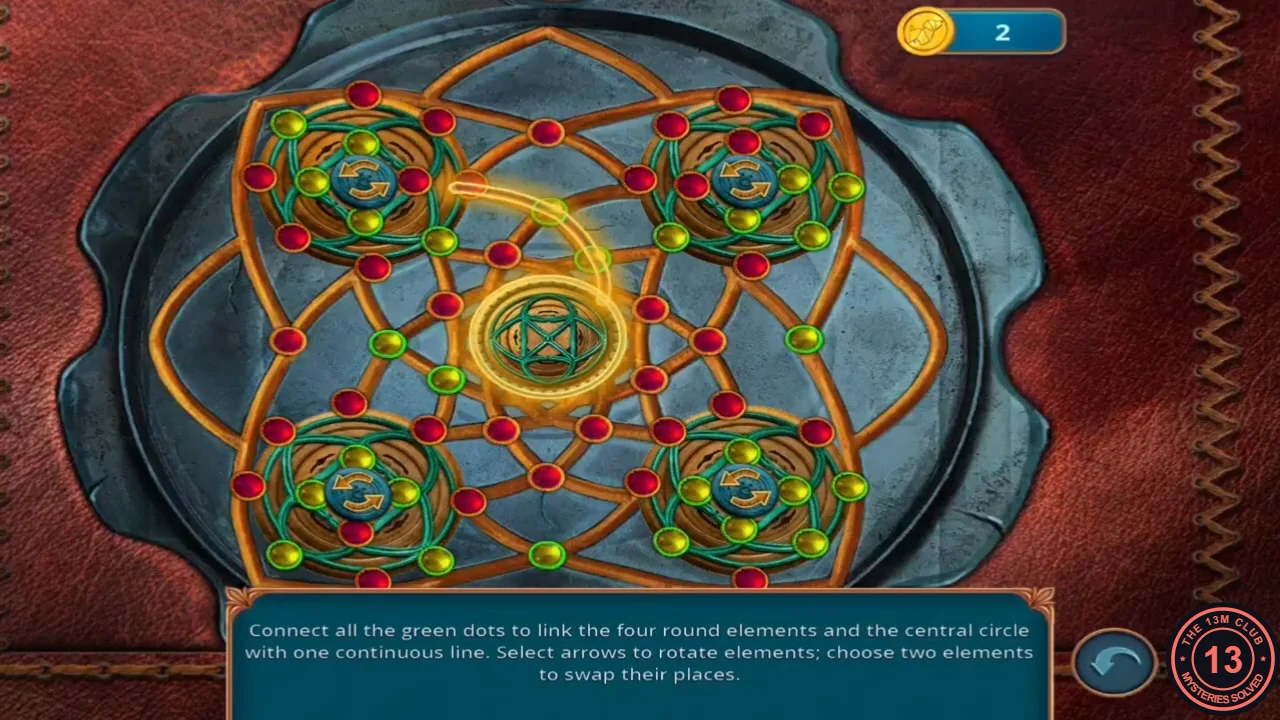
- Connect all the green dots with one continuous line that links the four round elements and the central circle. Use the arrows to rotate an element, or select two elements to swap them. Match the solved image.
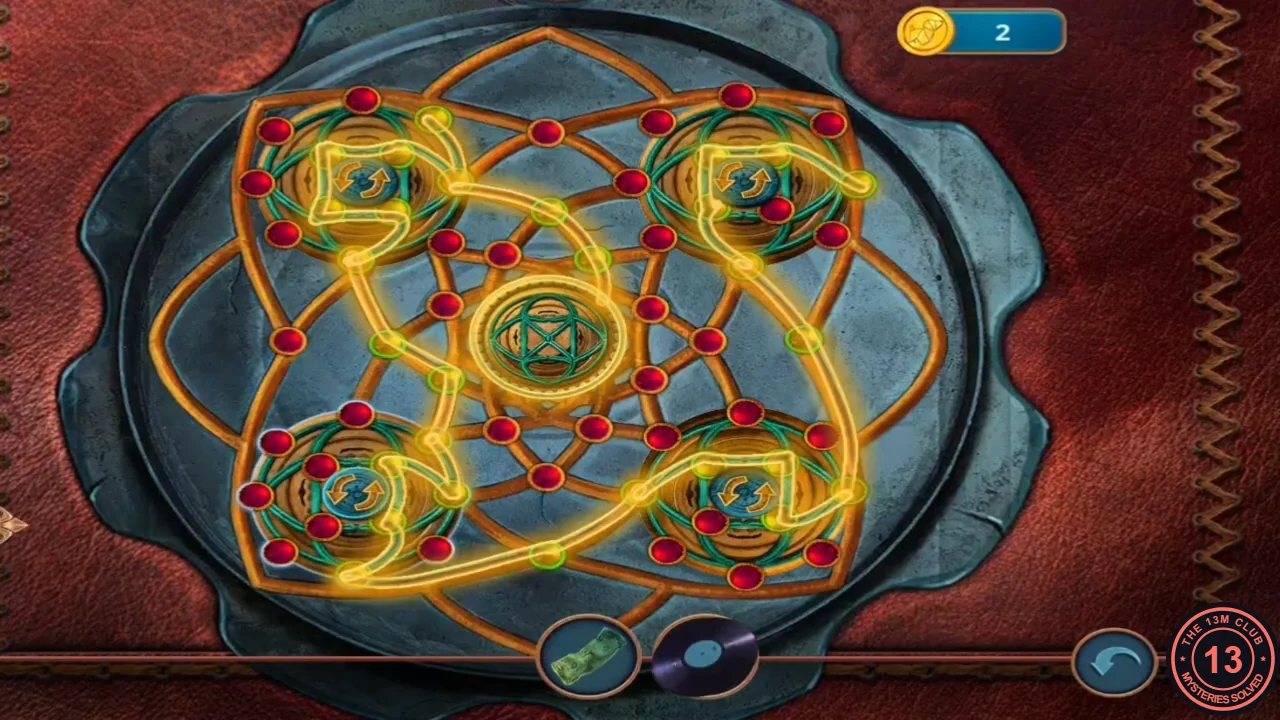
Solved emblem: one continuous line. - The bag opens. Read the note from Harry's wife and take the Bracelet with Code.
Red box code lock
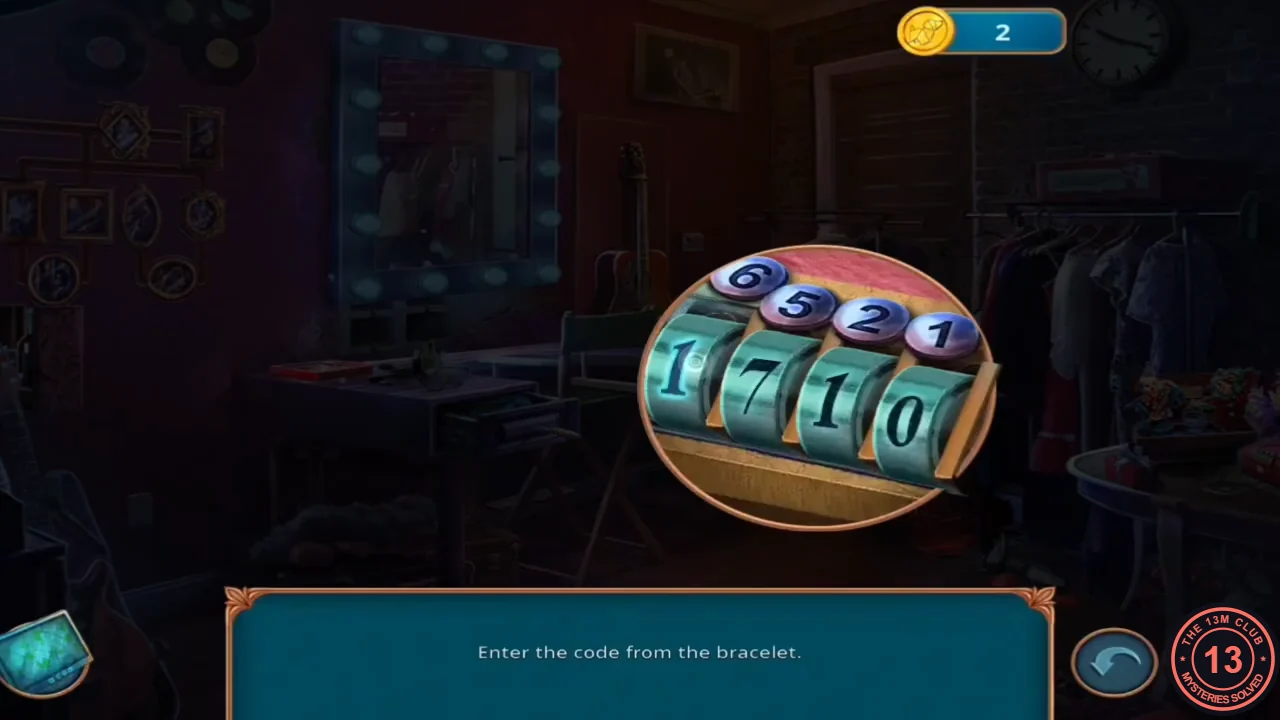
The red box in the clown trunk has a 4-digit lock. The Bracelet with Code holds the answer.
- Put the Bracelet with Code on the red box in the clown trunk and enter the code from its beads: 6521. Read the card signed "D.B." to Harry.CODE6521
Bird's Music Shop
The gift box is from Bird's Music Shop, run by Harry's old teacher. Some answers in this chapter show a coin price. Paying for Scott's answers was followed by an extra reward later (see Darren's room).
- Outside the shop, Scott proposes a plan: he talks to the shop owner while you search the area. The coin-priced answer is "Yep, it's a good plan indeed. Let's do it!" and the free answer is "I'd like to talk with that man too. Can we swap roles?". Pick the coin-priced answer if you want the Multi-Tool Pocketknife later (see Darren's room). Scott then gives you the Detective License you left in the car. The new task is Talk to the shop owner.
- At the 24-hour pharmacy window to the left of the shop, take the Funnel from the sill. Give the Bill to the clerk to buy a Band-Aid.
- Zoom into the shop door. Take the Wire Saw and cover the bare doorbell wire with the Band-Aid. Press the doorbell button when the needle is in the green zone. Darren opens the door and you go inside.
- Zoom into the turntable by the "Music for every taste" bin at the front left. Take the Charger, the Slides and Cogs 1/2, then put the Vinyl Record on the turntable.
Album bin
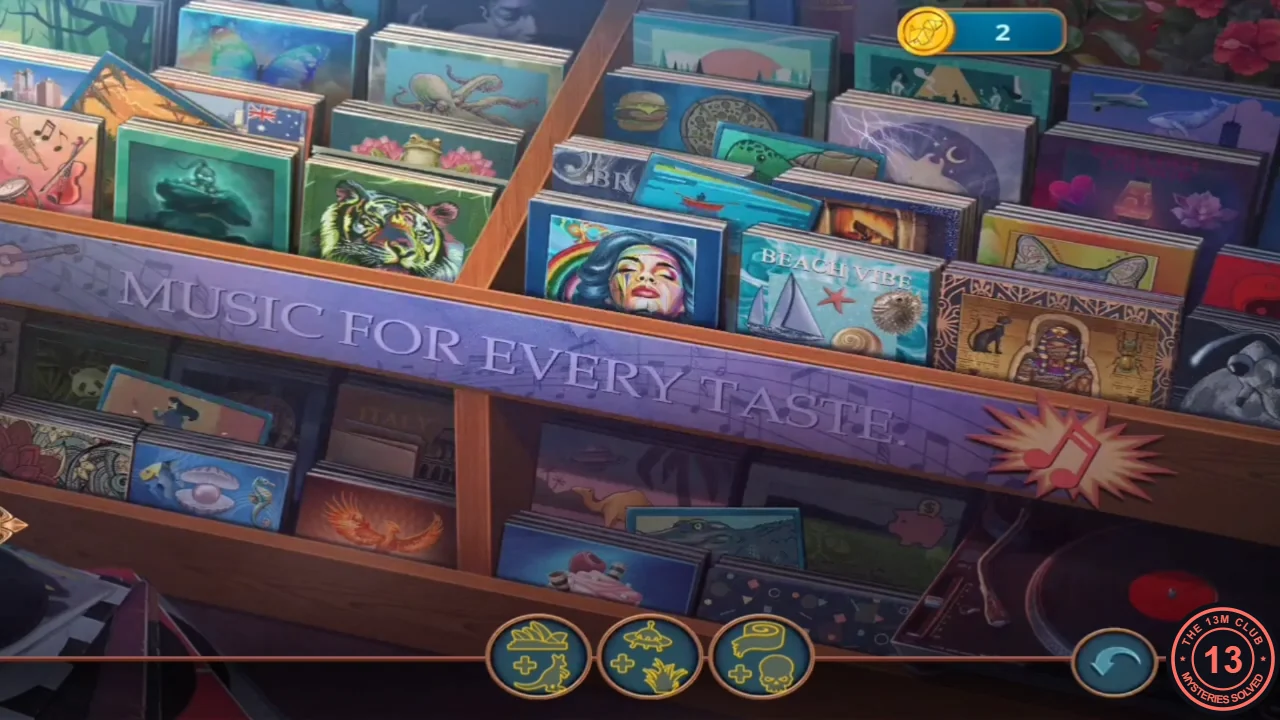
Each token at the bottom shows two symbols. Tap the album cover that shows both of them. A wrong tap makes you wait five seconds.
- Match each token to its album. For example, the pyramid-and-cat token matches the Egyptian cover with a cat and a sarcophagus. Partway through, read Darren's note and tap the phone in the photo. The last album is "Notes of Separation", and you receive the Parting Tunes Album Cover.
Darren's alibi
Show Darren something that links him to Harry. One of his answers opens the optional Recording Studio.
- Give Darren the Parting Tunes Album Cover. He admits Harry was his student and his son-in-law.
- Darren offers to let you look at the studio where he keeps Harry's early works. The coin-priced answer, "I say, I will go and search for that studio. There may be some clues." (lock-and-room icon), opens the optional Recording Studio in the back room. The free answer, "We don't have time for that, I'm afraid.", skips it. The price differs between game versions (90 coins in one recording, 30 in another). Darren then lets you search the shop and you receive the Register Key.
- Open the cash register (counter, left) with the Register Key. The sales journal confirms Darren's alibi. Take the Binder Clip.
- At the pharmacy window outside, pull Cogs 2/2 out of the crack in the sill with the Binder Clip.
Recording Studio: first visit
Only available if you paid for Darren's studio answer. The studio is through the back room of the record shop. The new task is Listen to Harry Fishman.
- Go into the back room to the Recording Studio. The computer on the right desk asks for a CD.
- Zoom into the chain cabinet beside the mixing desk; one of its chain slots is empty. Take the Adjustable Handle and the Seam Ripper.
- Cut the stitches of the blue couch on the left with the Seam Ripper and take the Spring.
- Put the Spring into the keyhole of the wooden drawer cabinet behind the speaker and take the Clef Amulet.
Cog mechanism
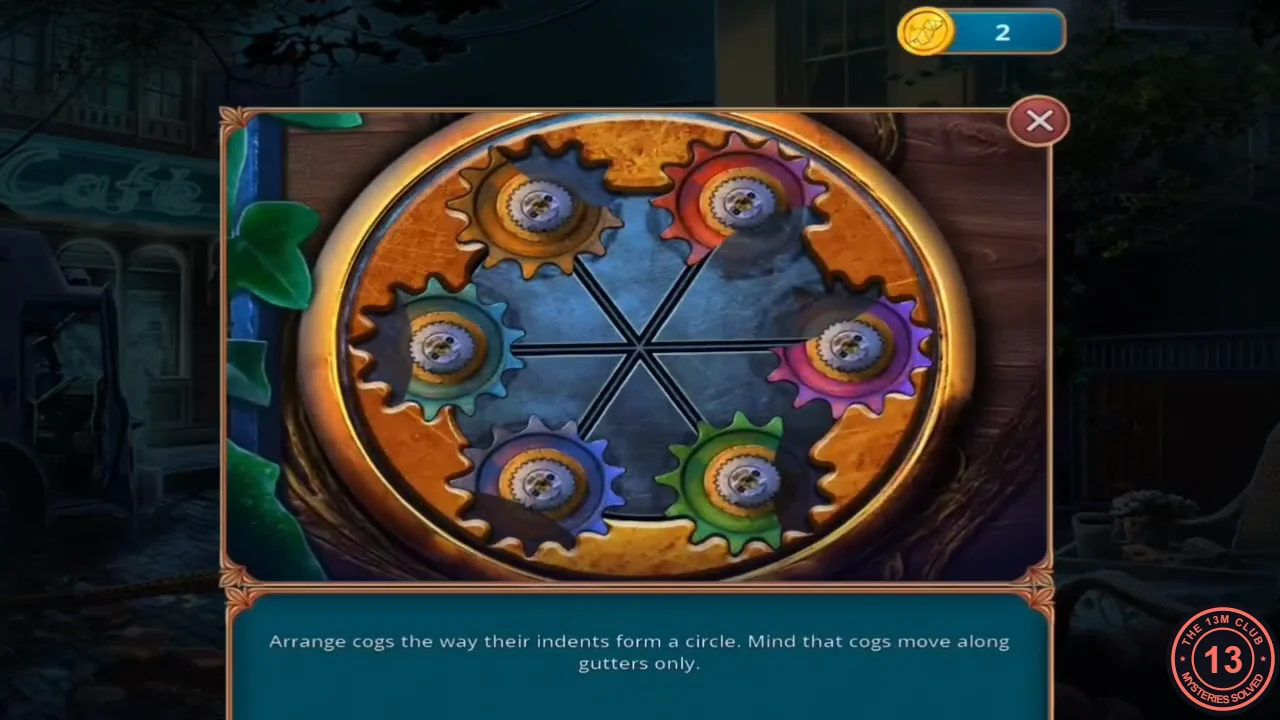
Place Cogs 2/2 in the round mechanism on the wall to the right of the shop (under the vines). Arrange the cogs so that their indents form a circle; cogs can only move along the grooves.
- Place the Cogs, then slide the six cogs into the rim positions with their indents facing the centre so that together they form a circle. Match the solved image. The way to the backyard opens.
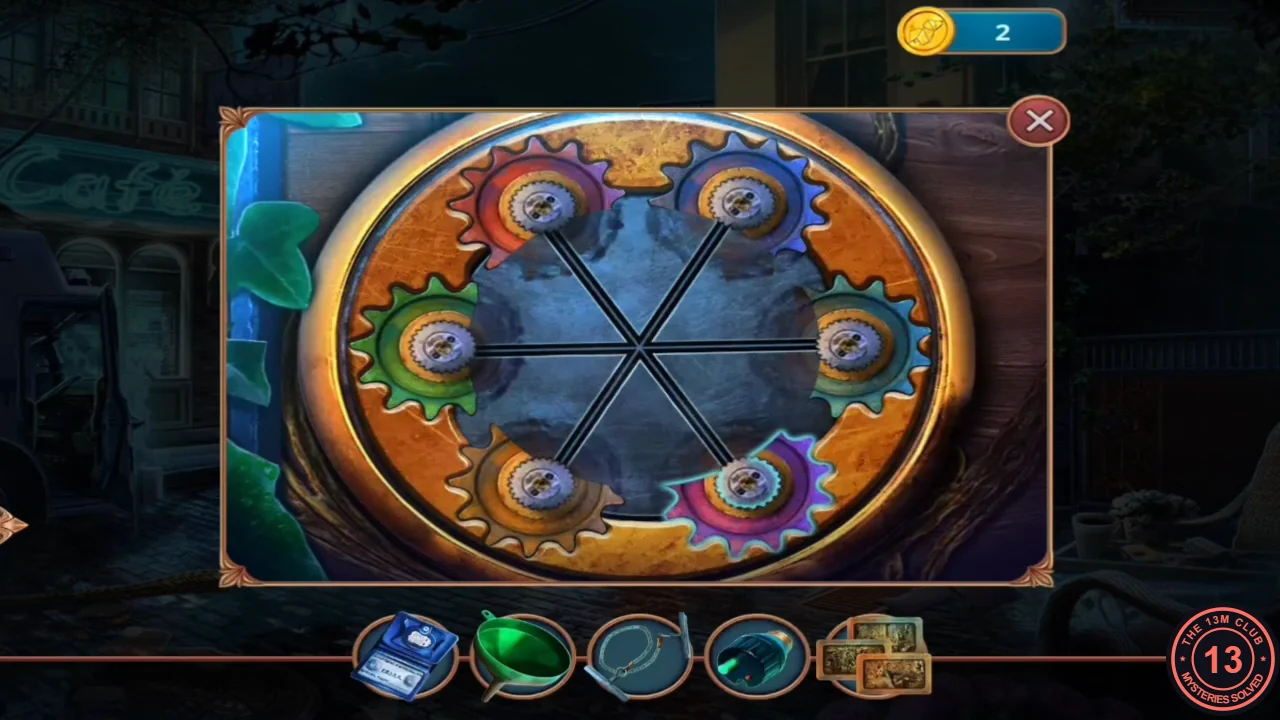
Solved cog mechanism.
The backyard and the fuse
The backyard has a locked star-pattern chest marked D.B. on the wicker chair. You will open it later.
- Zoom into the wooden crate on the right and take the Sponge and the Glove. Cut the slats with the Wire Saw and take the Fuel.
- Put the Funnel on the lawnmower in the grass, pour in the Fuel and start it. Take the Metal Rod from the mown mound.
- In the shop, prop the piano lid open with the Metal Rod and take the Fuse from the compartment. At the breaker box by the staircase, put in the Fuse and plug the round Charger from the turntable into the round socket. The breaker puzzle starts.
Breaker circuit
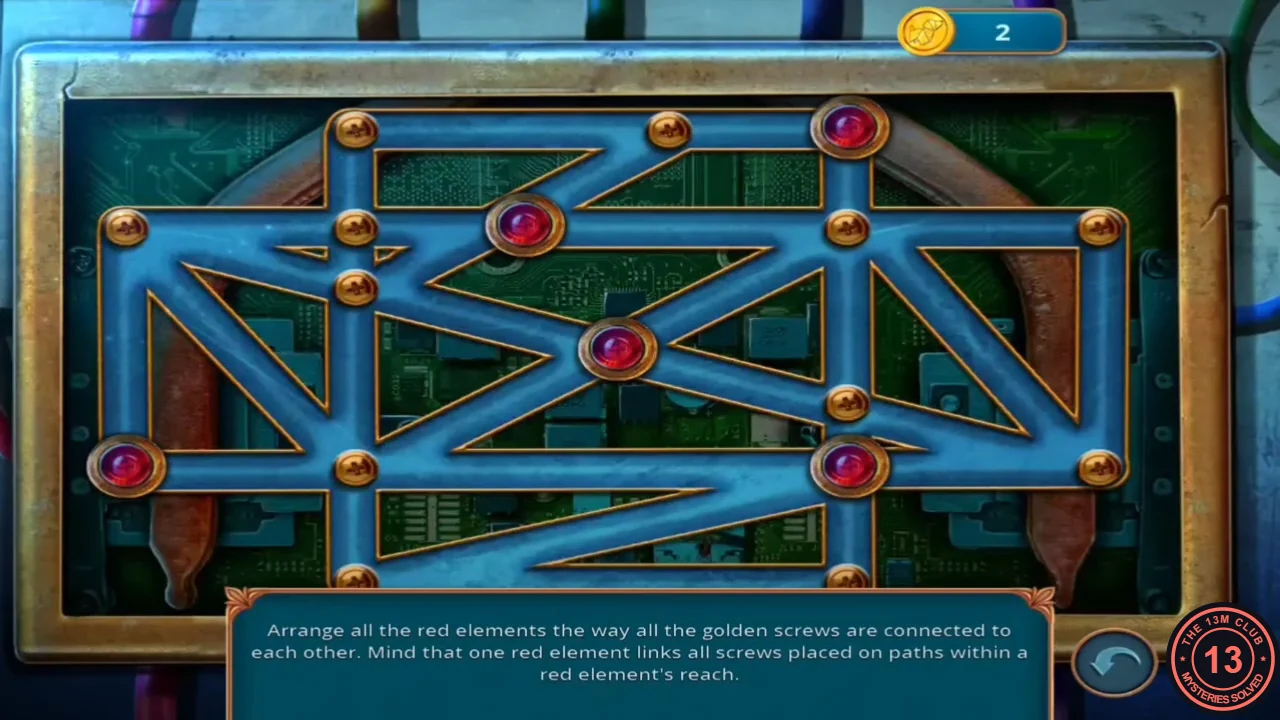
Arrange the red elements so that all the golden screws are connected. Each red element links every screw on the paths within its reach.
- Move the five red elements to the positions shown in the solved image and switch the power on.
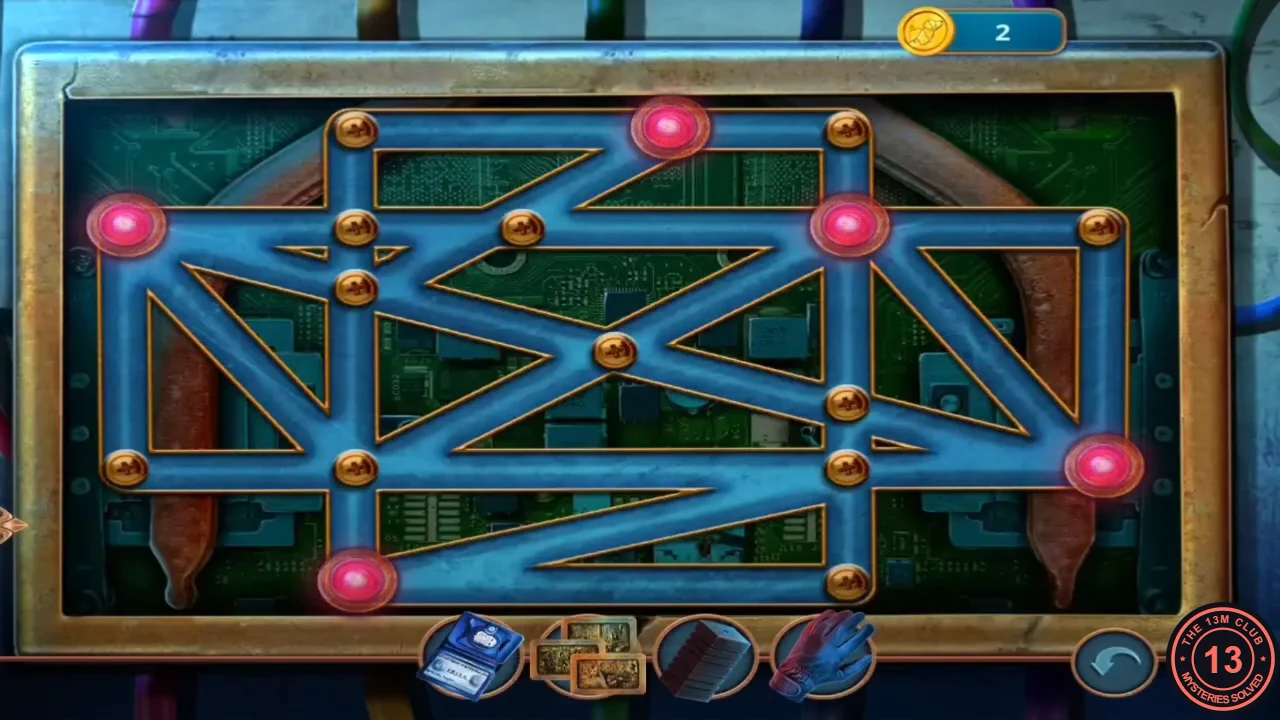
Solved positions of the red elements.