Central Park crime scene
An architect, Otto Hudson, has been found dead in Central Park. Start by speaking to the people at the scene.
- Follow the tutorial prompts, then talk to Daniel Smith, the jogger who found the body, and go through all of his answers.
- Talk to Detective Scott Matthews. He hands you Latex Gloves.
Examine the body
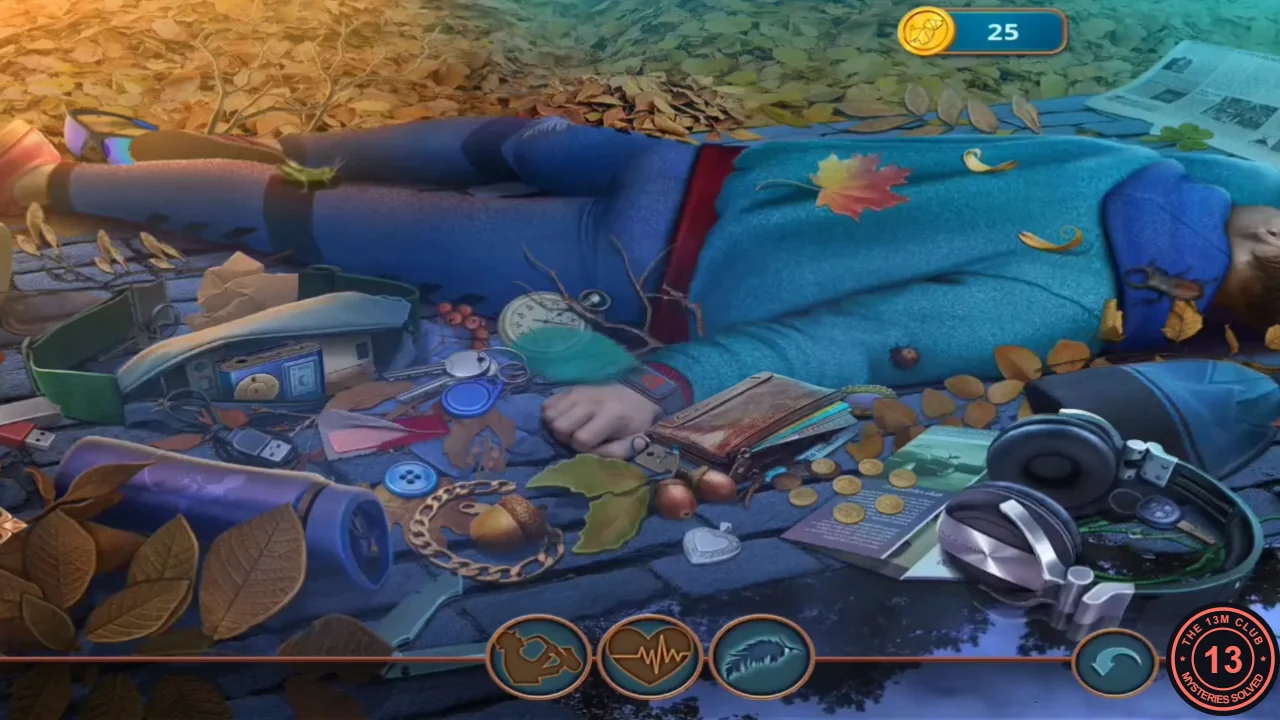
Use the Latex Gloves on the body to open a hidden-object scene.
- Use the Latex Gloves on the body. Find the silhouettes shown in the bottom tray; the tray refills until every item is found. Two items sit inside small close-ups: tap the MP3 player to inspect its screen, and clear the pile of coins to reach what is underneath. The scene ends with a photo of Otto and Evidence 1/5.
Collect the park evidence
Collect the remaining four pieces of evidence with the forensic toolkit.
- Talk to Sandra Parsons from forensics to receive the Detective's Toolkit. Open it from your inventory to see its tools: Polaroid camera, journal, fingerprint kit (talc, brush and tape) and Plastic Bags.
- Zoom into the plant sign (Codaeum variegatum) by the hedge on the left. Bag the green cloth with a Plastic Bag, then use the fingerprint kit: brush on talc over the upper right of the sign and lift the print with tape.
- In the same hedge close-up, take the Broken UV Lamp and the Garden Rake.
- Zoom into the fountain. Rake the leaves aside and take the Battery, then bag the red shoelace (the murder weapon) with a Plastic Bag.
- Zoom into the wallet on the cobblestones and take the House Emblem and the Wallet (a leather case).
- Put the Battery into the Broken UV Lamp in your inventory. Shine the UV Lamp on the cobblestones close-up to reveal a footprint, then photograph it with the Polaroid.
Reconstruct the crime
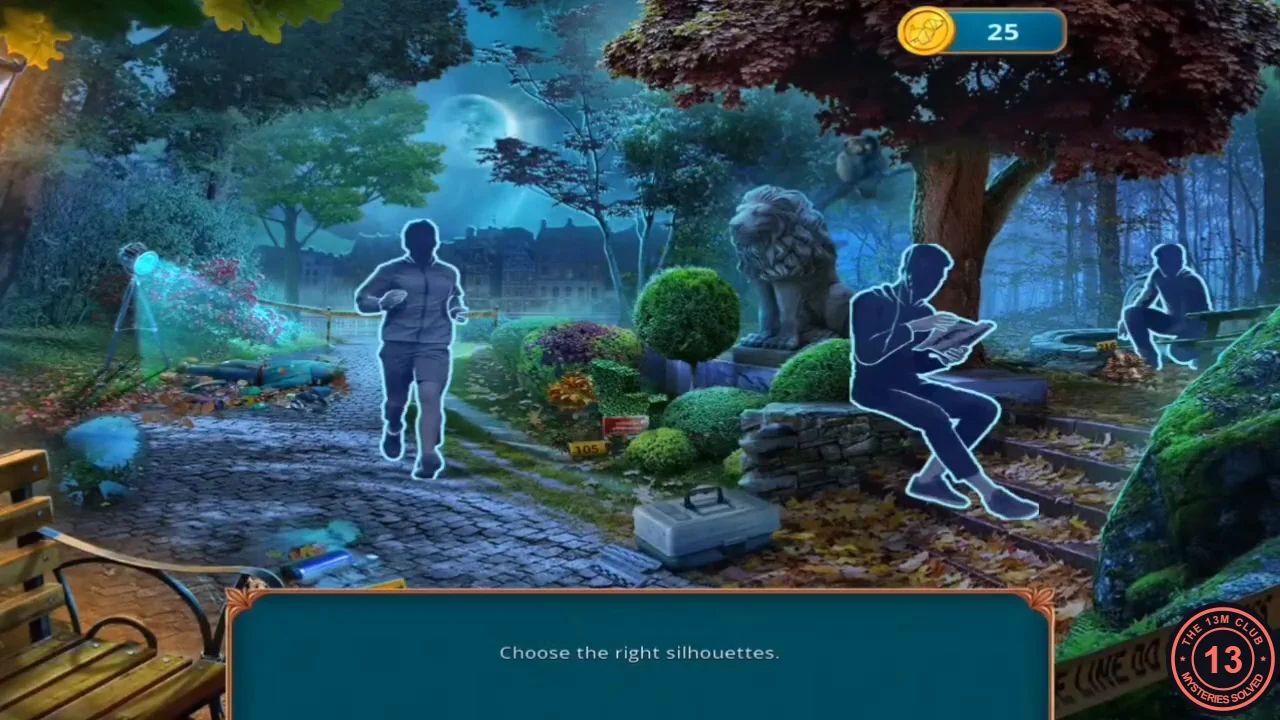
With all five pieces of evidence, the game asks you to choose the right silhouettes in two stages.
- Stage 1: tap the jogger silhouette on the path. The scene changes to show the killer waiting behind the tree, out of the camera's view, until the victim reached him.
- Stage 2: select the right-hand pair (the victim falling) and the middle pair (the attacker with an arm around the victim's neck from behind). Both turn green and the reconstruction ends.
Building 117 and the studio lobby
Scott suggests visiting Otto's workplace. Some dialogue answers show a coin price; these paid answers unlock extra rewards later (see the notes beside each choice).
- Talk to Scott. Two answers appear. The coin-priced answer ("Of course we should pay a visit to Otto's house and workplace!") counts towards Scott's Chapter 1 reward, the Lockpicks (see Pin Oak Drive). The free answer ("It's way too early...") also continues the story. The coin price differs between game versions. Scott then gives you Bottled Water.
- On the street outside Building 117, zoom into the construction bags and take the Duct Tape and the Sponge.
- Zoom into the door handles of Building 117 and take the Foldable Umbrella. This reveals a card reader.
- Zoom into the stained café table. Wet the Sponge with the Bottled Water, wipe the stain and take the Hook Earring.
- Open the Wallet in your inventory and use the Hook Earring as a zipper pull. Inside are a staff photo signed by Mr. Atkins, Coin 1/3 and Otto's Permit.
- Use Otto's Permit on the card reader by the door and enter the lobby. After the argument between the director and Laura, talk to the director: he asks you to search the studio, says Laura will find keys to Otto's office and suggests checking the computer and camera footage.
- Zoom into the lobby coat rack. Take the Cable Plug and Coin 2/3.
- Zoom into Otto's office door (his nameplate is on it). Take the blue cable hanging from the handle. In your inventory, fix the Cable Plug to the cable with the Duct Tape to make an HDMI Cable. The door itself is locked for now.
- Zoom into the computer on the lobby desk and plug the HDMI Cable into the PC tower. A token puzzle starts.
Computer token puzzle
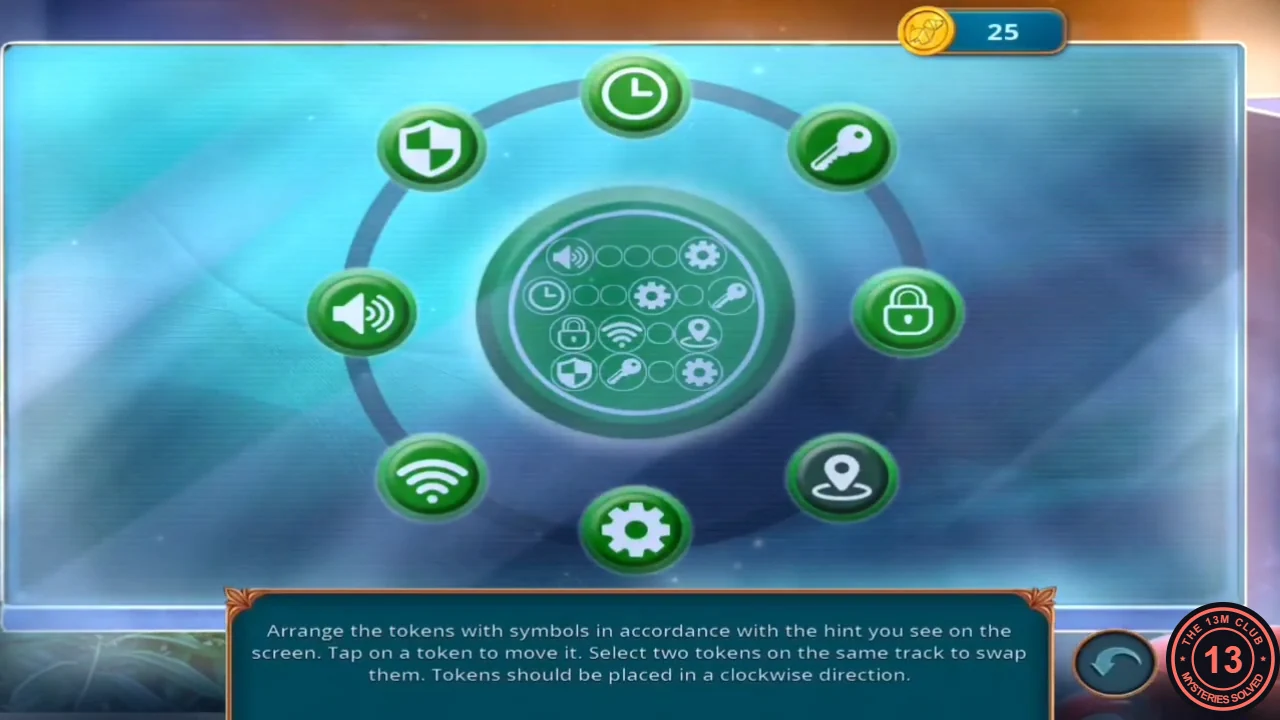
Arrange the eight tokens on the ring to match the hint in the centre. Tap a token to move it clockwise, or select two tokens on the same track to swap them.
- Place the tokens so that, clockwise from the top, they read: Lock, Gear, Wi-Fi, Location pin, Key, Shield, Speaker, Clock.
Camera footage and Otto's office
The footage puts Daniel near the scene at the time of the murder. Laura then offers help.
- Watch the camera footage: Daniel was at the scene at the time of the murder, and Laura recently resigned. Talk to Laura.
- Laura offers to let you look around the break room. Choose "That's a great idea, Laura!" (it shows a coin price and a lock-and-room icon) to receive the Magnetic Key and open the optional Break Room investigation later in this chapter. "No, thanks." skips that extra content. In the recording that took this option, it cost 10 coins.
- Laura gives you access to Otto's office. Your tasks are to gain access to Otto's office and find evidence. Go through the double doors into the office.
- Zoom into the shelf on the right. Take the Scissor Jack and the Tower Mock-up, then place the House Emblem in the lock of the wooden box on the lower shelf. A puzzle starts.
Arrow circle box
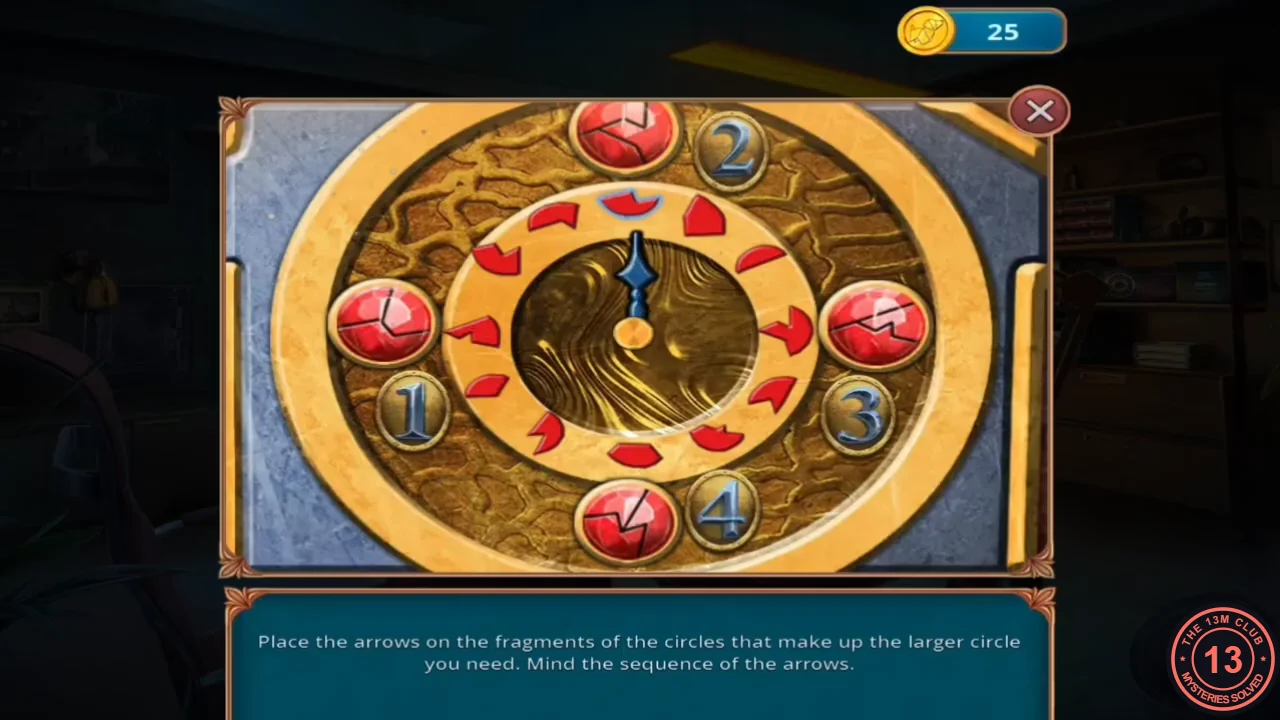
Four cracked discs (1 left, 2 top, 3 right, 4 bottom) each need three arrows pointing at the ring fragments that make up the larger circle. Solve them in order; a disc turns green when all three of its arrows are correct.
- Set the three arrows of each disc to these clock positions: disc 1 at 12, 1 and 8 o'clock; disc 2 at 11, 3 and 6; disc 3 at 2, 9 and 5; disc 4 at 10, 7 and 4.
The third coin and the café
Collect the last coin and pay the waiter outside.
- Take the Architectural Compass from the opened box (a photo of Otto with coffee is also inside).
- Zoom into the trophy shelf. A Sale Coupon is hidden here under the scroll; tap it to collect it. Use the Architectural Compass on the shelf base to get Coin 3/3.
- Go back out to the street and zoom into the café counter. The waiter says nothing is free: give him the three Coins. He lifts the cloche and a hidden-object scene opens.
Café anagram scene
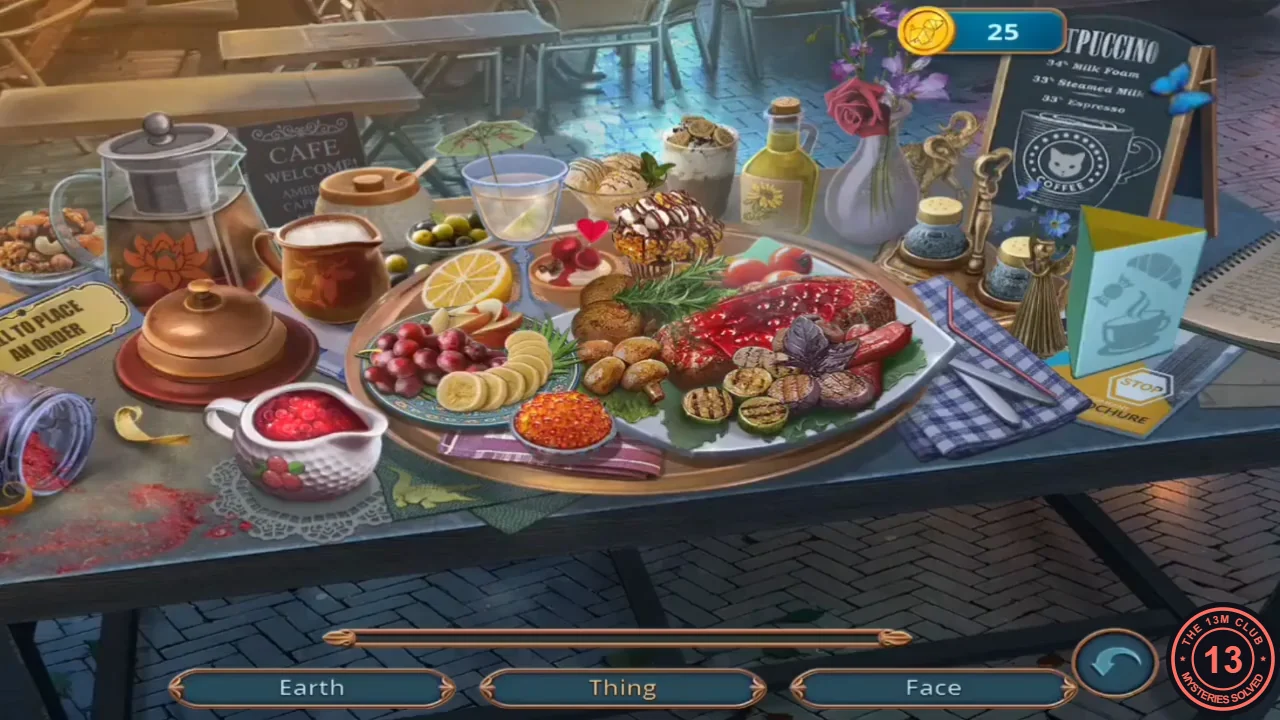
Find an object whose name is an anagram of each listed word. Three words are shown at a time. Some versions also offer a match-3 alternative.
- Find these anagram pairs: Thing = Night (sign), Face = Café (board), Angle = Angel (figurine), Team = Meat (steak), Earth = Heart (pastry), Saint = Stain (on the counter), Lamp = Palm (leaves), Post = Stop (sign), Mile = Lime (slice), Act = Cat (drawing), Plate = Petal (flowers), Maniac = Caiman (the small crocodile figure on the green placemat at the front left). The reward is the Table Napkin.
Find the missing mock-ups
Otto's museum diorama needs its missing pieces.
- Zoom into the bonsai planter on the right of the street. Use the Table Napkin to move the thorny branches. Collect the Sale Coupon, then take the Copper Wire and the Umbrella Button. The glowing powder needs something to hold it.
- In your inventory, attach the Umbrella Button to the Foldable Umbrella so that it opens.
- In the lobby, use the Umbrella on the coat rack to knock down the hat. Take the Cup and the Awl, and collect the Sale Coupon. The satchel here stays locked for now.
- Zoom into the crate on the truck in the street. Cut open the Eco Gypsum sack with the Awl. Read the museum director's note (mock-ups due by 2 PM on September 23), then take the Pen (1/2) and the Broken Dummy.
- Go back to the bonsai planter and use the Broken Dummy on the glowing powder. It becomes the Lantern Mock-up.
- In Otto's office, zoom into the "Museum of Contemporary Art" diorama and place the Tower Mock-up and the Lantern Mock-up. A lantern puzzle starts.
Museum lantern puzzle
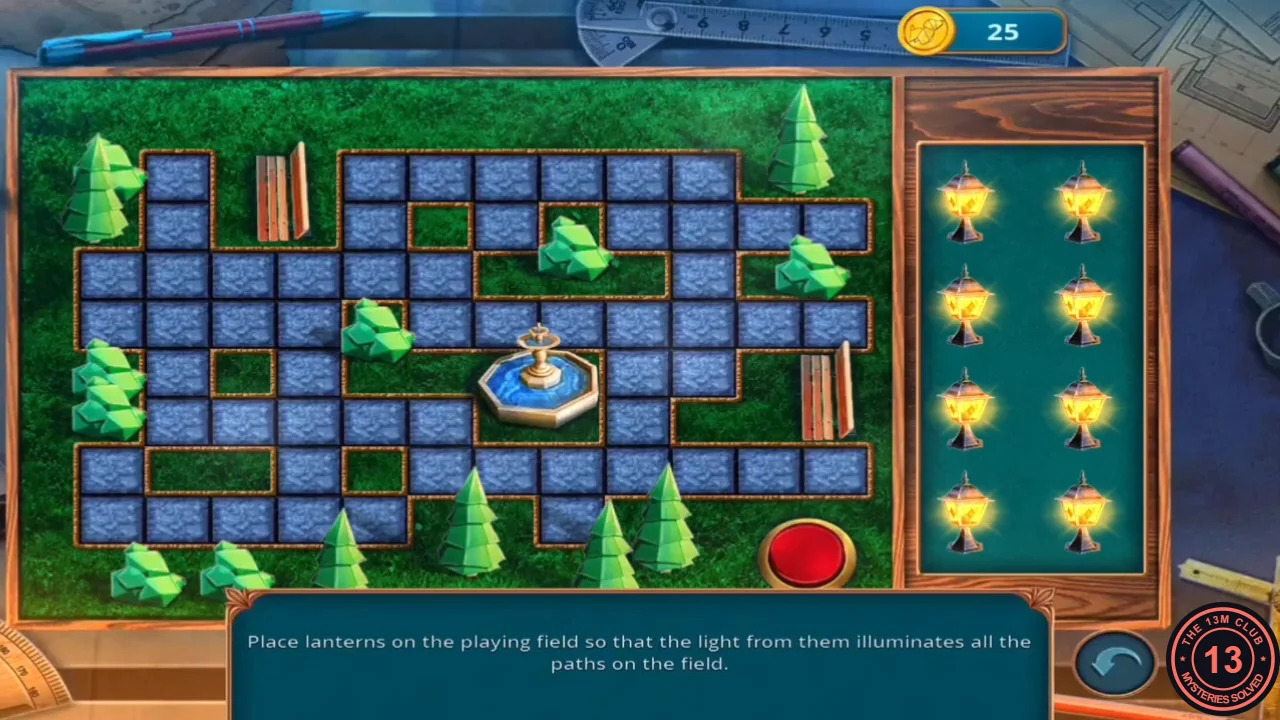
Place the eight lanterns on the diorama paths so that their light reaches every path tile.
- Place the lanterns as shown in the solution image so that no path tile stays dark.
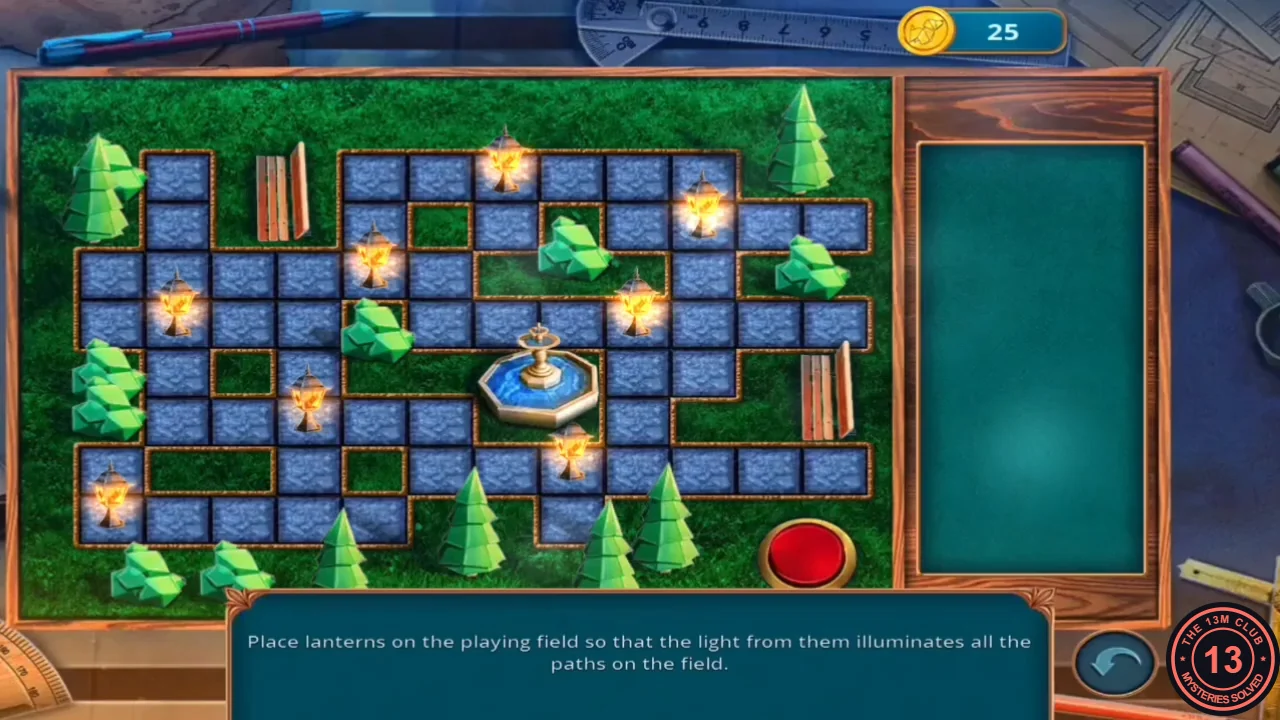
Solved: all eight lanterns placed.
Award, jack and the Bauhaus blueprint
The solved diorama opens a drawer, which starts a chain of item uses that ends at Otto's drafting board.
- Read Mr. Atkins's memo complaining about Otto's behaviour, then take the Outstanding Architect Award.
- Place the Award on the trophy shelf. Take the Scarf and the Jack Lever.
- Combine the Scissor Jack with the Jack Lever and the Copper Wire to make a working Jack.
- Use the Jack on the grate at the rear of the truck to spread the bars and take the Sculpture Fragment. Another item lies too deep to reach; it needs something long and hooked (this is only needed for the optional Break Room).
- Place the Sculpture Fragment on the bust in the lobby and take the Ruler.
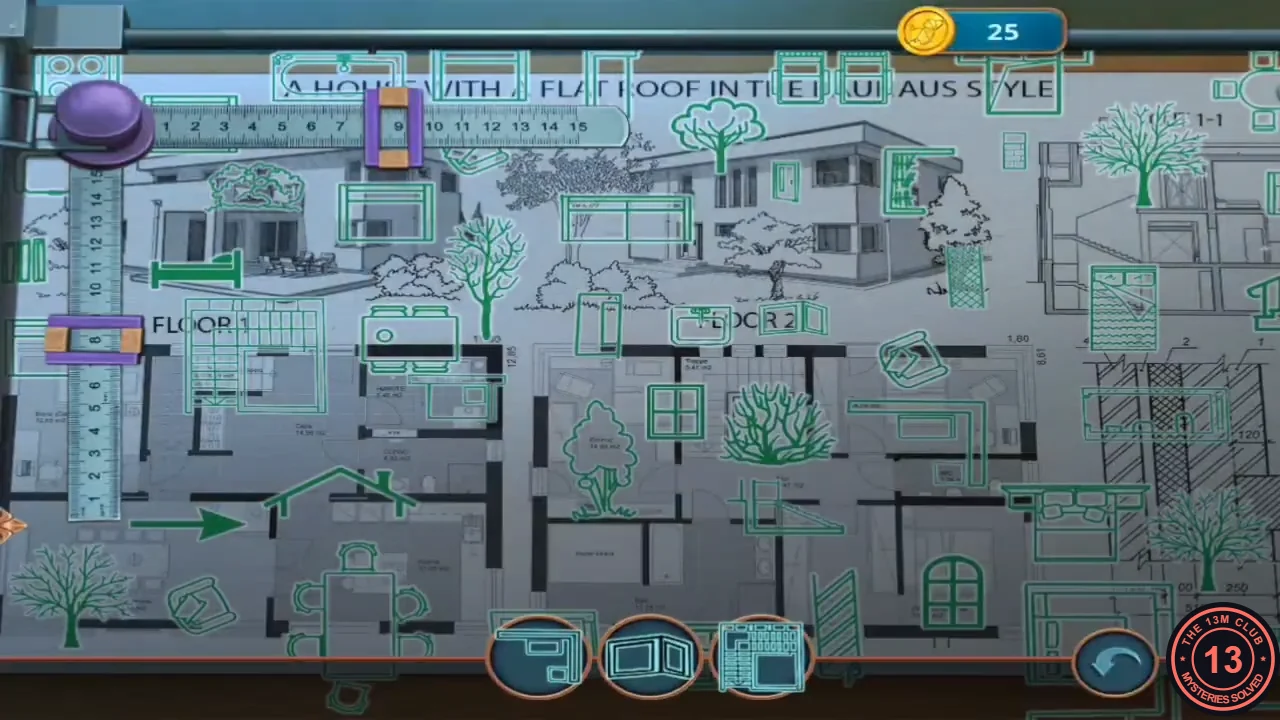
- Place the Ruler on Otto's drafting board. The blueprint shows "A house with a flat roof in the Bauhaus style". Slide the horizontal and vertical rulers to outline the shapes shown in the bottom tray; each correct outline is removed from the tray and a new shape is added until the tray is empty. You receive the Statue of Liberty Drawing.