CHAPTER 3 - PUZZLE
Trap field
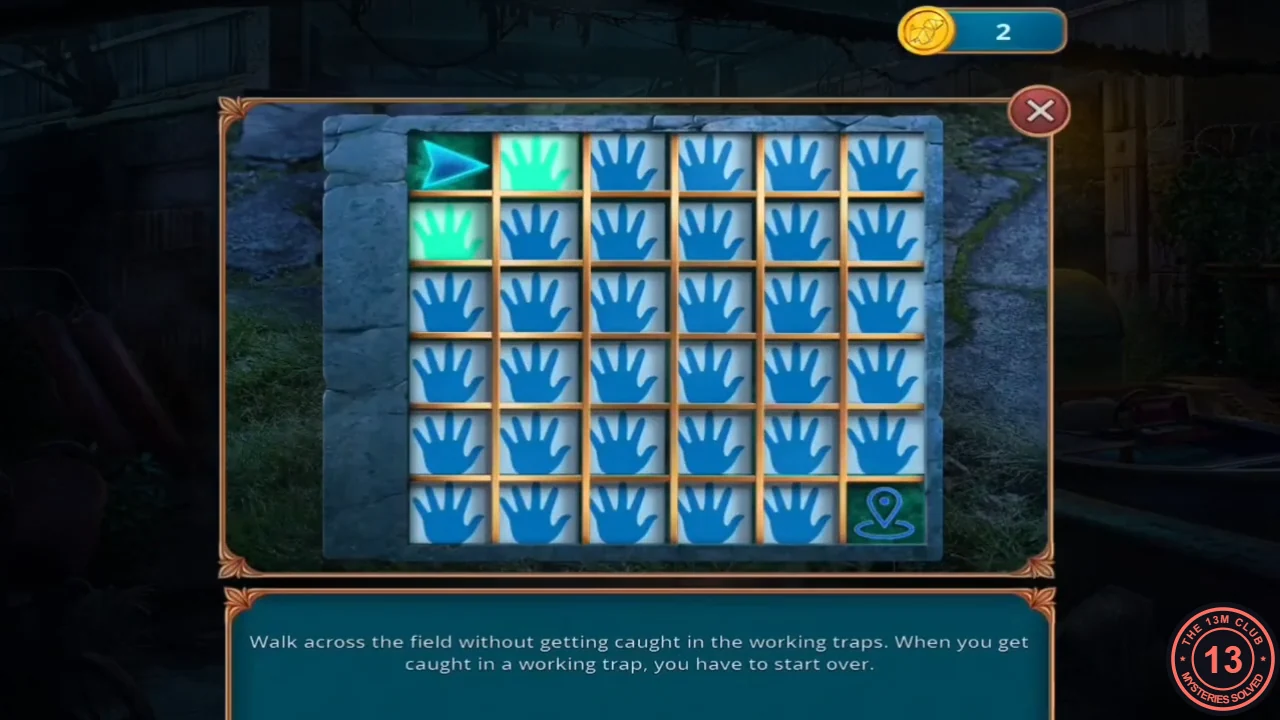
Use the Pegs on the yard foliage with the bear traps and barbed wire. Walk across the field without stepping on a working trap; if you are caught, you start over.
- Use the Pegs on the foliage with the traps.
- On the 6x6 field, start at the top left. Walk this safe path: down 1, right 2, down 1, right 1, down 3, right 2, which ends at the bottom right. The same path worked in two separate recordings made with different game versions. If a trap still catches you, the game sends you back to the start; remember where it was and go around it.CODED1 R2 D1 R1 D3 R2
- Take the Lemon from the foliage.
CHAPTER 3 - PUZZLE
Bomb symbols
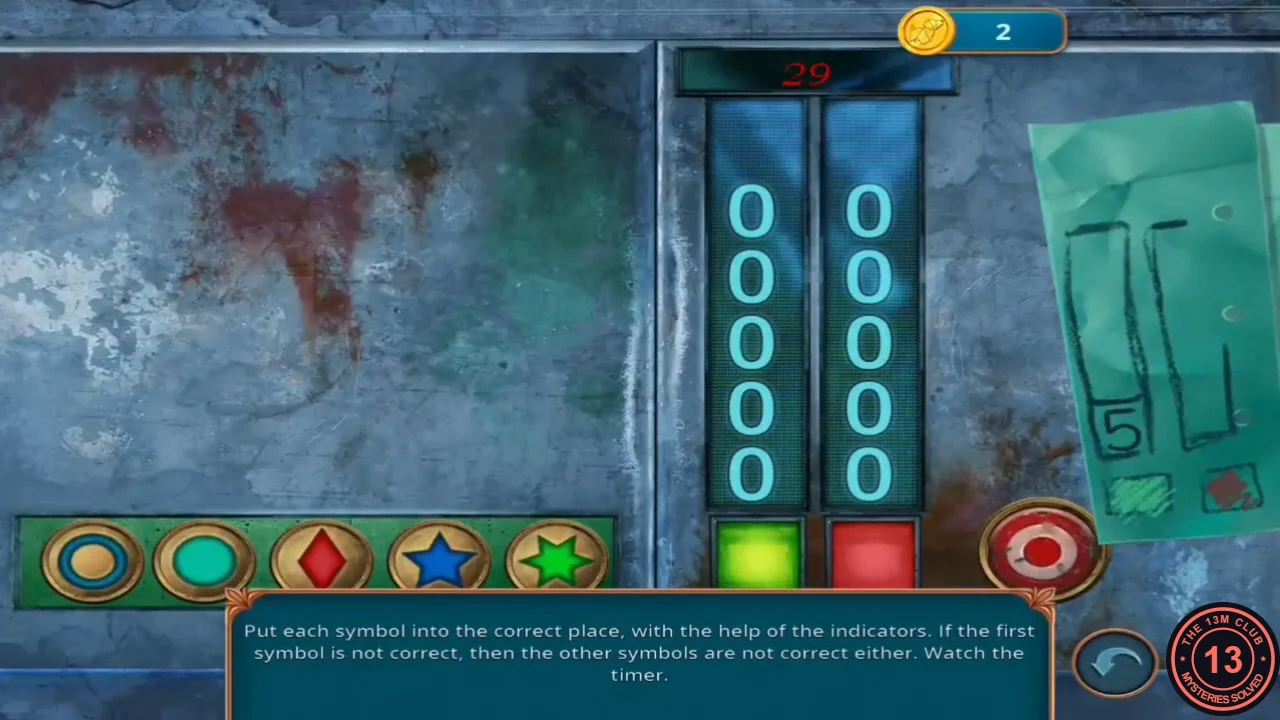
Reveal the hidden instruction, then defuse the bomb. Using the instruction on the bomb triggers a warning that you cannot return to earlier locations; finish the optional Factory Office first.
- Open the Bomb Instruction, squeeze the Lemon on it and heat it with the Lighter to reveal the hidden instructions.
- Use the Bomb Instruction on the bomb in the mill hall and confirm the warning with YES.
- You have 30 seconds. Place the symbols in order; the green counter shows how many are right, and if the first is wrong the rest count as wrong too. The order is: blue star, green star, red diamond, gold circle (blue ring), teal circle. The same order was correct in two separate recordings made with different game versions.
CHAPTER 3 - PUZZLE
Bomb switches (newer versions only)
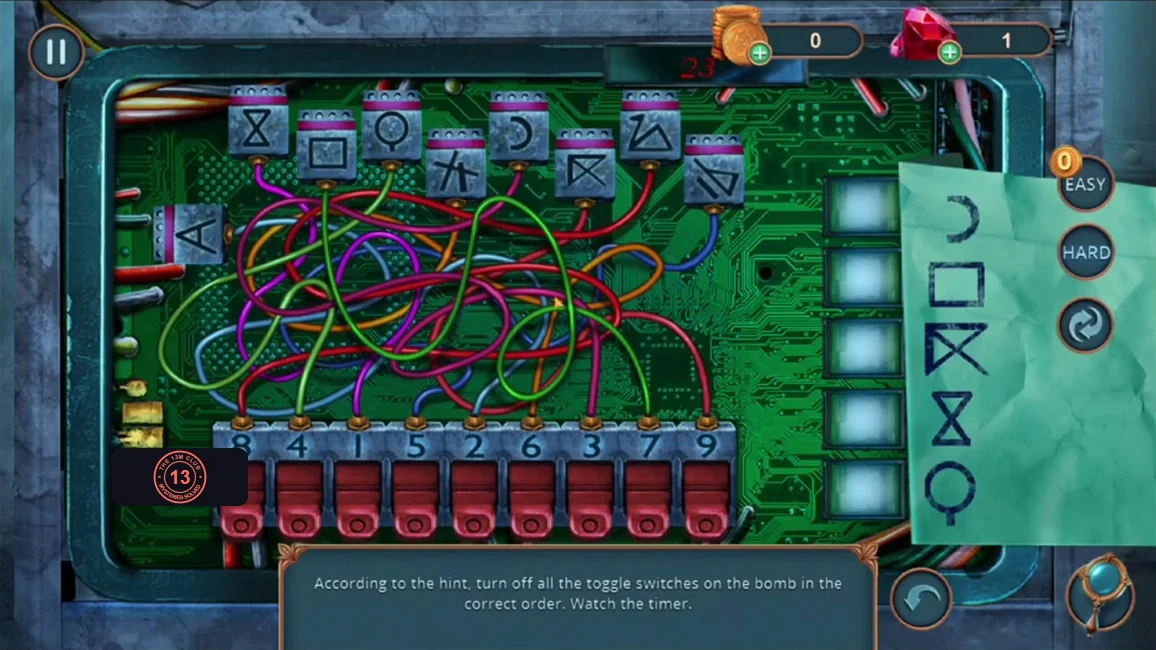
In the newer free-to-play build, a toggle-switch stage follows the bomb symbols. The older recording went straight to the wire stage.
- The task reads: "According to the hint, turn off all the toggle switches on the bomb in the correct order." The paper on the right shows five symbols from top to bottom: crescent, square, crossed box, hourglass, and circle on a stem. The symbol plugs at the top of the board are connected to the numbered red switches by the tangled wires. Turn the switches off in the order of the paper. In the recording the order 3, 7, 9, 1, 4 worked; each number appears in the column beside the paper as you go. If those switches do not work for you, trace the wire of each symbol down to its switch. Watch the timer.CODE3-7-9-1-4
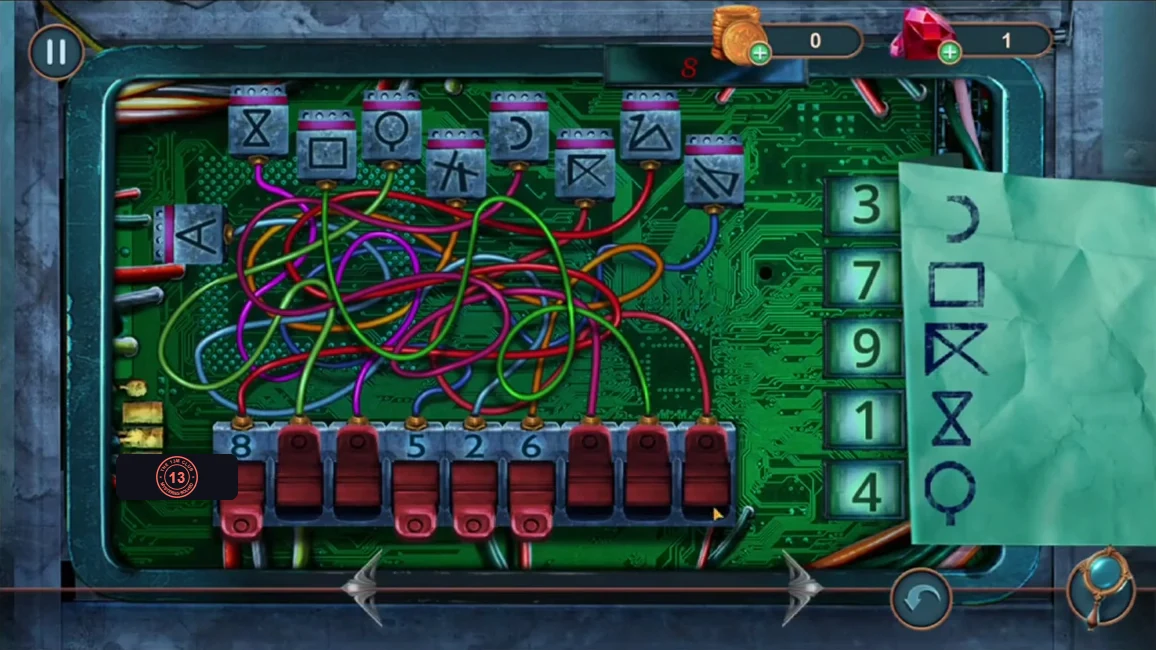
Newer build only: the switch stage after switching off 3, 7, 9, 1 and 4.
CHAPTER 3 - PUZZLE
Bomb wire and the end of Chapter 3
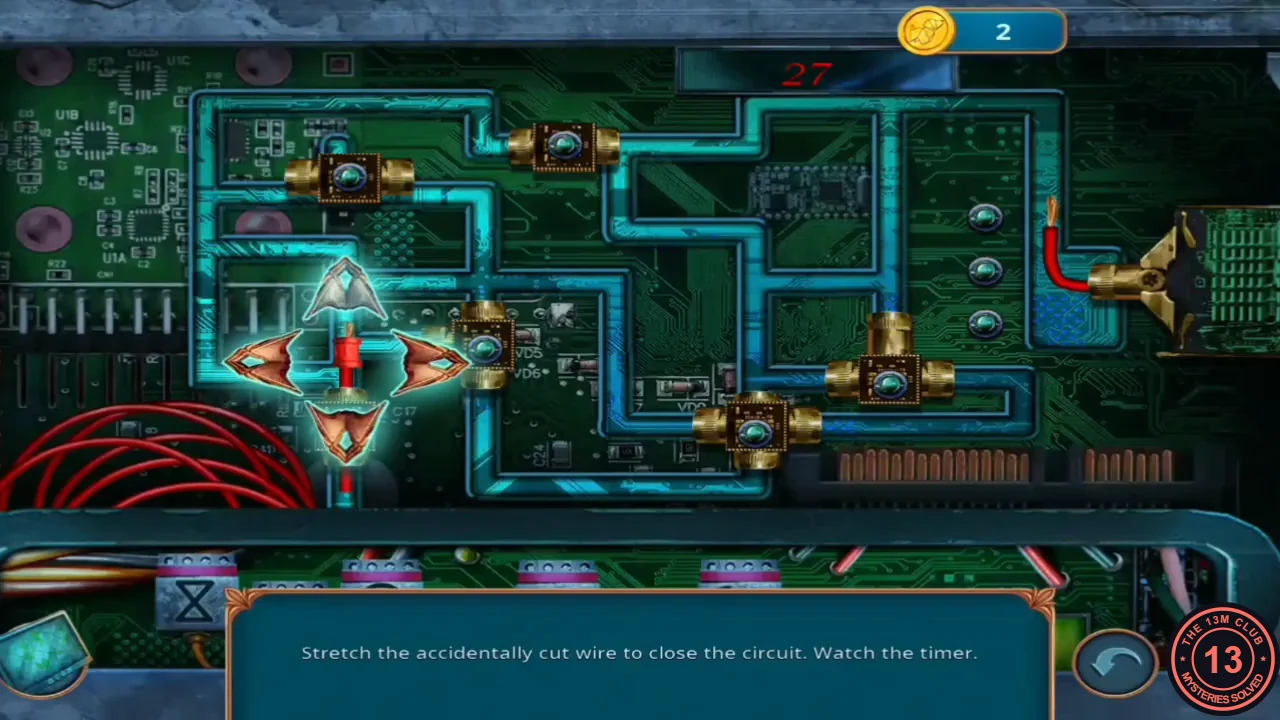
Stretch the cut wire to close the circuit before the timer runs out.
- Use the four arrows to steer the wire head from the bottom left through the brass junctions to the detonator terminal on the right. The route goes up, around the top-left loop, along the top to the right, then down to the terminal.
- The bomb is defused and Earl is arrested. Close the case on the laptop. In the therapy session, the therapist asks what you think of Vivian: "Vivian is an outstanding journalist! I'm glad I got a chance to work with her." or "Vivian is quite an intrusive lady. She couldn't help but interfere with the investigation!" Then you pick the picture that scares you most from three pairs of cards: Water or Dark, Snakes or Rats, and Clown or Ghost. In the recording, the session then ends with a phone call and Chapter 3 closes.