CHAPTER 3
The mill hall
The door opens into the old mill hall, where Vivian is waiting.
- Vivian offers to keep Earl busy. The coin-priced answer is "I guess it's a good plan. Thank you, Vivian!" and the free answer is "What are you talking about?! No, no and no!". The recording took the free answer. The new task is Call for help.
- Zoom into the chained crate on the workbench. Read Earl's note and take the Plasticine, Valcoder 1/2 (on the floor), Sale Coupon 15/70 and the Batteries. In your inventory, put the Batteries into the Discharged Taser to make the Shocker.
- Use the Shocker on the conveyor panel to open the shutter.
CHAPTER 3 - HIDDEN OBJECTS
Conveyor pile
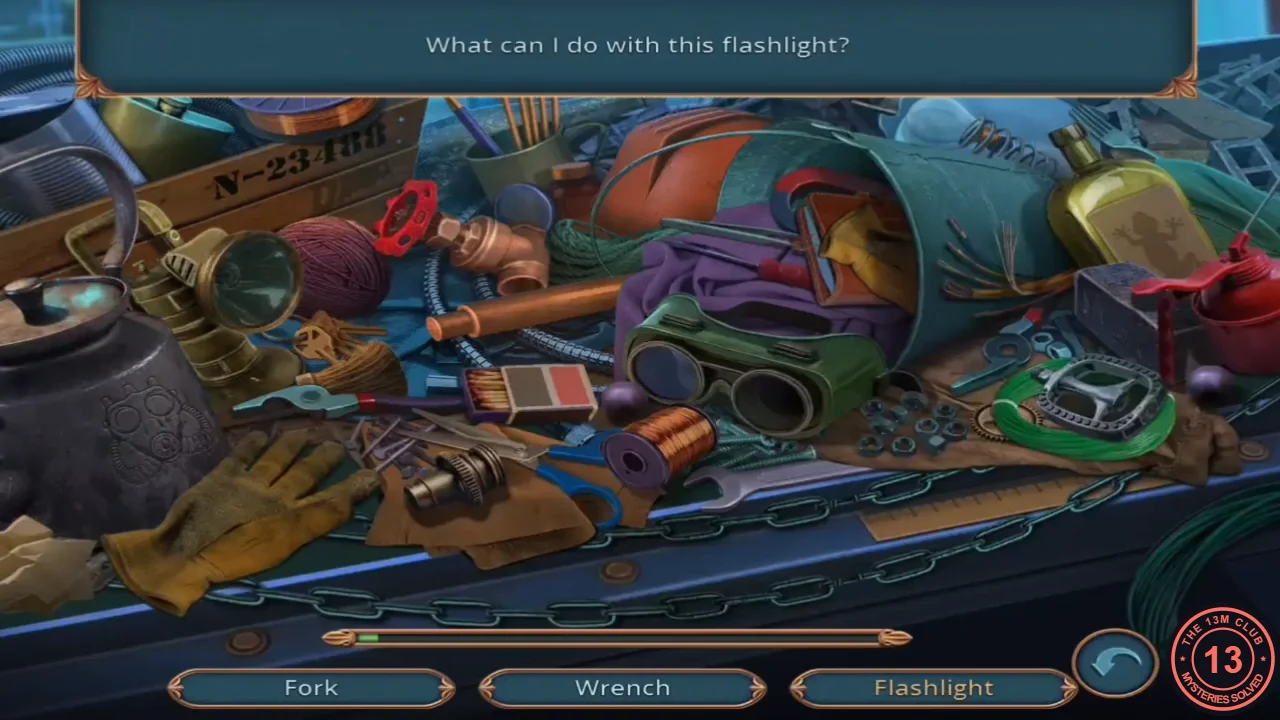
Find the listed items; new names replace found ones.
- Find the fork, wrench, screw, flask, helmet, spring, hammer, pliers, pen, flashlight, safety glasses and gloves. Two need an extra action. Flashlight ("What can I do with this flashlight?"): drag the light bulb lying near the yellow bottle at the top centre into the brass flashlight on the left, then take the flashlight. Gloves: pull the second yellow glove out of the teal bucket and drop it on the glove at the bottom left to collect the pair. The last item is the Gear in the bucket.
CHAPTER 3
The factory yard
Restart the machine to reach the yard.
- Put the Gear into the casing of the blue machine in the middle of the hall. The machine moves and opens the way to the yard.
- Zoom into the steam pipe under the vines (centre right). Take the Pump and the Wooden Pyramid; the steam valve is missing. Cut the vines with the Penknife and take the Empty Paint Can.
- Put the Empty Paint Can on the ground by the gas-cylinder cart on the left. The cart tips over and a mouse appears. Take Valcoder 2/2, which lies on the Wrench, and then the Wrench.
- Factory Office only: at the same cart ("Some light wouldn't hurt."), put the Flashlight from the cellar emblem box on the ground to light up the spot. The mouse runs off; take the Magnet.
- Press the Plasticine into the flower emblem on the toolbox in the flooded boat (right) to get the Amulet Mold.
- In the cellar, use the Wrench on the vise and take the Saw (a circular blade) and the Tongs.
- At the cellar furnace ("not a good idea to touch anything red-hot with my bare hands"), use the Tongs on the furnace to pull out the red-hot wire and take the Hanger. The tongs stay at the furnace, where you use them again later. Keep Valcoder 2/2 for the radio.
CHAPTER 3 - PUZZLE
Call for help on the radio
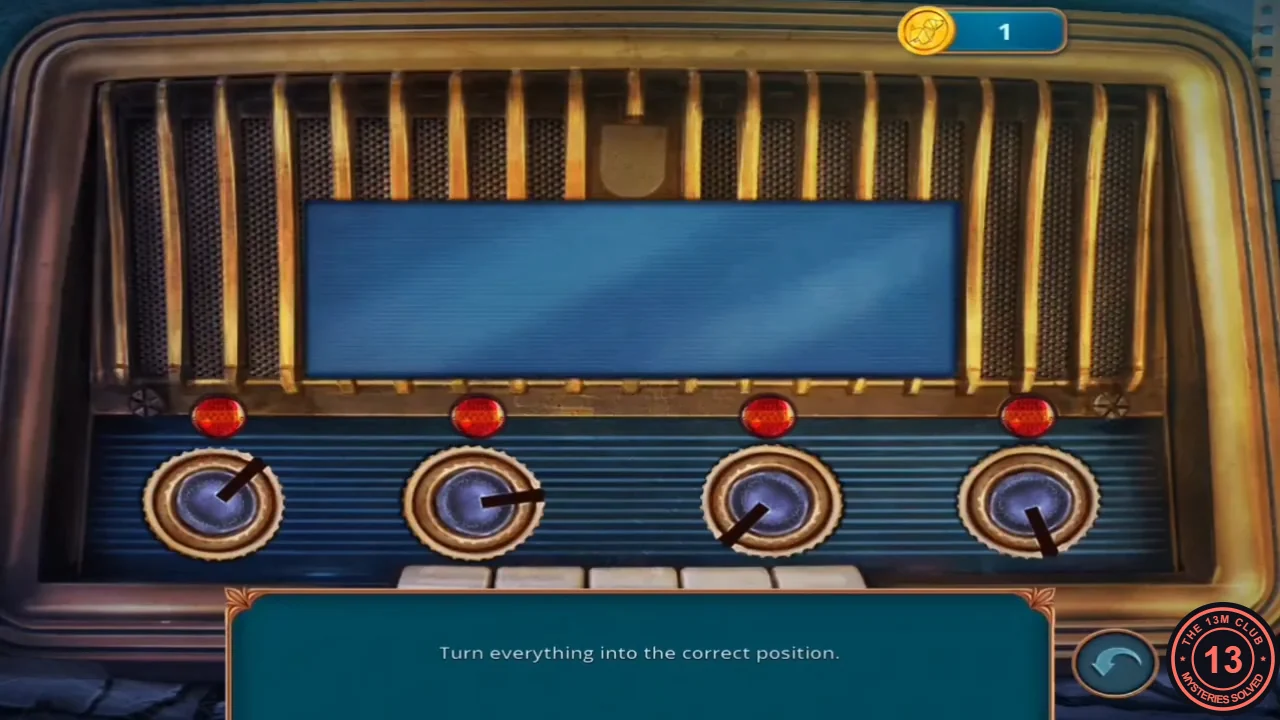
Bend the Hanger in your inventory to make a Metal Hanger, then attach it to the radio on the mill hall table as an antenna.
- Bend the Hanger in your inventory to get the Metal Hanger and attach it to the radio as an antenna. The radio still will not work: fit Valcoder 2/2 to it as the two tuning knobs.
- Turn the four dials until each light is green. The first two dials point up-left (about 10 o'clock) and the last two point down-right (about 4 o'clock). Achievement: Me? Over!
CHAPTER 3
Earl and the bomb instruction
Earl attacks, and Barlow pins him down.
- Use the Rope to tie Earl's hands. The new task is Defuse the bomb.
- Zoom into Earl. Read his note about the Daily Event article and take the Bomb Instruction. It shows a lemon and a lighter, a hint at invisible ink.
- Take the Screw from the floor near Earl. The pump on the floor is missing parts.
- Fit the Saw onto the saw machine, fix it with the Screw and press the red button to cut the chain on the crate. Inside are a photo signed "To my best friend Earl", the Lighter and the Hose.
- Attach the Hose to the Pump. Place the Pump in the yard boat to drain the water and take the Plank.
- Put the Wooden Pyramid at the bottom of the green shed door as a fulcrum and lever the door open with the Plank.
CHAPTER 3 - HIDDEN OBJECTS
Greenhouse
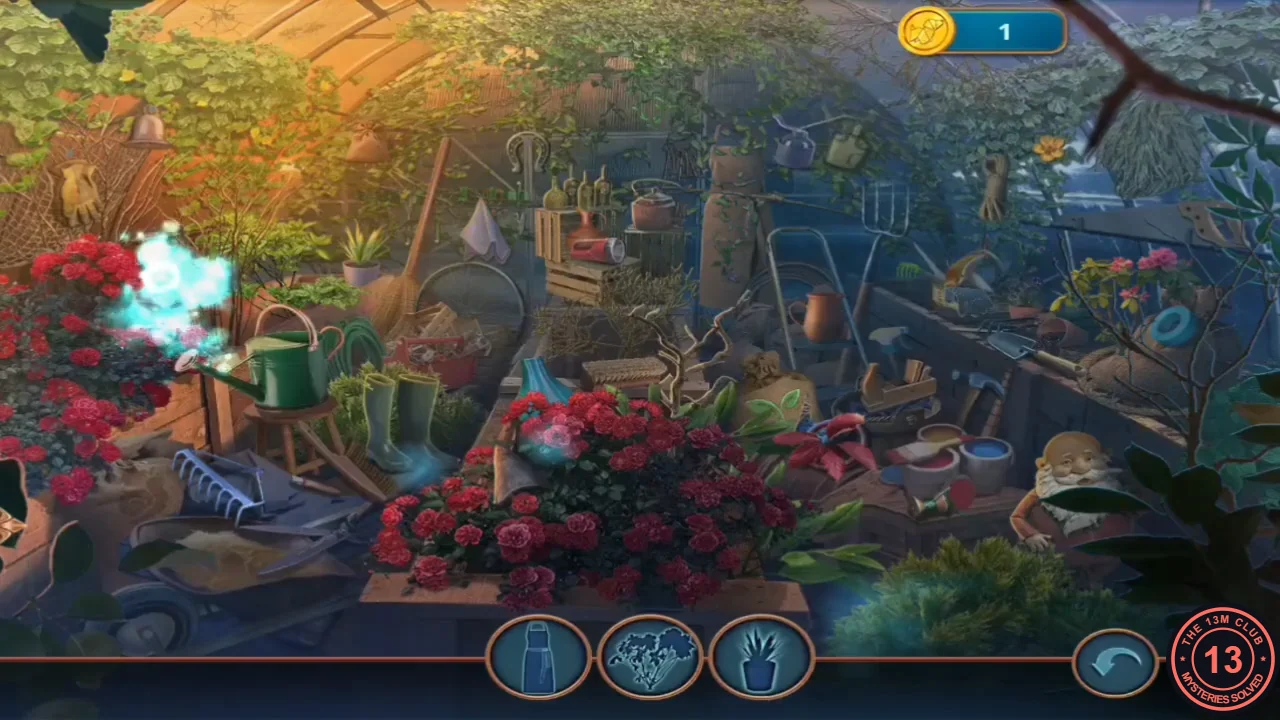
Find the silhouettes shown in the tray; some need an extra action in the scene.
- Find the silhouettes three at a time. The orange silhouettes need an extra action. Pinwheel: drag the red propeller lying on top of the rose bed onto the bare stick at the left, above the watering can. Spray bottle: take the trigger nozzle from the wheelbarrow at the lower left and attach it to the blue bottle on top of the rose bed. Gnome ("Don't freeze your ears off!"): drag the grey pointed hat lying at the left edge of the rose bed onto the bald gnome on the right beside the paint tins. Rake ("Like this, it's useless!"): drag the blue ring from the sack on the right onto the loose rake head in the wheelbarrow. The last item is the Valve.
CHAPTER 3
Comb, iron bar and the star
Turn off the steam to reach the comb.
- Fit the Valve to the yard steam pipe and turn it to stop the steam. Take the Comb.
- In the cellar, clear the debris on the chest under the window with the Comb. Read Earl's diary page and take the Iron Bar. The chest keyhole stays locked on the main route.
- Put the Amulet Mold on the floor beside the furnace and the Iron Bar in the crucible. Use the tongs on the furnace to pour the metal, then take the Star.
- Put the Star into the emblem on the red toolbox in the yard boat and take the Pegs.
CHAPTER 3 - OPTIONAL HIDDEN OBJECTS
Factory Office drawer
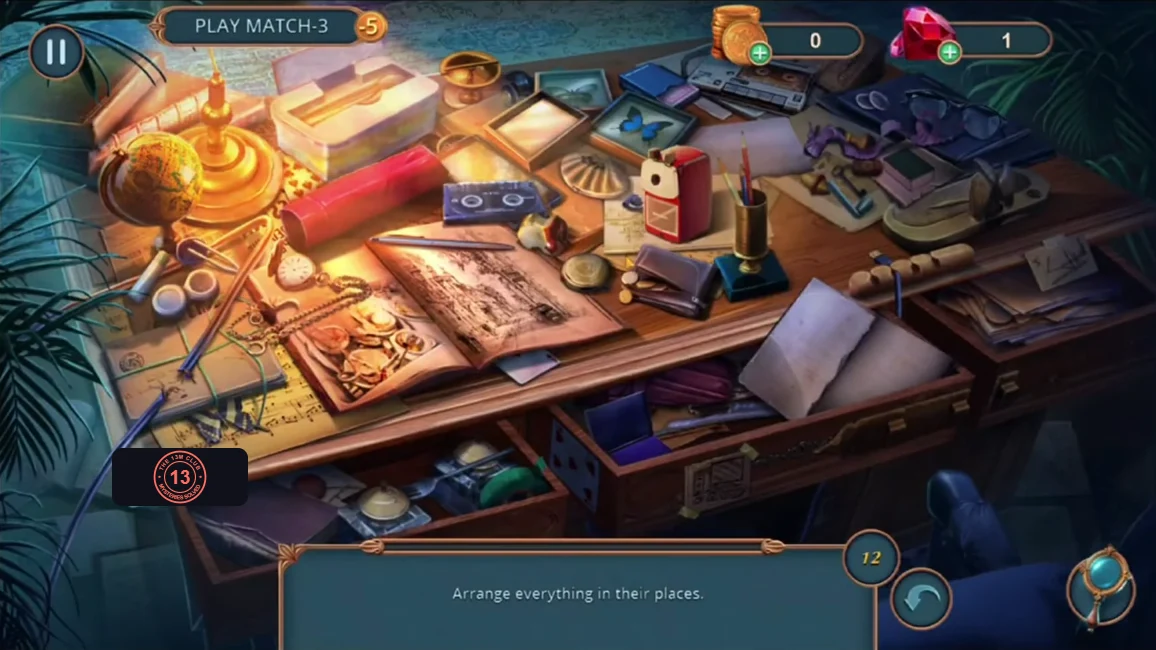
Factory Office only. Use the Magnet on the latch of the office desk drawer.
- Move the latch aside with the Magnet. The drawer opens and starts the Arrange everything in their places scene.
- Put the 12 out-of-place objects back where they belong. In the recording: 1) the blue butterfly lying on the sheet music (lower left) goes into the empty display frame at the top; 2) the two clear contact lenses on the dark-blue folder (top right) go into the two small open round cases beside the globe; 3) the blue pen lying by the key, right of the pencil cup, goes into the pencil cup; 4) the folded pink umbrella in the middle drawer slides into the open end of the red tube; 5) the small dark-blue ink bottle at the top, between the gold bowl and the butterfly frames, goes into the open purple-lined box in the lower middle drawer; 6) the fork lying across the inkwells in the lower-left drawer goes into the fork-shaped slot of the white lunch box (top left); 7) the green tape roll from the lower-left drawer tapes up the broken blue cable on the string-tied letter bundle (lower left); 8) the green-and-white matchbox on the small book stack right of the pencil cup goes onto the bottom of the open scrapbook's left page; 9) the loose lavender page behind the pencil cup goes into the open lavender notebook in the front-right drawer; 10) the playing card with a heart back tucked under the gold desk-lamp base goes onto the small stack of cards beside the blue folder in front of the cassette player; 11) the smartphone lying between the red tube and the yellow-butterfly frame goes on the desk right of the pencil cup, by the blue USB cable; 12) the silver coin in the gap between the white lunch box and the gold bowl goes into the open coin purse. The scene also offers a match-3 alternative. You receive the Hacksaw, which appears in the far-right drawer.
CHAPTER 3 - OPTIONAL
Factory Office: the second frame pattern
Factory Office only.
- Cut the ornate metal piece on the office rug with the Hacksaw and take the Small Key.
- In the cellar, open the orange chest on the window ledge with the Small Key and take Frame Pattern 2/2.
CHAPTER 3 - OPTIONAL PUZZLE
Factory Office safe fragments
Put the Frame Pattern on the damaged painting's frame in the office to reveal a safe panel. Arrange the fragments in the central part so that, when activated, they connect to the fragments along the walls.
- Place the Frame Pattern on the frame of the damaged painting.
- The panel holds seven notched fragments on each side of the central rod, with a PLAY button at the lower left. Swap the fragments between the rows until each one fits the wall piece beside it, then press PLAY to slide the walls in and test. Match the final layout shown in the solved image.
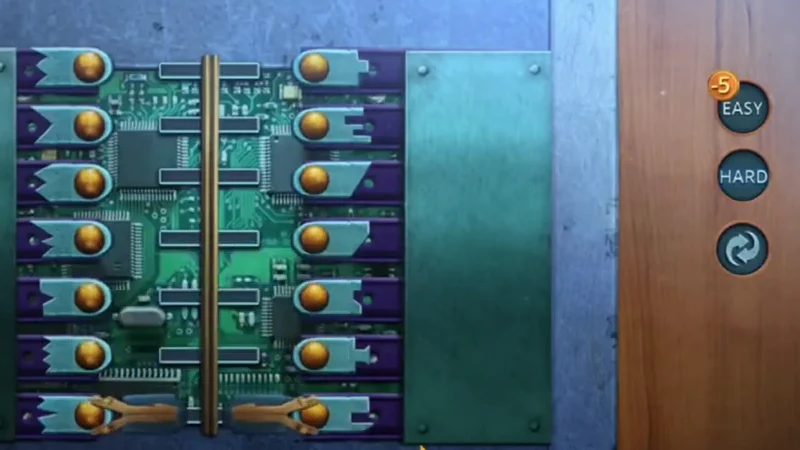
Solved fragment layout. - Read the Top Secret folder: Barlow's employee report, and his note refusing to act on a reported breach in a warehouse cylinder. Achievement: Tragic Accident. The task Learn more about the accident is complete.