Bomb: The Rotating Disc
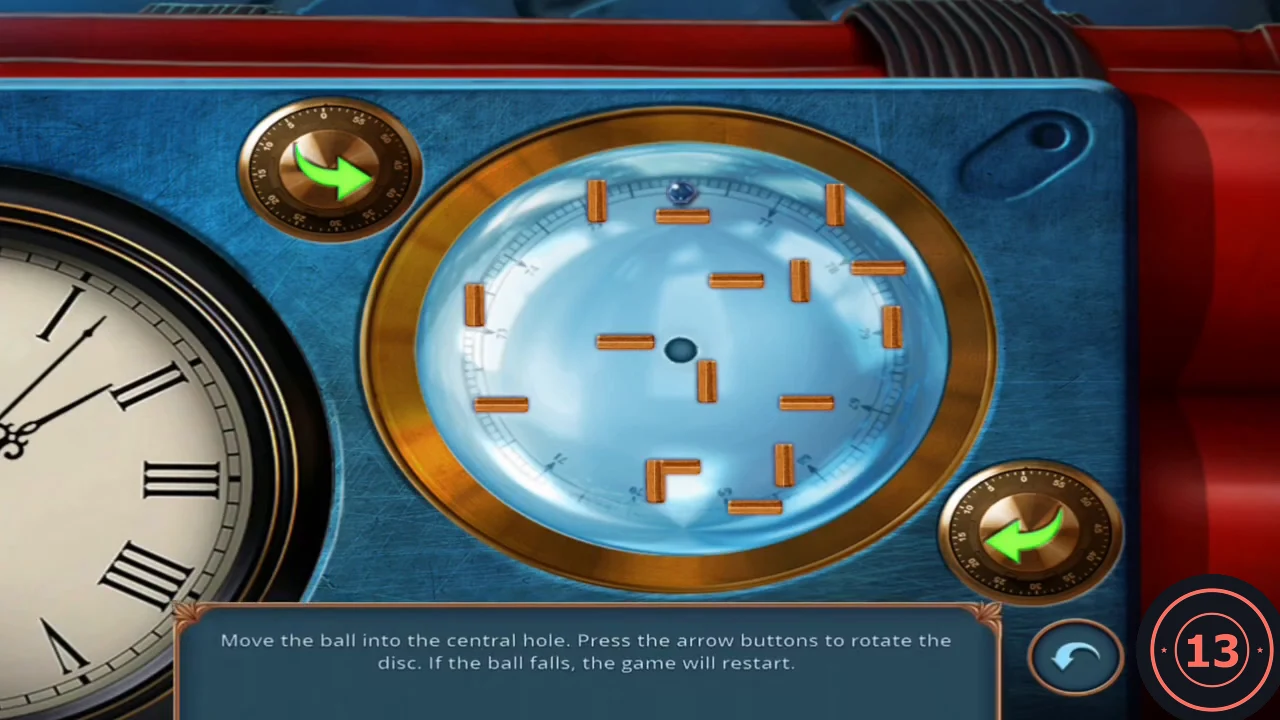
Move the ball into the central hole by rotating the disc with the arrow buttons. Each tap turns the disc a quarter turn: the upper-left button turns it clockwise and the lower-right button turns it anticlockwise. The ball rolls downwards and stops against the bars. Wait until it stops before the next tap. If the ball falls the wrong way, the puzzle restarts; start the sequence again from the first tap.
- The ball starts on the short bar at the top of the outer ring. Tap anticlockwise once: the ball stops on a bar on the left of the outer ring. Tap clockwise once: it drops inwards onto the short bar just left of the centre hole. Tap anticlockwise once: it rolls down to a bar at the bottom of the outer ring.
- Tap clockwise three times, one tap at a time. After the first tap the ball stops on a bar on the left of the outer ring. After the second it drops onto a bar just left of the centre hole. The third tap drops it into the centre hole.
Bomb: The Gear Tokens
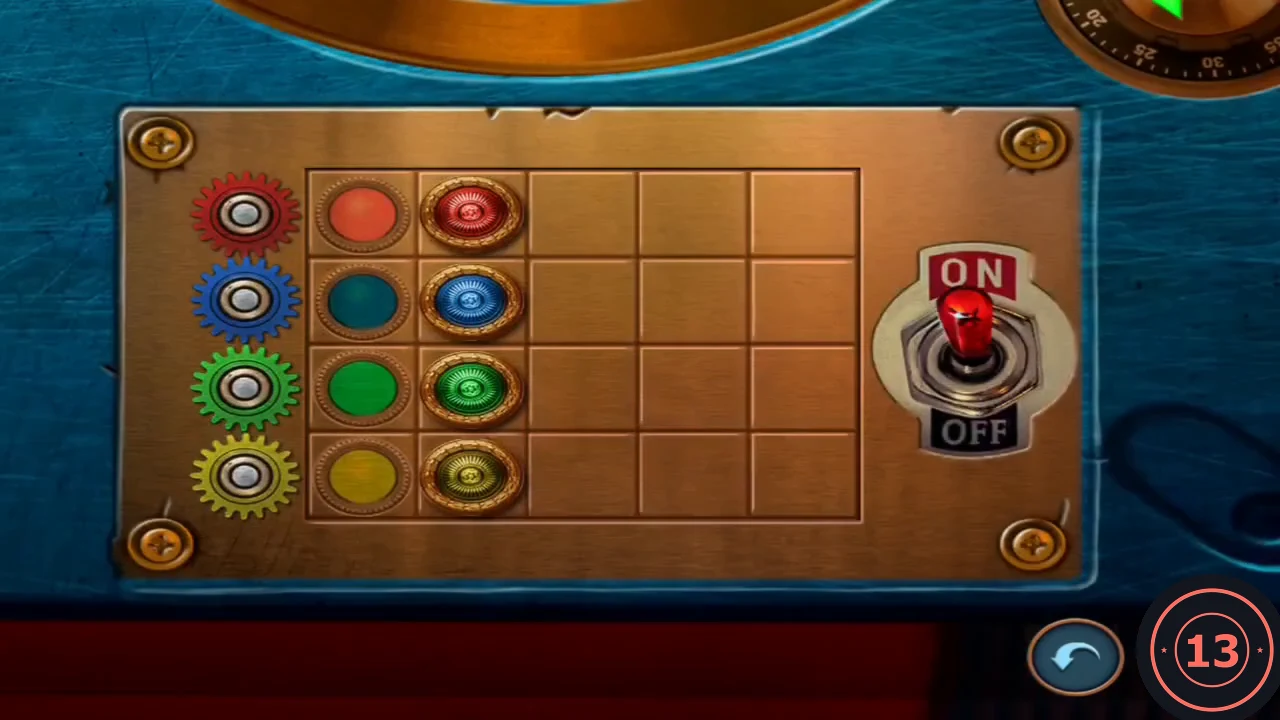
Move each token onto the coloured circle right beside the gear of the same colour. The gears are red, blue, green and yellow from top to bottom, one per row. Tapping a gear shows its track and moves every token on that track one square clockwise. The red track loops round the first three columns of rows 1 to 3. The blue track loops round the first three columns of rows 3 and 4. The green track loops round columns 2 to 4 of all four rows. The yellow track loops round all five columns of rows 3 and 4. The ON/OFF switch stays on; the recorded solution never touched it.
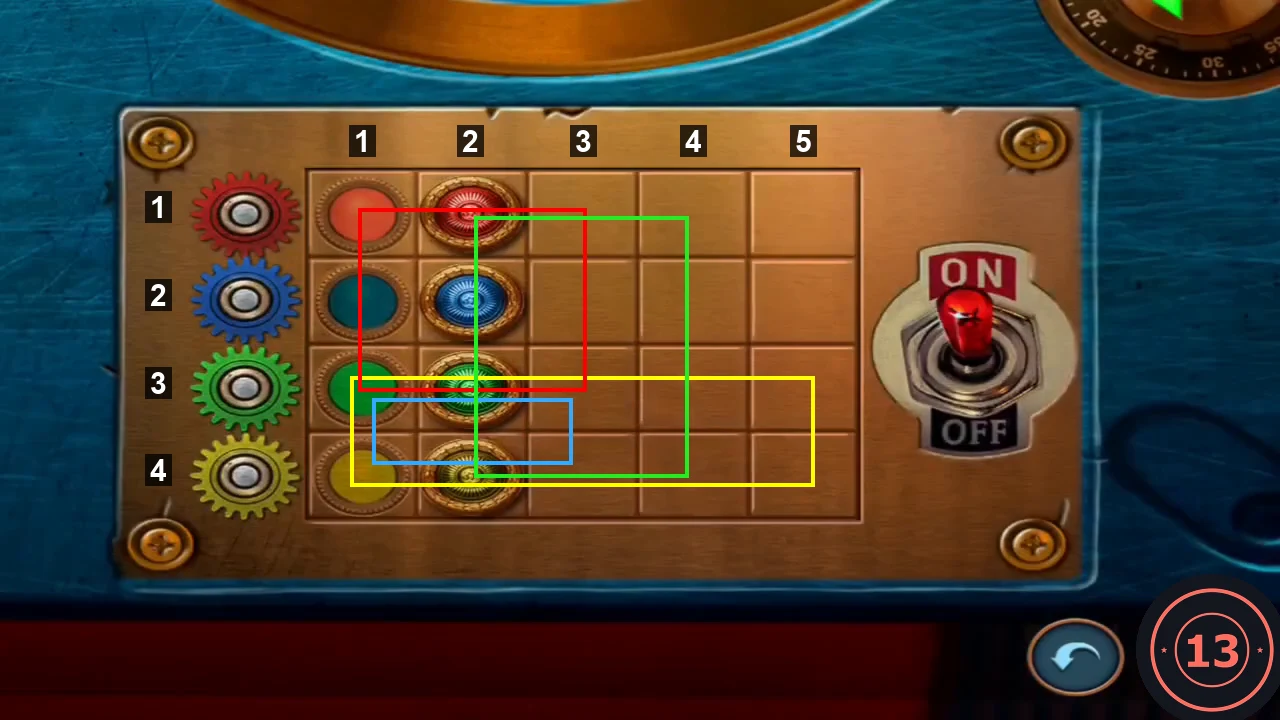
- All four tokens start in the second column, beside their own coloured circles. Tap the blue gear once, the green gear once, then the red gear six times. The red, blue and yellow tokens now sit on their circles.
- Tap the yellow gear three times (this moves the yellow token off its circle), the green gear once, the yellow gear once, the green gear five times and the yellow gear twice. The green token is now on its circle and the yellow token is in row 2, column 2.
- Tap the green gear three times, the yellow gear twice (this moves the green token off its circle for now), the green gear once, the yellow gear once and the green gear three times. The green and yellow tokens are now side by side in the bottom row. Tap the blue gear twice: the green token returns to its circle and the yellow token reaches its own.
Bomb: Cutting the Wires
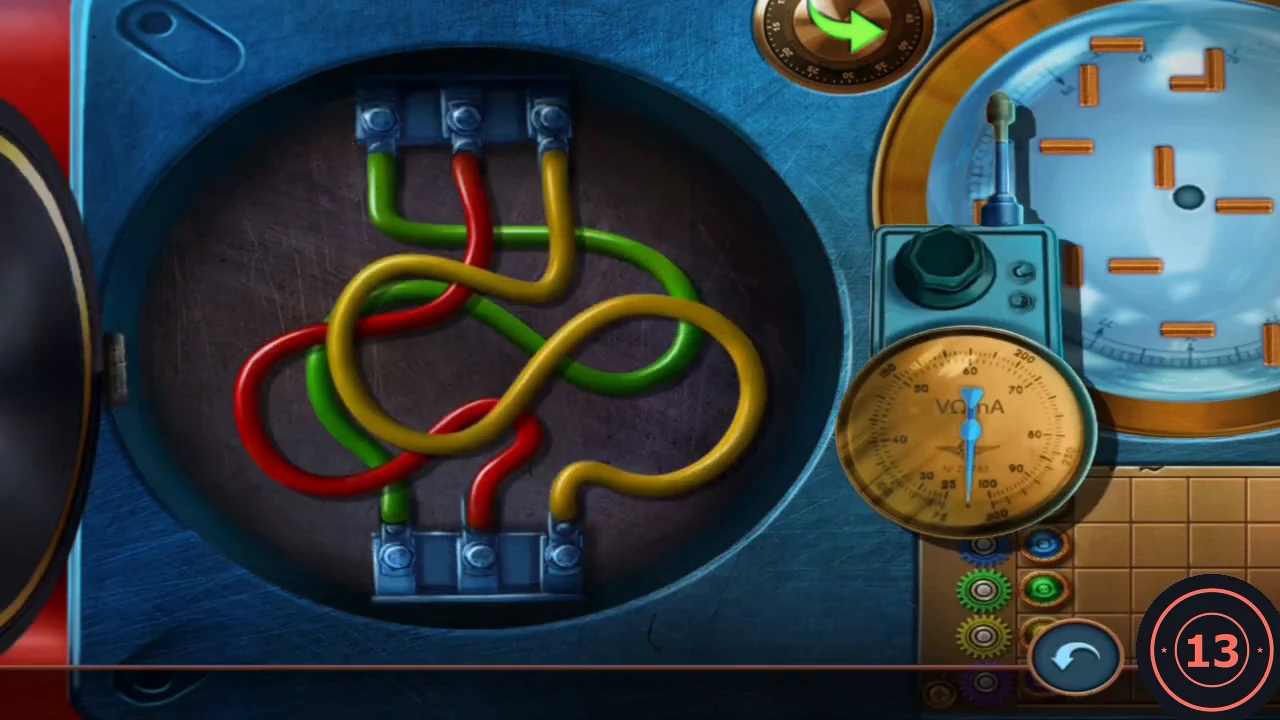
Measure the voltage of each wire, then cut them from highest to lowest.
- Check each wire on the voltmeter and cut the highest first. In the recorded game the order was red, then yellow, then green.
The Real Plague Doctor
The bomb is defused.
- Watch the ending. The police cordon off the area and arrest Cameron as the real Plague Doctor, along with Alice. Cameron swears revenge, and the officer thanks you.
Achievements
These are the 22 achievements that unlocked during the recorded playthrough, with what each one asks. Most come naturally from the story; the speed and no-skip achievements are the ones you can miss. The game's full achievements list was not shown, so there may be others.
- Hidden-object speed: in any hidden-object scene, find objects in quick succession for Perfect Eye (several objects within 3 seconds) and Just Did It (within 5 seconds), and finish a whole scene within one minute for Walk in the Park. All three can unlock in the first scene at the crime scene.
- Hints and totals: complete three hidden-object scenes without using any hints for Iconic Reporter. It's All Connected unlocks after you have found 100 objects in total (in the recording, during the shed key search).
- Mini-games: solve a mini-game within one minute for Cracking Cases (the potion puzzle is a good chance). Never press Skip: Keen Mind unlocks after five mini-games without skipping and Sharp and Gleaming Eyes after ten.
- Story achievements, Parts 1 to 3: Accurate Throw (protect Melinda with the vase), In the Villain's Shoes (put on the plague doctor's mask and gloves at the sewer gas valve), Burning Injustice (learn the story of the fire on Garden Street from the investigation board), Blasted Birds (scare the crows away with the bike horn), Caught the Wrong Guy (get arrested), Justice was Served (escape from prison) and Undercover Work (put on the police uniform).
- Story achievements, Parts 4 to 7: Risky Task (shoot the wardrobe lock), Strong Protection (use the umbrella at the steaming doorway), The Last Hero (set Liam free), Aspiring Doctor (calm Meredith down), Traveler’s Fate (unpack the suitcase in Alice’s apartment), Art Enthusiast (enter the festival) and Die-Hard Fan (get into the actors' trailer).
Stone Tokens and Newspaper Clippings
The adventure has two collectible sets: 45 stone tokens and 10 newspaper clippings. A popup with the new total appears each time you pick one up. Story notes also pop up along the way, but they have no counter and the walkthrough already covers them. The recorded playthrough ended with only 23 of 45 tokens and 2 of 10 clippings, so this list is incomplete. It lists all 13 token pickups and both clippings in the recording. The number in brackets is the counter shown after each pickup, so some numbers are skipped.
- Part 1: a stone token (counter 3/45) is inside the red car trunk on the crime scene street. A stone token (counter 5/45) is at the base of the water tap in the alley by the newspaper box.
- Part 2: a stone token (counter 7/45) is in the basement desk drawer you pull open with the corkscrew. A stone token (counter 8/45) is under the sewer floor grate after you put out the fire. A stone token (counter 9/45) is under the shed floorboard in the judge's garage yard.
- Part 3: in the prison cell, move the loose floor stone to find newspaper clipping 1/10. A stone token (counter 11/45) is in the top-right corner of the same floor-hole close-up. A stone token (counter 12/45) is at the base of the shop counter beside the bulldog in the clothes shop.
- Part 4: a stone token (counter 14/45) is in the upper-right cubby of the judge's roll-top desk once the fire is out. A stone token (counter 16/45) is on the left shelves outside the construction company.
- Part 5: a stone token (counter 18/45) is in the stable courtyard fountain. Newspaper clipping 2/10 is on the wall of Liam's office, next to his cell. A stone token (counter 19/45) is beside the plant on Meredith's dresser.
- Parts 6 and 7: a stone token (counter 21/45) is in Alice's green wardrobe. A stone token (counter 23/45) is on the map stand on Oak Street.