The Office Keyhole
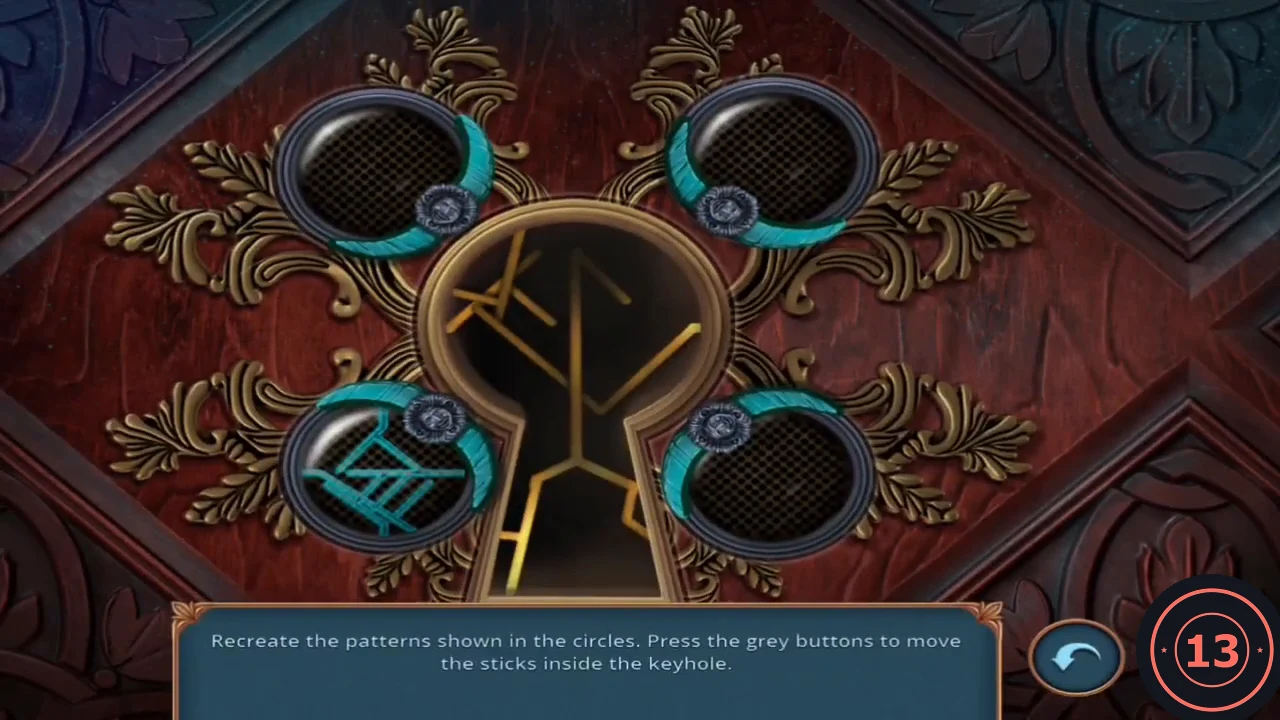
The office key will not turn: something blocks the lock from inside. Recreate the patterns shown in the circles by pressing the grey buttons to move the sticks inside the keyhole.
- Use the office key on the office door and look through the keyhole.
- Work through the four patterns one at a time. Each grey button moves its own stick; press them until the sticks match the pattern in the highlighted circle, then move on to the next circle.
- Watch the cutscene. You are framed for the murder, arrested and earn Caught the Wrong Guy.
The Prison Cell
Your belongings were taken. Retrieve them and find a way through the cell door.
- Open the corridor view beyond the bars, hook the bag with the umbrella and pull it closer. Take the bag: inside are the lockpick piece (1/2), the newspaper, the glove, the thick book and the spoon.
- Open the basin. Take the red flag, then scoop out the broken chisel and the brush with the spoon.
- Move the floor stone and take the newspaper clipping (1/10). Brush away the dirt and take the handle. Take the stone token in the top-right corner of the same close-up.
- Fit the handle to the broken chisel. Open the wall crack close-up and take the scissor jack frame lying there, then use the chisel and the thick book as a hammer on the crack and take the second lockpick piece (2/2).
- Use the lockpicks on the cell door plate.
The Guard's Desk
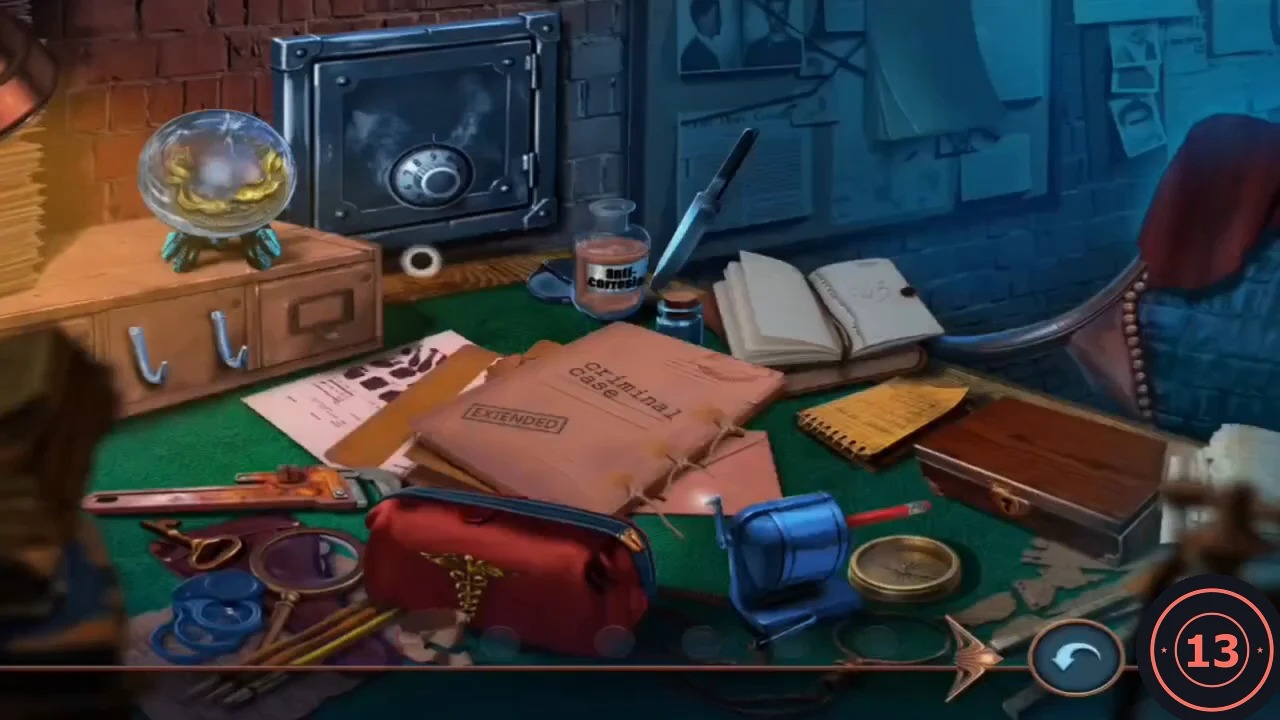
An interactive hidden-object scene: some objects must be uncovered or opened first.
- Tap the outlined objects as you spot them. Open the wooden box on the right and take the gavel, then smash the glass dome on the left and take the gold handle. Fit the handle on the small drawer below the dome, open it and take the cloth. Wrap the cloth around the bare blade stuck beside the anti-corrosion jar and pull it out. Cut the string on the Criminal Case folder, read the file naming you as the suspect and take its paperclip.
- The notepad's top page was torn out, but the numbers left an imprint. Hook the paperclip onto the red bag's zipper, open it and take the dropper. Fill the dropper from the anti-corrosion jar, drip it on the rusty pipe wrench and take the wrench. Fit the wrench on the blue pencil sharpener as a crank, sharpen and take the pencil, then rub the notepad to reveal 543.
- Enter the code 543 on the safe dial to open it and take the file.CODE543
- Saw through the window bars with the file and escape to the street. This earns Justice was Served.
The Police Station Street
You are outside the police station beside a clothes shop.
- Open the mailbox by the police door. Read the police notice, take the seashell and the note. Raise the mailbox flag with the red flag, take the malachite casket and open it to get the mechanical beetle.
- The shutter padlock needs a corrosive liquid; return later. Take the metal rod lying on the manhole cover, then open the manhole and let the beetle unscrew the bolts. Take the small clasp; the wired object needs something sharp.
- At the clothes shop door, slide the newspaper under the door and push the key out with the small clasp. Pull the newspaper back, take the key and open the door.
The Clothes Shop
A bulldog guards the shop. Gather what you can while it is awake.
- Take the stone token at the base of the counter and the torn recipe by the dog. The dog needs special food to fall asleep; the green carved cabinet needs its chains connected.
- At the mannequin, take the coiled hose lying on top of the spiked box. Then open the spiked box, cover the spikes with the glove and take the crank handle and the star emblem.
- Open the scissor jack frame in inventory, screw the metal rod into the frame and attach the crank handle to complete the car jack.
- Open the dumbwaiter alcove and take the meat from the plate. Prop the grate with the car jack and take the flashlight.
The Dark Cabinet
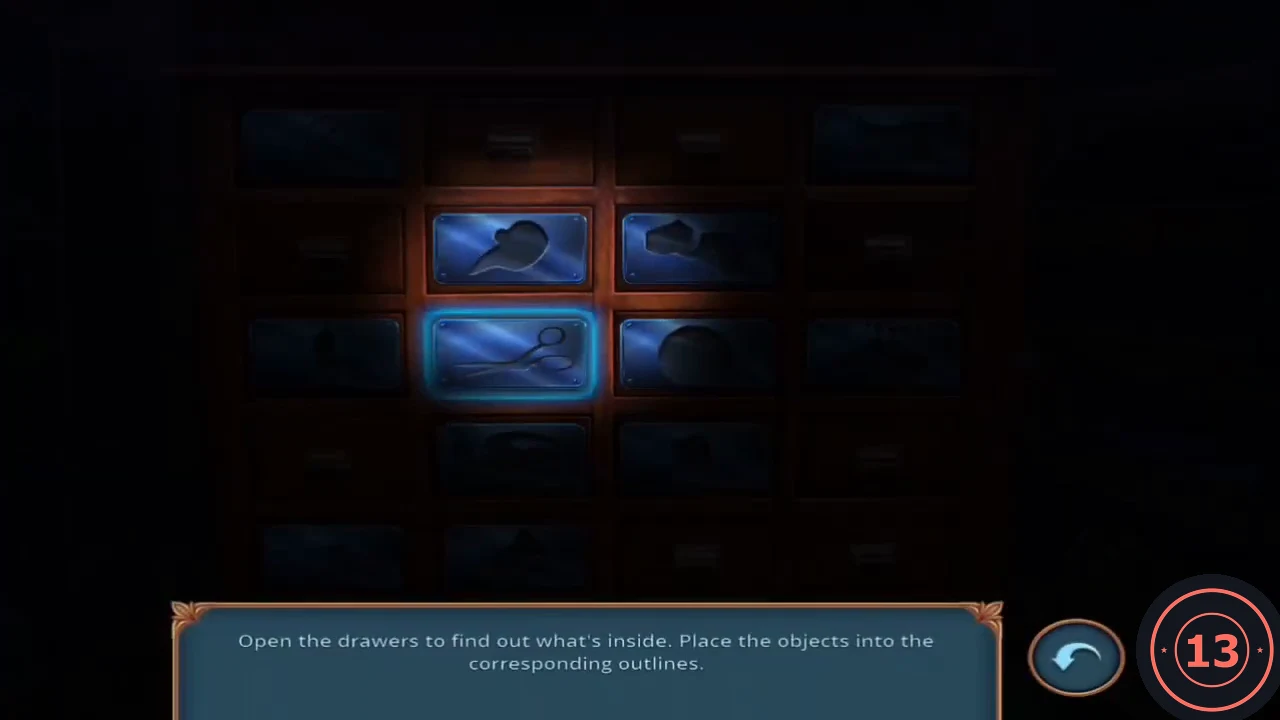
Use the flashlight on the dark cabinet. Only the lit area is visible.
- Shine the flashlight on the dark cabinet to open the drawer search.
- The cabinet has 4 columns and 5 rows. Plain drawers with handles sit in the middle two places of the top row, at both ends of rows 2 and 4, and at the two right-hand places of the bottom row. Every other front is a glass panel with a silhouette. Top row: a long thin crossed shape (left) and a sewing machine (right). Row 2: a beaked plague-doctor mask (second) and an angular shape (third). Row 3: a small figure, scissors, a ball of yarn and a spiky pincushion. Row 4: a curved tailor's ruler (second) and a small bottle (third). Row 5: two silhouettes on the left. Sweep the light across the grid, open each handled drawer and drag its object onto the panel with the same shape. A wrong panel only says "That wasn't right". Each correct drop opens that panel and shows another object to place, so check every panel you fill. In the recording, the object in the right-hand drawer of row 4 went into the top-left panel first.
- The last object is the beaked plague-doctor mask, revealed behind the curved-ruler panel in row 4. Drop it on the mask silhouette (row 2, second place). That panel opens on the corrosive vial; take it. Sharp and Gleaming Eyes can unlock here.
Undercover
Disguise yourself as a constable to slip back to the judge's mansion.
- Pour the corrosive liquid on the police shutter padlock. Read Melinda's note on the clipboard and take the police uniform.
- Put on the uniform to earn Undercover Work and walk past the guard to the judge's mansion garden.
The Mansion Garden
The front door is locked. Search the garden and the street drain.
- Open the planter by the gate and take the star emblem. Dig with the seashell and take the small rake.
- At the pond, take the cork from the rocks. The object floating in the water is out of reach for now. Rake away the moss on the rock and take the sharp tool.
- Return to the street manhole. Cut the wires with the sharp tool and take the mortar together with its pestle.
- Attach the hose to the fire hydrant to flood the drain. Take the star emblem from the floating board.
The Police Car Trunk
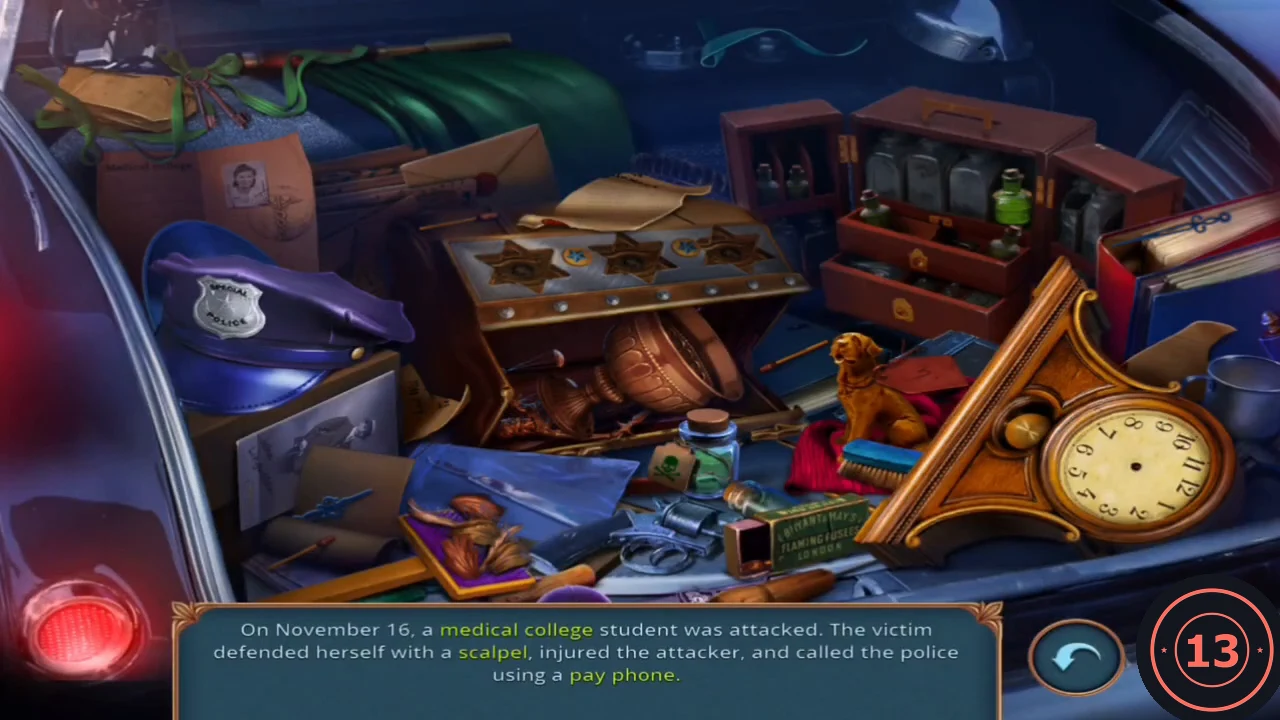
Open the police car trunk latch and place the three star emblems on the chest. Each story card has highlighted keywords; find or complete the matching object for each.
- Open the trunk latch and place the three star emblems in the chest recesses.
- Card 1 (medical college, scalpel, pay phone): pour the green developer into the tray, add the film plates and click the college tower and the phone booth in the developed photos; find the scalpel.
- Card 2 (Tibetan mastiff, cups, fur): find the dog statue and the cup, then brush the fur off in the close-up.
- Card 3 (quarter past ten, poison, will): set the clock to 10:15, find the poison bottle and join the two halves of the torn will.CODE10:15
- Card 4 (John Linguiston, letters, burn): find the name and the letters, then gather the scattered matches into the matchbox. Take the handcuffs from the opened chest.
Putting the Dog to Sleep
Use the recipe to make a sleeping treat for the bulldog.
- In the clothes shop, connect the chains of the green cabinet with the handcuffs. Take the blue pencil and the blue pills.
- Follow the Soporific Recipe: crush the pills in the mortar with the pestle and put the powder in the meat to make a sleeping sausage.
- Feed the sausage to the bulldog. When it falls asleep, take the roll of red tape by its bed.
The Garden Gate Levers
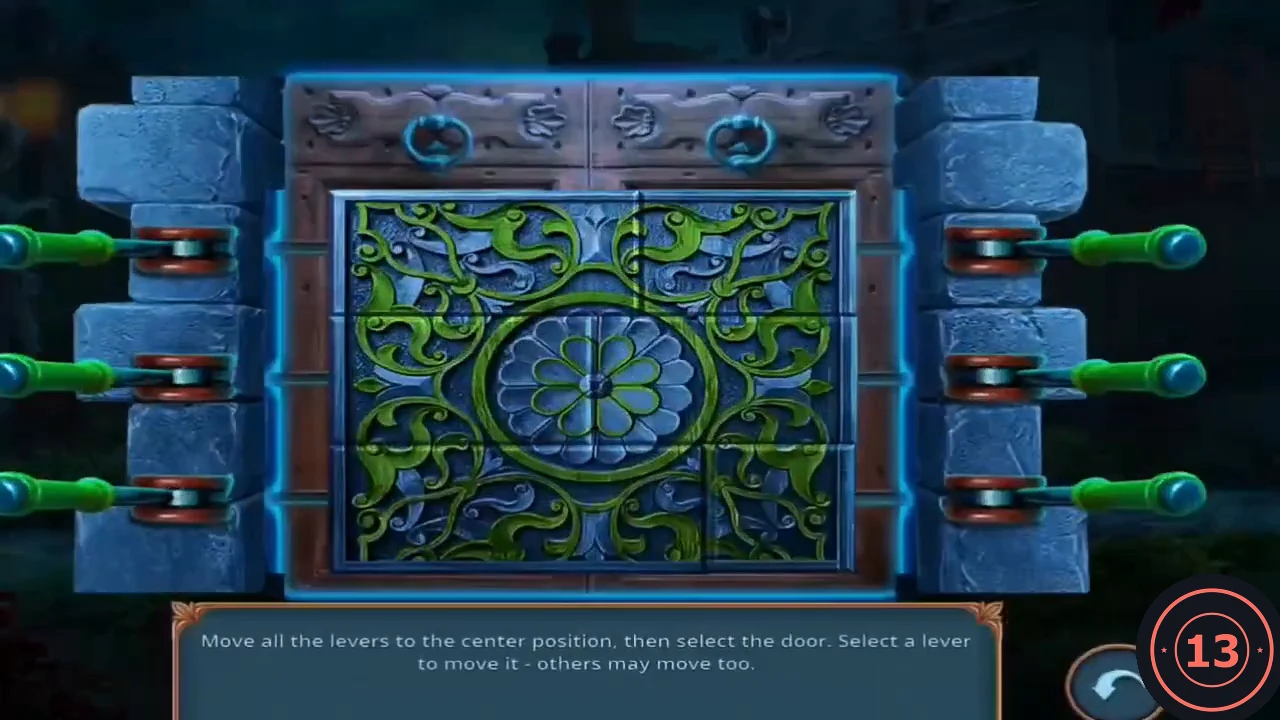
Seal the leaking pipe at the mansion gate to reach the lever lock. Move all six levers to the centre, then select the door. Moving one lever may also move others.
- Wrap the red tape around the leaking green pipe at the mansion gate.
- In the recorded game every lever started fully out, and clicking each lever once (left top, left middle, left bottom, right middle, right top, right bottom) centred them all. If a lever moves past the centre, keep clicking until all six sit in the middle, then click the door.
The Office in Smoke
Climb into the judge's office and find what the safe is hiding.
- Inside the open gateway, take the ladder and the wooden fist. Set the ladder on the ledge under the red fire escape and climb into the office. Cameron sets the room on fire and escapes.
- Once the smoke clears, read the letter to Liam. At the globe, lift off the green net draped over it and take the scalpel. The globe's spindle tip is too sharp to touch: cover it with the cork from the pond, open the globe and take the tracing paper. Note the empty gavel-shaped recess inside the globe.
- Place the tracing paper on the etched runes of the glass cabinet and rub it with the pencil to copy the rune code.
The Wall Safe Dial
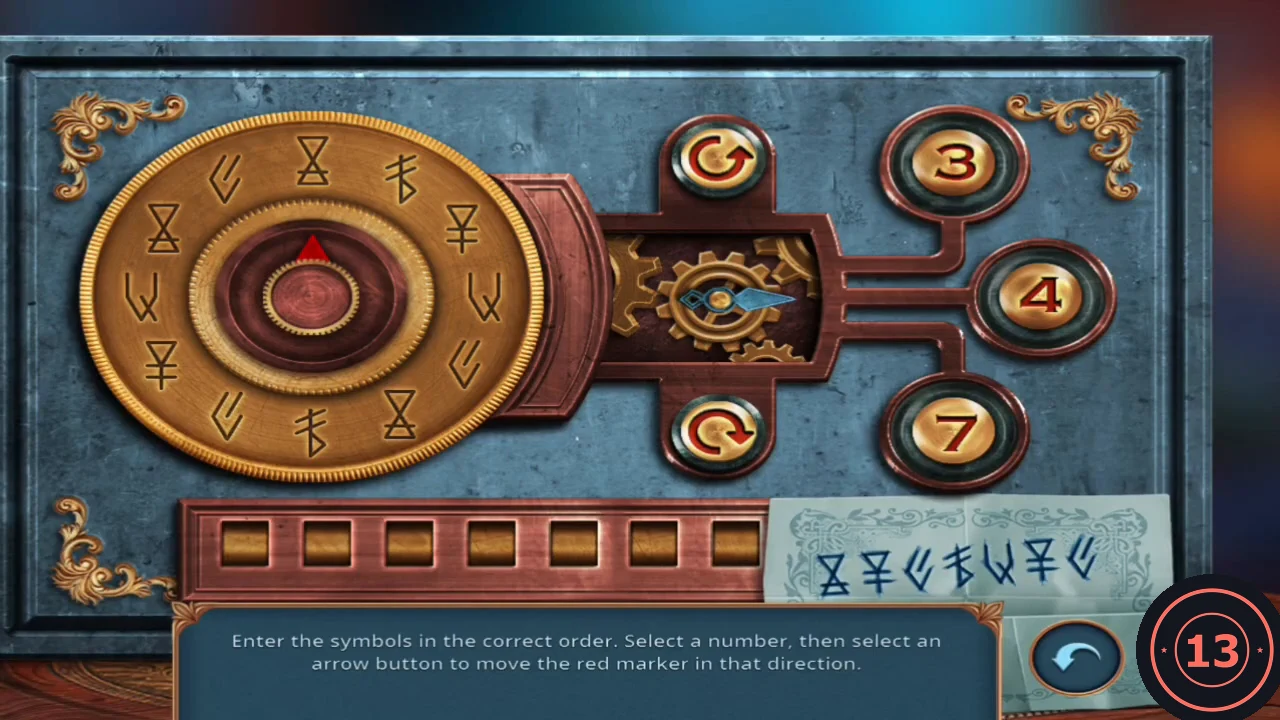
The wall safe has a dial of twelve symbols, number buttons 3, 4 and 7, and two rotation arrows. Enter the seven symbols from your rune rubbing in order.
- Enter the symbols in this order: hourglass, Y-rune, curved-check rune, crossed-f rune, W-rune, Y-rune, curved-check rune. Use the number buttons to set the step size and the arrows to turn the dial onto each symbol.
- Take the revolver from the safe.