Helping Melinda
Melinda is hurt in the basement hideout. Treat her first.
- Open the bookcase and take the Pharmacie book. Open it, collect the coins from the medicine box and take the ammonia. Note the empty marks on the top shelf for later.
- Open the desk close-up. Twist the corkscrew from the alley basket into the front of the desk drawer and pull it open. Take the stone token, the satchel and the cartridge. Open the satchel pouch and take the bandage; its main lock needs a bat-shaped emblem.
- Use the bandage and the ammonia on Melinda. She gives you the valve.
Raising the Water
Use the street tap to fill the canister and put out the fire in the sewer.
- In the alley, fit the valve to the water tap, place the red canister below and turn the tap to fill it.
- In the sewer, pour the water over the burning floor grate. Take the revolver frame, the first bat-wing emblem piece (1/3), the green screwdriver and the stone token.
- In the basement, unscrew the four screws of the wall vent with the screwdriver. Take the rope and the red journal.
- Open the red journal in inventory. Its clasp is missing a piece: add the lock part from the sewer barrel to open it, read the note and take the quill. At the desk, move the green cloths aside, place the notepad on the cleared desk, then use the quill on the ink pot to draw the symbol clue on the notepad.
The Symbol Box
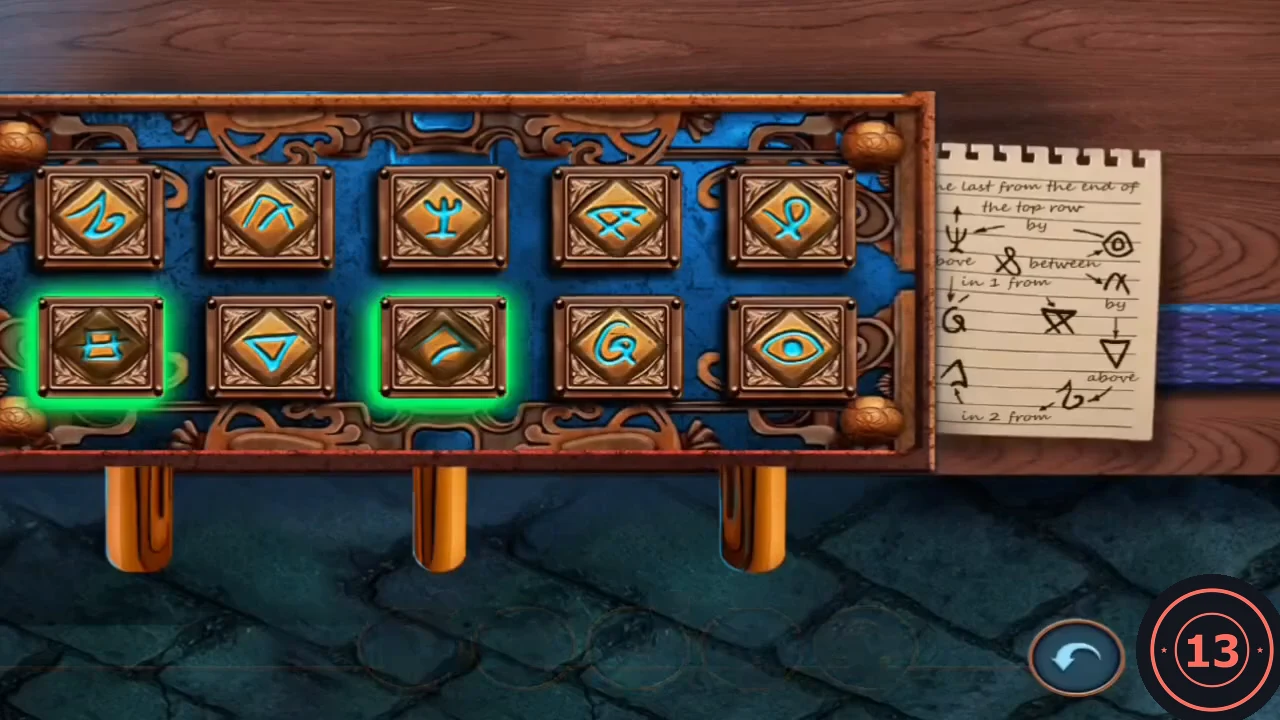
Open the wooden box on the alley street. Its two rows of symbols must match the clue you revealed at the desk.
- Arrange the top row as trident, eye, figure-eight loop, arch with a tail and downward triangle. Arrange the bottom row as double-bar box, spiral G, peak, star cross and hook squiggle.
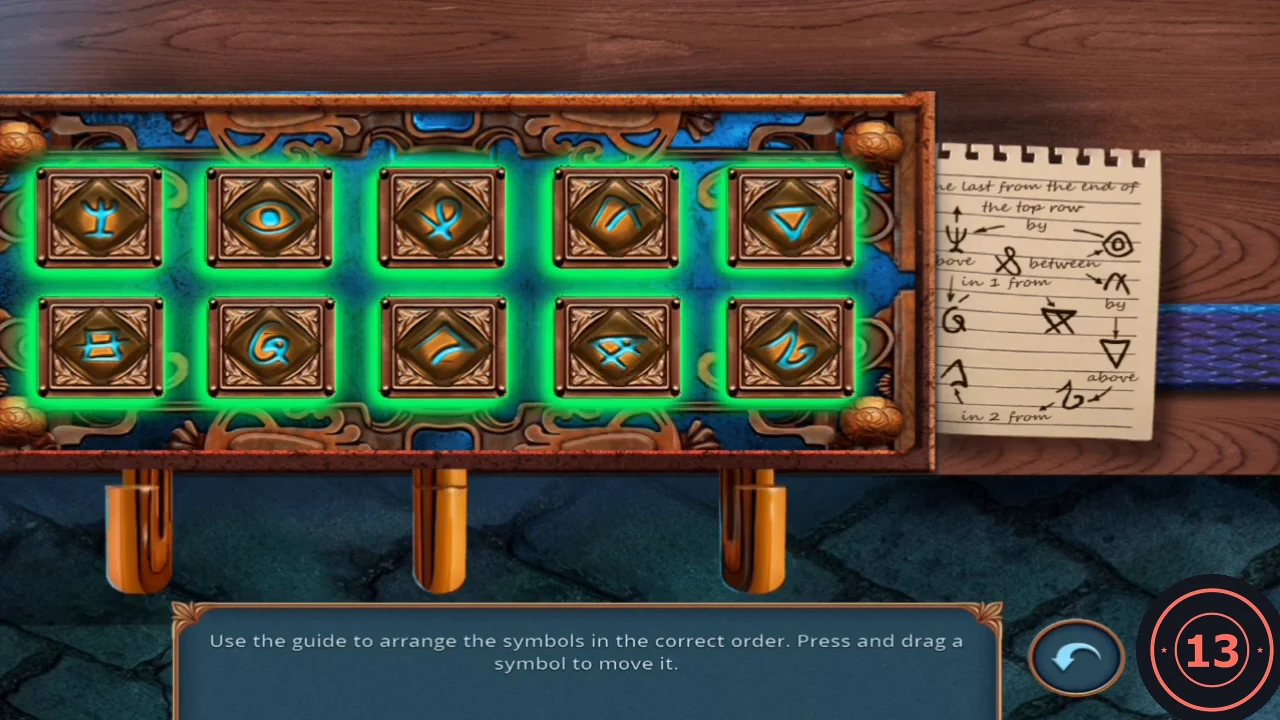
Solved: all ten symbols glow green. - Take the winged green tool and the second bat-wing emblem piece (2/3).
The Revolver
Assemble a revolver to bring down the hanging cage in the sewer.
- At the post in the alley, clear the leaves from the hanging basket with the winged tool. Take the bow saw and the revolver cylinder.
- Open the revolver frame in inventory, add the cylinder and load the cartridge.
- In the sewer, shoot the chain of the hanging cage. Take the wrench and the third bat-wing emblem piece (3/3) from the fallen cage.
The Hidden Board
Back in the basement, open the satchel and reveal what is behind the bookcase.
- Place the bat emblem on the satchel lock and take the plague doctor figurine.
- Stand the figurine on the marks on the top shelf of the bookcase. The bookcase slides away to reveal an investigation board.
The Investigation Board
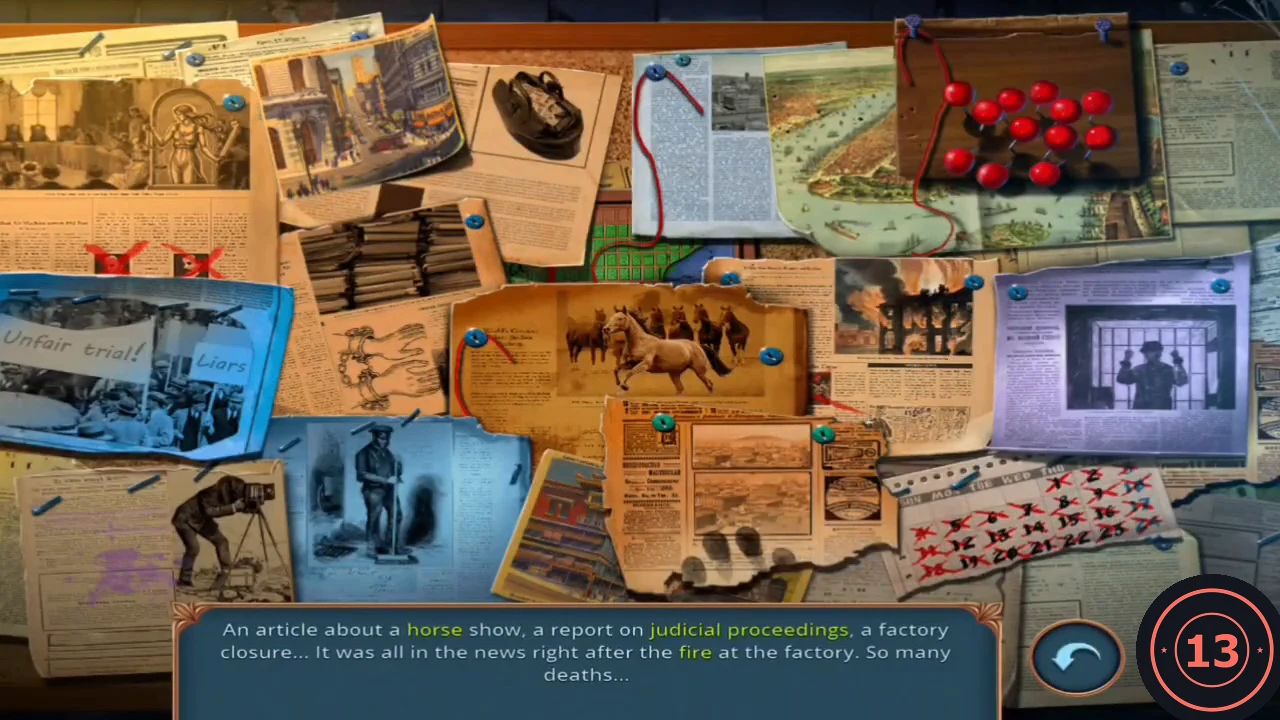
Each newspaper caption has highlighted keywords. Pin the picture that matches each keyword.
- Take red pins from the box at the top right and pin the matching pictures for every highlighted keyword: horse, judicial proceedings and fire; month, folders and handcuffs; demonstrations, paid off and paparazzi; fingerprint, prison and janitor.
- Look at the city map: Garden Street and Diamond Street are circled. Melinda asks you to check on Judge Russell, and the Burning Injustice achievement unlocks.
Judge Russell's Courtyard
The killer is already here. Find a way past the fallen column and the cart.
- Open the fallen column by the winch and take the bronze bust. Tie the rope around the column and turn the winch, then take the cart wheel.
- Open the cart and take the scissors. Put the wheel on the axle and tighten it with the wrench. The cart rolls away and opens the path to the garage yard.
The Garage Yard
Search the yard and the shed for the parts of the Lady Justice statue.
- Take the duster near the tree. Saw through the fallen branches with the bow saw and take the wedge.
- Open the shed floor. Take the diamond ring and the stone token. Hammer the wedge into the floorboard seam using the bronze bust, then take the glue and the scale pans.
Lady Justice's Scales
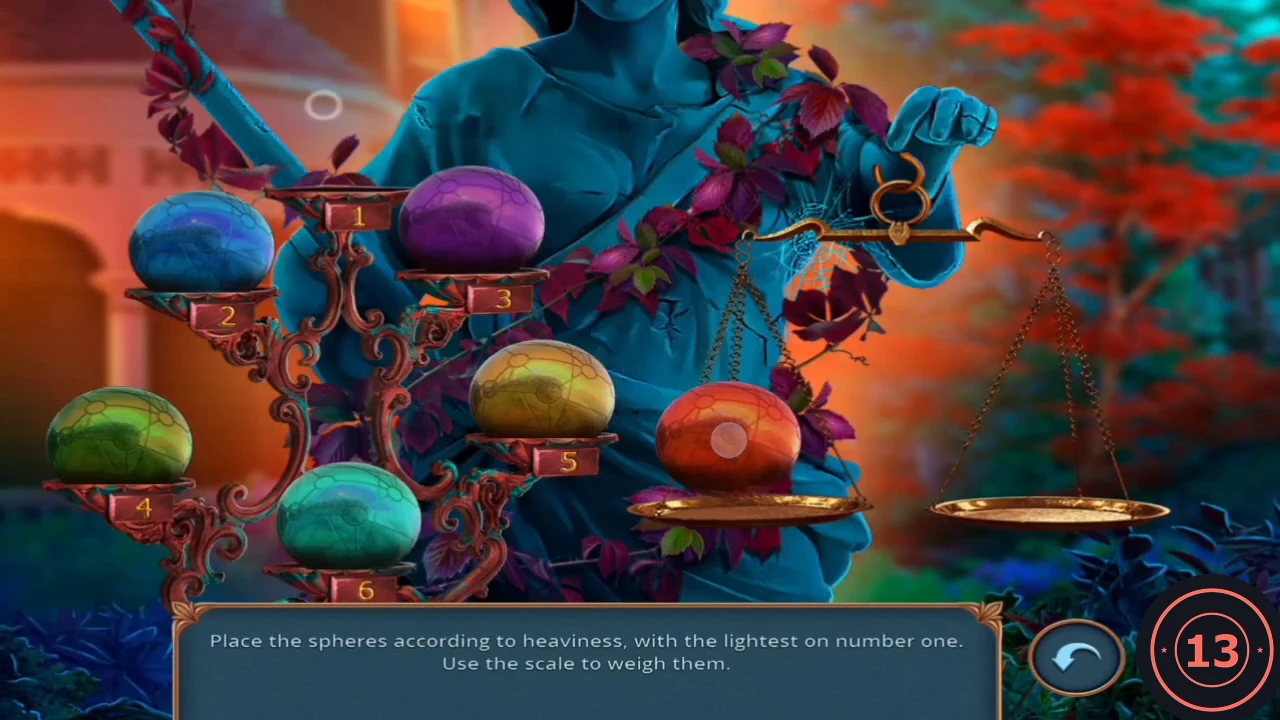
Place the scale pans on the statue in the courtyard to start a weighing puzzle: order six spheres by weight, lightest in slot one.
- Place the scale pans on the Lady Justice statue.
- Put two spheres on the scale at a time and note which is heavier, then fill the slots from lightest (1) to heaviest (6). In the recorded game the correct order was teal, orange-red, green, yellow, purple, blue. If your result differs, trust the scale.
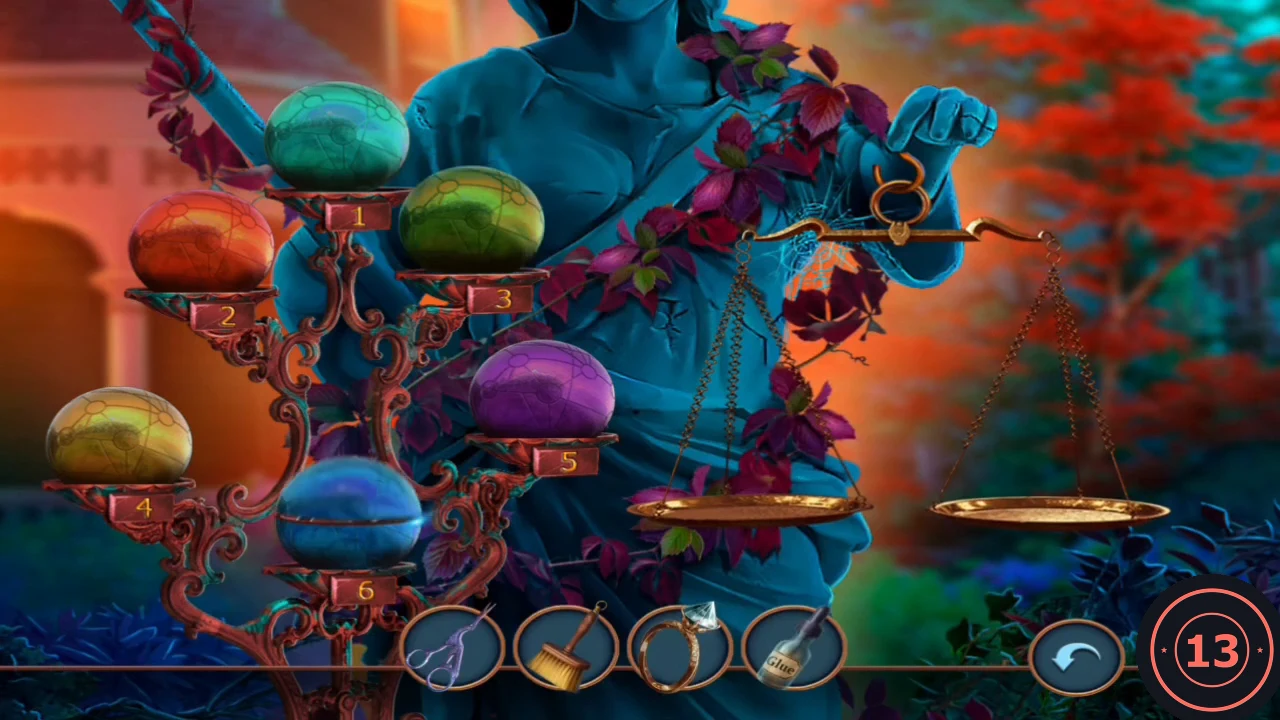
The recorded game's correct order (an example; weigh your own spheres). - Take the gavel amulet and place it on the house door to go inside.
The Judge's Living Room
The office is locked. Collect the amulet pieces and a way into the garage.
- Open the gift box on the shelf and take the amulet part. Cut its ribbon with the scissors and take the belt.
- Open the mantel tray and take the spoon. Sweep the ash with the duster and take the pipe. The painting swings aside to show a recess for an amulet.
- In the garage yard, remove the broken belt from the garage door mechanism, fit the new belt and add the pipe as a handle. Turn it to open the garage.
Pairs in the Garage
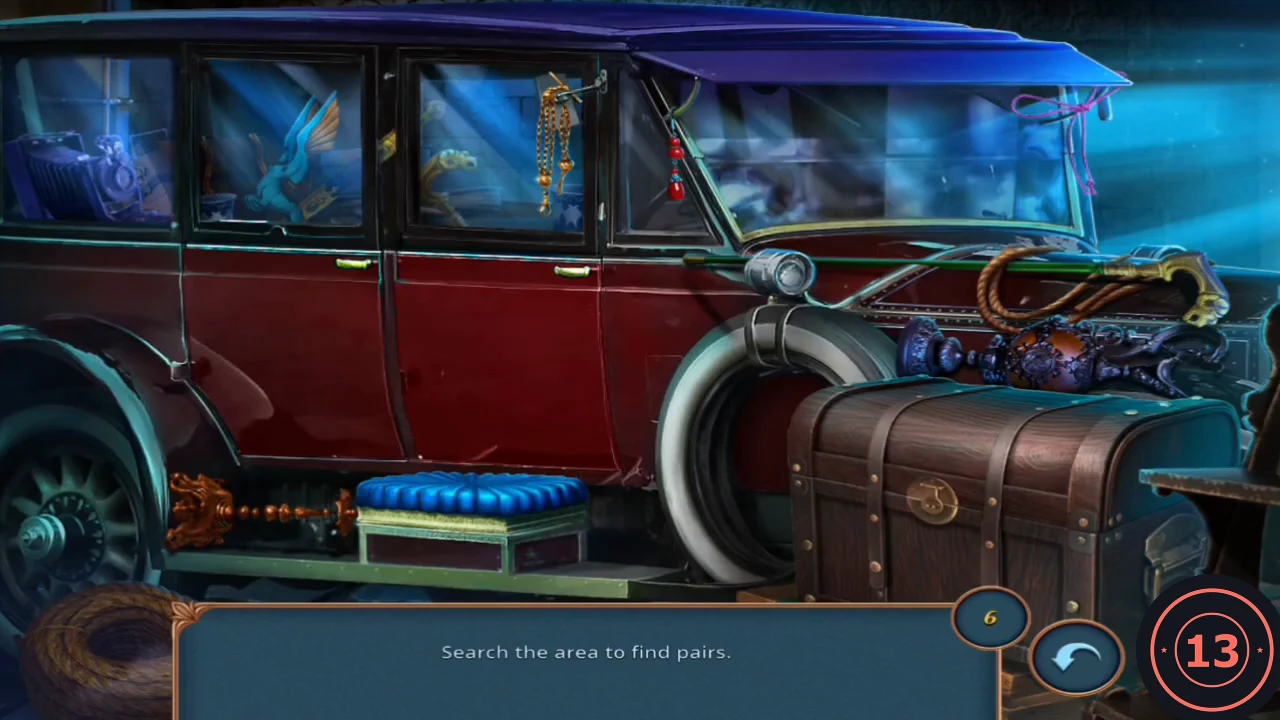
Search the car for matching pairs of objects.
- Open the hiding places first: lift the blue cushion off the box on the running board, open the front and rear car doors, and open the trunk at the back of the car.
- Tap both items of each pair (6 pairs): the green walking cane inside the front door and the gold-handled cane on the hood; the gold bowl in the running-board box and the one in the trunk; the blue-and-white vases in the rear and front door spaces; the teal winged bird figurines in the rear seat and the trunk; the purple gloves in the trunk and behind the front door; the banknote bundles on the rear seat bag and in the running-board box. Take the bike horn.
The Graduation Amulet
Assemble the amulet that opens the recess behind the painting.
- Use the bike horn on the crows on the garage yard table to earn Blasted Birds. Take the scroll amulet part and the horseshoe.
- In the living room, open the steam cloud by the fireplace. The kettle needs a handle: attach the horseshoe and lift the kettle off the stove. Take the thick book and the newspaper from the clock table, then cut the glass case with the diamond ring and take the amulet cap.
- Open an amulet part in inventory, add glue and fit the cap and the scroll to complete the graduation amulet. Place it in the recess behind the painting and take the glove and the office key.