The Crime Scene Street
Barbara sends you to photograph a new murder scene. Constable Melinda Watson meets you on the street. Your first task is to take a picture of the victim.
- Talk to Melinda Watson and open the case folder she gives you. Take the red ribbon, the map, the Case 638 note, the first lockpick piece (1/2) and the handkerchief.
- Open the flower planter beside the house steps. Lay the handkerchief over the thorns and take the firefighting emblem.
- Open the bag on the bicycle. Take the dustpan, then place the firefighting emblem on the bag lock and take the magnet and the clip.
- Open the trunk of the red car. Take the Tasks notebook and the stone token. The trunk key is broken: fix it with the clip, open the lock and take the camera.
Photographing the Victim
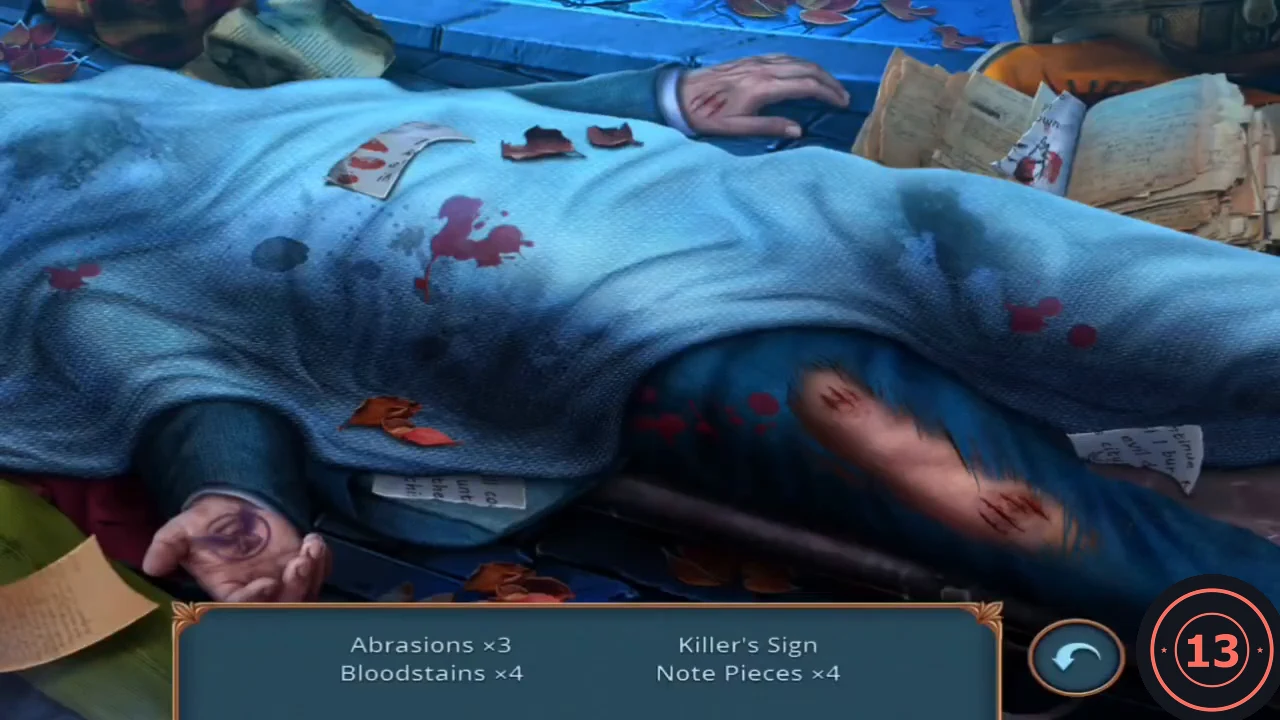
Mount the camera on the tripod beside the body to start a hidden-object scene. The list counts several objects of each type.
- Place the camera on the tripod next to the victim.
- Find 3 abrasions, 4 bloodstains, the killer's sign (the mark drawn on the palm of the victim's open hand) and 4 note pieces. The assembled note reads that the killer will keep on killing until the city is cleansed by fire.
- Take the film plates from the camera close-up to get the film, then give the film to Melinda Watson. After the captain's cutscene, enter the house.
The Victim's Parlor
Inside, Melinda asks you to find three pieces of evidence. The counter at the top left tracks your progress.
- Open the fireplace. Remove the two burnt beams and take the ornate box, then use the dustpan on the ash to find the metal ruler.
- Open the glass cabinet on the right and pry its door open with the metal ruler. Read the firefighter photograph note, take the coin and tie the loose books together with the red ribbon, then take the tied books.
- Open the sofa close-up and use the tied books to prop it up. Take the second lockpick piece (lockpicks 2/2) and the chain lying under the sofa, then take the jar of fuel, which counts as evidence 1/3.
Lockpick Puzzle: The Planter Chest
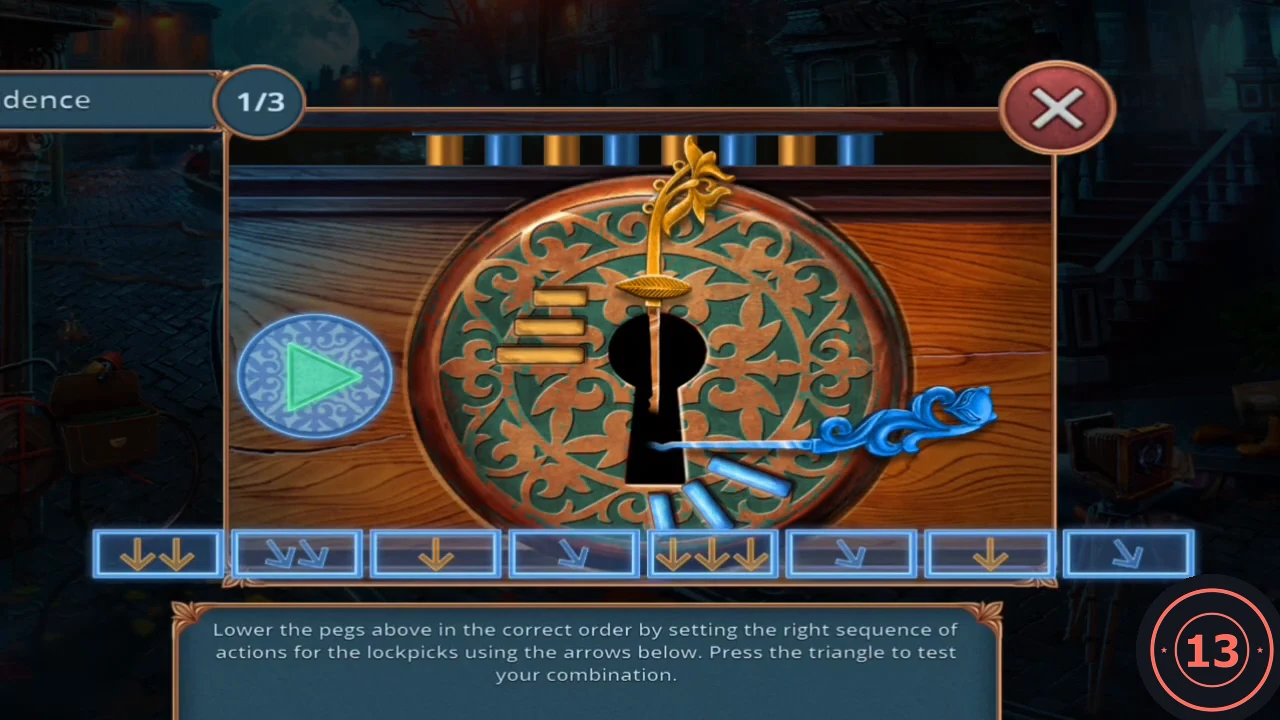
Return to the street and use the completed lockpicks on the chest by the planter.
- Place the lockpicks on the chest lock.
- The lock has eight tiles that alternate between straight-down arrows and diagonal arrows. Clicking a tile cycles its number of arrows from one to three. Set them, left to right, to: 1 down, 1 diagonal, 3 down, 2 diagonal, 1 down, 3 diagonal, 3 down, 2 diagonal.
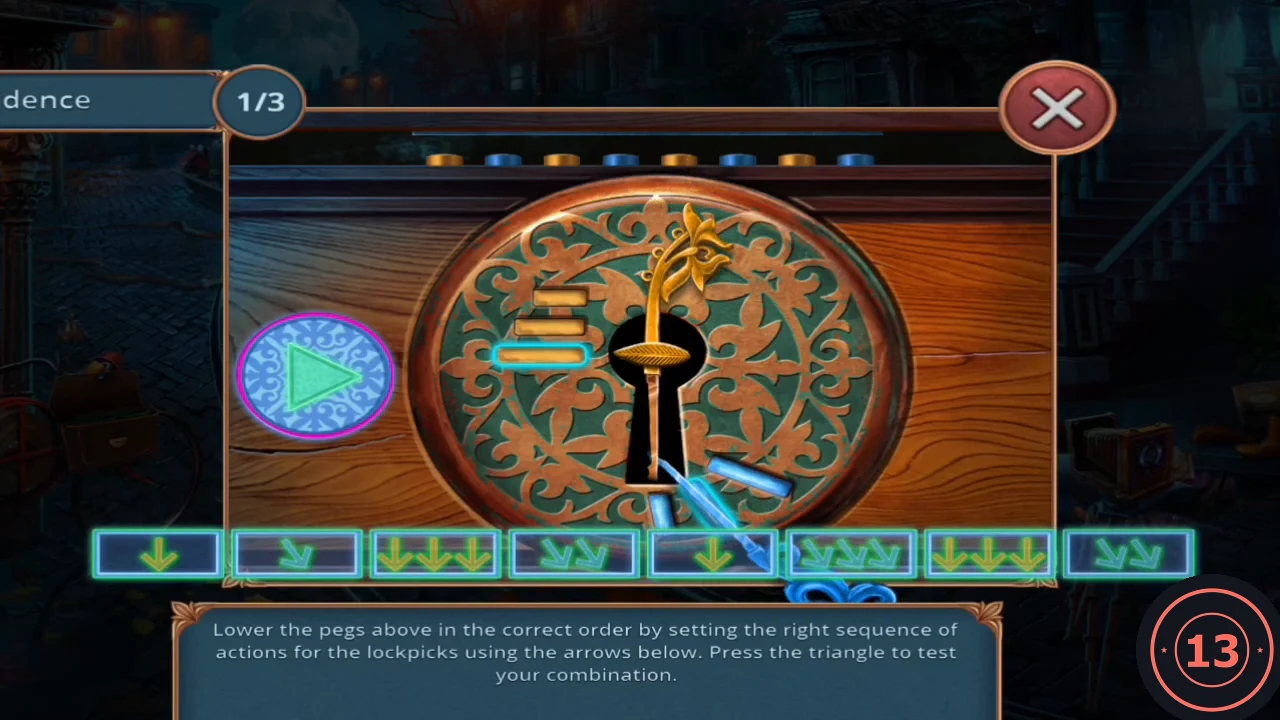
Solution: the eight tiles set as described in step 2. Press the triangle to test them. - Take the broken cutter and the ring from the chest.
The Remaining Evidence
Go back into the parlor to finish collecting the evidence.
- Click the rug to move it aside. Place the ring on the floor grate to lift it, then take the bag of money (evidence 2/3).
- Use the magnet on the narrow slit in the floor to pull out the winged amulet.
- Place the winged amulet on the ornate box. Take the lighter and the envelope (evidence 3/3).
Mixing the Potions
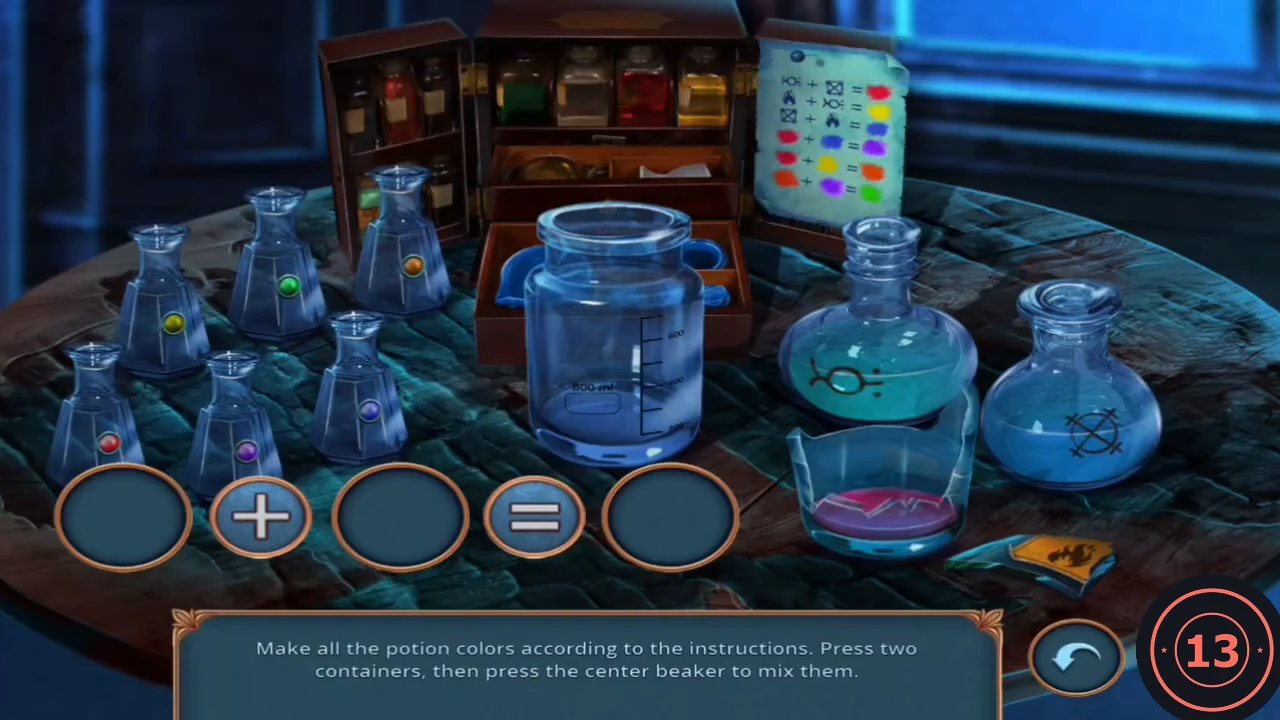
Hand the evidence to Melinda. She asks you to identify the fuel, which opens a colour-mixing puzzle.
- Give the three pieces of evidence to Melinda Watson.
- Read the recipe card at the top right. The teal flask has the first symbol, the blue flask has the crossed-box symbol, and the pink liquid in the broken beaker is the flame (its flame label lies beside it). Select two containers, then the centre beaker, to mix: teal + blue = red; flame + teal = yellow; blue + flame = blue; red + blue = purple; red + yellow = orange; orange + purple = green.
The Torn Blackmail Letter
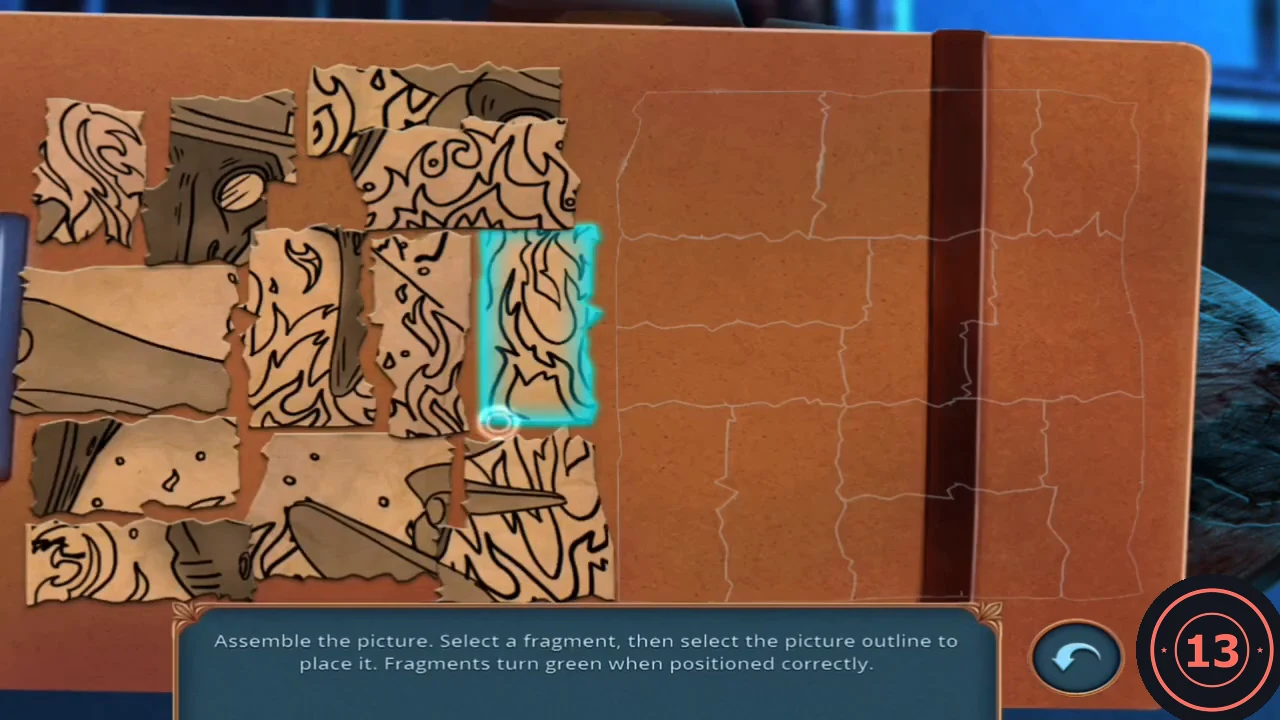
The analysis leads to a torn letter that must be reassembled.
- Drag the paper fragments into the outline until the picture is complete. Fragments turn green when correct; match the torn edges and the lines of the drawing. The finished picture shows a plague doctor mask among flames. It then changes to the killer's note: the city is soaked in corruption, and the writer will change it, starting with Mr. Sanders.
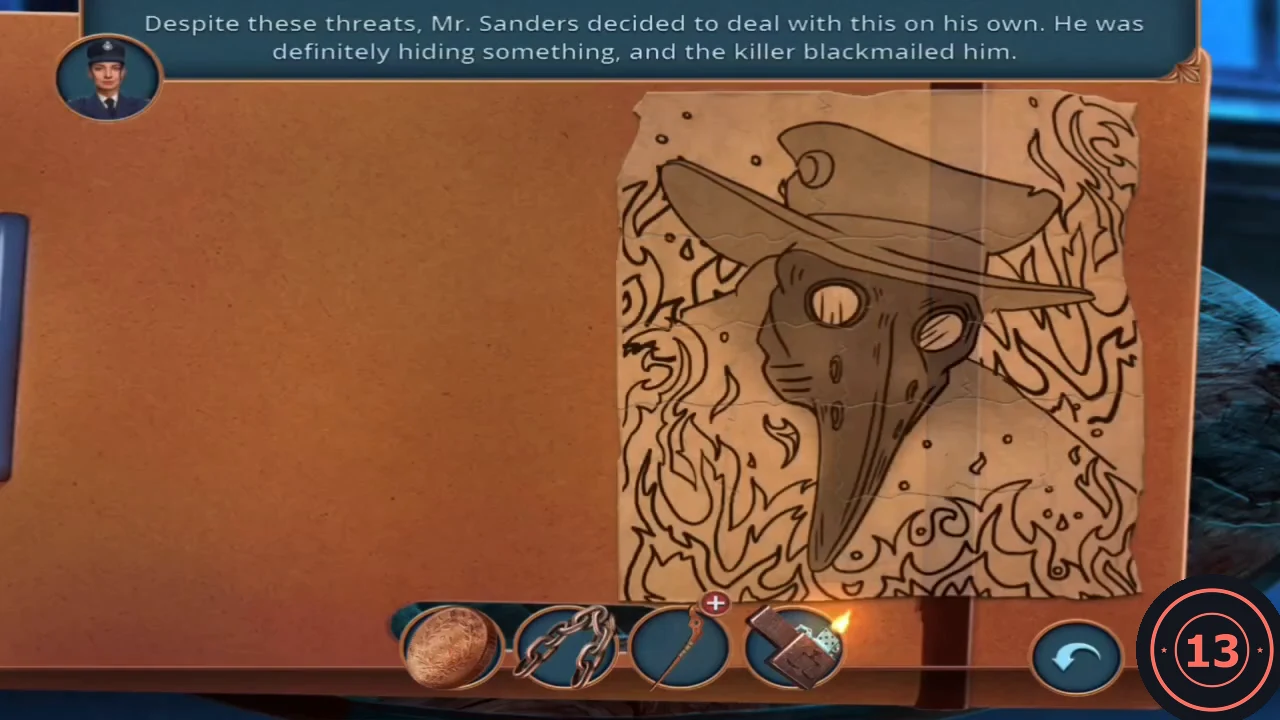
Completed: the pieces form a plague doctor mask among flames.
Spot the Differences: The Banknotes
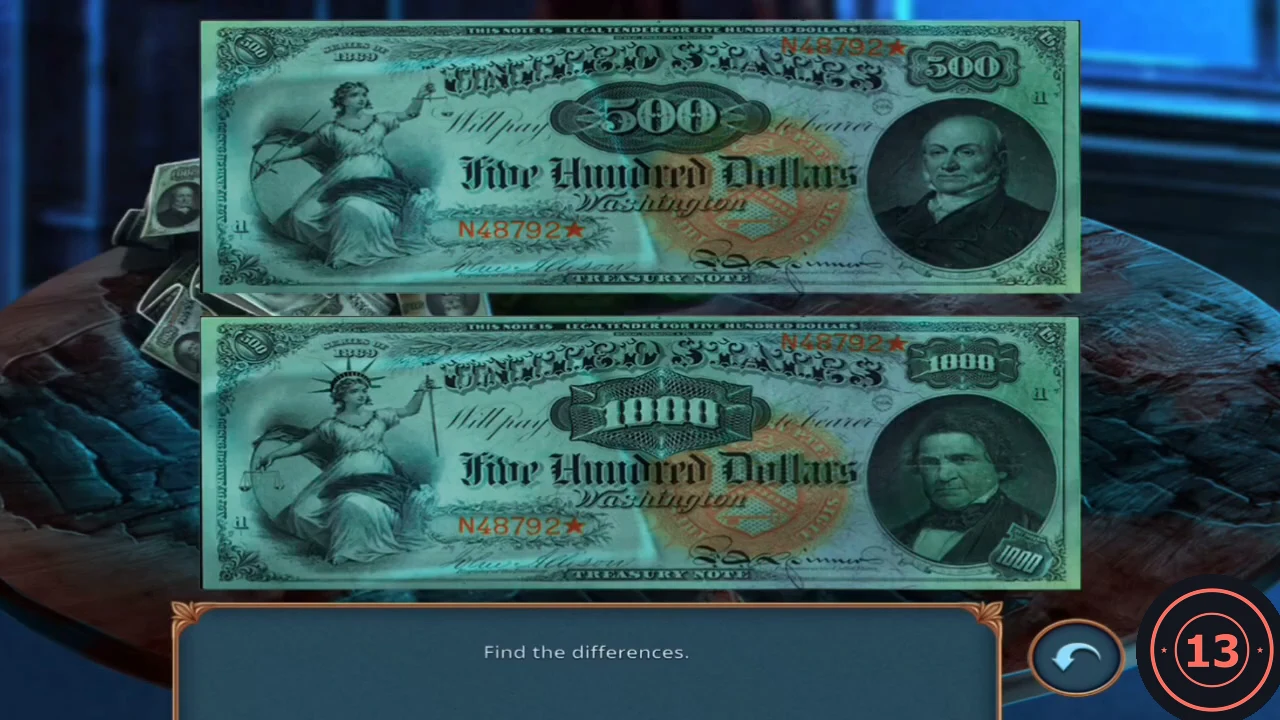
Compare the 500 and 1000 dollar banknotes and click every difference.
- The game does not show a count. Click each difference on either banknote: the portrait, the large value in the centre (500 against 1000), the small value at the top right, the corner at the bottom right (1000 appears only on the lower note), the item in Liberty's raised hand (scales against a sword), the item in her lowered hand, and the crown on her head (only on the lower note).
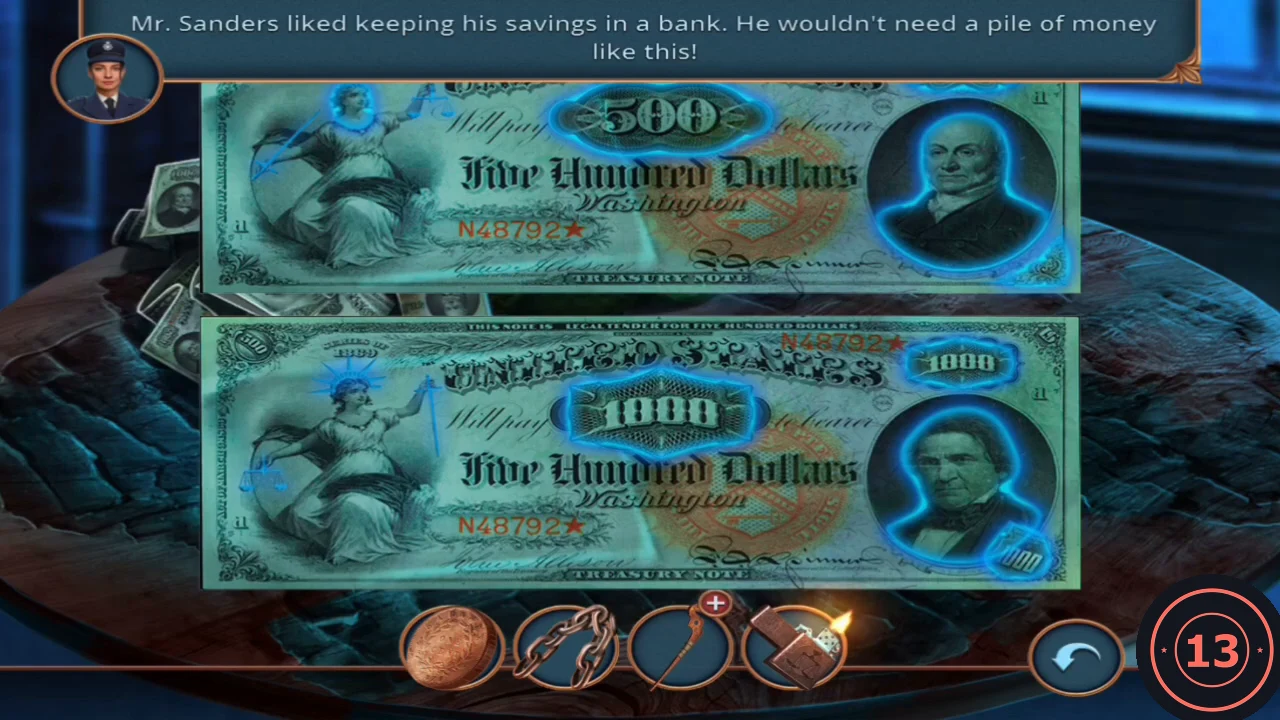
All seven differences found, glowing on the lower note. Melinda's comment covers the top of the upper note.
The Plague Doctor Attacks
A man in a plague doctor mask attacks. Protect Melinda, then follow the trail into the alley.
- When the task Protect Melinda appears, click the vase to throw it at the attacker. This earns the Accurate Throw achievement.
- Go to the alley. At the newspaper box by the water tap, take the bolt and the stone token at the base of the tap.
- Put the coin in the newspaper box slot. Read the newspaper note and take the gear.
- Open the blue post with the red box. Take the sponge, hang the chain on the hook and place the gear in the red box slot to lower the basket. Take the corkscrew and the cutter part from the basket.
- Open the broken cutter in inventory and add the bolt and the cutter part to make a bolt cutter.
- Cut the chain on the alley gate with the bolt cutter and go down into the sewer.
The Sewer
The criminal escaped through the sewer. Light the way and search the storage room.
- Open the barrel. Take the lock part, the notepad and the empty red canister. Use the lighter on the oily water to set it alight.
- The floor grate is out of reach until the water is higher; come back later. Open the ladder close-up, wipe the slimy rungs with the sponge and climb up into the storage room.
The Storage Room
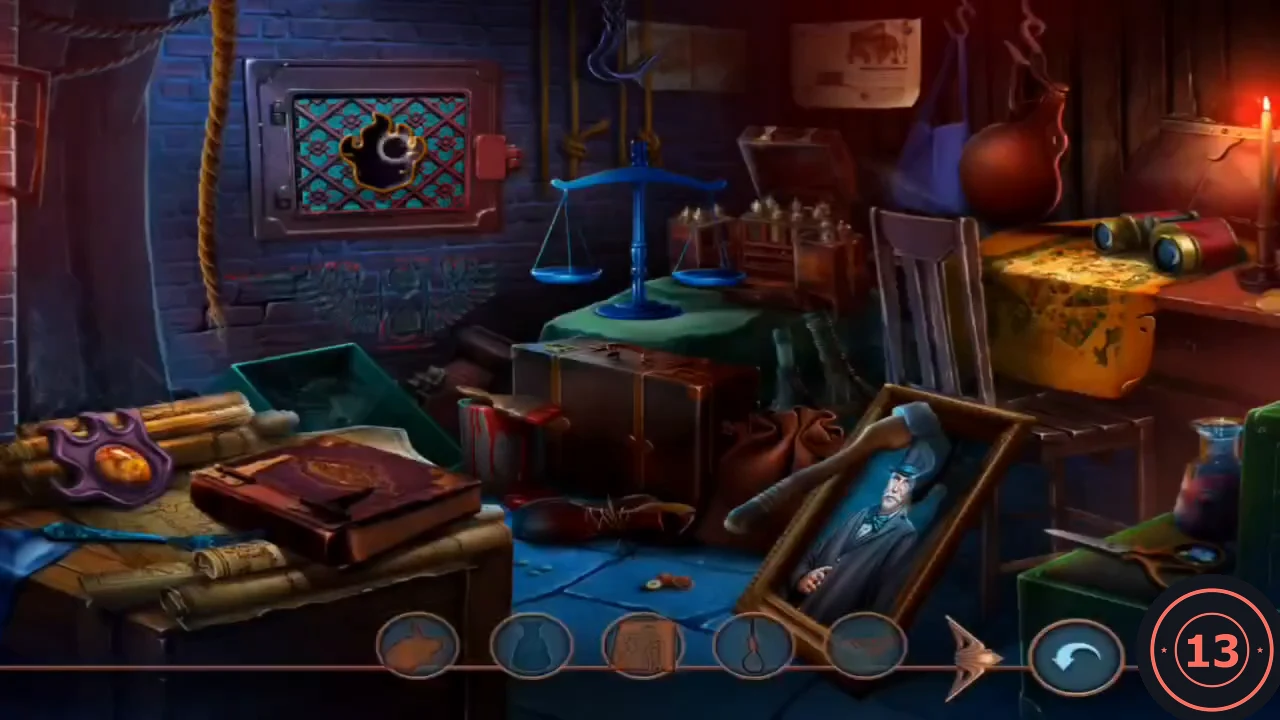
This hidden-object scene uses silhouettes: find each outlined object and drop it into its shape.
- The silhouette bar scrolls with the arrows at each end. Blue silhouettes can be clicked straight away: the blue vase at the right edge beside the green crate, the hatchet leaning on the fallen portrait, the scales on the green-covered table, the long fork at the lower-left edge of the table, the blue pouch hanging at the top right, the brown suitcase in the middle and the binoculars on the yellow crate.
- Orange silhouettes need an extra action. Take the brush from the red paint can and paint the faint winged emblem on the wall below the grate, then click the red emblem. Click the yellow crate to open a city map, move the magnifying glass to Town Hall and click the building. Click the long rope at the top left so it ties into a noose, then click the noose. Open the red book on the table and take the family photograph ("Family was all I had. But they took it away from me."). Take the purple emblem with the amber stone from the left end of the table, place it in the flame-shaped hole of the wall grate and take the item from behind the opened grate.
- Use the protective equipment on the valve releasing green gas. This earns the In the Villain's Shoes achievement.
The Underwater Grate Locks
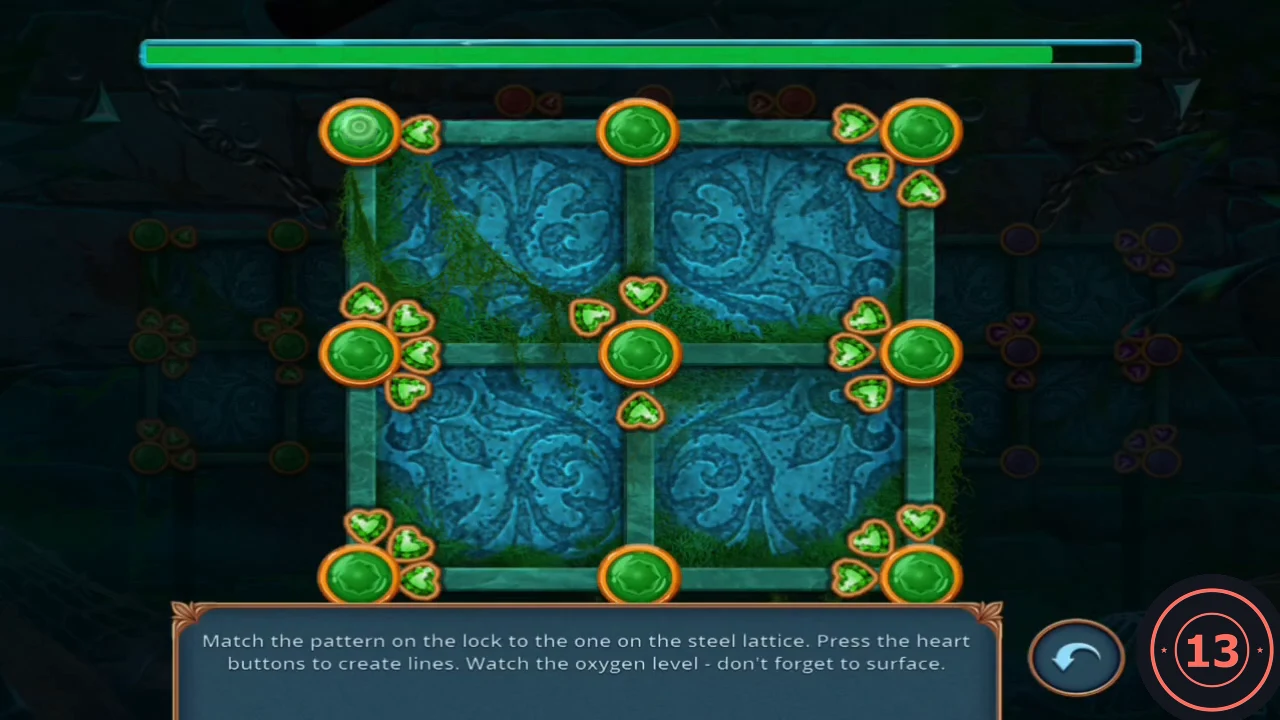
Click the canal edge. You end up trapped under a grate and must open three locks before your air runs out. Each lock is a 3x3 grid of nodes; the buttons beside the nodes draw lines between them. Surface to refill the oxygen bar if needed. Below, nodes are named TL, TC, TR (top row), ML, C, MR (middle) and BL, BC, BR (bottom).
- Click the edge of the canal to dive.
- Green lock: connect TL-TC, ML-BC, BC-C and C-MR.
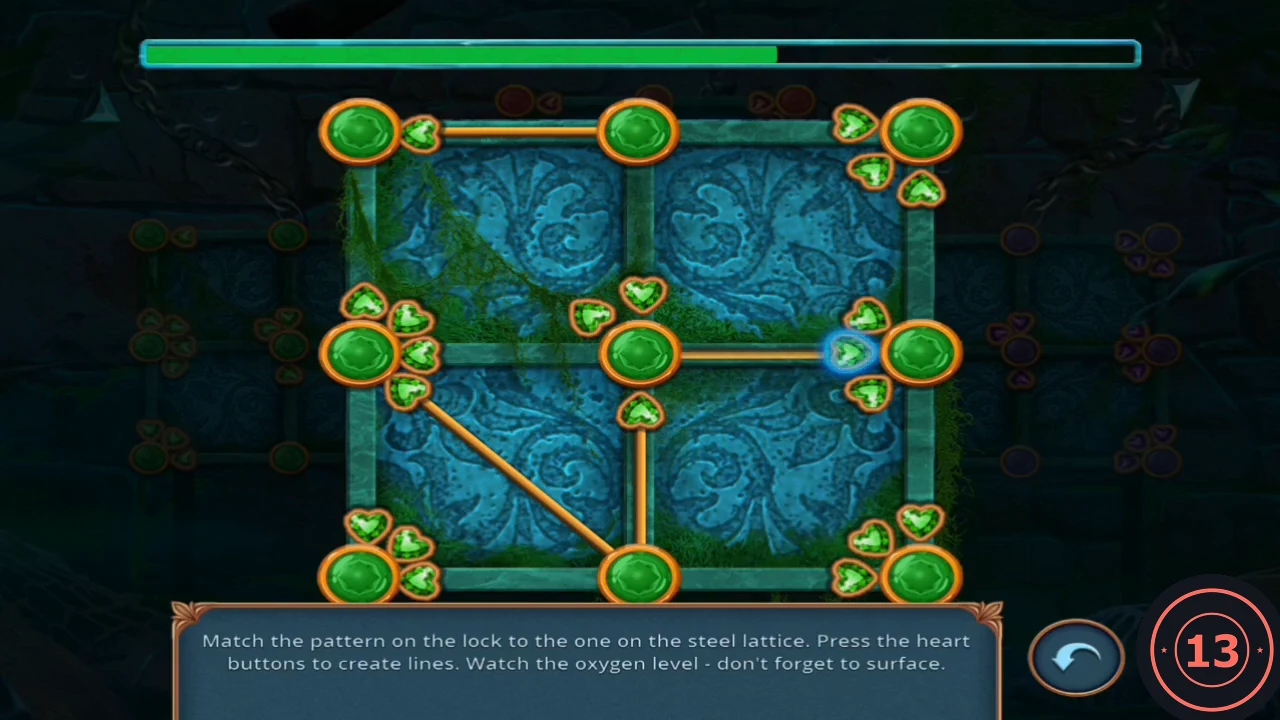
Green lock completed. - Red lock: connect TL-ML, ML-C, TC-TR and BC-MR.
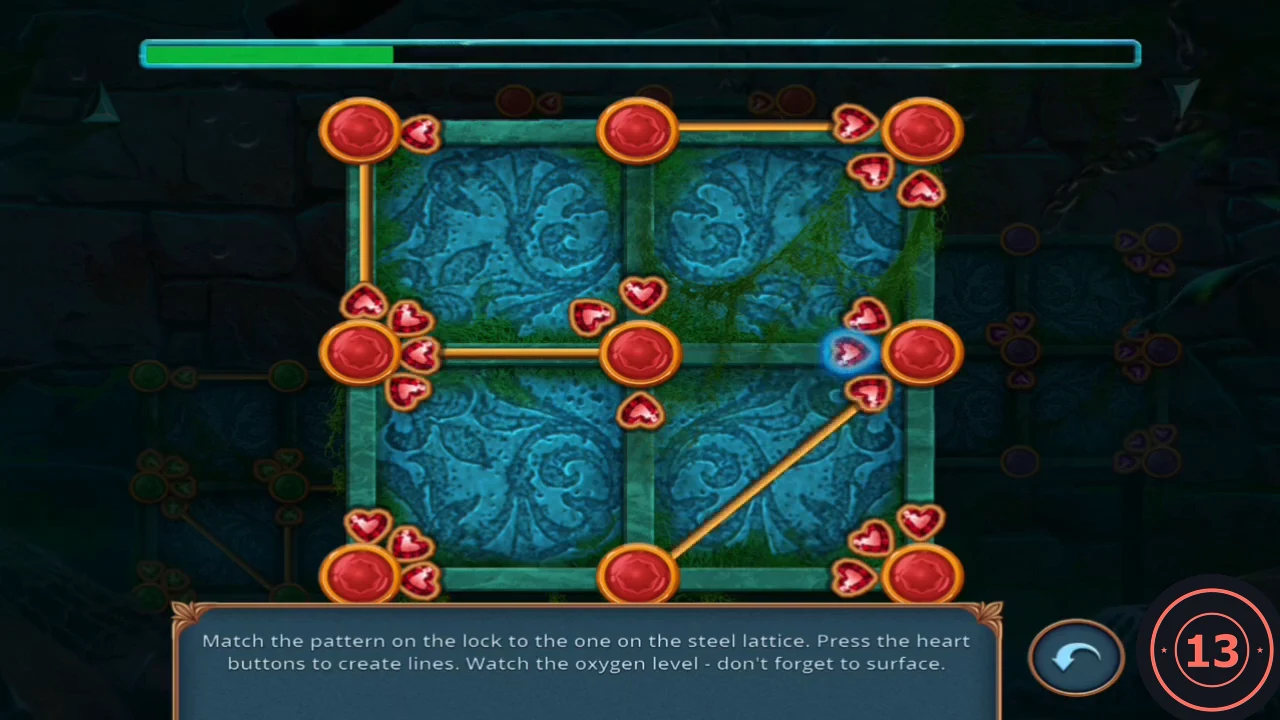
Red lock completed. - Purple lock: connect TL-TC, TL-ML, TC-MR, C-BR and BL-BC. The grate opens and you reach the basement.
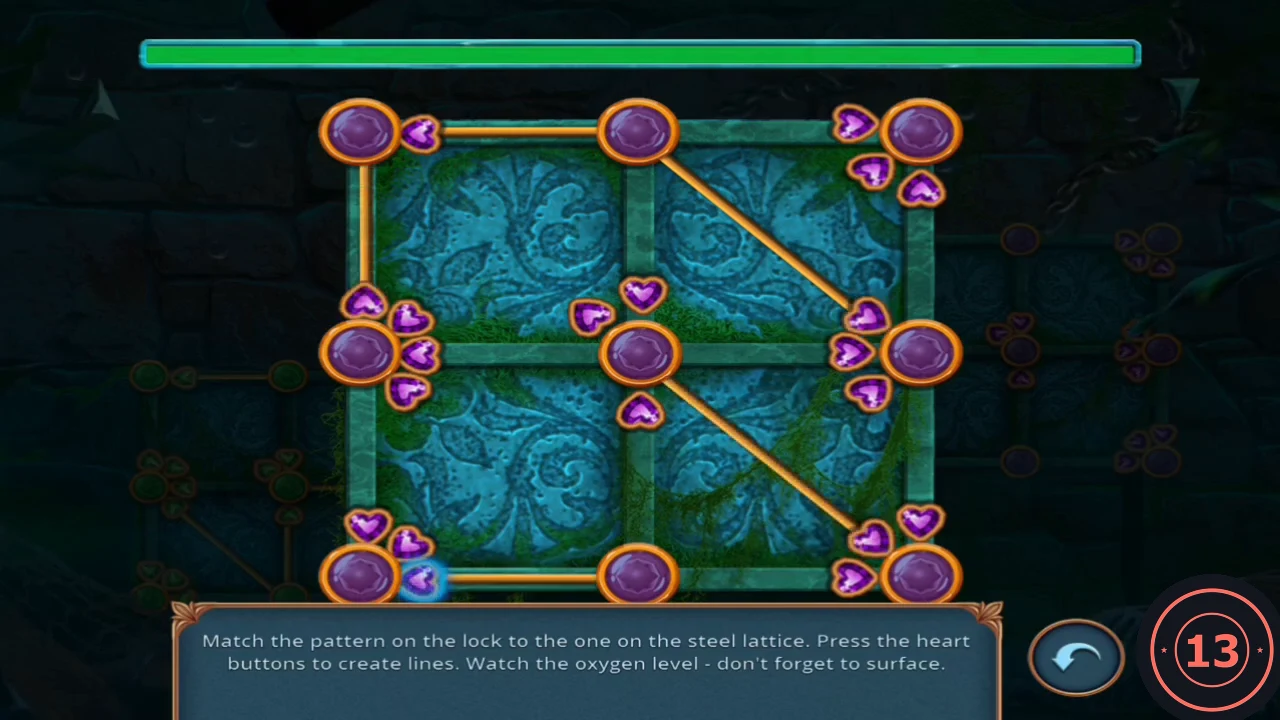
Purple lock completed.