Tower of Treasures: rune chest
Nimra needs two resin samples. Meanwhile, open the researcher's bag and the observatory chest.
- In the underwater garden, give Nimra the Water Resin Sample. She still needs a second resin, so the task counter on the right shows 1/2.
- Zoom into Nimra's garden bed and pour the Fertilizer into the empty bed.
- Zoom into the barred gate and pry out the Flower Amulet with the Navigator's Divider.
- Open the Researcher's Bag and put the Flower Amulet in the round clasp. Read the researcher's diary (someone was watching them) and take the Keys. They do not fit the gate padlock.
- In the observatory, zoom into the chest with three padlocks. The Keys open the two copper padlocks; the silver padlock starts the puzzle.
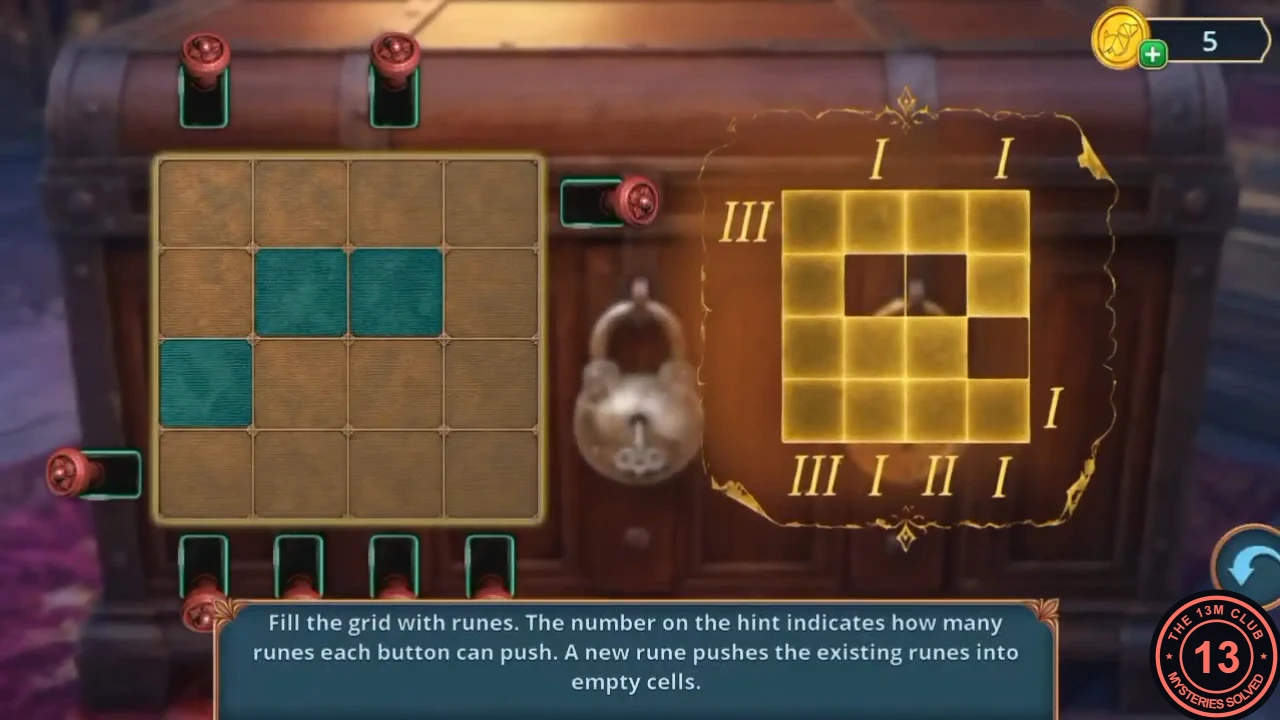
- Puzzle: "Fill the grid with runes. The number on the hint indicates how many runes each button can push. A new rune pushes the existing runes into empty cells." The hint on the right is a left-to-right mirror image of the board: its dark cells match the three fixed teal cells flipped sideways, so read its Roman numerals mirrored too. On the board that means: bottom buttons under columns 1–4 push I, II, I and III runes; the left button (bottom row) pushes I; the right button (top row) pushes III; the top buttons push I each. Count columns from the left of the board. The recorded sequence that opened the chest was: bottom column 1 once, bottom column 2 twice, left button once, bottom column 3 once, bottom column 4 three times, top button over column 3 once, right button three times. The top button over column 1 was not needed, and the cell left of the teal pair stayed empty when the chest opened.
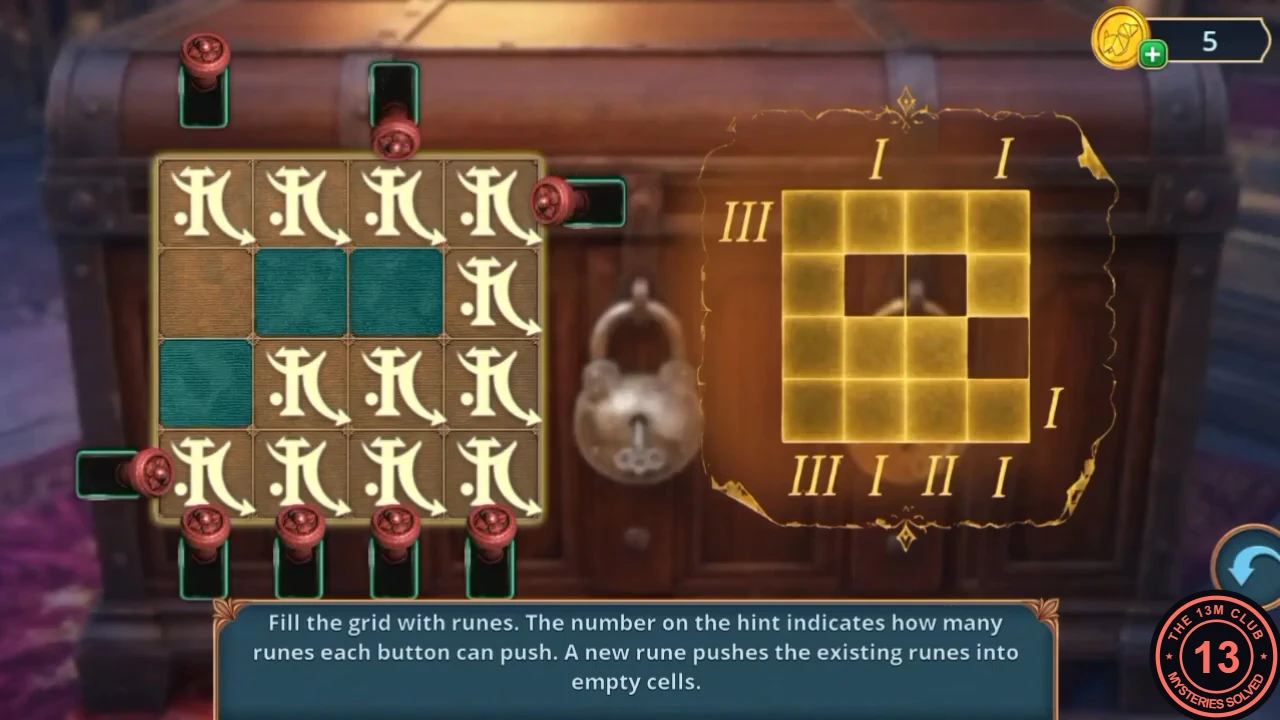
The board when the chest opened; the top-left button was never pressed. - The chest opens; take the Winding Clock Key.
Tower of Treasures: bookshelf search (second visit)
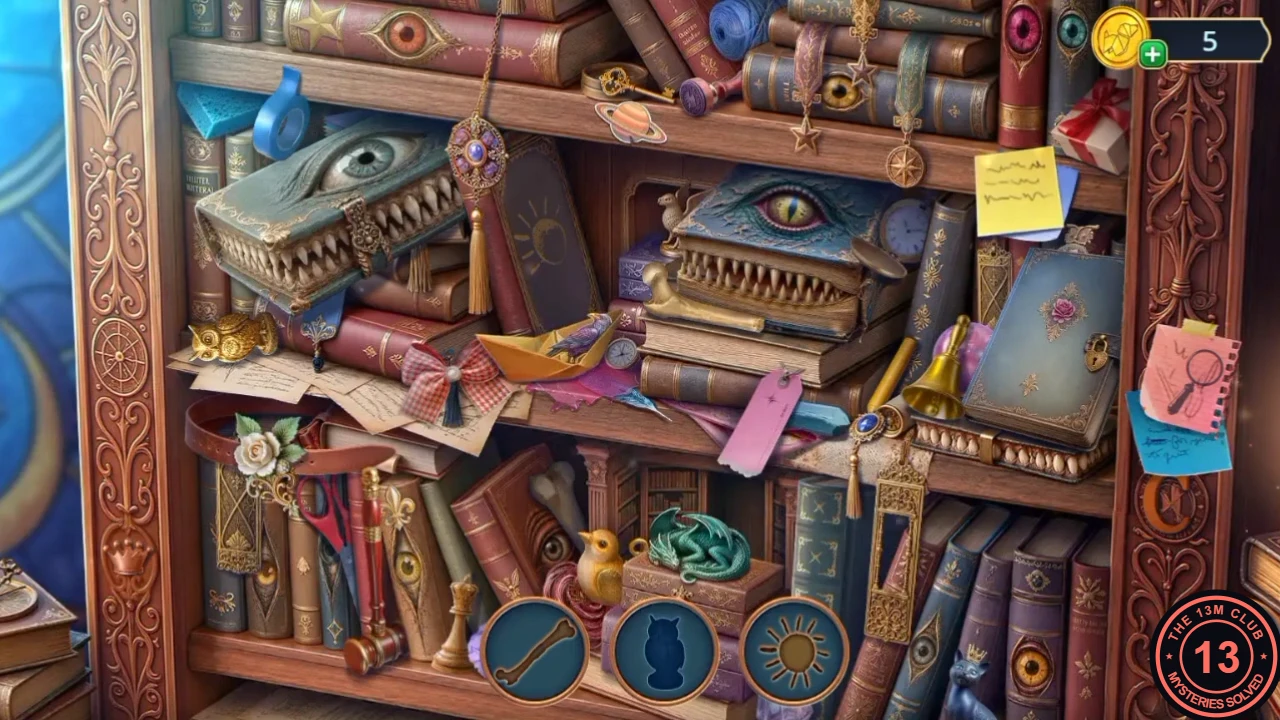
Wind the observatory clock and bring the Book Nook to life.
- Zoom into the observatory clock and wind it with the Winding Clock Key. The clock runs; take the Book Nook Wings.
- Open the Book Nook in the inventory and add the Book Nook Wings to make the Living Book Nook.
- Place the Living Book Nook on the bookshelf to open a hidden-object scene.
- Find the items shown as silhouettes at the bottom. One drawing in the scene has to be finished before its item counts.
- At the Water Pavilion, use the wand on the rose-window hatch (the "magic and a catalyst" it needed). The grate opens; take the second Glowing Lantern (2/2) and the Small Pouch.
Water Pavilion roof: lantern colours
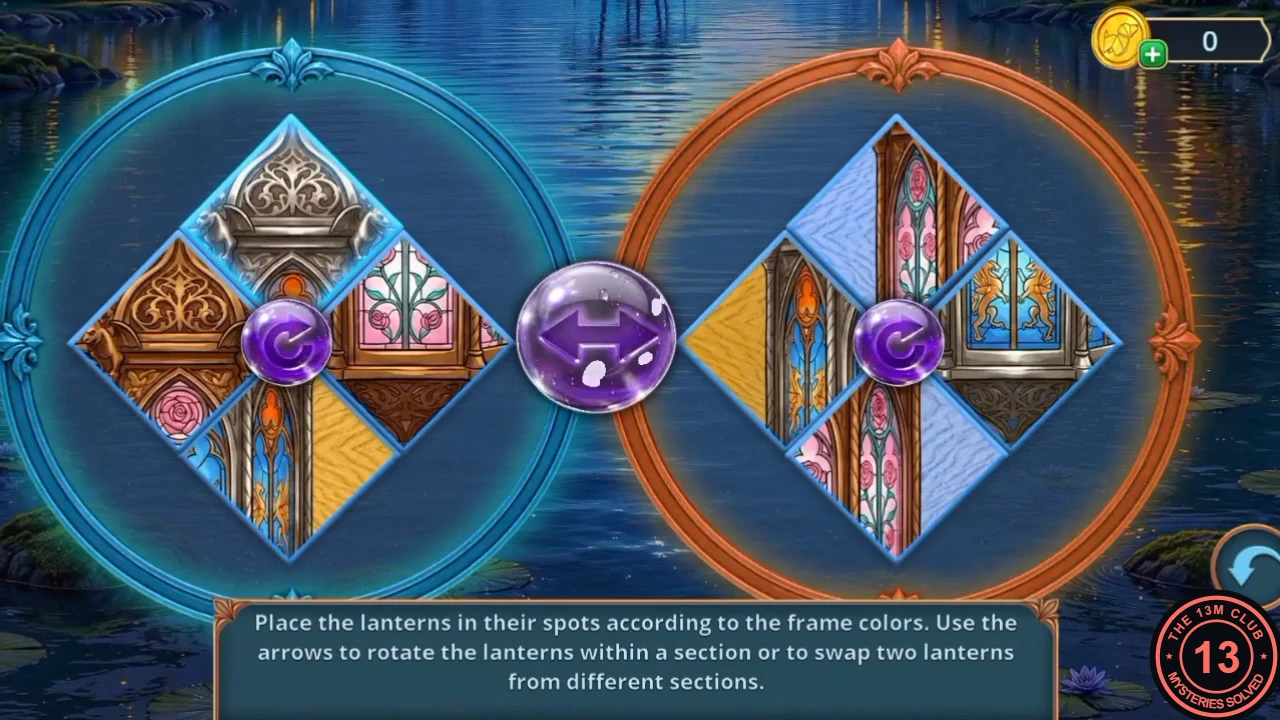
Hang the lanterns under the pavilion roof.
- Zoom into the pavilion roof and hang the Glowing Lanterns to start the puzzle.
- Puzzle: "Place the lanterns in their spots according to the frame colors. Use the arrows to rotate the lanterns within a section or to swap two lanterns from different sections." There are two diamond-shaped sections. The button in the centre of a section rotates its lanterns; the double arrow between the sections swaps the two lanterns next to it. The pieces are slices of two lantern pictures. The blue-framed left section must show the silver lantern with blue stained glass (golden beasts on the lower pane) and yellow wood in its side corners; the orange-framed right section must show the bronze lantern with pink rose glass and pale blue corners. Swap pieces into the section where they belong, then rotate each section until its picture lines up (see the completed image).
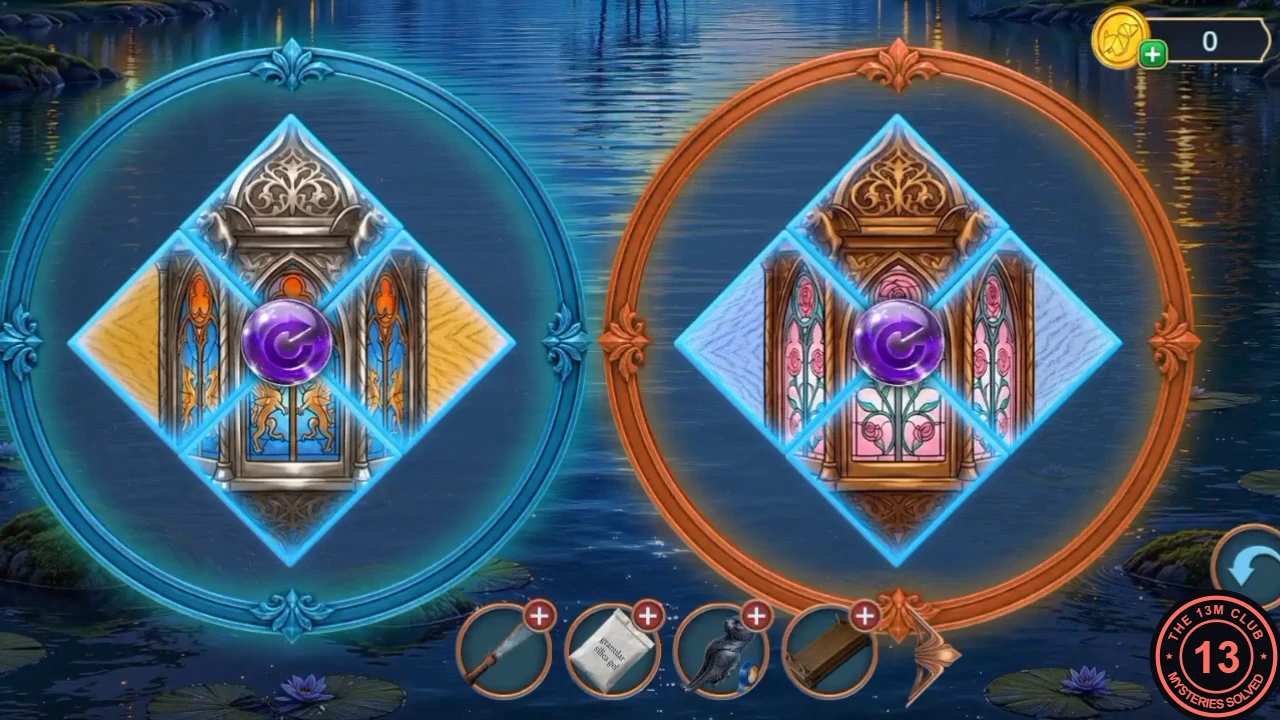
The completed lanterns. - The lit lanterns reveal a scroll. Take the Planets (Saturn; 2/3) and the Fast-Growing Mushroom.
Water Altar stump: water mechanism
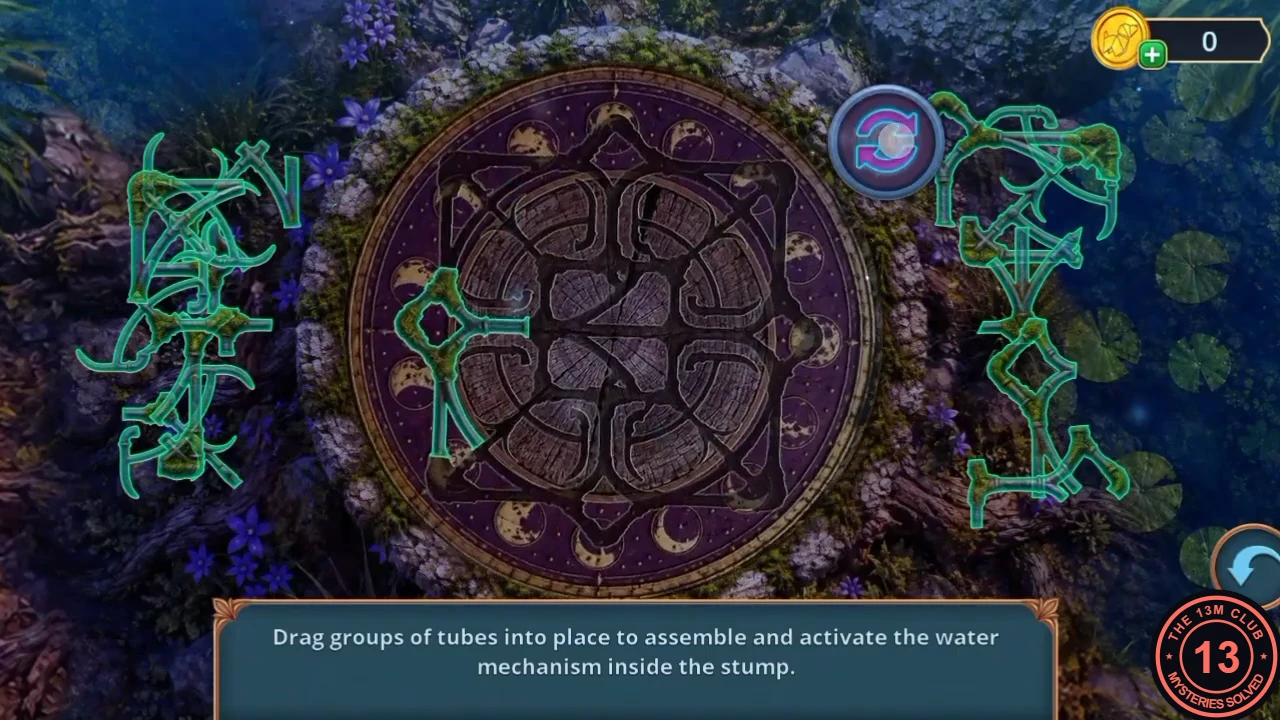
Sharpen the machete, cut a clock hand from the reeds and open the old stump.
- The Fast-Growing Mushroom does nothing in Nimra's garden bed ("That's not the result I was hoping for"). On the Water Altar island, plant it at the tent instead. It grows and lifts the tent; take the Firesteel and the Whetstone.
- Open the Dull Machete in the inventory and sharpen it with the Whetstone to get the Machete.
- Zoom into the reeds by the shore and cut them with the Machete. Take the Moon Clock Hand.
- Zoom into the dial on the stump and fit the Moon Clock Hand to start the puzzle.
- Puzzle: "Drag groups of tubes into place to assemble and activate the water mechanism inside the stump." This is long. Groups move as a unit, so first place the groups whose shape fits only one spot, then fit the rest around them. The purple button at the top right rotates the pattern already on the dial; the recording used it to turn the last open gap to match the final loose group before dropping it in. The mechanism is complete when the tubes form one closed, symmetrical knot pattern (see the completed image).
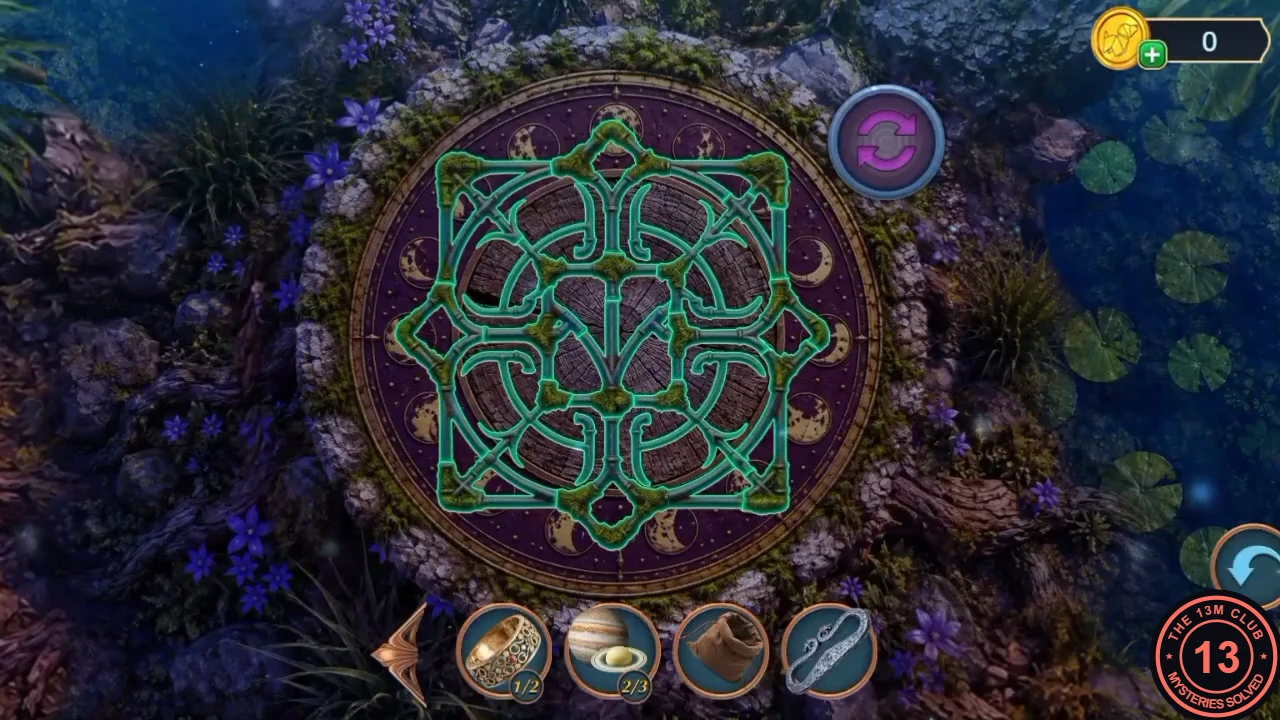
The completed tube pattern.
Roof weathervane: air currents
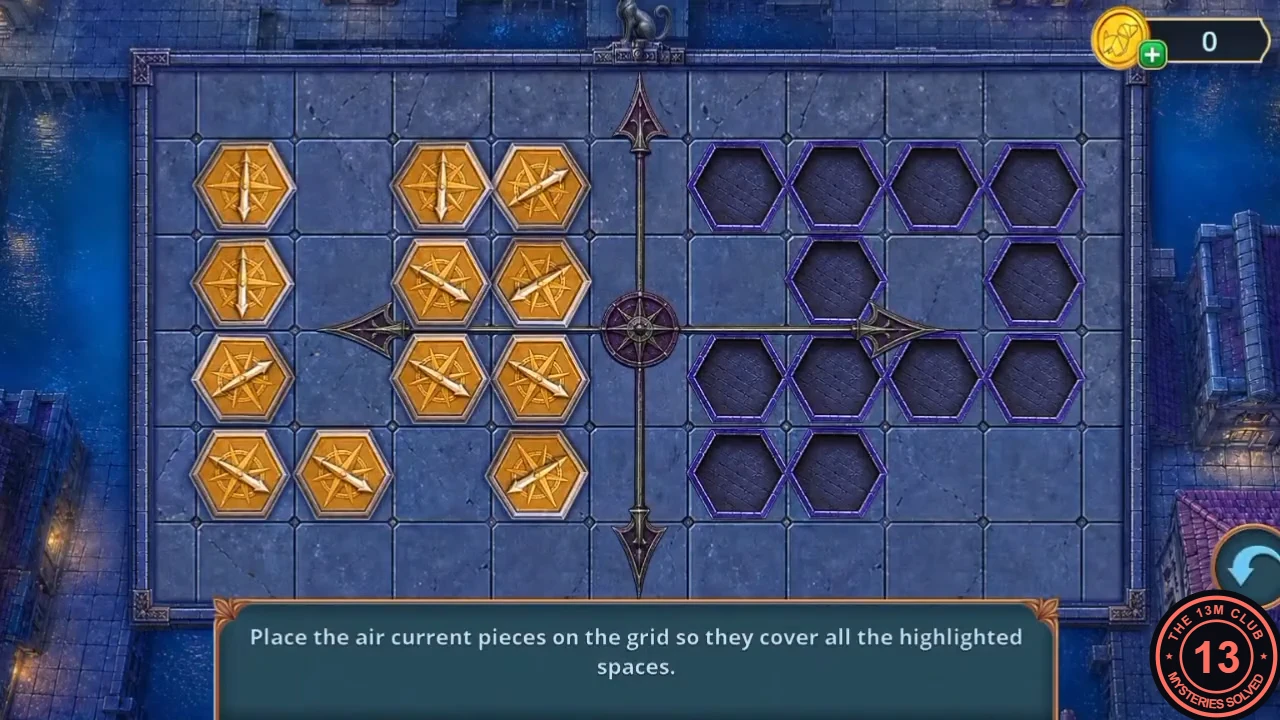
Open the moon box, rebuild the black cat and set it on the weathervane.
- The stump opens; take the Crescent Amulet. The wood pieces inside need a tool (later).
- On the Roof over Old Canal, zoom into the moon box under the lifted tile and fill the missing phase with the Crescent Amulet. The box opens; take the Figurine Part (the cat's tail).
- Open the Broken Figurine in the inventory and add the Figurine Part and the Scotch Tape to make the Metal Black Cat Figurine.
- Zoom into the weathervane and set the Metal Black Cat Figurine on top to start the puzzle.
- Puzzle: "Place the air current pieces on the grid so they cover all the highlighted spaces." There are 12 arrow tiles on the left and 12 purple target cells on the right. The tiles are linked: touch one and every tile of the same piece lights up blue, and they all move together with the same spacing, even when they are not next to each other (the last piece in the recording was the two top corner tiles). Drag the pieces across one at a time until every purple cell is covered; the arrow directions do not matter. See the completed image for the finished layout.
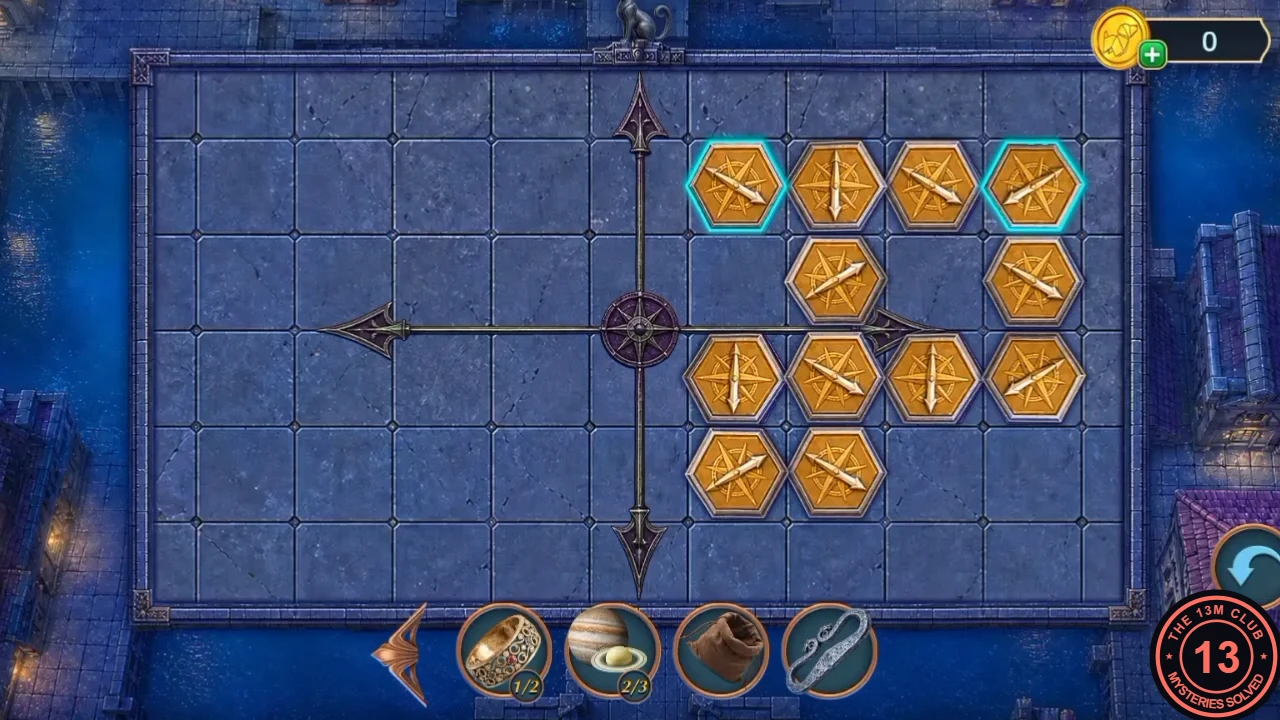
The finished layout; the two highlighted corner tiles were the last linked piece. - The weathervane releases the Corkscrew Funnel; take it.
Old Canal brazier: spark lines
Dry some tinder and light the knight's brazier.
- At the Grimhollow Old Canal, zoom into the barrel and screw the Corkscrew Funnel into its bung. Take the Wet Tinder. A plant here is "growing in the wrong place" (later).
- Open the Silica Gel in the inventory and add the Wet Tinder to dry it.
- Zoom into the knight's brazier, put the dry tinder in it and strike the Firesteel to start the puzzle.
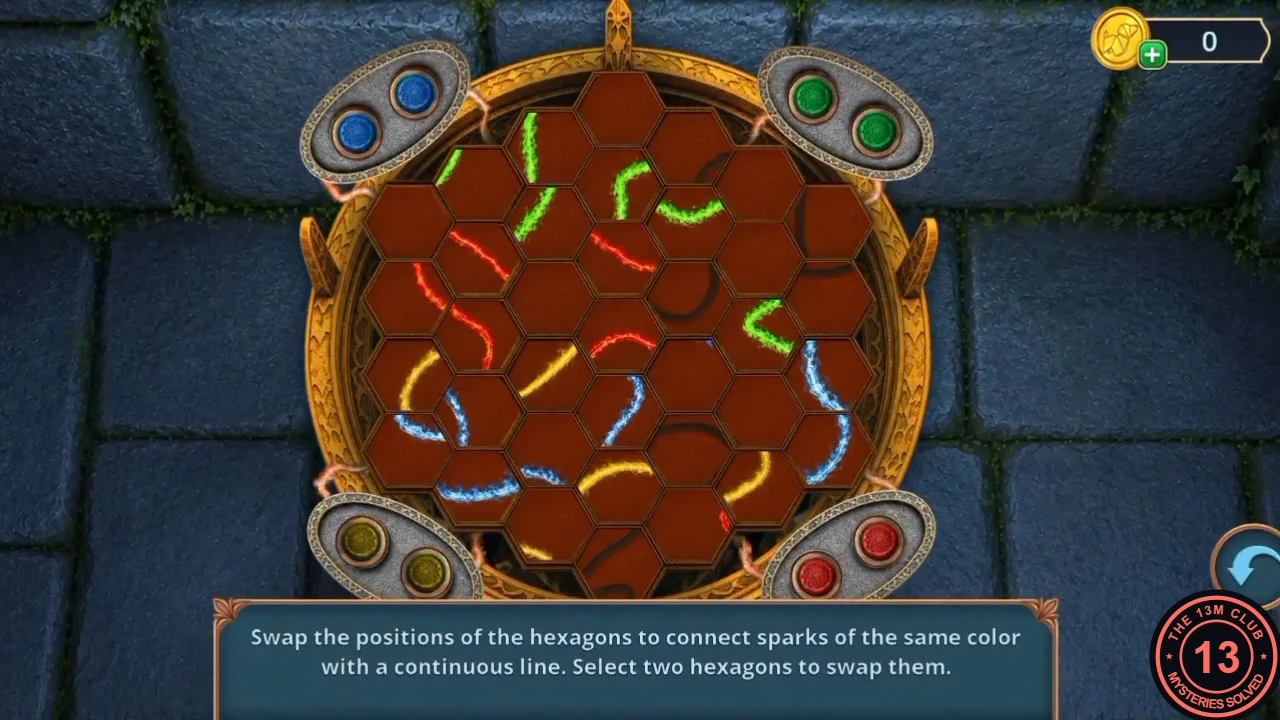
- Puzzle: "Swap the positions of the hexagons to connect sparks of the same color with a continuous line. Select two hexagons to swap them." Each corner holds a pair of sparks of one colour (blue top left, green top right, yellow bottom left, red bottom right). Each colour's line must leave the rim beside one of its sparks and loop back to the rim beside the other, so every colour stays in its own quarter of the board. Gather the tiles carrying that colour's line segments into its quarter and swap them until the loop is unbroken; finish one colour at a time. Tiles with no lit line end up in the middle (see the completed image).
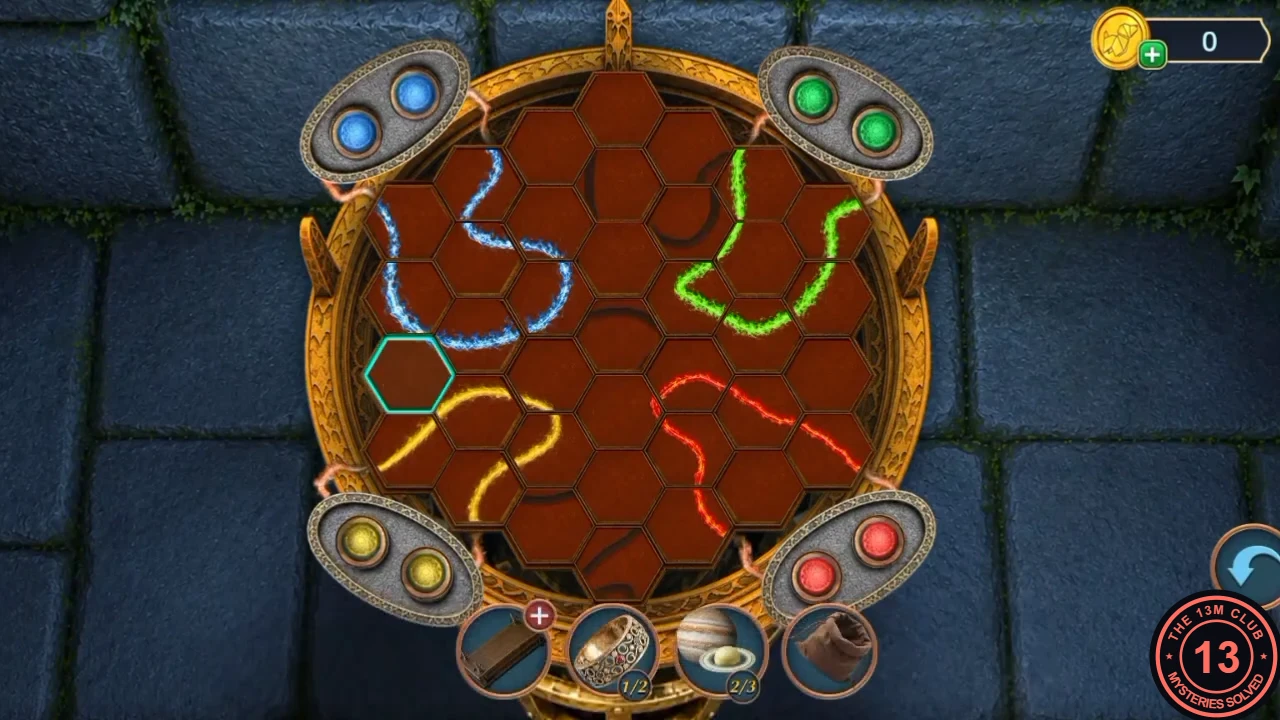
The four completed loops. - Zoom into the oven niche of the lit brazier and take the Interleaving Paper and the Old Shawl.
- Zoom into the canal grate and tie the Old Shawl around the rusty bars, then reach behind them for the Small Plane Tool. The golden bars behind need a saw (later).
Gargoyle Tower: ink relief search
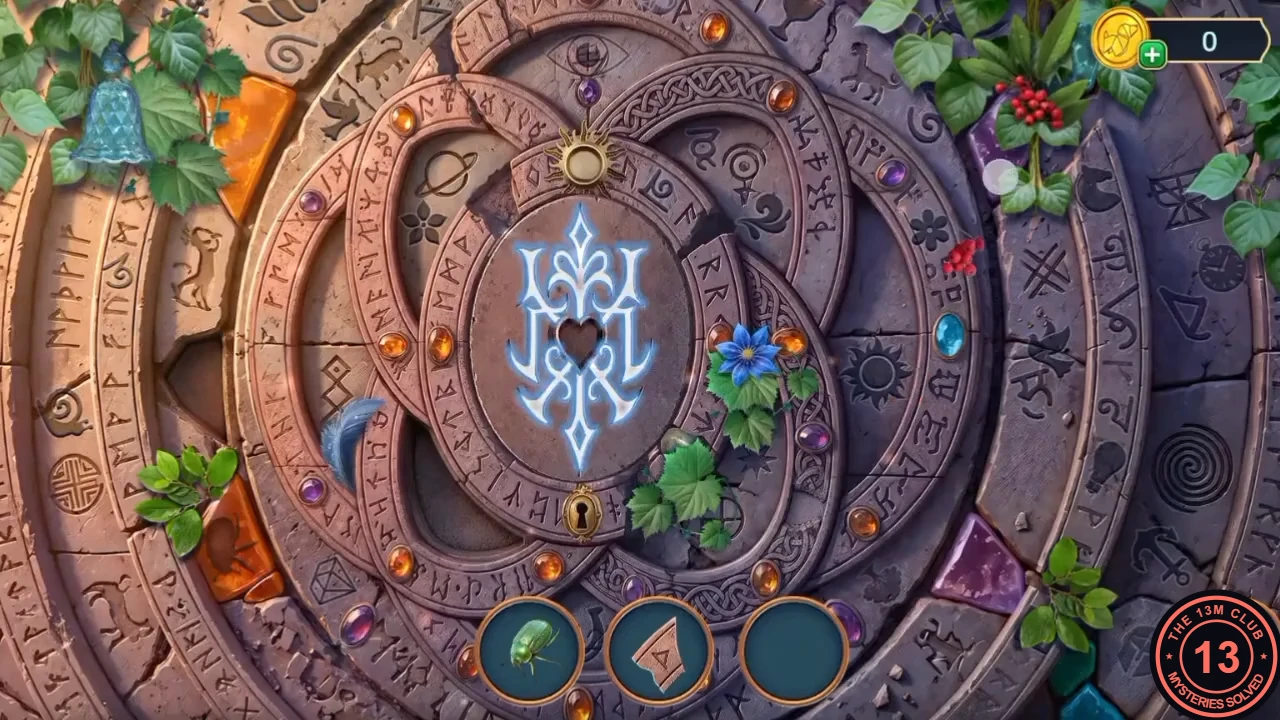
Carve a brush, ink the labyrinth relief and find a new home for the hermit crab.
- Open the Herbarium Press in the inventory and insert the Interleaving Paper. Mabel remembers that Oberon's favourite flower was the cornflower; the press needs one (later).
- On the Water Altar island, zoom into the open stump and shape the wood pieces with the Small Plane Tool. Take the Brush.
- Zoom into the tent and dip the Brush in the ink to get the Brush with Ink.
- In the Gargoyle Tower, trace the labyrinth relief with the Brush with Ink to open a hidden-object scene.
- Find the items shown in the three slots at the bottom. Several found tokens (for example a leaf, pyramid, heart, crescent, feather, orange gem and key) must be placed back into matching hollows of the relief to reveal further items.
- Zoom into the lion relief and place the Stone Crown on the lion. Take the Shell House.
- In the underwater garden, give the Shell House to the hermit crab. Take the Seeds of Tracer Plants.
Nimra's garden bed: seed planting
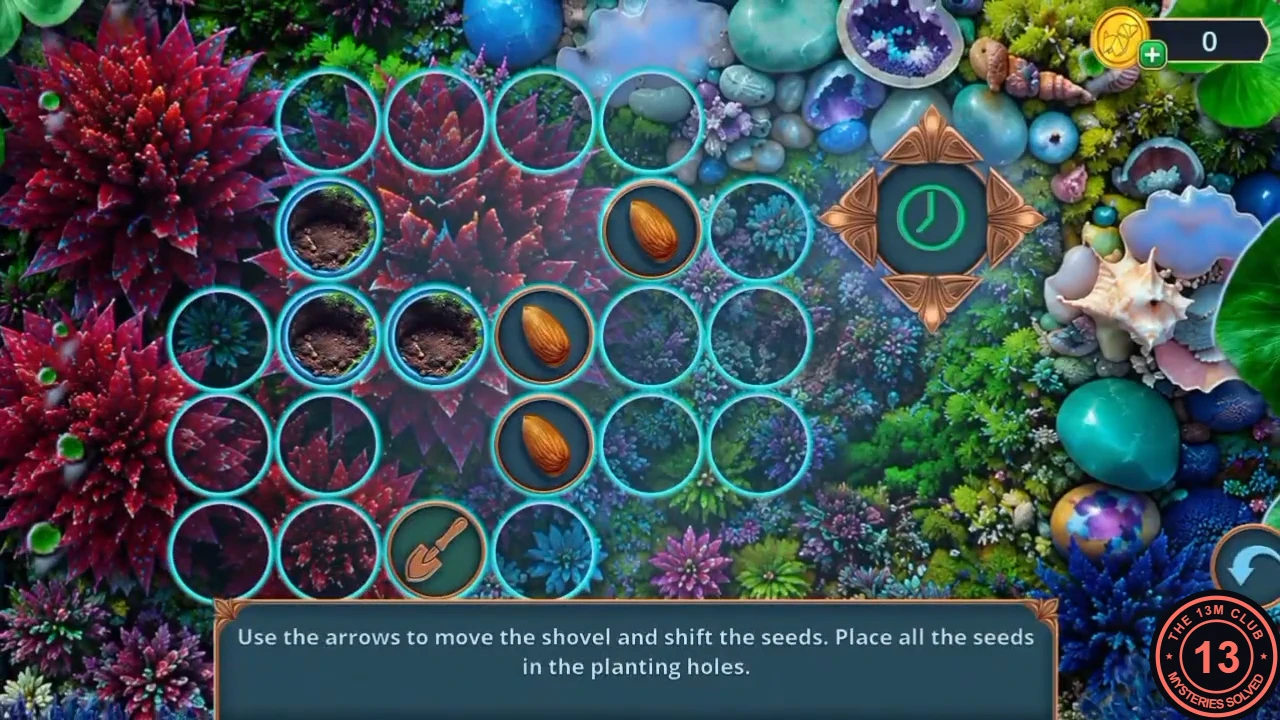
Grow the plant whose resin Nimra needs.
- Zoom into Nimra's garden bed and sow the Seeds of Tracer Plants to start the puzzle.
- Puzzle: "Use the arrows to move the shovel and shift the seeds. Place all the seeds in the planting holes." The shovel shifts a seed in the direction it moves, much like pushing crates. Before each push, check that the seed will not get stuck against a wall or in a corner away from a hole, and fill the hardest-to-reach holes first.
- The red underwater flower blooms; take the Fresh Underwater Resin.
- Give the Fresh Underwater Resin to Nimra; this is the second and last resin she needs (the Water Resin Sample was already handed over). Decision: "Summarize" (60 coins, +2) or "Ask Ezra" (free). Nimra insists she is not a murderer and gives you the Shell Amulet. The task "Bring both resins to Nimra" completes.
- Zoom into the barred gate and open the padlock with the Shell Amulet. Take the File.
Old Canal mermaid: coloured beams
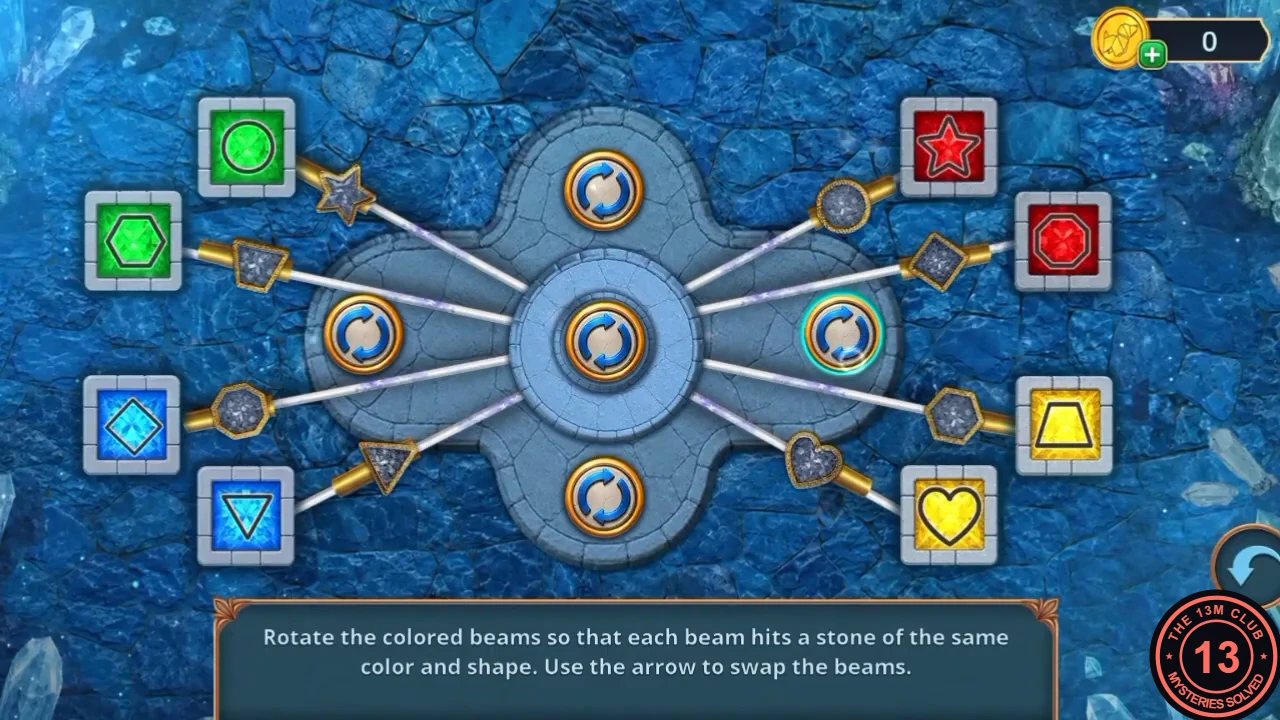
Saw through the golden bars and give the mermaid her rings.
- At the Old Canal, zoom into the grate and saw through the golden bars with the File. Take the second Gold Ring (Rings 2/2) and the Chain.
- Zoom into the mermaid statue and give her the Gold Rings. They appear on her fingers and the puzzle starts.
- Puzzle: "Rotate the colored beams so that each beam hits a stone of the same color and shape. Use the arrow to swap the beams." Eight beams fan out from the centre, each ending in a grey shaped tip. Every tip must touch the stone with the same shape: circle and hexagon (green, upper left), diamond and triangle (blue, lower left), star and octagon (red, upper right), trapezoid and heart (yellow, lower right). The five round arrow buttons move the beams: the centre button turns the whole fan of beams around together, and each outer button changes the beams nearest to it, so press one and watch which tips move. Settle one stone at a time and compare with the completed image.
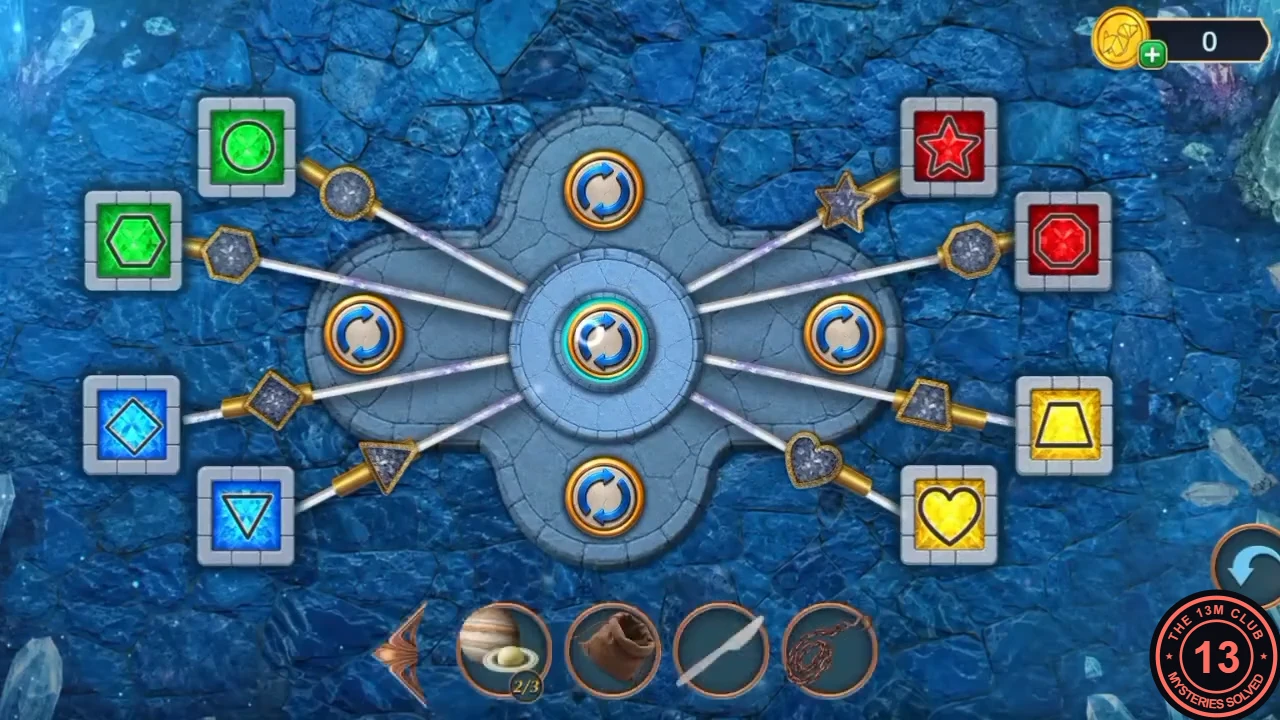
Every tip on the stone of the same shape. - The mermaid releases the Small Shovel; take it.
Greenhouse portal: differences
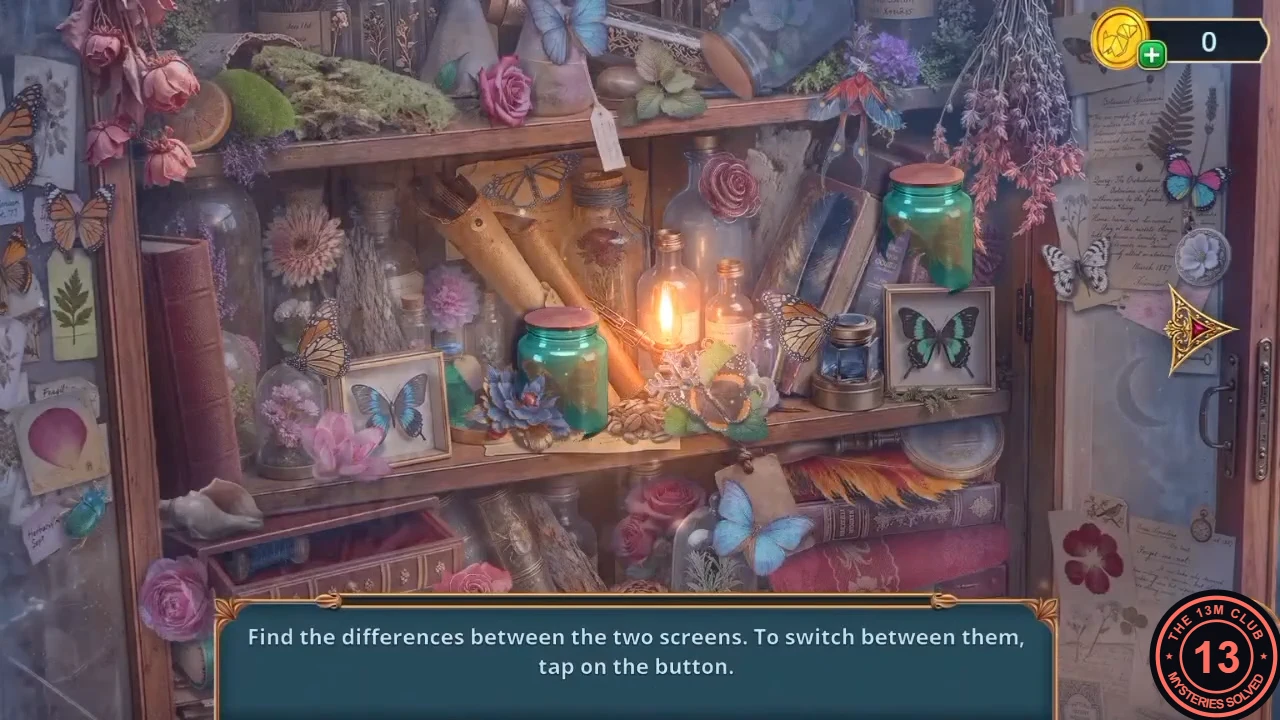
Press Oberon's favourite flower and open the herbarium portal in the greenhouse.
- Zoom into the plant by the canal barrel and dig it up with the Small Shovel. Take the Cornflower.
- Open the Herbarium Press in the inventory and add the Cornflower to get the Dried Flowers.
- In the greenhouse, zoom into the herbarium book on the mushroom shelf and add the Dried Flowers. Butterflies open a green portal in the doorway, leading to a differences scene.
- "Find the differences between the two screens. To switch between them, tap on the button." Toggle between the two views and look for changed, added or missing objects. Each find gets a green tick and fills the bar above the bottom panel; the completed image shows where the recorded ticks sit (one tick is partly hidden behind the panel at the bottom).
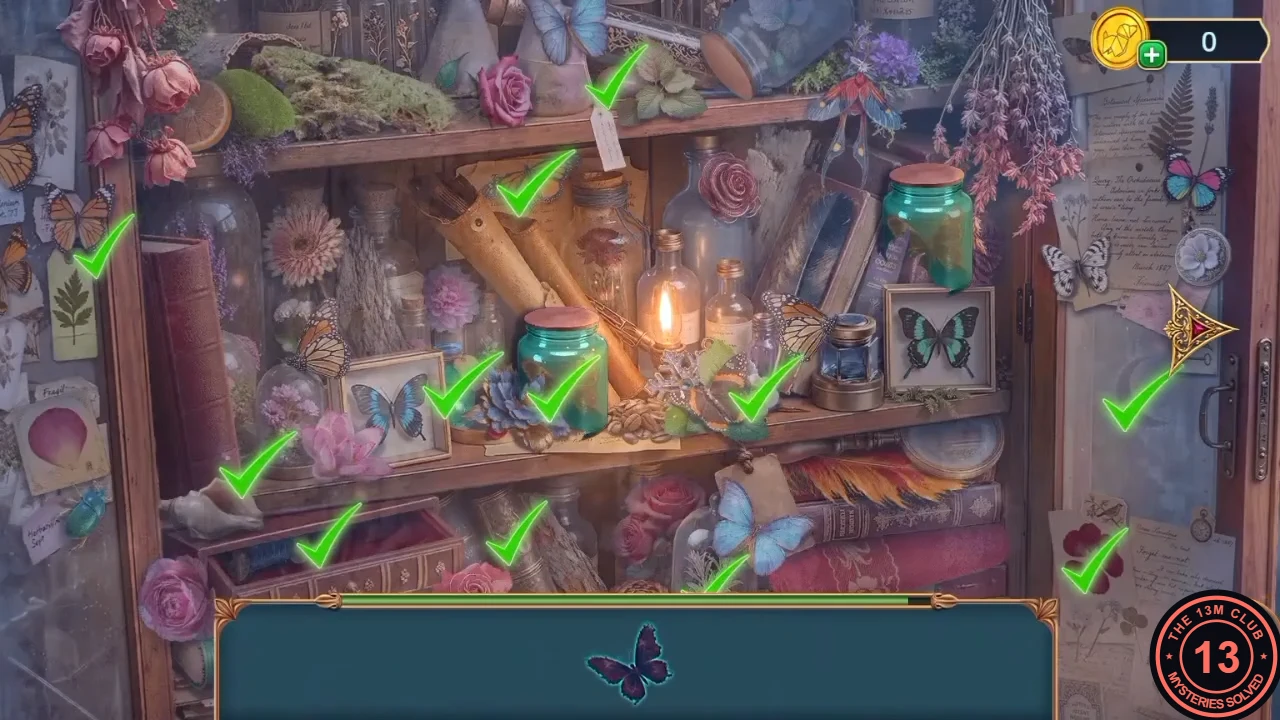
Where the recorded differences were found. - Take the Magic Fire Butterfly.
Tower of Treasures orrery: planets
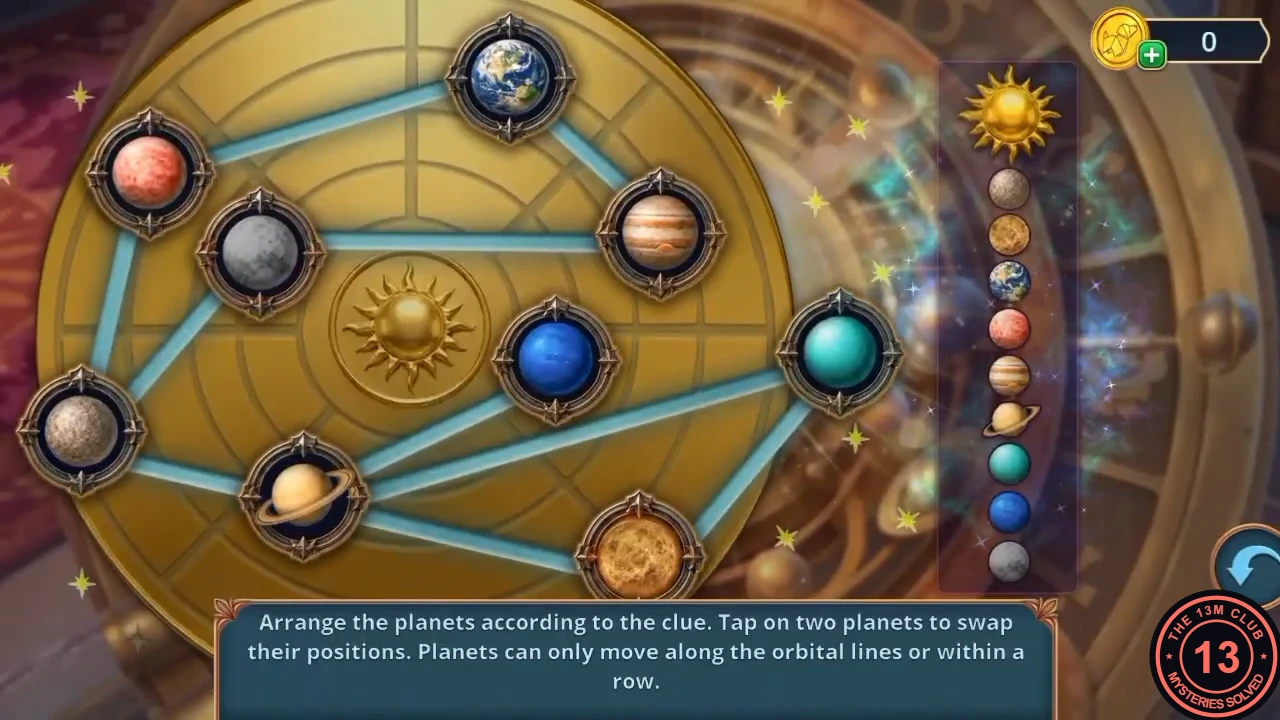
Free the stone toad, open the fly-covered chest and complete the orrery.
- In the greenhouse, zoom into the distiller and let the Magic Fire Butterfly melt the ice block. Take the thawed Stone Magic Toad.
- In the observatory, place the Stone Magic Toad by the chest with the flies. The toad eats them and the chest opens; take the Earth (Planets 3/3) and the Lighter.
- Zoom into the orrery and place the Planets (Jupiter, Saturn and Earth) to start the puzzle.
- Puzzle: "Arrange the planets according to the clue. Tap on two planets to swap their positions. Planets can only move along the orbital lines or within a row." The clue column on the right lists the planets in order from the Sun: Mercury, Venus, Earth, Mars, Jupiter, Saturn, Uranus, Neptune and Pluto. Put each planet on the orbit matching that order, swapping only along an orbit or within a row: Mercury sits just right of the Sun, Venus and Earth on the next rings to its left, and the outer planets on the wider rings, with Pluto on the far right edge. Compare with the completed image.
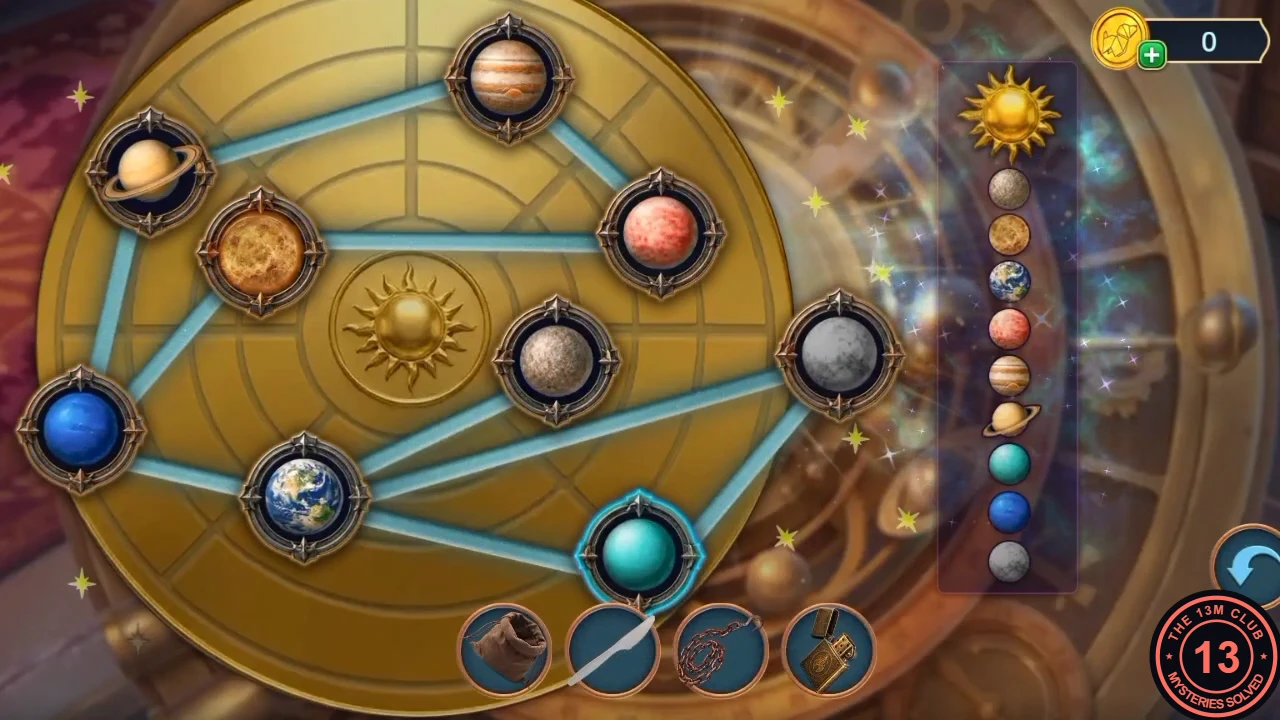
The completed orrery. - The orrery opens and reveals a scroll of petitions from Anubris, Vespera, Lucius and Nimra ("What?! It's all here!").
Chapter 3 decision points
The chapter ends with the Decision Points summary.
- The summary lists the chapter's four choices with their points: Refrain from thought (0) or Recall the information (2) (the greenhouse question about Nimra); Ignore (0), Tease (3) or Show calmly (6) (Ezra at the air bubble); Wait until the fighting ends (0) or Calm brothers down (2) (the gargoyles); Ask Ezra (0) or Sum up (2) (Nimra). The maximum is 12 points. The rows match the dialogue buttons by their wording. One value does not match: the summary gives "Tease" 3 points, but the 30-coin "Tease him mercilessly" button showed +2. The recording picked only free answers, so it does not show which value is actually added.
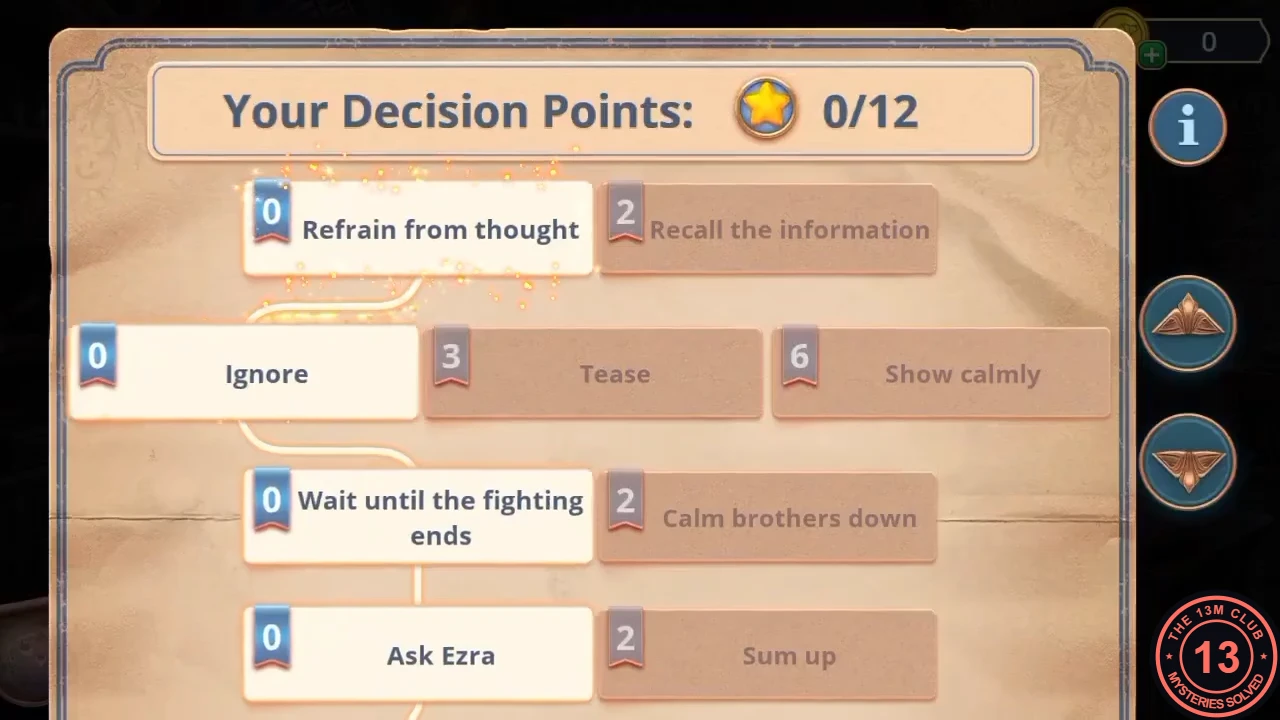
The Chapter 3 summary from the recording (0 of 12 points). - Outcome panels unlock at 0, 4 and 10 points. The recording earned 0 points, so only the 0-point outcome opened: Mabel and Ezra talk in the library, and Ezra notes that each relative was vying to become the next head of the family. Chapter 4 begins. The 4- and 10-point scenes are not shown. We could not find any playthrough or written walkthrough that shows them, so they are not covered in this guide.