Family Living Room mirror: pattern search
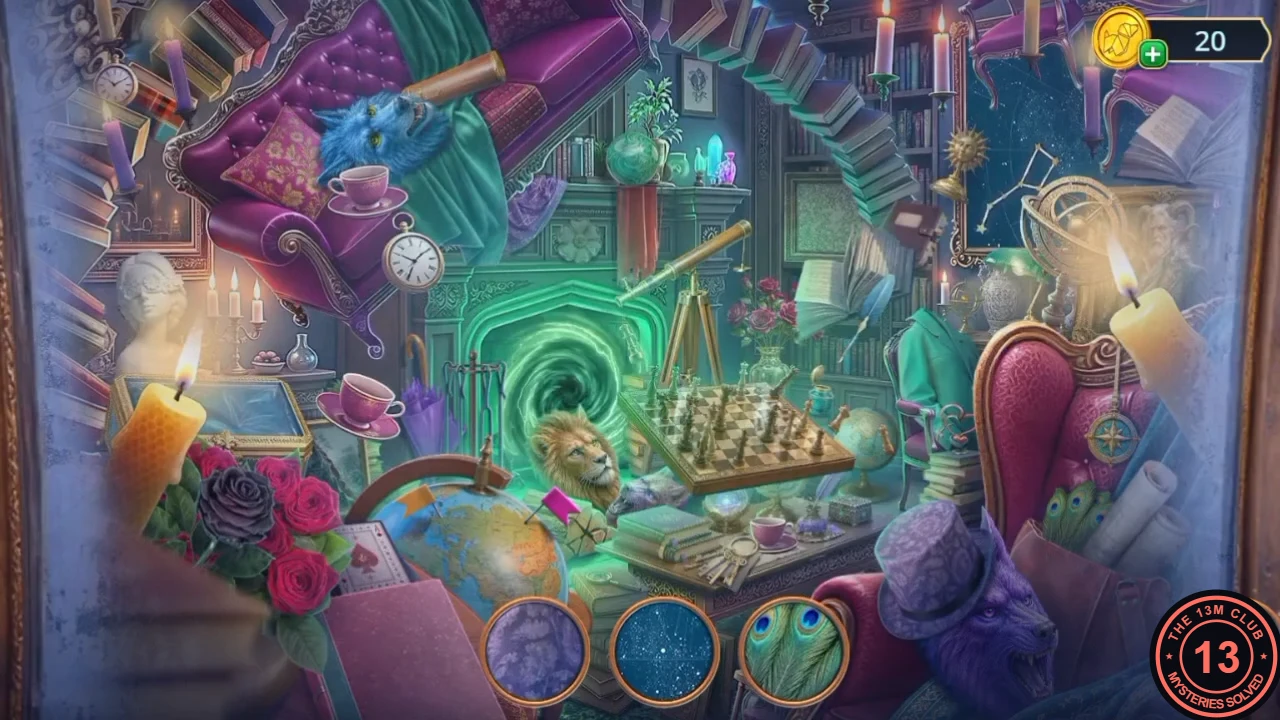
Clear the dark mirror in the Family Living Room with magic dew.
- Open the Jar with Magic Dew in the inventory and add the Wyvern's Spiral Horn.
- In the Family Living Room, zoom into the dark mirror and pour the jar over it. The mirror clears and opens a hidden-object scene.
- The slots at the bottom show pattern swatches (tartan, checkerboard and others). Find an object in the scene covered with each pattern.
Landscape Painting: haystack sheaves
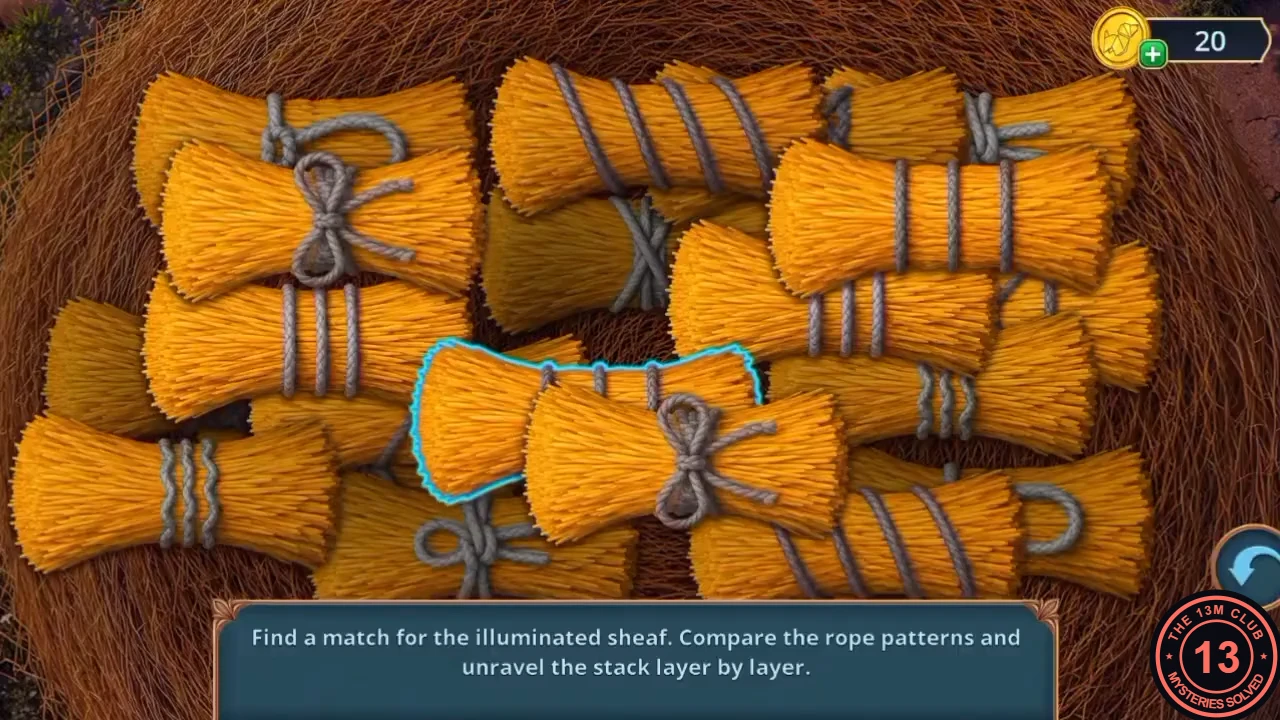
Calm the storm box, build a pitchfork and take apart the haystack in the Landscape Painting.
- In the Family Living Room, zoom into the glass storm box and put the Glass Dome over the glowing flower. The storm calms; take the Shears and the Wrench in front of the box.
- Zoom into the chess table drawer and unscrew the rusty bolt with the Wrench. Take the Metal Fixture.
- Open the Handle in the inventory and add the Pitchfork head and the Metal Fixture to assemble the Pitchfork.
- In the Landscape Painting, use the Pitchfork on the haystack to start the puzzle.
- Puzzle: "Find a match for the illuminated sheaf. Compare the rope patterns and unravel the stack layer by layer." Look at the rope binding of the highlighted sheaf and tap the sheaf in the stack whose rope pattern is identical. Keep matching each newly lit sheaf, working down through the stack layer by layer until it is cleared.
- Under the hay, take the Marble Working Scheme and the Straw Bag. The packed ground here needs something to dig with (later). Optional spider (17/140 in our playthrough): in the hay close-up, it is on the right side by the fence.
Balcony wisteria: flower search
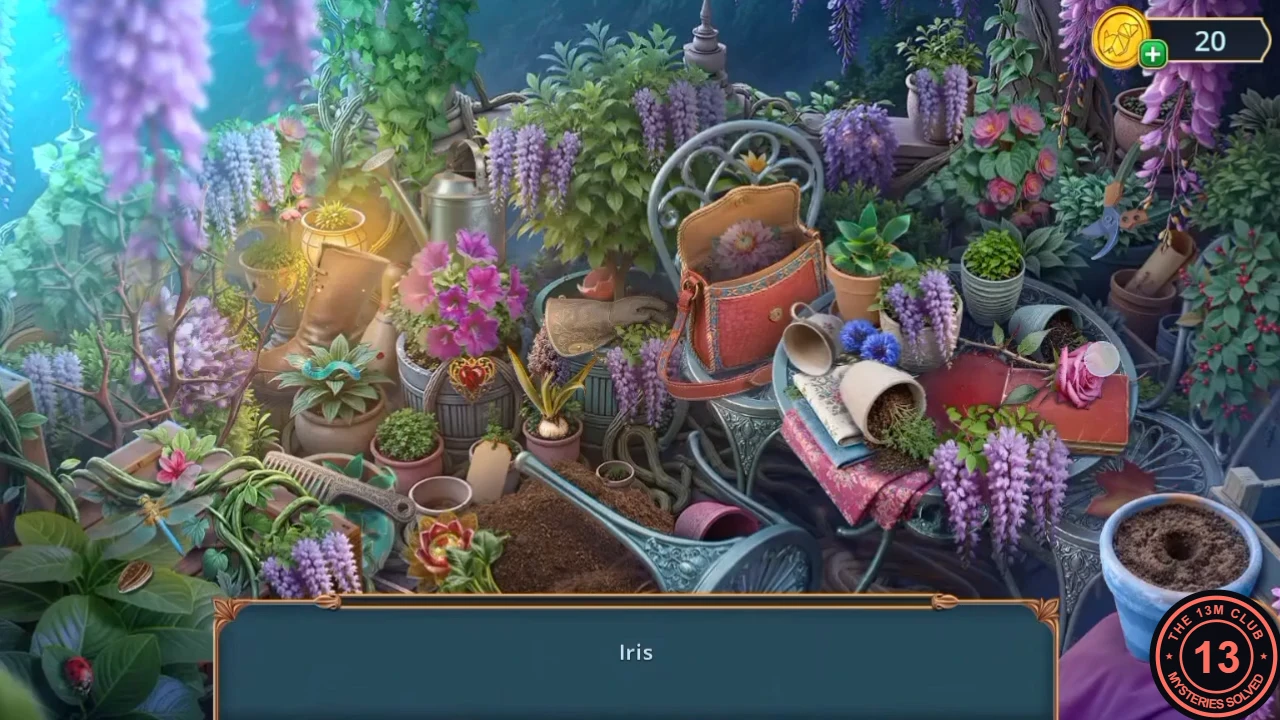
Scare off the crows, prepare the marble block and burn back the wisteria on the balcony.
- Zoom into the scarecrow frame on the tree in the Landscape Painting. Add the Straw Bag and the Shabby Bowler Hat, then draw a face with the Marker. The scarecrow is complete and the crows fly away; nothing is collected here in the recording.
- In the Victorian Art Studio, zoom into the marble table and place the Marble Working Scheme beside the marble block. The block still needs a tool (later).
- On the Balcony, use the wand on the thorny vines of the wisteria arch. They burn away and open a hidden-object scene.
- The flowers are requested one at a time (Iris, Rose, Sunflower, Hyacinth...). Some need preparation inside the scene: the rose is too thorny to pick by hand, so first tap the white glove by the overturned flowerpot, and water the dry hyacinth bulb with the watering can in the scene.
Victorian Art Studio: cello melody
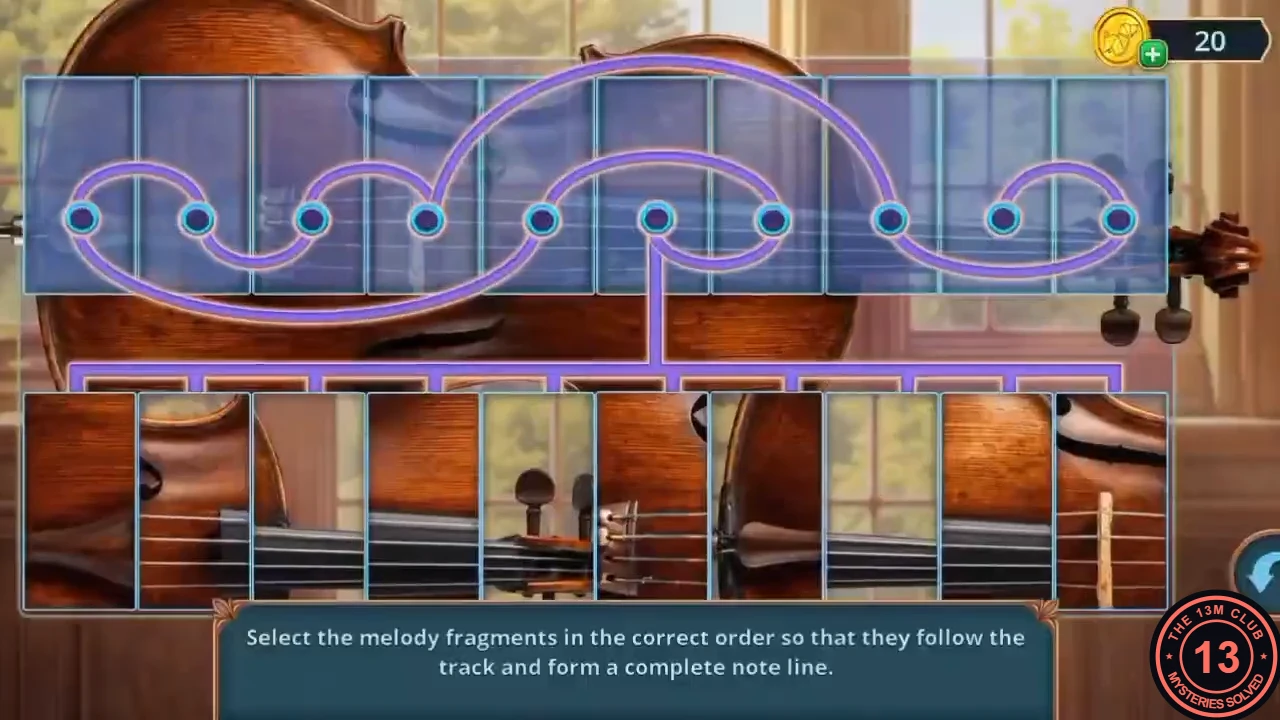
Copy the carved notes on the balcony and play them on the studio cello.
- On the Balcony, zoom into the palette on the easel and dip the Palette Knife in the paint to get the Palette Knife with Paint.
- Zoom into the carved notes on the balcony floor. Lay the Paper over the carving and rub it with the Palette Knife with Paint. Take the Dancing Notes.
- In the Victorian Art Studio, place the Dancing Notes on the empty music stand by the cello to start the puzzle.
- Puzzle: "Select the melody fragments in the correct order so that they follow the track and form a complete note line." Follow the purple track from its start and, for each slot it reaches, tap the bottom fragment whose note line continues the previous one. In the recording the bottom fragments were tapped in this order, counting positions from the left: 8th, 5th, 3rd, 10th, 6th, 1st, 7th, 2nd, 9th and 4th (the game numbers each fragment as you tap it, as in the image below). If your fragments are arranged differently, match the note lines rather than the positions.
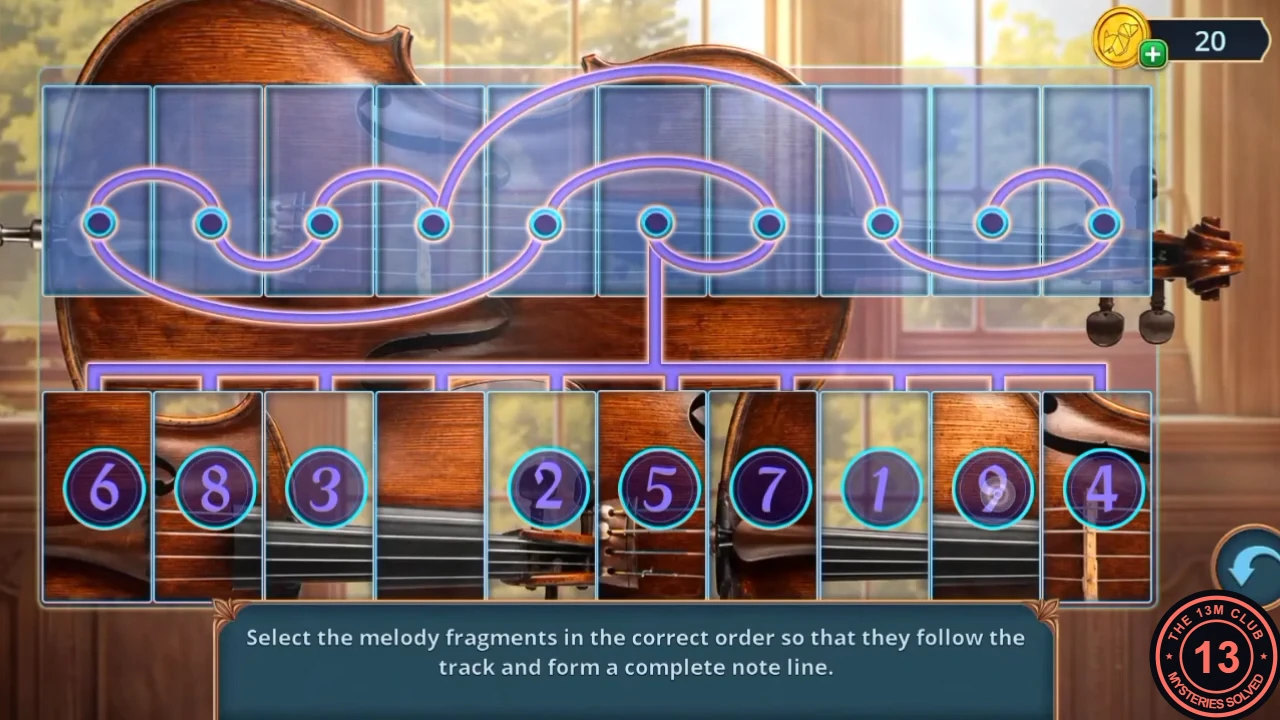
Tap order from the recording: the numbers show when each fragment was tapped; the unnumbered fourth fragment is tapped last (10th). - The cello compartment opens; take the blue wind-up key.
Magic mirror: differences
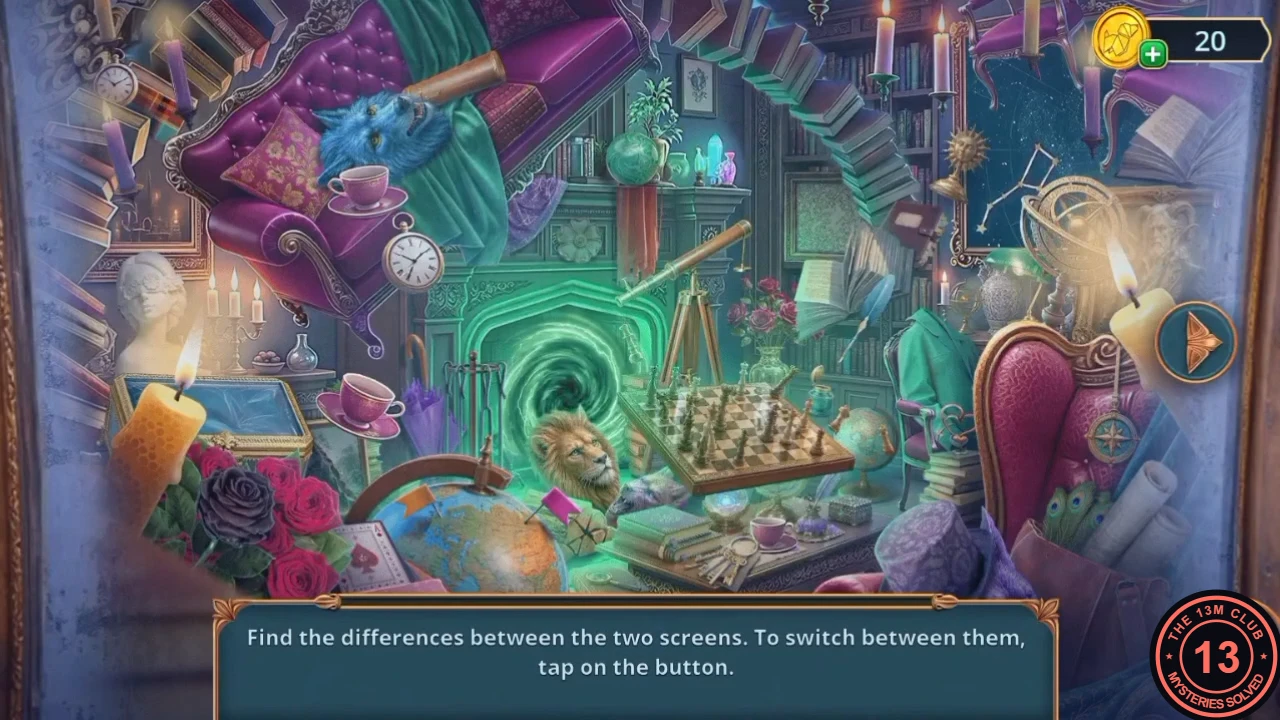
Find a photo of the day Oberon and Lucius quarrelled and let the mirror show it.
- Open the Circus Strongman Figurine in the inventory and insert the wind-up key to get the Wind-Up Circus Strongman.
- In the Family Living Room, zoom into the trophy wall and set the Wind-Up Circus Strongman on the wolf head. He forces the jaws open. Mabel remembers the quarrel between her grandfather and uncle; take the Photo of the Past.
- Place the Photo of the Past on the mirror to start the puzzle.
- Puzzle: "Find the differences between the two screens. To switch between them, tap on the button." Only one picture is visible at a time. Toggle with the arrow button and watch for objects that appear, vanish or change; each find is ticked in green. The image below shows every tick from the recording.
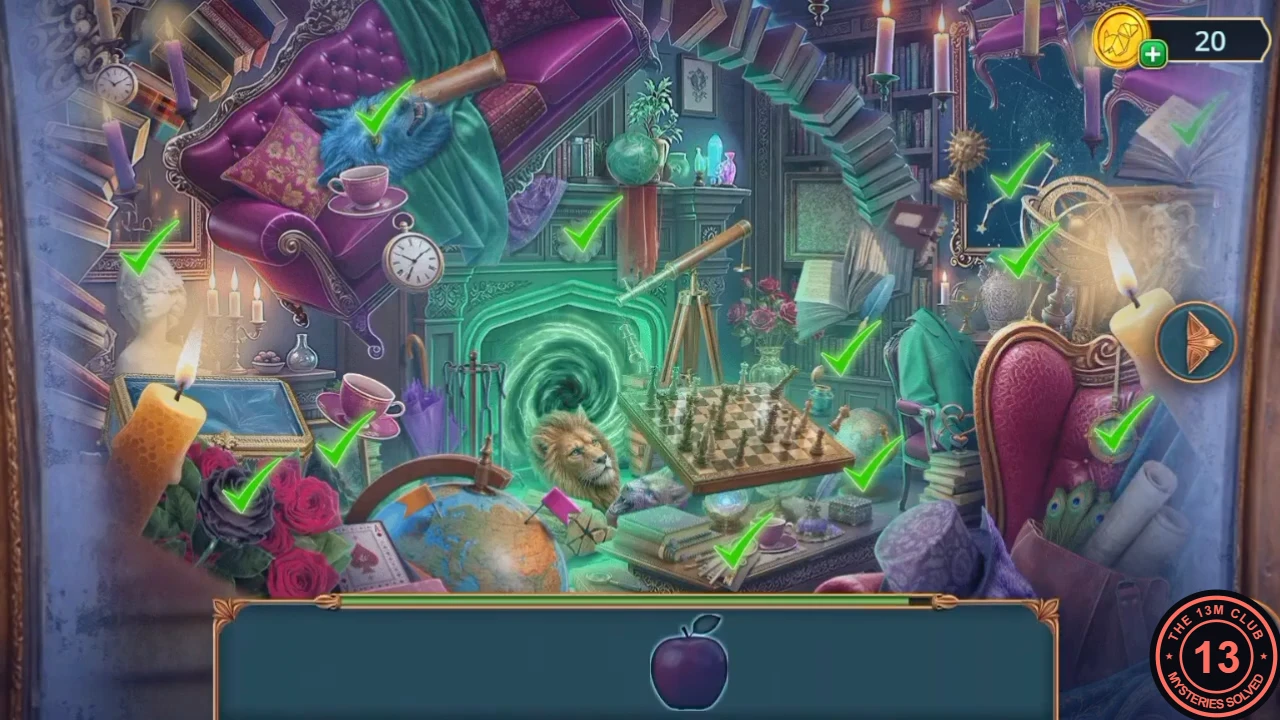
All differences from the recording, ticked in green. - Take the Enchanted Apple.
Castle Painting: fountain funnels
Get the valve from the horse stall and drain the fountain.
- In the Castle Painting, zoom into the horse stall and give the horse the Enchanted Apple. The horse turns; take the Valve. The saddlebag strap needs something sharp (later).
- Zoom into the fountain and fit the Valve to the pedestal to start the puzzle.
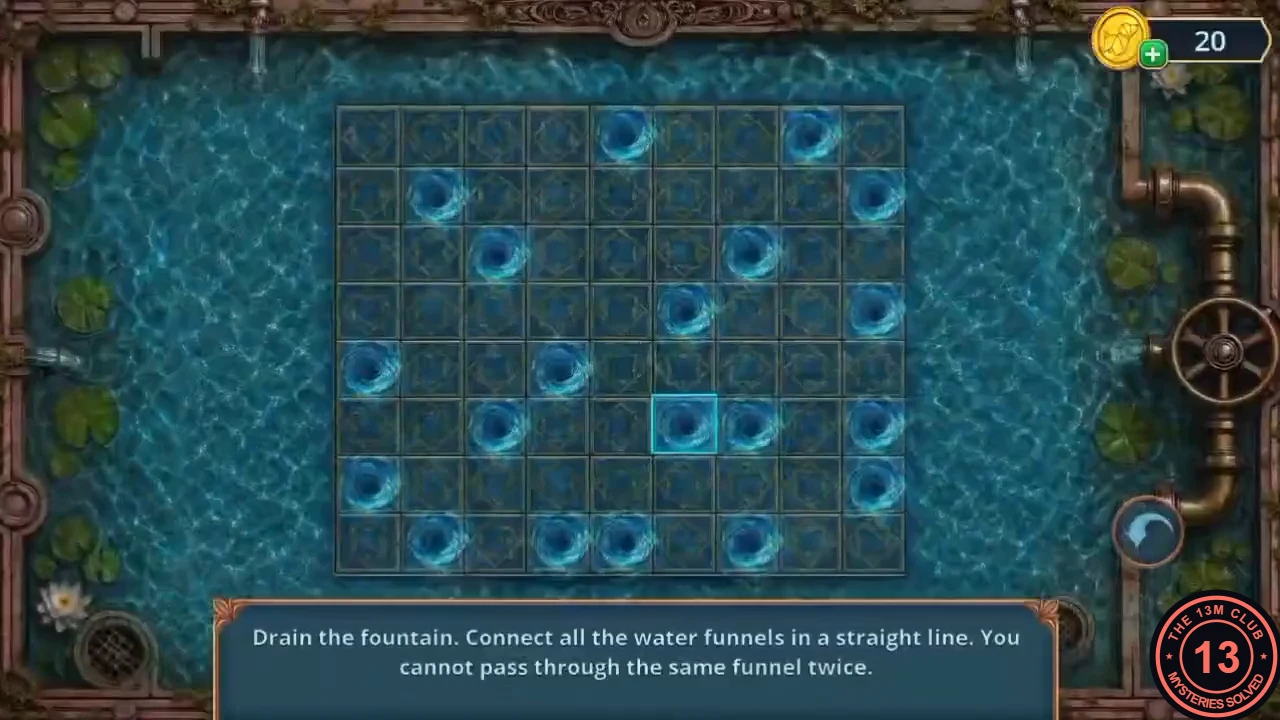
- Puzzle: "Drain the fountain. Connect all the water funnels in a straight line. You cannot pass through the same funnel twice." The path starts at the outlined funnel (sixth row, sixth column). Draw one continuous path from funnel to funnel. Each segment must be straight, so you can only change direction on a funnel; lines may cross. Plan ahead around funnels with few straight-line neighbours, because they have to be the ends of a segment you can still reach. The image below shows the path from the recording at the moment the game accepted it. Note one exception: the funnel in the top row, second from the right, is still unconnected in that image, yet the game completed the puzzle as soon as the path reached the funnel in the top row, fifth column. Under the stated rules, that top-right funnel can only be reached along the top row. So if your game does not finish at that point, draw one more straight segment to the right, from the top-row funnel where the path ended to the unconnected one. That last segment is not shown in the recording.
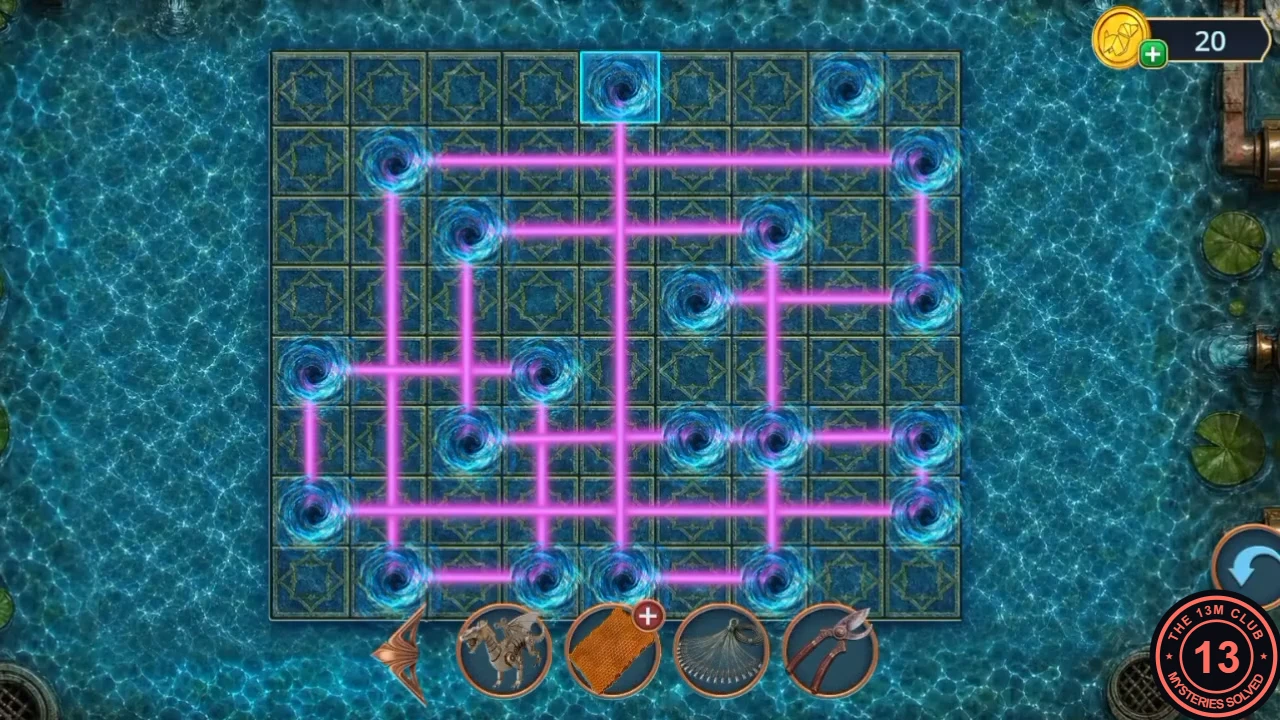
The path at the moment the game accepted the puzzle in the recording. The funnel in the top row, second from the right, is still unconnected. - Zoom into the drained basin and tap the wick lying by the pedestal. Oil is poured over it; collect the Oiled Wick and the Empty Vial.
Victorian Art Studio: globe search (second visit)
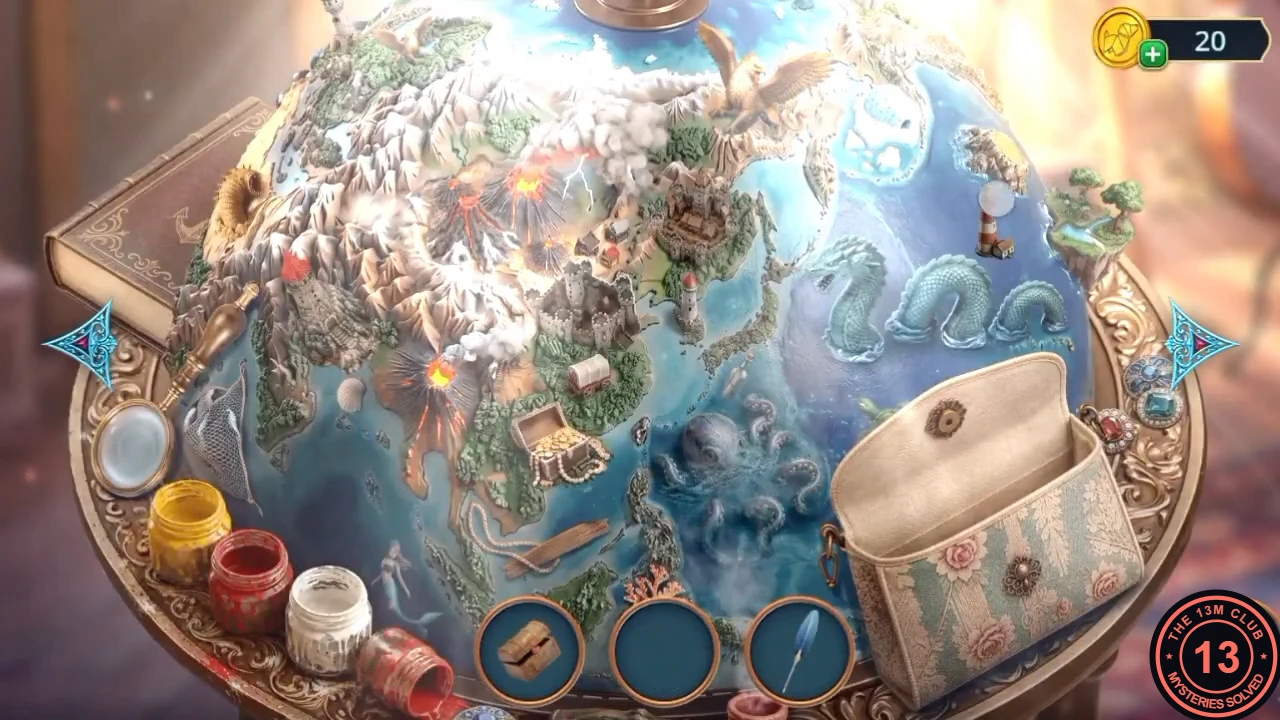
Light the lantern for a flag, then search the globe again.
- Open the Wax Honeycomb in the inventory, add the Oiled Wick and light it with the Wind-Up Dragon to make the Homemade Candle.
- In the Castle Painting, put the Homemade Candle in the lantern on the post with the zombie face. The lantern lights up; take the Country Flag.
- In the Victorian Art Studio, put the Country Flag in the empty stand at the base of the globe to open the globe scene again.
- Find the items shown in the three slots at the bottom, rotating the globe with the side arrows. Several objects only appear after using something found in the scene (for example on the palette, the compass needle, a gear, a ship and a pyramid). This scene is long; use the hint if you stall.
Family Living Room: trophy tracks
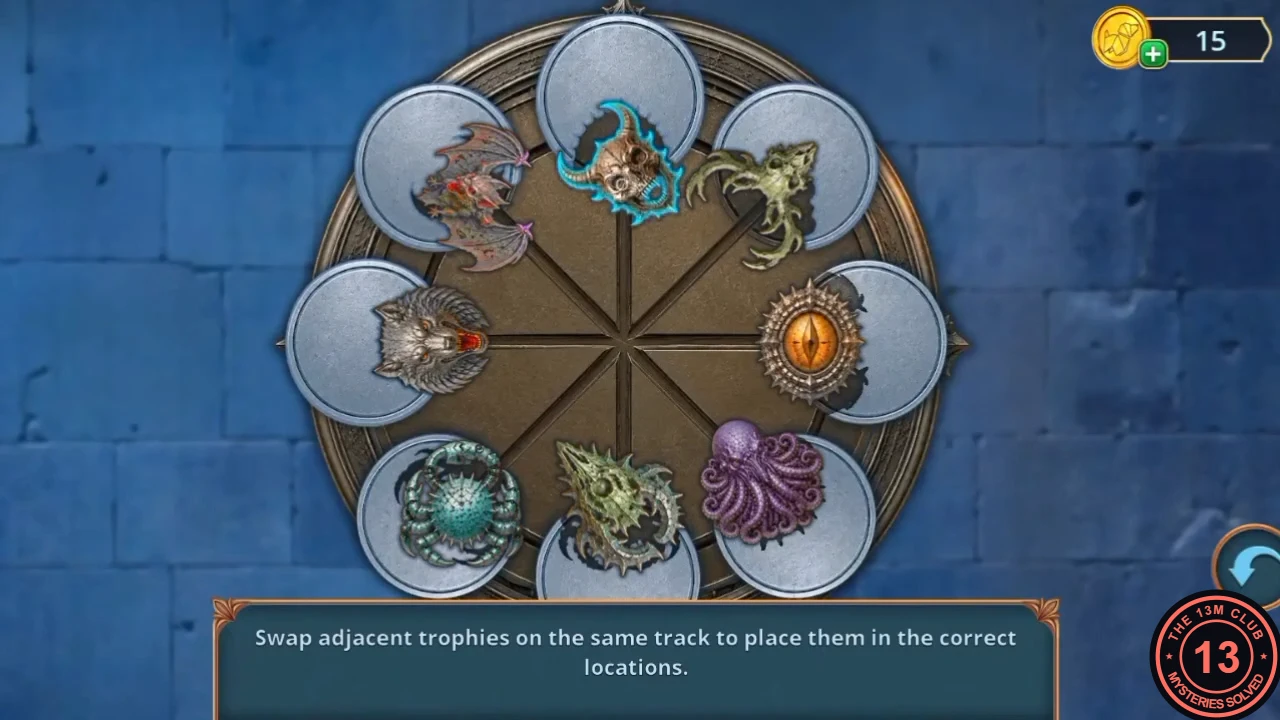
Carve a statue for the fountain and use the comb it leads to on the lion trophy.
- In the Victorian Art Studio, use the Chisel on the marble block. Take the Marble Triton Figurine.
- In the Castle Painting, place the Marble Triton Figurine on the fountain pedestal. Water flows again; take the Fake Vampire Fangs. Optional spider (19/140 in our playthrough): in the Triton fountain close-up, it sits on the basin rim to the right of the statue.
- Zoom into the horse saddlebag and bite through the strap with the Fake Vampire Fangs. The bag opens; take the Comb.
- In the Family Living Room, use the Comb on the lion trophy's mane to start the puzzle.
- Puzzle: "Swap adjacent trophies on the same track to place them in the correct locations." Eight trophies sit on an outer ring and a centre track. Only neighbours on the same track can be swapped, so move each trophy towards its place one swap at a time, settling trophies one by one rather than shuffling several at once. The solved ring is shown below: clockwise from the top, the orange eye, purple octopus, bat-winged creature, green spiny sea dragon, blue crab, green antlered creature, snarling wolf and horned skull.
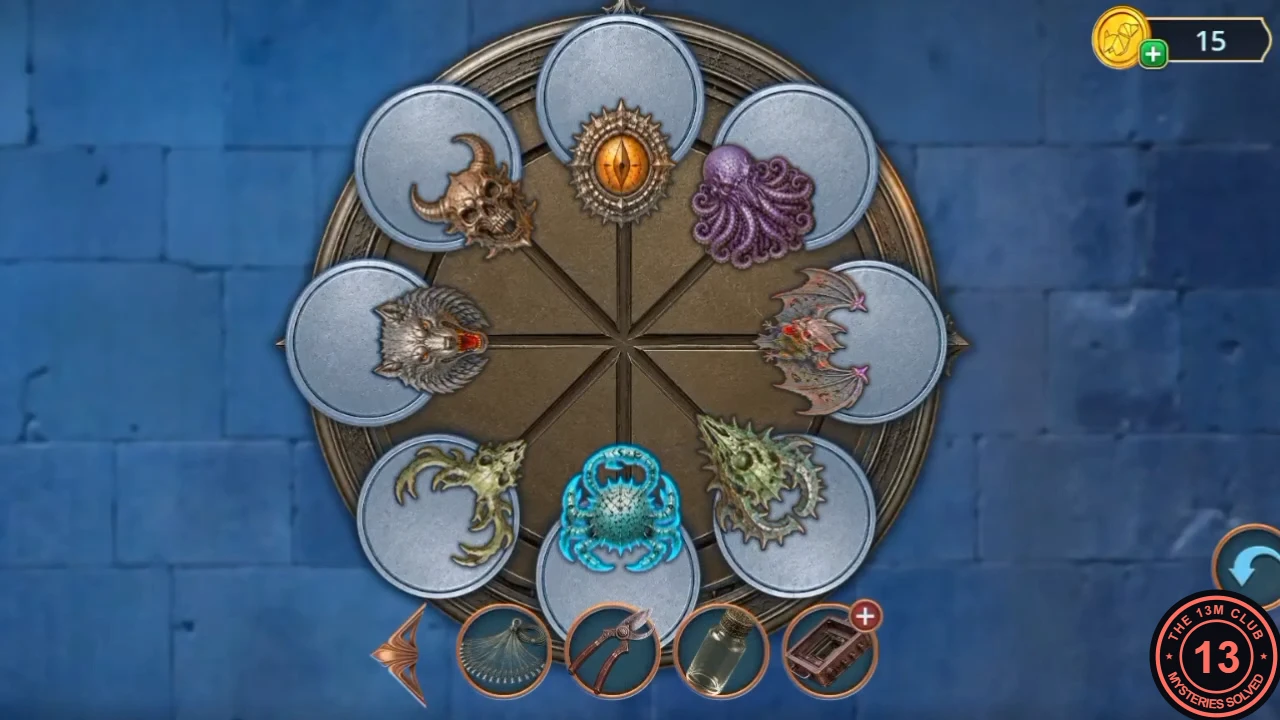
The solved wheel. - A niche opens behind the trophies and a blue orb flies into the wand, giving it a new spell.
Landscape Painting: mill-yard search (second visit)
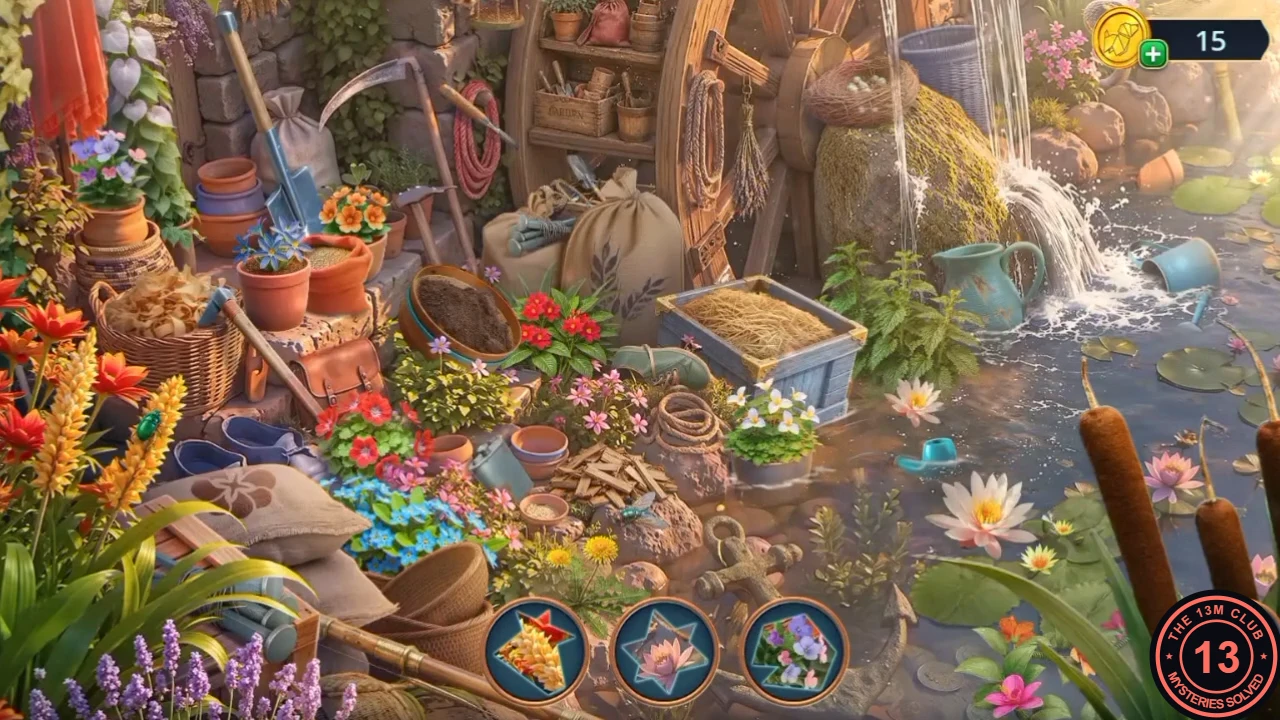
Free the stuck mill wheel with a lever and search the mill yard again.
- In the Family Living Room, use the wand on the lightning display case beside the aquarium. The storm stops; take the curved golden horn.
- In the Landscape Painting, zoom into the rock by the mill wheel. Wedge the golden horn under the rock and place the Golem Figurine on it. The golem levers the rock away and the water turns the wheel, opening a hidden-object scene.
- Find the items shown in the three slots at the bottom.
Family Court Room: tapestry stitches
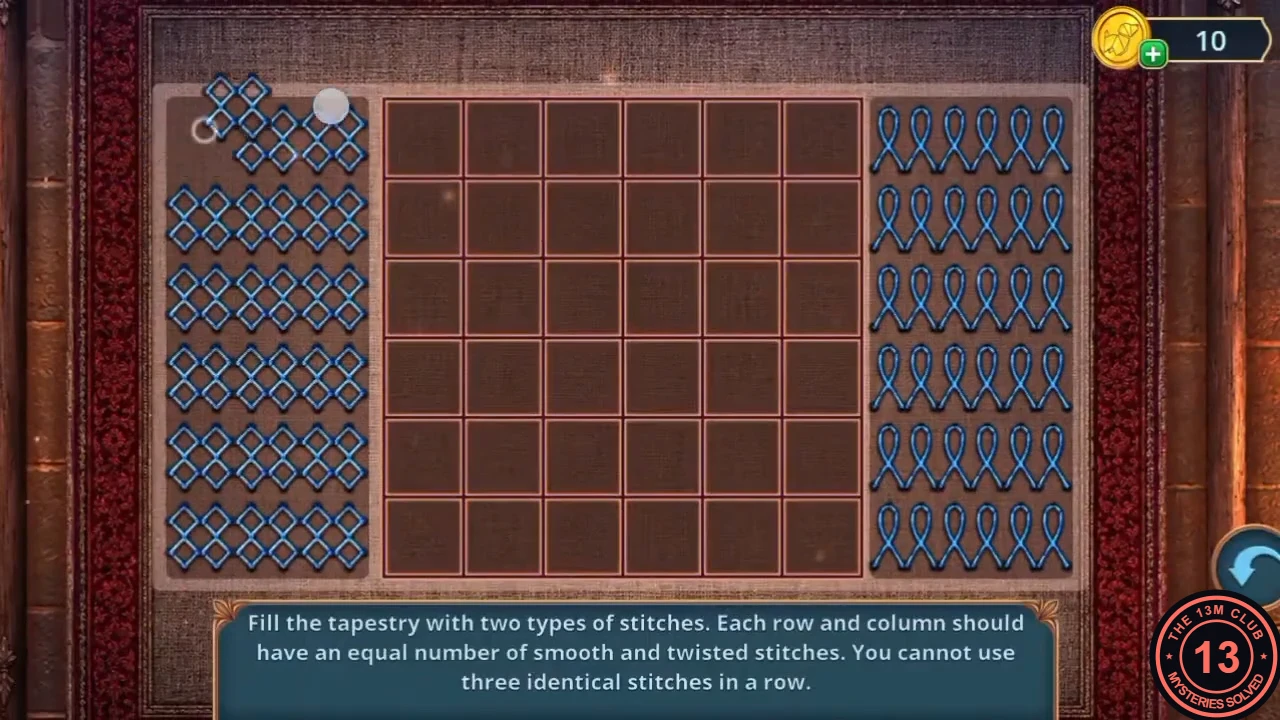
Spin silk from the Codex cobweb and mend the tapestry.
- Zoom into the haystack spot in the Landscape Painting and dig the packed ground with the Shovel. Take the Empty Spindle.
- In the Family Court Room, wind the cobweb by the Codex onto the Empty Spindle to get the Silk Spindle.
- Use the Silk Spindle on the tapestry to start the puzzle.
- Puzzle: "Fill the tapestry with two types of stitches. Each row and column should have an equal number of smooth and twisted stitches. You cannot use three identical stitches in a row." Drag stitches from the trays on the left and right into the empty 6×6 grid. A checkerboard works: fill the first row with alternating stitches starting with the left-tray stitch, start the second row with the right-tray stitch, and keep alternating every row.
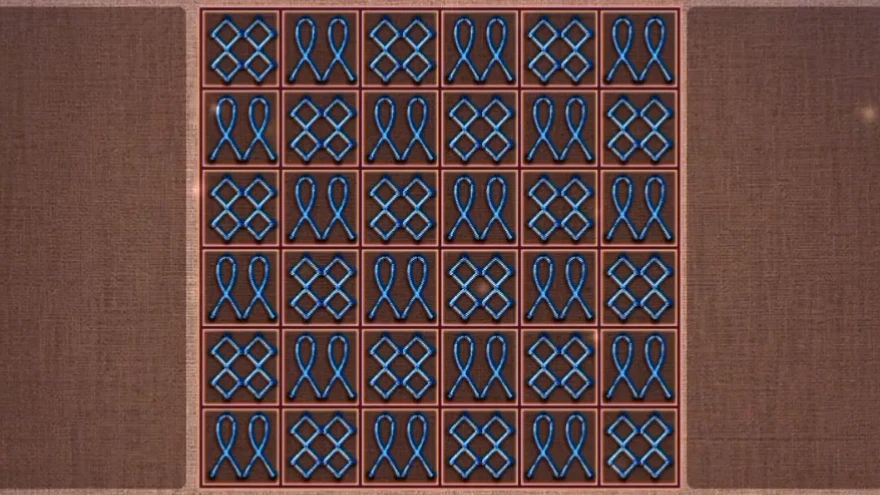
A valid finished grid: a checkerboard, starting with a diamond-knot stitch at the top left. - Take Oberon's Cameo from the niche in the tapestry.
Castle model: the Philosopher's Stone
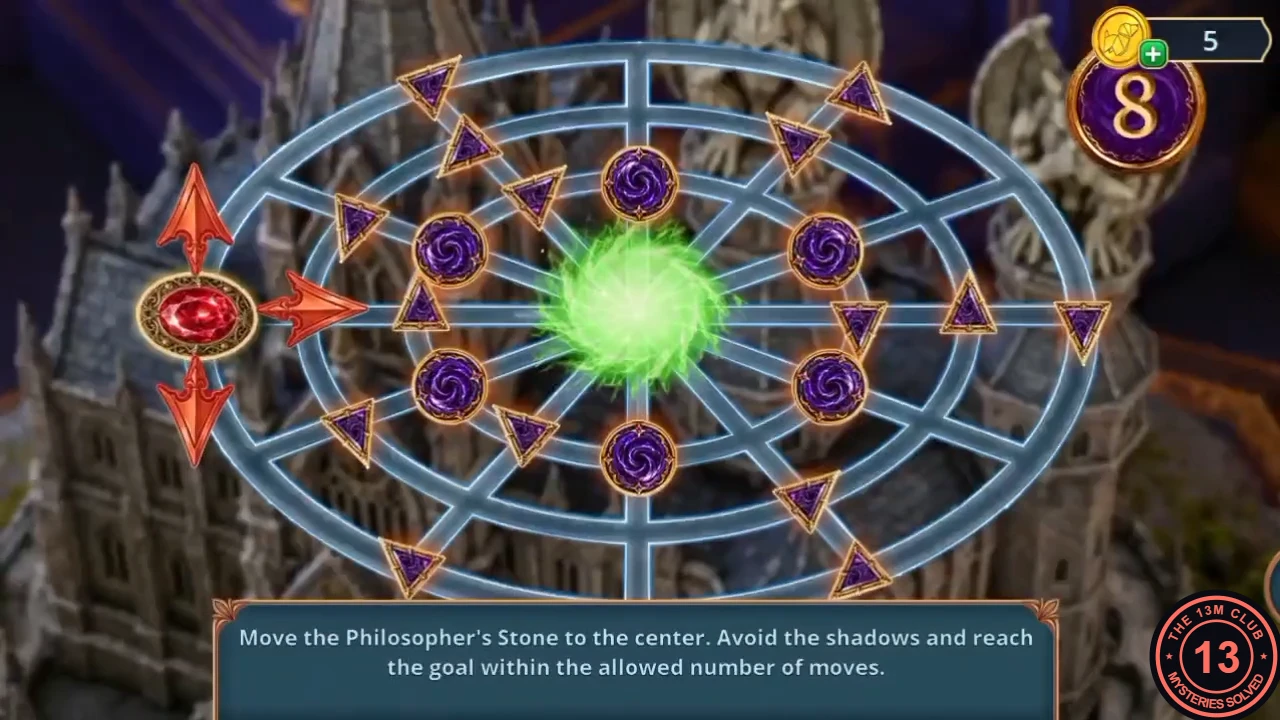
Find Oberon's will, survive the closing portal and solve Oberon's last riddle in the painted study.
- In the Painting in Oberon's Study, put Oberon's Cameo in the red box on the bookshelf. The box opens; take the Torn Will.
- Give the Torn Will to Lucius. Even this copy of the will has been destroyed, and the portal starts to close. Decision: "Freeze with fear" (free), "Run to the portal" (30 coins, +2 on the button) or "Hold the portal" (60 coins, +6). The task changes to "Get out of the painting".
- Zoom into the bookshelf again and take Nimra's token ("What's it doing here?!") and the Star Coordinates (Oberon named a star after Mabel).
- Use the Star Coordinates on the telescope at the window. Oberon's note promises a gift for solving his riddle, and the wand gains a new spell.
- Use the wand on the castle model on the side table to start the puzzle.
- Puzzle: "Move the Philosopher's Stone to the center. Avoid the shadows and reach the goal within the allowed number of moves." You have 8 moves, and the shadows move after each of yours. Recorded solution in 5 moves from the stone's start on the outer ring at the 9 o'clock position: one step clockwise along the outer ring, in to the middle ring, one step back to the 9 o'clock spoke, in to the inner ring, then in to the centre. The shadow positions in your game may differ, so check each step before moving.
Chapter 2 decision points
The chapter ends with the Decision Points summary.
- The summary lists the chapter's four choices with their points: Swallow the offense (0) or Stand up for the family (2); Drive Ezra away (0) or Explain calmly (2); Get angry at Lucius (0) or Demand an explanation (2); Freeze in fear (0), Run to the portal (3) or Use magic (6). The maximum is 12 points. The wording is close to the dialogue buttons, so the rows can be matched to the choices: Ezra at the Codex, Ezra in the Victorian Art Studio, Lucius in the painted study and the closing portal (whose buttons read Freeze with fear / Run to the portal / Hold the portal). One value does not match. The summary gives "Run to the portal" 3 points, but its 30-coin button showed +2. The recording picked only free answers, so it does not show which value is actually added.
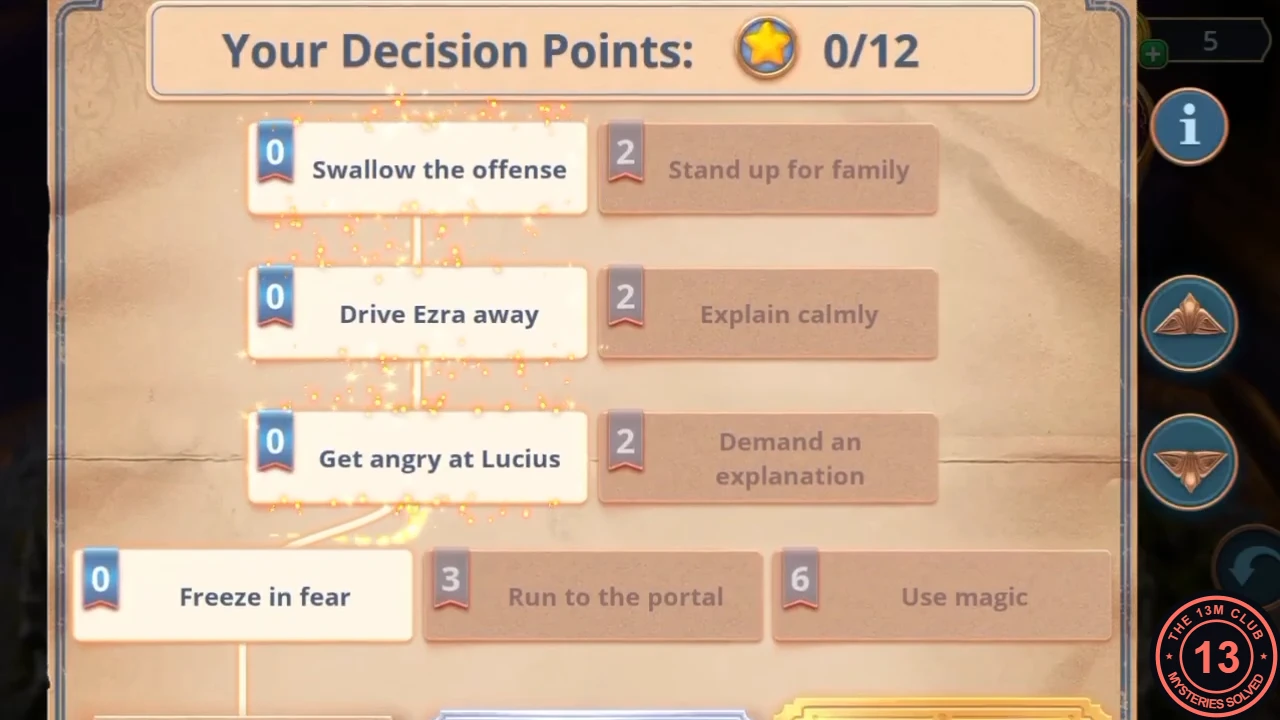
The Chapter 2 summary from the recorded playthrough: 0 of 12 points. - Outcome panels unlock at 0, 4 and 10 points. The recording earned 0 points, so only the 0-point outcome opened: Lucius urges Mabel through the portal before her magic fades, and Ezra suggests visiting Nimra. The story continues into Chapter 3. The 4- and 10-point scenes are not shown. We could not find any playthrough or written walkthrough that shows them, so they are not covered in this guide.