CHAPTER 1
Castle courtyard: the prop cart
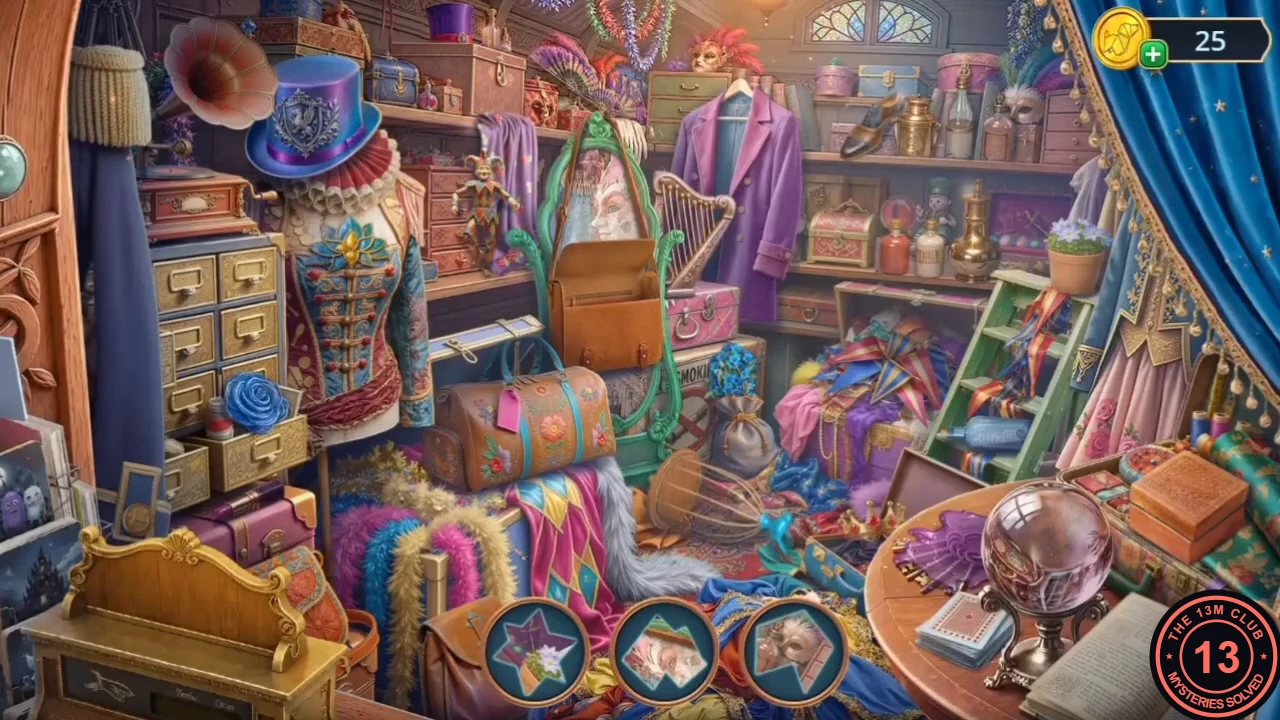
Earn the wand's frost spell, open Oberon's dragon drawer and search the prop cart for Anubris's monocle.
- On the castle-wall parapet, pry the loose brick out with the Iron Pen and take the Metal Flower.
- In Oberon's study, zoom into the family tree stand and put the Metal Flower in the empty flower slot. A blue magic orb flies into the wand, giving it a frost spell.
- Zoom into the study fireplace and use the wand to freeze the fire out. Take the Golden Key.
- Open the dragon drawer on Oberon's desk with the Golden Key. Read Anubris's note (gargoyles snatched his monocle from the prop cart). Take the ring with the green stone: the Emerald joins the gem set (2/3) and the Septum Ring stays in the inventory.
- In the Grimwood Castle courtyard the bats fly off. Tap the sparkling prop cart to open a hidden-object scene.
- Find the silhouetted items shown in the three slots at the bottom.
CHAPTER 1
Storage room: category search
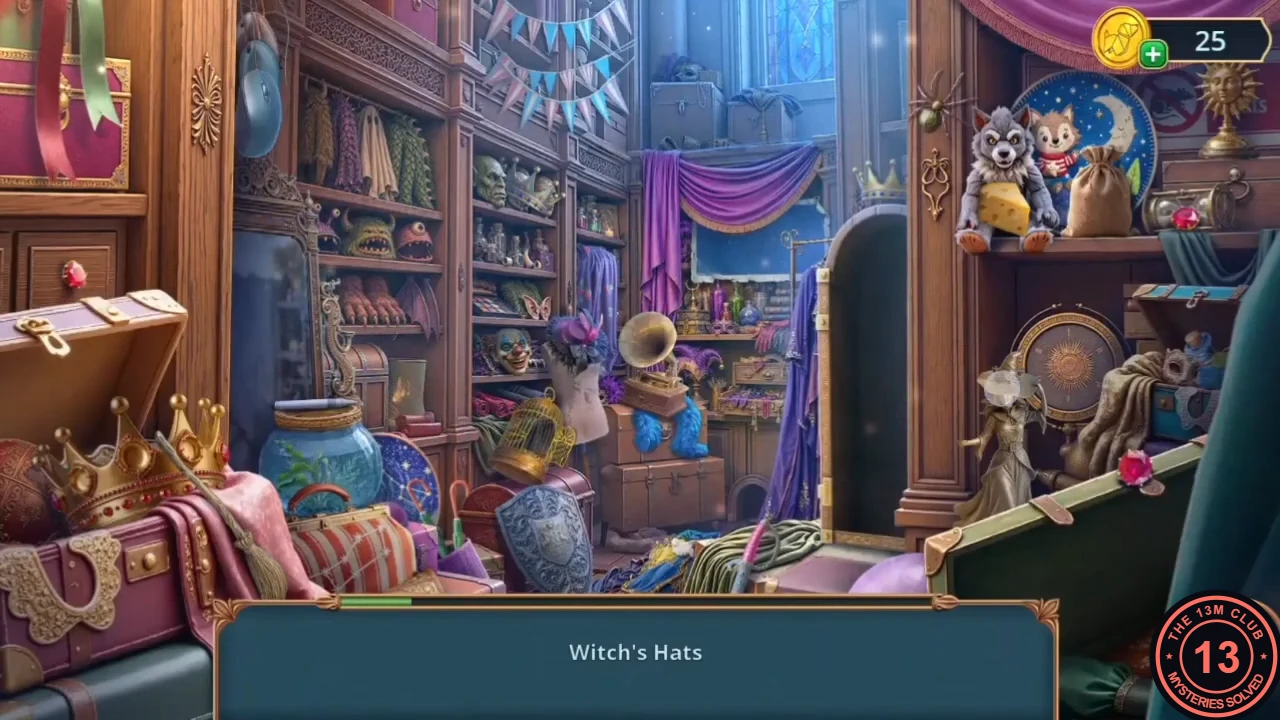
Complete the gem set, power the prism and get back into the storage room.
- Zoom into the courtyard gargoyle spout and lower the Monocle Chain without Lens through the grate. It pulls up a golden pendulum weight.
- Zoom into the Grand Masquerade Hall clock and hang the weight on the pendulum chain. The clock face opens; take the Sapphire, completing the gem set.
- Zoom into the prism and place the gems: the Ruby on the left mirror, the Emerald on the right mirror and the Sapphire in the front ring. The beams open the pyramid; take the Belt with Gold Buckle.
- Go to the Storage Room door in the corridor. Its old chains have dropped the sign ("I need to figure out a way to lift it up"). Use the Belt with Gold Buckle on the hanging sign to reopen the storage room as a hidden-object scene.
- This scene lists categories: Witch's Hats, Mice (three), Constellations and Crowns. Find every object that fits each category; one hat needs completing inside the scene ("Where witch needs her... what?").
CHAPTER 1
Grand Hall portrait chutes
Find a nail to rehang the missing portrait in the Grand Hall reception.
- Drop the Bath Bomb into the corridor sink basin. Take the Brass Spoon from the foam.
- Dig in the flower pot on the corridor window sill with the Brass Spoon to find the Nail.
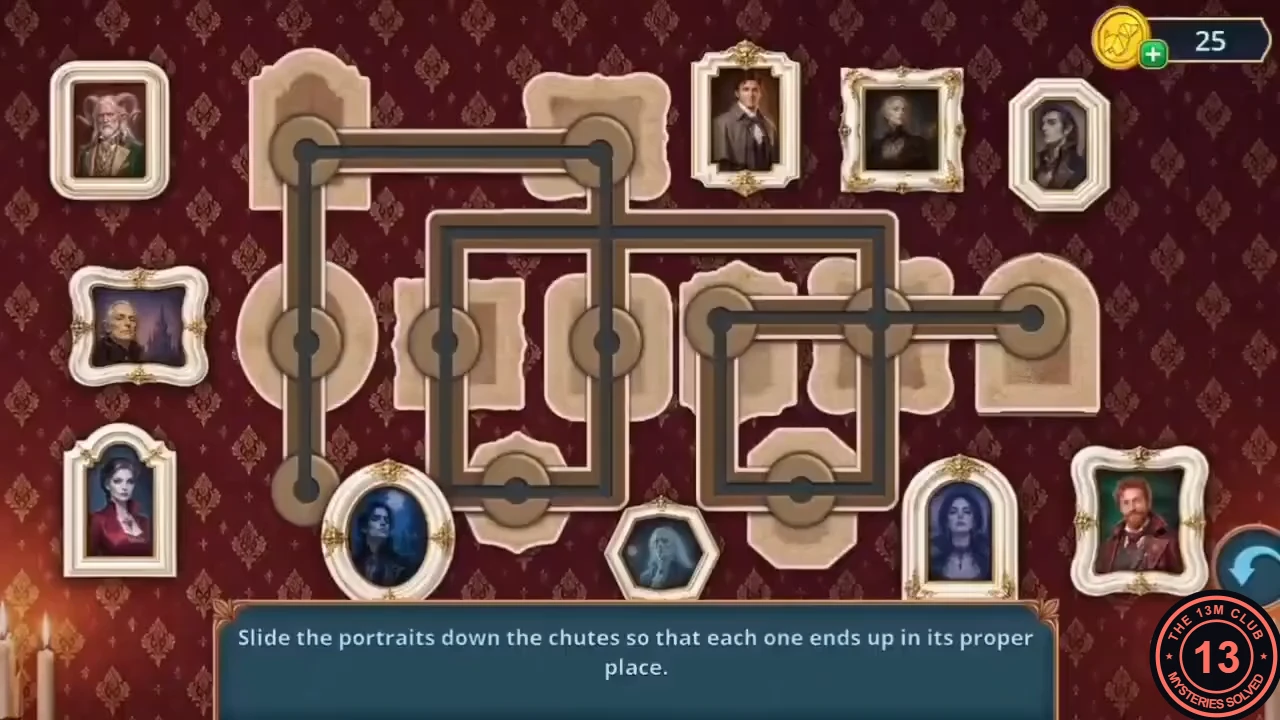
- In the Grand Hall reception, zoom into the portrait wall and put the Nail in the empty centre spot to start the puzzle.
- Puzzle: "Slide the portraits down the chutes so that each one ends up in its proper place." This is a lengthy sliding puzzle, so the guide gives the method rather than every move. Each frame shape (oval, hexagon, arch, ornate square and so on) matches the outline of one slot on the wall, which tells you where it belongs. Work out which portrait belongs at the bottom of each chute first and send those down before filling the upper spots, using the free chute to park portraits that are in the way.
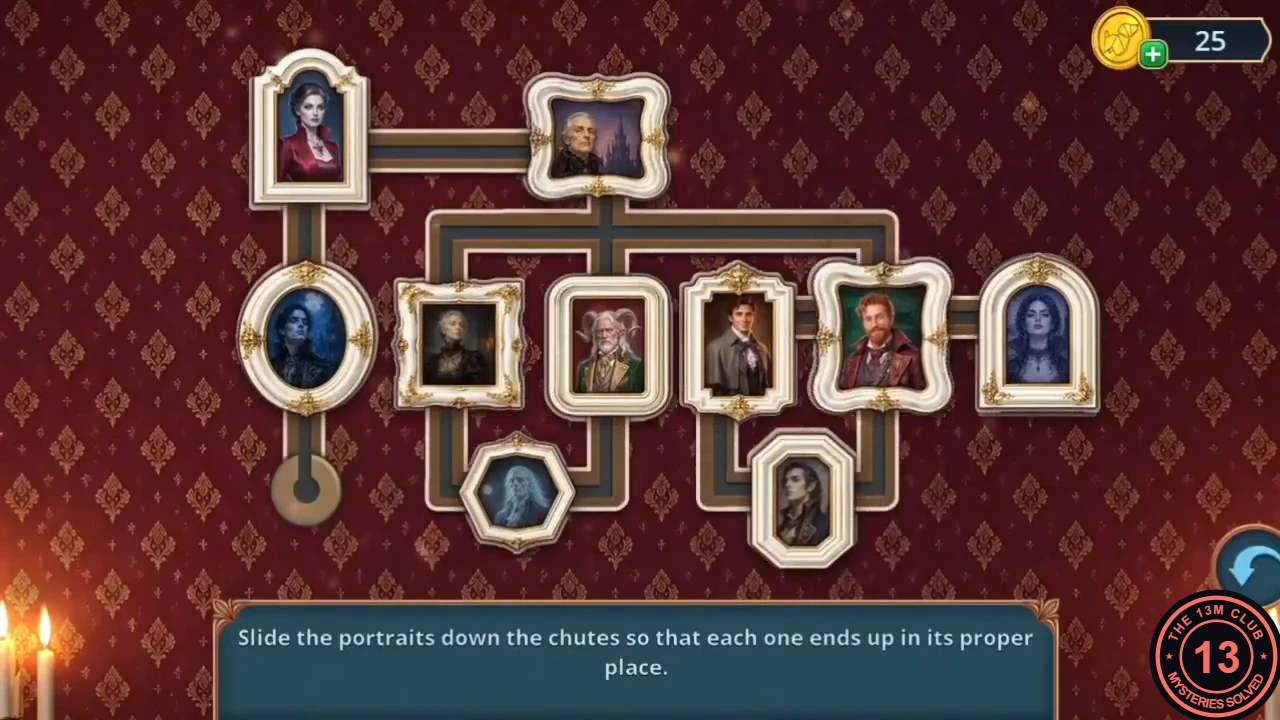
Target arrangement: every portrait rests in the slot whose outline matches its frame. - Behind the solved portraits, take the Raven Cane and the Printing on Blotting Paper.
CHAPTER 1
Car trunk case: formula search
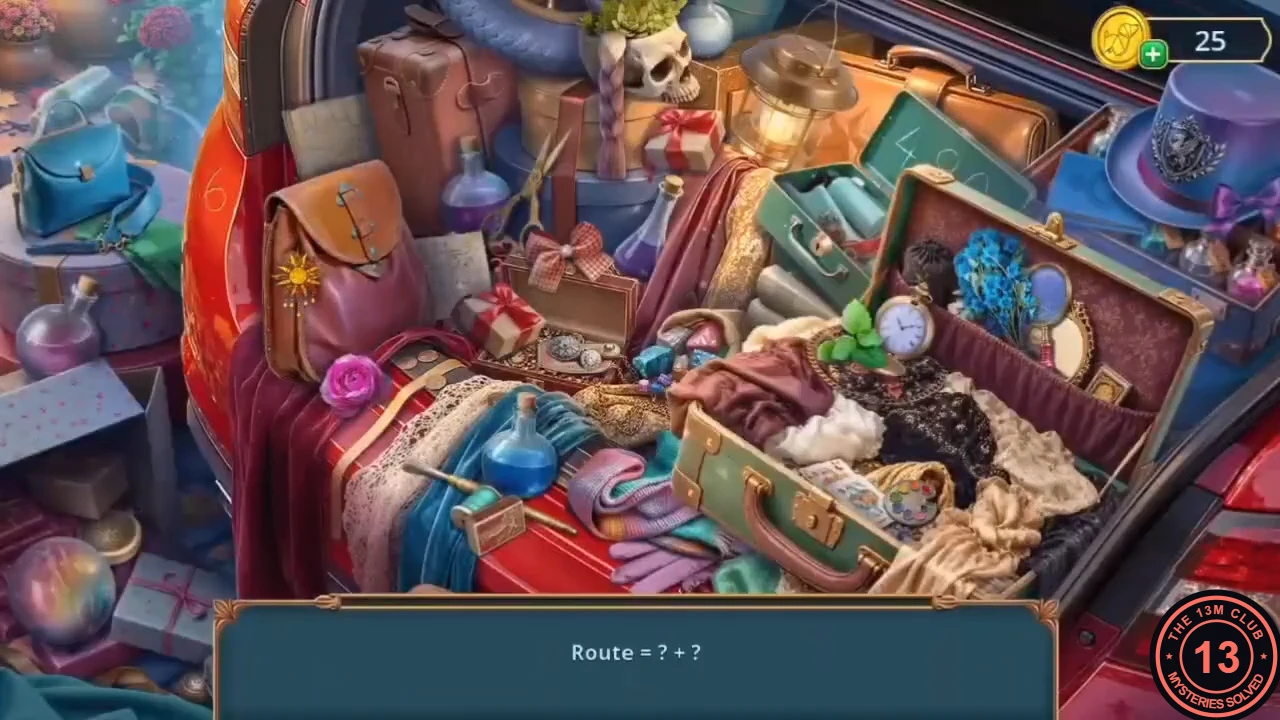
Calm the pumpkin stall with incense and open the small case in the car trunk.
- Use the Printing on Blotting Paper on the spilled ink by the reception guest book to get the Soothing Incense.
- In the Main Square, zoom into the pumpkin stall and put the Soothing Incense in the burner. Take the Chainmail Glove, the Jar Lid and My Amulet Key Chain. Optional spider (8/140 in our playthrough): in the pumpkin stall close-up, it sits on the table beside the birdcage, at the lower left.
- Zoom into the small case in the car trunk and use My Amulet Key Chain on it to open a formula hidden-object scene.
- Each line shows a word built from two objects, for example "Route = Map + Compass", "Shoe = Venus Sign + Sneaker", "Clover = Leaf + Number 4" and "Painting = Brush + Palette". Find both objects in the scene for each formula until the list is complete.
CHAPTER 1
Tower knight: shield links
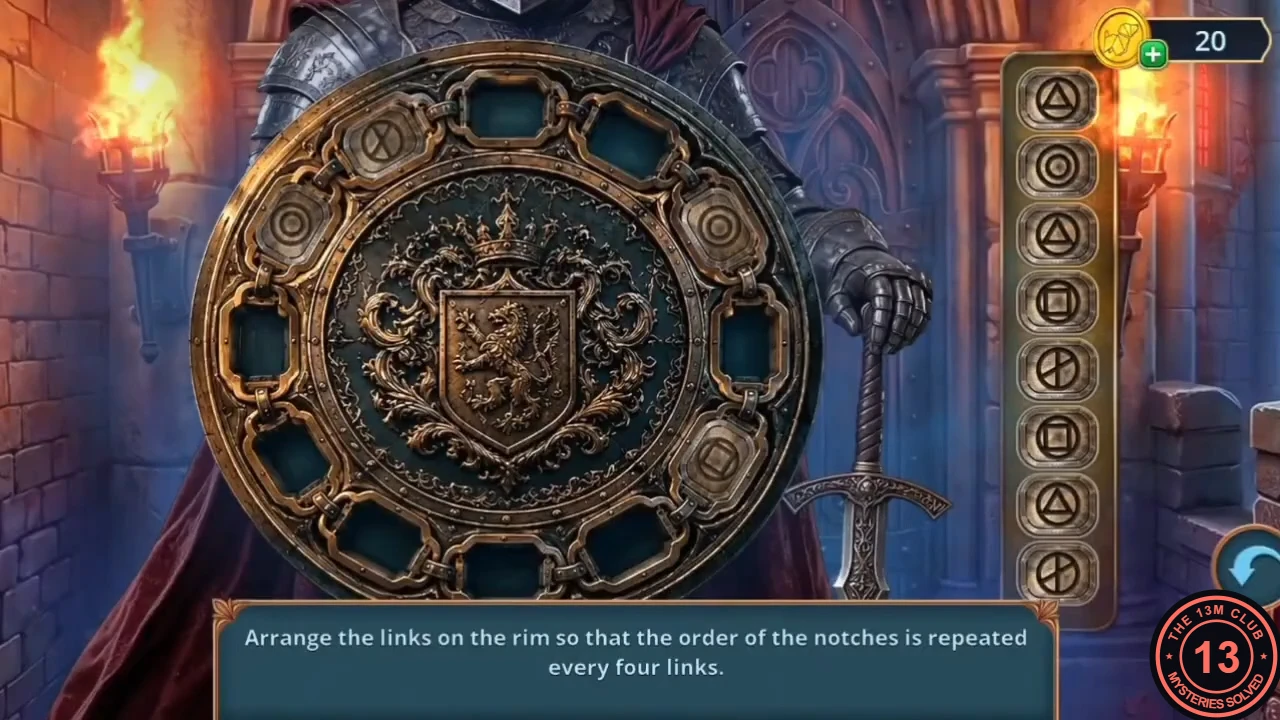
Clean the rusty sword and give the tower knight his weapon.
- Zoom into the mask wall in the gallery and tickle the left elf mask with the Feather. It laughs and drops the Werewolf Mouthwash.
- Open the Portable Irrigator in the inventory and add the Werewolf Mouthwash to fill it.
- Zoom into the scorpion and flagpole area on the castle wall and spray the rusty sword with the filled irrigator. Take the Clean Sword.
- Give the Clean Sword to the knight at the tower door to start the puzzle.
- Puzzle: "Arrange the links on the rim so that the order of the notches is repeated every four links." Read the notch pattern from links already in place to find the four-link sequence, then fill the empty rim spots so that the same sequence repeats all the way round.
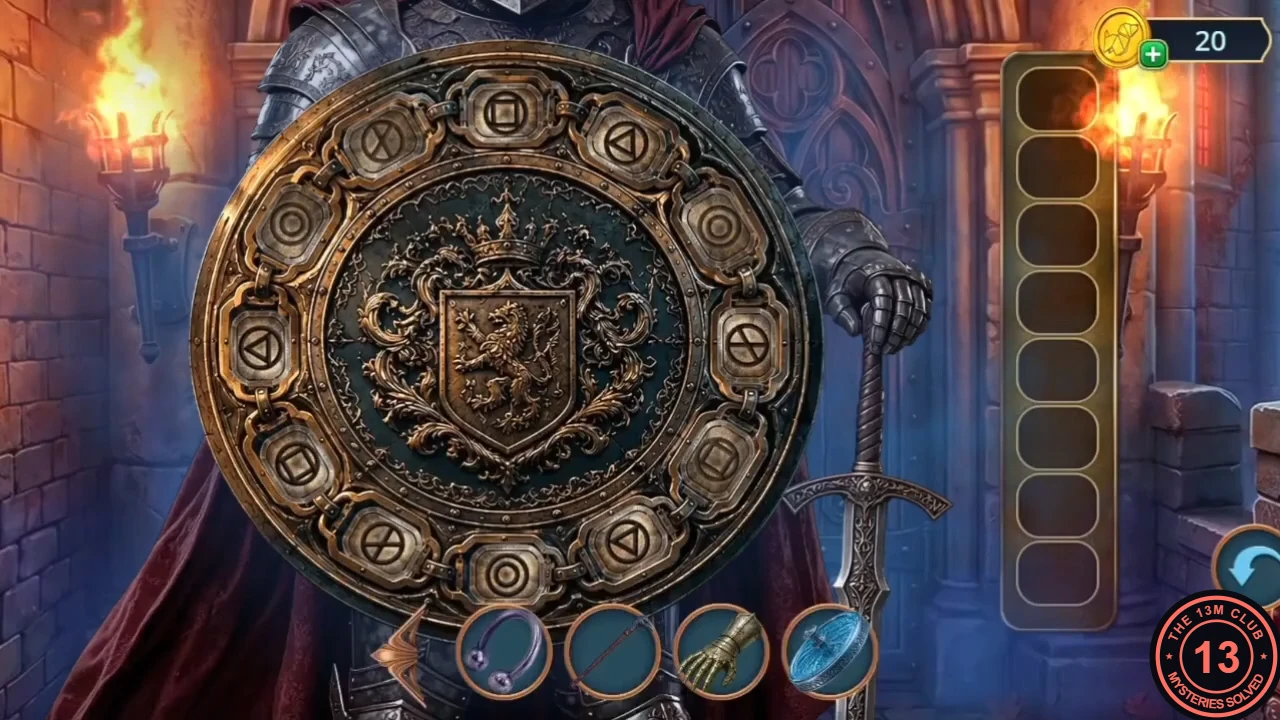
Solved rim: clockwise from the top the symbols repeat square, triangle, circle, crossed circle.
CHAPTER 1
Terrace altar: rim pieces
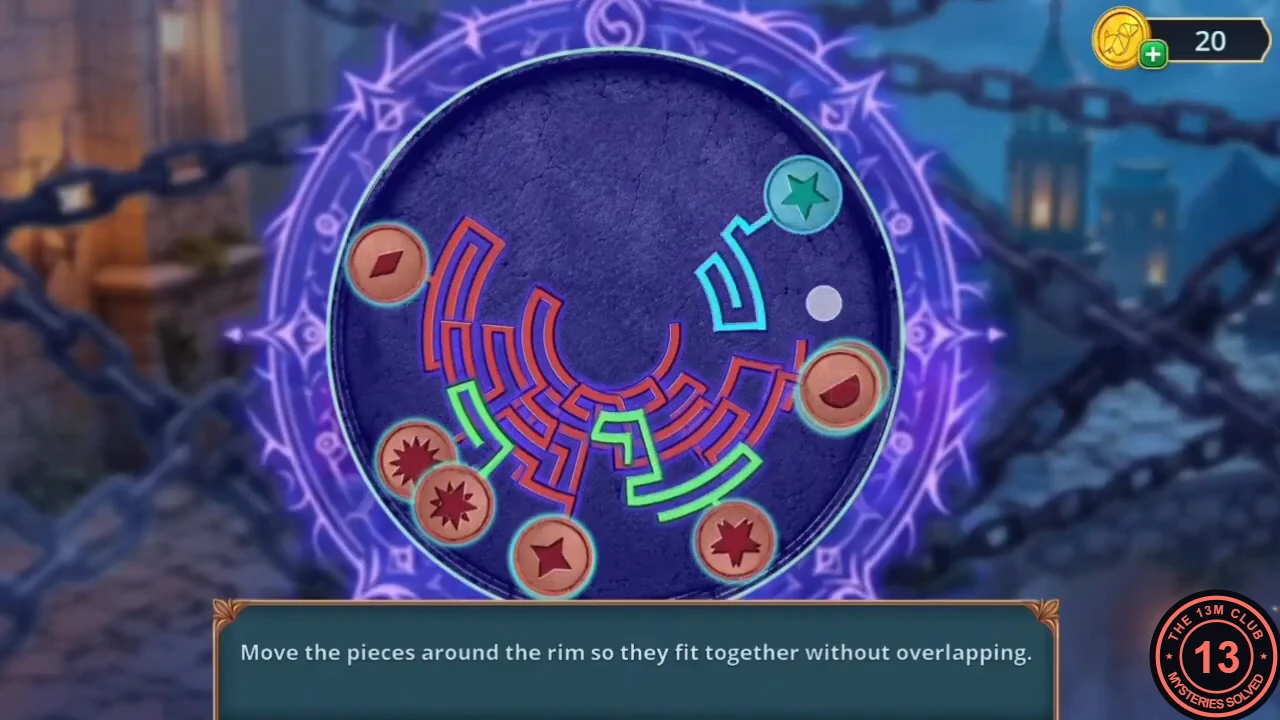
Chains fall across the terrace: it is a trap.
- On the terrace (task "Find the unwanted guest" completes; new task "Escape the trap"), use the bat buddy from the bottom-left slot on the altar. The bat knocks the purple orb off the dome.
- Use the wand on the altar to start the puzzle.
- Puzzle: "Move the pieces around the rim so they fit together without overlapping." Pieces turn green when they sit correctly. Slide the largest pieces first, then fit the small ones into the remaining gaps.
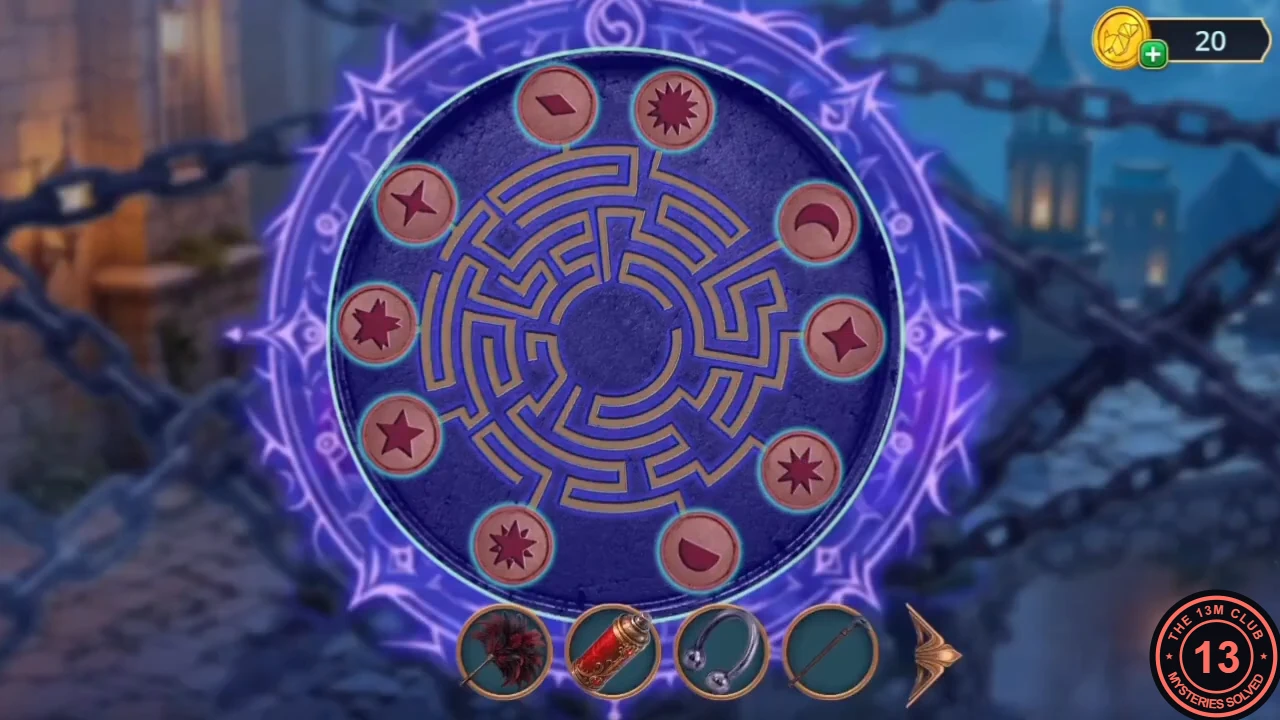
The completed rim: all pieces fit together (they turn bronze once the puzzle is solved).
CHAPTER 1
Neutralize Ezra: lightning and duel
Ezra of the Hunters' Association blames Mabel. Distract him and win the duel.
- Decision: "I don't wish you any harm! I'm looking for the killer, too!" (60 coins, +2 decision points) or "Put down your weapon or you'll regret it!" (free). New task: "Neutralize Ezra".
- Zoom into the lion fireplace on the parapet and spray the Magic Red Paint over the lion relief's face. Take the Wolf Statuette. The rusty grate here hides something (later).
- Zoom into the fallen bell ("I need something heavy, and something long..."). Place the Wolf Statuette beside the bell as a fulcrum and use the Raven Cane as a lever. Take the Powder with Puff and the File from under the bell.
- In the same close-up, sweep the blue debris with the Fluffy Duster and take a Metal Ring (Metal Rings 1/2).
- Back at the lion fireplace, file through the rusty grate bars with the File and take the second Metal Ring (Metal Rings 2/2).
- Zoom into the lightning rod (its note warns it lacks conductive rings) and fit the Metal Rings. Lightning strikes and charges the stone at its base.
- Decision: "Attack" (free), "Knock the weapon out" (30 coins, +2 shown on the button) or "Subdue and restrain" (60 coins, +6). Task "Neutralize Ezra" completes and "Save yourself" begins.
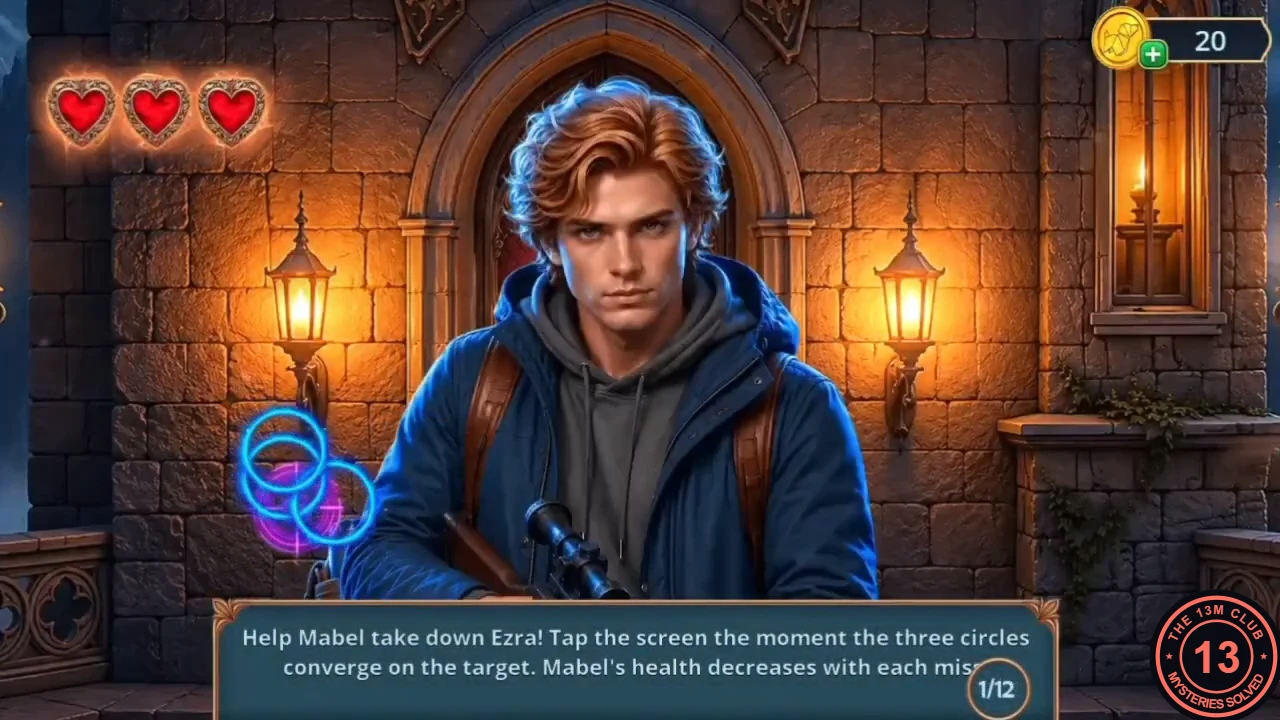
- Minigame: "Help Mabel take down Ezra! Tap the screen the moment the three circles converge on the target. Mabel's health decreases with each miss." Watch the circles shrink together and tap exactly when they overlap the target; you need 12 hits and can afford only a few misses (three hearts).
CHAPTER 1
Chapter 1 decision points
At the end of every chapter the game totals your decision points and shows which outcome you unlocked.
- The summary shows four rows with its own labels and point values: Hurry up (0) or Find out more about the wand (2); Panic (0) or Pull yourself together (2); Threaten (0) or Negotiate (2); Get scared (0), Ask for help (3) or Grab the ledge (6). The maximum is 12 points. These labels are not the wording of the dialogue buttons you pressed. Chapter 1 had four point choices: Dad's "Thanks, Dad!" (+2 on the popup), the reaction to Oberon's death (60-coin answer +2), the answer to Ezra on the terrace (60-coin answer +2), and the duel choice Attack / Knock the weapon out (30 coins, +2) / Subdue and restrain (60 coins, +6). Only one link is confirmed by the recording: the only points it earned came from "Thanks, Dad!", and the summary showed 2/12 with "Find out more about the wand" (2) lit. The other rows are probably in the same order as the choices, but this is not verified. The three-answer row is also unconfirmed. Its labels (scared / help / ledge) do not match the duel buttons, no other choice appears between the duel and the summary, and its middle value (3) differs from the +2 on the 30-coin duel button.
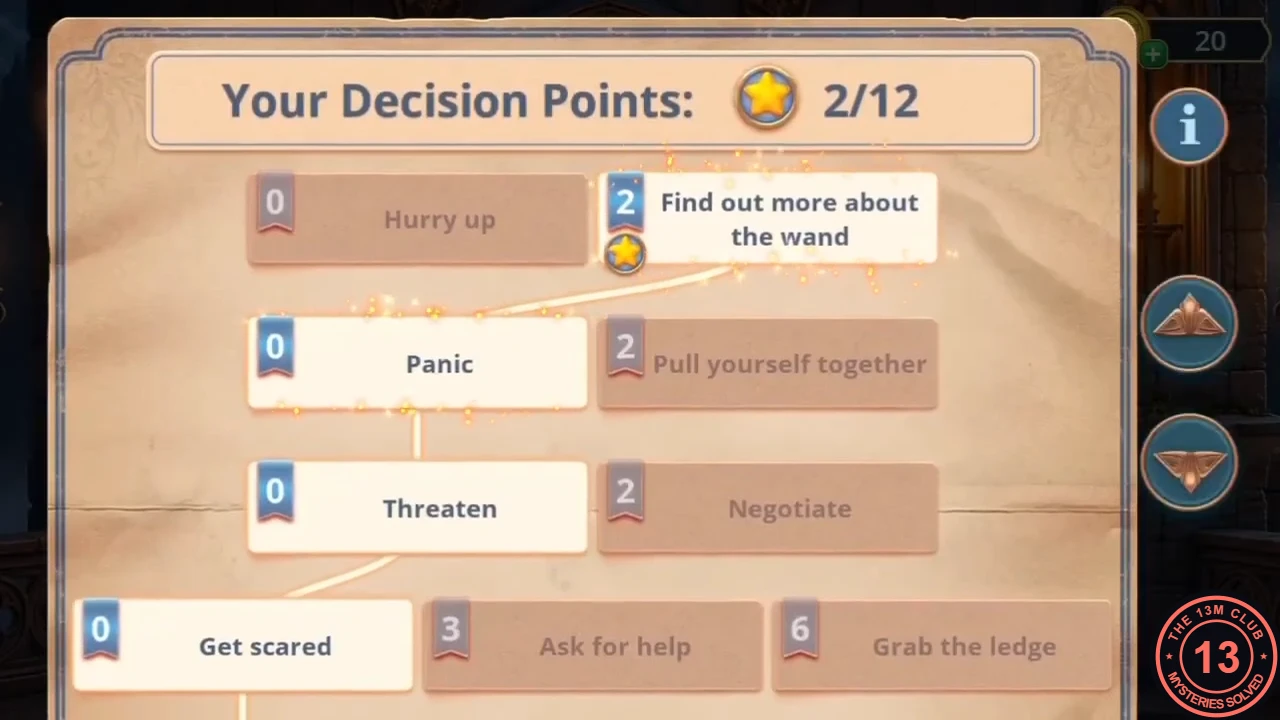
The Chapter 1 summary from the recorded playthrough: 2 of 12 points. - Outcome panels unlock at 0, 4 and 10 points. The recording earned 2 points (from the free "Thanks, Dad!" answer), so only the 0-point outcome opened: Mabel raises her wand while Ezra aims his crossbow, and the story continues into Chapter 2. The 4- and 10-point scenes are not shown. We could not find any playthrough or written walkthrough that shows them, so they are not covered in this guide.