The Castle Approach: Crow Cage, Wrecking Ball and Cliff Ledge
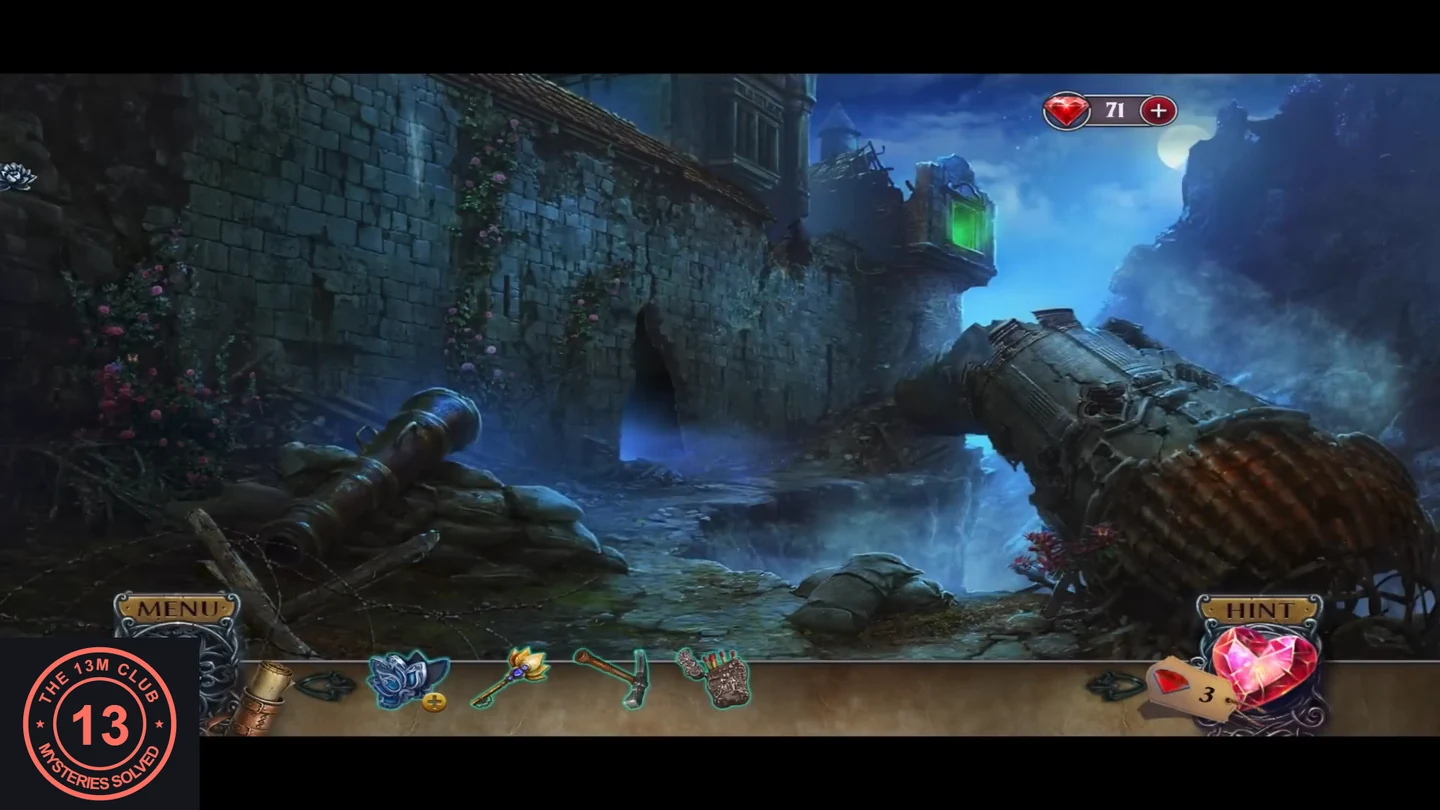
A crow swoops at you as you reach the ruined castle. Collect tools around the broken wall and clear the cliff ledge.
- After the crow attack ('Ahh! That was close. The castle isn't glad to see me again.'), zoom into the fallen soldier's coat and tricorn hat in the left foreground. Take the small rock pick lying to the right of the coat. Back in the main view, pick up the gem-studded box of matches at the foot of the wall, just right of the left cannon's muzzle. Optional: the castle approach tab shows 'Phoenixes to find here: 2'. This guide doesn't show where they are.
- Zoom into the cages at the upper right, below the green-lit tower window ('Cages and glowing skulls? This is getting ridiculous.'). Tap the glowing skull; it vanishes and leaves a green glow. Take the old rag from the glow. The crow in the cage is not friendly ('I need to calm it down.').
- Zoom into the blue-lit gap in the wall in the middle of the scene: a wrecking ball hangs on a rusty chain above a teal crate. Take the small wooden figurine of a man with a hammer from the top of the crate (lumberjack figurine 1/2). 'The chain is old and rusty, but it won't break by itself.'
- Zoom into the cages again and take the rope hanging from them. Zoom into the cliff edge in the middle, by the waterfall, where a lantern hangs on a hook ('It's a long drop down there! I could really use a rope.'). Tie the rope to the hook and take the lantern.
- In the same cliff close-up, rocks block the ledge ('I need a tool to break through these rocks.'). Use the rock pick on them. The rocks fall away and open a way into the ruined hall, where a hidden-object scene starts.
Hidden Objects: The Ruined Hall
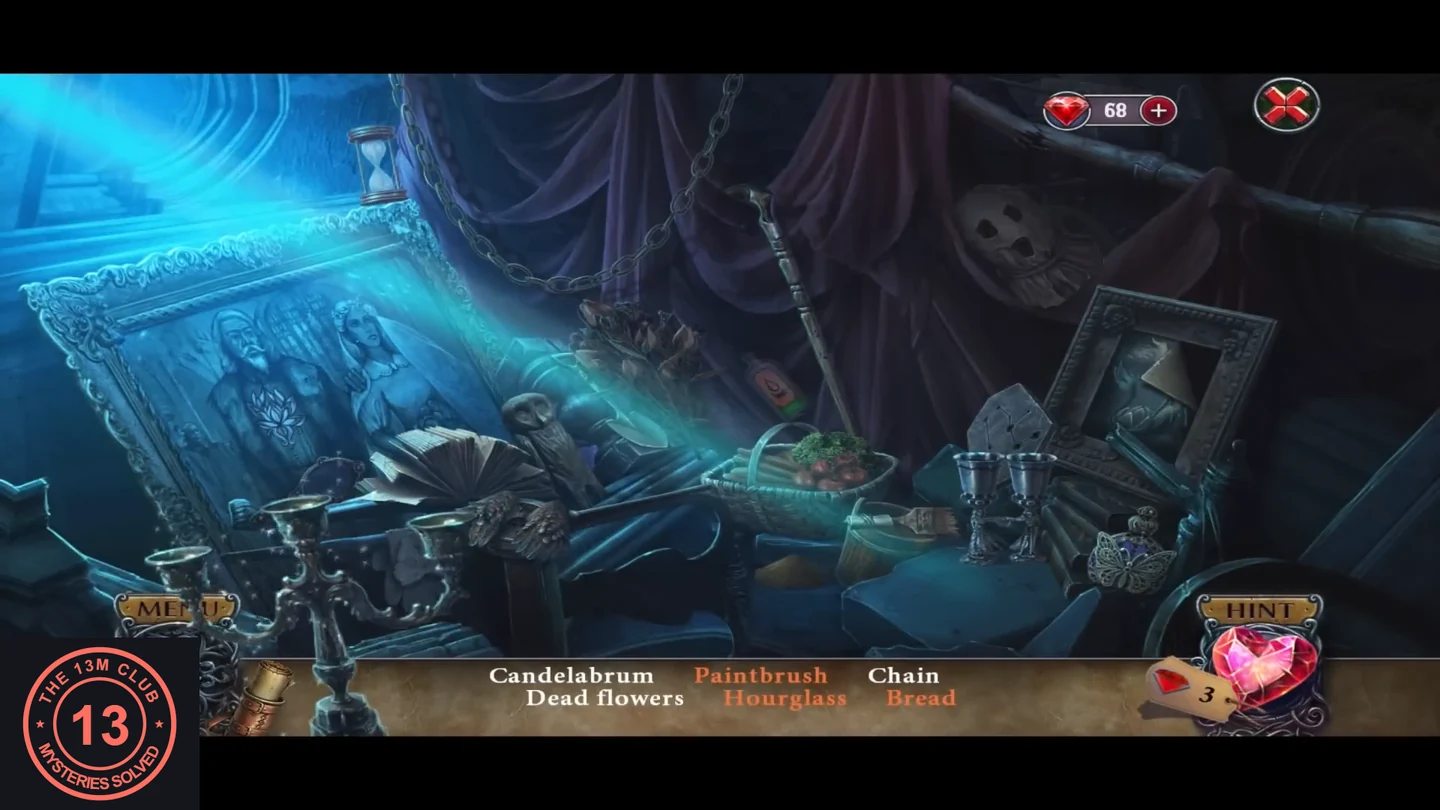
Philip's traps are written all over this hall. Orange names take an extra step.
- Find: Candelabrum, Paintbrush, Chain, Dead flowers, Hourglass, Bread, Constellation, Scary mask, Goblets, Mirror, Lotus and Cane. Candelabrum: left foreground. Chain: hanging from the top middle. Dead flowers: the dried bunch above the basket. Bread: tap the vegetable basket and take the loaf that appears in front of it. Hourglass: the empty hourglass at the top left above the painting needs sand ('This hourglass needs sand.'); tap the small sand pile left of the basket, then take the filled hourglass. Paintbrush: beside the basket, after Philip's note ('Finish the traps and get out of here before the real curse comes out!') appears. Goblets: the pair right of centre. Constellation: move the grey perforated card into the light beam; take the star pattern it casts on the floor. Scary mask: the skull mask at the top right. Cane: the long cane in the middle. Mirror: the hand mirror at the lower left. Lotus: the white lotus on the man's chest in the large painting at the left. Your reward is acid.
The Courtyard: Repairing the Lantern and the Countess Automaton
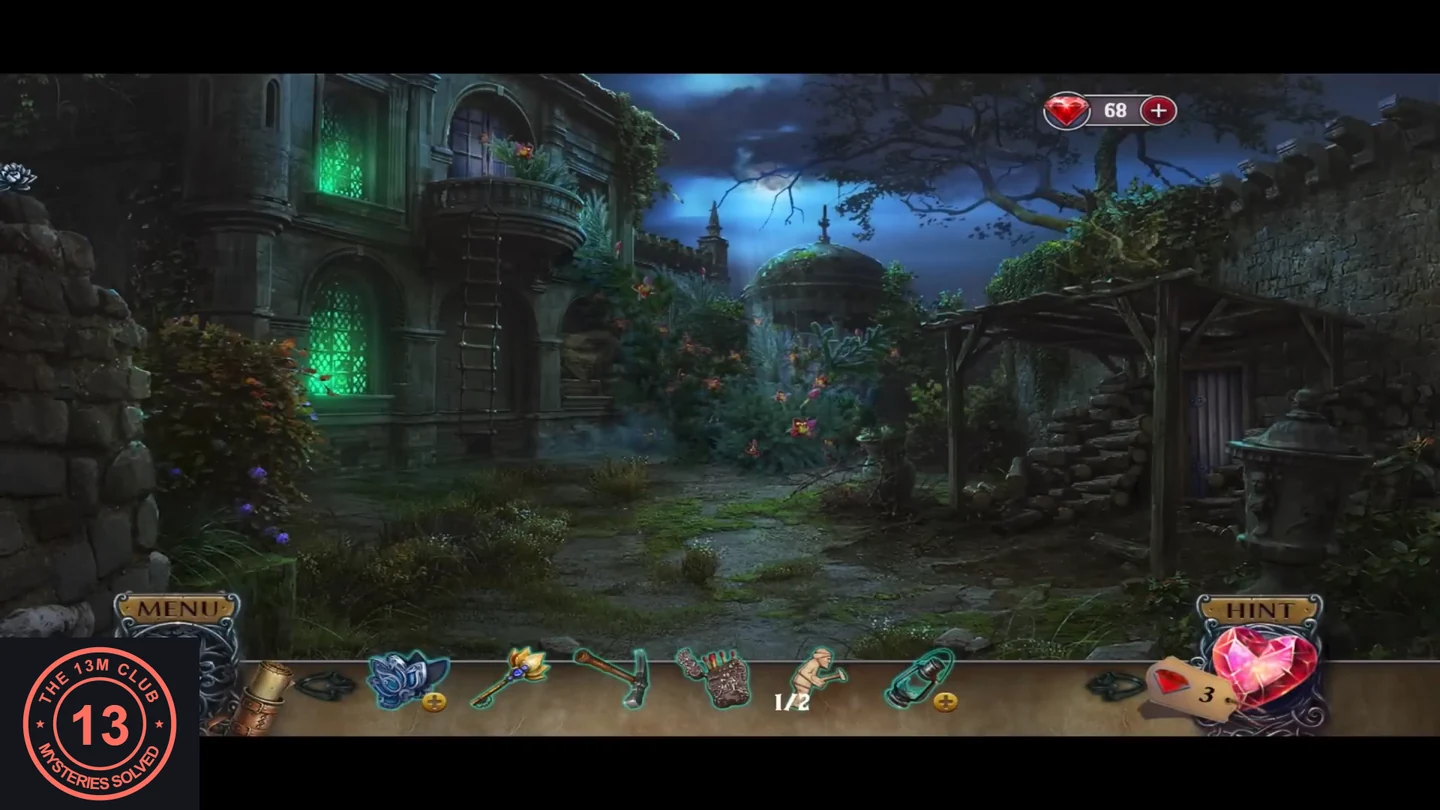
Dissolve the wrecking-ball chain, repair and light the lantern, and find out what is waiting behind the courtyard's double door.
- Open the broken lantern in your inventory ('This lantern needs to be fixed.'). Zoom into the wrecking ball and pour the acid on its rusty chain. The ball drops and smashes the crate: take the oilcan from the wreck. The gap in the wall is now open.
- Open the broken lantern again. Pour in the oilcan, then add the old rag as a wick. The matches won't work yet ('I can't light it until it's repaired.'), because the glass is missing.
- Go through the opened gap into the castle courtyard. Zoom into the woodpile on the right, by the storage shed, and take the teal glass casing. The woodpile collapses and uncovers the shed door. Its lock looks too fancy for a storage shed. Back in the lantern close-up, fit the glass casing ('Now I can light it!') and light the lantern with the matches.
- Zoom into the flowering bush in the middle of the courtyard ('These lilies need to be trimmed back.') and take the green wool mittens lying under it. Zoom into the green-lit window on the left and break the glass with the rock pick. 'The shards are sharp. I need to protect my hands.' Use the wool mittens on the shards, then take the red blanket.
- Zoom into the frosted double door at the back of the courtyard. It opens on a figure in a green dress holding a sword ('The countess! Is she... alive!?'). You won't go further without light, so place the lit lantern. It is only an automaton, another trap that something nearby makes move. Take the knife stuck in the pillar to the right of the automaton, above the lantern: 'I need to find and disable the mechanism for this trap.'
Hidden Objects: Behind the Ruined Hall Curtain
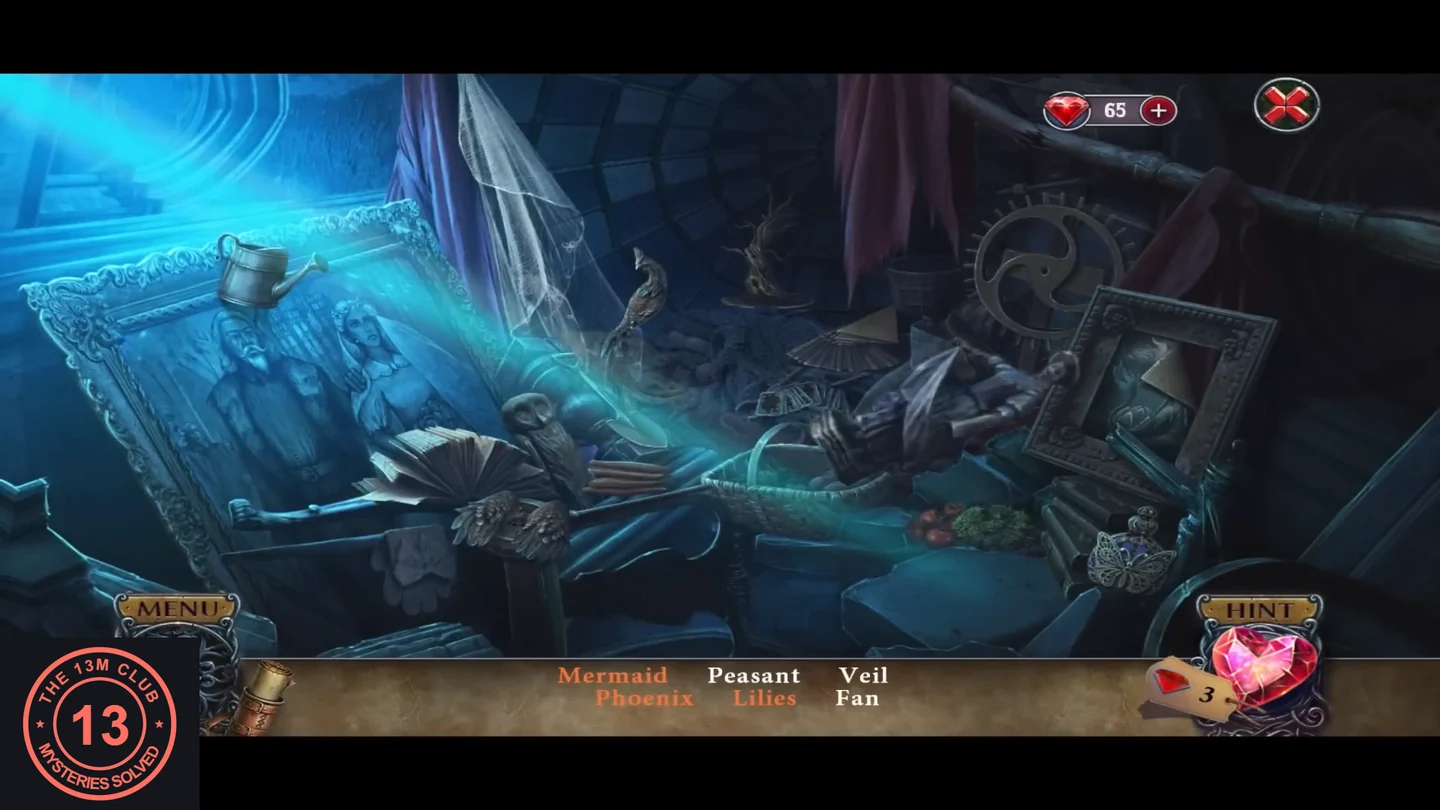
A second search waits behind the curtain in the ruined hall. There are two lists and a final single item.
- Return to the castle approach and enter the ruined hall ('There's something behind that curtain. I need to remove it somehow.'). Cut down the purple curtain in the middle with the knife. A gear mechanism behind it starts a new hidden-object scene.
- List 1: Mermaid, Peasant, Veil, Phoenix, Lilies, Fan. Peasant: the small figurine on the blue cloth in front of the basket. Phoenix: tap the wingless bird statue by the veil ('I guess I'll have to wing it.'), tap the pair of brown wings in front of the owl's base to attach them, then take the phoenix. Lilies: tap the small pale folded paper on the dark fan to read Lis's note ('Paul, if you love me, do the impossible. Grow fir vines with lilies on them. Impress me.'), then take the lilies. Veil: the white veil hanging at the top, left of centre. Fan: the dark folding fan in the middle. Mermaid: tap the empty frame on the right to uncover the mermaid picture and take it. List 2: Playing cards, Butterfly, Glove, Green tree, Shovel, Gear. Playing cards: the fanned cards on the cloth in the middle. Shovel: under the owl. Gear: the big gear wheel at the top right. Butterfly: the silver brooch at the lower right. Green tree: use the watering can from the big painting at the top left on the bare little tree sculpture at the top middle, then take the green tree. Glove: the grey glove at the lower left below the round lid. Finally, find the bolt cutter (the pincers behind the basket) and take it as your reward.
Calming the Crow and Disabling the Automaton
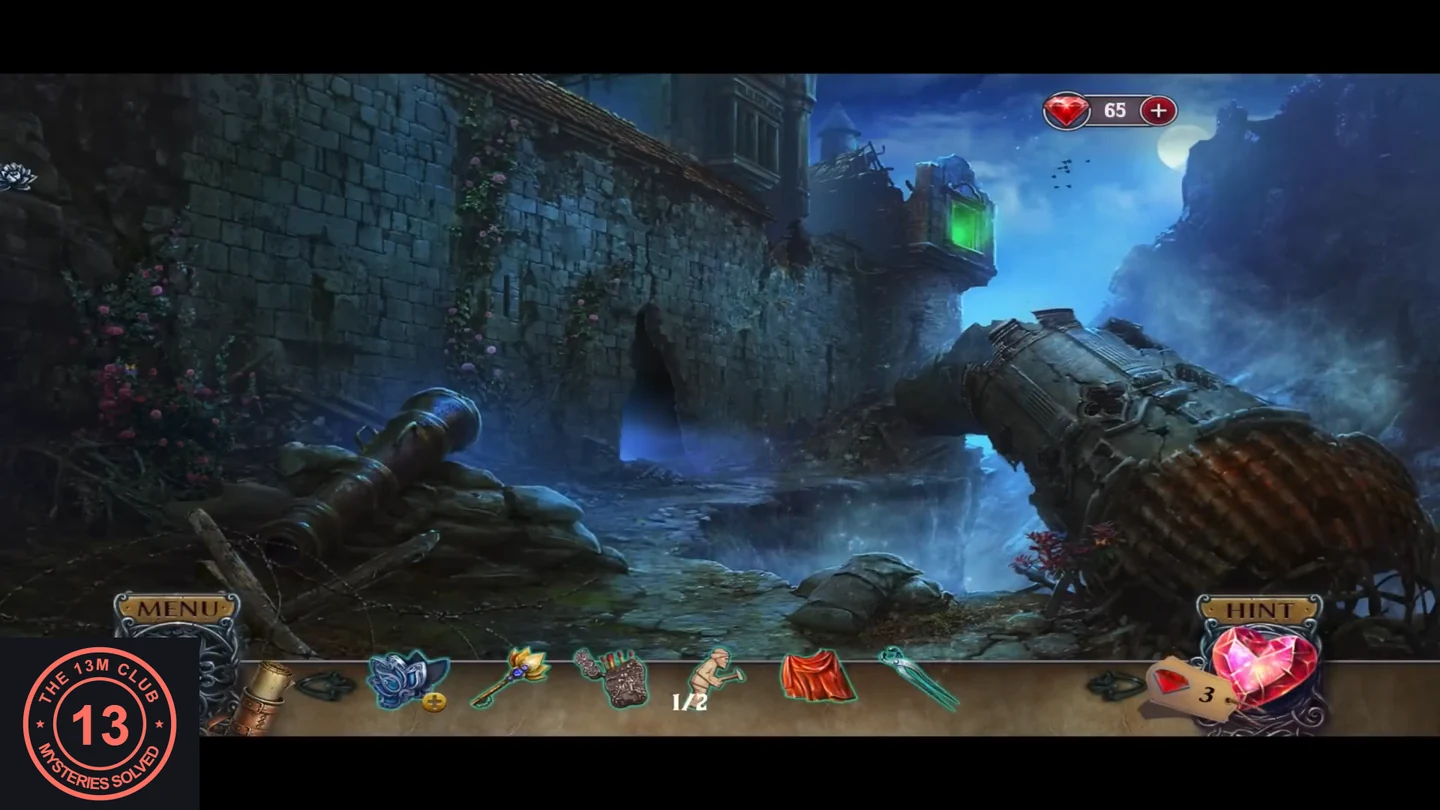
Free the second lumberjack figurine from the crow's cage, open the shed and cut the chain that drives the automaton.
- Go back to the castle approach and zoom into the crow's cage. Cover it with the red blanket. The crow flies off and the cage door opens: take the wooden figurine on the cage floor (lumberjack figurine 2/2).
- Return to the courtyard and zoom into the shed door. Put the two lumberjack figurines on the lock bar; they saw and hammer, and the door opens. Take the garden shears from the blue bucket on the top shelf.
- Zoom into the flowering bush and trim it with the garden shears. The cut branches reveal a winch with a chain ('With the right tool, I could cut this chain.'). Cut the chain with the bolt cutter. The automaton is now harmless: 'Now this doll can't hurt anyone.'
The Music Room: Harpsichord and Harp
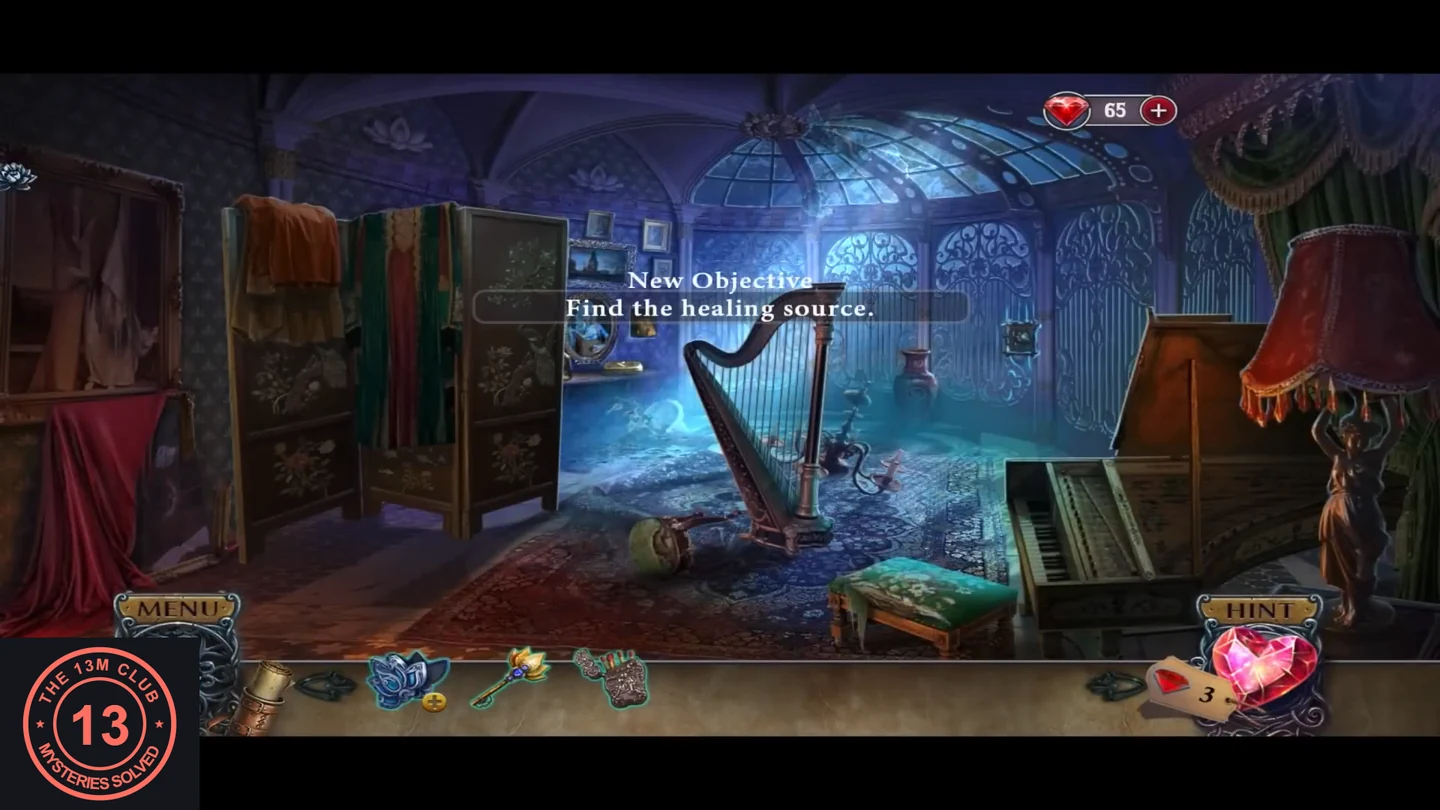
Past the disabled automaton is the count's music room, with a harp in the middle, a harpsichord on the right and the library door at the back left.
- Go through the double door behind the automaton into the music room. New objective: Find the healing source. Zoom into the harpsichord on the right and take the round green-and-gold gear from the heap of sunflowers at its left end. The strings are slack: 'I need a tool to tighten the strings.' Zoom into the harp in the middle and take the sheet of music from its upper left. 'Some pegs are missing. If I find them, I'll be able to loosen the strings.'
Hidden Objects: Music Instruments
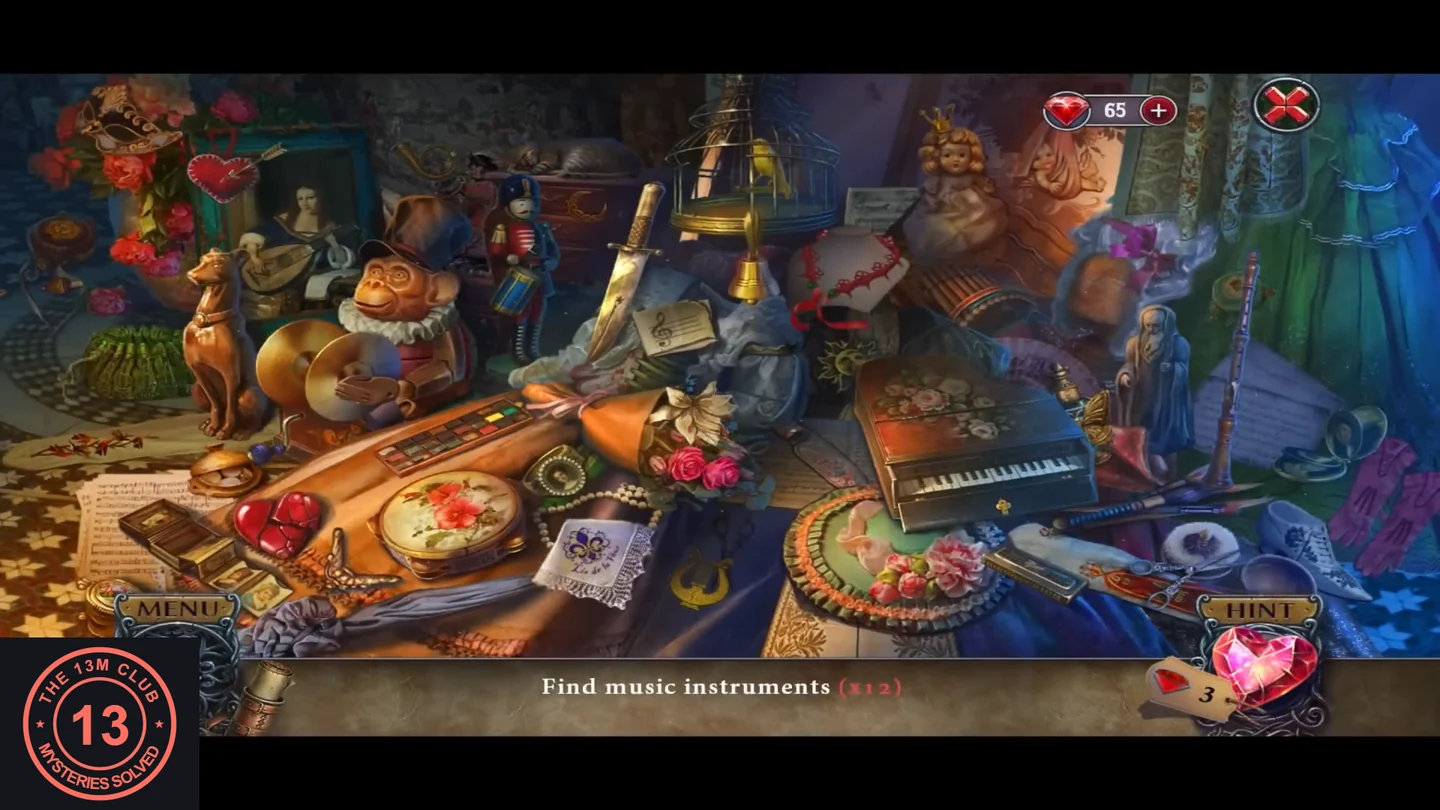
A list search for twelve music instruments in the pile of keepsakes. The violin only appears after you read the count's music card.
- Tap the sparkling pile on the floor at the foot of the folding screen on the left. 'Find music instruments (x12)'. Tambourine: the round flower-painted drum at the centre left. Clarinet: standing upright at the right. Toy drum: carried by the toy soldier. Pan pipes: behind the bell. Harmonica: at the lower right, left of the scissors. Lute: next to the lady's portrait at the top left. Horn: the curled brass horn at the top left, behind the toy monkey's top hat and left of the toy soldier, in front of the dresser. Horn: the curled brass horn at the top left, behind the toy monkey's top hat and left of the toy soldier, in front of the dresser. Cymbals: the pair held by the toy monkey. Lyre: the small gold lyre on the blue cloth at the front. Toy grand piano: centre right. Violin: tap the music card with the treble clef to read the count's letter ('My love, you are so beautiful when you play the violin...'); a violin then appears on the orange cloth in the middle, so take it. Bell: the hand bell beside the birdcage at the top. Then find the single item, the frame part, and take it.
Harp Pegs, the Library Door and the Window Plate
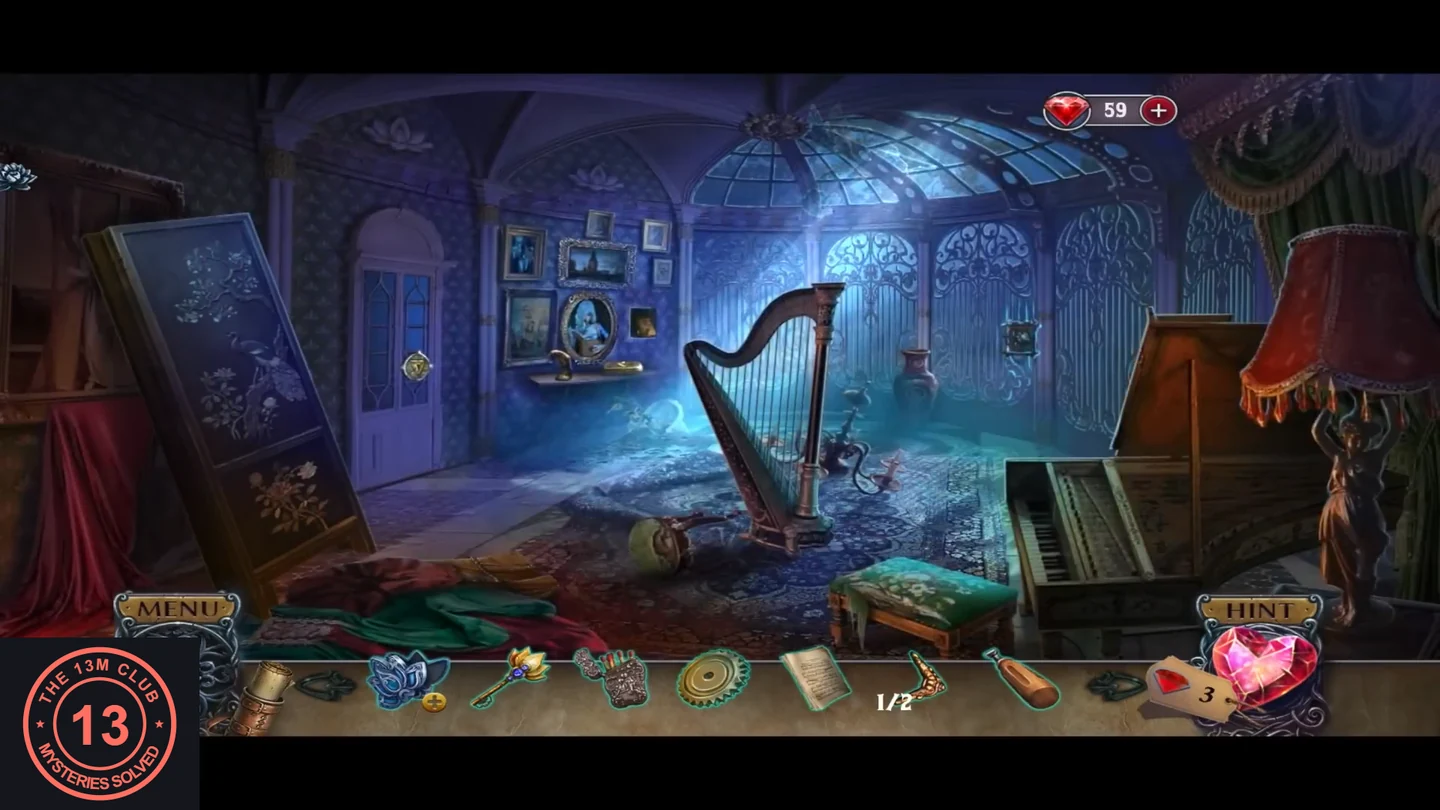
Loosen the harp strings to free a screwdriver, open the library with Raymond's key and pry open the plate under the window.
- Zoom into the picture wall between the library door and the windows (a lady with a lute in a round frame). Tap the small metal case with a harp emblem on the shelf below her; it opens, so take the harp pegs. Note the mud-covered painting at the right ('I wonder what's under the mud?'). Zoom into the harp and put the harp pegs on it. The strings loosen and a screwdriver drops to the base of the harp; take it.
- Zoom into the white door at the back left ('Is this the door to the library that Raymond mentioned?'). Put the ornate key in its round gold lock to open it.
- Zoom into the back right window, with a blue basin and a small rusty square plate. 'It's rusty. I'll need to pry it open.' Use the screwdriver on the plate and take the teal tuning fork from behind it. Behind the plate is a grimy picture with pieces missing ('The woman is waiting for her captain.'). The basin water will be useful later: 'I wouldn't drink it, but it would work well for cleaning.'
- Go through the library door. It is dark: 'I need to light this lamp so I can see in here.' Light the lamp on the desk at the left with the matches.
The Library: Red Box, Fireplace and Snake
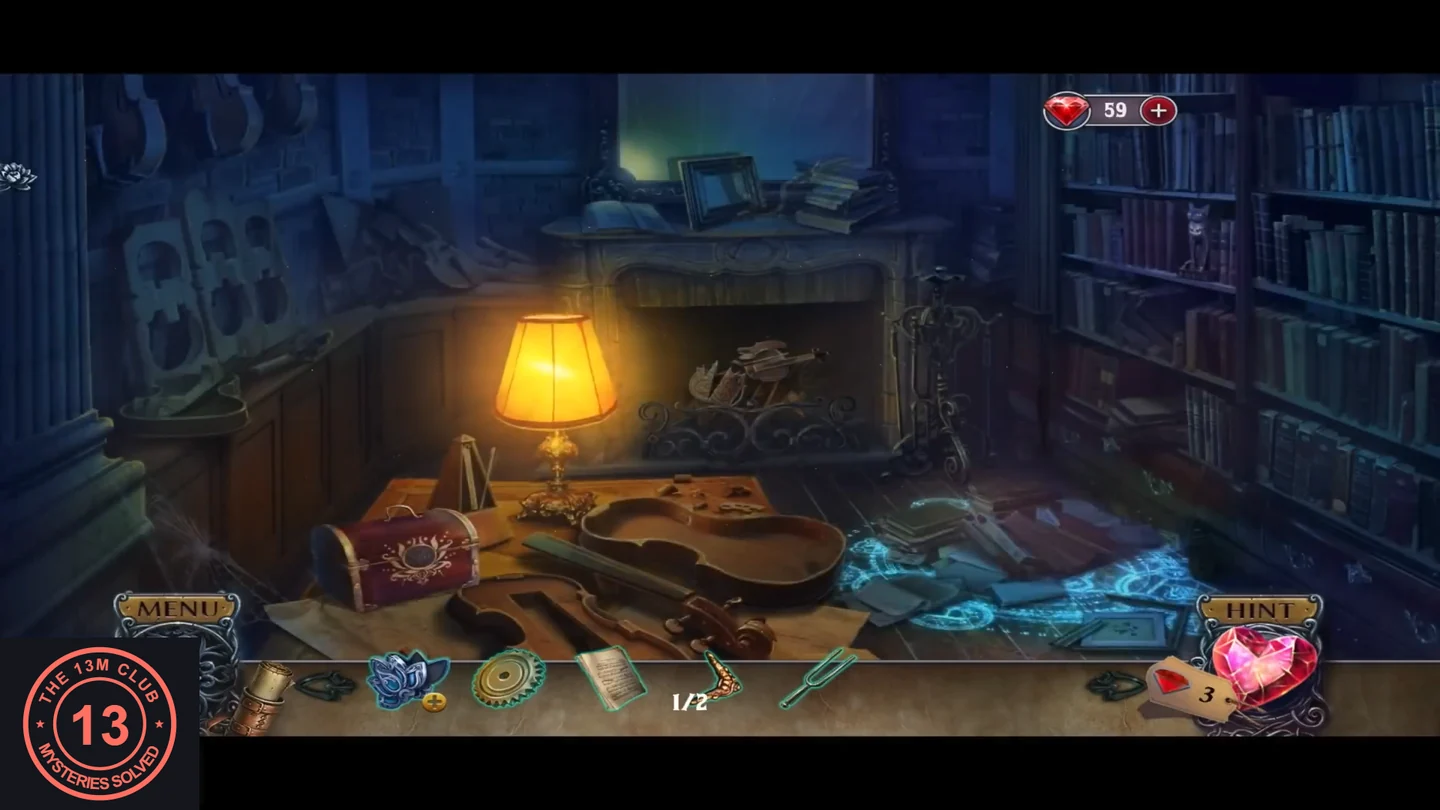
Raymond's notes are scattered across the count's library. Collect the tools and the first of three books.
- Zoom into the red casket with a lotus emblem on its lid, on the desk left of the violin. Take the ink bottle beside it. The lid stays locked for now ('The right symbol will open it.'). Tap the hinged wooden side compartment: it opens, and 'A gear fell out, it seems.' Put the gear from the harpsichord into the mechanism. A magnet and a silver triangle (picture part) spill out, so take both.
- Zoom into the fireplace at the back. Tap the note on top ('I know everything, Lis, about you and that gardener, Paul! ...'). Tap the book to open the count's journal ('This potion of youth is a failure! It turns the subject into an infant...') and take the yellow page from the right side: alchemical recipe. Take the blue book from the fireplace (book counter 1/3) and the fireplace tongs hanging at its right edge.
- Zoom into the blue-lit pile of papers at the right front. A snake lies on them: 'Yikes! I'm not moving it with my bare hands!' Use the fireplace tongs to remove it, then take the orange sponge. Tap the papers to start Raymond's journal puzzle.
Raymond's Journal: Spot the Differences
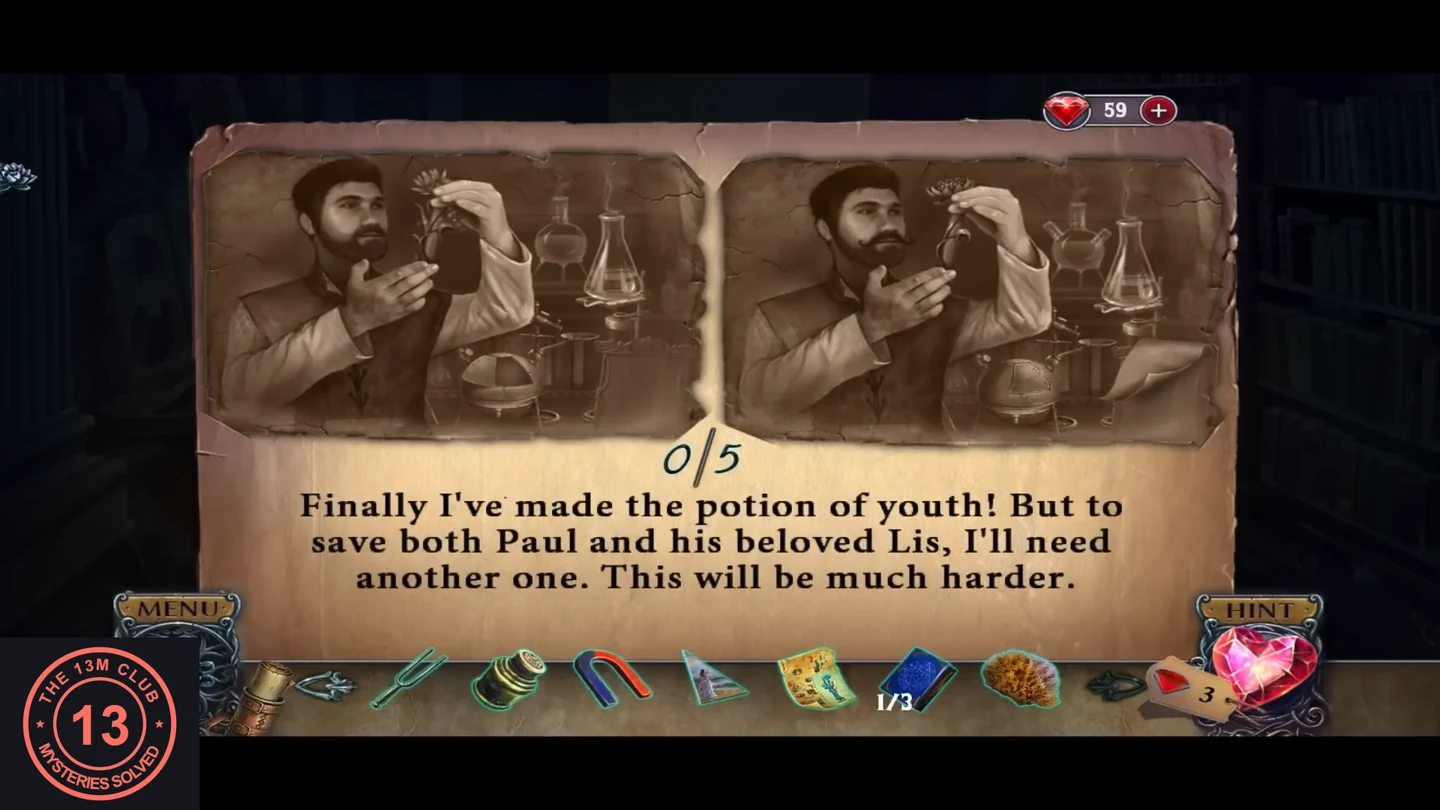
Four journal pages, each with two pictures and five differences. Tap a difference in either picture.
- Page 1 ('Finally I've made the potion of youth!...'): Raymond's moustache, the flask apparatus behind his raised hand, the small triangle on the round bowl at the lower centre, the long curved tray at the lower right, and the flower sprig in the bottle he holds. Page 2 ('I used the count's blueprints to build a diving bell...'): the sketch on the blueprint, the bell's porthole, the rope knot on top of the bell, his glasses, and the dividers at his belt. Page 3 ('I need to hurry. Phillip saw me going to the castle...'): the cuff on his left wrist, the scales on the table, his head and hair, the small jar to the left of the club, and dark rings near the top of the right-hand club. Page 4 ('Oh no! They're here! My potion... no!'): the area around the eye patch, a drop on the forehead strap, a tear on the cheek, a drop on the collar, and a drop on the shirt at the right. New objective: Make the potion of youth.
Three Books, the Picture Wall and the Grimy Picture
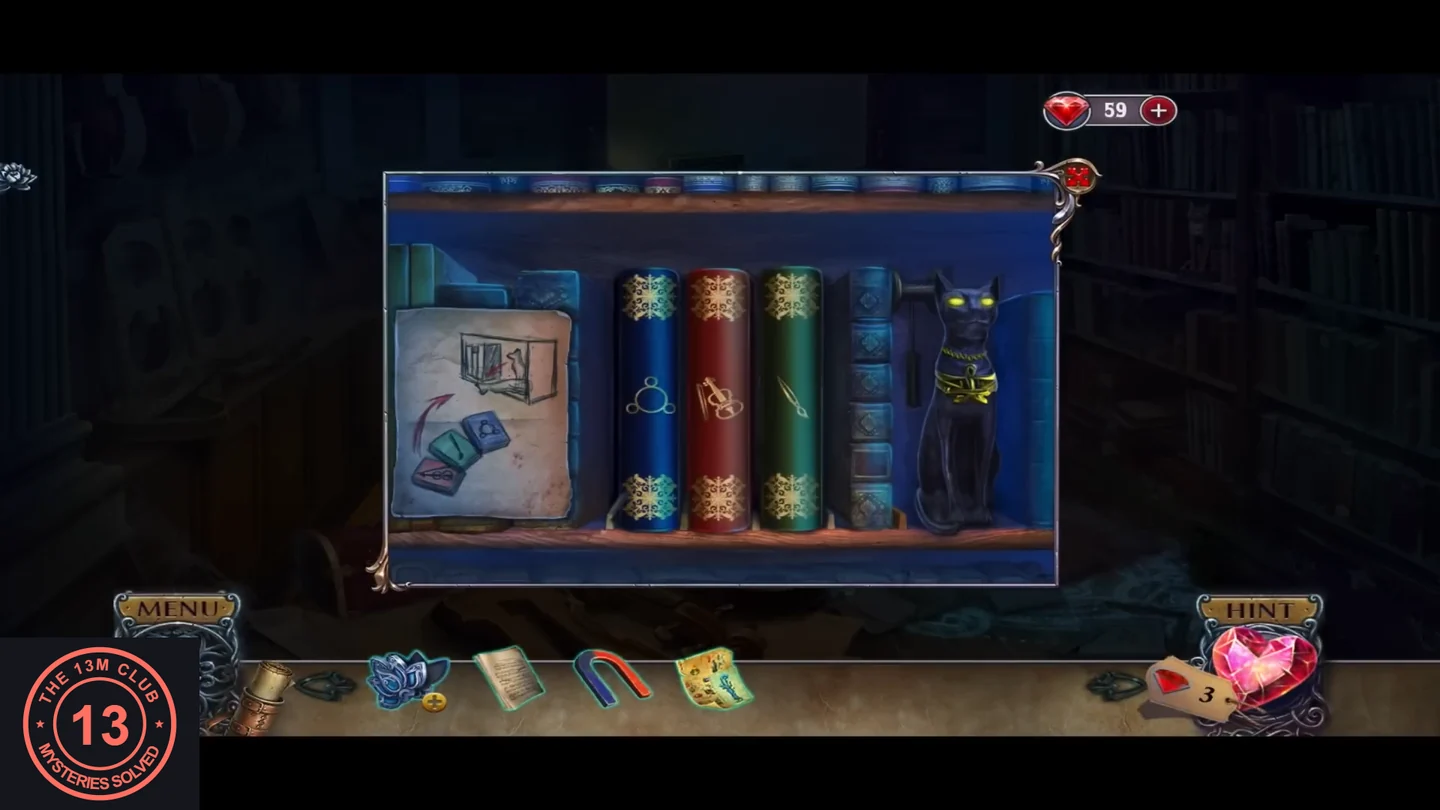
Repair a book, find a phoenix and the second frame part, then use the sponge and frame part on the picture wall to find the last book and its colour order.
- Zoom into the book with a violin emblem in the same pile at the right front ('This book is falling apart.'). Use the bottle from the red box on it; its label reads 'Glue'. The repaired book is the second book (2/3).
- Optional collectible: zoom into the shelf to the right of the fireplace (black cat statue, three gem buttons). The library tab shows 'Phoenixes to find here: 2'. Tap the phoenix at the top of this close-up; the tab drops to 1.
- In the same shelf close-up, take the gold frame part at the lower left (frame part 2/2). The red, green and blue gem buttons belong to a secret lock: 'It looks like a secret lock, but I don't know how it works.'
- Back in the music room, zoom into the harpsichord and put the tuning fork into it. It stays there, but the strings still need tightening: 'I need a tool to tighten the strings.'
- Zoom into the window with the basin and dip the sponge in the water to make a wet sponge. 'It will be a beautiful picture if I can repair it.'
- In the same window close-up, put the silver picture part from the red box on the grimy picture. It fills the lower-left triangle.
- Zoom into the picture wall again. Wipe the mud-covered painting at the right with the wet sponge to reveal a flower still life. Put the assembled frame part on the top-left corner of its frame. The painting swings aside to reveal a niche with a note showing the book order: red at the bottom, then green, then blue on top, with an arrow into the shelf by the cat statue. Take the green book from the niche (books 3/3). The raven statue at the lower left has something on its breast ('That looks like a flame on the raven's breast. But why?').
- Return to the library and zoom into the cat-statue shelf. Put the three books on the shelf. Tap books to swap them until, from left to right, they read red, green, blue, each above the gem button of its colour. The cat statue turns its head and a hexagon puzzle opens in the shelf.
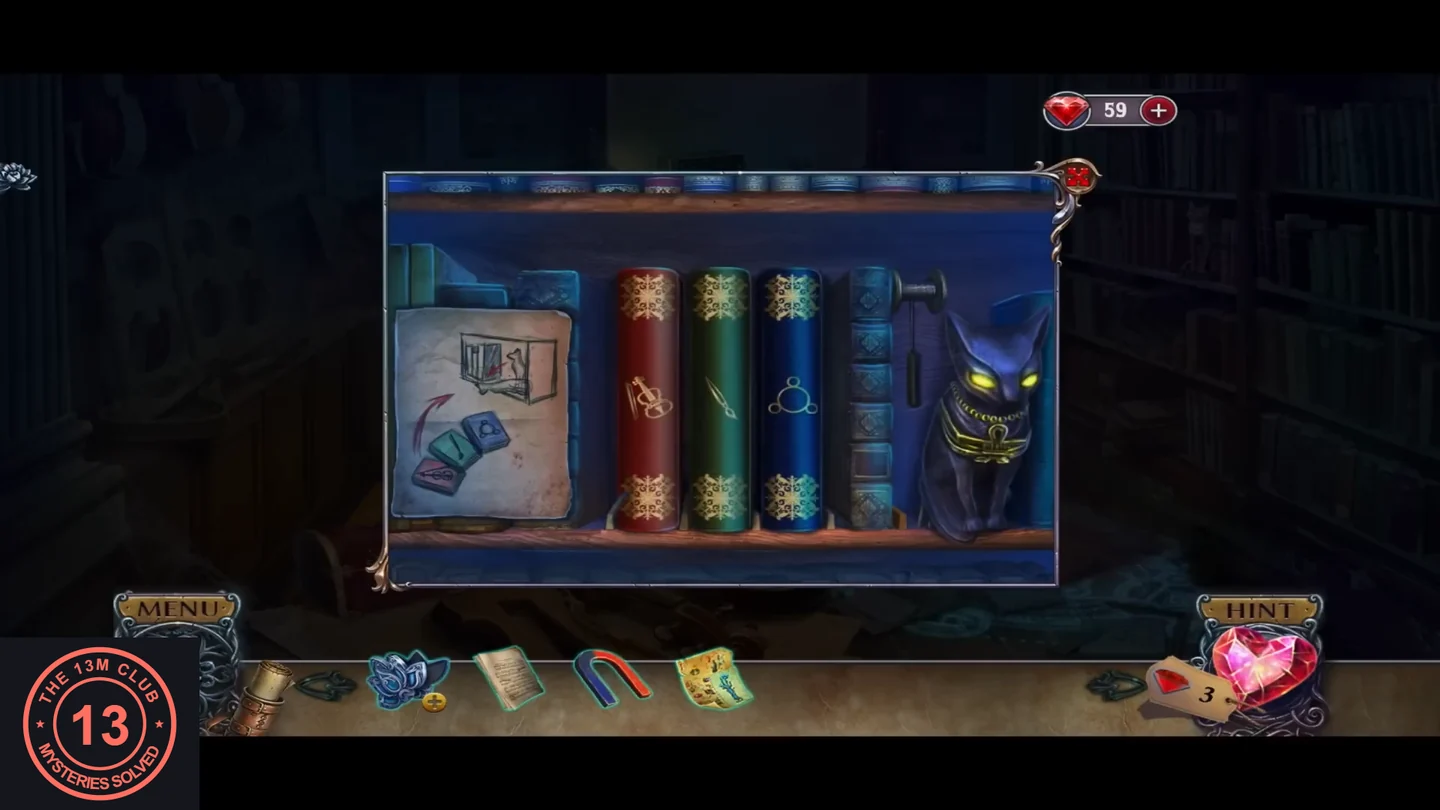
Books in the order red, green, blue: the cat statue turns its head.
Hexagon Puzzle: Fill the Field
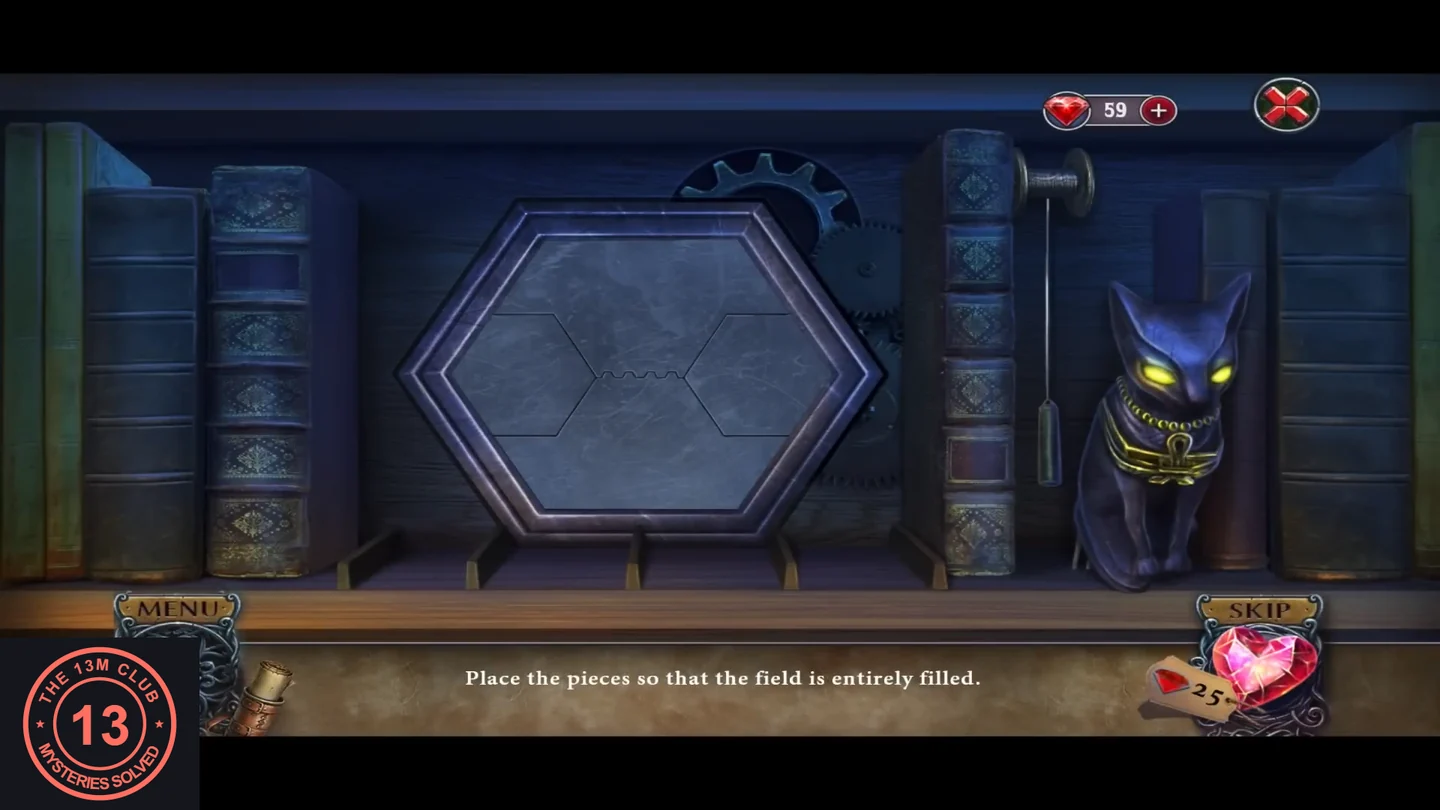
'Place the pieces so that the field is entirely filled.' Three rounds, each using six coloured pieces (pink, purple, blue, green, cyan and yellow). The Skip button costs 25 rubies.
- Drag the pieces into the hexagonal field and match the solved boards in the screenshots. Round 1: pink at the top left, cyan at the top right, purple on the left, yellow in the middle, green on the right and blue along the bottom. Round 2: cyan at the top left, purple at the top right, blue on the left, pink at the lower left of the centre, yellow in the centre right, and green down the right edge and along the bottom. Round 3: green at the upper left, yellow as a strip from the top centre down to the bottom left, pink at the top right, blue at the left point, cyan at the lower centre right and purple at the bottom centre. After the third round, the shelf opens into the count's secret potion lab.
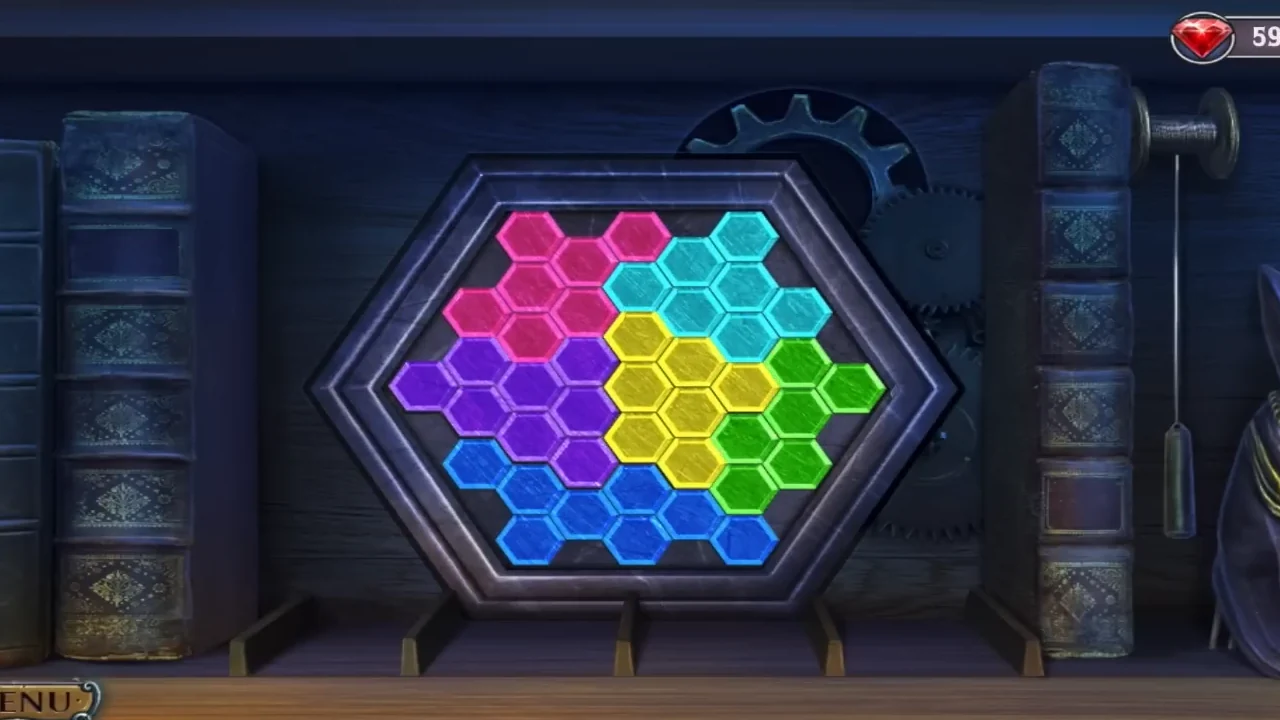
Round 1 solved. 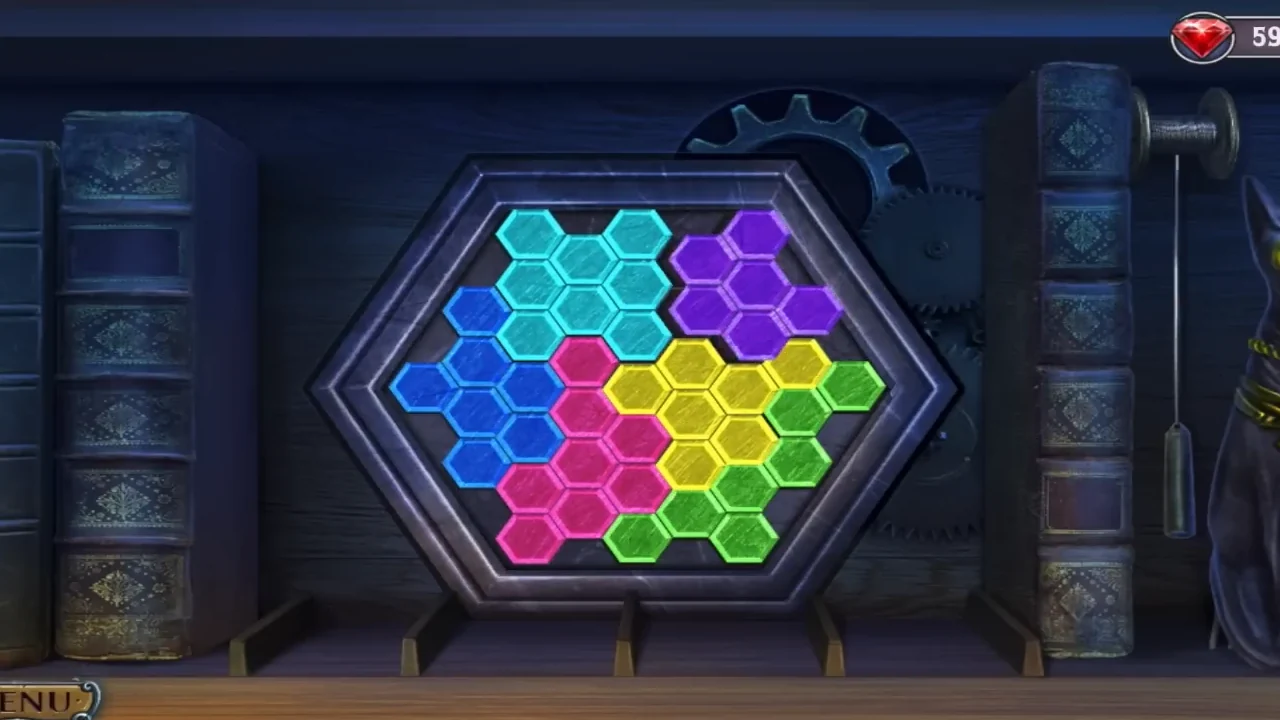
Round 2 solved. 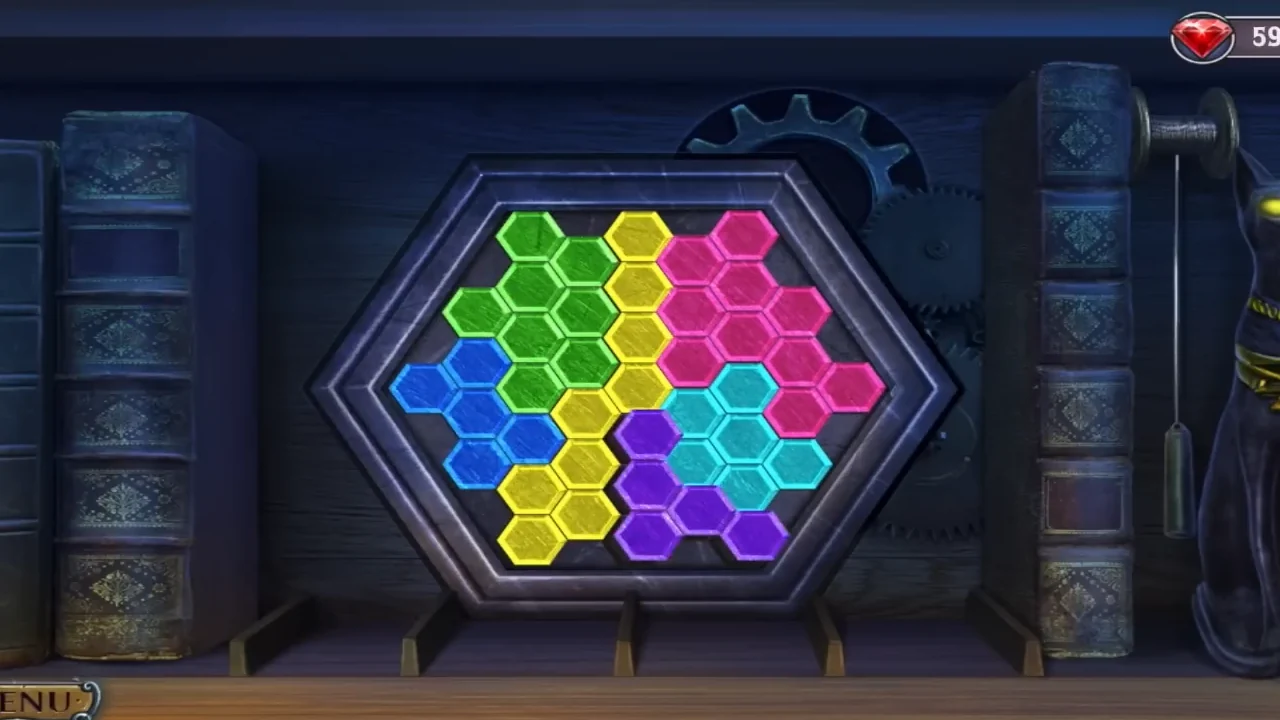
Round 3 solved.