Village Gate: Wheat Broom, Statue Valve and Freezing the Wine Barrels
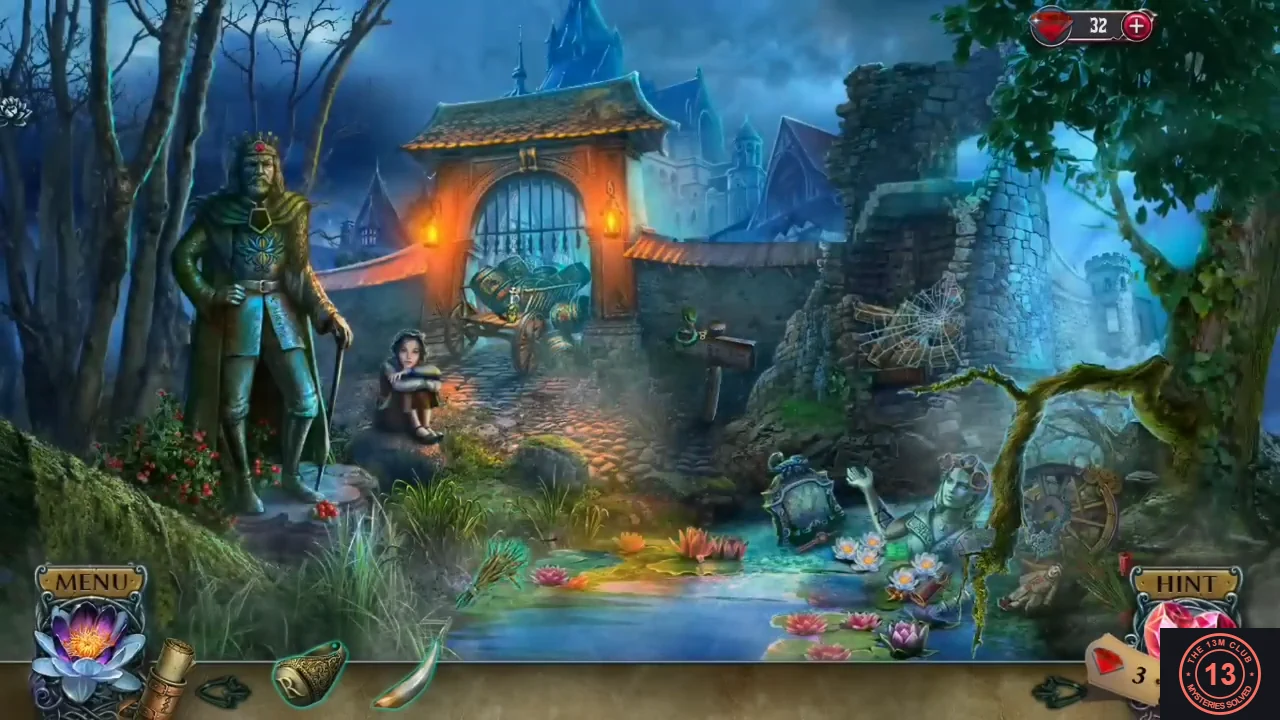
Mimi brings you to the gate of La Fleur Village: 'Here's the village where Raymond lives, but everything here belongs to the count!' A cart of wine barrels blocks the gate. The count's statue stands on the left, a signpost and boarded-up ruins are on the right, and a pond is in front.
- Zoom into the loose wheat stalks on the ground in front of the gate and tie them together with the ribbon.
- Zoom into the wine cart in the gateway. Read the count's order (15 barrels of wine for Castle de la Fleur, or execution) and take the bottle of olive oil from the cart. The barrels are too heavy and tightly packed to move.
- Zoom into the La Fleur Village signpost on the right, with the green snake coiled around it. Take the round metal valve wheel hanging below the sign.
- Zoom into the boarded-up opening in the ruins on the right and sweep away the spider web with the sheaf of wheat.
- Take the torn paper from the boards and read it: a bottle of blue liquid freezes a barrel until it bursts ('Ice can break even strong things from the inside.'). Then take the blue lotus clasp from the gap at the top right of the boards. You cannot pull the nails out by hand yet.
- Zoom into the count's statue on the left. Put the blue lotus clasp in the pentagonal socket on its chest. A compartment opens with a blue vial behind a valve. Fit the valve wheel onto the valve; it's 'really rusty', so pour the olive oil on it, then turn it to release the vial. Take the freezing liquid.
- Zoom into the wine cart again and pour the freezing liquid on the barrels. They freeze and shatter, clearing the gateway. Mimi walks through; follow her into the village.
- Optional collectible: the village gate hides 2 phoenixes. Tap the gate's tiled roof right of centre, and the ruined stone wall or tower right of the gate, up by the tree branches.
Town Square: Raymond, the Notice Board and the Flower Stall
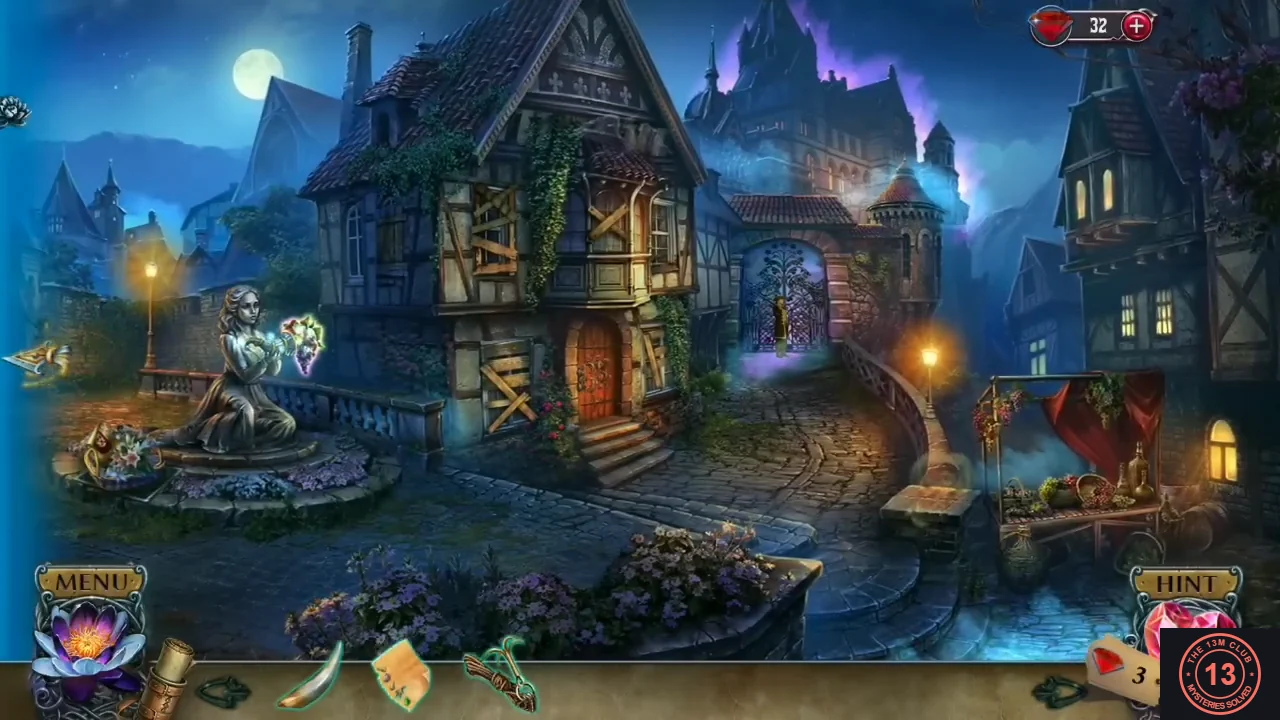
The count's soldiers ride through the square as you arrive: 'So this is Count de la Fleur and his soldiers. The poor townspeople!' The square is a wide panning scene. On the right are the fountain statue, Raymond (holding Mimi) and a closed shop with a notice board; on the left are a dovecote cabinet on a post, a round dial in the street and a flower stall. The village gate is behind you.
- Talk to Raymond. He asks who you are and why he should trust you; give him Raymond's ring. He realises your beloved carries a black lotus, promises to help you get into the castle, and hands you the list of ingredients the count needs urgently.
- Zoom into the notice board beside the shop door. Move the note ('The gardener got what he deserved – Count de la Fleur', with 'Count is a murderer' scrawled over it) and take the grappling hook hanging behind it.
- Pan left. Zoom into the round metal dial set into the street and take the nail puller lying across it.
- Zoom into the dovecote cabinet on the post at the far left. Its lattice door has an empty bird-shaped socket: 'A pigeon emblem is missing.' Come back when you have one.
- Zoom into the flower stall at the bottom left. Move the lilies and read the poster underneath: the count's face over portraits of his victims ('Count is a murderer! Enough!'). Move the lilies again and take the wicker basket. Behind it is a board of villagers' portraits with hedge tiles and two empty round slots; you cannot do anything with it yet.
- Go back to the village gate and use the grappling hook on the pond in front of the statue to drag the junk out of the water.
- Optional collectible: the town square panorama hides 4 phoenixes (the tab at the top left shows 'Phoenixes to find here: 4'). Tap the right end of the boarded-up house's roof ridge by the chimney, and the cobbles in front of the left end of the flower stall.
- Scroll to the far left of the square for the other 2 phoenixes. Tap the top of the dovecote's pointed roof, and the green shrub at the foot of the dovecote post, right side.
Pond Hidden-Object Scene and the Boarded-Up Chest
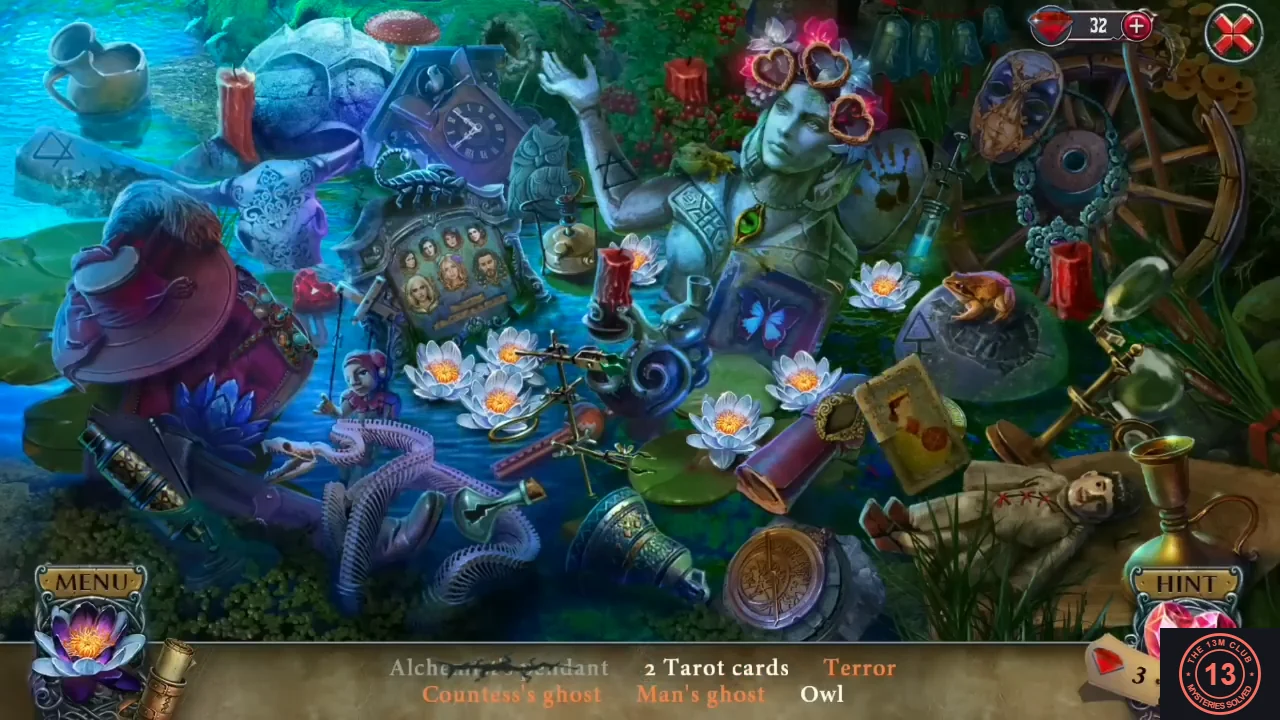
The pond hidden-object scene has two lists. Words in white are simple finds. Words in orange need an extra action, described below. A broken statue of a woman stands in the middle of the junk.
- First list: Alchemist's pendant, 3 Tarot cards, Terror, Countess's ghost, Man's ghost, Owl. The alchemist's pendant is the gold emblem on the red hat at the left. One tarot card is in the statue's raised hand, and one is propped against the cart wheel at the top right. The owl is the stone owl figure above the victims' frame. For the ghosts, open the 'Victims of the Count de la Fleur' frame left of centre. Tap the blonde woman's portrait and then the bearded man's portrait. Both turn into ghosts that float out: the Countess's ghost and the Man's ghost.
- Tap the purple leather case with the gold clasp, lying on the lily pads: 'It seems that part of the lock is missing.' Take the green eye gem from the statue's chest and place it in the clasp. The case opens and shows a newspaper. Tap the headline TERROR, then take the last tarot card tucked behind the paper.
- Second list: Wedding wreath, 7 Black lotuses, 4 Candles, Decorated skull, Jeweled lotus, Mask. Take the large blue jeweled lotus at the left first. The white water lilies then turn into black lotuses; collect them. The four red candles stand at the top left, at the top centre behind the statue, in the centre beside the statue and at the right beside the cart wheel. The mask hangs on the cart wheel at the top right. The decorated skull is the horned animal skull with blue patterns at the upper left.
- For the wedding wreath, collect the red heart gems: one from the lily pad in the lower centre and one at the left just right of the big red hat. Place them in the empty heart-shaped frames on the statue's flower crown. For the last heart: 'There's something sewn into the doll.' Take the scissors from beside the statue's elbow and cut open the stuffed doll lying at the lower right. Put the heart inside it into the last frame. The Countess's ghost appears ('Nothing is what it seems!') and the crown becomes the wedding wreath.
- The last black lotus is the white water lily right beside the statue's elbow, next to the brass lamp. Zoom in on it and tap it; it turns black and is collected.
- Zoom into the boarded-up opening in the ruins on the right of the gate again. Use the nail puller to remove the nailed boards. Behind them is a stone chest with an empty lotus socket ('The lotus ornament is gone'). Place the jeweled lotus in it and open the chest. Read the drawing of a lotus with crystals: 'Maybe these are the ingredients that were missing. I must create a black lotus!' Take the quartz crystals, the sword and the gold pigeon emblem.
Dovecote, Castle Gate and the Flower-Stall Fresco
Back in the town square you now have the pigeon emblem, the quartz and the crocodile tooth. Collect the first ingredients for Raymond, explore the castle gate at the far right of the square and restore the fresco hidden in the flower stall.
- Pan to the far left of the square and zoom into the dovecote cabinet on the post. Put the pigeon emblem into the empty bird-shaped socket on the lattice door. The door opens and a white dove flies out. Take the round stone disc with hydrangeas (1/2) and the small engraved green wooden tile lying inside.
- Zoom into the fountain statue of a woman holding a cornucopia; fireflies are buzzing around it ('How can I entice these fireflies to join me?'). You cannot catch them yet. Open the basket from the inventory and put Raymond's list into it. The list becomes the 'Alchemist ingredients' checklist: Snake venom, Quartz, Crocodile tooth, Fireflies, Emerald. Put the quartz and the crocodile tooth into the basket.
- Pan right past the fountain to the castle gate, wrapped in purple mist with a guard standing behind the bars. Take the forked rod (the snake hook) leaning against the wall at the left of the gate. Zoom into the plaque on the right wall ('The castle was built for a beloved wife'): take the small bottle hanging in the vines and the round stone disc with red roses (2/2) at the plaque's top left.
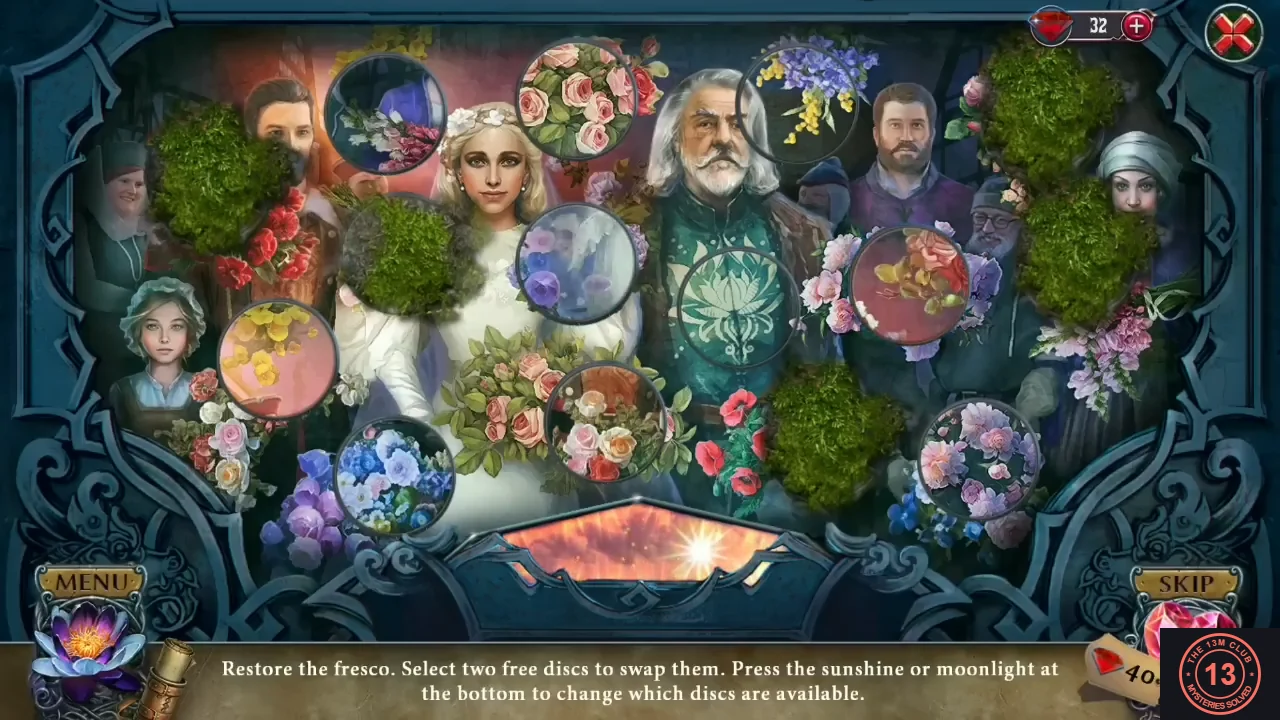
- Go to the flower stall at the bottom left and zoom into the board behind it. Put both stone discs into the two empty round slots to start the puzzle: 'Restore the fresco. Select two free discs to swap them. Press the sunshine or moonlight at the bottom to change which discs are available.' Discs covered by hedges are locked; press the sun or moon symbol at the bottom to change which discs are free, then swap free discs until the picture is complete. The finished fresco shows the Countess as a bride in white in the centre, an old bearded man beside her and villagers with bouquets on both sides, with the caption 'In Memory of Countess de la Fleur's Kindness, Beauty, and Love. - Villagers'.
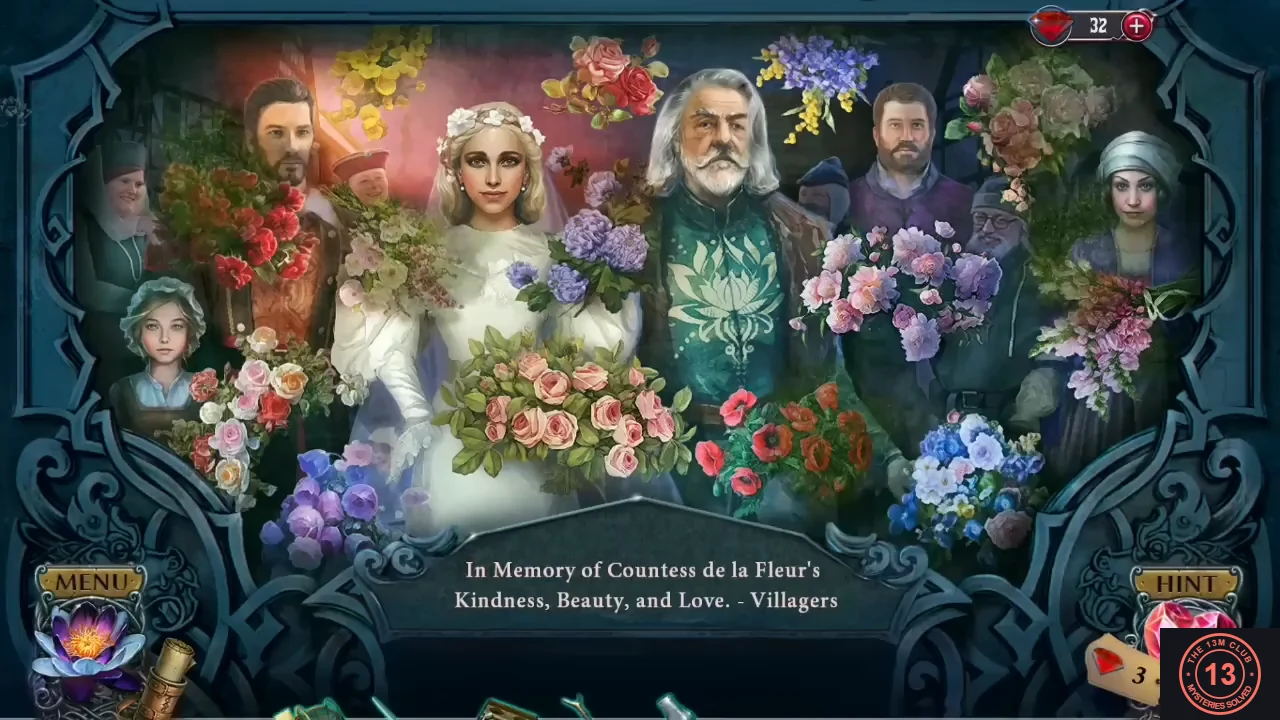
The completed fresco and its memorial caption. - In the compartment behind the fresco, take the blue wavy iron ornament and the teal loop lying on the stone ledge.
- Now that the fresco is restored, the fireflies settle on the fruit in the statue's cornucopia. Zoom into the statue and tap them to collect them, then put the fireflies into the basket.
- Return to the village gate and zoom into the signpost ('...UR VILLAGE') where the green snake is coiled. Use the snake hook to pin the snake's head, then use the small bottle on its fangs to collect the venom. The snake leaves. Take the small gold triangle key left on the signpost. Put the snake venom into the basket.
The Guard's Duel and Paul's House Door

A soldier blocks the arch at the village gate. Defeat him in a duel to earn the key to the house of Paul, the count's late gardener.
- Talk to the soldier at the arch of the village gate ('Halt! What strange clothes...'). A duel starts. Each round choose Attack, Defend or Disarm; your choice appears on the left and the guard's on the right. Attack beats Defend, Defend beats Disarm and Disarm beats Attack. Win three rounds. In the game checked for this guide the guard played Defend, Disarm and Attack, beaten by Attack, Defend and Disarm. If his choices differ in your game, use the same rule against each move.
- A villager in a red vest knocks the guard out. He tells you the count killed his brother Paul and the Countess, tells you to take some peasant clothes from Paul's house without forgetting the ingredients, and gives you a green key.
- Go back to the town square and zoom into the round metal dial in the street. Insert the triangle key; the dial opens. Take the teal leaf-shaped iron ornament from inside.
- Zoom into the door of Paul's house, to the right of the fountain. Two pieces of the wrought-iron scrollwork are missing. Put the blue wavy iron ornament from the fresco into the wave-shaped gap at the lower right, then the leaf-shaped ornament from the street dial into the leaf-shaped gap above it. The flower knob shows a keyhole; use the green key and go inside. A vision of Christina trapped in a lotus plays, and then a small blue ghostly figurine of the Countess rises from the lotus basin into your inventory.
Paul's House: Flower Tiles, the Gardener's Secret and Peasant Clothes
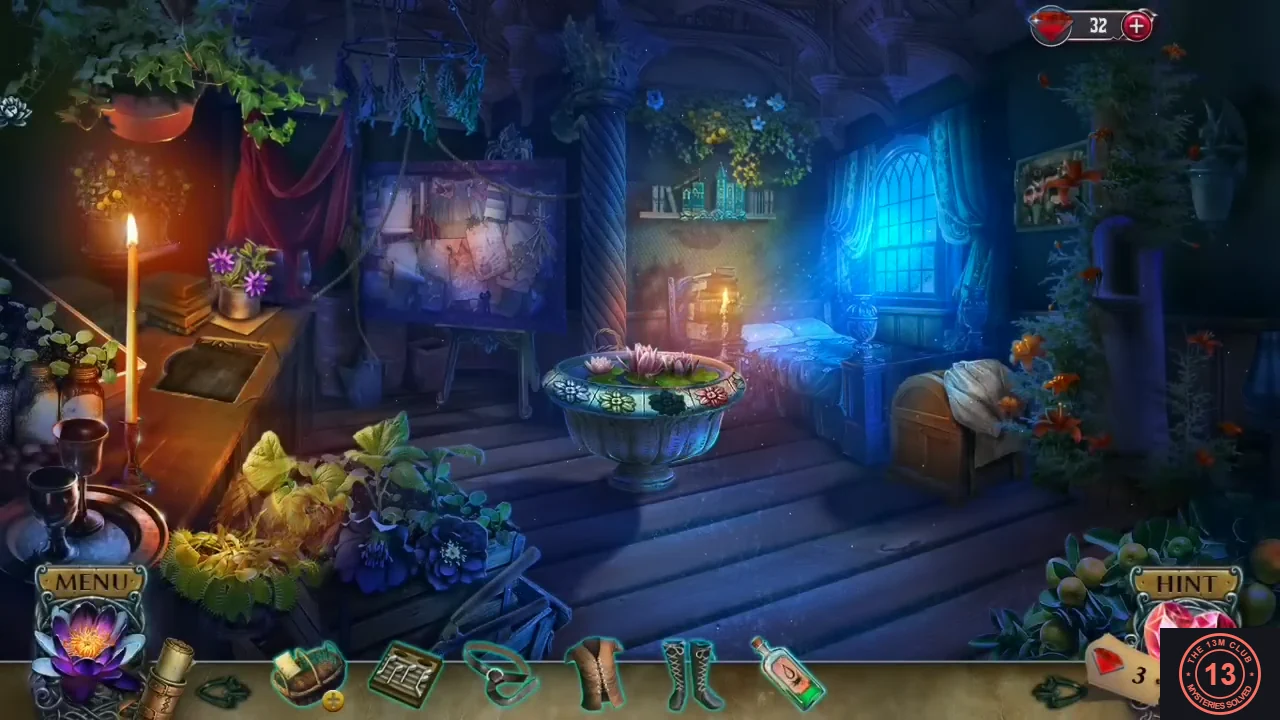
Inside Paul's house you see Christina trapped in a lotus ('Hold on! I'll save you!'). A girl explains that Paul, Raymond's brother, was the count's gardener and that Countess Lis de la Fleur loved him.
- Talk to the girl. She hands you what she found: the first flower tile, showing a yellow lily.
- Zoom into the table at the left and take the green book. Note the carved lotus recess on the table top: 'There's a secret compartment in the table.' It needs an insert you do not have yet.
- Zoom into the curtained panel at the back and take the vest hanging there. Behind it is a chained 2×2 panel with a yellow lily picture whose right half is empty. Pick up the boots standing by the flower basin.
- Zoom into the bookshelf on the right and put the green book in the gap. 'Arrange the books to form a complete picture. Select two books to swap them.' Swap books until their spines form one green castle with a tall central tower, matching battlements and windows running continuously from book to book.
- Zoom into the green flower book (it has a II on its spine). Put the ghostly Countess figurine into the woman-shaped clasp on its right side, then open the book. 'Select all the smoky silhouettes that match the image in the centre of the flower.' Find three of each in four rounds: alchemist symbol (eye in a triangle), quill and ink, phoenix and skull. The number in the flower counts down. Read the story pages: the first lotuses were weak, then they grew the deadly lotus, and years later the count's plans for revenge succeeded. Take the brown carved insert from the page.
- Put the carved insert into the lotus recess on the table. The secret compartment opens. Read Lis's letter ('Paul, my love, I'm so afraid!... Yours, Lis') and take the second flower tile.
- Go to the chained panel behind the curtain and place both flower tiles. Tap a tile to change which quarter of a flower it shows; make all four quarters form one complete flower. Each time a flower is complete the panel changes to the next one: yellow lily, then rose, then sunflower, then blue blossom. After the fourth flower the chains fall and the curtain opens.
- First list: Alchemical flask, Lock of hair, Hourglass, Count's pond, Black lotus, Poison (orange entries need an extra action). The alchemical flask is the glass retort at the lower right, and the poison is the blue bottle at the top left. For the lock of hair, tap the Countess's locket at the centre left and drag the six pieces into the oval to rebuild her portrait; the locket opens ('For Paul with love') and the lock of hair is inside. The black lotus is the dark red flower at the centre of the table. For the Count's pond, pull the pond painting out of the stack of books at the upper right. The hourglass stands in the centre.
- Second list: Books, Aging, Lotus victims, Chestnut leaf, Silence, Growth cycle. Books are the stack at the upper right. Aging is the old woman's face in the centre. Lotus victims ('The lotus victims are dead and buried. But where are their portraits?'): move the loose round portrait into the empty frame in the row of four portraits at the top centre. Chestnut leaf ('isn't quite whole yet'): drag the leaf piece at the lower left onto the leaf drawn on the paper at the left. Silence: drag the cloth hanging at the top left over the drawn lips on the pinned paper. Growth cycle ('One stage of plant growth is missing'): tap the pale sprout outline between the seed and the grown plant on the circular diagram at the left centre. Completing the list gives you the acid.
- Zoom into the chest at the right of the room. Take the white shirt (peasant clothes) lying on the lid and read the note about Paul's flowers. 'How can I get rid of these iron straps?' Pour the acid over the iron straps to dissolve them, open the chest and take the emerald, the dark green trousers and the hat.
- Drag the peasant clothes (the shirt) into the room to open the dress-up screen with the shirt on the outline figure. Drag the boots, the teal belt, the vest, the trousers and the hat from inventory into the scene, then put each one on the figure: vest, trousers, boots, belt and finally the hat.
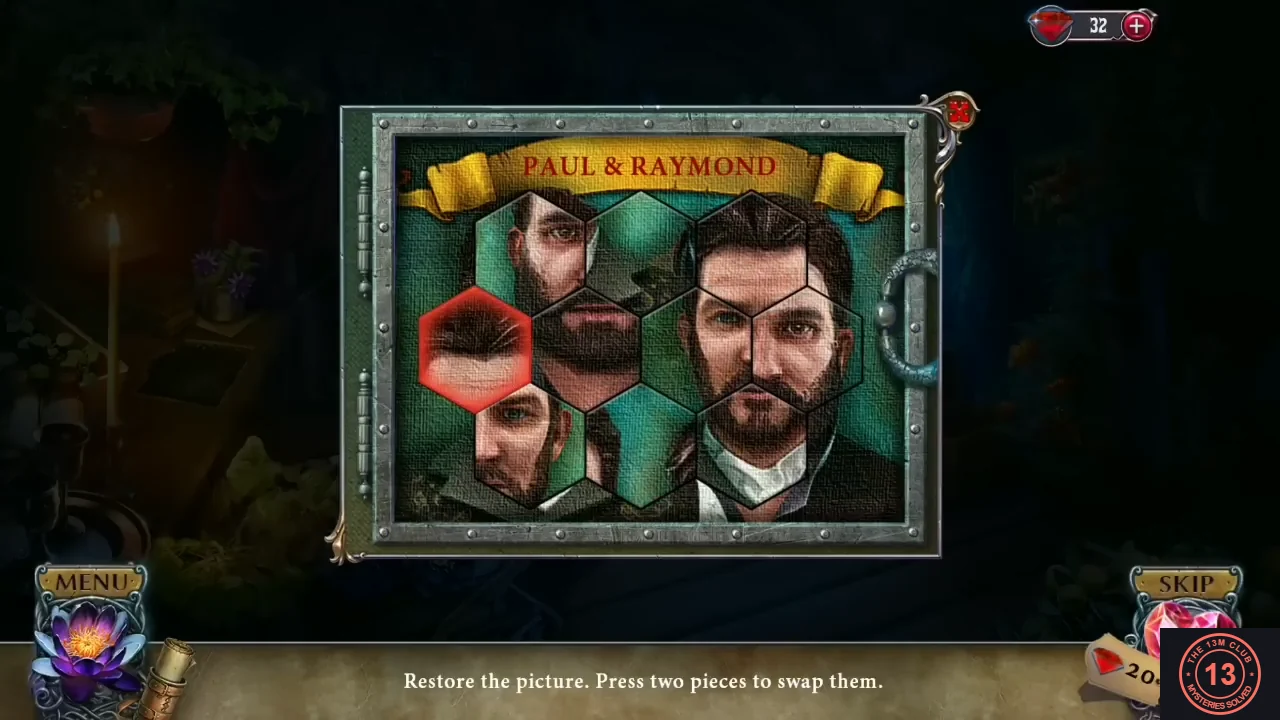
- Note the 'PAUL & RAYMOND' hexagon portrait on the wall; one hexagon is missing, and you cannot finish it yet. Open the basket and put the emerald in it.
- Optional collectible: Paul's house hides 2 phoenixes. Tap the yellow-green leaves of the plant at the lower left, in front of the candle table, and the top centre-left of the room above the stone basin, by the ceiling at the top of the pillar.
The Ingredients, Paul's Safe and the Flute
All five ingredients are in the basket and you are dressed as a peasant. Deliver the ingredients with Raymond, then use the clues in Paul's house to open his hidden safe and find the flute that lets you slip past the guards.
- Return to the town square and talk to Raymond. 'I see you've found everything. I also made some preparations. Hurry!' Give him the basket; it becomes the finished ingredients package.
- Go to the castle gate and give the ingredients to the guard. He is suspicious ('Is this the count's delivery? I thought there would only be one person.'). Raymond explains that the count is torturing the Countess and that you need proof: an apothecary outside the La Fleur wall lost his daughter to the count. He hands you a yellow lotus.
- Go back into Paul's house and zoom into the stone basin with the water lily in the middle of the room. The rim holds blue, green and red flower tiles with one empty slot. Put the yellow lotus into the empty slot, then press the flower tiles in this order: blue, yellow, red, green. A compartment opens; take the hexagonal portrait piece.
- Zoom into the 'PAUL & RAYMOND' portrait on the wall and put the hexagonal piece into the empty hexagon. 'Restore the picture. Press two pieces to swap them.' Swap the hexagons until the two bearded brothers appear side by side: Paul in a dark coat and white shirt on the left, Raymond with a fuller beard on the right.
- Inside the safe, take the folded letter (with an autumn leaf and acorns on it), the birdcage, the gold coins and the small green music tile.
- Go to the castle gate and zoom into the plaque on the right wall ('The castle was built for a beloved wife'). Use the gold coin on it; the plaque slides aside. Read Paul's letter ('Take the flute and play the alarm on it to distract the guard from the passage behind the wall...') and take the flute.
- Open the flute from the inventory and add both green music tiles (the one from the dovecote and the one from the safe), so it has three bands. 'I need to put the music notes in the right order.' Rearrange the three bands so the notes run on unbroken across the joints: first the band with two beamed notes, a single note and a hooked stem at its right edge; then the band with the flagged notes; last the band that ends in three beamed notes.
- Pan to the far left of the square, past the dovecote and the open manhole, to the stone arch guarded by two soldiers. Play the flute there; the alarm draws the guards away. 'The path is open!' Go through the arch.
The Apothecary's Ruined House
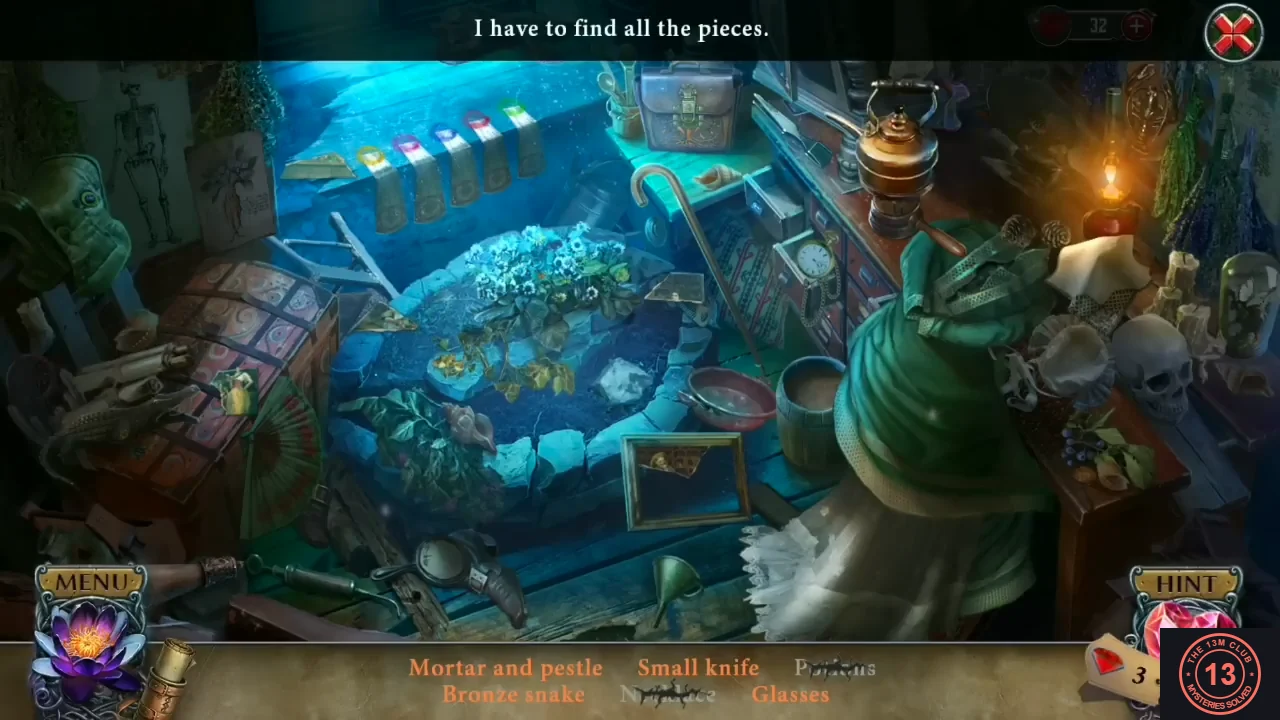
Beyond the arch lie the ruins of the apothecary's house. Search the wrecked workshop, then use what you find in the overgrown yard to gather the apothecary's letters as evidence against the count.
- Tap the sparkling ruins to search the apothecary's workshop. First list: Mortar and pestle, Small knife, Potions, Bronze snake, Necklace, Glasses. Take the gold bead necklace hanging on the green cloak at the right. Potions: tap the five coloured potion bottles scattered around the room (green on the chest at the left, pink on the floor at the lower left, blue in the open drawer, red on the dresser at the right, yellow beside the bucket); each one flies to its matching coloured tab on the shelf at the top left. Glasses: move the loose planks lying in front of the stone pool to uncover an empty picture frame ('I have to find all the pieces'). Tap the torn scraps of the painting lying around the pool, then zoom into the frame and drag the pieces into place to restore the picture of the apothecary and his daughter. The painting fades and a pair of glasses appears in the pool; take them.
- Zoom into the brown leather case on the shelf at the top centre of the workshop and tap it to open it. Inside, take the bronze snake hanging on the left, the mortar and pestle in the middle and the small knife in the bottom strap.
- Second list: Handkerchief, Mirror, Comb, Tweezers, Kettle, Fan. The comb lies on the right rim of the pool by the walking cane, the round hand mirror on the floor at the lower left, the folding fan against the chest at the left, the long tweezers on the dresser top beside the open case, the handkerchief is the white cloth by the candle at the right and the kettle is the copper kettle on the stove at the top right.
- Back in the ruined yard, zoom into the broken jug lying in the grass in the middle of the scene and take the small teal medicine bowl emblem from the straw. The thorny straw cannot be cleared yet ('Those thorns are sharp! I can't clean this up with my bare hands.').
- Zoom into the glass distilling apparatus in the ruined house on the left. Put the bronze snake into the snake-shaped recess and the medicine bowl emblem into the slot beside it. A compartment opens: read the note ('Someone sent a beautiful white lotus for my dear daughter, but the next morning the lotus became black and my daughter died...') and take it together with the daughter's portrait (the green cameo). The apparatus itself cannot be used yet: 'Without instructions, I'm not sure how to use this.'
- Zoom into the small stone niche among the roses under the tree in the background. Put the daughter's portrait into the empty oval. A letter appears ('My dear daughter, After I publicly accused the count of your death, he attacked my house at night and destroyed it...'); take it and the green ornate emblem lying in the niche.
- Open the folded letter from Paul's safe in the inventory ('Dear Raymond, My work for the Count de la Fleur is over. I helped him grow a deadly flower... If you're reading this, then I'm dead. Run away from here!'). Add the lotus note and the letter to his daughter to it; the three letters combine into the Evidence.
- Optional collectible: the apothecary's ruined yard hides 2 phoenixes. Tap the broken roof edge and tree at the back (top centre), and the stone wall at the upper right.
Raymond's Pigeon and the Garden Pruners
Bring the evidence to Raymond, prepare the pigeon he asks for, then search the apothecary's ruins a second time for a pair of garden pruners.
- Return to the town square and give the Evidence to Raymond. He says the villagers cannot storm the castle in time and asks you to find the count's secret passage under the castle wall and send him a pigeon once you reach the courtyard. He gives you a pouch of birdseed.
- Zoom into the dovecote on the left side of the square. Place the birdcage inside and sprinkle the birdseed into it; the white dove walks in. Take the caged pigeon, then take the leather glove that sparkles in the coop.
- Go back to the apothecary's ruined yard and zoom into the broken jug in the grass. Use the leather glove to clear away the thorny straw. Only a frozen blue lump remains ('Something exploded here and froze like glass.'); the glove stays in your inventory.
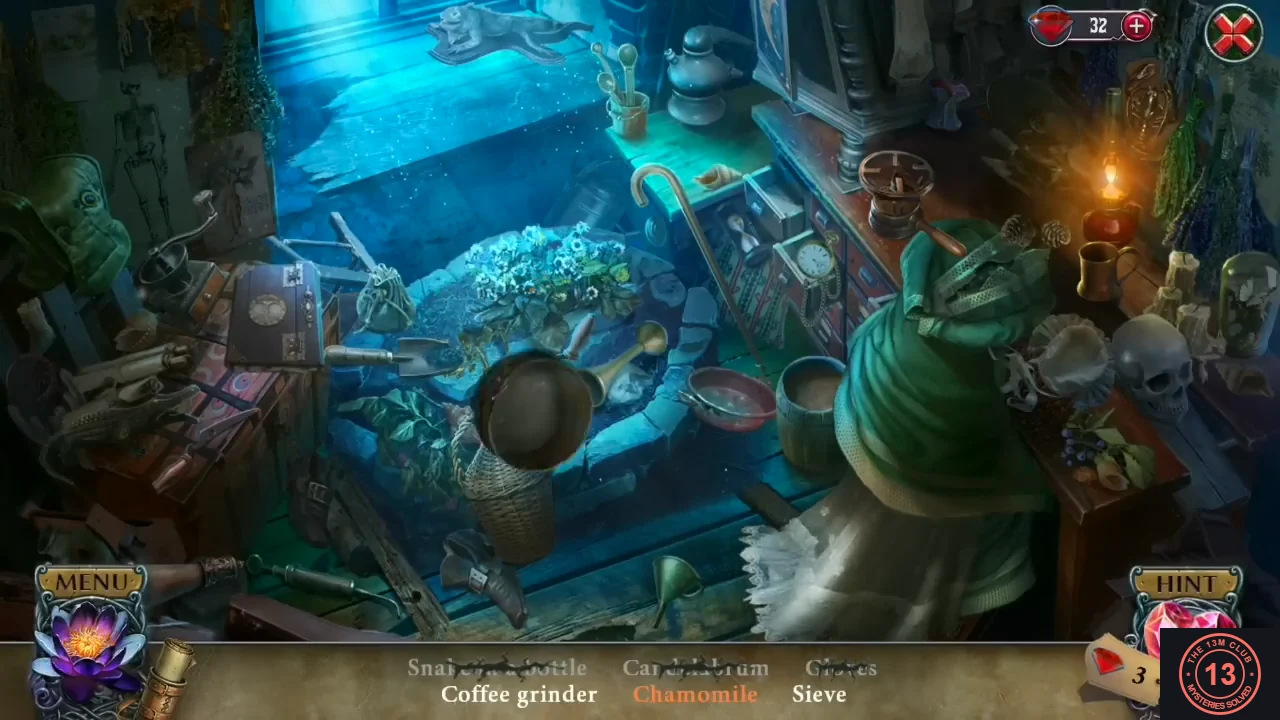
- Tap the sparkling ruins again for a second search. First list: Snake in a bottle, Candelabrum, Gloves, Sieve, Chamomile, Coffee grinder. The snake in a bottle is the green bottle at the top right, the brass candelabrum stands just right of it, the grey gloves lie on the white cloth at the lower centre, the round sieve hangs at the upper left and the coffee grinder sits below it at the upper left. Chamomile (orange, needs an extra action): tap the brown book on the left table to open the herbarium, then drag the loose white chamomile flower heads from the left page onto the bare stem on the right page until the drawing is complete.
- Second list: Pruners, Wine bottle, Tobacco pouch, Old stethoscope, Hourglass, Trowel. Pruners (orange): take the loose pruner half with the reddish-brown wooden handle, lying across the front of the wooden chest at the lower left, and drag it onto the other half lying in the pool. The wine bottle is the wicker-covered demijohn at the lower centre, the tobacco pouch is the small pouch at the centre left, the old stethoscope is the brass ear trumpet in the pool, the hourglass is in the open drawers and the trowel lies at the centre left.
The Countess's Garden
The pruners open the overgrown arch behind the apothecary's yard, leading into a misty garden with a pond under the castle wall.
- In the apothecary's yard, use the garden pruners on the thorny vines covering the stone arch at the back. The arch opens into a garden courtyard ('What an odd place! But where is the secret entrance?'). The pruners stay in your inventory.
- Zoom into the reclining stone statue in the lower left corner of the garden and take the funnel lying in the grass behind its head.
- Zoom into the rose-covered niche with the stone busts at the back left of the garden. Cut the climbing roses away with the garden pruners, then take the yellow candle and the pink rose sprig.
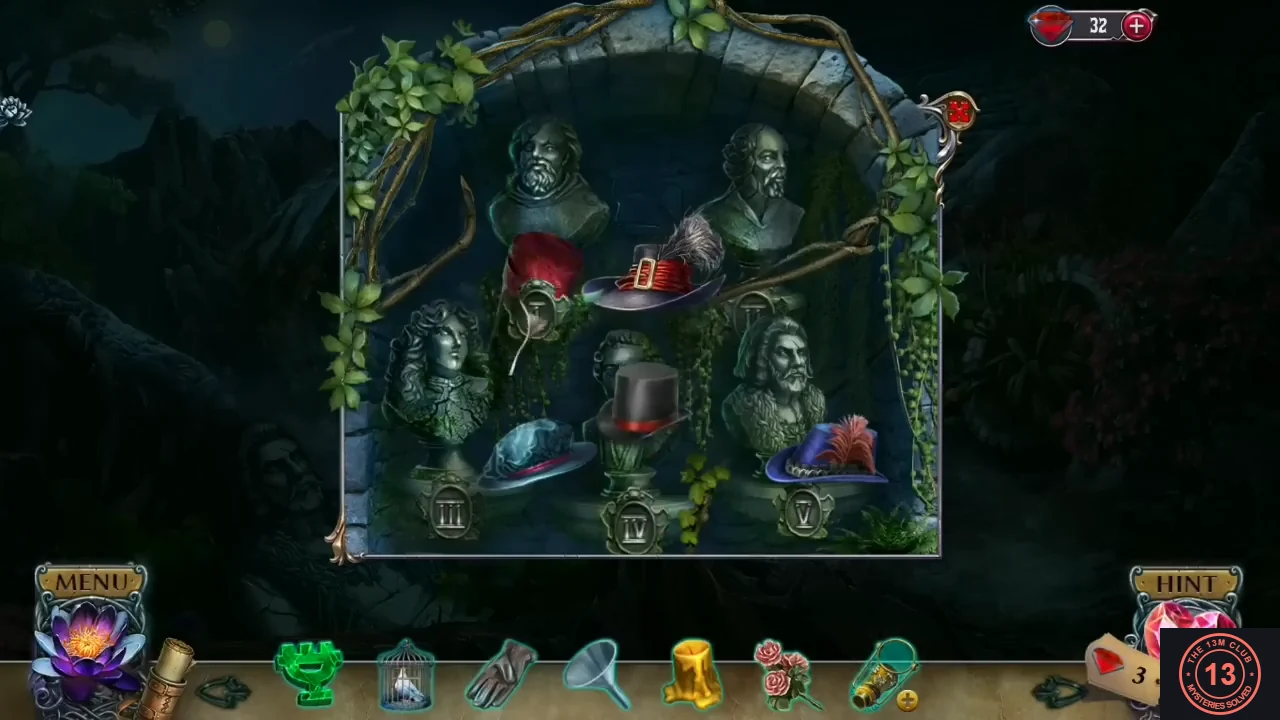
- Swap the hats between the busts by tapping two hats in turn (the selected hat glows). Give bust I the red cap, bust II the grey-blue hat with the red band, bust III the black cavalier hat with the white feather and red sash, bust IV the black top hat and bust V the blue hat with the red feathers (it starts in the correct place). A red cat figure appears in the centre of the niche: take it (cat emblem).
- Optional collectible: the Countess's garden hides 2 phoenixes. Tap the top of the wall at the upper right, and the stone urn with pink flowers on top of the wall, left of the ivy-covered column.
The Sapphire Device and the Secret Passage
Collect a metal bat, two engraved tiles, a glass lens and a sapphire, assemble the strange telescope and use it to reveal the hidden door in the garden wall.
- Zoom into the pedestal with the yellow roses at the right edge of the pond, where the red cat sits ('Here, kitty!'). Take the hammer and chisel lying left of the dish, then put the cat emblem into the cat-shaped dish. The dish opens: take the metal bat (folded wings) and engraved tile 1/2. Keep the bat; it belongs to the bat panel you will find in the catacombs.
- Zoom into the reclining stone statue in the lower left corner of the garden and use the hammer and chisel on the statue's chest. The stone cracks open: take engraved tile 2/2. The hammer and chisel stays in your inventory.
- Go back to the apothecary's yard and zoom into the frozen blue lump left by the broken jug. Break it with the hammer and chisel and take the oval glass lens.
- Return to the garden and zoom into the centre of the pond. Use the leather glove to pull the submerged chest out onto the little dock ('What a strange shape.'). Put the green emblem into the lock. Inside, take the strange telescope, the sapphire recipe parchment with the flint and steel clipped to it, and the blue cone of sapphire powder.
- Go to the distilling apparatus in the apothecary's ruins and place the sapphire recipe on it. Then, in this order: put the funnel on the side spout, put the candle under the apparatus, pour the sapphire powder in through the funnel and light the candle with the flint and steel. Powder without the funnel is refused ('I should use a funnel'), and the candle is refused before the funnel is in place. A blue crystal forms: take the sapphire.
- Open the strange telescope from your inventory ('I think a glass lens should go here.'). Put the glass lens into the ring at the top and the sapphire into the eyepiece at the bottom.
- In the garden ('Perhaps this mysterious device can help me find the underground passage.'), use the assembled telescope and sweep its lens slowly over the scene, including the stone wall and the rocks at the upper left. A glowing door outline appears on the stone wall just right of the ivy-covered column, and the telescope leaves your inventory. Tap the outline.
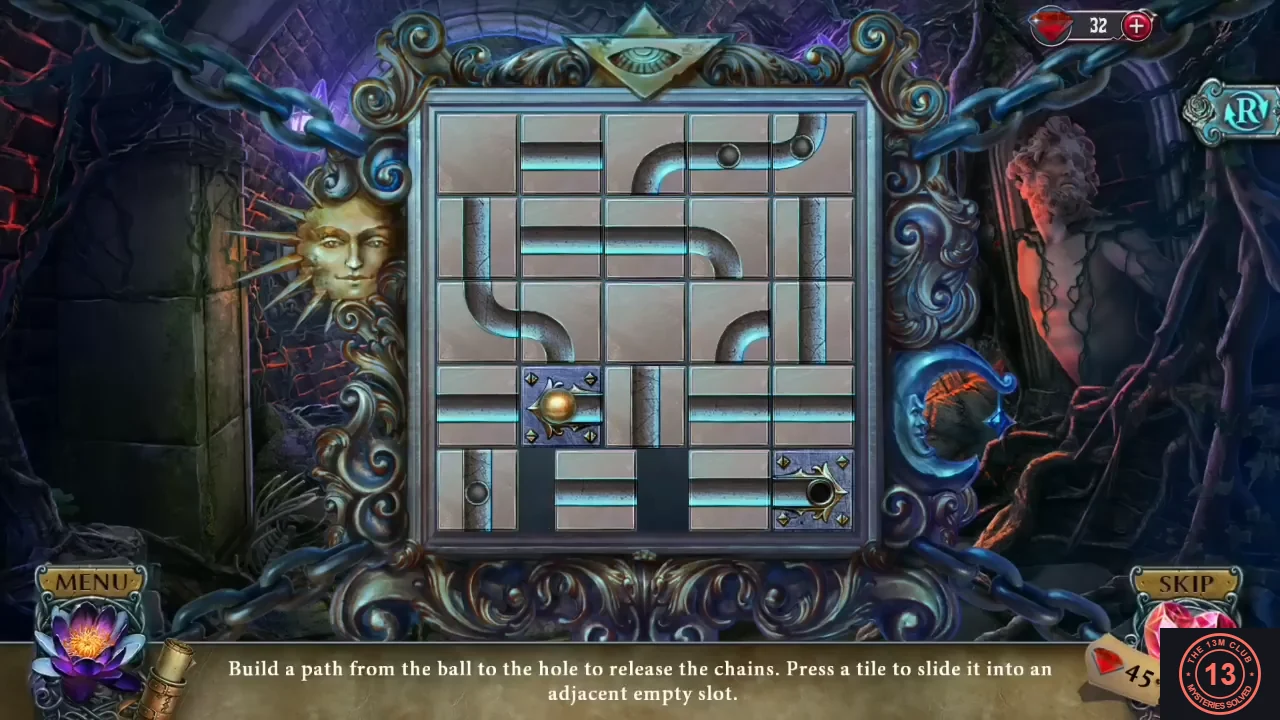
- Put both engraved tiles into the empty slots of the chain board first. Chain puzzle: 'Build a path from the ball to the hole to release the chains. Press a tile to slide it into an adjacent empty slot.' On the 5x5 board the ball (row 4, column 2) and the hole (bottom right corner) cannot move. Build this loop: from the ball go right along row 4, turn up in the right column to the top row, run left along the top row, turn down the left column to the bottom row, then run right along the bottom row into the hole. Use Reset to restore the start or Skip if needed.
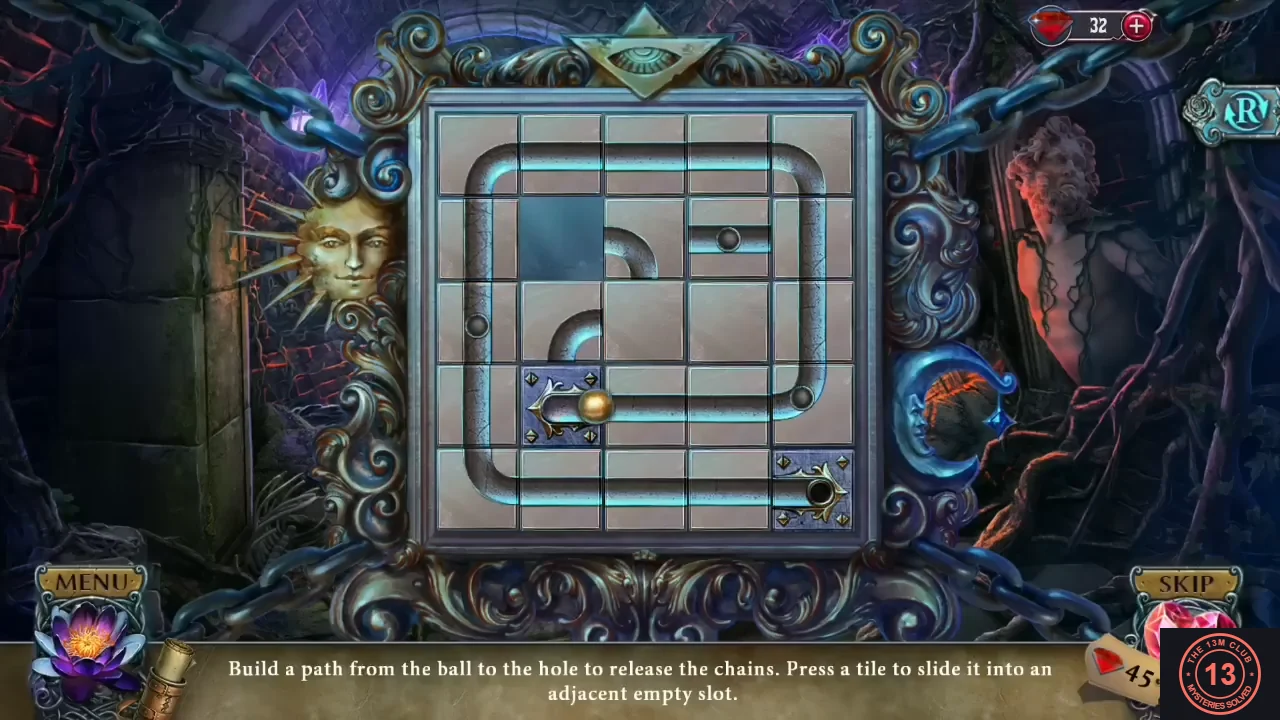
The completed loop, with the ball starting to roll along it.