The Catacombs and the Three Snake Beams
Below the castle wall, gather two rune crystals, read the count's memoir and wake the three snake carvings in the knight hall, then use the rune wheel and the mortar to free a torch and a second metal bat.
- Go through the hidden door into the catacombs. After the lotus petal cutscene, take the teal knot emblem that appears on the floor in the middle of the passage.
- Look around the corridor. The bat-shaped stone panel on the left wall cannot be solved yet ('I can figure this out without batting an eye.'). Take the copper pot from the floor grate. The round rune wheel to the right of the passage has empty slots, and a stone pestle lies in it. Zoom into the statue's rusted gauntlet holding a torch and take the purple rune crystal from it. The mortar niche is covered in webs and has no pestle yet.
- Go up into the knight hall. Zoom into the snake shield on the banister of the left staircase and take the second purple rune crystal from it. The snake's eyes turn red and a red beam shines towards the arched door on the left.
- Optional collectible: the catacomb tunnel hides 2 phoenixes. Tap high on the right side of the central arch, just left of the right purple crystal, and the stone floor at the lower left in front of the left pillar.
- Open the sarcophagus at the lower left of the hall. The corpse wears clothes like the count's ('I need a portrait of the count to know for sure, though.'). Take the gold dagger and the Count's memoir.
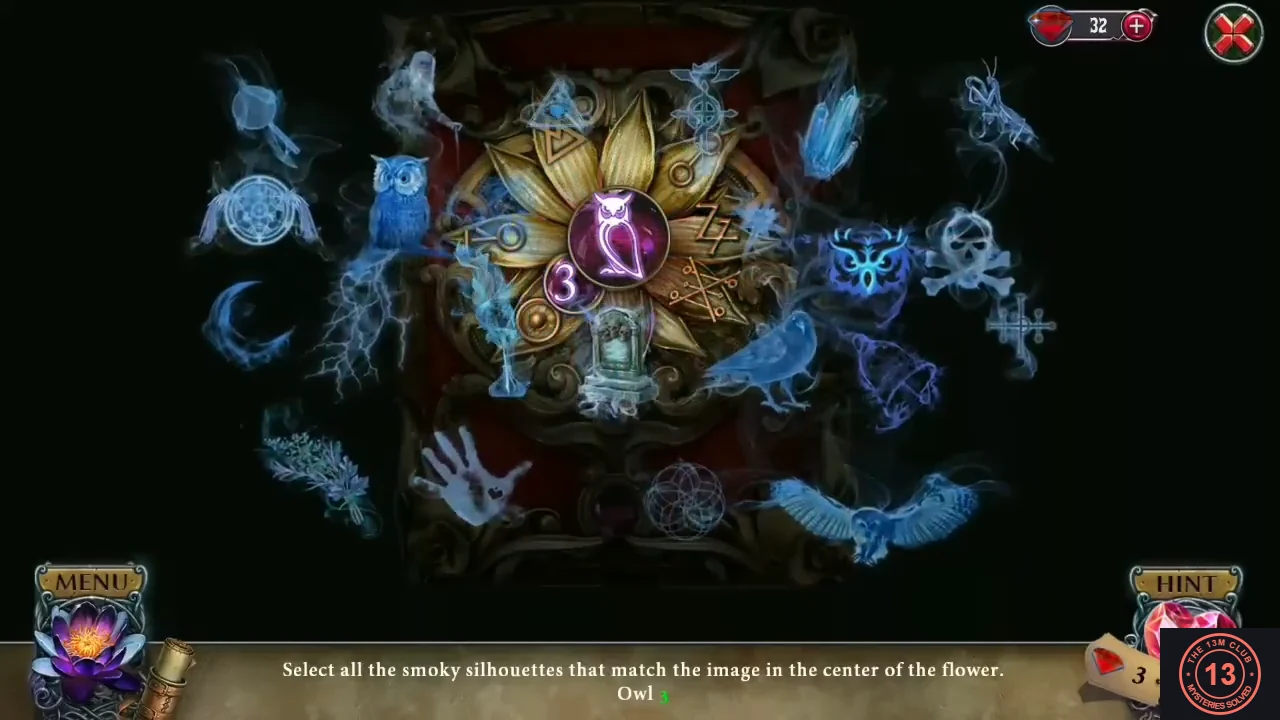
- Open the Count's memoir from your inventory and put the knot emblem into its lock. Select all the smoky silhouettes that match the picture in the centre of the flower. Find three of each, in four rounds: turtle skeleton, eyes, owl and deadly moth. The number in the flower shows how many are left in the current round. Read the story pages, then take the snake eyes (two red gems).
- Zoom into the eyeless snake carving at the foot of the right staircase and put the snake eyes in. Its eyes glow blue and a blue beam joins the red one at the left door. (The moth panel nearby says 'The door is locked. And some parts are missing.' It is solved later; the coiled snake shield on the wall above the right staircase has no head yet.)
- Zoom into the lock of the arched door on the left, where the beams point, and take the glowing orange orb from it.
- Return to the corridor and zoom into the rune wheel. Place one rune crystal, take the stone pestle from the wheel, then place the second rune crystal. The wheel opens on a skeleton in a niche; take the green-eyed snake head brooch from it.
- Zoom into the mortar niche. Put the pestle into the mortar, add the rose and grind it. Place the copper pot on the lower shelf, pour the mixture into it and take the filled pot.
- Zoom into the statue's rusted gauntlet and pour the filled pot over it. The rust dissolves and the hand lets go; take the torch.
- Zoom into the mortar niche again and use the torch to burn away the webs on the top shelf. Take the metal bat (spread wings) that was hidden there. Keep it with the bat from the cat dish; all three bats go into the bat panel together later.
- Go back up to the knight hall and zoom into the headless coiled snake on the shield on the wall above the right staircase. Attach the snake head brooch; its eyes flash and settle on green, and a green beam joins the red and blue beams at the left door.
- Optional collectible: the knight hall (stairs, blue lotus wall, kneeling knight) hides 2 phoenixes. Tap by the purple lamp on the right wall above the right arched door, and the very top edge of the scene above the left part of the hall.
The Count's Laboratory
With all three beams lit, the left door opens into the blue laboratory. Search the floral niche for a third metal bat, set the planets on the orrery, open the bat panel in the corridor and complete the old couple's portrait.
- Go through the arched door on the left of the knight hall into the laboratory. Zoom into the shadow box under the balcony at the back (gold stars and a striped balloon behind glass) and take the small gold planet disc (Venus). The balloon is out of reach: 'It's trapped behind glass. If only there were a gust of wind to blow the balloon toward that opening.'
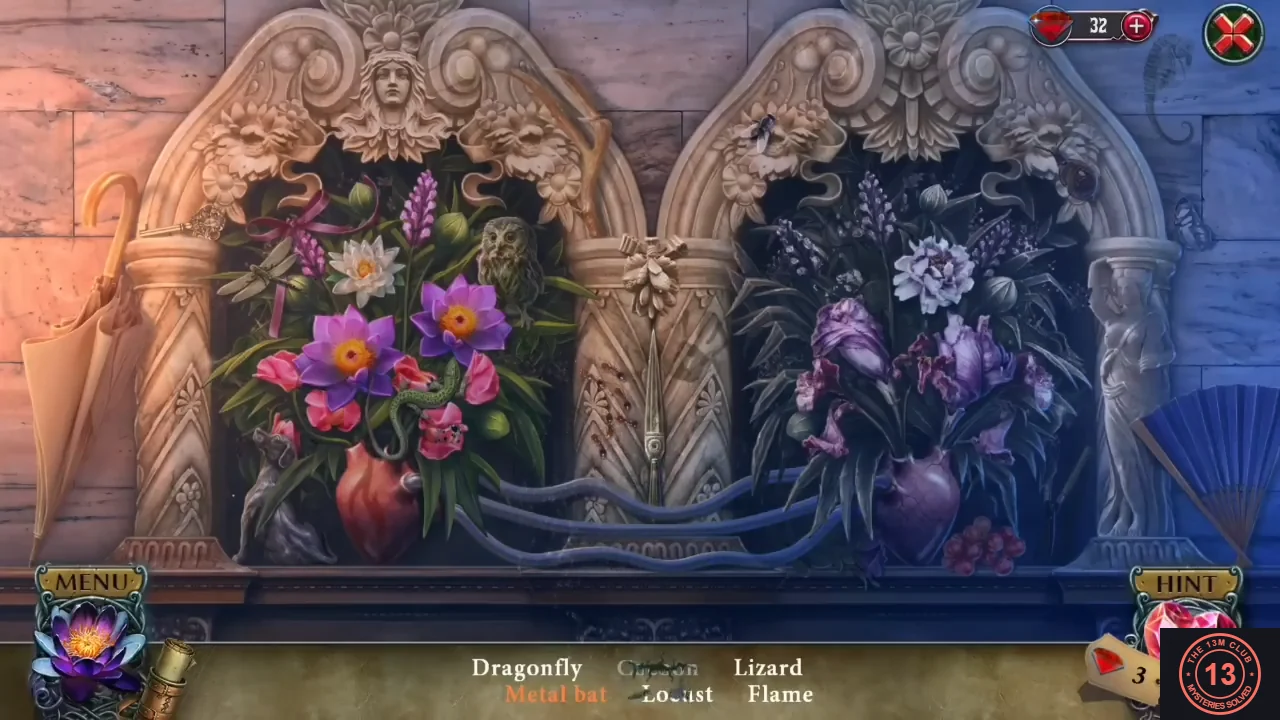
- Tap the sparkling floral niche at the right of the desk to start a hidden-object scene. First list: Lotus pod (seed pod in the right bouquet), Infinity symbol (drag the red-and-black snake from the top of the right arch onto the snake on the centre column to make a figure eight), Beard (carved beard under the face at the top of the left arch), Tortoise (on the lower ledge), Daisy (white daisy in the left bouquet) and Mandrake (pale root figure in the right bouquet). Second list: Cocoon (drag the curly green tendril from the right bouquet onto the green caterpillar on the left bouquet, then tap the cocoon), Flame (painted on the red heart vase), Locust (green grasshopper on the blue ribbon by the centre column), Lizard (on the left bouquet by the red vase) and Dragonfly (upper left of the left bouquet). When the rest are found, the right bouquet blooms and a third metal bat appears in it; tap it.
- Zoom into the brass orrery (planet board) in the upper centre of the lab. Take the red picture card from the lower left of the board ('Men are from Mars, women are from Venus.'). Put Venus on the second ring from the centre and Mars (the orange orb from the knight hall door) into the empty socket on the fourth ring. The centre flares and a glass apple rises; take it.
- Zoom into the portrait of the old seated man and the blonde woman on the left wall above the telescope. Put the glass apple into the woman's hand. The man's chest still has an empty heart-shaped socket.
- Go back down to the catacomb corridor and zoom into the bat-carved stone panel on the left wall. Place all three metal bats, one in each recess: left, top and right. The panel slides open onto a set of pipes, and a folded fan flies into your inventory. At the same moment the stuffed bat hanging in the arch drops to the floor ('What happened to that bat?').
- Zoom into the stuffed bat on the floor and use the dagger to cut it open. Take the glass heart from inside.
- Return to the lab portrait and put the glass heart into the man's chest. A compartment opens at the top left of the painting; take the crescent ornament with an orange lotus and the picture card that come out of it.
- Zoom into the shadow box again and put the folded fan at its right side. The draught blows the striped balloon to the opening at the left; take the teal round item it leaves there.
- Optional collectible: the laboratory hides 2 phoenixes. Tap the writing desk just right of the blue chair, and the small greenish object at the top left corner of the tall bookcase (upper left of the scene, right next to where the phoenix tab slides out).
The Moth Door and the Specimen Room
Search the floral niche a second time for a metal disc, open the moth door in the knight hall and solve the specimen room: the jar, the cat skeletons and the phoenix painting.
- Back in the lab, tap the sparkling floral niche at the right of the desk again. First list: Crescent moon, Griffin, Death, Lightning bolt, Infant (the baby among the left bouquet) and Ghost (the see-through blue figure at the right edge of the right arch). Second list: Pocket watch, Phoenix, Scroll (rolled up on the centre column), Wheel (the cartwheel behind the right vase), Maze (the round labyrinth carving at the top left of the left arch) and Metal disc. When the others are found, the right bouquet turns pink and the metal disc appears in it; tap it.
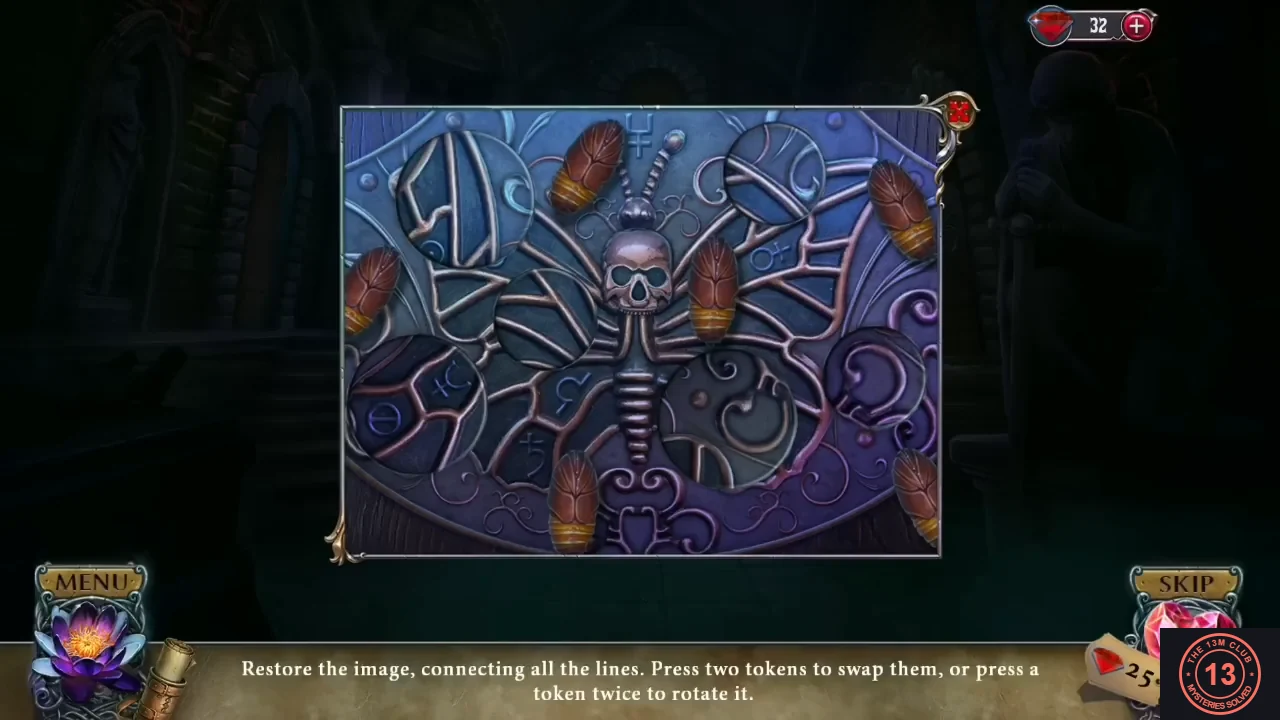
- Go to the knight hall and zoom into the moth panel on the locked right-hand door. Put the metal disc and the teal round item from the shadow box into the empty token slots. 'Restore the image, connecting all the lines. Press two tokens to swap them, or press a token twice to rotate it.' Swap and turn the round tokens until every wing line of the skull moth joins up (see the finished panel). The door opens into the specimen room.
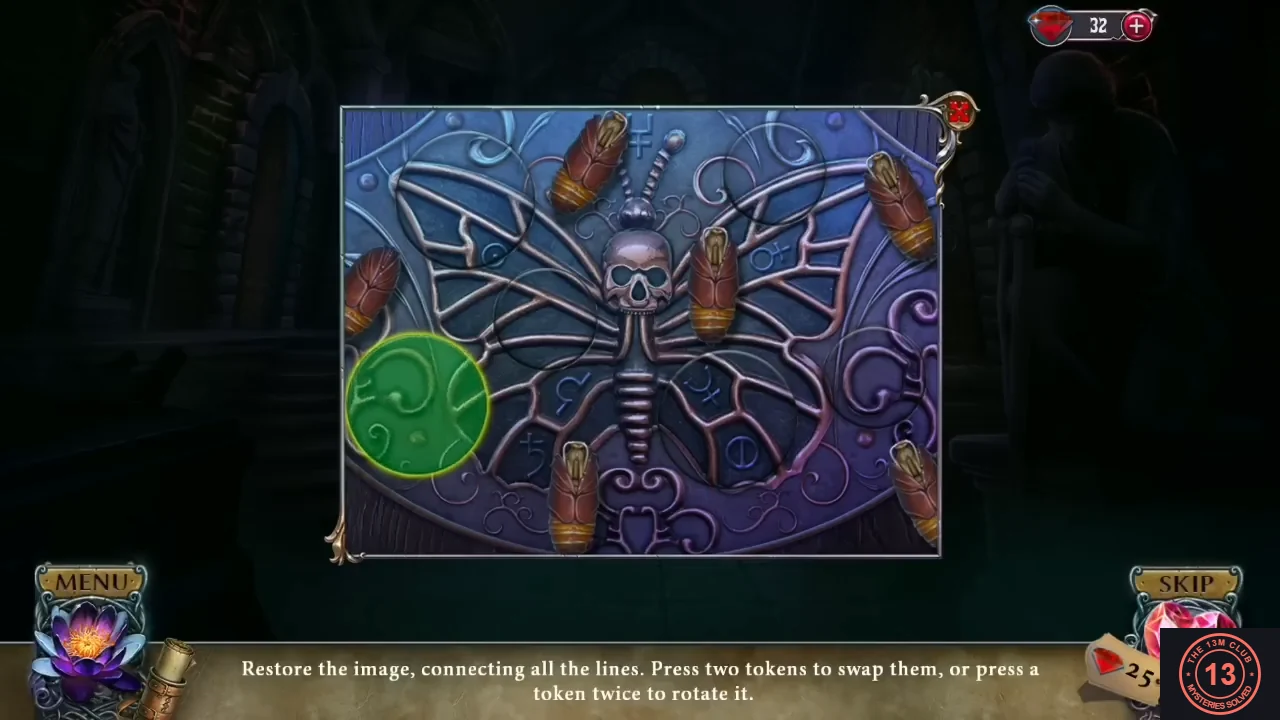
The finished moth panel, with every wing line joined. - In the specimen room, zoom into the green jar on the pedestal in front of the mammoth. 'The ornaments fell off the top of this jar.' The lid has two empty half-moon sockets. Take the silver matchbox beside the jar.
- Zoom into the framed turtle drawing to the right of the mammoth. The turtle ornament is stuck ('I'll have to pry it out.'); use the dagger to pry out the blue turtle half-ornament.
- Return to the green jar and put the lotus crescent and the turtle half into the two sockets on the lid. The jar opens; take the glowing cat skeleton figure.
- Zoom into the cat skeleton display on the shelf at the right. Put the cat skeleton on the empty round stand, then move the skeletons between the stands (select one, then a stand). Final layout: the arched-back cat on the carved box at the top left, the low prowling cat on the red stand at the top right, the crouching head-down cat on the left board, the snarling walking cat on the middle board and the sitting cat on the round stand. The lid of the box opens; take the teal glass tile.
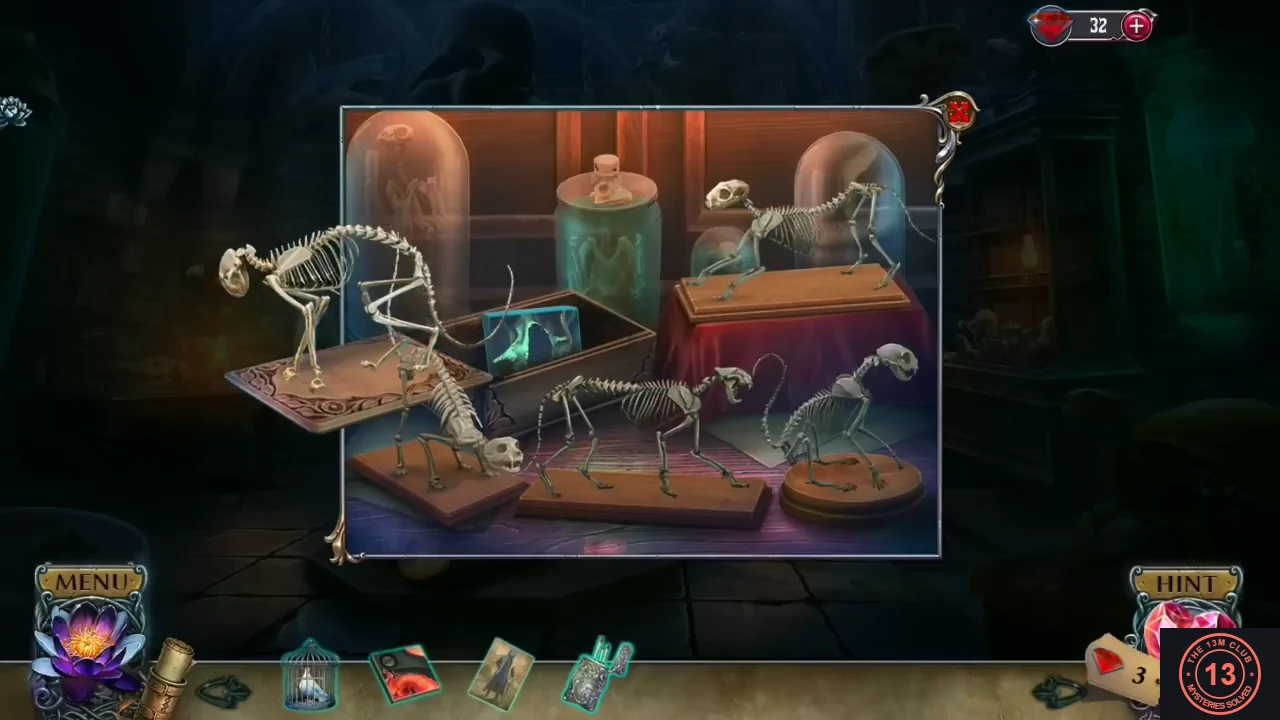
The correct cat skeleton layout; the box at the top left opens and holds the glass tile. - Zoom into the tiled painting on the wall to the left of the mammoth. Put the red picture card from the orrery and the glass tile into the two empty slots. 'Restore the painting. Press two tiles to swap them.' Swap tiles until the red phoenix sits on top of the green skull (see the finished painting). The painting slides aside to reveal a safe full of gears; take the gold lotus key with the purple gem.
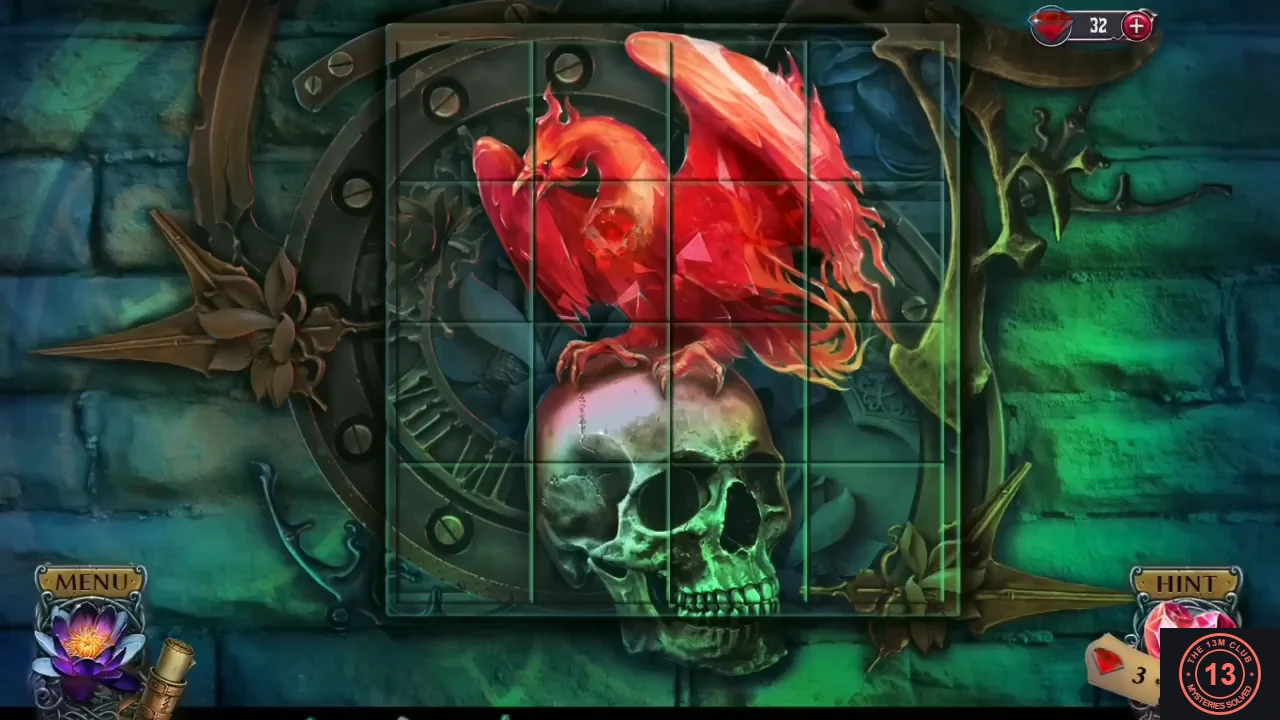
The restored painting: the red phoenix sits on top of the green skull. - Optional collectible: when you are back in the specimen room view, a teal phoenix appears among the glass jars by the mammoth's front left leg. Tap it to collect it. The tab at the top left shows 'Phoenixes to find here: 2' before and '1' after. The second one is in the next step.
- The second specimen-room phoenix is inside the hanging birdcage just right of the mammoth skeleton's head (top centre). Tap it.
The Mummy and the Pigeon
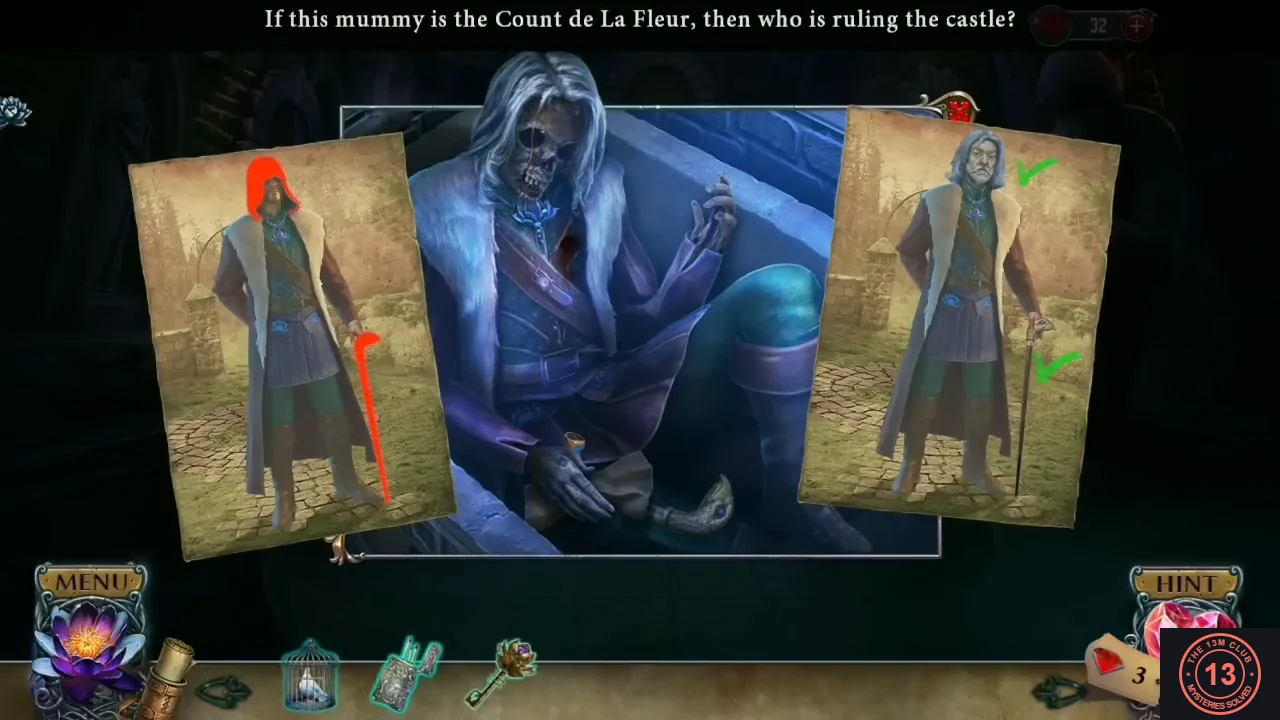
Prove who lies in the sarcophagus, then open the window at the top of the knight hall and send Raymond the pigeon.
- In the knight hall, zoom into the open sarcophagus at the lower left and put the Count's portrait (the picture card from the lab painting) on the corpse. Two portraits appear beside it. Tap the corpse's long grey hair, then the head of the cane at its feet; each detail gets a green check on the right-hand portrait. 'If this mummy is the Count de La Fleur, then who is ruling the castle?' Take the gold La Fleur ring with the purple gem.
- Zoom into the small wooden door at the top of the back stairs, behind the glowing lotus wall. Put the La Fleur ring on the padlock; a keyhole appears. Unlock it with the lotus key. The door opens onto a window overlooking the castle courtyard: 'I have to send a pigeon to Raymond, as we agreed.' Use the caged pigeon on the window (the matchbox does not work here). The pigeon flies off.
- In the castle courtyard, the pigeon lands on the cannon in the foreground. Take the small wooden keg marked with a skull from the ground to the right of the cannon, by the iron gate. Tap the pigeon to read Raymond's note: 'We can't open the gates! Find a way to open them or the whole thing ends here!' Take the winged lion-face emblem attached to it.
The Castle Courtyard
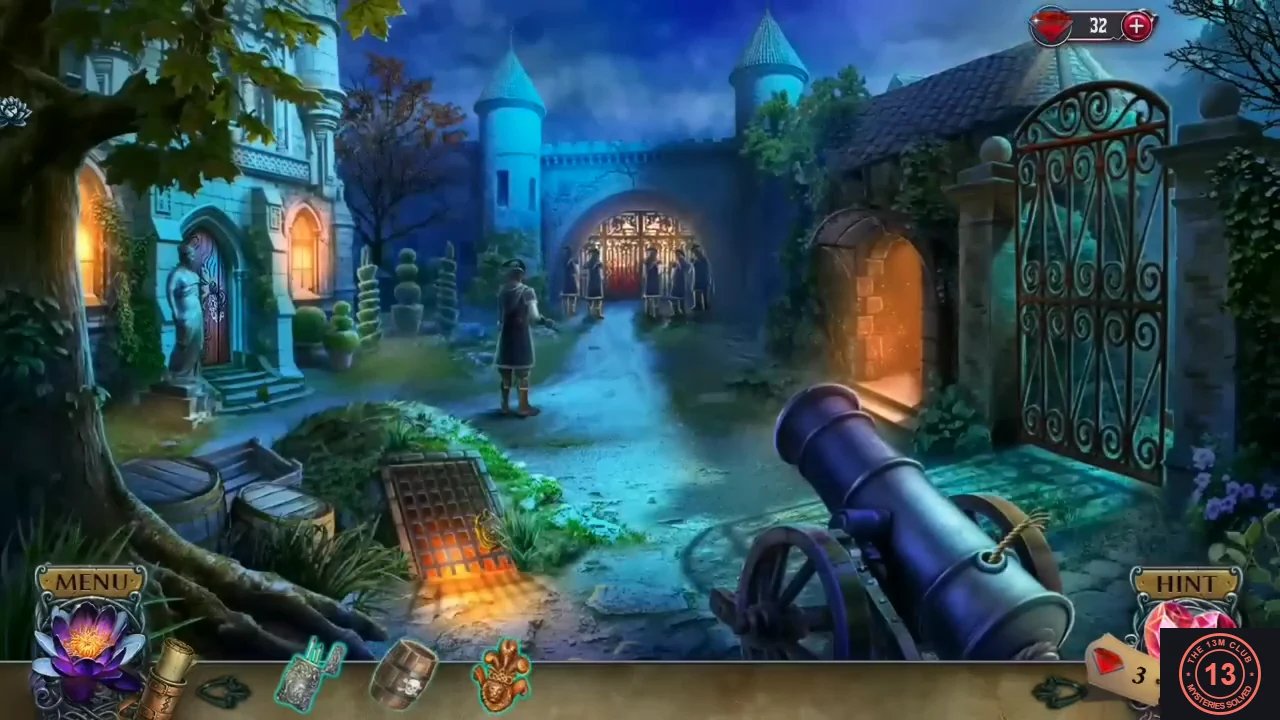
Raymond's men are stuck outside the castle gate. Make a sickle on the grindstone, take the guard's key, search the armoury below the grate for a cannonball, then load and fire the cannon at the gate.
- Zoom into the stone statue beside the red door of the house on the left. Take the curved metal scrap from the statue's hand, then take the statue's loose green stone arm.
- Zoom into the glowing doorway to the right of the cannon, beside the iron gate, where a grindstone stands on a table. An old ramrod leans at the lower left ('This ramrod is so old that the handle fell off.'); leave it for now. Take the teal tongs tied to the grindstone. Put the metal scrap on the grindstone; it is ground into a sickle. Take the sickle.
- Zoom into the tall grass in front of the glowing floor grate, left of the cannon, and cut it with the sickle. A clock-face padlock on the grate appears ('I bet the guards have the key.'). Take the wooden handle lying across it.
- Zoom into the guard standing on the path in the middle of the courtyard. Use the sickle to hook the key hanging from his belt. The key's tag reads 11:20.
- Zoom into the clock padlock on the grate again and insert the jail key. Set the hands to the time on its tag, 11:20: the short hand on 11 and the long hand on 4. The lock opens, and so does the grate below it.
- The open grate leads to an armoury hidden-object scene. List: Wanted poster, French horn, Pumpkin, Crescent, Helmet, Axe, Coat of arms, Stone face, Birdcage, Bouquet, Horse and Jug. Bouquet: a mouse sits in the dried roses on the window ledge at the top left; drag the wedge of cheese from beside the iron gauntlet at the lower right to the mouse so it leaves, then tap the bouquet. Helmet: pull the sword out of the cobweb under the ceiling beam and put it in the suit of armour's raised hands; the helmet drops onto the table, tap it. Stone face: the round medallion at the top right shows a woman with a broken face ('Her face is broken.'); drag the stone face piece lying under the chain on the table into the medallion, then tap the completed face. When the list is done, tap every dark cannonball in the room as the counter at the bottom asks ('Find all cannonballs', then 'Find the last cannonball').
- Go back to the grindstone doorway and attach the wooden handle to the old ramrod. Take the repaired ramrod.
- Zoom into the muzzle of the cannon in the right foreground. The tongs do nothing here ('I was sure that was right!') and the cannonball alone is refused ('It won't shoot without powder.'). Pour in the skull keg of powder first, then put the cannonball in. The black lotus flares ('She's getting worse! I have to act quickly!') and gives you a blue ghostly scroll figurine. Push the cannonball down the barrel with the ramrod.
- Use the matches on the cannon to light it. 'I have to destroy the gates with one well-placed shot!' A crosshair drifts across the courtyard; tap when it is centred on the lit castle gate at the end of the path. The shot blows the gate apart.
- Optional collectible: the castle courtyard hides 2 phoenixes. Tap the ivy at the top of the wall between the round turret and the tiled roof on the right, above the glowing arched doorway, and the branches of the reddish autumn tree between the castle's left wing and the small round turret (upper left of centre).
The Gas-Filled Garden and the Windmill
Behind the broken gate a green gas has knocked out the villagers. Get a gas mask, collect four pieces of blue canvas and repair the windmill so it blows the gas away.
- After the shot the new objective is 'Catch the count.' Go through the broken gate into the garden in front of the greenhouse. Villagers with torches arrive ('Show your face, murderer!') and a green gas knocks them out. Take the blue canvas draped over the low wall beside the lantern on the left. 'The gas is everywhere! One breath and I'd join those poor guys on the ground.'
- Tap the man slumped against the lantern wall: 'I can't quite reach him. Maybe I can pull him closer somehow.' Use the tongs on him; his leather pouch comes within reach. Zoom into the pouch and take the gold winged guard's emblem and blue canvas 2/4.
- Go back to the courtyard and zoom into the glowing doorway with the grindstone. Put both guard's emblems into the two winged recesses on the blue wooden cabinet to the left of the grindstone. The cabinet opens: take the gas mask and the brush.
- Return to the garden and use the gas mask on the scene so you can move around in the gas.
- Zoom into the windmill tower on the left. Cut the rope net with the sickle and take blue canvas 3/4 and the net.
- Zoom into the steps of the fountain on the right ('Nobody is maintaining this garden...'). Move the blue cloth aside and take blue canvas 4/4, then take the count's cane lying there.
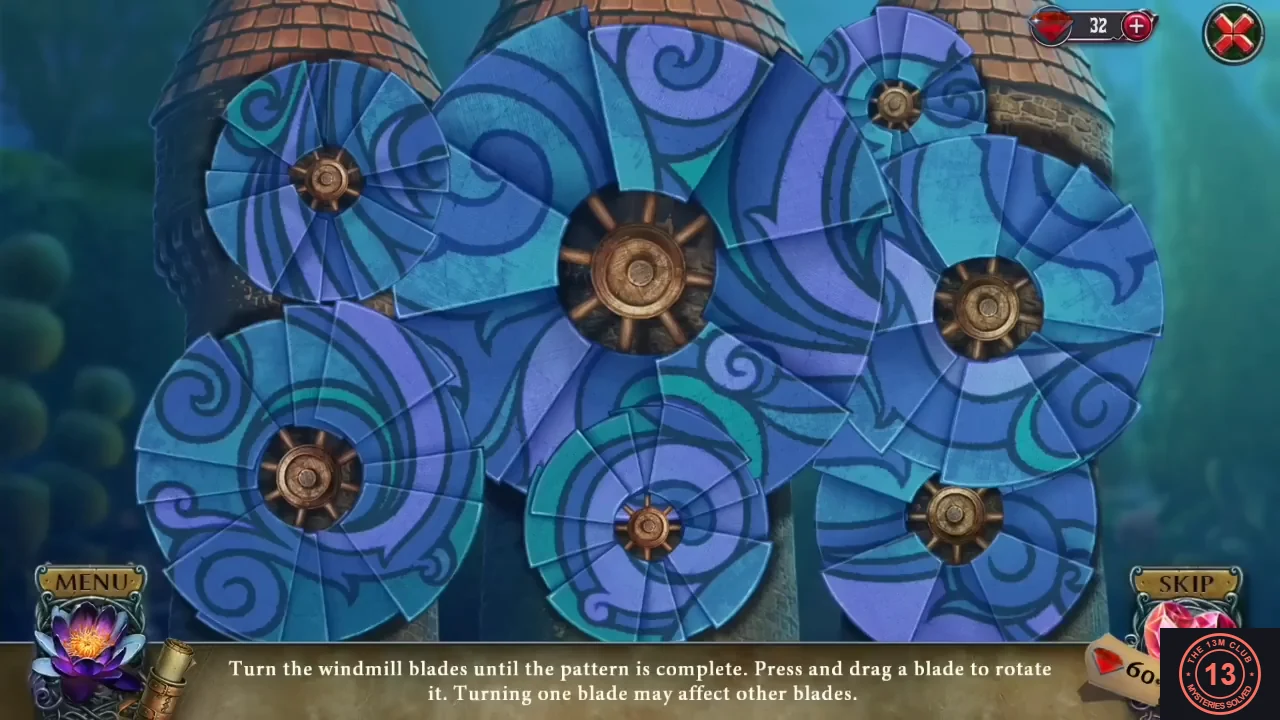
- Go back to the windmill and put the blue canvas on the hub. 'Turn the windmill blades until the pattern is complete. Press and drag a blade to rotate it. Turning one blade may affect other blades.' Rotate the seven sail wheels until the dark blue and turquoise swirls run unbroken across all the wheels and form one continuous wave picture; each wheel shows a clean spiral around its hub when it is right. When the picture is complete the windmill turns and blows the gas away.
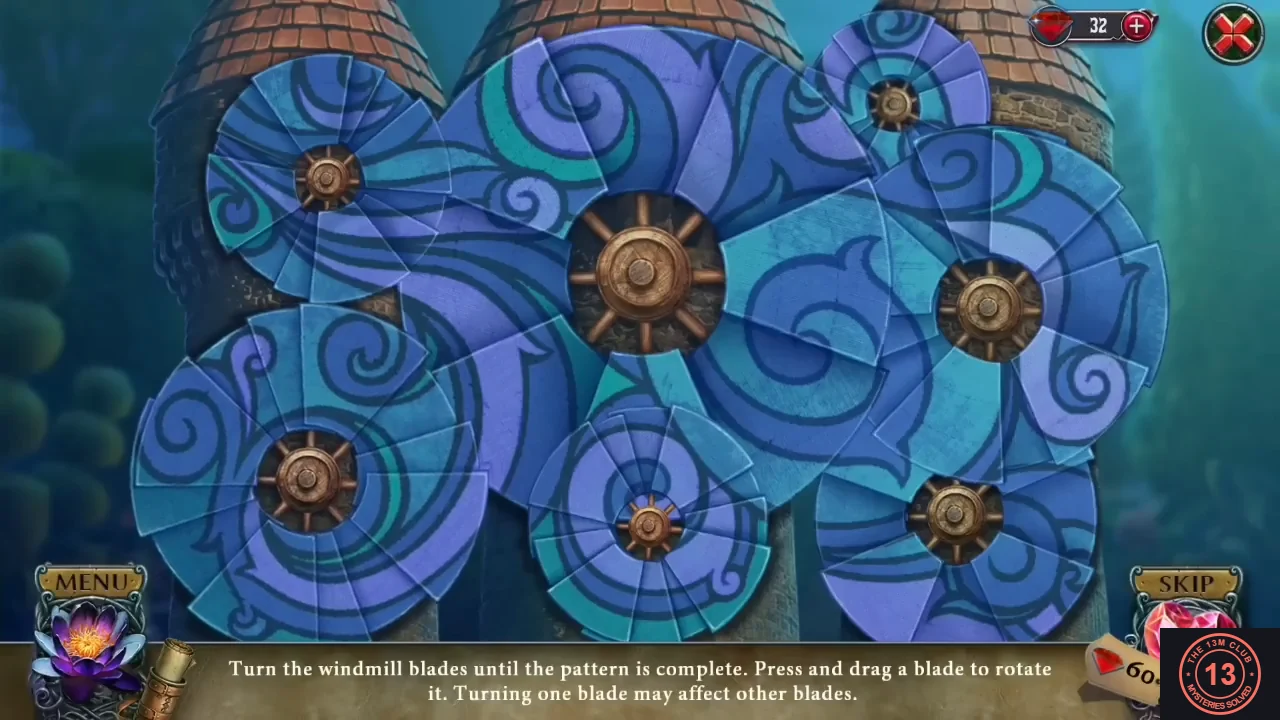
The completed windmill picture: each wheel shows a clean spiral and the waves run across all of them. - Optional collectible: the gas-filled garden hides 2 phoenixes. Tap the small flat-topped pine between the two spiral topiaries at the upper right, and the greenhouse's left corner by its lit wall lamp and climbing vines, just right of the windmill's spire.
The Countess Statue, Book IV and the Greenhouse
With the gas gone, restore the countess statue, open Book IV for the silver petals and get into the greenhouse to catch the man posing as the count.
- 'I'm sure the villagers will wake up soon.' Zoom into the round lock on the greenhouse door at the top of the steps. It needs a three-leaf emblem ('The count must be somewhere behind this door.'). Take the marble face from the lock.
- Zoom into the neglected statue of the countess to the right of the house; she holds an empty lotus bud among black roses. Put the marble face on her face and the stone arm at her side.
- Zoom into the broken signpost in the flower bed with the blue hydrangea, left of the steps. Read the note: 'Paul, the count's gardener, is no longer allowed in this garden. He will be imprisoned for adultery.' Scrub the thick moss off the board with the brush and take the first bronze plate. The second plate is jammed ('I'll need to pry the boards apart.'); pry the boards apart with the count's cane and take bronze plate 2.
- Zoom into the fountain on the right. Burn the weeds choking it with the matches. Water flows again and two recesses appear ('Is there something hidden under there?'). Put both bronze plates into the recesses; a box opens. Take Book IV.
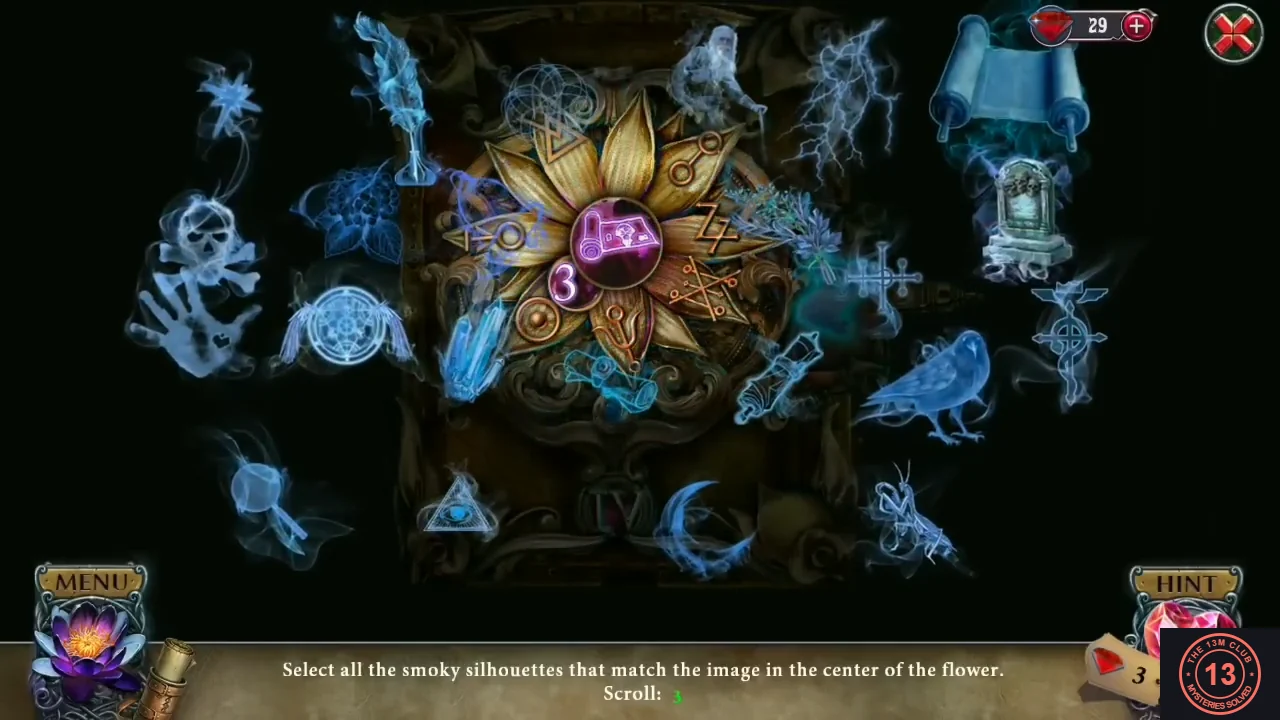
- Open Book IV from the inventory ('As usual, I need the figurine.'). Put the ghostly scroll figurine into the clasp on the cover. Select the smoky silhouettes that match the picture in the centre of the flower, three per round: light sources (the candle, the oil lamp with a glass chimney at the upper right of the book, and the candelabrum), scrolls, and hooded or bearded strangers. Read the story ('Paul helped grow the lotus that could drain the life from a person...'), then take the silver petals from the right page.
- Put the silver petals into the empty lotus bud in the countess statue's hand. The lotus blooms; take the greenhouse emblem and the metal flower.
- Put the greenhouse emblem into the round lock on the greenhouse door and go inside. 'There's the count! I must stop him!' A hooded man works at the altar at the back. 'If I reach for it, the count will see me.'
- Take the empty flowerpot from the floor at the lower left.
- Zoom into the pot of red flowers beside the steps. Cut the plant with the sickle and take the vine and the red flowers.
- Optional at this point: in the garden, put the flowerpot down beside the blue hydrangea in the signpost bed. You still cannot dig the plant out ('Digging it out of the ground with my bare hands would probably kill it.'); it is finished later.
- In the greenhouse, cut the ivy covering the flower cabinet on the left with the sickle ('This ivy is everywhere. That's what you get for imprisoning the gardener.'). Behind it is a cabinet with coloured compartments; take the second vine.
- Put the red flowers into the red compartment at the top of the flower cabinet. 'I think I need to find more flowers.'
- Open the net from the inventory and weave the vines into its holes to repair it. Throw the repaired net over the man at the altar. The lotus medallion and a gold-green trefoil piece, the golden emblem, go to your inventory. He boasts that the count's lotus alchemy works and that nothing will stop his true love. Raymond arrives: 'It appears that my brother impersonated the dead count and is behind all the murders.' He guards his brother, hands you the castle key and sends you on to find the countess.
- Optional collectible: the greenhouse hides 2 phoenixes. Tap the dark red blossoms of the tree at the top right, above the orange glow, and the palm fronds just above the top left corner of the ivy-covered cabinet.